
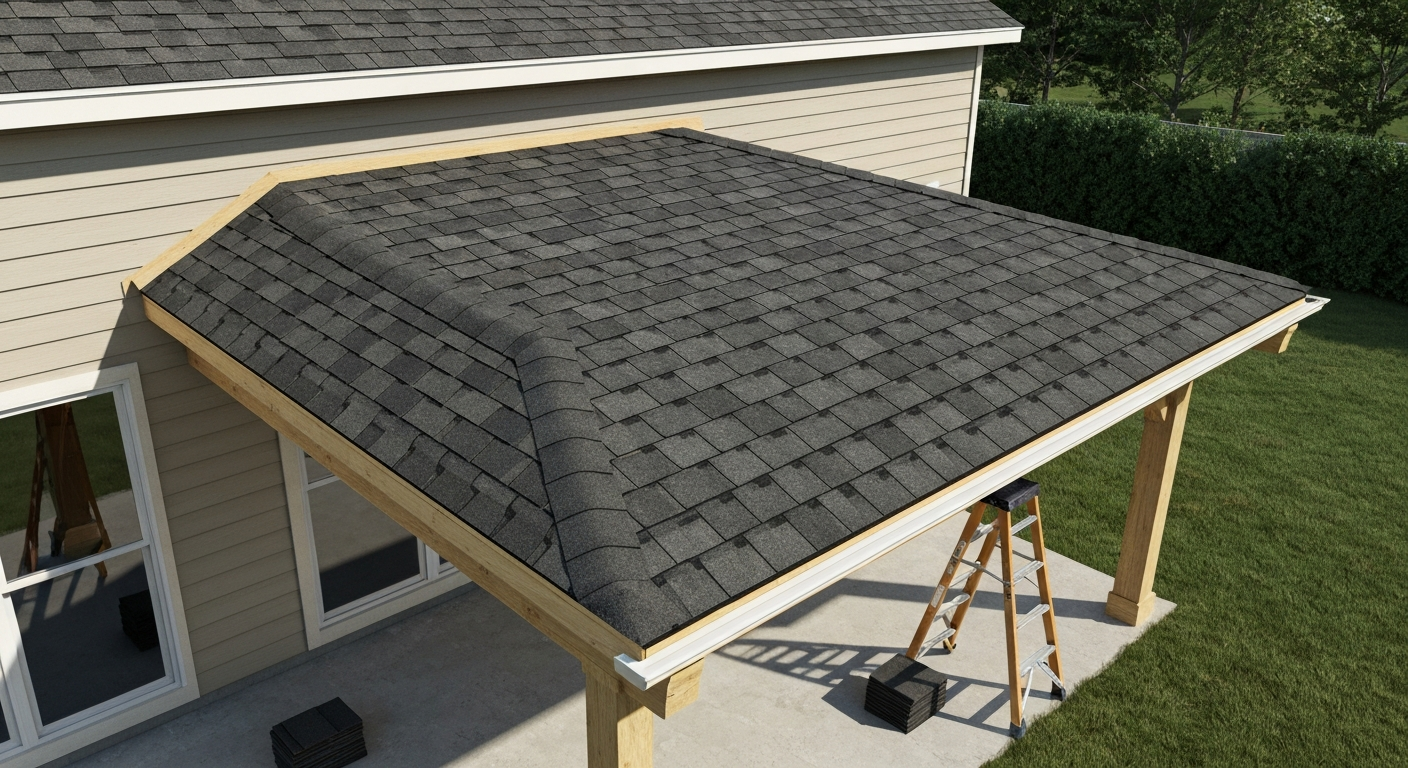
Yes, you can roof a patio with asphalt shingles, and it is one of the most cost-effective ways to give a patio cover a finished, house-matching look. The non-negotiable requirement is pitch: your patio roof must have a slope of at least 2:12 (2 inches of rise for every 12 inches of run). Below that, shingles will leak no matter how carefully you install them, and every major manufacturer, including GAF, Owens Corning, and CertainTeed, will void the warranty. Get the pitch right, use the correct underlayment, and follow the flashing details, and a shingled patio roof will last 20-plus years with almost no maintenance.
How to Roof a Patio With Shingles: DIY Guide & Checklist

Celia Vaughn
12 Jul 2026
Who this guide is for and what you'll cover
This guide is written for homeowners who want to add or reshingle a patio cover and are comfortable with basic carpentry and ladder work. You do not need to be a roofer, but you do need to be honest with yourself about heights and working on a slope. I will walk you through everything from checking whether your slope qualifies for shingles, pulling permits, sizing your structure, choosing a roof style, framing the skeleton, and then the full shingle installation sequence, including decking, underlayment, starter strips, field shingles, flashing, and ridge caps. I will also cover real cost estimates, common mistakes I see on DIY patio projects, and a clear checklist for when you should put the hammer down and call a licensed contractor instead.
Can you actually use shingles on a patio roof?
The biggest reason DIY shingled patio roofs fail is not poor workmanship on the shingles themselves, it is too-flat a slope. Asphalt shingles rely on gravity to shed water quickly. When water lingers on a low slope, it works backward under the shingle tabs and finds every nail hole and lap edge. The 2:12 minimum exists because below that angle, no amount of overlap saves you.
The 2:12 rule and low-slope procedures
Standard 3-tab and architectural shingles are considered steep-slope products (4:12 and above). Between 2:12 and just under 4:12, you are in low-slope territory, and manufacturers allow shingles here only with special underlayment. GAF requires a full leak barrier (self-adhered membrane) across the entire deck in the 2:12-4:12 range rather than standard felt. Owens Corning requires either a double layer of felt lapped 19 inches or a self-adhered membrane. CertainTeed directs you to their low-slope installation instructions for anything below 4:12. Do not skip this step: it is the difference between a roof that lasts and one that soaks your patio furniture in the first rainstorm. If your patio roof is currently flatter than 2:12, your options are a roof overlay with a self-adhered membrane (TPO, EPDM, or peel-and-stick), metal panels, or polycarbonate, but shingles are off the table.
| Slope | Shingles Allowed? | Underlayment Required | Notes |
|---|---|---|---|
| Below 2:12 | No | N/A — use membrane roofing | Shingles will leak regardless of installation quality |
| 2:12 to under 4:12 | Yes, with low-slope procedures | Self-adhered leak barrier OR double felt (19" lap) | Required by all major manufacturers; confirm locally |
| 4:12 and above | Yes, standard installation | Single layer #15 or #30 felt or synthetic underlayment | Most common range for patio gable and shed roofs |
Limitations worth knowing upfront
- Shingles add weight (2-4 lbs per sq ft depending on product) — your framing and footings must be sized for this dead load plus live loads.
- A shingled patio roof is essentially permanent; it is harder to repurpose than polycarbonate or metal panels.
- Valleys, wall tie-ins, and gutters all require flashing details that take more skill than a simple field installation.
- Maintenance (cleaning, occasional re-sealing of flashing) is minimal but not zero.
Permits and planning before you touch a board
Almost every jurisdiction in the U.S. requires a building permit for an attached roofed patio cover. Cities like Phoenix and Los Angeles publish specific patio cover permit checklists, and they treat an attached covered patio the same as any other structural addition to your home. I know it feels like bureaucratic friction, but a permit protects you at resale and ensures someone reviews the structural details before you are standing under the thing in a snowstorm.
What typically triggers a permit
- Attaching any roof structure to the house (ledger board connection).
- Installing footings or posts, even for a free-standing cover.
- Adding a roofed or covered structure over a certain square footage (thresholds vary by city, often 200 sq ft).
- Any electrical work (fans, lighting) added to the cover.
- Converting an open patio to an enclosed or semi-enclosed space.
Pre-work permit checklist
- Call or visit your local building department and ask specifically about attached patio covers — rules vary more than you might expect between municipalities.
- Confirm setback requirements: most cities have minimum distances from property lines for covered structures.
- Check HOA rules if applicable — some associations require architectural review before permits are even submitted.
- Prepare a site/plot plan showing the house footprint and proposed cover dimensions.
- Have a framing plan ready, including rafter size and spacing, beam size, post size, and footing diameter/depth.
- Include a flashing and attachment detail if tying to the house — many inspectors want to see this specifically.
- Ask about inspection stages: typically footing (before concrete pour), framing, and final.
The submittal package for Palmdale, CA, for example, requires a plot plan, framing plan, footing and post details, and explicit flashing/attachment details all before they issue a permit. Most jurisdictions follow the same pattern. Budget one to three weeks for permit approval in most suburban areas, longer in high-volume urban departments.
Structural checks: loads, ledgers, and when to call an engineer
Before you frame anything, you need to understand what loads your new patio roof will carry. The IRC breaks these into dead load (the weight of the structure and roofing materials themselves), roof live load (a catch-all for workers, equipment, and temporary loads, typically 20 psf in most prescriptive designs), snow load (if relevant to your area, this often controls design in northern climates), and wind uplift. Getting these wrong is how roofs end up on the neighbor's lawn.
Checking dead and live loads
A standard asphalt shingle roof assembly (decking, underlayment, shingles) runs roughly 3-5 lbs per sq ft. Add framing weight and you are typically looking at 10-15 psf dead load. The IRC prescriptive rafter span tables in Chapter 8 (Tables R802.4.1 series) are built around 20 psf live load and defined dead load assumptions. If your spans and spacings fall within the table assumptions, you can size your rafters directly from those tables without an engineer. If your spans are long, your wind exposure is high, or you are in a significant snow load zone, stop and consult a licensed structural engineer. This is not optional, it is the difference between a structure that stays put and one that becomes a safety hazard.
Ledger condition and attachment
If you are attaching to the house, the ledger board is the single most critical connection point. It carries the inboard end of every rafter. Before anything else, expose the rim joist or wall framing where the ledger will land and look hard at what is behind the siding. Rotted rim joists, cracked studs, or moisture damage disqualifies that attachment point until it is repaired. Ledger connections must use code-accepted positive fasteners, either structural ledger screws (like LedgerLOK), through-bolts, or Simpson Strong-Tie listed connectors, with spacing per the manufacturer's published charts. Toenails are not acceptable here. Flashing the ledger is equally important: water that gets behind a ledger board will rot both the ledger and the house framing over time. Use a continuous Z-flashing above the ledger before re-installing siding, or a surface-applied tape/membrane product rated for the application.
When to hire a structural engineer
- Your local ground snow load exceeds 20 psf and the prescriptive rafter tables do not cover your span or spacing.
- You are in a high wind zone (hurricane or coastal areas with design wind speeds above 115 mph).
- Your free-standing cover spans more than about 18-20 feet without intermediate support.
- Your house framing at the attachment point is not standard platform framing (e.g., masonry, older balloon framing, or post-and-beam construction).
- Your building department requires a stamped engineering drawing — some do, particularly for larger or complex covers.
Assessing an existing structure: when you need to raise the roof
This comes up more often than people expect. You decide you want to shingle your patio cover, you go out and measure the slope, and it is 1:12 or flat. Now what? You have two realistic options: re-pitch the roof by raising the outer edge (the fascia/beam end), or switch to a different roofing material like standing-seam metal, TPO, or polycarbonate panels that tolerate low slopes. Raising the outer beam is structurally straightforward in most cases, you are essentially increasing the height of your outer posts or adding a sub-fascia riser, but it requires temporary support while you make the change. For step‑by‑step instructions and safety tips on lifting the outer beam or adding a sub‑fascia riser, see our guide on how to raise a patio roof.
Temporary supports and safe procedure
If you are modifying an existing patio cover to change the slope, treat it like any structural modification: support the roof before you remove or cut any load-bearing members. Use adjustable steel post shores (commonly called Lally column jacks or Acro props) under the existing beams before cutting posts or changing beam heights. This is one of those non-negotiable safety steps. A patio roof is not as heavy as a floor, but it can still injure you seriously if it drops unexpectedly. If the existing framing is in poor condition, brittle, or connected in ways you do not fully understand, this is a good time to call a contractor for the structural modification and then take over for the roofing work yourself.
Choosing your roof style: lean-to, gable, or free-standing
The roof style you choose affects complexity, cost, framing difficulty, and how naturally shingles can be installed. For step-by-step instructions on constructing the roof itself, see our guide on how to build a patio roof. Here is an honest breakdown of each.
| Style | Slope Achievable | Framing Complexity | Best For | Shingle-Friendly? |
|---|---|---|---|---|
| Lean-to / Shed | Easily 3:12-6:12+ | Low — single ridge direction, simple rafter layout | Attached covers along a house wall | Yes — easiest shingle application |
| Gable | Typically 4:12-8:12 | Moderate — ridge beam, two rafter slopes, gable ends | Larger covers, free-standing or attached | Yes — classic shingle application |
| Free-standing (flat/shed) | Depends on design | Low to moderate | Detached pergola-style covers | Yes if slope is sufficient; needs separate footing system |
Lean-to (shed) roof
This is the most common style for attached patio covers and the easiest to shingle. The high end of the rafters ties to a ledger on the house wall; the low end rests on a beam supported by posts. You control the slope by adjusting the height difference between the ledger and the outer beam. A 4:12 slope on a 10-foot-deep cover means the ledger sits about 3 feet 4 inches higher than the outer beam. This style drains all water away from the house toward the outer edge, which simplifies gutter placement and reduces flashing complexity. If you are shingling a patio cover for the first time, start here.
Gable roof
A gable adds a ridge beam down the center of the cover, with rafters sloping down on two sides. It looks more architectural, handles wider covers well, and can shed snow more effectively. The trade-off is more framing work (ridge beam sizing, collar ties or rafter ties to prevent the walls from spreading, gable-end framing) and more flashing complexity where the gable meets the house wall. Building a gable patio cover is one of the more satisfying DIY roof projects, but it is worth reading through dedicated gable cover framing guidance before you start.
Free-standing covered patio
A free-standing cover sits completely independent of the house on its own posts and footings. This eliminates house attachment complexity and the ledger flashing issue entirely, but it introduces footing and foundation requirements that often require engineering input, especially in high wind or heavy snow areas. You also need to think about drainage: where does water off the low side go? Make sure your slope directs runoff away from the house and away from any hardscaping you want to keep dry.
Framing your patio roof: rafters, beams, spacing, and key details
Framing is where your shingled patio roof either holds up for 25 years or develops problems within 5. The IRC prescriptive rafter tables (Chapter 8, Tables R802.4.1 series) are your first tool. They list allowable spans for given rafter sizes, spacing, species, and grade under standard residential roof loads (20 psf live load, defined dead loads). For most patio covers in moderate climates with spans under 14-16 feet, 2x6 or 2x8 rafters at 16 or 24 inches on center will be in range. For a detailed walkthrough on sizing rafters, spacing, and key layout steps, see our guide on how to frame a patio roof. Look up your specific span, spacing, and lumber species before ordering anything.
Common framing details
- Rafter spacing: 16" OC is standard for residential framing; 24" OC is acceptable with properly rated sheathing and is more economical for large covers.
- Ridge beam (gable roofs): size the ridge beam for the loads it carries — in simple gable covers the ridge is often a doubled 2x10 or LVL; have this checked against your span and load.
- Collar ties / rafter ties: for gable roofs, collar ties (typically in the upper third of the rafter span) or ceiling-level rafter ties prevent the roof from spreading and pushing the walls outward. These are required by code in gable framing.
- Bird's mouth cut: the notch cut in the rafter where it sits on the top plate or beam. Keep the seat cut (horizontal portion) to no more than one-third of the rafter depth to maintain structural integrity.
- Hurricane ties / rafter-to-plate connectors: Simpson H2.5A or equivalent connectors at every rafter-to-beam connection significantly improve wind uplift resistance and are good practice on any patio cover.
- Overhang: plan your eave overhang before framing — 12-18" is typical; too little means water drips back onto posts and footings.
A note on lumber selection
Use No. 2 or better dimensional lumber (Douglas Fir, Southern Yellow Pine, or Hem-Fir depending on your region) and check your species against the IRC span tables since the allowable spans differ between species groups. If you are in a high-humidity region or the framing will be exposed to weather before you get the deck and shingles on, consider pre-treated lumber for beams and posts even if it is not technically required for above-grade framing in your code cycle.
Footings, posts, and foundations for free-standing covers
If your patio cover is attached to the house, the house foundation handles that end of the load. The outer posts still need footings, and for a fully free-standing cover, every post needs a properly sized footing. This section matters more than many DIYers realize, because a poorly designed footing does not fail immediately, it settles slowly over years and causes the whole structure to rack out of square.
Frost depth and footing sizing
The bottom of your footing must sit below the local frost depth, the depth at which ground freezes in winter. In warm climates (most of the South and Southwest), this can be as shallow as 6-12 inches or even non-applicable. In northern states, frost depths of 36-48 inches are common. Frost heave under a shallow footing will lift a post and crack the structure above it. Check the frost depth map for your county through the IRC or your local building department, and confirm before you dig. Footing diameter for a typical patio cover post (6x6 or 4x6) usually runs 12-18 inches depending on soil bearing capacity and the load being carried. Your building department's patio cover handout will often give you a prescriptive footing size for standard conditions.
Post-to-beam connections
Never notch a post so deeply that you compromise its structural section. Use Simpson Strong-Tie post caps (BC series for post-to-beam, or E-Z Base post bases for post-to-concrete connections) or equivalent listed hardware. Post bases that keep the wood above the concrete slab or grade prevent moisture wicking into the end grain, which is a major source of post rot over time. Set the post base anchor bolt in wet concrete before it cures, and check that it is perfectly plumb before the concrete sets, adjusting a cured anchor bolt is a miserable job.
When to hire an engineer for footings
If you are in expansive clay soil, high wind zones, seismic design categories D or higher, or if your building department requires stamped drawings, hire a licensed structural engineer. The fee for a straightforward patio cover footing and post design is typically a few hundred dollars and is worth every cent compared to the cost of a failed structure. Do not guess on footing size in unknown soil conditions, a simple soil bearing test (often available through geotechnical firms or just asking your local inspector what the presumptive soil bearing capacity is in your area) gives you the number you need.
Materials and tools list
Before you start any installation, have everything on site. Stopping mid-installation because you are short on step flashing or forgot drip edge is how roofs get damaged during unexpected rain. Here is what you need for a standard shingled patio cover.
Roofing materials
- Roof sheathing: 7/16" OSB or 3/8" minimum CDX plywood (confirm APA span rating matches your rafter spacing), rated for roof applications.
- Underlayment: self-adhered leak barrier (peel-and-stick ice-and-water shield) for 2:12-4:12 slopes; #30 felt or synthetic underlayment for 4:12 and above.
- Drip edge: pre-formed aluminum or galvanized, installed along eaves before underlayment and along rakes after underlayment.
- Starter strip shingles: manufacturer-supplied starter strip or field shingles with the tabs removed (do not skip this).
- Asphalt shingles: calculate squares needed (1 square = 100 sq ft of roof area) plus 10-15% for waste; add extra for hip/ridge.
- Ridge cap shingles: either dedicated ridge cap product or cut from 3-tab shingles.
- Step flashing: pre-formed galvanized or aluminum step flashing pieces, minimum 4"x4" per course.
- Counterflashing or siding receiver: used where step flashing ties to a wall.
- Kick-out diverter: installed at the bottom of any roof-to-wall intersection to direct water into gutters.
- Valley flashing: W-metal valley flashing for open valleys, or plan for woven/closed-cut valley with matching shingles.
- Roofing nails: hot-dipped galvanized or stainless, correct length to penetrate sheathing by at least 3/4" (for 7/16" OSB, use 1-1/4" minimum).
- Roofing caulk / sealant: use manufacturer-approved roofing sealant, not general-purpose silicone, for sealing step flashing and penetrations.
- Gutters and downspouts: sized for roof area and local rainfall intensity.
Tools
- Roofing nailer (pneumatic coil or strip, 15-degree) or roofing hatchet for hand-nailing.
- Utility knife with roofing blades (hook blades cut shingles far more easily than straight blades).
- Chalk line and chalk.
- Speed square and tape measure.
- Circular saw for sheathing cuts.
- Tin snips for cutting flashing.
- Flat pry bar / roofing shovel if removing old material.
- Safety harness rated for fall protection (ANSI Z359 class) — non-negotiable at any roof slope.
- Roof jacks and a 2x8 plank to create a stable work platform.
- Extension ladder tall enough to top out 3 rungs above the eave.
- Safety glasses, work gloves, and rubber-soled boots.
Step-by-step: how to shingle a patio roof
With framing complete and inspected (frame inspection before sheathing, if your permit requires it), you are ready for the roofing sequence. For a step-by-step walkthrough on how to roof a patio cover, see our detailed guide. For a full project walkthrough on building a patio roof from framing to finish, see how to make a patio roof. Work in the order listed below. Skipping steps or reversing the order is the most common source of leaks on DIY roofing jobs. For a full, illustrated walkthrough on how to shingle a patio cover, see the step-by-step guide.
Step 1: Install roof sheathing
Start at the bottom corner and work up, staggering panel end joints by at least one rafter bay (so no two adjacent rows share the same end joint). Leave a 1/8-inch gap between panels to allow for expansion. Use 8d ring-shank nails at 6 inches OC along supported edges and 12 inches OC in the field, or follow the sheathing manufacturer's nailing schedule for your specific panel and rafter spacing. Confirm your panels are the right APA span rating for your rafter spacing (24/16 rated panels for 16" OC rafters, 24/0 or 32/16 for 24" OC). Run a straightedge across the surface after installation: any high or low spots greater than 1/4" over 10 feet will telegraph through to the finished shingle surface.
Step 2: Install drip edge at eaves
Install metal drip edge along the eave (bottom edge) before the underlayment goes down. Lap pieces 2 inches and nail every 8-12 inches with roofing nails. The drip edge overhangs the fascia by about 1/4-3/8 inch to direct water into the gutter channel rather than behind it. Rake (side edge) drip edge goes on after underlayment, which means you do the eave now, apply underlayment across the whole deck, then come back to do the rakes.
Step 3: Install underlayment
For slopes 4:12 and above, roll out synthetic underlayment (or #30 felt) starting at the eave and working up the slope. Lap horizontal courses a minimum of 4 inches. Lap end joints 6 inches. Fasten with cap nails or staples per the product instructions, do not over-stretch the material. For slopes between 2:12 and 4:12, you are applying self-adhered membrane across the entire deck. Peel and roll slowly, pressing firmly and eliminating air bubbles. Overlap courses per the manufacturer (typically 6 inches). This step alone is what makes the low-slope installation work, so take your time here.
Step 4: Install rake-edge drip edge
Now that underlayment is down, install drip edge along both rake edges (the sloped side edges of the roof). This goes over the underlayment, which is the reverse of the eave detail. Lapping and nailing are the same as the eave drip edge. This sequencing ensures water that gets under the edge of a shingle on the rake is directed over the drip edge rather than behind it.
Step 5: Install step flashing at all wall intersections
Wherever your patio roof meets a house wall, you need step flashing. This is a series of individual L-shaped metal pieces (minimum 4x4 inches per piece, though 4x7 or larger is better practice) woven with each course of shingles as you work up the slope. Each piece of step flashing overlaps the piece below by at least 2 inches. The vertical leg slides under the siding; the horizontal leg lays on top of the shingle course below it. Do not caulk the vertical leg to the wall, leave it free to move with thermal expansion and let gravity do the sealing. Caulking it traps water. At the bottom of each wall intersection, install a kick-out diverter that bends the step flashing outward to direct water into the gutter. Without a kick-out, water runs behind the siding and rots the wall framing over time. This is one of the most commonly missed details on DIY roofing jobs.
Step 6: Install the starter strip
The starter strip runs along the eave edge and provides a solid, sealed foundation for the first course of shingles. You can use a factory starter strip product (which has pre-applied adhesive on the top edge) or cut 3-tab shingles so only the adhesive strip remains, removing the tab portion. Align the starter strip flush with the drip edge and butt the ends together. The purpose of this layer is to back up the spaces between shingle tabs in the first course, closing off any gap that water could enter. Do not skip the starter strip, it is a 5-minute step that prevents a real leak path.
Step 7: Install field shingles
Start the first course at the bottom corner with a full shingle, aligning it with the starter strip and eave edge. Snap a chalk line horizontally every few courses to keep your exposure consistent and your courses parallel to the eave (a roof that wanders off-course looks terrible and causes uneven wear). Standard architectural shingle exposure is 5-5/8 inches (but follow your specific product's installation guide). Nail each shingle in the nailing zone, which is typically within 1 inch above the cutouts on 3-tab shingles or in the nailing strip printed on architectural shingles. Four nails per shingle minimum; six nails in high-wind areas (check your local wind zone). Nails should be driven flush, not overdriven into the shingle face and not underdriven so they stick up. Common mistake: nails that hit a shingle course below get driven through two layers, which prevents proper sealing and voids the warranty.
Offset joints between courses by at least 6 inches on 3-tab shingles (follow the manufacturer's offset pattern for architectural shingles, as the offsets are built into the product's exposure pattern). Work up the slope, maintaining your chalk line as a guide, and interweave step flashing pieces at the wall as described above.
Step 8: Install the ridge cap
The ridge cap covers the peak of a gable roof or the high end of a lean-to where it meets the wall. Use dedicated ridge cap shingles rather than cutting field shingles, they are pre-scored for bending and sized correctly. On a gable ridge, start at the end opposite the prevailing wind direction and work toward it so laps face away from the wind. Nail each cap piece with two nails per side (four total), keeping nails out of the exposure zone. Apply a small dab of roofing sealant under the final ridge cap piece where the nails are exposed.
Step 9: Gutters and downspouts
Install gutters on every downhill edge of the roof. Slope gutters toward downspouts at approximately 1/4 inch per 10 feet of run. On a patio cover, a single downspout at one end often handles the load, but in high-rainfall areas, add a second. Make sure downspouts discharge well away from the patio foundation and footings, concentrated roof drainage right at a post footing is a footing erosion problem waiting to happen.
Ventilation: does a patio cover need it?
Most open patio covers (where the underside is exposed to outside air and there is no enclosed attic space) do not require ventilation in the traditional sense because there is no trapped air mass to heat up or accumulate moisture. However, if you insulate the roof deck or create a finished enclosed ceiling under the cover, ventilation becomes important both for thermal performance and to prevent condensation. In that case, a vented air space between the insulation and the roof deck is standard practice. If your patio cover is open-beam construction with just decking and shingles above, you can skip dedicated ventilation, but confirm with your building department since some jurisdictions apply ventilation requirements to all covered structures.
Comparing roofing material options for patio covers
Shingles are not the only option, and depending on your slope and situation one of the alternatives might serve you better. For a full step-by-step walkthrough on how to cover a patio with roofing, see our detailed guide on how to cover a patio with roofing. Here is a direct comparison to help you decide.
| Material | Min Slope | Cost per Sq Ft (installed, DIY) | Lifespan | Best Use Case | DIY Difficulty |
|---|---|---|---|---|---|
| Asphalt shingles | 2:12 | $1.50–$3.00 | 20–30 years | Attached covers, house-matching aesthetics | Moderate |
| Standing-seam metal | 1:12–2:12 | $3.00–$6.00 | 40–50 years | Low-slope covers, modern look, minimal maintenance | Moderate-High |
| Corrugated metal panels | 1:12+ | $1.50–$3.00 | 30–40 years | Budget covers, barn-style or utility aesthetic | Low-Moderate |
| Polycarbonate panels | Flat OK with drainage | $2.00–$5.00 | 10–20 years | Light transmission needed, sunrooms | Low |
| TPO / EPDM membrane | Flat to low slope | $2.00–$4.00 | 15–25 years | Truly flat roofs below 2:12 | Moderate (seaming critical) |
If your current patio cover is below 2:12 and you cannot raise it, corrugated metal panels or a self-adhered TPO membrane are the most practical DIY-friendly alternatives. Metal panels are particularly forgiving and install quickly on low-slope structures. If you want the cleanest look and your house already has architectural shingles, matching them with a shingled patio cover is worth the extra effort.
Time and cost estimates
For a straightforward 12x16-foot lean-to shingled patio cover (framing, sheathing, underlayment, shingles, basic flashing, and gutters), plan on the following rough figures. These assume you are doing all the work yourself and purchasing materials at retail. Local lumber and shingle prices vary significantly, so get actual quotes before budgeting.
| Phase | Estimated Material Cost | DIY Time |
|---|---|---|
| Framing lumber (rafters, ledger, beam, posts) | $400–$700 | 1–2 days |
| Concrete and post hardware (footings) | $150–$300 | 0.5 day (plus cure time) |
| Sheathing (7/16" OSB or plywood) | $150–$250 | Half day |
| Underlayment and drip edge | $80–$150 | 2–3 hours |
| Shingles (architectural, 3 squares + waste) | $250–$500 | 1 full day |
| Flashing kit (step, kick-out, valley) | $60–$120 | Included in shingle day |
| Gutters and downspouts | $100–$200 | 2–4 hours |
| Permit fee | $100–$600+ | N/A — plan for 1–3 week wait |
| TOTAL (rough range) | $1,300–$2,800 | 3–5 days total |
A contractor doing the same project typically charges $4,000-$9,000 depending on region, complexity, and whether engineering is required. The DIY savings are real, but they come with time, learning, and the responsibility of getting the structural and waterproofing details right.
Common mistakes and how to avoid them
- Installing shingles on a slope below 2: 12 — always measure before buying materials; use a digital level or slope gauge.
- Skipping the starter strip — this single omission causes a leak path at the eave on the very first rain.
- Nailing through two shingle layers — check that each nail hits only the course you are installing.
- Missing the kick-out diverter at the base of any roof-to-wall intersection — water will eventually rot the wall behind the siding.
- Not flashing the ledger board to the house — this is one of the top causes of hidden structural damage on attached patio covers.
- Shallow footings in frost-prone areas — frost heave will rack a beautifully built structure in a single winter.
- Using general-purpose silicone caulk instead of roofing-specific sealant — silicone does not adhere properly to asphalt and peels within a season or two.
- Underdriving or overdriving nails — set your pneumatic nailer pressure before you start and check the first few nails by hand.
- Not checking rafter span against code tables before framing — undersized rafters deflect visibly and can fail under snow load.
- Ignoring permit requirements — unpermitted structures often must be removed or brought up to code at sale, and homeowner's insurance may not cover damage to unpermitted additions.
Safety practices to keep on your mind throughout
Working on a roof, even a low-slope patio cover, is one of the higher-risk DIY activities. Falls from roofs cause more serious DIY injuries than almost any other home project. Wear a properly fitted fall protection harness connected to a roof anchor rated for your weight any time you are on the slope, even on a 4:12 pitch. Use roof jacks and a plank to create a level work platform rather than crouching on the slope. Set ladders on firm, level ground at the correct 4:1 angle (1 foot out from the wall for every 4 feet of height). Work with a partner whenever possible. Check the forecast: shingles and wet surfaces are dangerously slippery, and underlayment in particular is like ice when wet. Do not carry heavy bundles up a ladder alone, use a shingle hoist or a helper.
When to hire a pro instead of DIYing
This project is absolutely within reach for a capable DIYer, but there are specific situations where hiring a licensed contractor or structural engineer is the right call. Here is a straight checklist.
- Your building department requires a licensed contractor to pull the permit (rare but it happens in some jurisdictions).
- The ledger attachment point on your house has structural damage, rot, or unusual framing that you cannot confidently assess.
- Your site has expansive soil, high seismic risk, or wind design requirements beyond the prescriptive IRC tables.
- You are not comfortable working at height or cannot obtain proper fall protection equipment.
- The existing patio structure needs to be substantially rebuilt rather than just re-roofed.
- The project involves valley flashing, skylights, or complex intersections that require significant experience to waterproof correctly.
- Your snow load zone significantly exceeds the 20 psf prescriptive assumption in the IRC rafter tables.
There is no shame in hiring out the structural work and doing the shingle installation yourself, or in hiring a licensed roofer for the waterproofing while you handle the framing. Breaking the project into phases and being honest about which phase is within your skill set is exactly the kind of realistic thinking that gets a patio cover built well.
FAQ
What roof slope is required to install asphalt shingles on a patio roof?
Most manufacturers and the IRC require a minimum slope of 2:12 for standard asphalt shingles. Slopes between 2:12 and less than 4:12 need special low‑slope procedures (self‑adhered leak barrier or double underlayment) per manufacturer instructions; below 2:12 asphalt shingles are not permitted. Verify the shingle manufacturer's installation guide for exact requirements.
Do I need a building permit to shingle a patio roof or attach a patio cover to my house?
In most U.S. jurisdictions an attached or covered patio is considered building work and requires a permit and inspections. Permit submittals typically need a plot plan, framing plan, footing/post details, and flashing/attachment details. Check your local building department before starting.
How do I check whether my existing structure can support shingles (loads and framing)?
Confirm dead loads (roofing materials), roof live loads (commonly 20 psf per IRC unless snow governs), and any local snow/wind loads. Use IRC prescriptive rafter/span tables when your spans, spacing, species, and loads match the tables. If spans, loads, or details fall outside prescriptive limits, or if you have heavy snow/wind exposure, hire a structural engineer to size rafters, beams, and footings.
Which patio roof styles work well with shingles, and what framing details differ?
Common DIY styles: lean‑to/shed (single slope) — simplest to tie into a house; gable — more complex but better ventilation and aesthetics; free‑standing — requires independent ledger, beams and footings. Key framing differences: ridge/hip framing for gables, taller posts and beams for free‑standing, and proper ledger attachment and flashing when tying to a house. Use appropriate rafter spans, collar ties or ridge beam as required by the design.
What materials and tools will I need to shingle a patio roof?
Materials: roof sheathing (code‑rated plywood/OSB), underlayment (synthetic or asphalt felt; self‑adhered membrane for low slope), starter strip, 3‑tab or dimensional asphalt shingles, ridge cap shingles, drip edge, step flashing and counterflashing, roof vents or ridge vent, ice & water shield where required, roof nails, gutters (optional). Tools: ladder/scaffolding, hammer or roofing nailer, chalk line, utility knife, tape measure, circular saw, pry bar, safety harnesses, tin snips, caulk gun, chalk.
What is the step‑by‑step sequence to roof a patio with shingles?
Typical sequence: 1) Confirm permits and structure; install or verify proper framing and sheathing. 2) Install drip edge on eaves. 3) Apply underlayment (and self‑adhered membrane in low‑slope areas). 4) Install starter strip along eaves. 5) Lay shingles from eaves to ridge per manufacturer pattern, nailing per spec. 6) Install ridge cap shingles and ridge vent if used. 7) Install step flashing at any wall intersections and counterflashing where required. 8) Install gutters and clean up. Follow manufacturer nailing pattern, exposure, and wind‑uplift instructions.