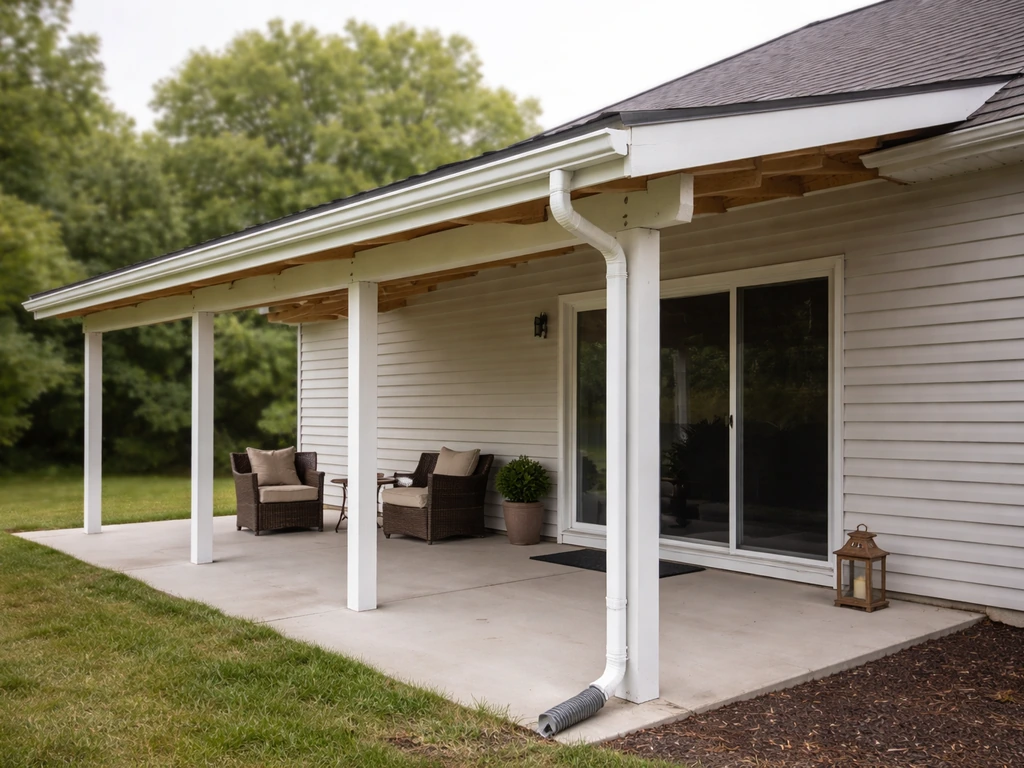
You can add a roof to your existing patio by attaching a lean-to style structure directly to your house using a ledger board mounted to the wall framing, posts and a beam at the outer edge, and rafters spanning between them. Most homeowners tackle this as a DIY project in a weekend or two, depending on material choice and patio size. The key decisions are: what style and material to use, whether you need a permit (almost always yes for anything attached), and how to make the connection to the house watertight and structurally solid. If you’re mapping out how to roof a patio cover, this is one of the most important details to get right watertight and structurally solid. These steps cover the essentials of how to build a patio roof while keeping the house connection watertight and structurally sound.
How to Make a Patio Roof: DIY Plan and Installation Guide

Pick the best patio roof type for an attached build
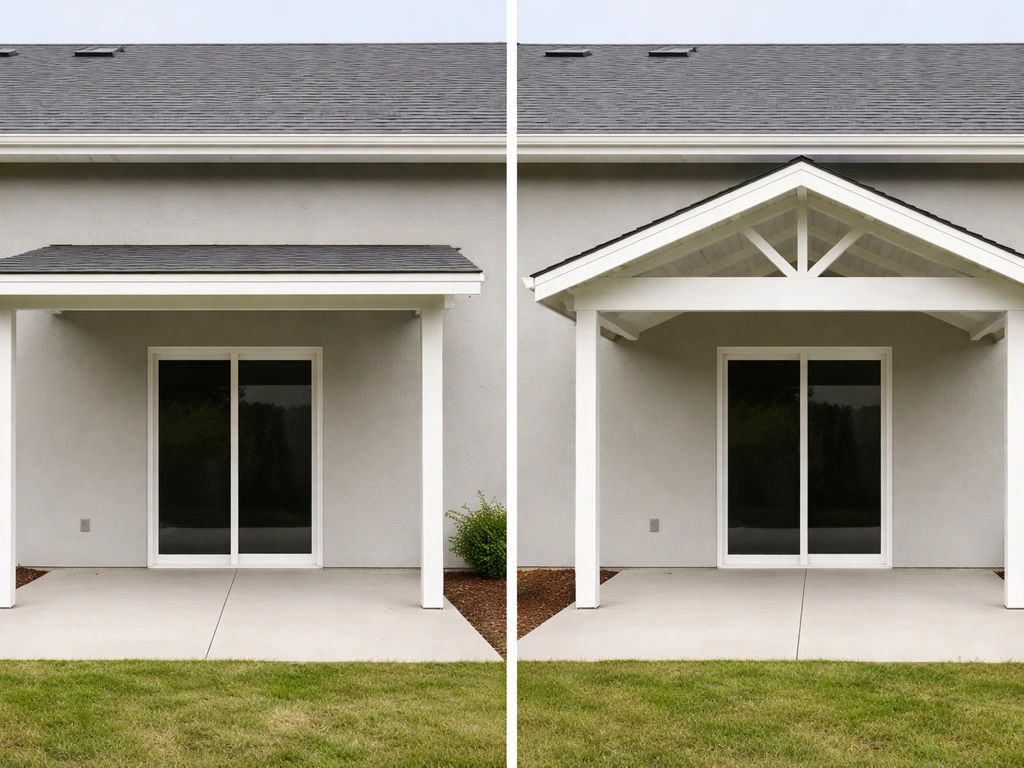
For a roof attached to your house, the lean-to (also called shed-style or single-slope) design is the right starting point for most homeowners. It's the simplest structure to frame, the easiest to waterproof where it meets the house wall, and it drains water away from the structure naturally if you give it enough pitch. A good starting point is to choose a lean-to patio roof type, then confirm the framing, pitch, and waterproofing details before you build lean-to (shed-style) patio roof. The high side attaches to the house, the low side sits on posts at the outer edge, and everything slopes in one direction. That's it.
A gable-roof style patio cover is also possible if you want more headroom or a more finished look. If you want a gable roof patio cover, you'll need to frame the ridge and rafters correctly and plan the water-shedding and flashing details at the house connection A gable-roof style patio cover is also possible. The ridge runs parallel to the house and both sides slope outward, which is more complex to frame and flash but creates a more architectural result. Hip roofs shed wind better than gable designs, which matters if you're in a windy region. If your patio layout makes attaching to the house difficult or structurally questionable, a free-standing structure is a legitimate alternative, but this guide focuses on the attached build since that's what most homeowners are after.
For most attached DIY builds, stick with the lean-to. It works with aluminum kits, wood framing, and metal panel roofing equally well, and it produces the fewest headaches at the house connection.
Materials and design choices
The three realistic material paths are aluminum (kit systems), wood framing with a surface roofing material, and steel or metal panel systems. Each has real trade-offs.
| Material | Best For | Typical DIY Cost (materials) | Lifespan | Key Trade-off |
|---|---|---|---|---|
| Aluminum kit (Alumawood-style) | Fast installs, HOA-friendly look, low maintenance | $1,500 to $4,000 for a 12x16 ft patio | 30+ years | Less design flexibility; you follow the kit's engineering |
| Wood framing + roofing | Custom sizing, shingle or metal roof finish, traditional look | $1,200 to $3,500 depending on roofing type | 20 to 30 years with maintenance | More skill required; PT lumber needs corrosion-resistant hardware |
| Metal panel (corrugated/standing seam) | Long lifespan, fast water shedding, modern look | $800 to $2,500 for panels on existing frame | 40+ years | Can be loud in rain; thermal expansion needs to be managed |
Aluminum kit systems are worth serious consideration. Products like Alumawood and similar DIY kits come pre-engineered, often with manufacturer-stamped plans that many building departments accept alongside a site-specific plot plan. They're designed so you're not improvising member sizes or spans. They don't rust in the way that raw steel does, and they don't rot like untreated wood. If this is your first patio roof build, a quality aluminum kit removes a lot of the structural guesswork.
Wood framing gives you full control over dimensions and finish. If you're going with wood, use pressure-treated (PT) lumber for the ledger, posts, and any framing that contacts concrete or is exposed to weather. One important note: PT lumber is corrosive to standard fasteners. Use hot-dipped galvanized or stainless steel hardware throughout. Don't mix stainless and galvanized fasteners in the same connection if you're in a wet climate, because galvanic corrosion can eat through the galvanized piece faster than you'd expect.
Metal roofing panels (corrugated or standing seam) work great over a wood or metal frame and are genuinely the easiest roofing surface to install. They shed water fast, they're lightweight, and they go on quickly. If you're building a wood-framed lean-to and want the simplest roofing finish, metal panels are a strong choice. To get the roofing details right, you can follow a patio-cover shingling process step by step from underlayment to final shingle installation shingling a patio cover.
Measurements, layout, and site assessment

Before you touch a single tool, spend time measuring and assessing the site. This is where most DIY patio roof projects run into problems, and getting it right here saves major headaches later.
What to measure and check first
- Width of the patio (the ledger will span this dimension along the house wall)
- Depth of the patio from the house to the outer edge (this is your rafter span)
- Height of the attachment point on the house wall (measured from the finished patio surface up to where the ledger will land)
- Wall framing type and stud spacing (16" or 24" o.c.) so you know where to anchor the ledger
- Existing roof eave height and overhang, to make sure your patio roof pitch clears it and doesn't create a water trap
- Utility locations: gas lines, electrical, and any underground utilities in post-footing zones
For pitch, the rule of thumb is a minimum of 1/4 inch of drop per foot of run for water drainage, though most builders use 1/2 inch to 1 inch per foot for better performance and code compliance in many areas. Here's the practical math: if your patio is 12 feet deep and you want a 1-inch-per-foot pitch, you need 12 inches of vertical rise between the ledger (high point) and the outer beam (low point). That means the ledger sits 12 inches higher than the top of the outer beam. Work backwards from a comfortable head-clearance height at the outer posts (typically 7 to 8 feet) and add your calculated rise to find where the ledger needs to land on the house wall. If that point is above the eave or conflicts with windows, you'll need to revisit the depth, pitch, or roof style.
Check your house wall framing by locating studs with a stud finder and probing with a small finish nail to confirm. The ledger must anchor into actual structural framing members, not just sheathing or siding. If your rafter spacing (typically 24 inches on center) doesn't line up neatly with your stud spacing, you'll run a continuous ledger board spanning multiple studs, which is the standard approach anyway.
Structural framing and support planning
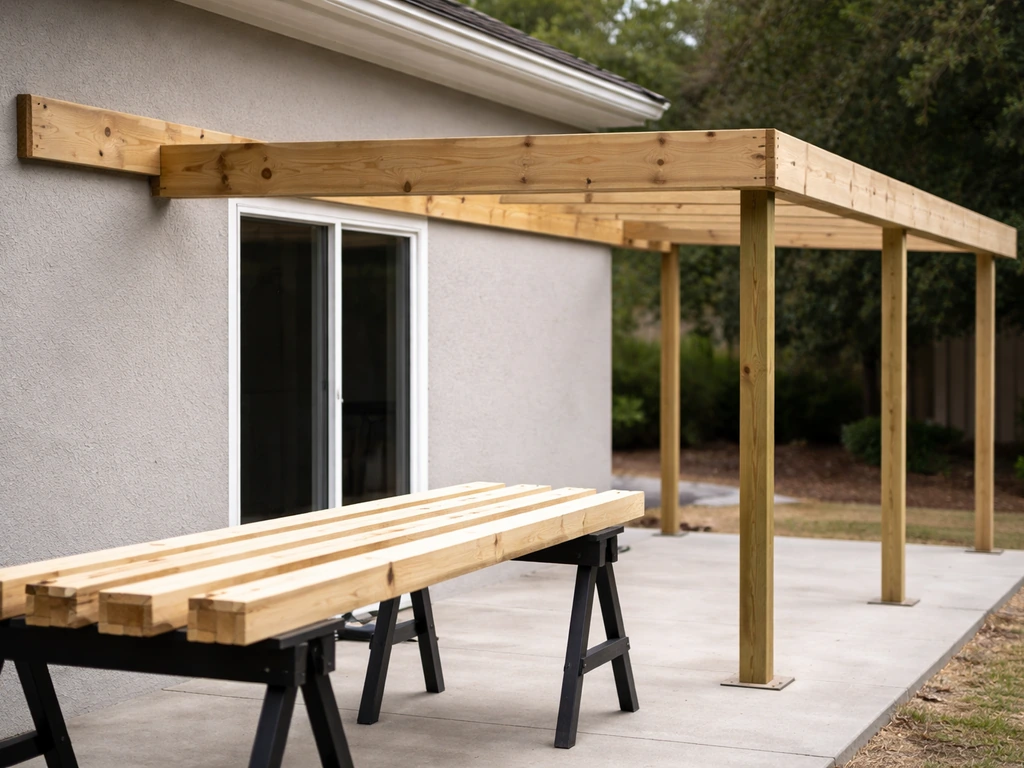
An attached patio roof has four main structural elements: the ledger board, the outer beam, the posts supporting the beam, and the rafters spanning between ledger and beam. Getting the sizing right for each is critical, and this is where many DIYers undersize components.
Ledger sizing
A common starting point for a patio with rafters spanning up to 12 feet is a 2x6 ledger with wall studs at 16 inches on center, though your local span tables and permit office will confirm what's required for your specific load conditions. Larger spans or heavier roofing materials bump up ledger and rafter size requirements. Don't guess here, especially if you're in a snow or high-wind zone.
Posts, beam, and bracing
Posts are typically 4x4 or 4x6 depending on height and load, set in concrete footings sized for your local frost depth and soil conditions. Your permit plans will spell out footing diameter and depth. The outer beam spans between posts and carries the lower ends of the rafters. Beam size depends on the span between posts and the load it carries. For a simple 12x16 attached patio, 4x6 or doubled 2x8 beams are common, but again, verify with your local span tables or building department's standard plan.
Bracing is not optional. Diagonal knee braces from post to beam add lateral stability, especially against racking forces from wind. Most jurisdictions require them by code, and they make a real difference in how solid the finished structure feels. A common brace angle is 45 degrees, cut from 4x4 stock and bolted through the post and beam.
Rafter connections
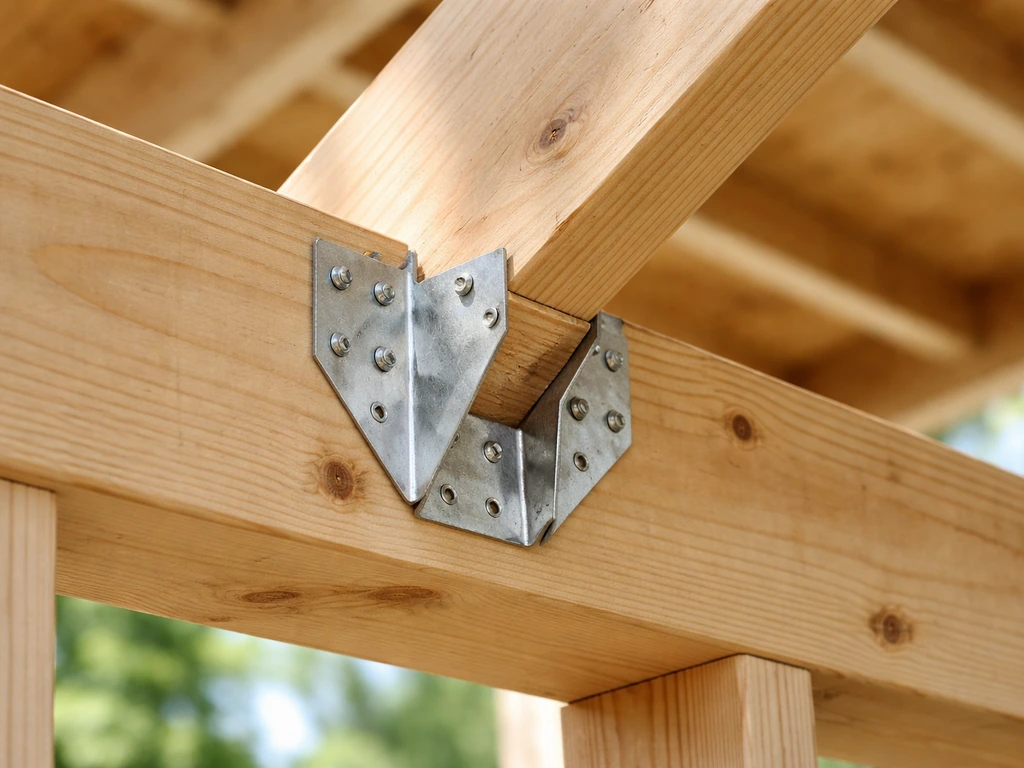
Rafters should be secured to both the ledger and the outer beam using metal framing connectors, such as joist hangers or rafter ties, not just toe-nailed in place. Metal connectors distribute the load properly and resist uplift forces. This is a non-negotiable detail from both a structural and code standpoint.
Attachment methods and waterproofing where it meets the house
The ledger-to-house connection is the most structurally and weatherproofing-critical part of the entire build. Getting this wrong causes two problems: structural failure if the ledger pulls away from the wall, and water intrusion behind the siding that rots the house wall over years.
Attaching the ledger structurally
Remove the siding in the area where the ledger will sit so you can attach it directly to the house sheathing and framing. Use structural lag screws or through-bolts into wall studs, following the pattern specified in your permit plans. The ledger itself should be PT lumber. Fastener pattern and size depend on the loads, which your permit plans or engineered drawings will specify.
Flashing and waterproofing
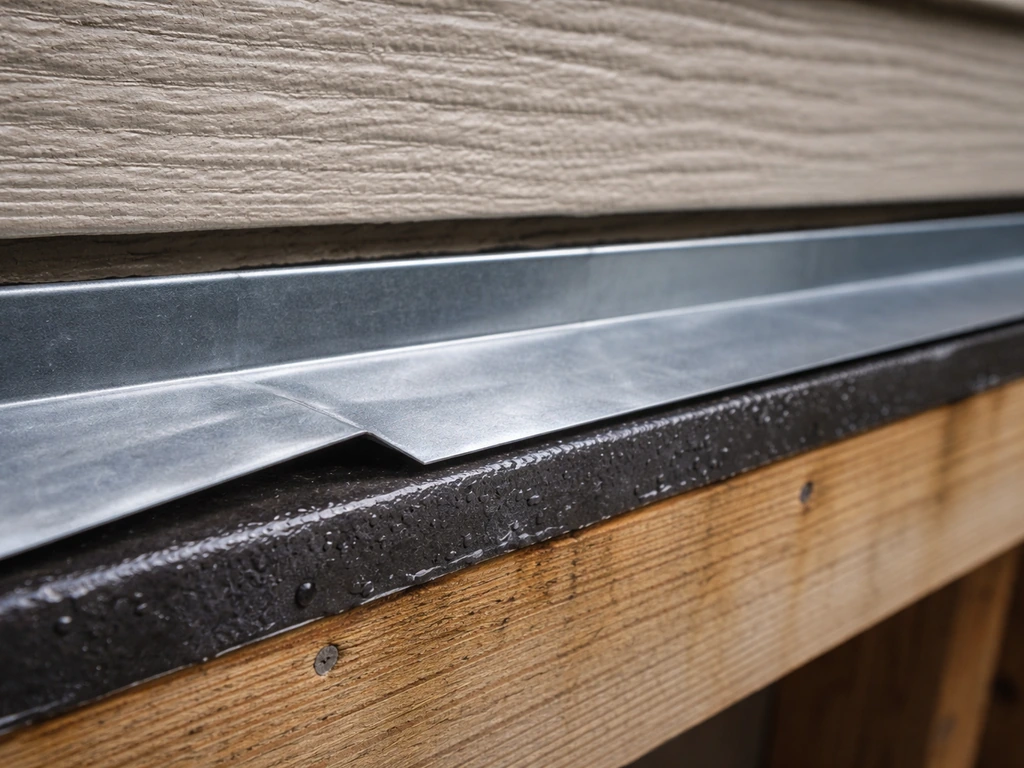
Flashing is what keeps water out at the ledger. The goal is to create a water pathway that always directs moisture away from the house wall, never trapping it behind a sealed edge. Here's the sequence that works:
- Apply ledger flashing tape (such as a self-adhering butyl or similar product) directly to the house sheathing above and behind where the ledger will sit, before the ledger goes up. This protects the sheathing from any water that sneaks past the metal flashing.
- Mount the ledger board to the wall framing.
- Install metal Z-flashing or L-flashing along the top edge of the ledger, tucked up behind the siding above. The top leg goes behind the existing water-resistive barrier (house wrap or building paper), and the bottom leg laps over the face of the ledger.
- Do not caulk the bottom edge of the flashing where it meets the ledger face. That gap is intentional. Water that gets behind the flashing needs a way to drain out, not be sealed in.
- Re-install or patch the siding above the flashing so it laps over the top of the flashing in shingle fashion.
A common mistake is running a bead of caulk along the bottom of the Z-flashing thinking it seals the connection. It actually traps water behind it. The flashing geometry itself does the waterproofing work. Caulk belongs at specific seams (like where flashing meets a trim piece at the sides), not at designed drainage interfaces.
If you're using an aluminum kit system, follow the manufacturer's instructions for their ledger connection method exactly. Some systems use a proprietary ledger channel or wrap approach that integrates with their rafter system, and deviating from that can compromise both structural integrity and weatherproofing.
Step-by-step installation workflow
Here's the sequence I'd follow for a standard attached lean-to patio roof, whether you're working with a wood frame or an aluminum kit. Next, you’ll choose your shingle roofing surface and install it in a way that sheds water and stays watertight at every seam how to roof a patio with shingles. The order matters because each step either prepares for or depends on the previous one.
- Pull your permit and gather approved plans before any work starts. This isn't just a legal formality. The approved plans tell you exactly what size your members need to be.
- Lay out post locations on the patio slab or ground, marking footing centers. Double-check square using the 3-4-5 triangle method or by measuring diagonals.
- Dig or drill footings to required depth and diameter. Pour concrete and set post anchors (J-bolts or standoff post bases) at the correct height and spacing. Let concrete cure fully, typically 48 to 72 hours minimum before loading.
- Set posts in anchors and brace them plumb with temporary 2x4 braces staked to the ground. Don't skip the temporary bracing. Posts that aren't held plumb while you build on them create alignment problems that compound throughout the project.
- Install the ledger board on the house wall. Remove siding, apply ledger flashing tape to sheathing, bolt ledger through studs, install Z-flashing, reinstall or patch siding.
- Install the outer beam across the tops of the posts, using post caps and structural connectors. Confirm the beam is level along its length and that the height difference between ledger and beam matches your intended pitch.
- Cut and install rafters at the planned spacing (typically 24 inches on center), using rafter hangers at the ledger end and rafter ties or hurricane clips at the beam end.
- Install diagonal knee braces from posts to beam at 45 degrees.
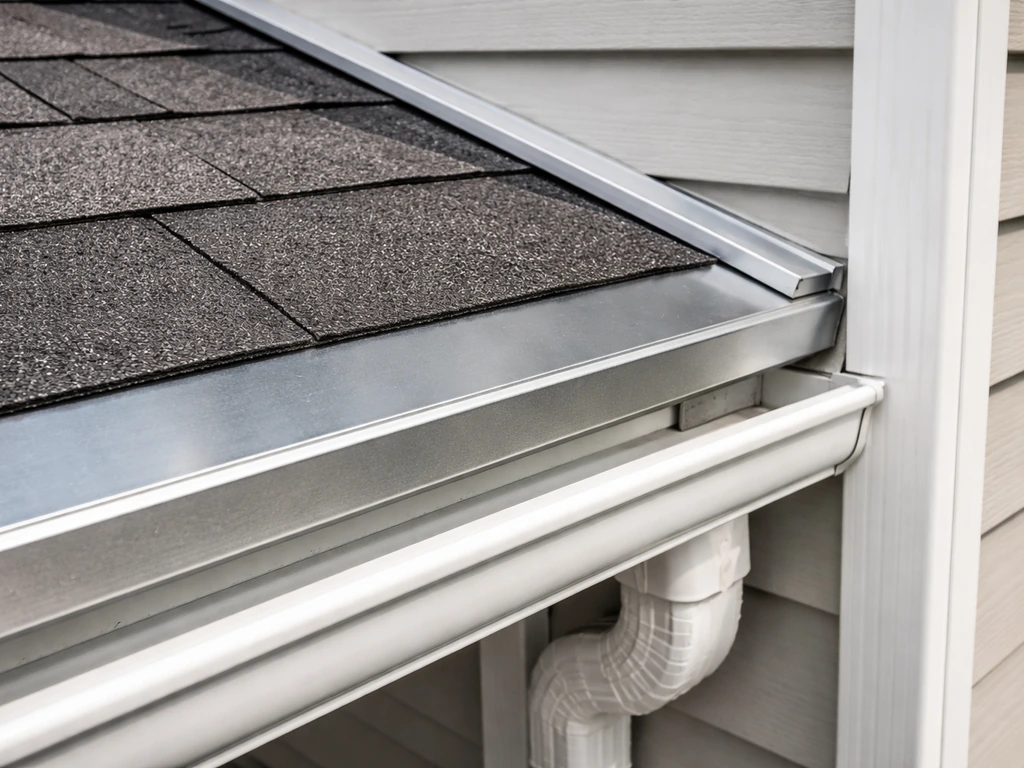
- Apply roofing material: metal panels, aluminum panel roofing (if kit), or sheathing plus roofing felt plus shingles. Work from the low (outer) end upward toward the house so each layer laps over the one below it.
- Finish the flashing at the house wall where roofing material meets the ledger area. Apply a bead of silicone sealant at specific seam points (like where roofing panels meet trim), following the manufacturer's guidance for your specific roofing material.
- Install fascia boards, trim, and gutters. A gutter at the outer low edge is highly recommended to control where water goes.
- Schedule your required inspections before calling the project done.
If you're working from an aluminum kit, the manufacturer's installation instructions take precedence over this generic sequence in the details. But the overall order, footings first, posts second, ledger and beam next, rafters, then roofing, holds for virtually every system.
Permits, code, and when to call a pro
Almost every jurisdiction requires a permit for an attached patio roof. The common threshold that triggers a permit requirement for detached structures is 120 square feet, but attached structures typically require a permit regardless of size. Don't skip this step. Beyond the legal issue, a permitted structure means a building inspector checks the ledger attachment and structural connections before they're covered up. That's worth something.
What your permit submittal typically needs to include: a site plan (plot plan) showing your property and where the patio cover sits relative to the house and property lines, a construction plan drawn to scale with framing member sizes and spacing labeled, footing/foundation details, ledger attachment detail, and roofing type. Some jurisdictions have standard plan handouts (sometimes called prescriptive plans) for common patio cover configurations that simplify the process significantly. Ask your local building department if they have one before you pay for custom drawings.
If you're in a high-wind zone, a high-snow-load area (anything above roughly 30 psf flat roof snow load is a common threshold where more rigorous analysis kicks in), or if your span or roof geometry is outside standard prescriptive tables, you'll likely need a licensed structural engineer to stamp the plans. Many local building departments require engineering for any attached patio cover. Ogren Engineering and similar firms do patio cover engineering for permit submittal routinely. It typically runs $300 to $700 for a simple attached cover and is worth every dollar because it confirms your design before you build, not after.
Call a pro (or at minimum a structural engineer) when: your house wall framing is non-standard or you can't identify solid framing to anchor the ledger, you're spanning more than 12 to 14 feet with the rafters, you're in a high snow or wind zone, you're attaching to a masonry or stucco wall (specialized anchors and details required), or the building department specifically requests engineered plans.
Budget, tools, and final checklist for a weather-ready finish
Realistic budget ranges
| Project Type | DIY Materials Cost | Pro Install Cost (rough estimate) | Timeline (DIY) |
|---|---|---|---|
| Aluminum kit, 12x16 ft attached | $1,500 to $4,000 | $4,000 to $8,000 installed | 2 to 3 weekends |
| Wood frame + metal panel roof, 12x16 ft | $1,200 to $2,800 | $3,500 to $7,000 installed | 2 to 4 weekends |
| Wood frame + shingles, 12x16 ft | $1,500 to $3,500 | $4,000 to $9,000 installed | 3 to 5 weekends |
| Permit fees | $150 to $600 | Same | Factor in 2 to 4 weeks for approval |
Tools you'll need
- Tape measure (25 ft minimum) and a 4-foot level
- Circular saw and a miter saw for rafter angle cuts
- Power drill and impact driver
- Post hole digger or rented power auger
- Hammer and framing square
- Chalk line and string line for layout
- Stud finder
- Caulk gun
- Ladder rated for your working height (check the weight rating with your tools included)
- Safety glasses and hearing protection
- For metal roofing: tin snips or a metal cutting blade
Pre-closeout checklist
Before you call the project done, walk through these items. They're the things inspectors check and the things that cause problems six months after installation if you skip them.
- Ledger is bolted into wall studs with the correct fastener pattern, not just into sheathing
- Z-flashing is installed at the top of the ledger and integrated with the house's water-resistive barrier in shingle fashion
- Bottom of flashing is NOT caulked shut (designed to drain)
- All rafter-to-ledger and rafter-to-beam connections use metal framing connectors
- Diagonal knee braces are installed at each post
- Posts are anchored in concrete footings at the correct depth for your frost zone
- Roof pitch is adequate for water drainage (minimum 1/4 inch per foot; 1/2 inch or more is better)
- Roofing material laps from low end to high end so each row sheds water onto the one below
- Gutter is installed at the outer low edge and directed to a downspout that drains away from the foundation
- All required inspections have been completed and approved
- Corrosion-resistant hardware used throughout, especially at PT lumber connections
The next step after reading this is simple: go out to your patio and take your measurements. Write down the width, the depth, the height to the eave, and find your wall studs. With those numbers in hand, you can price out materials, confirm the design works structurally, and walk into the building department with an informed question list rather than a vague idea. From there, it's a matter of getting the permit and working through the installation sequence above. The framing side of this project is genuinely manageable for a capable DIYer. The flashing and waterproofing at the house connection is where you should slow down and be careful, because that's what separates a patio roof that lasts decades from one that causes headaches every rainy season. For a detailed walkthrough, use this guide to map out your measurements, layout, permits, and step-by-step installation for raising your patio roof.
FAQ
Do I still need a permit if my patio roof is small or nearly freestanding?
If your patio roof will be fully attached to the house (ledger fastened into studs or structural framing), permits are commonly required even when the roof is under the detached-120-square-foot threshold. If you are thinking about making it “almost attached,” like using separate freestanding posts with no ledger, ask the building department what they consider attached based on wind uplift and connection details, not just how close it sits to the wall.
What happens if I can’t line up the ledger with the studs?
Avoid attaching the ledger to sheathing, siding, or trim. Use a stud finder, then confirm with probing and by drilling a small test hole if needed, so you can land bolts or lag screws in the wall’s structural members. If you can’t reliably hit studs, redesign the member layout or use an engineered solution, don’t “span over” weak backing.
How do I confirm my patio roof pitch in the field?
To keep drainage reliable, verify the roof pitch before you order rafters and panels. Measure from the top of the ledger to the top of the outer beam in real dimensions, then re-check after you set posts. If post heights vary even slightly, your installed pitch can end up less than planned, which makes flashing and water shedding much more failure-prone.
Is caulking the flashing seam at the house connection a good idea?
Don’t rely on caulk as the primary seal at the ledger. Caulk can actually trap water if it blocks the drainage path at flashing interfaces. Use flashing geometry to direct water outward, and reserve sealants for places where the design calls for them, like specific end overlaps or trim terminations.
Can I mix galvanized and stainless fasteners to save money?
In a wet or coastal climate, mixing fastener metals in the same connection can accelerate corrosion through galvanic action. Stick to one fastener system throughout a given connection (all hot-dipped galvanized or all stainless, per your design intent), and ensure any metal connectors you use are rated for that environment.
Why does my patio roof framing still feel rickety even if the boards are the right size?
Ledger sizing is tied to load and spacing, but connectors matter too. Even with correct lumber sizes, weak or incorrect connectors (wrong rated joist hangers, improper toe-nailing, or missing rafter ties) can cause uplift or racking problems. Use connectors that match the member dimensions and installation instructions, and follow the exact nail or bolt pattern specified.
What underlayment and roof surface details can cause leaks even if I install shingles or metal correctly?
Not all “waterproofing” products are interchangeable. If you use wood framing, confirm your roof assembly includes the correct underlayment, flashing tape or membrane where appropriate, and proper side and end overlaps for your chosen roofing surface. Roof panels and shingles also have different base requirements, so treat underlayment as part of the system, not an afterthought.
Can I attach a patio roof ledger to stucco or brick without special planning?
If you’re on a masonry, stucco, or EIFS wall, ledger attachment details change because studs or suitable backing may not be present at the fastening point. You may need specialized anchors, additional structural backing, or a different attachment strategy. Plan for this early, since it can affect ledger location and the flashing plan.
What are the most common footing mistakes that lead to sagging later?
Footings should be built for your soil and local frost depth, and they should be inspected before the concrete is covered. Common failure points are too-shallow footings, undersized pier diameter, and missing bracing. If your permit plans specify footing size and embedment, follow them exactly and verify frost depth requirements locally.
My rafter spacing doesn’t match my stud spacing, what should I do?
If your rafters don’t land near a stud spacing match, a continuous ledger spanning multiple studs is typical, but the ledger must still be secured in a way that matches your engineered or permitted fastener pattern. The fix is usually layout and fastener scheduling, not reducing structural requirements.