To roof a patio cover, you pick a roof style (lean-to, gable, flat, or free-standing), frame it out with posts, beams, and rafters sized to your span, lay down sheathing or purlins depending on your material, then finish with your roofing surface and flashing so water sheds away from the house. For details on the full roofing cover process, see our guide on how to cover a patio with roofing.
How to Roof a Patio Cover: DIY Step-by-Step Guide

Celia Vaughn
6 Jun 2026
To complete your project, follow the same material and waterproofing steps discussed here so your patio roof stays sealed for years how to build a patio roof. The exact steps vary by style and material, but the sequence is always the same: plan and permit, build the frame, install the roof deck or panels, and seal every edge and penetration so nothing leaks.
If you want a complete walkthrough, start by outlining the roof style, measurements, framing, and then the roofing and flashing steps as you plan how to make a patio roof sequence is always the same. If you follow that order and don't skip the waterproofing details, you end up with a structure that holds up for decades.
Pick your roof style first
The roof style drives every other decision, from how you frame it to how steep the pitch needs to be. Once you know the roof style you want, you can follow a complete step-by-step plan for how to frame a patio roof. There are four main options for a patio cover, and each one has a different level of complexity.
| Style | Best for | Typical pitch | Difficulty |
|---|---|---|---|
| Lean-to (shed roof) | Attached covers against the house wall | 1/12 to 4/12 | Beginner-friendly |
| Flat (low-slope) | Modern aesthetics, low clearance situations | 1/8" per foot minimum | Beginner-friendly with right materials |
| Gable | Maximum headroom, traditional look, heavy rain areas | 4/12 to 6/12 | Intermediate |
| Free-standing | Detached pergola-style or island structures | Any of the above | Intermediate to Advanced |
A lean-to is the most common starting point for DIYers. You attach one end of the rafters to a ledger board on the house wall and the other end to a beam on your outer posts. Gravity does the work: rain runs toward the yard, away from the house.
A flat roof (technically a low-slope roof with a minimum 1/8 inch per foot drop) is popular for a clean modern look, but it demands more careful waterproofing because water moves slowly. A gable roof looks the most like a real house roof, sheds water fast in both directions, and handles heavy snow loads better, but it involves a ridge board and matching rafter pairs, which adds complexity.
For a complete walkthrough, see the section on how to build a gable roof patio cover from framing and ridge connections through waterproofing and sealing. If you're tackling a gable style, there's a lot more to unpack on the framing side specifically. Free-standing structures need footings and posts on all four corners because there's no house wall sharing the load.
Plan your measurements, layout, and materials
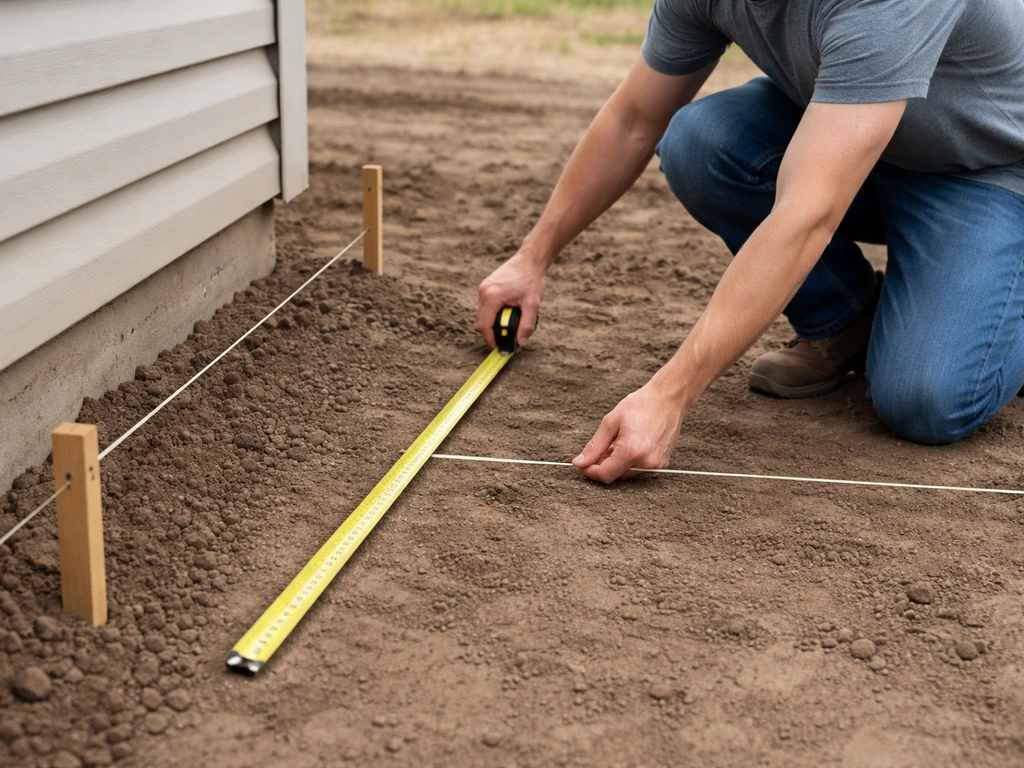
Before you buy a single board, measure the space carefully and sketch it out. You need the width of the patio (how far out from the house), the length (side to side), and the height you want at the outer edge. Those three numbers determine your post heights, beam sizing, rafter lengths, and the amount of roofing material you need.
Measurements that actually matter
- Patio width (depth from house): this becomes your rafter span
- Patio length: determines how many posts and rafters you need
- Desired roof height at the outer edge: sets your post length
- Attachment height on the house wall: where the ledger sits, which controls your slope
- Slope: aim for at least 1/4 inch drop per foot of run for shingles or metal panels; flat roofs need a minimum of 1/8 inch per foot to drain
For a simple 12-foot-deep lean-to, a 1/4-inch-per-foot slope means your ledger needs to sit 3 inches higher than your outer beam. That sounds small, but it's enough to keep water moving. Don't eyeball it. Use a level and a tape measure, or a laser level if you have one.
Material options: aluminum, wood, and metal
Wood (typically pressure-treated lumber for the frame and standard dimensional lumber for rafters) is the most DIY-friendly because it's easy to cut, widely available, and works with standard fasteners. A 2x6 or 2x8 rafter on a 12-foot span is a typical starting point, though your actual sizing depends on local snow and wind loads. Wood does need periodic maintenance: sealing, painting, or staining every few years.
Aluminum patio cover systems (the kind you buy as a kit) are popular for their low maintenance and clean appearance. They come as interlocking panels that span from a ledger to a beam, often with a built-in drainage channel. They're faster to install than a built-from-scratch wood frame, but they're less flexible in terms of custom sizing and aesthetics.
Metal roofing panels (corrugated steel or standing seam) can go over a wood frame and are one of the most durable and cost-effective roofing surfaces you can use on a patio cover. They handle rain and UV well, they're lightweight, and a handy DIYer can install them with basic tools. Polycarbonate panels are a good option if you want natural light; they're available in corrugated or flat versions.
Quick materials list for a typical 12x16 lean-to
- 4x4 or 4x6 pressure-treated posts (quantity depends on spacing, typically 6-8 feet apart)
- 2x8 or 2x10 beam (doubled if spanning more than 8 feet between posts)
- 2x6 rafters at 24 inches on center (or 16 inches for heavier loads)
- 2x8 ledger board, pressure-treated
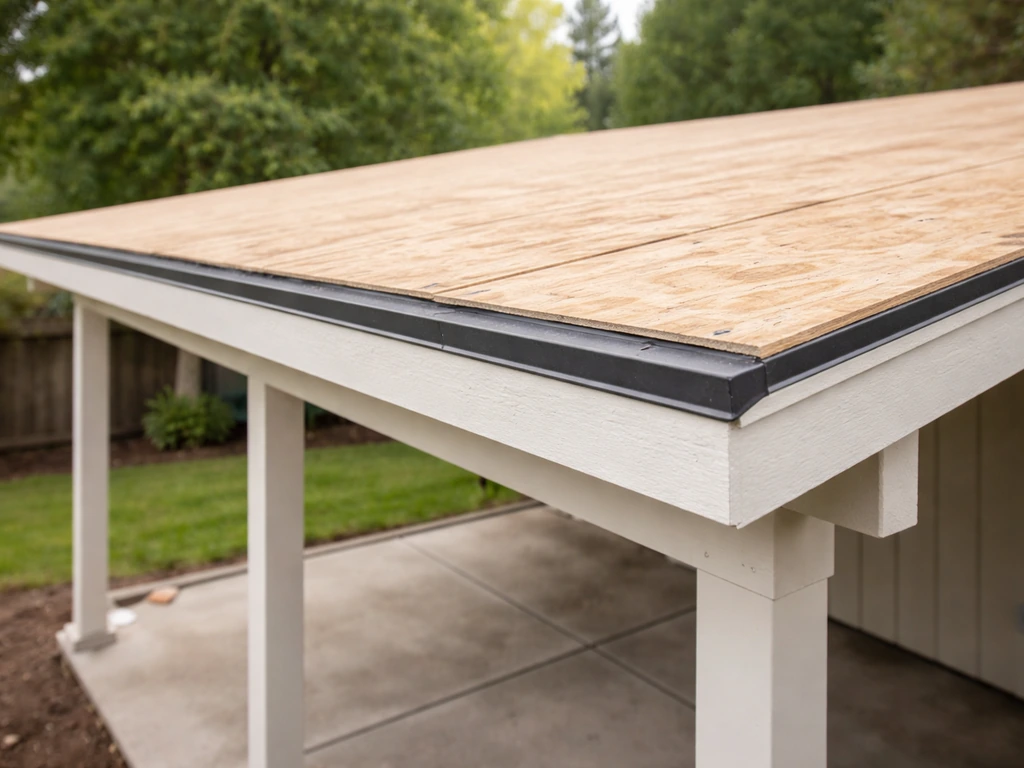
- 1/2-inch OSB or plywood sheathing if using shingles or rolled roofing
- Metal roofing panels or asphalt shingles (calculate square footage plus 10% waste)
- Ledger flashing (step flashing and z-flashing if attaching to siding)
- Drip edge, roofing felt or synthetic underlayment
- Post bases, joist hangers, hurricane ties, lag screws, structural screws
- Concrete for footings (2-3 bags per post hole, depending on depth)
Framing the structure: lean-to, gable, flat, and free-standing
Framing is where the project either goes right or wrong. Get this part solid and everything else is just surface work. The key principle is that every load needs a clear path to the ground: roof weight goes to rafters, rafters go to beams, beams go to posts, posts go to footings in the ground.
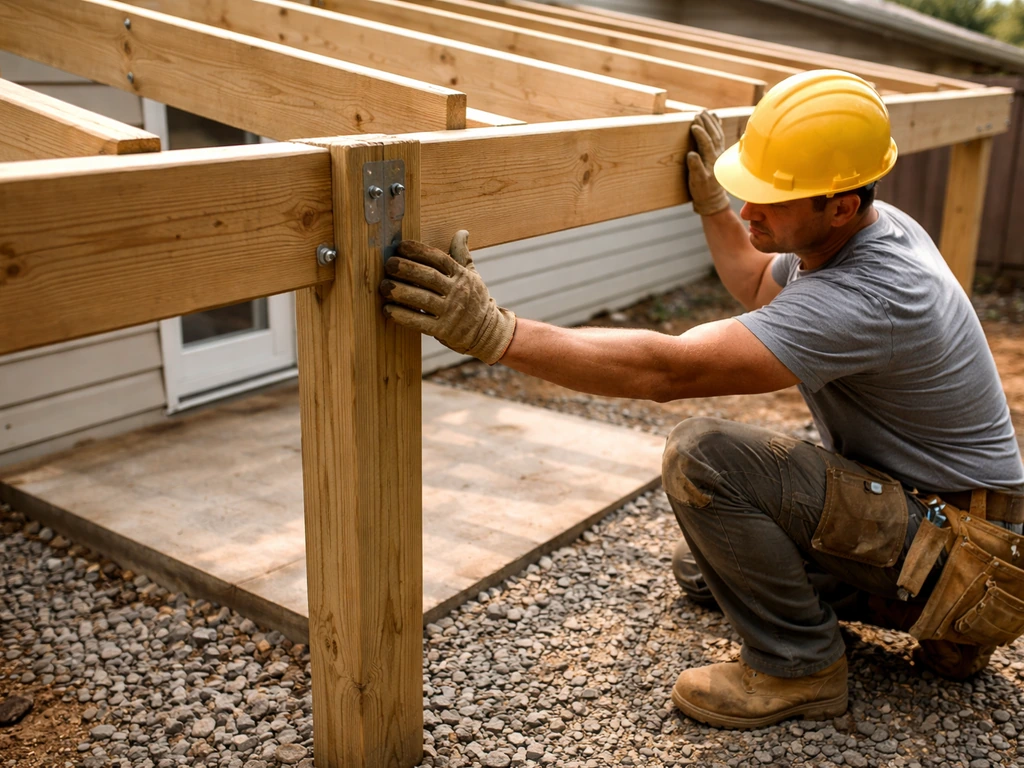
Footings and posts
Dig your post holes below your local frost depth (check your local building department, but 18 to 36 inches is common in most of the US). Set posts in concrete or use approved metal post bases anchored to concrete piers. Post bases are actually preferred in many jurisdictions because they keep wood off the ground and prevent rot. Make sure posts are plumb (perfectly vertical) before the concrete sets. Common mistake: rushing this step and ending up with a post that's an inch out of plumb, which throws off every beam and rafter after it.
Ledger attachment (for attached covers)
The ledger is the board you bolt to your house wall that the rafters hang from on the house side. This is arguably the most critical connection in an attached patio cover. Use lag screws or through-bolts (not just nails or deck screws) into the house's rim joist or wall framing, staggered to avoid splitting. The ledger board should be a 2x8 or 2x10 pressure-treated board. Most permit sets require the ledger to be flashed before the rafters go on, and they're right: water intrusion at the ledger is one of the most common sources of rot and structural damage in attached patio covers.
Beams and rafters
Set your outer beam on top of the posts and secure it with post caps (metal hardware that locks the beam to the post). Then hang your rafters between the ledger and the outer beam using joist hangers. Space rafters 16 or 24 inches on center. At each rafter-to-beam connection, add hurricane ties or rafter ties; these are the metal clips that stop the roof from lifting off in high winds. They're cheap, fast to install, and often required by code. Don't skip them.
Gable roof framing specifics
For a gable roof, you need a ridge board running along the peak, with matching rafter pairs meeting at the ridge from each side. Each rafter needs a bird's mouth cut (a notch that lets it sit flat on the top plate or beam) and a plumb cut at the top where it meets the ridge. Getting consistent rafter cuts is where most beginners slow down. Make a rafter template with the first one, test-fit it, then use it to cut all the rest. The ridge board itself needs to be temporarily supported until both sides of the rafter pairs are installed and the structure is self-supporting.
Flat and low-slope framing
A flat roof on a patio cover isn't truly flat; it needs that minimum slope to drain. You can build in the slope by setting your ledger slightly higher than your outer beam, or by using tapered lumber (sleepers) on top of a level frame to create the pitch. The second approach works well when you're using a membrane roofing system like EPDM rubber or modified bitumen over plywood sheathing.
Sheathing and roofing surface options
Once the frame is up, you need to close in the roof. What you put on depends on your roofing material.
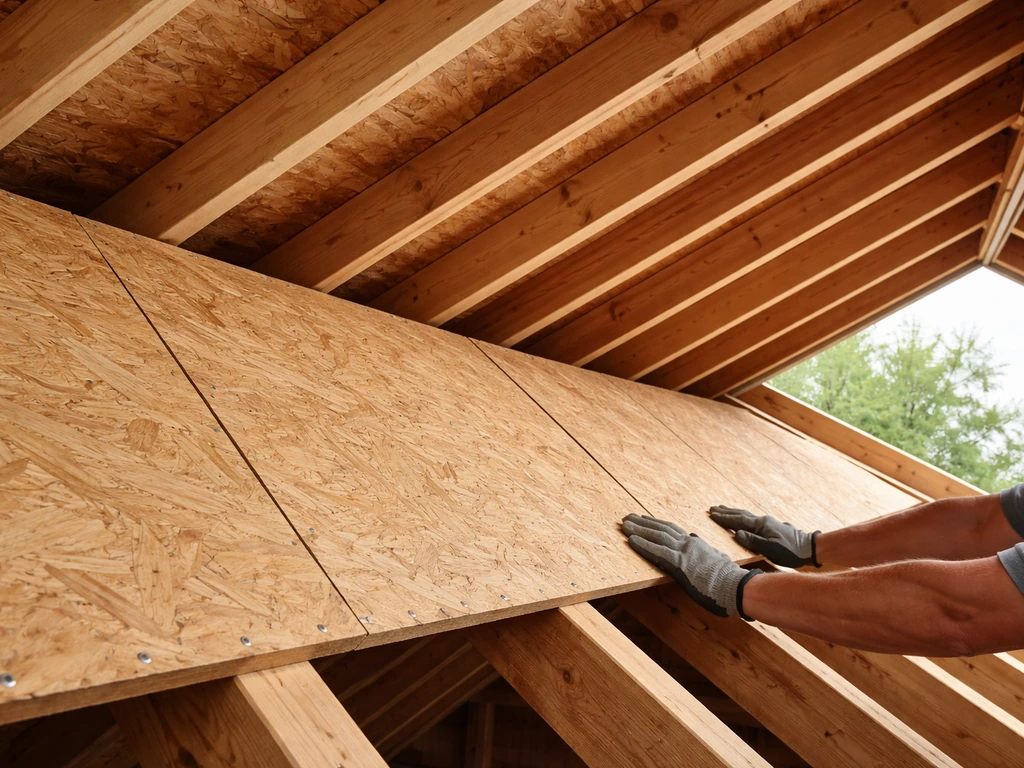
When you need sheathing
If you're using asphalt shingles, you need a solid sheathing base: 1/2-inch CDX plywood or OSB over the rafters, then synthetic underlayment or 15-pound roofing felt over the sheathing, then the shingles on top. If you choose shingles as your roofing surface, follow the patio-cover shingle steps carefully so water sheds correctly and edges stay sealed how to roof a patio with shingles. This is the same layered system used on a house roof.
Shingling a patio cover follows the same technique as any roof, starting from the bottom edge and working up with each row overlapping the one below. The minimum slope for asphalt shingles is 2/12 (2 inches of rise for every 12 inches of run), though 4/12 and above is more reliable.
Metal panels and polycarbonate
Metal roofing panels (corrugated or standing seam) don't require solid sheathing. They can run directly from the ledger to the outer beam, or you can add horizontal purlins (1x4 or 2x4 boards running perpendicular to the rafters, spaced according to the panel manufacturer's specs) for the panels to screw into. Use the manufacturer's recommended screws, which have a rubber washer built into the head to seal the screw hole. Overtighten them and you compress the washer too much; undertighten and you get a leak. Snug plus a quarter turn is the target.
Flat roof membranes
For a flat or low-slope patio cover, EPDM (rubber membrane) is one of the most reliable DIY-friendly options. You glue it down over 1/2-inch plywood sheathing, roll it out without seams if possible (it comes in large sheets), and seal the edges with compatible adhesive and termination bars. Modified bitumen rolls (torch-down or peel-and-stick versions) are another solid choice. Avoid relying on just roofing felt or tar paper on a flat surface; they're not long-term waterproofing solutions on their own.
Flashing, attachment, and weatherproofing
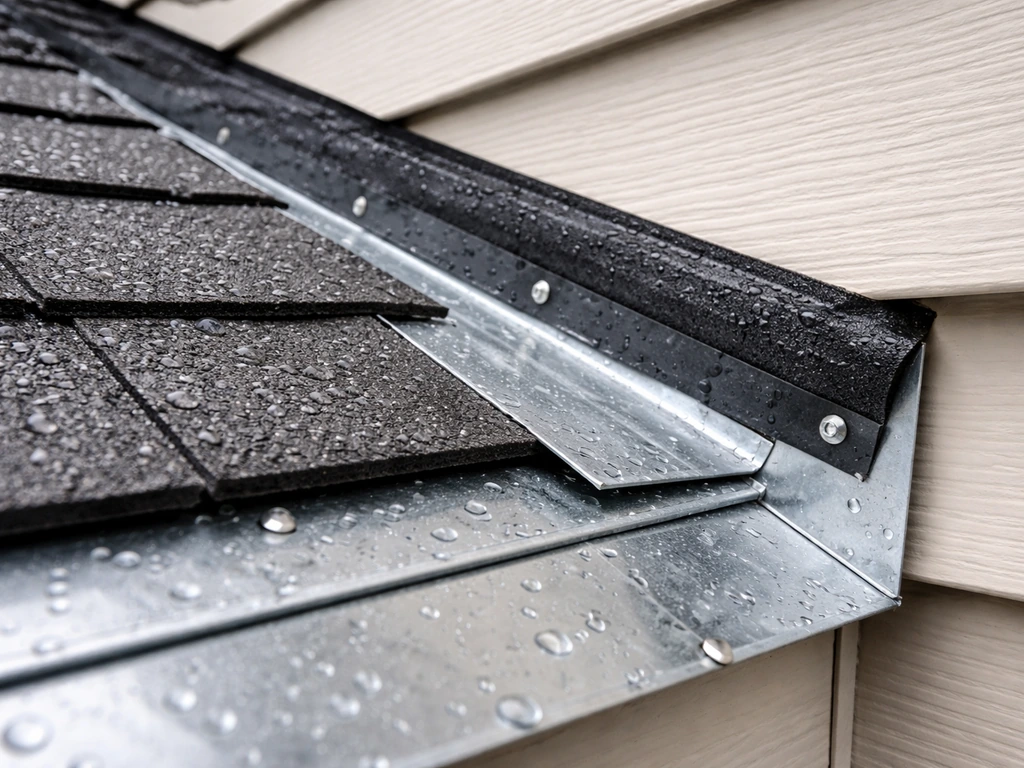
This is the step most DIYers underestimate, and it's where most leaks come from. Flashing is the metal (usually galvanized steel or aluminum) that bridges the gap between your roof and any adjacent surface, like the house wall, a chimney, or a valley between two roof planes.
Ledger flashing
Where your ledger meets the house, you need step flashing or a continuous z-flashing that tucks behind the siding above the ledger and laps over the top of the ledger board. Water that runs down the house wall will hit that flashing and get directed onto the roof surface instead of behind the ledger. If your house has stucco or stone veneer, this gets more complicated and a waterproofing membrane behind the ledger becomes important. If you're attaching to a rim joist through siding, cut the siding back at least an inch on each side of the ledger location so you can properly tuck the flashing behind it.
Drip edge and edge flashing
Drip edge is the L-shaped metal strip that runs along the bottom edge (eave) and the sides (rakes) of a shingled roof. On the eaves, it goes under the underlayment. On the rakes, it goes over the underlayment. This order matters: reverse it and water can wick behind the drip edge during wind-driven rain. For metal panel roofs, use the manufacturer's matching trim pieces at the eave and rake edges. For a flat membrane roof, lap the EPDM over the edge and terminate it with a metal termination bar and lap sealant.
Sealing penetrations and joints
Any fastener, vent, or gap in the roofing surface is a potential leak point. Use butyl tape under metal panel laps, silicone or polyurethane sealant (not standard caulk) at wall connections and trim joints, and make sure any overlapping panels have a minimum overlap per the manufacturer's recommendation (usually 6 to 12 inches for corrugated metal, depending on slope). What often goes wrong here is using the wrong sealant: standard paintable latex caulk breaks down fast on a roof exposed to UV. Use a product rated for outdoor roofing use.
Step-by-step installation from start to finish
- Pull your permit and mark your layout with stakes and string lines so you know exactly where posts and footings go.
- Dig and pour footings or set post base anchors; let concrete cure for at least 24 to 48 hours before loading them.
- Set and plumb your posts; brace them temporarily with 2x4 braces staked to the ground.
- Install the ledger board on the house wall, flashing it immediately before moving on.
- Set the outer beam on top of the posts using post caps and structural screws.
- Cut and hang all rafters using joist hangers on the ledger side and rafter ties or hurricane ties at the beam.
- Install any blocking or bracing needed for lateral stability, especially on free-standing structures.
- Lay sheathing (if using shingles or membrane) from the bottom up, staggering the joints so they don't line up between rows.
- Install underlayment (felt or synthetic) from bottom to top, overlapping each row by at least 2 to 4 inches.
- Install drip edge at eaves first (under felt), then rake drip edge (over felt).
- Install your roofing material: shingles from bottom to top, metal panels per manufacturer instructions, or membrane with full adhesion.
- Install all flashing: step flashing at the wall, any valley flashing if you have intersecting planes, and cap flashing at the top wall connection.
- Seal all joints, panel laps, and fastener heads with the appropriate sealant.
- Do a final inspection: run a hose on the roof and watch for any drips or wet spots inside the structure.
That hose test at the end sounds unnecessary until the first time you skip it and find out where you missed a joint six months later after a hard rain. If you want a patio roof to shed water correctly and look finished, the key is raising the roof to the right slope and ensuring proper flashing That hose test. Do it before you close up any interior finishes.
Permits, safety, and when to bring in a pro
You probably need a permit
Most municipalities require a building permit for a patio cover with a solid roof. The 2024 International Residential Code (IRC) includes a dedicated patio covers appendix (Appendix BF) that specifically addresses design requirements for patio covers, including wind speed considerations for your area. Many jurisdictions adopt this with local amendments. Permit applications typically require a framing plan that shows post and beam sizes, rafter spacing, ledger attachment details, footing dimensions, and roof covering type. Counties like Douglas County, Colorado explicitly require all of this on submitted plans. Skipping the permit isn't worth the risk: unpermitted structures can cause problems when you sell, and if something fails and you don't have a permit, your homeowner's insurance may not cover it.
Working safely at height
Roofing a patio cover usually means working at 8 to 12 feet above the ground, sometimes higher. OSHA standards require fall protection on residential roofs 4 feet or more above a lower level. Even if you're not a contractor subject to OSHA rules, that threshold is a sensible guideline for your own safety.
Use a properly rated ladder (ladders have load ratings; make sure yours exceeds your weight plus tools), set it on stable ground at the correct angle (about a 75-degree angle, or 1 foot out for every 4 feet up), and have a second person on the ground when you're on the roof. Don't work on a wet or frost-covered roof surface. Wear rubber-soled footwear.
If your patio cover is on a second story or connects to a second-story wall, seriously consider hiring a roofing contractor for the installation phase.
When to hire a professional
Be honest with yourself about the scope. Most single-story attached lean-to or flat patio covers are very reasonable DIY projects if you're comfortable with basic carpentry and working at moderate heights. Where I'd say call a pro: if you're building a gable roof over a large span (more than 16 feet) and aren't experienced with rafter layout and ridge connections; if your house has stucco or brick and the ledger attachment requires cutting into masonry; if the project requires engineered drawings for your permit and you're not sure how to interpret them; or if the structure will be anywhere near electrical lines or require electrical rough-in for lights or fans. A structural engineer consultation (often a few hundred dollars) is worth it if you're unsure whether your beam and post sizing is adequate for your local snow or wind loads.
The DIY-or-hire decision really comes down to framing confidence and comfort at height. The roofing surface installation itself (shingles, metal panels, EPDM) is genuinely manageable for most capable DIYers once the frame is solid. If you're uncertain about the frame, get that part reviewed or built by someone experienced, then take over for the roofing. Splitting the work that way saves money and keeps the structural piece in competent hands.
FAQ
Do I need a building permit to roof a patio cover, and what do plans usually require?
In many areas you do. Permit applications typically ask for a framing plan showing post and beam sizes, rafter spacing, ledger attachment details, footing depth/dimensions, and the roof covering type. If you are in a snow or high-wind zone, the plan may also need the design wind speed or snow load used for member sizing.
How do I know what slope I should use for my patio cover roof?
Use the minimum slope required by your roof covering, then aim for a little extra for safety. Flat or low-slope systems need careful waterproofing, shingles generally require a higher pitch for reliable runoff (minimums are specific to asphalt), and metal panels depend on manufacturer guidance for overlap and slope. If you are between values, choose the higher slope.
Can I make a flat patio cover and rely on a membrane alone to handle standing water?
You should avoid relying on standing water. Even with EPDM or modified bitumen, you still need designed drainage toward gutters, scuppers, or the outer edge. If the roof flatness or framing causes puddling, you can get premature deterioration, especially around penetrations and seams.
What’s the biggest leak risk near the house, and how can I prevent it?
The ledger connection and its flashing are the most common failure points. Make sure the flashing laps correctly and directs water out and away from behind the ledger. If you’re attaching through siding, cut the siding so flashing can be properly tucked, and don’t skip the required flashing order before the roof deck or rafters are fully enclosed.
Do I need drip edge and what order should it be installed in?
Yes, on shingle roofs it matters. The drip edge goes under the underlayment at the eave (bottom edge) but goes over the underlayment on the rakes (side edges). Reversing that can allow water to wick behind the metal during wind-driven rain.
What sealant should I use for roof penetrations and trim joints?
Use sealants rated for exterior roofing exposure, UV, and roof movement. Avoid standard indoor latex caulk. For metal panel overlaps, use butyl tape or the manufacturer’s recommended under-lap products, and for trim or wall interfaces use roofing-grade sealants such as polyurethane or properly rated silicones.
Can I install metal roofing over my frame without solid sheathing, and how do I protect the screw holes?
Often you can, depending on the panel type, but the key is following the manufacturer’s purlin spacing (or allowing the system to span to the deck/ledger as designed). Use the exact matching fasteners with rubber washers, and don’t crush the washer with over-tightening. Aim for snug plus a small additional turn so it seals without being compressed flat.
How far apart should I space rafters, and does it change with snow or wind?
Common DIY spacing is 16 or 24 inches on center, but spacing alone is not the full answer. Member size and allowable span depend on local design loads, including snow load and wind uplift. Your permit plan or load table should drive both rafter spacing and lumber dimensions.
What’s the safest way to set posts in concrete, and what mistake ruins alignment?
Set posts with approved bases anchored to concrete piers or set them in concrete below frost depth, and keep them plumb before the concrete sets. The classic mistake is rushing plumb alignment, then discovering the beam sits out of level, which forces you to fight rafter fit and creates uneven flashing lines.
If I’m using shingles, what should I do differently than a full house roof?
Treat it like a real shingle roof, but pay extra attention to how the patio cover meets the house and how edges are sealed. Make sure your underlayment layering and bottom-to-top shingle overlap rules are followed, and keep the required slope so water doesn’t linger at seams. Also confirm ventilation and airflow details if your design traps heat and moisture under the roof deck.
Is it really necessary to do a hose test, and when should I do it?
Yes. Do it right after flashing and roofing materials are installed, before any interior finishes or ceiling panels are closed up. Run water along the leak-prone areas first, especially where the roof meets the house wall and around any penetrations, then inspect from below and around seams for damp spots.
Do I need fall protection equipment for working on a patio cover?
Even if you are not following OSHA as an employee, working 4 feet or higher from a lower surface is where fall protection becomes a serious consideration. Use proper ladders rated for your weight, set them at the correct angle, and have a helper when possible. Never work on a wet or frosty roof surface, wear slip-resistant footwear, and plan the safest access route before you start.
Should I hire a pro for the framing, or the entire roofing job?
If you are confident in basic carpentry and can follow a framing plan, many DIYers can handle framing of small attached lean-to or low-slope roofs. The usual reason to hire help is uncertainty with structural details like gable ridge connections, engineered sizing for longer spans, unusual ledger attachments (brick or stucco), or situations near electrical lines where modifications might be required.