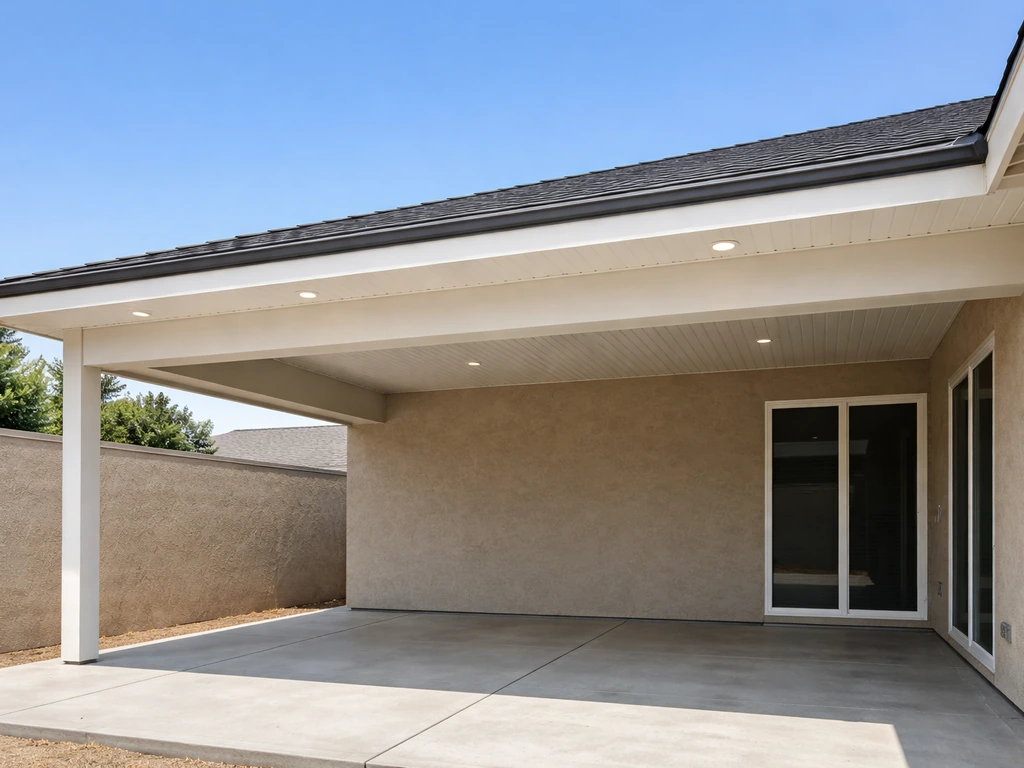
Raising a patio roof means replacing or extending your posts to add height, relocating the ledger board higher on the house wall (for attached covers), and re-cutting or swapping out the rafters to span the new geometry. Done right, you end up with more headroom and better airflow. Done wrong, you get sagging framing, water pouring in at the house wall, or a structure that fails a code inspection. This guide walks you through the full process, from figuring out why you need the extra height to driving the last screw on your new flashing. If you’re ready to start, this guide explains how to frame a patio roof step by step, from shoring to rafters and flashing.
How to Raise a Patio Roof: DIY Steps, Codes, and Weatherproofing

Celia Vaughn
20 Jun 2026
First, Figure Out Why You're Raising It
The reason you want more height directly shapes how much work you're actually taking on. These are the most common scenarios, and each one has a slightly different solution path.
- Not enough headroom: Standard minimum clearance under a patio cover is 8 feet from the finished patio surface. If your cover sits lower than that, you feel it immediately every time you walk through.
- Doors or windows blocked: Raising the ledger to clear a sliding door header or a window that opens outward is a targeted fix that only affects the house-side attachment.
- Poor sightlines or a closed-in feeling: Adding 12 to 18 inches can open up the visual connection to the yard dramatically, especially on deeper covers.
- Ventilation problems: A low roof traps heat under it in summer. More clearance at the sides lets hot air escape naturally.
- Drainage issues: Sometimes a flat or near-flat roof was built without enough slope. Raising the outer edge to create a 1/4-inch-per-foot pitch toward a gutter is a structural change disguised as a weatherproofing fix.
- Adding features: Running overhead fans, lighting conduit, or a ceiling fan where the current ceiling is too low.
Write down exactly what you're trying to solve before you touch anything. If the core issue is drainage, you might only need to raise the outer posts and re-pitch the rafters without touching the ledger at all. If it's headroom at a doorway, the ledger is your first focus. Knowing this upfront keeps you from over-engineering the project.
Measure Twice Before You Unbolt Anything

Get these numbers down on paper or a simple sketch before you touch a single fastener. You'll need them for every decision that follows, and you'll almost certainly need them if you pull a permit.
- Existing soffit height: Measure from the patio surface up to the underside of the current roof framing at the house wall and again at the outer beam. Note both numbers.
- Target finished ceiling height: Add your required gain to the lower of the two measurements. For most people this is 8 feet minimum, but 9 feet feels much more comfortable on a deeper patio.
- Roof slope (pitch): Measure the rise over a 12-inch horizontal run on your current rafters. Even a near-flat roof should have at least 1/4 inch of drop per foot of run (about 1.2 degrees). More pitch is better for drainage.
- Rafter span: The horizontal distance from the house wall (ledger face) to the outer beam, center to center.
- Post height and spacing: Current post heights and on-center spacing. Standard spacing is every 6 to 8 feet, but check your existing layout.
- Ledger position on the wall: Measure from the top of the existing ledger to the nearest structural element above it (rim joist, floor joist, or wall stud plate). This tells you how much room you have to move the ledger up.
- Footing or post base locations: If you're adding height via taller posts, confirm existing footings are present and get their diameter if you can.
Transfer all of this to a simple elevation sketch showing the house wall, the new ledger height, the new post heights, and the rafter run with slope labeled. You don't need CAD software. A clean hand drawing with dimensions labeled is exactly what most building departments ask for anyway, and jurisdictions like Douglas County and San Diego specifically require lumber dimensions, spacing, and connection details on submitted plans.
Your Structural Options for Getting More Height
There are three main ways to raise a patio roof, and you might use a combination of them depending on your cover's style and how much height you're adding. Done right, this planning helps you choose the best approach for how to make a patio roof without creating water and structural issues.
Option 1: Replace or Extend the Posts
This is the most common approach for freestanding covers and for attached covers where the outer beam is the low point. You pull the old posts, install taller ones (or post extensions with a properly rated post-to-post connector), and let the outer beam rise with them. If you're adding 12 inches or less, a post extension bracket secured with structural screws can work. For anything more, replace the post entirely. Common post sizes for residential patio covers are 4x4 (light loads, shorter spans) and 4x6 or 6x6 (heavier beams, longer spans or high-wind zones). Match the species and size of what's already there unless your new post height requires an upgrade per span tables.
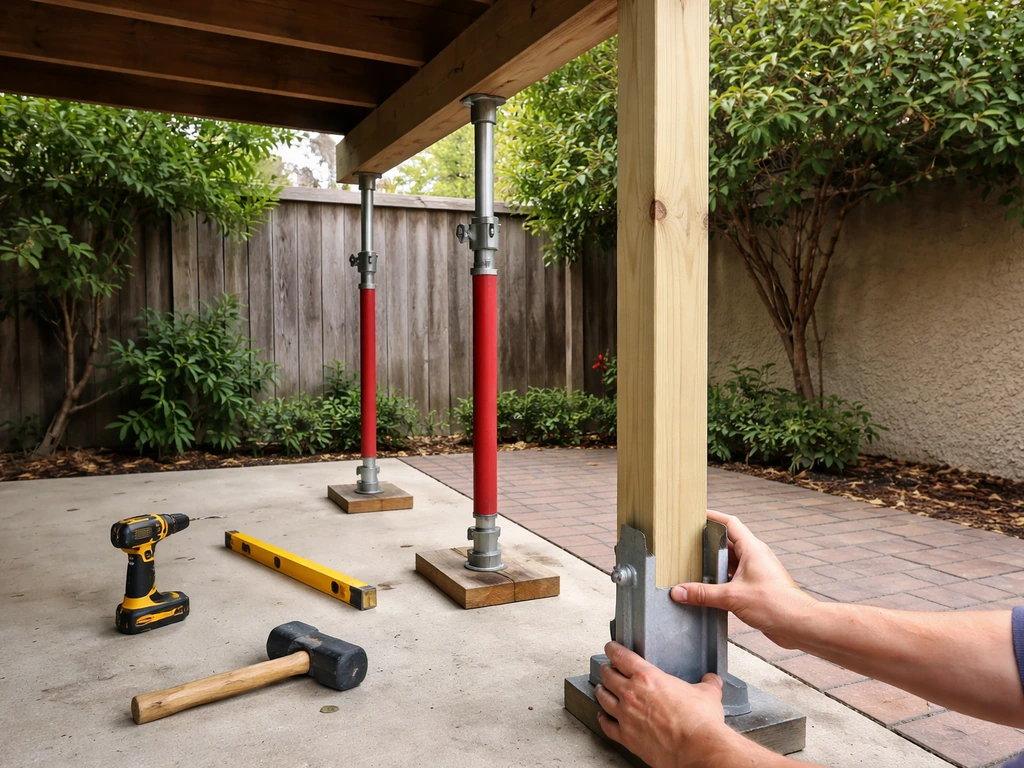
One thing people get wrong here: they pull the posts without temporarily supporting the beam first. Always install temporary shoring under the beam before removing any post. A doubled 2x8 on two sawhorses works fine for most residential patio beams. Take the load off, swap the post, re-seat the beam, then move to the next post.
Option 2: Relocate the Ledger Higher on the House Wall
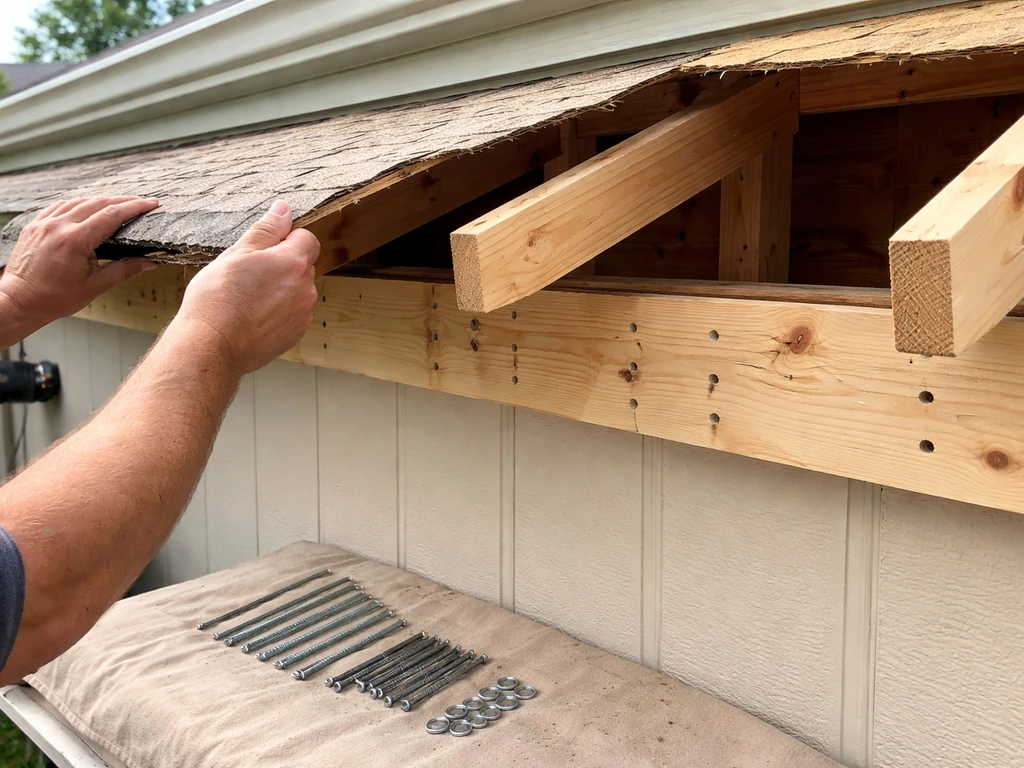
For attached covers (lean-to and gable styles), the ledger is bolted to the house framing and carries the top end of every rafter. Moving it up means you gain height at the house side. Before you commit to this, confirm there's structural wall framing to bolt into at the new height. Ledgers must be fastened into rim joists, band joists, or wall studs, not just into sheathing or siding.
Common practice is to use 1/2-inch lag screws or structural bolts, staggered into the framing, long enough to penetrate at least 1.
5 inches into the solid framing member. The ledger itself is typically a 2x8 or 2x10 pressure-treated board. Moving it up even 6 inches can make a big difference in how a doorway feels.
Option 3: Adjust Rafter Length, Pitch, or Both
Once the ledger and outer beam are at their new heights, you need rafters that span the new geometry. Once you adjust rafter length and pitch, the rest of the “how to roof a patio cover” steps follow, including panel overlap and flashing so water runs off correctly. If you raised the outer beam and kept the ledger in place, your rafters now have a steeper pitch, which is usually a good thing for drainage.
If you raised both ends by the same amount, the span is the same but the rafters are longer (because the posts are taller, not because the horizontal run changed). Cut new rafters to match the new plumb cut at the ledger and the bird's mouth (seat cut) at the outer beam. Always recheck your span tables for the new rafter size and spacing before you cut.
A 2x6 rafter at 24-inch spacing has a different safe span than the same lumber at 16-inch spacing. Don't assume what worked before still works after a height change if you're also increasing the span.
Connections and Hardware: Where Most DIY Problems Start
Weak connections are the number one failure point on DIY patio roofs. The framing lumber might be perfectly sized, but if the joints are sloppy, the whole structure can rack or pull away from the house in a windstorm. Here's what to get right.
| Connection Point | Recommended Hardware | Key Requirement |
|---|---|---|
| Ledger to house framing | 1/2" lag screws or 1/2" through-bolts, staggered | Penetrate at least 1.5" into solid framing; use 2 fasteners per stud/joist |
| Rafter to ledger | Joist hanger (LUS or equivalent) or bird's mouth notch + toenail | Hanger must match rafter depth; nails must fill every hole in the hanger |
| Rafter to outer beam | Rafter tie or hurricane clip | Required in high-wind zones; adds pull-out resistance |
| Beam to post | Post cap (e.g., Simpson BC or ABA series) | Post cap should match post and beam dimensions; galvanized or stainless in exposed locations |
| Post to footing/post base | Adjustable or fixed post base anchored to concrete | Minimum 3" embedment in concrete if setting in wet pour; use anchor bolt + base plate if retrofitting |
| Ledger flashing to house | Z-flashing over ledger top, self-adhered membrane behind ledger | Lap flashing over roofing below in shingle fashion; seal top edge to wall |
Use hot-dipped galvanized or stainless steel hardware throughout. Standard zinc-plated screws corrode quickly when they're in contact with pressure-treated lumber, especially the newer ACQ-treated wood. If you're in a coastal area, go straight to stainless. Don't mix metals at the same connection point: aluminum connectors against galvanized fasteners will eventually corrode from galvanic reaction.
The load path matters too. Every pound of weight on that roof (dead load from the roofing material plus live load from snow, people, or debris) has to travel from the roofing panels to the rafters, to the ledger and outer beam, to the posts, and finally into the footings. If any single connection in that chain is undersized, that's where failure happens. Lakewood's residential patio cover guidance, for example, calls for designing to at least 30 psf live load and 10 psf dead load. That's a useful baseline if your local jurisdiction hasn't published its own values.
Step-by-Step: Raising the Roof on Common Patio Cover Styles
Attached Lean-To (Most Common)
- Pull your permit before starting (see the permits section below).
- Remove the existing roofing material, then the rafters, then the ledger. Work from outside in. Keep the outer beam and posts in place temporarily if they're staying.
- Shore up the outer beam with temporary posts before removing anything structural on that side.
- Mark the new ledger height on the house wall. Snap a level chalk line across the full width. Confirm you have solid framing at this height by probing with a nail or using a stud finder.
- Remove house siding in a band at least 4 inches above the new ledger line. You'll need this clearance for flashing later.
- Install self-adhered flashing membrane on the house sheathing behind the ledger location, lapping over the siding below.
- Bolt the new ledger in place. Use 1/2-inch lags or through-bolts, two per framing bay or per stud, staggered high-low at least 1.5 inches apart vertically.
- Set new outer posts (or extend existing ones) to the correct height so the outer beam will sit at the right elevation to give you your target pitch from ledger to beam.
- Re-set or replace the outer beam in post caps. Check it's level across its full length.
- Cut new rafters to length with the correct plumb cut at the top and bird's mouth at the bottom. Install them into joist hangers at the ledger and secure at the beam with rafter ties.
- Install the roofing panels or sheathing, working from outer edge toward the house so each course laps over the one below (shingle fashion).
- Flash and seal the top where the roof meets the house wall. Full detail in the weatherproofing section below.
Freestanding Flat or Low-Slope Cover
- Shore all four beams before pulling any posts.
- Replace all posts with taller ones. If you're raising uniformly, all posts go up by the same amount. If you're adding pitch, the low-side posts go up more than the high-side posts.
- Re-seat beams in new post caps at the correct heights. Check diagonal measurements across the frame for square.
- Replace rafters or check that existing rafters can be reused if the span hasn't changed. If the span has changed even slightly, recalculate.
- Re-install roofing panels lapping from low side to high side with minimum 6-inch horizontal overlaps on metal panels, or per manufacturer spec.
- Add or relocate any gutter at the low-side beam. Pitch the gutter 1/8 inch per foot toward the downspout.
Gable Roof Patio Cover
Raising a gable cover is the most involved scenario because you have a ridge beam, two slopes of rafters, and potentially a collar tie or structural ridge. The process follows the same logic (shore, replace posts, re-set beams, cut new rafters), but you also need to re-establish the ridge height relative to the new beam heights.
If you raise both side beams by 12 inches, the ridge goes up by 12 inches too, and every rafter needs to be recut. Plan to replace all the rafters rather than trying to notch or extend the existing ones. For a deeper look at gable roof framing from scratch, the guide on how to build a gable roof patio cover covers the framing geometry in detail.
Weatherproofing, Flashing, and Drainage After Raising
This is where most DIY patio roof projects fail in year two. The framing looks great, the roof panels are on, and then the first heavy rain exposes a gap at the house wall or a low spot where water pools. Get this part right the first time.
Re-flashing the Ledger Wall
Every time you move a ledger, you disturb the water management at the house wall. Here's the correct layering sequence. First, install self-adhered flashing membrane directly to the house sheathing in the band where the ledger will sit, extending at least 4 inches above the ledger and lapping over the building wrap or housewrap below. Then bolt the ledger through this membrane.
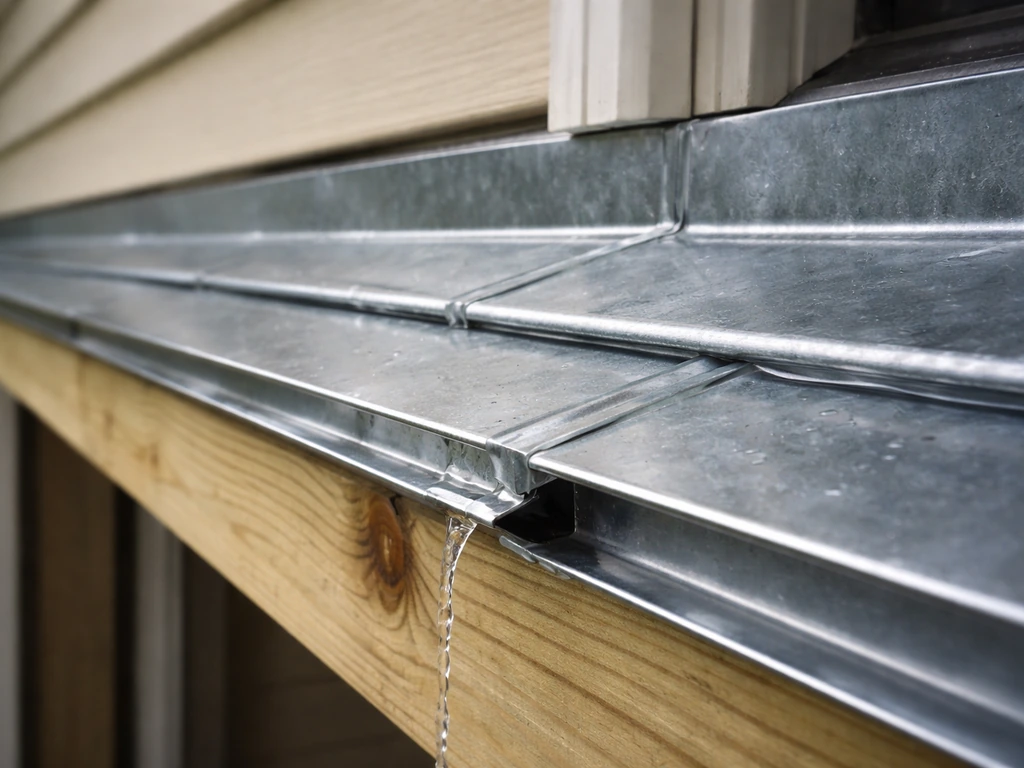
Next, install Z-flashing over the top edge of the ledger, with the horizontal leg sloping slightly outward (about 5 degrees as noted in ABCO's flashing guidance) so water doesn't sit on the ledger top. The Z-flashing's top leg goes behind the siding above, and the bottom leg overhangs the top face of the ledger. Finally, reinstall the siding, lapping down over the top of the Z-flashing by at least 1 inch. Never caulk this joint as your primary water barrier.
Caulk fails; lapped flashing doesn't.
Roofing Panel Overlap and Slope
Whether you're using metal panels, polycarbonate sheets, or asphalt shingles, every course must lap over the course below it in shingle fashion so gravity does the work. For metal roofing panels, minimum end lap is typically 6 to 12 inches depending on pitch: the lower the pitch, the longer the overlap needed.
At near-flat pitches (1/4 inch per foot to 1/2 inch per foot), some metal panel profiles actually require a sealant tape between lapped ends in addition to the overlap because gravity alone isn't enough. Check the panel manufacturer's spec sheet for your specific profile. A common mistake on low-slope covers is installing panels flat-to-flat without sealant, assuming the overlap is enough. It's not on anything below a 1:12 pitch.
Gutters and Drainage
If you had a gutter before, you'll need to reinstall it at the new outer beam height. Size gutters for your roof area: a standard 5-inch K-style gutter handles roughly 5,000 square feet of roof in moderate rainfall, so it's more than adequate for a patio cover. Pitch the gutter a minimum of 1/8 inch per running foot toward the downspout.
After raising the outer beam, double-check that the roofline still projects over the gutter lip by at least 1 inch, or rain will blow behind the gutter and rot the fascia. If your new roof pitch is steeper than the original, also check that fast-moving water won't overshoot the gutter entirely. A gutter guard or extended lip profile can help on steeper-pitch retrofits.
Sealing Penetrations
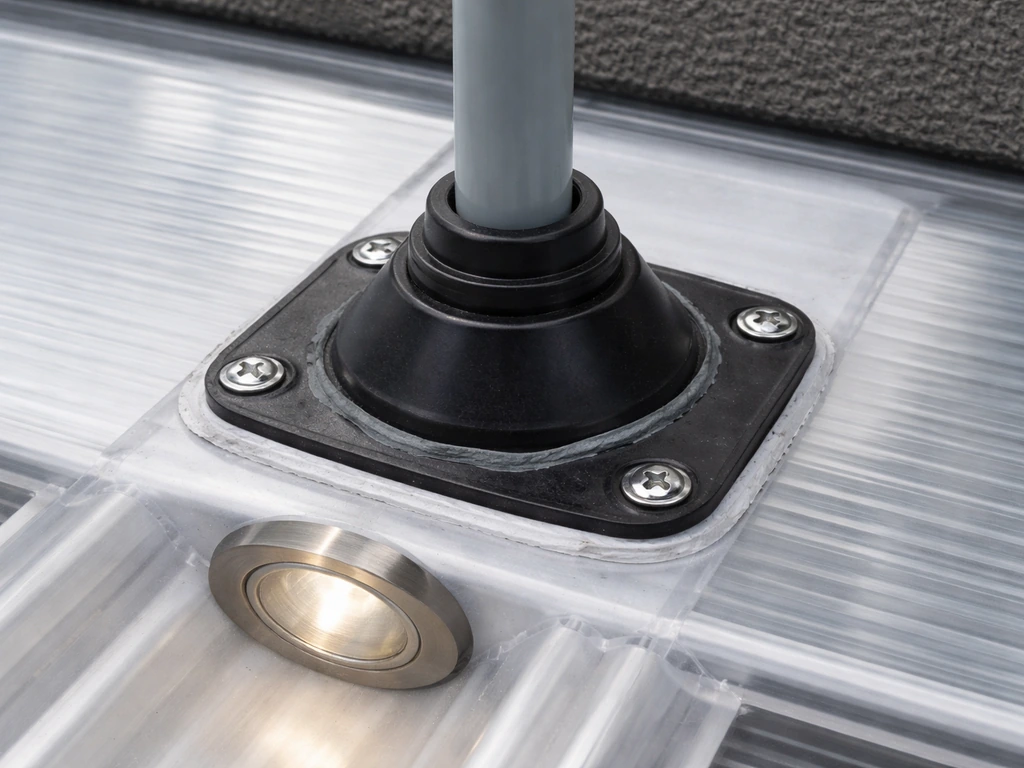
Any electrical conduit, fan mount, or lighting fixture that penetrates the roofing panels needs a roof-rated boot or flashing collar sealed to the panel surface. Use butyl tape or a compatible sealant rather than silicone on metal panels, since silicone can release acetic acid that corrodes some metal finishes. The flashing collar should overlap the upslope roofing by at least 4 inches. Building America's guidance frames this well: every penetration's flashing must overlap in shingle fashion so water is always directed downward and outward, never allowed to collect. Follow proper shingle-fashion sequencing when you install patio cover shingles so water always runs downward and never gets trapped flashing must overlap in shingle fashion.
Permits, Engineering, and Being Honest About What You Need
Raising a patio roof is almost always a permitted project. Garland, TX requires a building permit for any attached or freestanding patio cover. Herriman, UT requires a permit when a roof cover with ground posts exceeds a certain threshold. Phoenix, San Diego, and Douglas County all require structural plan submittals that include dimensions, lumber species and sizing, spacing, footing and post details, ledger attachment specifics, and roof covering type. San Diego’s patio cover guidance notes that plan sets should include roof framing, foundation plans, elevations and cross-sections, connection details, and structural calculations. Chula Vista caps patio cover height at 12 feet above grade and requires code-compliant construction even when a permit might not technically be required for minor work.
The practical message: call your local building department before you start. Ask specifically whether raising an existing patio cover requires a permit and what plans they need to see. In most jurisdictions, adding height to an existing structure triggers the same review as new construction. Getting caught doing unpermitted structural work can mean a stop-work order, forced demolition, and serious headaches at resale.
When You Actually Need an Engineer
Some jurisdictions waive the engineering requirement for small patio covers if you're using prescriptive construction (standard sizes from code tables). Others require a licensed engineer's stamp on the drawings regardless. Beyond the permit requirements, there are real situations where you should hire a structural engineer even if the building department doesn't require one: if you're spanning more than 16 feet with a single beam, if you're in a high-wind or seismic zone, if you're attaching to a wall that may have been modified (finished basement or room addition behind it), or if the existing footings are unknown or undersized. An engineer consultation typically runs $300 to $800 for a simple patio cover review, which is cheap insurance against a framing failure.
When to Hire a Contractor Instead of DIYing
Be realistic with yourself. If you're raising both the ledger and the outer beam on a large attached cover, re-cutting a full set of rafters, and re-flashing the house wall, you're looking at a multi-day project requiring temporary shoring, multiple trips up and down a ladder with heavy lumber, and precise cuts with a miter saw. If any of those steps sounds outside your current skill set, or if the project involves a second-story wall attachment, hire a licensed contractor for at least the structural work and handle finish details yourself. Professional installation runs roughly $20 to $75 per square foot depending on materials and complexity, with a typical project landing around $8,500 on average, though larger or more complex jobs push well past that.
Materials, Tools, and Cost: What You'll Actually Need
Tools Checklist
- Tape measure (25-foot minimum) and a 4-foot level
- Laser level or water level for setting consistent heights across posts
- Chalk line
- Circular saw and a power miter saw (chop saw) for rafter cuts
- Drill/driver with impact driver
- Socket set for lag bolt installation
- Reciprocating saw for demo work
- Hammer and nail gun (framing nailer) if available
- Tin snips for cutting flashing
- Caulking gun
- Ladder (extension ladder rated for your height plus margin; follow 4: 1 angle rule)
- Temporary shoring lumber: two or three 2x8 planks and adjustable steel posts (acrow props)
Materials Checklist
- Pressure-treated lumber for ledger board (2x8 or 2x10 depending on rafter load)
- Posts: pressure-treated 4x4, 4x6, or 6x6 (match existing or upgrade per span tables)
- Beam lumber or beam replacement if needed
- Rafter lumber sized to span and spacing (use IRC or your local code span tables)
- Joist hangers, post caps, rafter ties, post bases: all hot-dipped galvanized or stainless
- 1/2-inch lag screws or carriage bolts with washers and nuts for ledger attachment
- Self-adhered flashing membrane (Grace Ice & Water Shield or equivalent), minimum 12-inch width
- Z-flashing (aluminum or galvanized, 26 gauge minimum) for ledger top
- Roofing panels or sheathing and roofing appropriate to your cover style
- Sealant tape or butyl tape for panel laps on low-slope applications
- Concrete mix or anchor bolts if replacing or adding post bases
- Gutter hardware if reinstalling or relocating gutters
Rough Cost Factors
For a DIY project where you're supplying labor, the materials for a typical 10x12 to 10x20 attached cover raise run roughly $500 to $2,500 depending on how much lumber needs replacing and the roofing material chosen. Aluminum patio cover systems at the low end, wood framing with metal roofing panels in the middle, and wood framing with shingles or standing-seam metal at the higher end. Permit fees vary widely by jurisdiction but typically run $50 to $300 for residential patio structures. If you hire a contractor for the whole job, expect $2,000 to $7,500+ for a straightforward raise on a mid-size cover, or more if significant structural upgrades are needed.
Quick Decision Framework
Here's a fast way to figure out what you can do today versus what needs more planning or outside help. If you're raising the outer beam only (no ledger change, no new footings, standard spans), this is a solid DIY weekend project once you have your permit.
If you're relocating the ledger and replacing all rafters on an attached cover, budget two to three days, confirm your wall framing can handle the new location, and plan the flashing sequence carefully before you start demo. If you're doing any of this on a second story, with spans over 16 feet, in a high-wind or earthquake zone, or without knowing what's inside your walls at the attachment point, get an engineer review first.
The cost of getting it wrong is always higher than the cost of getting it checked.
If you're still in the planning phase and haven't decided on the style of cover you're building up to, the guides on how to frame a patio roof and how to build a patio roof cover the foundational framing workflows in more depth. If you specifically want a gable roof patio cover, the same ledger, rafter, and flashing steps apply, with added focus on matching the gable geometry how to build a gable roof patio cover. And if your end goal involves adding actual shingle or panel roofing to the newly raised structure, the articles on how to roof a patio cover and how to roof a patio with shingles pick up right where this one leaves off.
FAQ
Does raising a patio roof always require an engineer, or only in certain cases?
Start by checking whether the change is purely geometric (raising posts to change headroom) or structural (moving the ledger, changing the rafter span, or increasing roof area). If the ledger height changes, or rafters get replaced because the run and pitch change, plan on submitting structural details rather than only a scope change description. When in doubt, ask your building department whether they will review it under “existing patio cover alteration” and what they require for footing and ledger connection documentation.
Can I raise the ledger on an attached patio cover if I cannot hit studs at the new height?
Yes, but only if it does not compromise safety. A ledger cannot be anchored to siding or sheathing alone, so you must confirm where the solid members are (rim joist, band joist, or studs) at the new height. If the new ledger location does not land on solid framing, you may need to re-route the attachment or add reinforcement framing, which can turn a simple raise into a larger structural retrofit.
If I’m raising the posts, can I keep the existing outer beam instead of replacing it?
Often, the simplest solution is to re-shim and re-set the existing beam only if it is still straight and you are not changing its size or support spacing. If the beam is already crowned, twisted, badly weathered, or has localized rot, replacing the beam is usually cheaper than trying to “tune” alignment with shims that can loosen over time. Also verify you have a temporary shoring plan before loosening anything.
What fasteners can I reuse from the old roof when raising the patio roof?
Do not rely on standard deck screws or mixed fasteners in pressure-treated lumber. Use hot-dipped galvanized or stainless hardware, and keep metals consistent within the same connection point to avoid galvanic corrosion. If any existing connection uses zinc-plated hardware and you are reworking adjacent joints, replace that hardware in the affected connection zones rather than leaving mismatched fasteners in place.
If I only raise the outer beam (no ledger change), do I still need to recalculate rafter spans?
When you move only the posts and keep the ledger where it is, your outer beam height changes but your house-end geometry does not. That typically changes rafter length and pitch, which changes drainage, but it may not change the rafter span in the same way as moving both ends. Before cutting, confirm both the rafter run and the rafter span are still within the safe span table for your exact lumber size and spacing.
Can I keep existing rafters if I raise the patio roof by a small amount?
Reusing rafters is usually a mistake after a height change that alters pitch or seat angles. Even if the rafters “fit,” the bird’s mouth (seat cut) may not properly contact the beam, and the top cut at the ledger may create gaps that drive water intrusion. The safer path is to treat any rafter replacement decision as a framing layout change, then cut new rafters to match the revised cuts and geometry.
What flashing problems commonly show up after people raise an attached patio roof?
Yes, but you must re-check water behavior at the house wall. Even a few inches of ledger movement changes where the flashing lines up, and trapped water behind siding can still occur if lapping order is wrong. Also confirm that the siding can be removed and reinstalled cleanly so the Z-flashing properly tucks behind siding with the required overlap.
If I change the pitch, do I need special sealant or tape under metal roof panels?
If the roof pitch becomes flatter after the raise, or if the roof panels are near-flat, gravity alone may not be enough at panel seams. The fix depends on your roofing system, for metal profiles sometimes requiring sealant tape at lapped ends at low pitches. Confirm your roofing manufacturer’s minimum end lap and whether any tape or sealant is required for your exact pitch and panel type.
After raising the patio roof, how do I know whether my gutter will still work correctly?
Gutters can look “fine” after a raise, but wind-driven rain can bypass them if the roof edge projection over the gutter lip is insufficient. After raising the outer beam, measure that projection again and make sure the gutter is still pitched toward the downspout at least about 1/8 inch per running foot. If the roof pitch changed, verify water does not blast past the gutter at the highest flow moments.
How should I handle flashing for lights or fans on a raised patio roof?
Plan for every roof penetration, even small ones like light mounts or cable routes. Use roof-rated boots or flashing collars designed for the panel type, and ensure the collar overlaps the upslope surface so water sheds downward in shingle fashion. Avoid silicone, since certain formulations can degrade or affect metal finishes over time, and use the recommended sealant or tape compatibility.
When should I stop DIY and get a structural engineer for raising a patio roof?
Yes, and you should treat it as a different risk category. If your attachment point is on a second-story wall, spans exceed common prescriptive limits, the area is high-wind or seismic, or you do not know the condition of existing footings and wall framing, get an engineer or contractor review before cutting or drilling structural members. The main decision aid is whether you can verify the load path and attachment material is adequate without guessing.
What are the most common safety mistakes during post replacement or beam re-raising?
If your project involves temporary shoring under a beam, plan for a clear staging area and a method to keep shoring stable. A common failure point is removing a post before the beam is fully supported, or leaving shoring too close to edge conditions where it can slip. Also confirm you can reach the ledger and beam connections safely, since incomplete tightening while standing in unsafe positions often leads to weak joints.