Framing a patio roof starts with picking your roof style, setting a ledger board (or planning footings for a freestanding structure), then running beams, posts, and rafters in the right order with the right spacing. Get those three things right and the rest of the project falls into place. The most common DIY-friendly options are a lean-to (shed-style) attached to the house and a gable roof, either attached or freestanding. Once you pick a gable roof, you will frame it around a ridge beam with matching rafter pairs, either attached or freestanding gable roof patio cover. Lean-tos are simpler because they slope in one direction and attach directly to the house wall, while gable roofs require a ridge beam and matching rafter pairs. This guide walks you through the full framing process, from your first measurements to the last hurricane tie, so you can start with confidence and know exactly when to call in help.
How to Frame a Patio Roof: DIY Layout, Sizes, Steps

Choosing the patio roof type and framing approach

The framing approach you choose shapes every other decision, so settle this before buying a single board. The three most practical options for homeowners are: a lean-to (attached, single-slope), a gable roof (attached or freestanding, two slopes meeting at a ridge), and a flat or low-slope cover (also attached or freestanding). Each has a different framing skeleton.
| Roof Style | Skill Level | Best For | Main Framing Elements |
|---|---|---|---|
| Lean-to (shed slope) | Beginner | Attached patios, narrow depth under 16 ft | Ledger, outer beam, rafters sloping one way |
| Gable (attached) | Intermediate | Wider patios, better drainage, more headroom | Ledger or ridge beam, rafter pairs, collar ties |
| Gable (freestanding) | Intermediate-Advanced | Detached patios, poolside, no house attachment | Footings, posts, beams, ridge beam, rafter pairs |
| Flat/Low-slope | Beginner-Intermediate | Modern aesthetic, aluminum framing systems | Ledger or perimeter beam, closely spaced purlins |
For most first-timers, the lean-to is the right call. It uses fewer pieces, has no ridge beam to level and support mid-air, and every rafter runs the same cut. If you want a gable look, the framing is more involved but absolutely doable. A full guide on how to build a gable roof patio cover covers the ridge beam and rafter pair details specifically if you go that route. Freestanding structures require concrete footings and add a layer of engineering, so factor that in early. For material, pressure-treated wood (PT lumber) is the standard for outdoor framing because it resists rot and insects. Aluminum framing systems are a solid alternative, especially if you want a lighter structure or a low-maintenance finish, and they often come as kits with pre-engineered components.
Measuring, planning slope/drainage, and checking clearances
Before anything goes up, spend serious time on measurements. A framing error at this stage multiplies into problems every step after. Here is what you need to know before picking up a saw.
Critical measurements to take

- Patio width and depth: Measure the full footprint of the covered area. For attached structures, depth is the distance from the house wall out to where your outer beam will sit.
- Wall height at attachment point: Measure from the ground to where the ledger will bolt onto the house. Your finished roof height at the house must clear any windows and doors below it, with at least 7 feet of headroom underneath the lowest framing point.
- Slope (pitch): A minimum slope of 1/4 inch per foot is needed for drainage on low-slope roofs; 2-in-12 (2 inches of rise per 12 inches of run) is the practical minimum for shingles and most panel roofing. Standard lean-to patio covers often use 2-in-12 to 3-in-12.
- Rise calculation: Multiply your roof depth (in feet) by the pitch. For a 12-foot-deep lean-to at 2-in-12, that's 2 inches per foot times 12 feet = 24 inches (2 feet) of total rise. Your outer beam sits 2 feet lower than the ledger.
- Overhead clearances: Check for eaves, gutters, or second-story windows above your ledger attachment point. You need room for the ledger itself (typically a 2x8 or 2x10) plus flashing above it.
- Utility lines: Look for electrical service drops, gas lines, or buried utilities before digging any post holes. Call 811 (the US Dig Safe line) at least a few days before you dig.
A common mistake is forgetting to account for the fascia board and roofing material thickness when calculating final heights. Your rafters sit on top of the beam, roofing goes on top of the rafters, and fascia hangs on the ends. All of that adds up. Run your numbers through to the finished surface, not just the bare framing, before you commit to ledger height.
Permits and setbacks
Most municipalities require a permit for any permanent patio roof structure. Pull the permit before you build, not after. Your local building department will tell you the required setbacks from property lines, the maximum height, and whether you need engineered drawings. Under the International Residential Code (IRC) Appendix BF, patio covers must be designed to handle dead loads plus a minimum live load of 10 pounds per square foot (psf), and in any area where snow loads exceed 10 psf, you use the snow load number instead. In high-wind zones, wind uplift requirements apply on top of that. If you are in a hurricane zone or a heavy-snow area, this is where an engineer's stamp on your plan is worth every dollar.
Framing the main support structure (ledger, posts, beams, and headers)
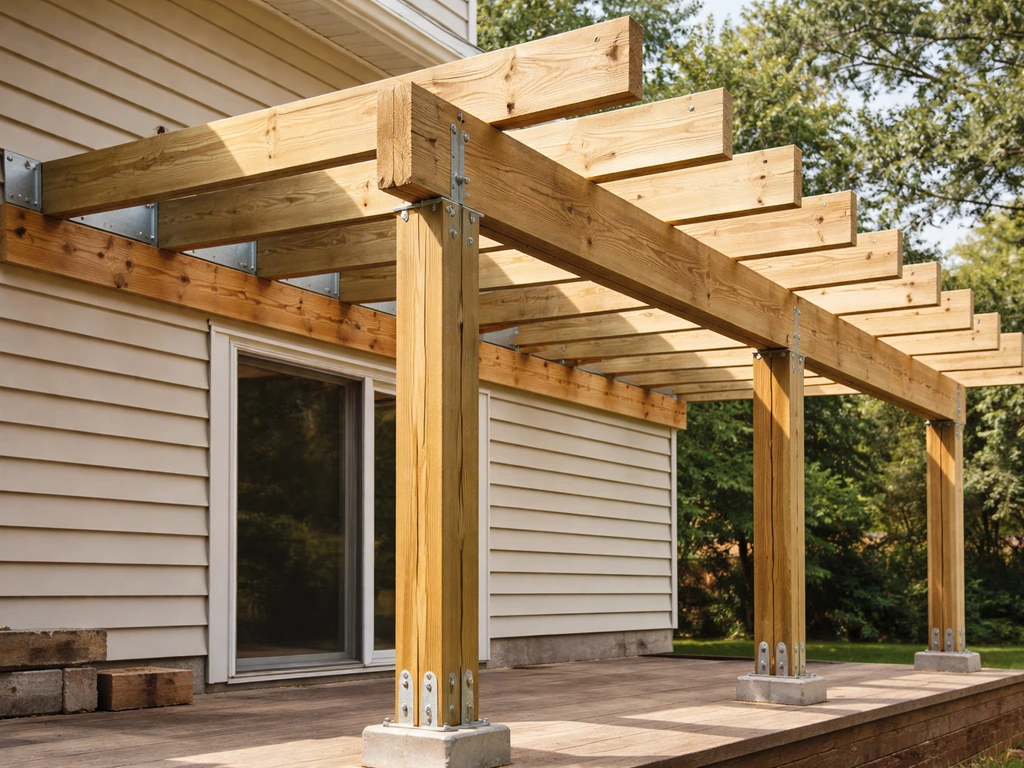
The support structure is the skeleton everything else hangs from. For an attached lean-to, this means a ledger on the house and a beam on the outer edge supported by posts. For a freestanding structure, you have posts and beams on both sides.
Installing the ledger board

The ledger is the board that bolts directly to your house rim joist or wall framing. Use pressure-treated lumber (2x8 or 2x10 depending on rafter span) and lag-bolt it into the structural framing of the house, not just the sheathing or siding. A typical pattern is 1/2-inch lag screws or structural screws staggered every 16 inches, alternating high and low so they hit different framing members. Before the ledger goes up, the house sheathing and siding must be cut back and flashing installed so water cannot get behind the ledger. This is one of the most important waterproofing steps in the whole project, and skipping it leads to rot in the house structure within a few years.
Set the ledger height based on your slope calculation. Use a level and chalk line to mark the exact position before drilling. If your ledger is going onto stucco or brick, you will need to use lag shields or appropriate masonry anchors and should pre-drill carefully to avoid cracking.
Setting posts and footings
For attached lean-tos with an outer beam, you typically need posts at each corner and at intermediate points if the beam spans more than 8 to 10 feet. Post size depends on height and load: 4x4 posts work for lighter structures under 8 feet tall, but 6x6 posts are the safer choice for anything taller or heavier. Posts must sit on concrete footings that go below the frost line in your area (anywhere from 12 inches in mild climates to 48 inches in colder regions). Use post base hardware to keep the post off direct concrete contact, which prevents rot. Set footings, let them cure at least 48 to 72 hours, then set posts plumb using a level on two sides, brace them temporarily, and lock them in with post bases before moving on.
Installing the outer beam
The outer beam runs perpendicular to the rafters and carries their outer ends. For most residential patio covers, a doubled 2x8 or 2x10 beam works for spans up to about 10 to 12 feet between posts. For longer spans, go to a doubled 2x12 or an LVL (laminated veneer lumber) beam. Set the beam on top of the posts using post cap hardware, or notch the posts (a traditional method) for a stronger mechanical connection. Either way, use structural connector hardware at every post-to-beam joint. Do not rely on toenailed nails alone for lateral load resistance.
Rafter layout, spacing, spans, and cutting details
Rafters are the sloping members that run from the ledger (or ridge beam) down to the outer beam and create the actual roof plane. Getting the layout and cuts right is what makes the frame look clean and perform correctly.
Rafter sizing and spacing
Standard rafter spacing is 16 or 24 inches on center (o.c.). Sixteen-inch spacing gives you a stiffer deck and is better for heavier roofing like shingles. Twenty-four-inch spacing works fine for lightweight panel roofing and most aluminum systems, and it saves material cost. Rafter size depends on the span (the horizontal distance from ledger to outer beam) and the species/grade of lumber. As a general starting point: for a 10-foot span, 2x6 rafters at 24 inches o.c. work for most light loads; for a 12-foot span, use 2x8 at 16 or 24 inches o.c.; for a 14-to-16-foot span, step up to 2x10. Always cross-reference with your local span tables or the IRC span tables because wood species and load requirements vary by region.
Laying out rafter positions
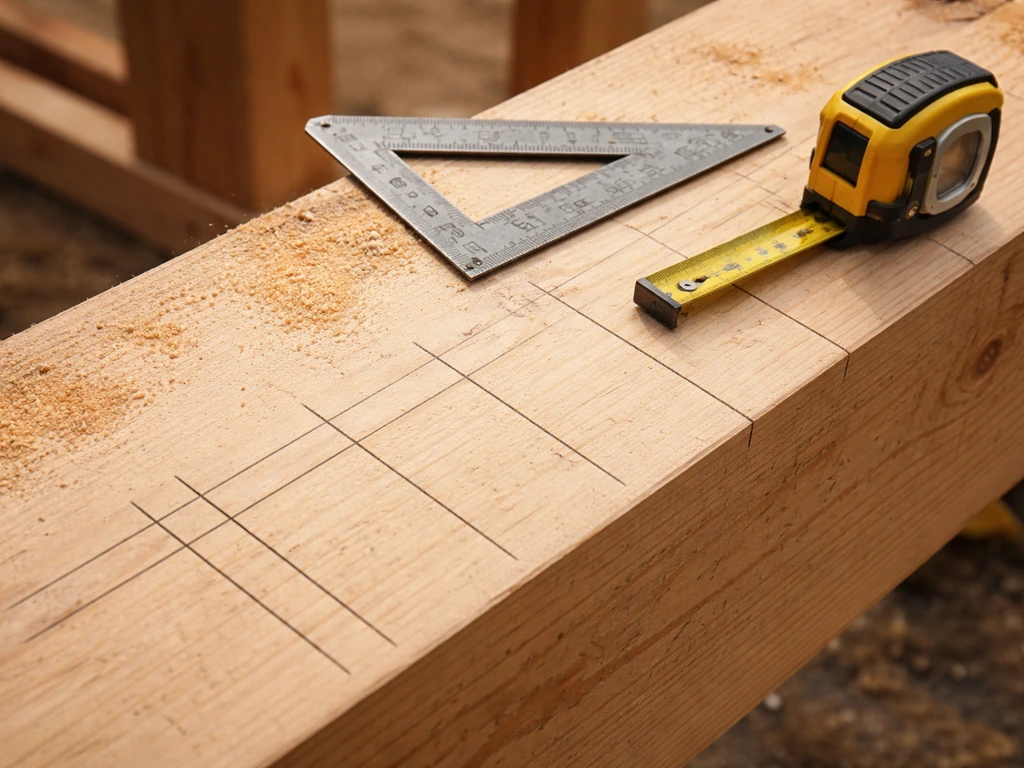
Start your layout from the same end on both the ledger and the outer beam so rafters stay plumb and parallel. Mark your first rafter flush with the end of the structure, then step down the beam 16 or 24 inches and mark each subsequent rafter with an X on the layout side. Do this on both the ledger and the outer beam before cutting a single rafter, and double-check that your marks align across the structure.
Cutting the rafters
Each rafter needs three cuts for a lean-to roof. First, a plumb cut at the top (where it meets the ledger) angled to match your pitch. Second, a bird's mouth cut partway down the rafter, which is a notch that lets the rafter sit flat on the outer beam. Third, a tail cut at the bottom end to shape the overhang. The angle for all cuts is determined by your pitch. For a 2-in-12 pitch, the angle is about 9.5 degrees. Set your circular saw to that angle and use a rafter square (also called a speed square) to mark the cuts on your pattern rafter. Cut one rafter, test-fit it, then use it as a template for every other rafter in the run. This saves hours of individual measuring and prevents cumulative error.
Overhang length
A 12-to-18-inch overhang is practical for most patio roofs. It sheds water away from the structure and provides a bit of extra shade. Longer overhangs need blocking or a lookout system to stay stiff. Whatever you choose, keep it consistent across all rafters.
Bracing, blocking, and making the frame square and rigid
A frame that is not square will cause every problem downstream: wavy rooflines, roofing panels that do not line up, doors and trim that look crooked. Bracing and blocking are also what make the frame resist wind loads instead of racking over time.
Squaring the frame
After the ledger and outer beam are up, measure diagonally from corner to corner in both directions. If both diagonal measurements are equal, the frame is square. If they are not, nudge the outer beam slightly until the numbers match, then lock it in place before installing rafters. This is the single easiest quality check in the whole project and it takes about two minutes. Do not skip it.
Blocking between rafters
Blocking is short pieces of lumber installed between rafters to keep them from twisting or tipping sideways under load. Install blocking at the ledger end, at the outer beam, and mid-span on any rafter run longer than 8 feet. Cut blocks to the exact rafter spacing (14.5 inches for 16-inch o.c., 22.5 inches for 24-inch o.c.) and face-nail or use framing clips. Blocking at the outer beam also creates a solid nailing surface for the fascia board. The IRC's roof-ceiling construction requirements emphasize blank" rel="noopener noreferrer">continuous ties across the framing to prevent racking and roof thrust, and solid blocking at key points is how you achieve that in a patio cover framing assembly. The IRC Chapter 8 roof-ceiling provisions include collar ties such as R802.4.6 and requirements for tying roof/ceiling framing members to resist thrust and separation blank" rel="noopener noreferrer">prevent racking and roof thrust.
Diagonal bracing for posts
Freestanding structures and any structure with posts taller than about 8 feet need diagonal knee bracing from each post to the beam above. A common approach is a 2x4 brace cut at 45 degrees, bolted to the post and the beam with 1/2-inch carriage bolts. This is what keeps the structure from swaying in a wind event. Knee braces should be on at least two adjacent faces of each post for maximum rigidity.
Anchoring, fastening, and waterproof-ready framing steps
The quality of your connections is what separates a patio roof that lasts 30 years from one that starts failing in five. If you want the full process end-to-end, including roofing materials and the finishing steps, use this guide for how to raise a patio roof from start to weather-ready. Every structural joint needs metal hardware designed for the load it carries, and every penetration through the house envelope needs to be waterproofed before you cover it up.
Hardware at every connection point
- Ledger to house: 1/2-inch lag screws or structural screws (such as LedgerLOK), staggered every 16 inches into rim joist or wall studs
- Post to footing: Code-approved post base (such as Simpson Strong-Tie ABU or ABA series) with anchor bolts cast into the concrete
- Post to beam: Post cap hardware (such as Simpson BC or PCZ series), not just toenails
- Rafter to ledger: Rafter hanger hardware (such as Simpson LUS or LUS series) for each rafter for uplift resistance
- Rafter to outer beam: Hurricane ties or rafter ties (such as Simpson H1 or H2.5) at every rafter-to-beam connection
- Blocking to rafters: 10d common nails, 3 per end, or framing clips where face-nailing is awkward
Use exterior-rated hardware throughout, and in coastal or high-humidity areas, use hot-dipped galvanized or stainless steel hardware to prevent corrosion that weakens connections over time. Bright zinc hardware will rust out in a few years outdoors.
Flashing and waterproofing at the ledger
Ledger flashing is not optional. Install z-flashing or step flashing above the ledger before any roofing goes on, directing water away from the house wall and over the top edge of the ledger. Seal all lag bolt holes with exterior-rated caulk or use self-sealing lag bolt seals. If you are attaching through stucco or EIFS, the waterproofing details are more complex and you may want a professional to handle that specific step.
Drip edge and eave prep
Install drip edge at the eaves before roofing material goes down, and at the rakes after. Per the IRC (R905.2.8.5), drip edge must extend at least 1/4 inch below the roof sheathing edge and at least 2 inches back up onto the roof deck, fastened to the deck at no more than 12 inches on center. This detail prevents water from wicking back under the roofing at the edges, which is where most roof leaks actually start. If you plan to shingle the patio roof, the full drip edge and underlayment sequence matters as much as the framing underneath it. If your goal is to shingle the patio cover, make sure the underlayment and flashing details are correct before the first course goes down shingle the patio roof. A separate guide on how to roof a patio with shingles or how to shingle a patio cover covers that sequencing in detail. If you are adding shingle roofing, see our guide on how to roof a patio with shingles for the exact underlayment and flashing sequence. If you are getting ready to install the shingles or panels, the next step is learning how to cover a patio with roofing from start to finish.
DIY safety, code/loads, and when to hire a pro
This is a realistic section, not a disclaimer. Framing a patio roof is genuinely within reach for a capable DIYer who is comfortable with a circular saw, a drill, and working at heights. Once the framing is set, you can move on to choosing roofing materials and installing your patio roof so it sheds water properly how to make a patio roof. But there are real situations where doing it yourself is the wrong call, and knowing those situations in advance saves money, not wastes it.
Load considerations you cannot ignore
The IRC requires patio covers to handle at minimum a 10 psf live load, but your real local loads may be much higher. Snow loads in mountain or northern regions can reach 40, 60, or even 100 psf in extreme cases. Wind uplift in coastal or tornado-risk zones adds significant engineering complexity. If you are in a high-wind or heavy-snow area, your local building department will ask for an engineered plan, and they are right to. An undersized patio roof can collapse under a heavy snow load and seriously injure people underneath it. Do not guess at structural sizing in those environments.
When to hire a professional
- Your local jurisdiction requires an engineered plan and you are not comfortable navigating that process
- The structure is freestanding and larger than about 200 square feet
- You are in a high-wind zone (hurricane-prone coastlines, Tornado Alley) or high-snow-load area
- The attachment point is to a masonry wall, stucco, or EIFS cladding where waterproofing is technically complex
- You are working with a house structure that has any signs of existing damage, rot, or questionable framing
- You have not done framing work before and the project exceeds a basic 10x12 lean-to
Even if you hire out the structural work, you can still do the finish work (fascia, trim, roofing) yourself and save meaningful money. There is no shame in drawing a boundary at the part that has real safety stakes. A good approach is to pull the permit yourself, get the plan approved, and then hire a framing contractor for just the framing phase if that is where you are not confident.
Jobsite safety basics
- Work with a helper when setting beams or posts. Trying to hold a beam in position while fastening it alone is dangerous and leads to bad connections.
- Use proper ladders rated for your weight plus tools, positioned at the correct angle (1 foot out for every 4 feet up).
- Wear safety glasses whenever cutting and a dust mask when cutting pressure-treated wood, which contains preservative compounds.
- Never work on a roof surface without slip-resistant footwear, and do not work on a wet or frost-covered roof.
- Keep a tidy work area. Lumber scraps and nail-covered cutoffs underfoot cause more injuries on framing jobs than almost anything else.
Tools/materials checklist and step-by-step workflow
Tools you will need
- Circular saw (with a sharp framing blade) or a miter saw for accurate angle cuts
- Speed square (rafter square) for marking pitch cuts
- Tape measure, 25-foot minimum
- 4-foot and 2-foot levels
- String line and line level for setting beam heights
- Hammer or framing nailer (a nailer will save hours)
- Impact driver or heavy-duty drill for lag screws and structural screws
- Post hole digger or rented power auger for footings
- Chalk line for layout
- Safety glasses, work gloves, and dust mask
- Ladders or scaffolding appropriate for your structure height
Materials checklist (for a basic attached lean-to)
- Pressure-treated 2x8 or 2x10 for ledger (cut to patio width)
- Pressure-treated 4x4 or 6x6 posts (quantity and height per your plan)
- Pressure-treated doubled 2x8, 2x10, or 2x12 for outer beam
- Pressure-treated 2x6, 2x8, or 2x10 rafters per your span (quantity per layout)
- 2x4 or 2x6 blocking lumber
- Concrete mix and sono tube forms for footings
- Post base hardware, post cap hardware, rafter hangers, hurricane ties
- 1/2-inch lag screws or LedgerLOK structural screws
- 16d and 10d exterior framing nails or nails for nailer
- Z-flashing or step flashing for ledger
- Drip edge (length per perimeter)
- Exterior-rated caulk
- Roofing material of your choice (panels, shingles, polycarbonate, etc.)
Step-by-step framing workflow
- Pull your permit and confirm setbacks, required load ratings, and any engineering requirements with your local building department.
- Mark the patio footprint on the ground and call 811 for utility locates before any digging.
- Calculate and mark ledger height on the house wall based on your slope calculation (desired roof pitch times depth equals total drop from ledger to outer beam).
- Cut back siding and sheathing at the ledger location, install z-flashing or housewrap flashing, then bolt the ledger to the house framing using lag screws staggered every 16 inches.
- Dig and pour concrete footings for posts at the outer corners and intermediate points. Let cure 48 to 72 hours minimum.
- Set post base hardware in footings, then install posts, plumb on two faces, and brace temporarily.
- Install the outer beam on top of posts using post cap hardware. Check beam is level across its length and at the correct height below the ledger (equal to your calculated total drop).
- Square the frame by measuring diagonally corner to corner and adjusting the outer beam until both diagonals match.
- Cut a pattern rafter with the correct plumb cut at top, bird's mouth over the outer beam, and tail cut at the overhang. Test-fit it, then use it as a template for all remaining rafters.
- Mark rafter layout (16 or 24 inches o.c.) on both ledger and outer beam, starting from the same end.
- Install rafters using rafter hangers at the ledger end and hurricane ties at the outer beam end. Nail off all hardware per manufacturer spec.
- Install blocking between rafters at the ledger, at the outer beam, and at mid-span for runs over 8 feet.
- Add diagonal knee bracing on posts if the structure is freestanding or if posts exceed 8 feet.
- Install fascia boards at rafter tails, then install drip edge at eaves per IRC R905.2.8.5 (at least 1/4 inch below sheathing edge, 2 inches back onto deck, fastened at 12 inches o.c.).
- Call for your rough framing inspection before adding roofing material or sheathing.
- Once inspection passes, proceed with sheathing, underlayment, and roofing material of your choice.
That sequence works for the vast majority of attached lean-to patio roofs. For gable roofs, the workflow adds a ridge beam installation step between step 7 and the rafter cuts, and each rafter is cut in opposing pairs rather than identical single-slope pieces. For freestanding structures, both sides of the perimeter get posts, beams, and hardware instead of just the outer side. Those variations are bigger projects but follow the same logic: get your support structure square and level, then hang your rafters with proper hardware, then brace and block for rigidity before any roofing goes on top.
FAQ
When I set my ledger height, should I measure to the top of rafters or to the final roof surface?
Use the finished roof height you want at the roof surface, then subtract what the fascia and roofing thickness will add above the rafter top. If you only measure to the bare framing, the ledger ends up too high or too low, and the pitch can become inconsistent from one end to the other.
What happens if I skip cutting back siding/sheathing for ledger flashing and just caulk over it?
Yes. If your patio cover ties into existing house framing, you still need flashing continuity. Any gap between the ledger, the cut-back sheathing, and the flashing layers can create a capillary path that leads to hidden rot behind siding.
How do I know my ledger fasteners are actually hitting structural framing?
Treat the ledger as a structural connection, not a surface attachment. The lag or structural screws must hit house framing members (rim joist or studs), and you should avoid relying on sheathing or siding. If you cannot line up with framing, adjust the ledger placement or use an engineered attachment strategy rather than guessing.
Can I change rafter spacing partway through the project to use up materials?
Do not mix rafter spacing without also adjusting blocking and any sheathing or roofing fastening pattern. Blocking lengths are based on the rafter spacing, so if you change from 24 in. o.c. to 16 in. o.c., re-mark the entire run and recalc the blocking and roofing layout before cutting lumber.
Is it okay if my patio roof overhang varies slightly from rafter to rafter?
For consistency and waterproofing, keep the overhang length uniform on both sides of the run. If the overhang varies, fascia and drip edge details will not align cleanly, which often shows up as uneven shadows and more complicated fascia cut lines.
Besides checking diagonals, what other layout checks prevent crooked rafters?
Square and level matter most at the ledger, outer beam, and the first rafter line. Even if your framing looks close, a slight skew can cause rafter ends to land inconsistently on the beam or ledger, which then forces you to modify cuts in the field.
Can I use whatever screws or brackets I have on hand for post-to-beam and rafter joints?
Use exterior-rated connectors for each joint that is designed for the member size and load path, and avoid “general purpose” hardware. Also, ensure the connection orientation matches the hardware instructions, for example nail/bolt locations and required edge distances.
What is the right way to handle posts that are not perfectly plumb after the footings cure?
If you cannot get posts set exactly plumb on a curing footing, brace them and re-set while the bases are still adjustable. Once the structure is locked and rafters are installed, correcting post lean is difficult and often requires partial disassembly.
My patio surface is uneven, how do I keep the roof pitch correct?
Start by confirming the slope math and that the ledger height difference across the width matches your pitch. If the patio is not level, you may need to adjust design or beam layout so water sheds properly, rather than forcing rafters to create a “random” slope.
Do I need to decide roofing material before finalizing rafter size and spacing?
In shingled or panel systems, the sheathing and underlayment control the leak behavior at edges and seams, not just drip edge. If you plan to use shingles, confirm that your sheathing thickness and underlayment type match the roof slope and local code requirements before you frame the roof close in.
Where exactly should I install blocking for maximum stiffness, not just for nailing convenience?
If you add blocking for rigidity, place it where the roof deck and fascia need reliable nailing surfaces too. For example, blocking at the outer beam helps with fascia attachment, and mid-span blocking helps prevent rafter twist under load.
When do I need diagonal bracing, and is it only for tall or freestanding patio roofs?
Do not rely on toenailed nails for lateral resistance. The frame needs bracing and properly fastened connections to resist racking, and diagonal knee bracing becomes especially important as post height increases or when the cover is freestanding.
If my span is longer than the “typical” range, what changes besides increasing rafter size?
Yes, especially with freestanding structures. Beam spans and post sizes must work together, and a longer span usually means a larger beam (for example doubled members or LVL), plus continued attention to hardware at every joint.
How should I fasten the ledger into stucco or brick without damaging the substrate or losing strength?
Pre-drill and use proper anchor type for brick or stucco substrates, and do not assume a lag bolt will hold just because it bites. Stiffer anchoring devices and correctly sized hardware are often required to reach structural capacity.
What should I ask my building department for before I start, even if I plan to DIY?
Assume you will need it in most jurisdictions for permanent patio covers, but the real details are local. Ask for the specific requirements for setbacks, maximum height, and whether an engineered design is required for wind or snow conditions before you buy materials.