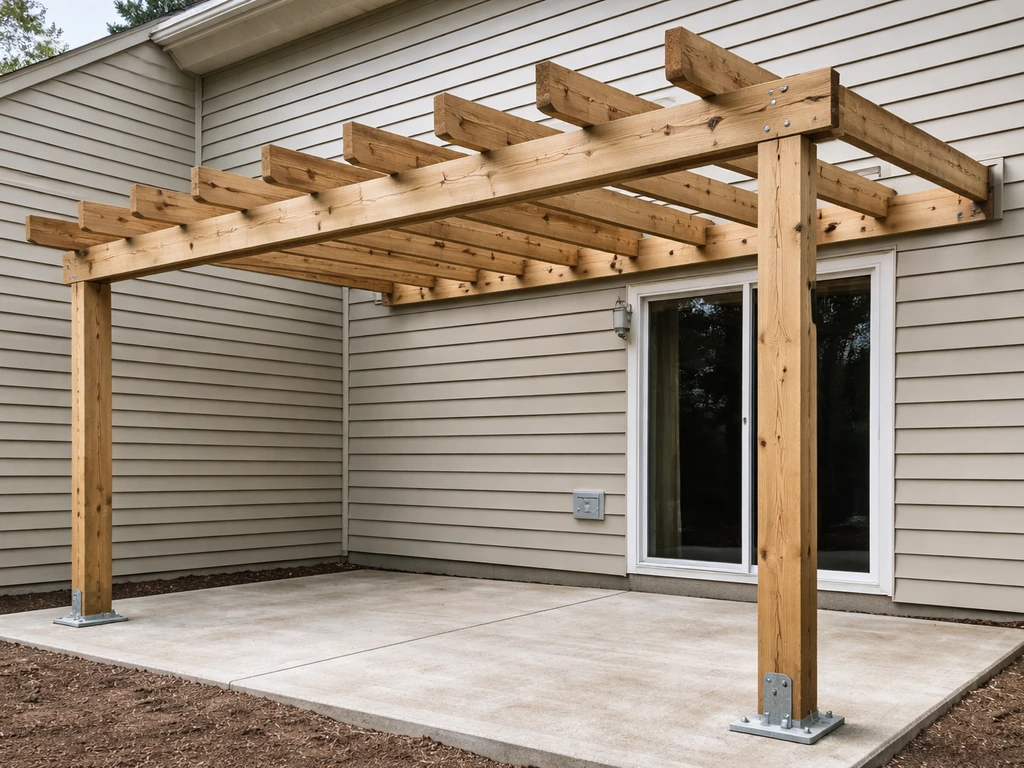
Framing a patio cover means building the skeleton that holds everything up: the ledger or beam along the house, the posts, the beams spanning between posts, and the rafters running from the house out to the outer beam. Get those four elements sized correctly, spaced right, connected properly, and pitched for drainage, and you have a structurally sound frame that can carry roofing panels, shade material, or polycarbonate without sagging, shifting, or blowing away. This guide walks you through the whole process, from layout and material choice to final fasteners and code basics, so you can frame your own patio cover with confidence. If you want the full walkthrough, this includes the exact steps for building a patio cover from layout to final fasteners and inspections build a patio cover.
How to Frame a Patio Cover: DIY Steps, Layout, and Codes

What framing actually means for a patio cover

A lot of people think of framing as just the rafters, but it's really the whole structural system working together. The frame has to transfer every load, the weight of the roof panels, rain, snow if you get it, and wind uplift, from the top down through rafters to beams, through beams to posts, and from posts into the ground. That continuous load path is what the building code is really checking when you pull a permit.
For a patio cover specifically, the framing components are: the ledger board or a double beam at the house side, the outer beam (sometimes called the header or fascia beam) carried by posts, the rafters or joists running between those two points, any bracing for lateral stability, and the post bases or anchor hardware connecting everything to footings. The roof or shade panels then sit on top of or between the rafters, but they are not structural, they are just the skin.
Common patio cover styles and how the framing changes
The framing approach shifts depending on which style you are building. A lean-to (also called a shed-roof cover) is the simplest: one ledger at the house, one outer beam, rafters running straight across with a single slope. A gable or A-frame patio cover adds a ridge beam and two sets of rafters pitching away from center, which means more cuts and more connections but better water shedding and more headroom.
A flat or low-slope cover is the easiest to frame but demands the most attention to drainage because there is no natural pitch to move water off quickly. Freestanding covers replace the ledger with a second beam and post row on the house side, so the structure stands entirely on its own. Freestanding patio cover framing replaces the house ledger with an inner beam and extra post row, so the structure stands on its own freestanding covers.
Each style shares the same core framing logic, but the details at the ridge, the ledger, or the inner post row change accordingly.
Planning your layout: measurements, slope, and spacing
Before you cut a single board, spend real time on planning. This is where most DIY framing problems start, not during the build itself.
Measuring and laying out the footprint
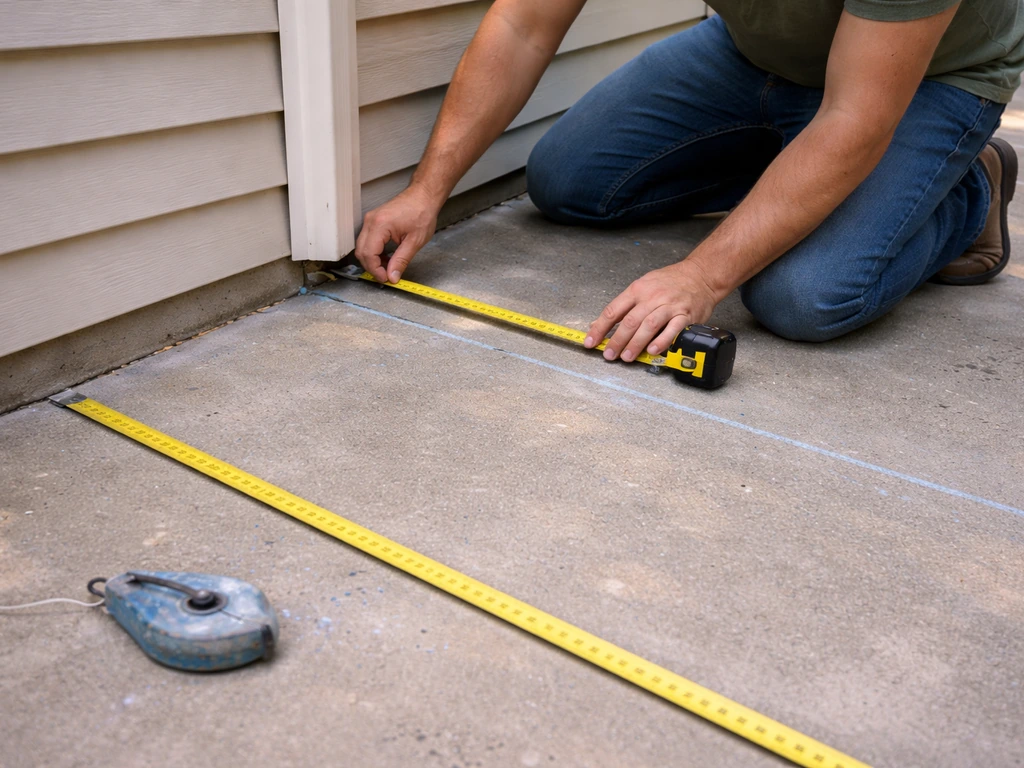
- Measure the patio area you want to cover and add any overhang you want at the outer edge (typically 6 to 12 inches past the outer beam).
- Mark the house attachment line with chalk or a snapped line. This is where the ledger or inner beam will land.
- Locate your post positions along the outer beam line. Post spacing is typically 8 to 12 feet depending on beam size, but check your local prescriptive table first.
- Use batter boards and string lines to establish perfectly square corners. Check square by measuring diagonals: both diagonals must be equal.
- Mark footing centers with stakes and confirm they clear any underground utilities before digging.
Getting the slope right for drainage
Every patio cover needs a slope so water runs off instead of pooling. The widely used minimum is 1/4 inch of rise per foot of run (roughly a 2% grade). For an aluminum or low-slope panel cover, that 1/4 inch per foot minimum is required by most manufacturers and many building departments. So if your rafters run 12 feet from the ledger to the outer beam, the ledger side needs to be 3 inches higher than the outer beam.
Set that height difference when you install the ledger, and the slope is built in automatically. On a gable cover, both rafter runs pitch away from the ridge, so the ridge is your high point and both outer beams are your low points.
What often goes wrong here is people set the ledger height based on the door threshold or aesthetic preference, then realize the outer beam ends up too low for comfortable headroom, or the slope is nearly flat. Figure out your slope math first, then set the ledger height. A minimum of 7 feet of clearance at the lowest point (the outer beam) is a reasonable target for livable patio space.
Rafter spacing and span planning
Most jurisdictions use prescriptive span tables that tell you exactly what size rafter you need at a given spacing and span. Common rafter spacings for patio covers are 12, 16, 19. 2, and 24 inches on center. The wider you space rafters, the bigger each rafter needs to be to carry the load across the span.
For a simple wood patio cover with a 10-foot rafter span, 2x6 rafters at 16 inches on center is a typical starting point in many areas, but always verify against your local prescriptive table because wind and snow loads vary significantly by location.
If you want to build a patio cover out of wood, start by matching your rafter size and spacing to the span and loads in your local prescriptive table how to make a patio cover out of wood. The minimum design live load for a patio cover under the 2024 IBC is 10 psf, and blank" rel="noopener noreferrer">snow loads govern wherever they exceed that minimum, so high-snow areas need heavier framing.
Choosing your framing materials and connection hardware
The two main material paths for DIY patio cover framing are wood and aluminum (or light steel). Both work well. The right choice depends on what you are covering with, your local climate, your budget, and your comfort level with tools.
| Factor | Wood Framing | Aluminum / Metal Framing |
|---|---|---|
| Cost (materials) | Lower upfront, especially for smaller covers | Higher upfront, but often lower long-term maintenance |
| DIY skill needed | Standard carpentry tools and skills apply | Requires aluminum-specific cuts and fasteners; learning curve |
| Durability (outdoor) | Needs treatment, paint, or naturally rot-resistant species (e.g., redwood, cedar, pressure-treated) | Corrosion-resistant without painting; ideal for humid or coastal climates |
| Span capability | Larger dimensional lumber can span longer distances | Aluminum extrusions are sized for specific spans; check manufacturer specs |
| Connection hardware | Standard joist hangers, hurricane ties, lag screws, post bases (Simpson Strong-Tie or equivalent) | Manufacturer-specific brackets, self-tapping screws, and extrusion connectors |
| Weight | Heavier; posts and footings sized accordingly | Lighter; reduces footing size requirements in many cases |
| Repairability | Easy to cut, sister, or replace individual members | Requires matching extrusion profiles; harder to field-modify |
If you are building a wood-frame cover to match your house's existing trim and you want to stain or paint it to blend in, wood is the natural choice. If you are installing aluminum shade panels or a kit-based cover system, aluminum framing is usually the better fit because the extrusions are designed to accept the panel system directly. For metal (steel) framing, the approach is similar to aluminum but heavier, and it is more common on commercial or semi-commercial patio structures than on typical residential DIY builds. Once you choose metal framing, the next step is to plan the layout, spacing, and drainage slope so everything installs correctly and holds up over time metal (steel) framing for a patio cover.
Connection hardware you will actually need
- Post bases (standoff type preferred): Keep post ends off concrete to prevent rot or corrosion. Use adjustable post bases for leveling flexibility.
- Joist hangers and rafter ties: Size-matched to your lumber dimensions. Use only hangers rated for the load and treated-lumber compatible if using PT wood.
- Hurricane ties or H-clips: Connect each rafter to the top of the beam to resist wind uplift. These are not optional in any wind-prone area.
- Lag screws or structural screws for the ledger: 1/2-inch diameter lags into the house rim joist or structural framing, not just into sheathing. Spacing per your local code or AWC DCA 6 guidance.
- Post-to-beam connectors: Prevent posts from shifting laterally under the beam. Post cap hardware (e.g., Simpson BC post cap) is the standard approach.
- Carriage bolts or through-bolts: For any beam-to-post connection that carries significant load, bolted connections are stronger than screws alone.
The main framing components and how to assemble them
Here is how the load path works in a standard lean-to patio cover: the rafters carry the roof weight and transfer it to the ledger at one end and to the outer beam at the other end. The outer beam spans between posts and transfers rafter loads down into the posts. The posts carry everything down to the footings. Every connection in that chain matters.
Footings and posts
Footings need to go below the local frost depth (check with your building department) and be sized to carry the load above them. A simple patio cover post in a moderate climate might land on a 12-inch diameter by 12-inch deep concrete footing, but snowy or windy areas or longer spans require larger footings. Once the concrete has cured, set your post base hardware, drop the post in, brace it plumb in both directions with temporary 2x4 braces, and do not move on until every post is plumb and braced.
Beams
The outer beam (the one carried by posts) is typically a doubled 2x (two 2x8s or 2x10s nailed or bolted together), a built-up triple 2x, or an LVL depending on the span. Your local prescriptive table specifies minimum beam sizes based on rafter span and post spacing. Do not guess here: use the table. Set the beam into post cap hardware, fasten it per the hardware manufacturer's schedule, then confirm the beam is level across its full length before moving to rafters.
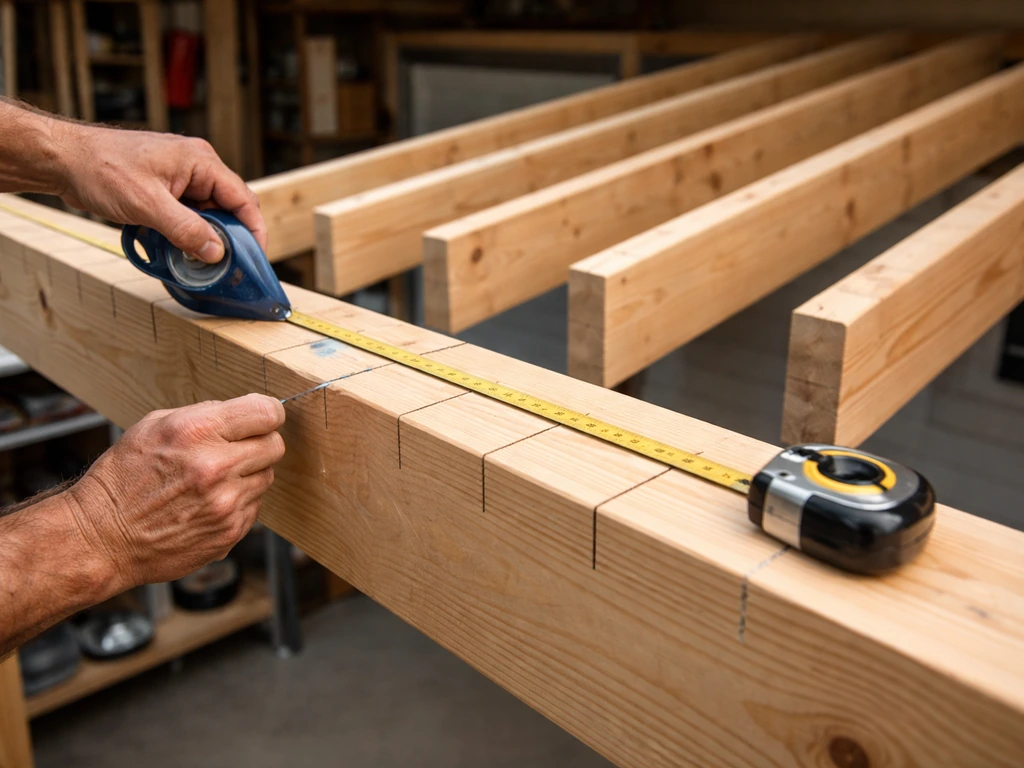
Rafters and spacing
Cut all rafters to the same length with the same plumb cut at the ledger end and the same tail cut or bird's mouth at the outer beam end if you are doing a traditional wood frame. Install the two end rafters first, then snap a line and install the field rafters at your planned spacing (16 or 24 inches on center is most common). Use a rafter tie or hurricane clip at every rafter-to-beam connection. At the ledger, hang each rafter with a properly sized joist hanger, nailed with the specified nails (usually 10d joist hanger nails, not drywall screws).
Bracing for lateral stability
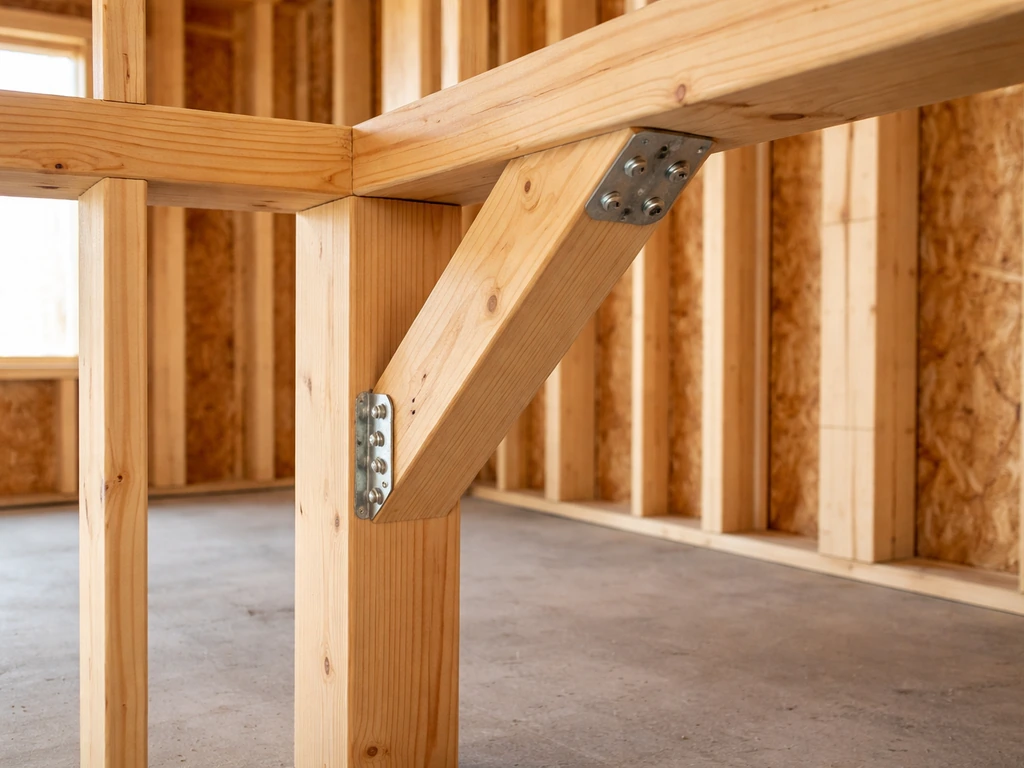
A frame that is plumb and square in the static build can rack sideways under wind or seismic loading. Knee braces from posts to the outer beam (typically at 45 degrees, with a minimum 2x4 or 4x4 brace) are the most common solution for patio covers. In longer structures, you may also need blocking between rafters at the outer beam line to prevent rafter rotation. If your cover is over about 20 feet long, talk to your building department about whether knee bracing alone is sufficient or if you need diagonal sheathing, plywood gussets, or engineered connections.
Attaching to the house vs. going freestanding
The ledger-attached approach
Attaching to the house is the most common choice because it eliminates an entire post row and keeps the structure compact. The ledger board (usually a 2x8 or 2x10 matching your rafter depth) bolts directly to the house's rim joist or wall framing with lag screws or structural screws at a spacing specified by code, typically 12 to 16 inches on center staggered in two rows. The critical thing most DIYers skip: flashing.
Water will run down the house wall and behind the ledger if you do not flash it properly. Install metal flashing that tucks under the house's water-resistive barrier (house wrap or building paper) above the ledger and laps over the face of the ledger. The AWC DCA 6 guide for decks is the go-to reference for this flashing detail, and the concept applies directly to patio cover ledgers.
Missing or improper flashing is one of the most common and most damaging mistakes on attached patio covers.
Also confirm you are bolting into actual structure, not just into sheathing or siding. Pull off a section of siding to expose the rim joist or band joist behind it. If the rim joist is not accessible (some slab-on-grade houses have no accessible rim joist), you may need a structural engineer to specify an alternative attachment method.
The freestanding approach
A freestanding cover replaces the ledger with an inner beam and post row, set a few inches away from the house wall. This avoids any penetration into the house structure, which is a big advantage if you have stucco, EIFS, or ICF walls where ledger attachment is complex or risky. The tradeoff is more posts, more footings, and a slightly more complex layout. The framing sequence is the same: footings, posts, inner beam, outer beam, rafters.
You will want the inner beam at the same height the ledger would have been, and you will still need to manage water that runs off the cover toward the house wall: a gutter on the inner beam is usually the right answer for a freestanding cover set close to the house.
Permits, codes, and load basics you need to understand
Most jurisdictions require a building permit for a permanent patio cover, and that permit triggers a plan review and at least one inspection. If you are still figuring out the basics of how to frame a patio deck, use the same permit-first mindset: plan the layout and slope, then confirm your framing meets the load requirements before you build plan review. Do not skip it. The inspection is actually useful: a framing inspector catching a missed hurricane clip or an undersized beam before you put the roof on is much better than you discovering a problem after the first big storm.
The load requirements you will see on permit applications
Under the 2024 IBC (Appendix I, which specifically covers patio covers), your structure must be designed for all dead loads plus a minimum vertical live load of 10 psf. [ICC-ES patio cover Acceptance Criteria AC340](https://shop. iccsafe. org/ac340-patio-covers-patio-covers-approved-august-2018-editorially-revised-september-2024-pdf-download.
html) evaluates patio covers, including wind uplift and snow loads, and forms the basis for how tested products demonstrate code-level performance. Snow loads govern where they exceed that minimum, so if you live somewhere that gets real snow, your framing needs to be heavier. On top of that, the structure must resist minimum wind loads and seismic loads as set by the IBC.
Wind uplift resistance, meaning the structure not lifting off the posts in a strong wind, is handled by the hurricane clips and post-to-beam connectors mentioned above, plus the footing size and anchor bolt design. This is why the continuous load path from roof panels all the way to the footings matters: every connection is a link in that chain.
Many cities publish prescriptive patio cover handouts that give you pre-approved rafter span tables, minimum beam sizes, and post spacing options. If your project fits within those prescriptive limits (typically covers up to around 12 feet deep, with standard post spacing and standard rafter sizes), you can often get a permit without hiring an engineer. If your design exceeds those limits, or if you are in a high-wind or high-snow zone, a structural engineer's stamp is the faster and safer path than trying to argue with a plan checker.
Setbacks and HOA
Before you finalize your layout, check your local zoning setbacks (minimum distance from property lines), height limits, and any HOA design guidelines. A cover that is too close to a property line or too tall relative to your zoning envelope can trigger a variance process that delays your project significantly. Ten minutes on your city's zoning portal or one phone call to the planning department saves a lot of pain.
Step-by-step DIY framing workflow
- Pull your permit and have your plan (with dimensions, materials, and footing sizes) approved before breaking ground.
- Mark and excavate footing holes to the required depth and diameter. Pour concrete and set post base hardware while the concrete is wet, using a string line to keep bases aligned.
- Let footings cure fully (at least 48 to 72 hours for small footings, longer in cold weather) before loading them.
- Install posts in post bases, brace plumb in both directions with temporary 2x4 braces, and confirm all posts are at the same height using a laser level or water level.
- If attaching to the house: remove siding in the ledger zone, install flashing under the house wrap, then fasten the ledger to the rim joist with appropriately sized and spaced lag screws. Lap flashing over the ledger face.
- Install the outer beam into post cap hardware on top of the posts. Check it is level and at the correct height to create your planned slope relative to the ledger.
- Install knee braces from posts to the underside of the outer beam at 45 degrees. Fasten with structural screws or carriage bolts.
- Cut rafters to length with appropriate end cuts. Install the two end rafters first, then snap a layout line and install field rafters at your planned on-center spacing. Use joist hangers at the ledger and hurricane ties at the outer beam for every rafter.
- Install blocking between rafters at the outer beam line if required by code or if using a roofing material that needs edge support.
- Schedule your framing inspection before installing any roof panels or sheathing.
- After inspection approval, install your roof covering or shade panels per manufacturer instructions, then add gutters if needed to direct water away from the house foundation.
Common mistakes and how to avoid them
- Wrong rafter spacing for the span: Spacing rafters at 24 inches on center on a long span with undersized lumber causes visible sag over time. Always use the prescriptive span table for your area, not a number you found on a random forum.
- No slope or not enough slope: Even 1/8 inch per foot is not enough for panel-type covers. Commit to at least 1/4 inch per foot and build it in when you set ledger height.
- Skipping ledger flashing: This is the single most common cause of rot damage on attached patio covers. Flash it properly every time.
- Bolting the ledger into sheathing only: Sheathing cannot carry the load. You must hit the rim joist or structural framing behind it.
- Undersized footings: A post sitting on a 6-inch concrete pad in expansive soil or a high-wind area will move. Size footings to both the load and the soil conditions.
- No hurricane ties: In most of the US, wind uplift connections are code-required. Even where they are not explicitly required, they are cheap insurance against a cover that blows off in the first big storm.
- Posts not plumb before beams go on: Once the beam is on, it is very hard to correct a post that is even 1/4 inch out of plumb. Brace and check before you move on.
- Mismeasured layout: Diagonal measurements tell you if your layout is square. If the diagonals are not equal, your whole frame is racked and every rafter will be cut to a different length.
- Forgetting a gutter on freestanding covers: Water running off the inner edge of a freestanding cover goes straight toward your house foundation if there is no gutter to catch it.
When to call in a pro
Most lean-to and simple flat patio covers are genuinely DIY-able if you are comfortable with basic carpentry, can read a tape measure, and are willing to follow the permit process. Where it makes sense to bring in a structural engineer or a licensed contractor: any cover larger than about 400 square feet, any design with unusually long rafter spans (over 14 to 16 feet), high-wind or high-snow locations where the prescriptive tables do not apply, walls made of stucco, EIFS, or masonry where ledger attachment is non-standard, or any situation where the plan checker kicks back your permit application for engineering documentation. Paying for a one-hour engineering consultation upfront is almost always cheaper than fixing a structural problem or failed inspection later. For gable or A-frame covers, the ridge beam sizing and the way uplift forces are handled at the ridge require more careful calculation than a simple lean-to, so those designs benefit most from an engineer's review.
FAQ
Do I frame the patio cover for the roof panels or for the structural loads only?
You frame for the structural loads (dead load from framing plus roof panels, vertical live load, snow load if higher, and wind uplift). The roofing or shade panels are usually not treated as structure, so size rafters, ledger, beams, posts, and connectors based on code/span tables, then install panels as non-structural skin that still can resist wind being pulled upward.
How do I calculate the slope correctly if my patio cover length is not a simple “12 feet straight out”?
Use horizontal run, not the board length. Measure the distance from the ledger line to the outer beam line (run), then convert the required rise (for example, 1/4 inch per foot) into a height difference (rise = run × 0.25 in/ft). If you have uneven site grades or a beam that must be level, decide whether you are pitching by changing the ledger height only, or by setting one beam end at a different elevation, and confirm drainage before framing.
What’s the most common reason patio cover framing fails inspection?
Missing or incorrect connections, especially hurricane clips and joist hangers, and ledger flashing. A lot of failures are “small” details that become big in wind or moisture events, so before roof or panels go on, do a connection checklist (hanger type and nail schedule, approved clip locations, post-to-beam fasteners, and correct flashing that laps over the WRB and covers the ledger).
Can I attach the ledger to just rim joist sheathing or siding if I can’t find solid framing?
No. Ledger bolts or lag screws must go into structural members like the rim joist, band joist, or wall framing, not just siding or sheathing. If you cannot access solid framing behind the finish, you may need to expose the wall, add blocking, or switch to a freestanding design that avoids the ledger entirely.
What if the exterior wall is stucco or EIFS, can I still build an attached patio cover?
Often yes, but only if you can anchor into actual structure with an approved method. Stucco or EIFS thickness can hide where the rim or band joist is, and improper anchoring can tear out. In practice, expect to remove a section to verify member location, then use flashing and sealants appropriate for your wall system and the ledger penetration.
How far apart should posts be, and does it change with rafter spacing?
Yes, post spacing drives beam size and rafter design, so they interact. Prescriptive tables typically give combinations of rafter span, rafter size/spacing, and post spacing that stay within limits for beam and uplift. Pick the rafter spacing first, then use the prescriptive beam/post options that match your span and loads instead of choosing “nice round” post spacing.
Do I need knee braces if I have rafters and beams sized correctly?
In most cases, yes. Even strong vertical members can rack sideways under wind or seismic forces. Knee braces (commonly at about 45 degrees from posts to the outer beam/beam line) provide lateral stability. For longer covers, you may also need blocking between rafters at the beam line or additional diagonal bracing, depending on local requirements.
What footing size and depth should I use?
Follow local frost depth requirements and use your local load conditions to size the footing. Don’t rely on a “typical 12x12” example because wind and snow regions can require larger or deeper footings and different anchor bolt designs. If the site has drainage issues, expansive soils, or you are near existing footings, consult your building department or engineer for the correct footing detail.
How do I prevent water from running back toward the house on a lean-to cover?
Flash the ledger correctly so water that runs down the wall cannot track behind the ledger. The flashing should tuck under the house’s weather barrier above the ledger and lap over the face of the ledger. Also plan where runoff goes, a gutter on the outer beam may be needed if the cover discharges near walkways or windows, and for freestanding designs plan a gutter on the inner beam when it sits close to the house.
Is 7 feet of clearance at the lowest point always required?
It’s a practical target for livability, not a universal code requirement. Some permits use a different minimum, and headroom can be affected by your slope and roofing thickness. Before finalizing heights, verify local standards and confirm that your chosen slope still maintains acceptable clearance at the outer beam line.
What rafter spacing should I choose if I want to minimize cost or mess?
Common spacings like 12, 16, 19.2, and 24 inches on center can work, but the tradeoff is rafter size. Wider spacing usually forces larger rafters to span the same distance. Pick the spacing that matches your local prescriptive table for the rafter span and load conditions, then buy materials sized to that plan.
When do I need a structural engineer instead of using prescriptive tables?
If your cover is large, your rafters have unusually long spans, you’re in high-wind or high-snow areas where tables don’t apply, you have complex ledger attachment conditions, or your plan review asks for engineering. Gable and A-frame designs also tend to need more careful ridge and uplift calculations than simple lean-to covers, so engineering review is usually the safer path.
Can I build the frame first and “figure out” permits later?
Usually no. Most jurisdictions require the permit before construction and will inspect framing. Waiting can mean you have to uncover work for reinspection, or you may be asked to redesign if a connection or sizing issue is discovered. Use a permit-first workflow: confirm zoning and setbacks, confirm your slope and member sizes meet load requirements, then schedule the framing inspection once the frame and connections are in place but before the roof is installed.