You can absolutely build a metal patio cover yourself. The basic process goes like this: pick your style (lean-to, gable, or freestanding), pull a permit, set your posts in concrete, attach a ledger to the house, run your beams and rafters, screw down metal roofing panels, flash the wall connection, and you're done. If you're set on wood instead of metal, the same permitting, slope, and ledger-to-house connection basics apply, and you can use this guide as a starting point for how to build wood patio cover. A typical 12x16 ft lean-to takes a capable DIYer a full weekend to frame and another half-day to roof. The metal part is actually easier than wood in some ways because aluminum and steel components are pre-cut, lighter to handle solo, and don't rot.
How to Build a Metal Patio Cover: DIY Step-by-Step


Choose the right style before you buy a single bolt
The three common metal patio cover styles each have a different build complexity, and picking the wrong one for your situation costs you time and money. Here's how to think about it.
Lean-to (attached shed roof)
This is the easiest build and the most popular choice for a house-attached patio cover. A lean-to patio cover is the easiest attached option, so it helps to follow a clear plan for posts, beams, rafters, and the ledger connection. One edge fastens to the house wall via a ledger board or ledger channel, the opposite edge sits on posts, and the roof slopes away from the house. It's structurally simple, requires fewer materials, and sheds rain reliably as long as you maintain at least a 1:12 slope (about 1 inch of rise per 12 inches of run). If you're a first-time builder, start here.
Gable (A-frame ridge)
A gable cover has a peaked ridge running down the center, with two roof planes sloping outward. It looks more like a permanent room addition, handles rain and moderate snow better, and matches most home rooflines. The trade-off is complexity: you need a ridge beam, angled rafter cuts, and usually more posts. If you want to explore the framing details of an A-frame style specifically, that process is worth reading about on its own since rafter angles and ridge connections differ from a flat lean-to.
Freestanding
A freestanding cover has four corner posts and no house attachment at all. If you are set on going freestanding, you can follow the same framing and roofing approach, but focus on strong posts, footings, and cross-bracing so the cover holds up on its own how to build free standing patio cover. This sidesteps any ledger-to-house waterproofing issues and avoids triggering some jurisdictions' stricter attached-structure rules. The downside: it needs more posts, heavier footings, and cross-bracing to resist lateral wind load without the house wall helping. If you're building away from the house or want a pergola-style structure mid-yard, this is your path.
| Style | Skill Level | Best For | Main Challenge |
|---|---|---|---|
| Lean-to (attached) | Beginner-friendly | Most house-attached patios | Ledger waterproofing |
| Gable (A-frame) | Intermediate | Larger covers, better aesthetics | Rafter angle cuts and ridge beam |
| Freestanding | Intermediate | Detached or mid-yard placement | Lateral bracing and heavier footings |
My recommendation for most readers: go with the lean-to unless your HOA or house aesthetics push you toward a gable. You'll finish faster, spend less, and the end result is just as weatherproof.
Materials, tools, and site measurements
Metal material choices: aluminum vs. steel
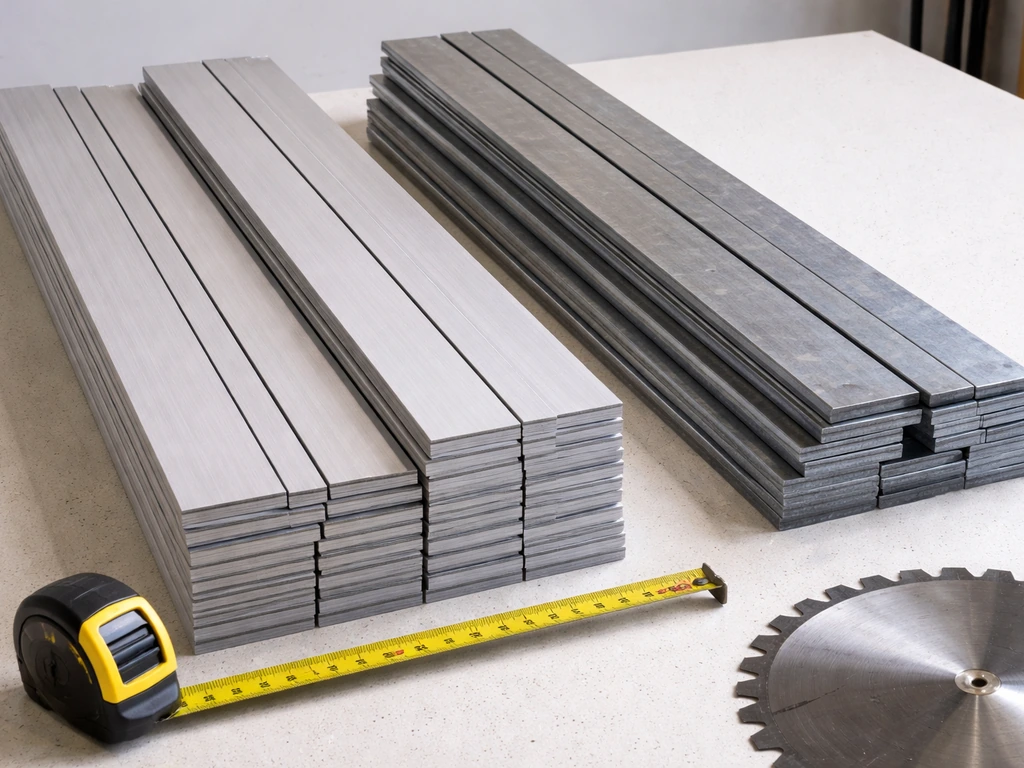
Aluminum is the default choice for DIY metal patio covers. It doesn't rust, weighs about a third of steel, cuts with a miter saw and a carbide blade, and available in pre-finished colors that don't need painting. Standard aluminum patio cover kits use 3x3 or 4x4 aluminum posts, 4x6 or 4x8 aluminum beams, and either solid aluminum pan roofing or corrugated/ribbed aluminum sheets. Steel framing (typically galvanized or pre-painted steel tubing) is stronger for large spans or heavy snow loads but heavier to handle alone and needs more corrosion protection at cut edges. For most residential patios under 20 feet wide, aluminum handles the job fine.
Roofing panel options
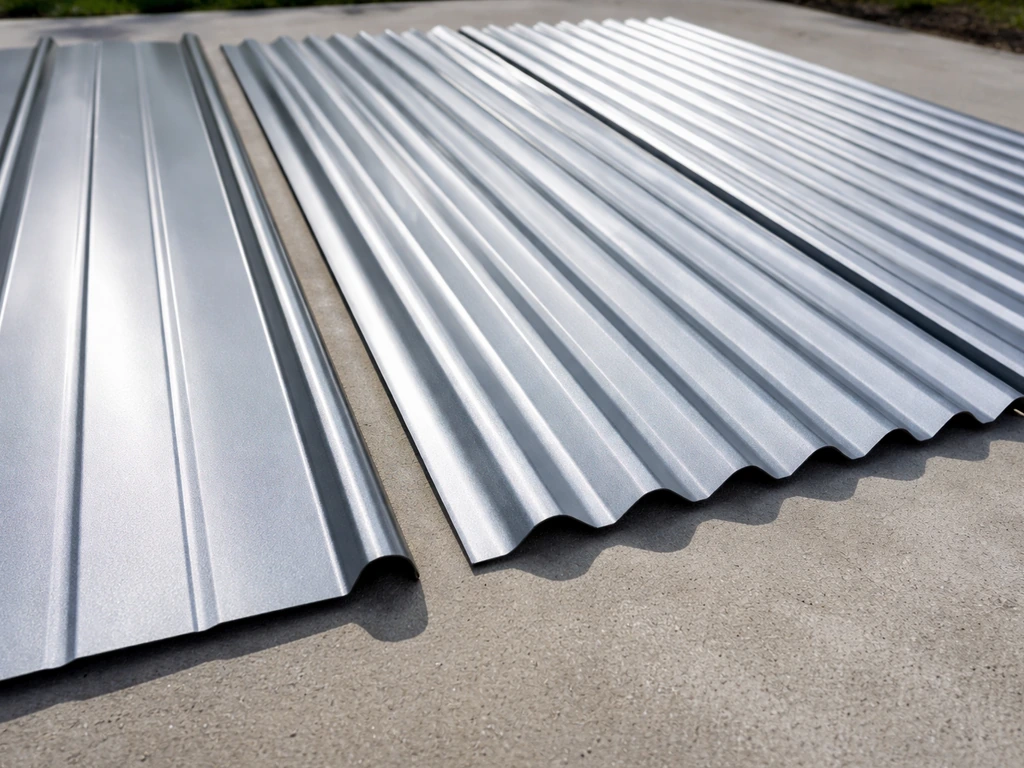
For the roof surface itself, you have three practical choices. Solid aluminum pan panels (the classic patio cover look) snap together and are nearly maintenance-free. Corrugated or standing-seam metal roofing panels (galvanized steel or aluminum) are cheaper per square foot and shed water excellently, but look more utilitarian. Polycarbonate panels on a metal frame let light through while keeping rain out, which works well if you want a brighter patio. For a pure metal cover, go with ribbed aluminum panels or solid aluminum pan system depending on your budget.
Fasteners and hardware
Use stainless steel or aluminum screws for all aluminum-to-aluminum connections. Galvanic corrosion happens when dissimilar metals contact each other with moisture present, so never use standard steel fasteners directly against aluminum framing. For steel-framed structures, hot-dip galvanized or stainless hardware is the right call. Post bases should be hot-dip galvanized or stainless steel rated for exterior concrete anchoring.
Tools you'll need
- Miter saw with a carbide-tipped or non-ferrous metal cutting blade (for aluminum)
- Angle grinder with a cut-off wheel (for steel or quick aluminum cuts in the field)
- Cordless drill and impact driver
- Level (a 4-ft level plus a long string line for spanning larger distances)
- Chalk line and tape measure
- Post hole digger or rented power auger
- Concrete mixing tub or wheelbarrow
- Ladder and possibly scaffolding for the roof phase
- Safety glasses, hearing protection, and work gloves
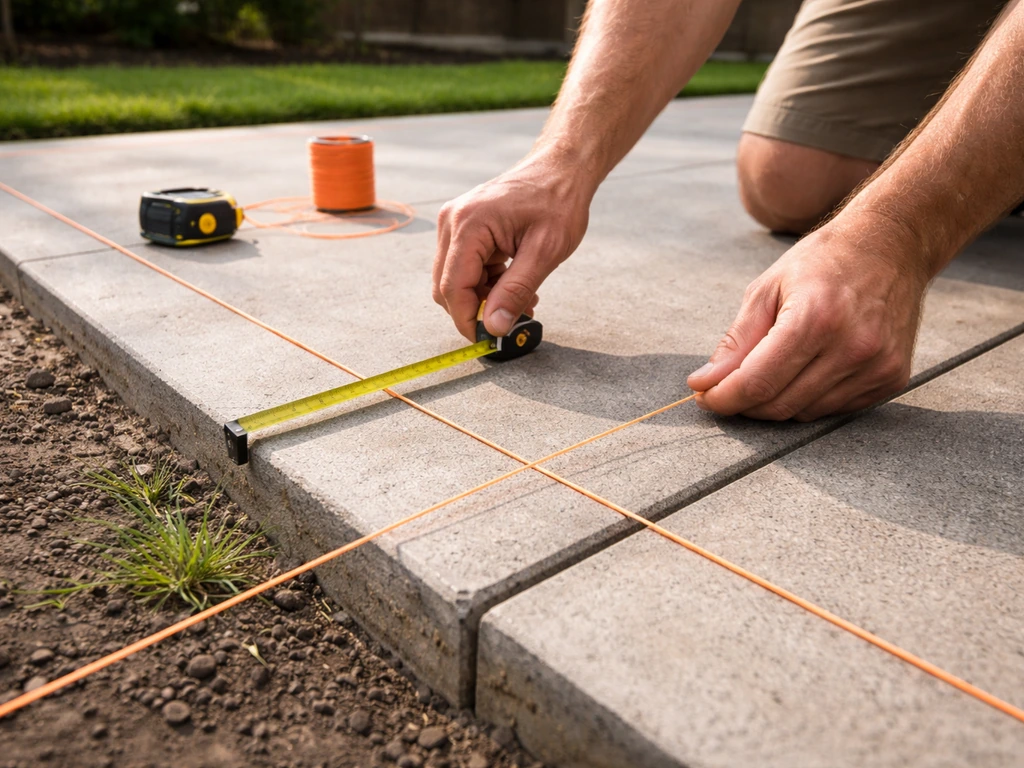
Measuring your site
Measure the patio slab or area you want to cover in both directions: width (parallel to the house wall) and depth (how far out from the house). Add about 6 inches of overhang on the outer edge if your design allows it. Sketch the layout on paper with post locations marked. Posts typically space 8 to 10 feet apart on center for aluminum framing, or up to 12 feet for heavier steel. Mark the post locations on the ground with stakes before you dig anything. Also measure the height of the eave or wall connection point on the house, because that determines your ledger height and consequently the overall roof slope.
Structural framing, codes, and load requirements
This is the part where you do not wing it. Patio covers have real structural demands, and most jurisdictions require a permit. The 2024 International Residential Code (IRC), Appendix BF, is the standard framework used in most states. It requires patio covers to support all dead loads (the weight of the structure itself) plus a blank" rel="noopener noreferrer">minimum vertical live load of 10 psf (pounds per square foot). If your area gets significant snow, the local snow load governs instead of that 10 psf minimum, and it will almost always be higher. Wind loading is the other critical factor: Appendix BF references design wind speed tables (based on your local ultimate design wind speed, or Vult) to set minimum connection and member requirements. California follows the same IRC Appendix BF framework through the 2025 California Residential Code.
What this means practically: look up your local design wind speed and ground snow load before finalizing any framing sizes. Your building department's permit counter can tell you these numbers in about two minutes. Then either use pre-engineered kit components (which come with span tables and load ratings already verified) or have a structural engineer size your beams and posts for custom builds. A common mistake is assuming a standard kit fits any span. Kits are typically engineered for specific load conditions, so check that the kit's rating matches your local loads.
Footings are non-negotiable. Posts sitting on the concrete patio surface without going into the ground will move, lean, and eventually fail in any real wind. For most residential patio covers, footings should be at least 12 inches in diameter and reach below the local frost depth (often 12 to 36 inches depending on your climate). Ask your building department for the required footing depth in your area.
Step-by-step build: posts, beams, rafters, and ledger
Step 1: Pull your permit
Submit your site plan and framing plan to the building department before breaking ground. If you already have a site measured and your permit plan ready, you can follow the deck-style framing steps and adapt them for a patio cover layout patio deck. If you're still planning out how to frame a patio cover, make sure your framing plan matches your local loads and your chosen cover style. Most jurisdictions require permits for any permanent patio cover attached to the house. The permit process is straightforward for standard lean-to covers, usually a couple of pages of paperwork and a small fee. The inspection that comes later is actually useful because an inspector will catch issues before they're buried in concrete or covered by roofing.
Step 2: Lay out and dig footings

Use batter boards and string lines to mark exact post locations. Check for square using the 3-4-5 triangle method: measure 3 feet along one string, 4 feet along the perpendicular string, and confirm the diagonal measures exactly 5 feet. Dig footing holes to the required depth and diameter. Call 811 (in the US) before you dig so underground utilities get marked, every time, no exceptions.
Step 3: Set post bases and pour concrete
For aluminum posts, set a hot-dip galvanized or stainless post base anchor into the wet concrete at each footing location. Position each anchor carefully, double-checking alignment with your string lines before the concrete sets. Let the concrete cure for at least 48 hours (72 is better) before loading posts on top. If you're attaching posts directly to an existing concrete slab, use code-approved concrete anchor bolts sized for your post base, not just construction adhesive.
Step 4: Attach the ledger to the house
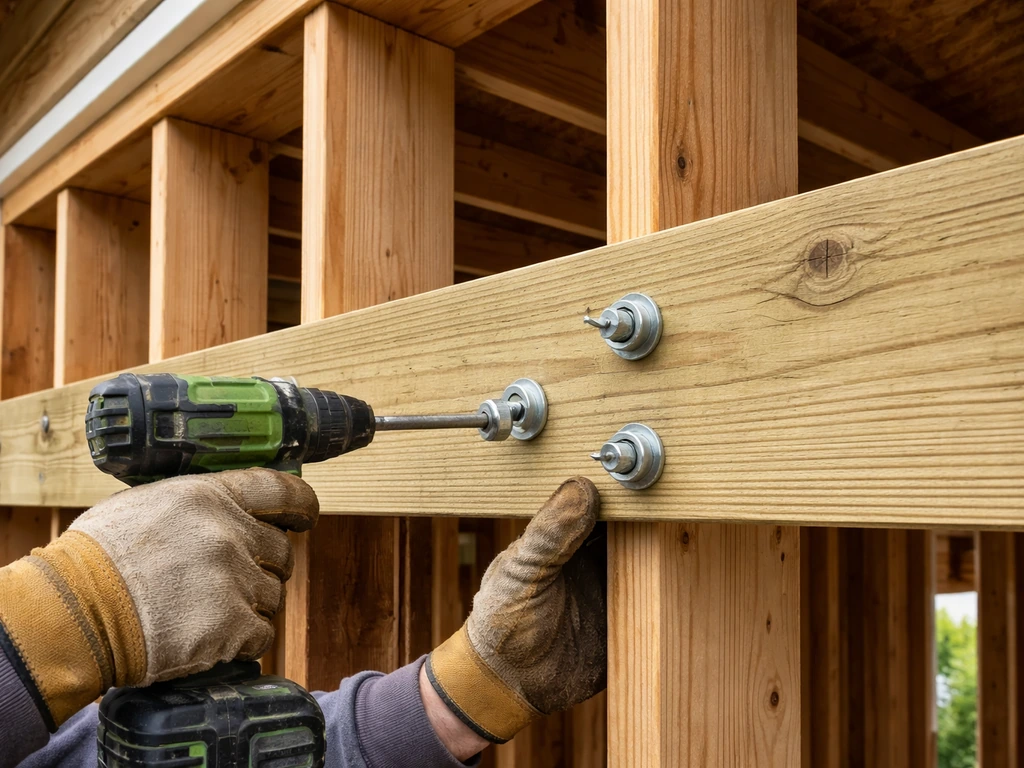
For an attached cover, the ledger is probably the most critical connection in the whole structure. It carries half the roof load and transfers it to the house framing, and a bad ledger connection is a common failure point. Locate the house's rim joist or structural framing behind the siding using a stud finder. If the house has stucco or stone, you'll need to cut a reveal or use a standoff ledger with proper flashing. Use structural lag screws (typically 1/2 inch diameter, minimum 3 inches into solid framing) spaced per your local code, usually every 16 inches. Do not attach a ledger only to siding or sheathing.
Ledger height determines slope. Set the ledger so that the roof will drop at least 1 inch per foot of horizontal run toward the outer edge. For a 12-foot-deep cover, that's at least 12 inches of drop from ledger to outer beam. More slope (up to about 3:12) sheds water faster and is worth the slightly taller posts.
Step 5: Install posts and beams
Set posts in the base hardware and plumb them with a level on two adjacent sides. Brace them temporarily with 2x4 bracing staked into the ground while you work. Run the outer beam (the one farthest from the house) across the post tops and secure it with appropriate post caps. Then run any intermediate beams parallel to the house if your design calls for them. Check the beam height against your desired slope before final fastening.
Step 6: Install rafters
Rafters run from the ledger to the outer beam, perpendicular to the house, at your designed spacing (typically 24 inches on center for aluminum systems). Use rafter hangers at the ledger connection rather than toenailing; hangers are stronger and much easier to get right. At the outer beam, rafters can notch over the beam or use a hanger, depending on your kit or design. Check each rafter for level along its length (they should all slope consistently) as you install them.
Roofing panels, slope, flashing, and waterproofing
Installing the roofing panels

Metal roofing panels install from one end and work toward the other, overlapping each panel over the previous one on the uphill side. For corrugated or ribbed panels, standard practice is to overlap by one full rib (or per manufacturer specs). Drive metal roofing screws with neoprene washers through the high rib, not the valley, to prevent water intrusion at the fastener point. Don't overtighten the screws because that distorts the washer and kills the seal. Snug is enough.
For solid aluminum pan systems (the snap-together type), the panels clip into the beam and rafter channels, and a cap piece locks the top edge. Follow the kit sequence exactly because out-of-order installation means backtracking.
Flashing the wall connection
Flashing is where most DIYers underinvest and where most leaks originate. At the top edge of the roof where it meets the house wall, you need a continuous piece of step or z-flashing that runs under the house siding (or into a cut saw kerf in stucco) and laps over the top of the roofing panels by at least 4 inches. The flashing should be the same metal as your roofing (aluminum over aluminum) to avoid galvanic issues. Seal the top edge of the flashing where it tucks under siding with a bead of paintable polyurethane or butyl caulk, not silicone alone. Silicone doesn't bond well to aluminum without primer and can crack over time.
Slope and drainage
Check the installed slope with a level and a tape measure once panels are down. Water should visibly run toward the outer edge, not pond anywhere on the surface. If you see low spots, the rafter below is slightly low and needs a shim at either the ledger or the outer beam connection. Fixing this before calling the job done is much easier than fixing it after.
Finishing touches, safety checks, and when to call a pro
Finishing the structure
Install fascia trim along the outer edge and any gable ends to give the cover a finished look and protect rafter ends. Add gutter and downspout at the outer fascia if your local rainfall warrants it (anywhere that gets more than about 20 inches of rain per year, a gutter is worth it). Touch up any bare aluminum cut edges with a clear lacquer or an aluminum-compatible primer and paint to slow oxidation, even though aluminum doesn't rust the way steel does.
Safety checks before you call it done
- Confirm every post base bolt is fully tightened and the post is plumb
- Verify all ledger lag screws are seated flush and there are no gaps between the ledger and the house wall
- Walk the roof carefully or sight along each panel to confirm no fasteners are missing and no panels are lifting at the edges
- Check that flashing overlaps are correct and caulk is fully applied with no gaps
- Look for any metal-on-metal contact points that lack isolation between dissimilar metals
- Schedule your final inspection with the building department before you use the space
When to stop and call a professional
Some parts of this project are fine for most capable DIYers. Other parts warrant a phone call. Call a structural engineer if your span exceeds 20 feet between supports, your local snow load exceeds 25 psf, or you're in a high-wind zone (V_ult above 130 mph). Call a professional roofer or contractor if the house attachment point involves a complex existing roof transition, a tile roof, or if the ledger needs to go through an area you can't identify structurally. And call an electrician if any lighting, fans, or outlets are part of the plan. Electrical work in a covered outdoor structure is not a beginner DIY item.
Getting the permit inspection is not optional. It protects you when you sell the house, it's required by law in virtually every US jurisdiction, and a competent inspector will often point out something you missed. Don't skip it.
Keeping your metal cover in good shape for the long haul
One of the best reasons to choose a metal patio cover over wood is how little ongoing maintenance it needs. If you want to build a wood patio cover instead, the big steps are similar: plan the span, set posts securely, and build a proper roof slope with weatherproofing metal patio cover. That said, 'low maintenance' is not 'zero maintenance.' Here's what to do each year.
- Inspect the flashing and caulk at the house wall connection every spring. Reapply caulk anywhere you see cracking or separation.
- Clear debris (leaves, dirt, bird nests) from the roof surface and gutters. Debris holds moisture and accelerates surface oxidation even on aluminum.
- Check all fasteners for loosening. Metal expands and contracts with temperature cycles, and screws can back out slightly over years of thermal movement. Snug anything that feels loose.
- Look for any white powdery buildup on aluminum surfaces (aluminum oxide). It's not dangerous but it looks bad. Clean it with a diluted white vinegar solution and rinse thoroughly, then apply a clear aluminum wax or protectant.
- For steel components, inspect any cut edges or scratched areas for rust starting. Touch those up immediately with a zinc-rich primer and matching topcoat before the rust spreads under the coating.
- Check post bases for standing water or soil contact that could accelerate corrosion at the base of steel components.
- Re-examine structural connections at post bases and ledger every two to three years, especially after severe storms.
A well-built aluminum patio cover with proper flashing and fastening can realistically last 30 to 50 years with only this kind of light annual attention. Steel covers can match that lifespan if the protective coating stays intact. The structures that fail early are almost always the ones where the ledger flashing was never done right, or where nobody re-tightened fasteners for a decade. Spend an hour on it each spring and the cover will outlast most of what's around it.
FAQ
Do I need a permit even for a small metal patio cover?
Often yes, because a patio cover can qualify as a permanent structure, especially when attached to the house. If you cannot remove it easily without damaging the building (or it supports roofing like a fixed roof), many jurisdictions require a permit and at least a framing or structural inspection.
What’s the minimum roof slope I can use for a metal patio cover?
Use at least a 1:12 slope, but also avoid making the roof so low that water can linger at panel seams. After installation, do a quick water-flow check by pouring a small amount of water near a seam, then confirm it runs toward the outer edge without pooling.
How do I know whether to choose aluminum or steel for my specific spans and climate?
Pick based on span length, local snow load, and wind exposure. Aluminum is usually the DIY-friendly default for residential widths under about 20 feet, but if you are in a heavier snow or high-wind area, you may need steel framing capacity and additional corrosion protection at cut edges.
Can I use standard steel screws to attach roofing to aluminum framing if they look fine?
No, not directly against aluminum. Mixing metals with moisture can cause galvanic corrosion, so use stainless or aluminum-rated fasteners for aluminum-to-aluminum connections, and hot-dip galvanized or stainless hardware for steel framing.
Should my posts sit on the existing patio slab, or do they need footings below grade?
They need real footings below grade in most cases. Sitting posts only on the slab invites movement and eventual failure from wind and lateral loading. Even if the slab is thick, go with code-required footing diameter and depth (below local frost depth) for stability.
How far apart should posts be, and what if my measurement doesn’t match common spacing?
Typical aluminum systems use about 8 to 10 feet on center, heavier steel can go up to around 12 feet, but the correct spacing depends on your engineered load conditions. If your layout forces unusual spacing, don’t “adjust by eye,” use a kit designed for your span or have an engineer rework member sizes.
What’s the biggest cause of leaks on metal patio covers, and how do I prevent it?
The ledger-to-house flashing and the top-edge water management are the most common leak sources. Prevent problems by using a continuous flashing that laps correctly over the roofing, matching flashing metal to the roofing metal, and using an appropriate caulk (paintable polyurethane or butyl) where it tucks under siding.
Can I attach the ledger to just the siding or sheathing if I can’t find solid framing?
No. The ledger must be anchored into structural framing (like rim joists or studs or solid framing behind finishes), not siding or sheathing. If you cannot access structural members behind the finish, use a standoff ledger with properly flashed detailing so water cannot get behind the connection.
How do I make sure I don’t end up with a crooked or “out-of-level” roof after the posts are set?
Plumb posts on two adjacent sides, brace them temporarily, and re-check beam heights against the designed slope before tightening connections permanently. Also verify slope after roofing panels are on, since a low rafter run often shows up as ponding or slow water drainage.
What overlap and fastening details matter most for corrugated or ribbed panels?
Overlap needs to match the panel profile and manufacturer requirements, and fasteners should go through the high rib with neoprene washers. Avoid overtightening because it distorts the washer and compromises the seal, which can lead to leaks at fastener points.
How often should I re-tighten hardware and inspect flashing?
At least once per year, commonly in spring. Look specifically at ledger flashing edges, check that fasteners remain snug (do not strip), and inspect caulk lines for cracks or gaps, especially around penetrations and transitions at the house wall.
When should I stop DIY and call a professional for a metal patio cover?
Call a structural engineer for large unsupported spans, unusually high snow loads, or high-wind areas, and call a roofer or contractor when the ledger connection involves complex existing roof transitions or difficult attachment points. If you plan lighting, fans, or outlets, use an electrician since exterior wiring and code-compliant weatherproofing are not beginner tasks.