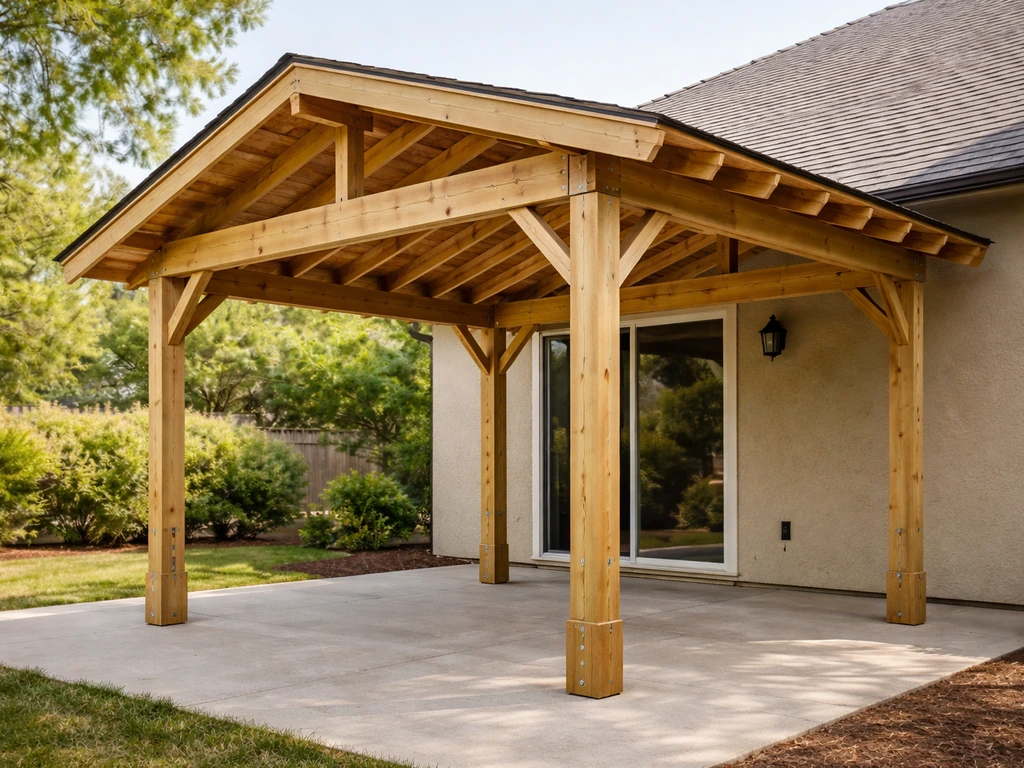
You can build a free-standing patio cover yourself in a weekend or two if you plan it right. The key steps are: choose a roof style, lay out your footings, set your posts in concrete, frame your beams and rafters, install the roofing material, and finish with weatherproofing. For a detailed walkthrough of how to make a patio cover out of wood, follow the sequence below from layout to weatherproofing.
How to Build a Free Standing Patio Cover: DIY Guide

Celia Vaughn
29 May 2026
Free-standing structures are actually more forgiving than attached covers in some ways because you're not cutting into your house, but they demand solid footings and correct post spacing to stay safe in wind and snow. Here's how to do it from start to finish. If you're also working on a deck structure, you can apply the same framing logic to answer how to frame a patio deck safely and efficiently.
Choose the right free-standing patio cover type
The style you pick affects everything downstream: how much lumber you need, how complex the framing gets, and what roofing materials will work. The most practical options for a DIY free-standing build are a flat (or low-slope) pergola-style cover, a single-slope shed roof, or a gable roof. Each has a different difficulty level and look.
| Style | Pitch | DIY Difficulty | Best For |
|---|---|---|---|
| Flat/pergola | 0–2:12 | Easy | Shade, partial cover, modern aesthetic |
| Single-slope (shed roof) | 2:12–4:12 | Moderate | Solid weather protection, simpler framing than gable |
| Gable roof | 4:12–8:12 | Harder | Full weather protection, classic look, more lumber |
For most first-time builders, a single-slope shed roof is the sweet spot. It sheds water cleanly, it's structurally straightforward, and it doesn't require you to cut a ridge beam or deal with two opposing rafter runs. If you want the classic look of a gable, that's totally doable but budget an extra day and some patience with the ridge and hip cuts. A flat pergola works great for shade but won't keep you dry in rain without adding a solid decking material on top.
Unlike an attached lean-to patio cover that transfers load to your house wall, a free-standing structure carries all its weight on its own posts and footings. If instead you want a lean-to patio cover, you’ll want to plan the attachment and load path to your house wall from the start. That's actually cleaner structurally, but it means you need at least four posts (six for anything over 12 feet wide) and every one of them needs a proper footing in the ground.
Plan layout, measurements, and site prep
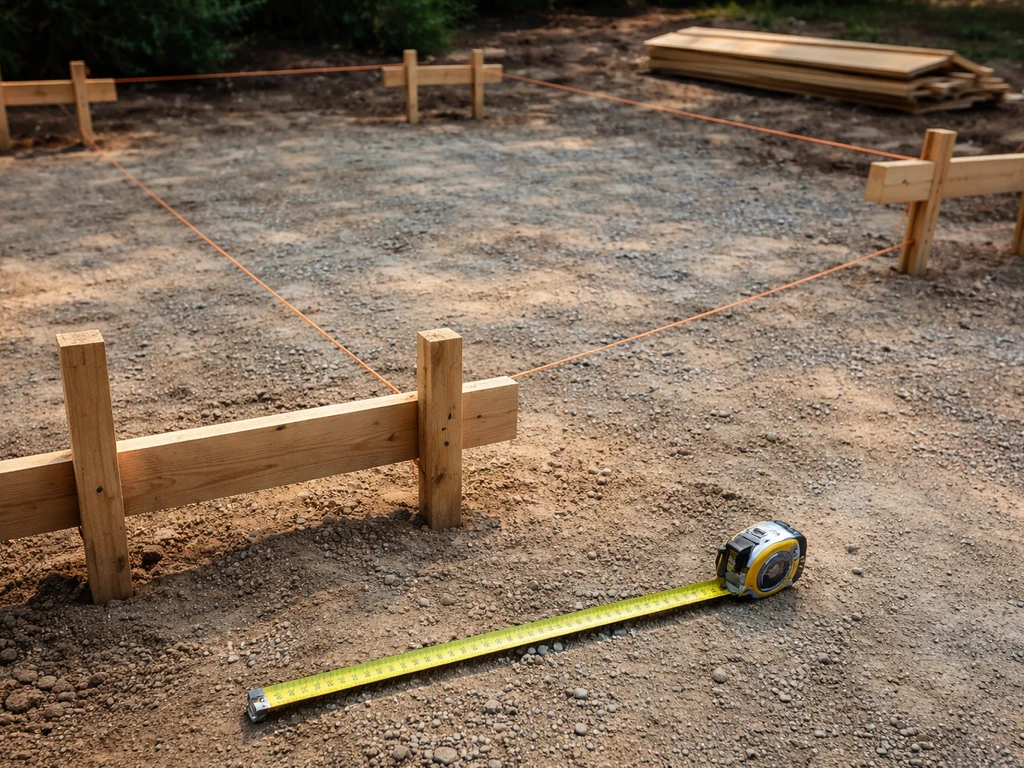
Start by staking out the corners of your structure on the ground using batter boards and string lines. Measure your desired footprint, then check for square by measuring diagonally corner to corner. Both diagonal measurements should match within a quarter inch. This step sounds tedious but a structure that's out of square will fight you at every stage.
Standard sizing for a free-standing patio cover is 12x16 feet or 14x20 feet. Those dimensions work well with off-the-shelf lumber lengths and minimize waste. For post spacing, aim for 8 to 12 feet between posts along the long side. Going beyond 12 feet between posts with standard dimensional lumber requires upsizing your beams significantly, which adds cost and weight.
- Mark post locations with stakes and confirm spacing before digging
- Call 811 (US) at least three business days before digging to have underground utilities marked
- Check the site for drainage: water should flow away from the structure, not pool under it
- Measure the overhead clearance you want: 8 feet at the lowest point is the comfortable minimum, 9–10 feet feels more open
- Account for roof slope when planning post heights: on a 14-foot-wide shed roof at 3:12 pitch, the high side is 3.5 feet taller than the low side
Clear the site of grass and debris, but don't grade the soil extensively until after your posts are set. You'll want to know final grade to set your post heights correctly. If you're building over an existing concrete patio, you have two options: drill and epoxy anchor bolts into the slab for surface-mounted post bases, or cut through the slab at post locations and pour proper footings below the frost line. The second option is more work but is structurally superior and usually required by code.
Materials and design considerations
The three main structural material choices are pressure-treated wood, steel (often galvanized or powder-coated), and aluminum. Your roofing choice is somewhat independent of your framing choice, though they interact on weight and fastening.
Framing material comparison

| Material | Typical Cost | Lifespan | DIY-Friendly? | Notes |
|---|---|---|---|---|
| Pressure-treated wood | Lowest | 20–30 years with maintenance | Yes, very | Easy to cut, widely available, needs staining/sealing |
| Rough-sawn cedar or redwood | Moderate | 25–40 years | Yes | Naturally rot-resistant, looks great, more expensive than PT |
| Galvanized or powder-coated steel | Moderate–High | 40+ years | Moderate | Heavier, needs a welder or bolt-together kit, very strong |
| Aluminum (extruded kit systems) | Moderate–High | 30–50 years | Yes, with kit | Lightweight, no rot, limited custom sizing unless you fabricate |
For a pure DIY build with no special tools, pressure-treated lumber is the easiest call. Use ground-contact rated (UC4B) lumber for any post that goes into or near the soil. If you're building a wood patio cover and want it to look more finished, rough cedar or redwood over a PT structural frame is a popular combo: PT where it touches the ground, cedar or redwood for the visible beams and rafters. If you want a deeper walkthrough, review a complete guide on how to build wood patio cover from layout through roofing. Aluminum kit systems are worth considering if you want low-maintenance longevity, but they're less forgiving to cut and fit on-site.
Roofing options
- Corrugated polycarbonate panels: translucent, lightweight, easy to cut, lets diffused light through, good for 2:12 or steeper pitch
- Metal roofing (standing seam or corrugated steel/aluminum): durable, low maintenance, clean look, needs 1:12 pitch minimum
- Asphalt shingles over plywood sheathing: most familiar to DIYers, works on 4:12 and steeper, heaviest option
- Solid wood decking or 2x6 tongue-and-groove: natural look for pergola-style, no weather protection unless sealed well
- Shade cloth or canvas: zero weather protection, great for sun filtering, simplest install
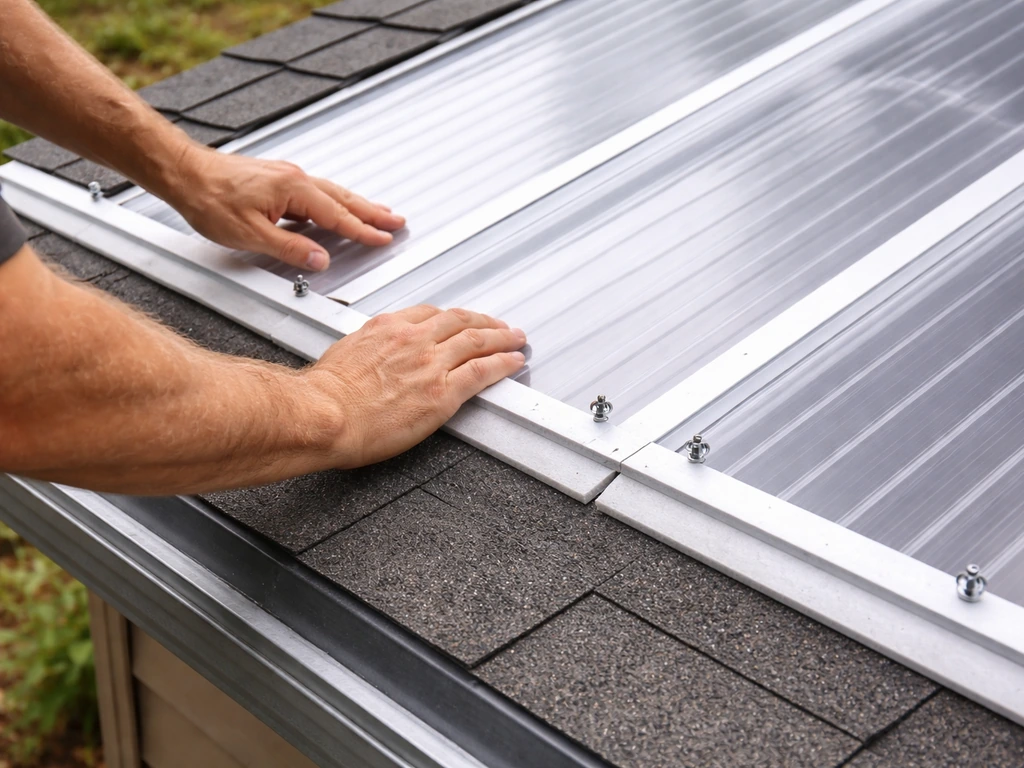
Polycarbonate panels are the most popular DIY roofing choice for patio covers because they're light (under 1 psf), easy to handle alone, and install with simple screws and closure strips. Metal roofing panels are a close second and are especially good if you want a solid, opaque cover with a modern look. If you're choosing metal roofing for your patio cover, plan for proper flashing, correct fasteners, and the right support spacing to keep it watertight and secure metal patio cover. If you're building a gable roof and want it to match your house, asphalt shingles are the way to go but factor in the sheathing weight when sizing your rafters.
Structural engineering basics for DIY builds
You don't need to be an engineer to build a safe patio cover, but you do need to understand a few numbers. The 2024 International Residential Code (IRC), Appendix BF, sets a minimum design load of 10 psf (pounds per square foot) for dead load plus live load on patio covers. That's the baseline. If you live somewhere with snow, your local snow load governs instead, and it's often 20–40 psf in northern climates. Always use the higher number.
Here's what that means practically for standard lumber sizing on a typical 12x16 foot structure:
| Member | Typical Size | Max Span (approx.) | Notes |
|---|---|---|---|
| Posts | 4x4 PT | Up to 8 ft height | Use 6x6 for posts over 8 ft or heavy snow loads |
| Beams (double) | 2x8 or 2x10 (doubled) | Up to 12 ft between posts | Double up and bolt together; size up for spans over 10 ft |
| Rafters | 2x6 | Up to 10 ft | Space 24 in. on center for most roofing; 16 in. for heavy tile or shingles |
| Ledger/rim board | 2x8 or match rafter depth | Full length of structure | Fastened to tops of posts or beams |
A common mistake is undersizing the beam. People use a single 2x8 where a doubled 2x10 is needed, and the beam sags or twists within a season. When in doubt, go one size up on beams. Lumber is cheap compared to the cost of rebuilding or, worse, a collapse. For spans over 14 feet, consult a span table or ask a structural engineer for a quick review, which typically costs $150–$300 and is money well spent.
Wind uplift is the other force that catches DIYers off guard. A roof acts like a sail in high winds. Every connection point needs metal hardware: post-to-beam connectors, rafter ties, and hurricane clips where you're in a wind-prone area. Using Simpson Strong-Tie H2.5A hurricane ties for rafter or truss connections to the top plate can help resist moderate wind uplift loads, which is useful for patio covers in wind-prone areas hurricane clips where you're in a wind-prone area. Don't rely on toenailing alone. Simpson Strong-Tie and USP Structural Connectors both make affordable hardware for every connection in a patio cover frame.
Footings, anchoring, and building code checks
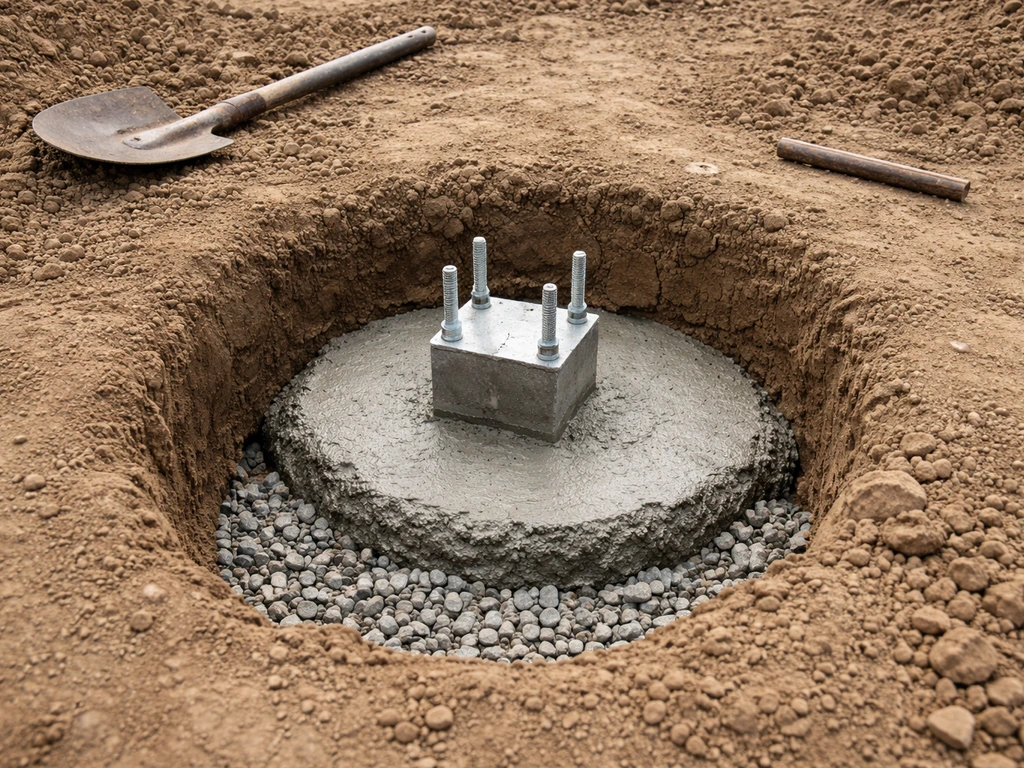
Footings are the most critical part of a free-standing structure. A bad footing means a wobbly or leaning post, and in a worst case, a structure that tips in wind. The basic rule: your footing must extend below the local frost line. In warm climates (Zone 7–8, like the southern US), that might be only 12 inches. In cold climates (Zone 4–5, like Minnesota or upstate New York), frost lines are 42–60 inches deep. Check your local frost depth with a quick call to your building department.
For a standard 4x4 or 6x6 post, dig a hole 12 inches in diameter and pour a concrete footing. The most common sizing is a 12-inch diameter hole that's at least as deep as the frost line plus 6 inches of gravel at the bottom for drainage. Use tube forms (Sonotubes) to keep the sides clean. Mix 80-lb bags of concrete per the instructions, or rent a mixer for larger jobs. For a 12-post structure, plan on two to three 80-lb bags per hole.
Post setting options
- Embed post in concrete (traditional): post sits in wet concrete at the bottom of the hole; strong but post base is vulnerable to rot over time even with PT lumber
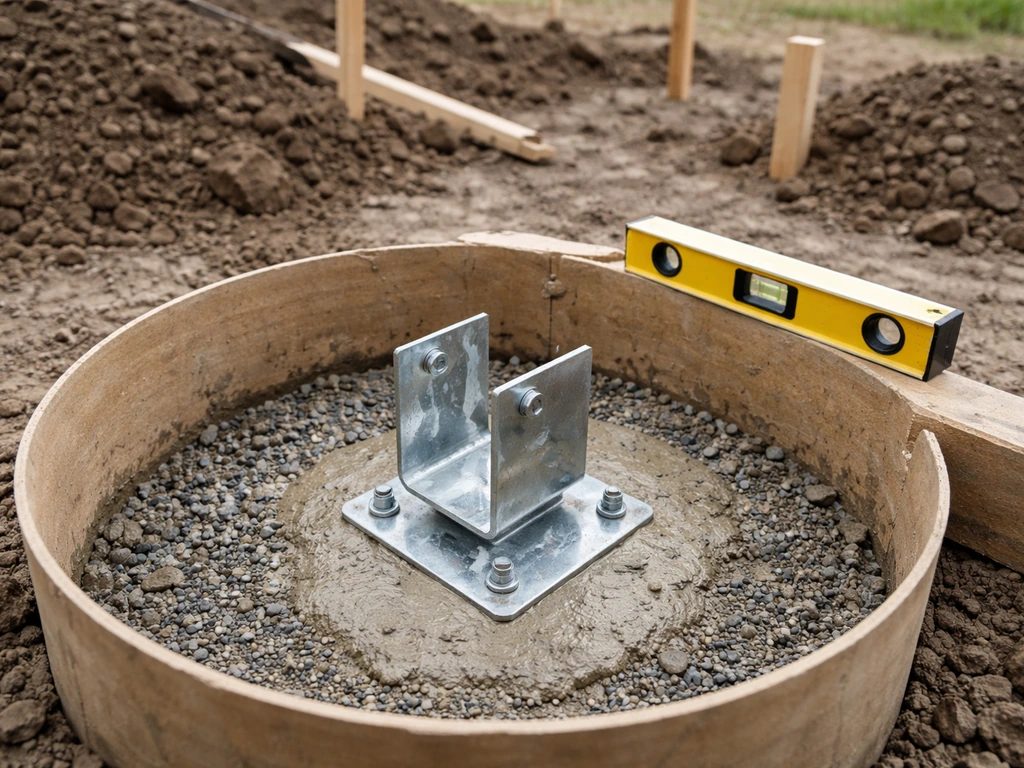
- Post base connector on top of footing: pour footing with an anchor bolt set in wet concrete, then bolt a surface-mount post base to the dry footing; keeps wood out of direct contact with concrete, easier to replace posts later
- Helical pier anchors: screw-in metal anchors that go below frost line without pouring concrete; good for hard-to-access spots, higher hardware cost
The post base connector method is what most experienced builders recommend for wood structures today. It costs a few dollars more per post but the posts stay dry, last longer, and can be replaced if one ever rots without jackhammering out a footing. For concrete patios, surface-mount post bases anchored with epoxy and wedge anchors are acceptable in many jurisdictions for patio covers with modest loads.
Permits and code: what to actually check
Here's the real talk on permits: most jurisdictions require a permit for any permanent structure over a certain size, often 120–200 square feet, but it varies widely. Some areas exempt patio covers entirely if they're open on the sides. The IRC Appendix BF patio cover provisions are not automatically mandatory everywhere because the appendix must be specifically adopted by your local jurisdiction. That means your local code might be more or less strict than the IRC baseline. Don't assume either way.
- Call or visit your local building department before starting. Ask specifically about free-standing patio covers, not general structures
- Ask what drawings and specifications they need for a permit application (often a simple site plan and framing layout suffice for a basic patio cover)
- Ask about frost depth, minimum footing size, and whether HOA approval is needed
- If a permit is required, get it. Inspectors catch problems early, and an unpermitted structure can complicate home sales or insurance claims
- In snow country, confirm the local ground snow load (Pg) so you can size your framing correctly
Skipping the permit to save time almost never ends well. The inspection process is not adversarial. Most inspectors are helpful, and a footing inspection before you pour concrete takes 15 minutes and gives you peace of mind that your structure is built right.
Step-by-step construction process
Once you have your layout staked, your permit in hand, and your materials on site, the build sequence goes like this. Work through it in order because each step creates the foundation for the next.
Phase 1: footings and posts
- Dig footing holes to the required depth using a power auger (rent one for $100–$150/day) at all post locations
- Add 6 inches of gravel to the bottom of each hole for drainage and tamp it down
- Set Sonotube forms and pour concrete; if using post base connectors, set the J-bolt anchor in wet concrete now and check alignment carefully before the concrete sets
- Let concrete cure at least 48 hours (72 hours in cold weather) before loading posts
- Set posts in the connectors or directly in the concrete, plumb each post in two directions using a level, and brace with temporary diagonal 2x4s staked to the ground
- Cut posts to final height using a chalk line to mark a level cut line across all posts simultaneously (a water level or laser level makes this easy)
Phase 2: beams
- Lift beams onto post tops and secure with post-to-beam hardware; for a 12- or 14-foot structure you'll need two people or a temporary prop to hold the beam while you fasten it
- Fasten through the beam into the post with structural screws or through-bolts as specified by your hardware; do not rely on nails alone for this connection
- Check that beams are level across their full length before finalizing fasteners
- Install a header or rim board at the rafter ends if your design calls for it to box in the roof frame
Phase 3: rafters
- Cut rafters to length with the appropriate tail cut (plumb cut at the top, fascia cut at the tail); for a shed roof, all cuts are the same angle based on your roof pitch
- Install rafters at your planned spacing (typically 24 inches on center) using rafter ties or hurricane clips at each end
- Snap a chalk line along the rafter tops to confirm they're all in the same plane before you install roofing; high or low rafters need shimming or trimming now, not after
- Install blocking between rafters at the beam line to prevent rotation and add lateral strength
Phase 4: roofing
- For polycarbonate or metal panels: install closure strips (foam or rubber) at the top and bottom of each panel run to block bugs and water; fasten panels with pre-drilled holes and self-sealing screws, starting from the end away from prevailing wind
- For asphalt shingles: install plywood or OSB sheathing first (nail every 6 inches at edges, 12 inches in the field), then 30-lb felt underlayment, then shingles from the bottom up, staggering joints by half a shingle each row
- For all roof types: install a ridge cap or flashing at the peak and drip edge along the eaves and rakes to direct water away from the framing
- Seal all fastener penetrations with compatible sealant for the roofing material you're using
What often goes wrong at the roofing stage is rushing the flashing details. A roof that looks great but has unsealed penetrations or missing drip edge will leak within the first season. Take an extra hour to seal everything properly. It's infinitely easier now than tracking down a drip after the structure is finished.
Weatherproofing, finishing, and maintenance
Once the structure is up and the roof is on, weatherproofing the wood is next. Even pressure-treated lumber benefits from a penetrating sealer or stain, especially on cut ends where the treatment doesn't fully penetrate. Apply a UV-resistant exterior stain or solid-color deck paint within a few weeks of building, before the wood starts to gray and check. Cedar and redwood take stain beautifully. PT lumber is more stubborn and benefits from waiting 30–60 days after installation to let any surface moisture escape before sealing.
Check all metal hardware connections after the first winter. Thermal expansion and contraction can loosen fasteners. Tighten any bolts that have worked loose and look for any signs of corrosion at connection points, especially where dissimilar metals are in contact. Add a dab of anti-seize compound to bolt threads during the initial build to make future adjustments easier.
Ongoing maintenance schedule
- Every spring: inspect all post bases for moisture intrusion or rot; prod the wood with a screwdriver tip (soft spots indicate rot starting)
- Every spring: check roof surface for cracked sealant, lifted fasteners, or damaged panels; re-seal anything that looks compromised before rainy season
- Every 2–3 years: reapply exterior stain or sealer to all exposed wood; don't wait until the wood looks bad because once it grays and checks it's much harder to get a good finish
- After any major storm: walk the perimeter and check that no posts have shifted, no hardware has pulled loose, and no roof panels are cracked or lifted
- Every 5 years: apply fresh sealant around any flashing joints and inspect the footing perimeter for soil erosion that might be exposing concrete or post bases
A well-built free-standing patio cover maintained on this schedule will last 25–40 years with wood framing, and potentially longer with aluminum or steel. The biggest enemy isn't weather, it's deferred maintenance where small issues like a lifted panel seal or a post base sitting in pooled water turn into structural problems over time. Spend an hour each spring doing a walk-around and you'll get decades out of this build.
If this is your first structural build, don't let the scope intimidate you. The framing principles here are the same ones used in wood patio cover and metal patio cover builds across the country. Start with a simple 12x16 single-slope design, get your permit, build your footings right, and the rest of the process follows a clear sequence.
Once you have that simple design, you can follow the same framing approach to learn exactly how to frame a patio cover for your layout and roof choice 12x16 single-slope design. Most motivated DIYers complete a structure this size in two full weekends, with a third weekend for the roofing and finish work. That's a realistic timeline, not an optimistic one.
FAQ
Can I build on an existing concrete patio slab without pouring new footings?
If your posts are set on concrete that is already above frost depth, you usually cannot rely on surface-mount bases alone. For deck-like heights or any post base near grade, the safer approach is to cut at post locations and pour footings to the frost line, then use post-base connectors to keep wood dry.
What fastener mistakes cause leaks or loosening on patio cover roofs?
Use “rated” fasteners and make sure the fastener type matches the hardware and exterior exposure. For wood roofs, many leaks trace back to roof screws that are not compatible with the panel system (wrong screw length, missing washers, or no sealing washer), so confirm the screw and washer spec for the specific roofing material.
How do I adjust my plan if I live in a heavy snow zone?
For snow areas, prioritize the roof type and load path over aesthetics. A shed roof can work well, but you still need proper rafter sizing, adequate bearing on beams, and a clear plan for how snow will shed rather than accumulate, then verify local snow load values beyond the basic 10 psf baseline.
Should I stain or seal my posts and beams right after installation?
Don’t treat “pressure-treated” as the final finish. PT helps with rot resistance, but cut ends and drilled holes need additional protection, and many builders seal or stain twice (lightly after installation, then again after the wood fully dries) to reduce checking and UV graying.
What should I know about drainage if I choose a flat or low-slope cover?
Plan drainage before you choose the roofing. A flat or low-slope cover needs a slope target and an underlayment plan, otherwise water sits at seams and around penetrations. If you want maximum reliability, choose a shed or gable roof and include drip edge and properly lapped flashing.
Can I build it freestanding but still tie it into my house for alignment or support?
If you want to match an existing house roof line, you may be tempted to “join” the structure at the wall. For free-standing builds, avoid cutting a structural dependency unless you design that load path, provide proper connection details, and confirm wind uplift handling at the interface.
What happens if I change the patio cover dimensions after I’ve started framing?
If you’re in the middle of a build and decide to change dimensions, the safest approach is to re-check post spacing and beam span relationships. Even small layout changes can push you into a longer unsupported span, so don’t assume lumber sizes you already bought are still correct.
Is it safe to mix steel, aluminum, and treated wood hardware in the same build?
Yes, but keep a consistent material strategy. Mixing steel hardware with untreated aluminum or non-compatible metals can accelerate corrosion in wet conditions, especially at contact points. Use the correct connectors rated for exterior use and consider isolating surfaces when dissimilar metals meet.
What are the most important checks to do at the footing and post-base stage?
Most failures start with post-base details, not the visible framing. Before you pour or backfill, verify each footing center location, check that your base plates are square, and confirm your top-of-footing height matches your layout so posts stay plumb.
How do I avoid panel seam problems on polycarbonate or metal roofing?
For multi-panel roofing, stagger seams so water flows down and never runs upward through overlapping joints. Also confirm the closure strip and seam tape, if the system uses it, are installed as specified, because DIY gaps at panel edges often appear only after the first driving rain.
What should I inspect each year to keep the cover watertight and stable?
Yes. After you’re done, do a “spring reset” inspection focused on uplift movement, trim seals, and any fasteners that show back-out. Tighten loose bolts, replace any sealant that has cracked, and clear debris from gutters or low-slope areas so water doesn’t sit against the structure.