Stop what you're doing and get a tarp over the wet area first, then we'll figure out where the water is coming from. Most patio roof leaks trace back to one of five spots: failed or missing flashing at the wall connection, cracked or dried-out sealant around fasteners, open seams between panels, clogged drainage keeping water pooled too long, or a slope problem that was baked in from the original build. Once you know which one you're dealing with, the fix is usually straightforward and completely within DIY range. If you're ready to start the repair, use this guide on how to fix leaking patio roof to choose the right materials and steps for your exact leak point.
How to Stop a Patio Roof From Leaking Today and Fix It

Celia Vaughn
29 Apr 2026
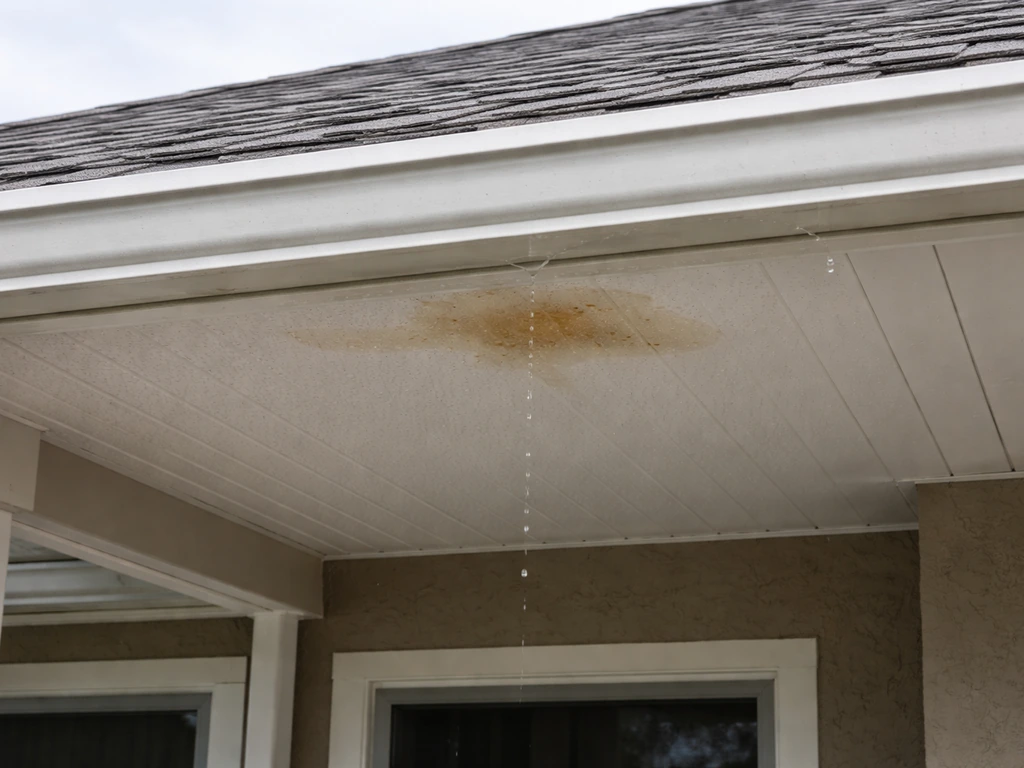
Figure Out Where the Leak Is Actually Coming From
The first thing to understand is that the wet spot you see on the ceiling or floor is almost never directly below where the water is getting in. Water travels along rafters, panel ribs, and framing members before it drips, sometimes several feet from the actual entry point. So start your diagnosis at the highest possible spot and work down.
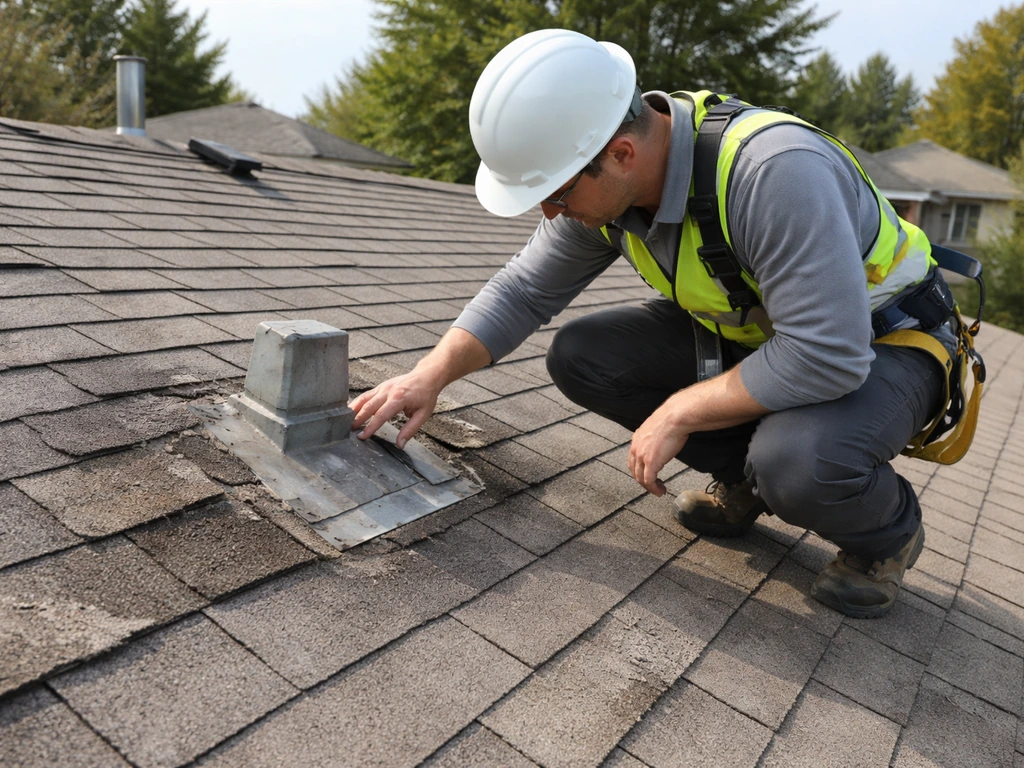
On a dry day, get up on the roof and look for the obvious stuff first: lifted or cracked sealant, rust stains around screw heads, gaps along the ridge or wall flashing, and any spots where panels overlap without proper sealing. Then, if you can safely do it and the roof is accessible, use a garden hose to simulate rain. Have someone inside watching while you wet one section at a time, starting at the top and moving down. This pinpoints the entry point surprisingly fast.
Here's what to check at each common location:
- Ledger or wall attachment point: Look for gaps between the ledger board and the house wall, and check whether the flashing behind the ledger is still intact and lapped correctly over the top.
- Fastener/screw holes: Rust streaks radiating from screw heads are a dead giveaway that the neoprene washers have failed or were never properly seated.
- Panel seams and overlaps: Lift panel edges gently if you can. Gaps, dried-out butyl tape, or crumbling caulk here are common culprits.
- Ridge cap and peak: The highest seam on a gable-style patio roof is under constant weather exposure. Check whether the cap is still sealed along both edges.
- Fascia and eave edges: Water that pools at the edge and wicks back under the panels often comes in here, especially if gutters are clogged or absent.
- Drainage channels and gutters: Standing water or debris-clogged outlets will back water up under the roof surface over time.
The Most Common Reasons Patio Roofs Start Leaking
Knowing what typically fails helps you zero in faster. These are the causes that come up again and again on DIY patio roof builds:
Fasteners and Screw Holes
Exposed-fastener metal and polycarbonate roofs rely on neoprene-backed screws to seal each penetration. Those rubber washers dry out, crack, and compress unevenly over time, especially with temperature cycling. When they fail, every screw hole becomes a small funnel for water. This is probably the single most common leak source on DIY patio roofs.
Flashing at the Wall or House Connection
Where a patio roof ties into an existing wall is almost always the most vulnerable spot. If the flashing wasn't installed correctly from the start, or if it was installed without proper integration into the wall's water-resistive barrier, water will work its way behind it. Silicone-only fixes at this joint tend to fail because the joint moves seasonally and silicone doesn't bond reliably to metal surfaces. Butyl tape or a polyurethane sealant is a better choice here.
Seams and Panel Overlaps
Every place two panels meet is a potential leak point. Metal roofing seams that weren't bedded in butyl tape during installation will eventually let water in. Polycarbonate panels without proper closure strips at the bottom and top leave openings that collect debris and channel water inward. Wind-driven rain makes these gaps worse.
Poor Drainage and Flat Spots
The minimum recommended slope for a patio roof is 1/4 inch per foot (roughly 2%). Below that, water drains too slowly and starts ponding. Standing water for more than 48 hours is genuinely damaging to most roof assemblies, including the sealants and fastener seals. A roof that technically has slope but has a low spot in the middle, usually from a rafter that sagged, will concentrate pooling exactly where you don't want it. Clogged gutters create the same problem at the eave edge.
Deteriorated or Wrong Sealant
Not all caulk and sealant is appropriate for a patio roof. Standard latex paintable caulk will fail outdoors within a season. Silicone has notoriously poor adhesion to metal. The right choices are butyl-based tape or sealant for concealed seams (it handles movement well and won't shrink), and polyurethane or hybrid sealants for exposed joints where flexibility and UV resistance matter. If the sealant on your roof is cracked, chalky, or has pulled away from the surface, it's done its job and needs replacing.
Wait, Is It Actually Condensation?
This one trips a lot of people up. If you notice dripping on cool mornings or right after a rain event, especially on polycarbonate or metal panel roofs, it may be condensation rather than a true leak. Condensation forms when warm, moist air inside the covered area hits the cold underside of the roof panels. It looks exactly like a leak. The fix is different though: better ventilation under the panels, insulating the underside, or adding vapor-permeable closure strips. If the dripping only happens during or right after temperature swings and you can't find any actual penetration point from your hose test, condensation is a strong possibility.
Stop the Damage Today: Immediate Steps
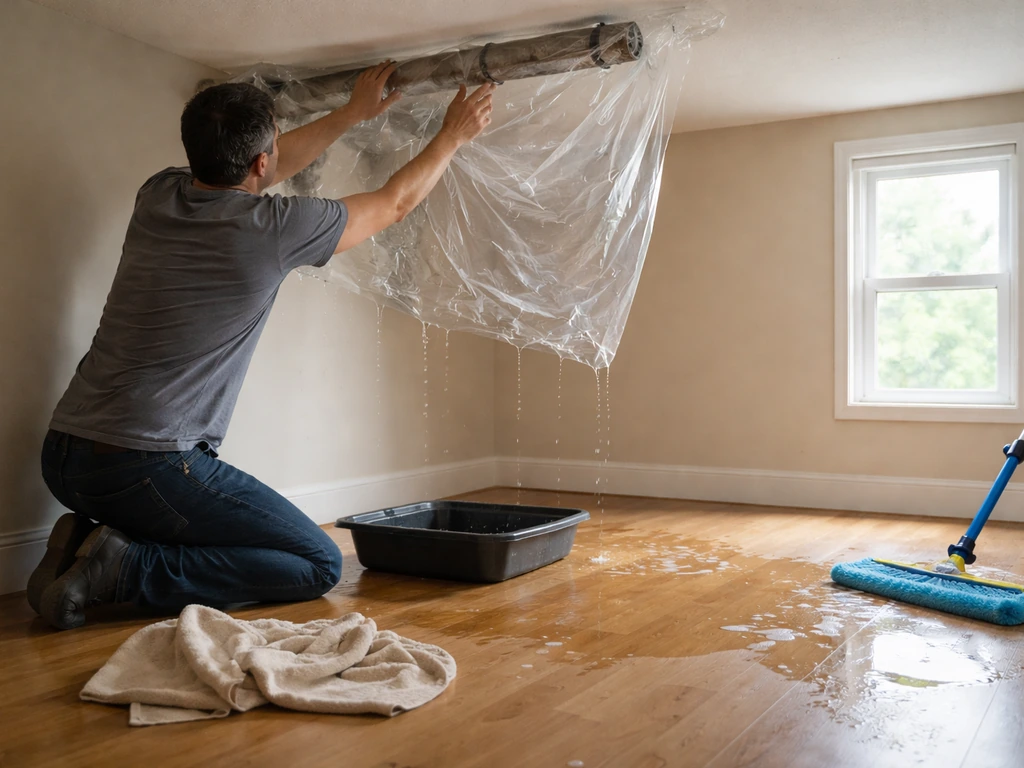
If it's actively leaking right now, your first job is damage control, not the permanent fix. Do these things in order:
- Protect the interior. Move anything that can be damaged away from the wet area. If there's standing water, get it up fast. Mold can start within 24 to 48 hours of sustained moisture exposure.
- Cover from above if safe. A heavy-duty poly tarp (at least 6 mil) weighted or secured over the leak area can stop incoming water immediately. Extend it well past the suspected entry point in all directions, and secure the edges so wind can't pull it off.
- Apply roofing tape as a temporary fix. Products like self-adhesive butyl flashing tape or waterproof roofing tape (sold at any hardware store) can be pressed directly over a visible crack, open seam, or failed sealant joint. This is a same-day, temporary measure, not a permanent repair, but it buys you time.
- Divert water inside if you can't stop it from above. A small roof jack or even a strategic piece of flashing attached to a rafter can redirect a drip away from finished surfaces and toward a bucket while you arrange a real fix.
- Document everything with photos before you start repairs. If the damage was storm-related, photos and receipts matter for insurance purposes.
Do not go up on a wet or slippery roof. It is not worth it. Wait until the surface is dry and you have someone aware you're up there. If you're dealing with a steep pitch or significant height, temporary interior mitigation is the safer immediate move.
DIY Fixes Matched to Your Roof Type
The right repair approach depends on what your patio roof is made of. Here's how to handle the most common DIY builds:
Metal Panel Roofs (Steel or Aluminum)
For exposed-fastener metal roofs, start by replacing any screw with a damaged or missing neoprene washer. Use a screw one size larger if the original hole is stripped. Then inspect every seam and endlap. Seams should be bedded in butyl tape, not silicone. If the seams were caulked with silicone, remove it (a plastic scraper and mineral spirits help), clean the surface thoroughly, and apply self-adhesive butyl tape pressed firmly into the seam. At ridge caps, apply a bead of polyurethane sealant along both edges before pressing the cap back down, then add screws through the capped edge. For aluminum patio roof panels specifically, cleaning and resealing the aluminum surfaces is a full subject worth its own attention.
Polycarbonate Panel Roofs
Polycarbonate leaks most often at the lower edge, where the open fluted ends of the panels sit, and at the side overlaps between panels. The lower edge needs a vented closure strip (lets moisture out but blocks bugs and debris) sealed with a neutral-cure silicone, not standard acetoxy silicone which can damage polycarbonate. The top edge needs a sealed closure strip that is fully watertight.
At side overlaps, panels should overlap by at least 50 to 75 mm (roughly 2 to 3 inches) and be secured with the correct roofing screws with neoprene washers. If existing closure strips are compressed flat, crumbling, or missing, replacement strips are inexpensive and available at roofing suppliers. Don't over-tighten screws on polycarbonate since you need to allow for thermal expansion.
Wood-Framed Roofs with Shingles or Membrane
For patio roofs built with wood framing and covered with asphalt shingles or a membrane, the repair approach is closest to standard residential roofing. Check the underlayment along the edges first since patio roofs often skip or skimp on underlayment in DIY builds. Missing or torn underlayment under shingles means water that gets past the shingles has nothing stopping it from reaching the decking. Replace damaged sections by weaving in new underlayment and resecuring shingles. For membrane roofs, look for bubbles, cracks, or lifted seams and use a compatible membrane patch and lap adhesive to seal them.
Ledger Attachment to the House
This is the repair most people underestimate. A leaking ledger connection almost always means the original flashing sequence was wrong. The correct layering is: house wrap or water-resistive barrier behind the ledger, then the ledger itself, then the roof panels or sheathing overlapping on top, then step or continuous flashing that directs water onto the roof surface rather than behind the ledger.
If you can access the wall above the ledger, installing a continuous piece of metal Z-flashing behind the siding and over the top of the ledger is the proper fix. Seal the top of the flashing to the wall with butyl or polyurethane sealant, but leave the bottom edge free so water can drain out. Caulking the bottom edge shut is a common mistake that traps moisture.
Flashing, Sealing, and Waterproofing Done Right
Flashing is where most patio roof leaks actually start, and it's also where most repairs go wrong the second time around. The fundamental rule is that every layer should shed water onto the layer below it, like shingles on a roof, not act as a dam. If your goal is how to seal a patio roof, focus on the roof-to-wall flashing, fastener seals, and proper sealant placement so water can exit instead of getting trapped. Here's how to approach the key areas:
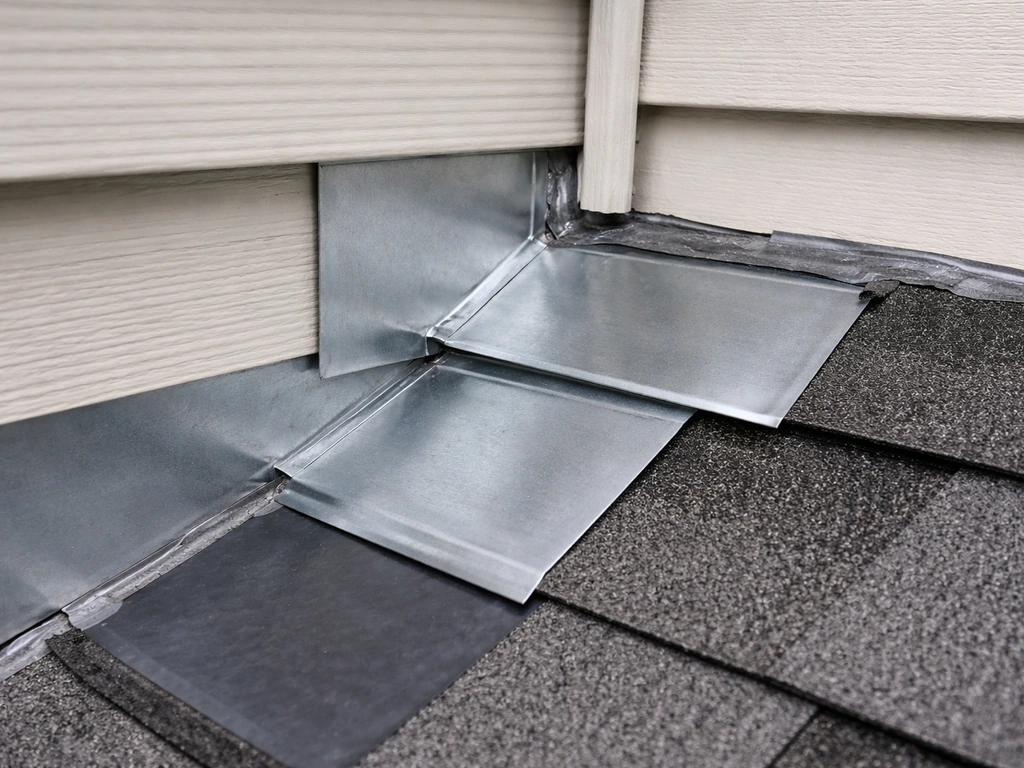
Roof-to-Wall Transitions
At any point where the patio roof meets a vertical wall, you need step flashing or continuous L-flashing that is integrated with the wall's water management layer. Step flashing pieces should be installed from the bottom up, with each piece overlapping the one below it. The vertical leg of the flashing goes behind the siding or wall cladding, not in front of it. Counter-flashing (a second piece that covers the top of the step flashing and is embedded into the wall) adds an extra layer of protection at masonry walls.
Sealant Placement: Where to Use It and Where Not To
Sealant is a supplement to proper lapping and flashing, not a substitute for it. Use butyl tape at concealed seams and endlaps on metal roofs. Metal Construction News notes that butyl tapes are commonly used for lap and seam seals, including under fasteners and roof curbs, but they perform best when covered to protect them from UV and weathering [butyl tape at concealed seams and endlaps on metal roofs](https://www. metalconstructionnews.
com/articles/sticking-with-correct-sealant-application/). Use polyurethane sealant at exposed joints that need to handle movement and UV exposure. Avoid silicone on metal surfaces since it doesn't bond reliably. Never seal the bottom (drainage) edge of a flashing piece shut, you need water to be able to exit.
Do not apply sealant over existing sealant without removing the old material first. Layering new over old creates a weak bond and traps moisture.
Valleys and Slope Changes
If your patio roof has a valley where two slopes meet, water volume concentrates here. Valley flashing should extend at least 6 inches under the panel or shingle on each side. At shallow slopes (less than 4:12), use a flexible sealant like polyurethane or butyl along the top edge of the valley flashing to prevent wind-driven water from backing up under the panels.
Fastener Sealing
On exposed-fastener metal systems, screws should be installed at the flat of the panel rib, not the peak, unless the system specifically calls for it. The neoprene washer compresses to form the seal when the screw is driven to the right depth: snug, with the washer barely bulging but not compressed flat. Too loose and it doesn't seal; too tight and you crack the washer and deform the panel.
Keeping It from Leaking Again
Once you've made the repair, a few habits will prevent you from being back in the same situation next year:
Check and Maintain Slope
The minimum is 1/4 inch of drop per foot of run. If your patio roof is flatter than that, water will find every imperfection. If you built it flat and it's been a problem since day one, adding tapered furring strips under the panels to create positive drainage is a legitimate fix short of rebuilding. Any ponding water that sits for more than 48 hours is working against your sealants and fasteners.
Gutters and Drainage
Clean gutters at least twice a year and after any major storm. Check that downspouts are clear and that water is actually leaving the roof and not backing up under the eave edge. If your patio roof doesn't have gutters at all and the eave edge is the source of your problem, adding a simple aluminum gutter is one of the most cost-effective upgrades you can make.
Annual Inspection Routine
Once a year, ideally in the spring after the wet season, do a quick walk-through. Check screw heads for rust, look at sealant for cracking or pull-away, clear debris from panel valleys and gutters, and inspect the wall flashing from the ground with binoculars if you can't safely access the roof. Catching a failing washer or cracked sealant joint early costs almost nothing to fix. Ignoring it for two more seasons can mean rot, mold, and a much bigger project.
Resealing Schedule
Polyurethane and butyl sealants in exposed locations typically last 7 to 10 years before they need refreshing, sometimes less in climates with intense UV or wide temperature swings. Mark your calendar. Proactive resealing is far easier than reactive leak chasing.
When This Is a Job for a Pro
Most patio roof leaks are DIY-fixable. If you are wondering whether you need to vent a patio roof, the right answer depends on the roof material and the way moisture escapes under the panels do you need to vent a patio roof. But some situations call for a professional, and being honest about that boundary is part of doing this right.
| Situation | Why It Needs a Pro |
|---|---|
| Soft, spongy, or visibly sagging areas on the roof deck or framing | Structural rot or damage that requires evaluation before anyone walks on it or loads it further |
| Widespread mold growth inside the covered structure | Mold remediation requires proper containment and cleaning beyond basic DIY; painting or caulking over mold does not fix the underlying problem |
| Leak source cannot be identified after systematic investigation | Professional moisture meters and thermal imaging can find concealed entry points that a hose test won't reveal |
| Water damage to the house wall or interior framing behind the ledger | May involve rot, compromised sheathing, or structural framing that affects the main dwelling, not just the patio cover |
| The roof structure doesn't meet local building code requirements | If the original build had permit or engineering issues, a repair-only approach may not solve the underlying compliance problem |
| The roof is unsafe to walk on or access | No repair is worth a fall; if you can't safely get to the problem, hire someone who has the equipment to do it safely |
If you're in any of those situations, get a roofing contractor or structural inspector out for an assessment before doing more work yourself. In some cases, the right answer is a full replacement rather than ongoing repairs, and an honest pro will tell you which one you're looking at. Replacing a patio roof is a bigger project but often a cleaner solution when the existing structure has accumulated too many problems. Replacing a patio roof is a bigger project, so if that's your end goal, use this step-by-step on how to replace patio roof as your comparison point.
For most homeowners reading this, though, the leak is coming from a failed screw seal, cracked sealant at the wall flashing, or a drainage issue, and all three of those are fixable this weekend with materials from any hardware store and a couple of hours on a dry day. If you want a full walkthrough of how to repair a patio roof once you spot the culprit, follow the dedicated steps for this exact project.
FAQ
How can I tell if my patio roof leak is real water or condensation?
Before you start repairs, confirm whether you have an actual water intrusion. If the ceiling stains appear after heavy rain but there is no new drip when the hose test runs (section by section, from the top down), or if dripping is mainly during temperature swings on polycarbonate, treat it as condensation first (improve ventilation, consider insulating the underside, and use appropriate closure strips).
What should I do if the leak spot inside is not directly below the problem area on the roof?
If water shows up at the ceiling/floor far from the obvious roof penetration, keep tracing upward along the framing lines. Use the hose test starting at the highest accessible area, wet small sections for 5 to 10 minutes, then move down. Mark the exact moment and location of new moisture so you do not chase the wrong “drip point.”
Can I just seal everything with silicone to stop the leaking faster?
Do not rely on silicone caulk for the main failure points on most patio roofs. Instead, use butyl-based tape for concealed seams and endlaps, and polyurethane (or the system’s approved sealant) for exposed, movement-prone joints. Silicone’s adhesion to many metal surfaces is inconsistent, and it can block future proper bonding when repairs are needed again.
Should I apply new sealant over the old cracked sealant to save time?
The most reliable order is wash away loose debris, remove failed material, and then apply the correct sealant system to clean surfaces. When old sealant is present over a seam, remove it first (scrape and then clean thoroughly), because layering new over old creates a weak bond and can trap moisture behind the repair.
How tight should screws be on a polycarbonate patio roof to prevent leaks?
If your patio roof is polycarbonate or uses neoprene washer fasteners, avoid over-tightening. Drive screws until the washer seals properly (barely bulging), not flattened. Over-tightening can crush the washer and deform the panel, which actually increases the chance of leaks and reduces the panel’s ability to expand and contract.
What do I do if the leak keeps coming back around screw heads?
If you keep seeing rust stains or water marks around screw heads, you likely have failing neoprene washers and possibly a slightly enlarged hole. Replace the screw with a matching fastener and, if the original hole is stripped, move up one size (only if compatible with the roof system). Then inspect every surrounding seam for missing butyl bedding.
My patio roof has a low spot or ponding water, how do I fix that without rebuilding?
If water pools for more than 48 hours or the roof seems flatter in the middle, address drainage. For small low spots, tapered furring strips under the panels can restore slope without full replacement. Also check that gutters and downspouts are clearing properly, because back-up at the eave can mimic a “roof leak” even when the panels are fine.
What’s the best way to handle it while it’s actively leaking right now?
Use a tarp only for temporary mitigation while you wait for a dry day and access. Prioritize safety and interior protection, then diagnose once the roof is dry. Tarping does not solve the entry point, it mainly stops additional damage while you remove the failed flashing, seals, or drainage obstruction.
Why does my patio roof leak at the ledger or wall connection even after I caulked it once?
For wall connections, leaking often means the flashing sequence and integration with the wall’s water barrier is wrong. Look for missing or improperly lapped step or continuous flashing, or flashing that is tucked incorrectly behind the cladding. A correct fix typically involves redoing the flashing layering and sealing the top of the flashing, while keeping the bottom edge able to drain.
What are the most common mistakes that cause leaks in valleys between two roof slopes?
A valley can concentrate water volume, so correct valley flashing dimensions matter. Ensure the valley flashing extends sufficiently under adjacent materials (at least several inches on each side for typical DIY patio roof overlaps). If your slope is shallow, add a compatible flexible sealant along the correct edge to reduce wind-driven backflow under panels.
When should I inspect my patio roof to catch leaks before they become damage?
Schedule maintenance when materials are easiest to inspect. Do a yearly walk-through after the wet season, check for rust at fasteners, chalky or lifting sealant, clogged debris in valleys and gutters, and inspect wall flashing from the ground with binoculars when you cannot safely reach the roof.
When is it time to stop DIY troubleshooting and call a professional?
If you cannot locate an entry point after a careful hose test, or if the leaking is near structural members, ledger areas, or you see significant sagging, damage, or rot, pause DIY repairs. A contractor or structural inspector can determine if the roof system needs more than sealant replacement, including whether replacement is more cost-effective than repeated patching.