To seal an aluminum patio roof, you need to find exactly where water is getting in, clean and dry the metal properly, then apply the right aluminum-compatible sealant or butyl tape to each specific failure point: panel seams, lap joints, flashing edges, and around fasteners. { how to stop patio roof from leaking. Slapping caulk on a wet surface or guessing at the leak location is the number one reason repairs fail within a season. Do it right once and it holds for years.
How to Seal an Aluminum Patio Roof Step by Step

Celia Vaughn
29 Apr 2026
How to Find Where the Leak Is Actually Coming From
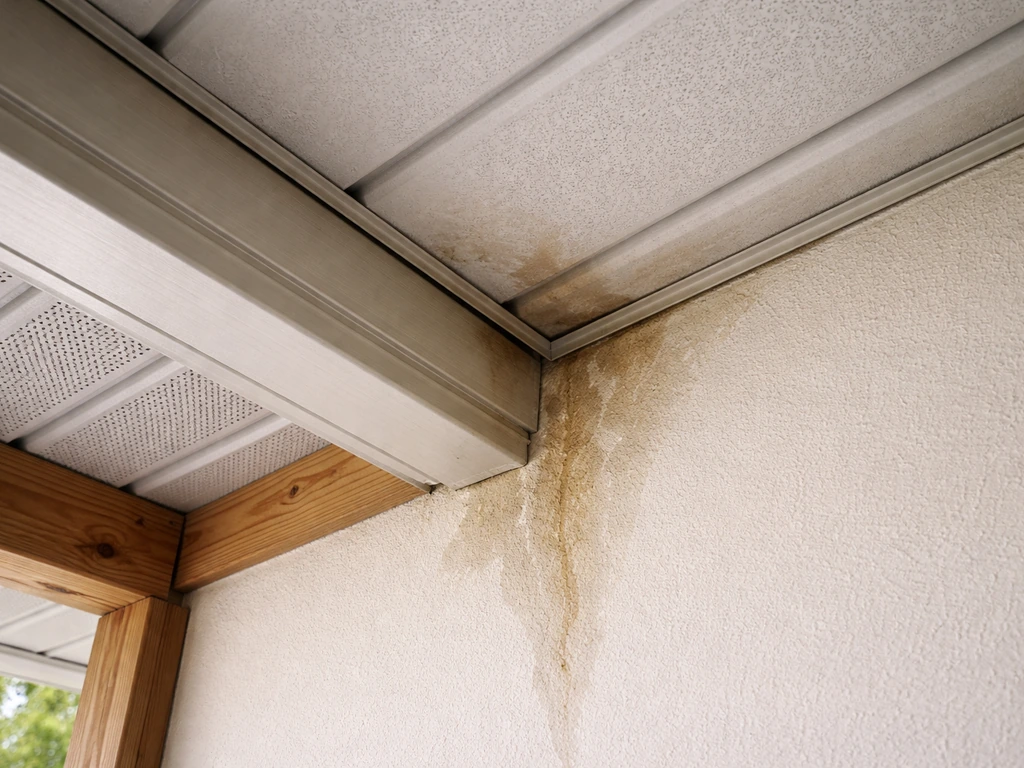
Before you buy a single tube of sealant, you need to know where water is entering. This sounds obvious, but aluminum patio roofs are sneaky: water often travels several feet along a panel or beam before it drips inside, so the wet spot on your ceiling or wall may be nowhere near the actual entry point.
Start from the inside. Find the stain, wet insulation, or drip point and use that as your starting zone. Then go up on the roof (when it's dry) and look uphill from that interior spot. In this guide, you will learn how to seal a patio roof by identifying the leak entry point, prepping the aluminum properly, and sealing the correct components like seams, flashing edges, and fasteners Then go up on the roof (when it's dry) and look uphill from that interior spot.. The most common failure points on aluminum patio roofs are:
- Panel overlap seams and side lap joints where two panels meet horizontally or vertically
- Flashing at the wall attachment point where the roof meets the house
- Around screws and fasteners, especially where the neoprene washers have aged or cracked
- End caps, trim pieces, and corner joints
- Gutter connections and drip edge transitions
- Any roof penetration like a light fixture, post, or electrical conduit
If you can't reproduce the leak visually, use a garden hose. Have someone inside watching while you run water slowly over each suspect area, starting low on the roof and working upward. Soak one zone for a couple of minutes before moving on. This methodical approach works far better than waiting for the next rainstorm, because different parts of the roof dry at different rates and a quick visual check after rain can mislead you. If the hose test can't reproduce the leak at all, you may be dealing with condensation or a structural gap rather than a simple sealant failure.
Picking the Right Sealing Products for Aluminum
Not every sealant sticks to aluminum, and not every sealant that sticks to aluminum belongs on a roof. You need something that handles thermal expansion (aluminum panels move a lot with temperature swings), stays flexible long-term, resists UV breakdown, and bonds properly to a painted or mill-finish aluminum surface. Here are the categories that actually work.
Butyl Tape
This is the go-to for sealing panel lap seams and overlaps on metal roofs. Butyl tape stays permanently flexible, accommodates the thermal movement that causes rigid sealants to crack and debond, and creates a compressed gasket when the panels are fastened together. It's not meant to be applied externally on top of a finished seam: it goes between panels during assembly or during a re-lap repair. Look for tapes rated for service from at least -30°F to 200°F. Note that most butyl flashing tapes are only rated for 120 to 180 days of UV exposure, so any tape left exposed to sunlight needs to be covered with a trim piece, lap, or paint-compatible covering.
MS Polymer (Hybrid) Sealant
MS polymer sealants (sometimes called silyl-modified polymer or hybrid sealants) are excellent for aluminum because they bond directly to the metal, stay flexible, and have strong UV and weather resistance. They're a better choice than standard silicone for painted aluminum because silicone can be hard to paint over and sometimes has adhesion issues with coated surfaces. Apply a minimum 6mm bond thickness for structural performance. Because aluminum panels often have factory coatings or anodizing, do a small test patch first and check the sealant manufacturer's compatibility guidance.
Paintable Polyurethane or High-Performance Acrylic Sealant
These work for non-moving joints like perimeter trim, gutter-to-fascia connections, and around fixed penetrations. Avoid standard acrylic latex on bare aluminum exposed to moisture: it often requires a primer to bond properly. If you're using a general-purpose acrylic, check the substrate compatibility chart and prime first if the manufacturer requires it.
Self-Adhered Flashing Membrane
For wall-to-roof flashing repairs and transitions, a self-adhered flexible flashing membrane (some are AAMA 711 compliant, like DOWSIL 711 or DuPont products) gives you a wide, watertight bridge between the aluminum roof and an adjacent wall. These adhere to metal without primer on most surfaces and can flex without cracking. Same UV-exposure caveat applies: cover them within 120 days.
| Product Type | Best Use | UV Exposure Limit | Notes |
|---|---|---|---|
| Butyl tape | Lap seams, fastener sealing under panels | 120–180 days exposed | Must be compressed between surfaces; not for external surface application |
| MS polymer sealant | Exposed joints, penetrations, trim edges | Excellent long-term | Test on coated aluminum first; min 6mm bond thickness |
| Self-adhered flashing membrane | Wall-to-roof flashing, wide transitions | 120 days exposed | Cover with flashing or trim for permanent installation |
| Polyurethane sealant | Perimeter trim, gutter joints, non-moving gaps | Good | Paintable; check primer requirements on coated aluminum |
| Acrylic sealant | Low-movement trim and cosmetic gaps only | Moderate | Requires primer on bare/coated aluminum in wet zones |
Prep Work: Clean, Dry, and Condition the Aluminum First
This is the step most DIYers skip or rush, and it's why their repair lasts one winter. Sealants bond to a clean, dry, contaminant-free surface. Aluminum forms a thin oxide layer naturally, and over time it also picks up chalk from paint breakdown, mildew, bird droppings, and grime. Every one of those things will prevent a proper sealant bond.
- Sweep or blow off loose debris first so you're not grinding grit into the surface during cleaning.
- Wash the area with a mild detergent and water, scrubbing with a stiff brush. Rinse thoroughly and let it dry completely. On a warm, sunny day that might mean 30 to 60 minutes; in cool or humid conditions, wait longer.
- Do a solvent wipe on the specific areas you're sealing. Isopropyl alcohol (IPA), mineral spirits, or naphtha all work. Wipe with a clean lint-free rag, using a clean section of the rag each pass. This removes oils, wax residues, and the loose oxide layer that would interfere with adhesion.
- If you see white, chalky oxidation or powdery buildup, scrub with a Scotch-Brite pad or fine abrasive pad before the solvent wipe. You don't need to strip the entire roof, just the bonding zone.
- Check for rust or corrosion at fastener holes or cut edges. Aluminum doesn't rust red, but it can pit and develop white corrosion. Wire-brush any active corrosion away and treat the area with a self-etching primer before sealing if the corrosion was more than surface-deep.
- Apply primer if your sealant product calls for it on aluminum. MS polymers are often primerless on clean aluminum, but acrylic-based products almost always need it in wet or submerged conditions. Follow the product's data sheet, not the label copy.
- Never apply sealant to a wet or even slightly damp surface. If you're not sure, wait another hour. A moisture issue at application is one of the biggest causes of early adhesive failure.
Step-by-Step Sealing by Roof Component
Work from the highest point on the roof downward, and seal in the order below. This way you don't contaminate areas you've already cleaned and sealed.
Wall Flashing and the House Attachment Point
This is the most common place an aluminum patio roof leaks. The ledger or attachment bracket meets the house wall, and water gets behind the flashing when the sealant at the top edge fails. Check whether there is actual step or continuous flashing installed here. If the flashing is just a bent piece of aluminum with old caulk, that caulk is your first target.
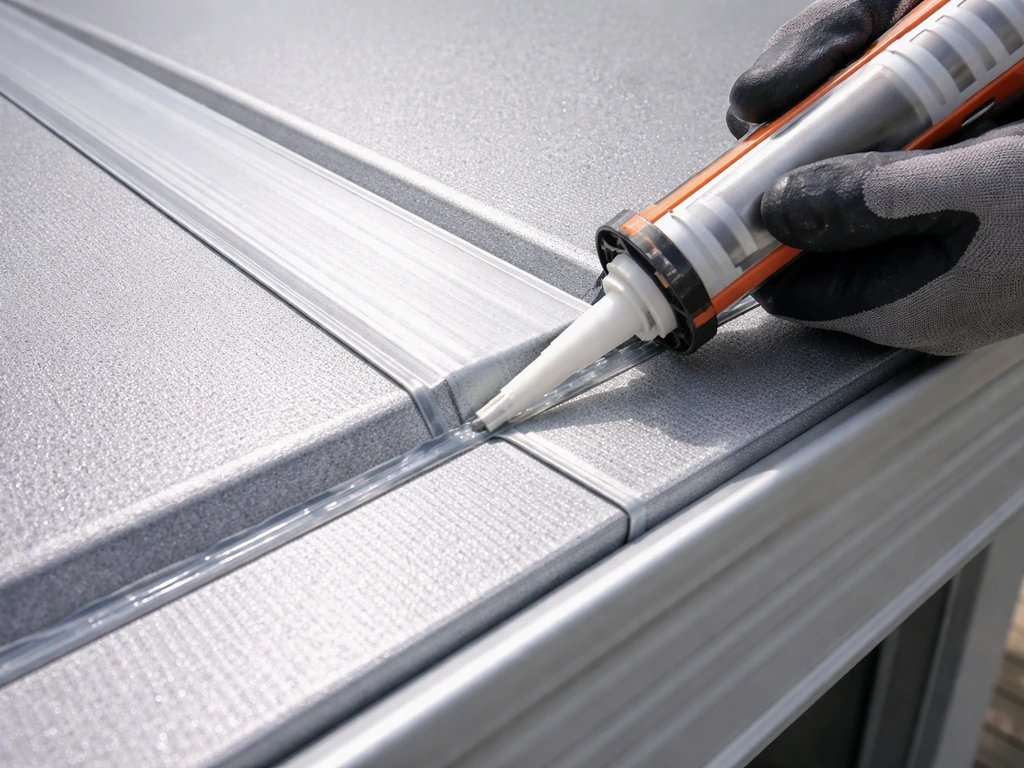
Remove all old sealant from the top edge of the flashing with a utility knife and a plastic scraper. Don't gouge the aluminum. Solvent-wipe the zone. If the gap between flashing and wall is small (under 1/4 inch), run a continuous bead of MS polymer sealant along the top edge of the flashing where it meets the wall, tooling it into a concave profile so water sheds away. For wider gaps or transitions over brick or stucco, use a self-adhered flashing membrane cut to width and pressed firmly into place, with the top edge driven under any overlapping siding or trim if possible. For self-adhered flashing membrane and steep-roof underlayment applications, ASTM D1970 is a contractor-facing standard that covers polymer modified bituminous sheet materials used for ice dam protection.
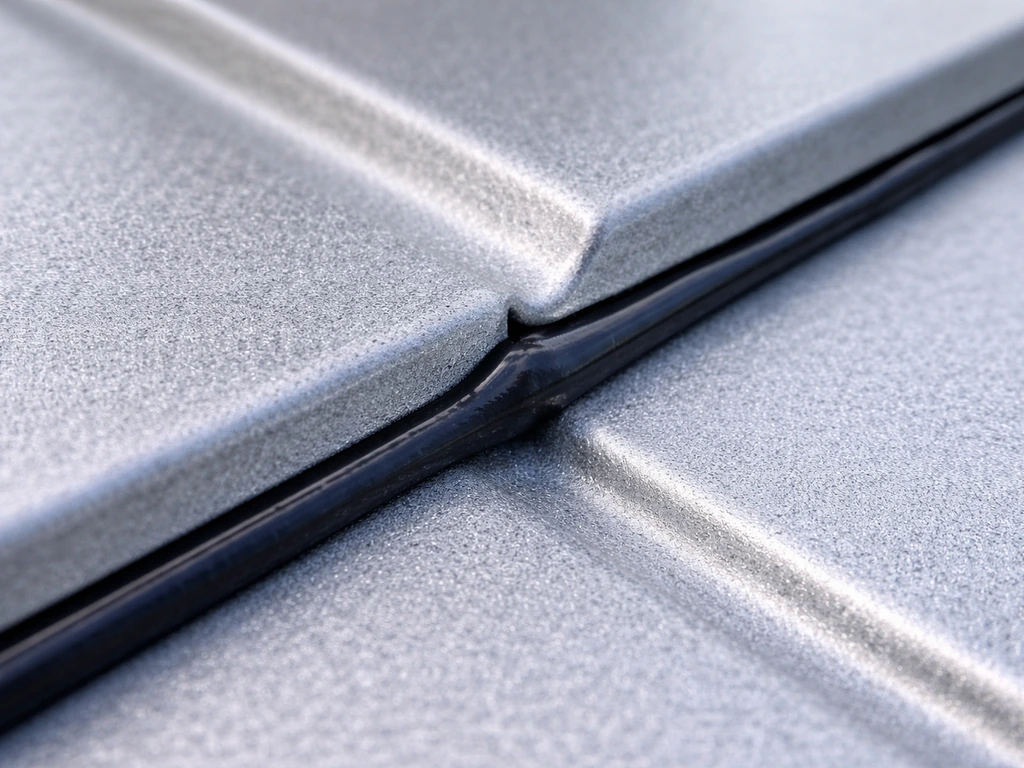
Panel Overlap Seams and Lap Joints
On aluminum panel roofs, panels overlap each other at side seams and end laps. The seal at these joints is supposed to be a continuous, compressed bead of butyl tape sandwiched between the panels. When that seal fails, you usually can't just run caulk on top of the overlap and call it good: the water gets under the overlap lip and follows the panel groove.
If the seam is still tight but visibly cracked or dried out at the edge, you can apply a compatible sealant to the outer edge as a secondary line of defense. But the correct repair for a failed internal lap seal is to carefully lift the upper panel slightly (if that's possible without damaging the structure), remove old tape, clean both mating surfaces, apply fresh butyl tape to the underside of the upper panel along the rib, and re-fasten. Place the tape on the uphill (dry/weather-protected) side of any fastener line so water doesn't wick past it. For low-slope roofs, this is especially important because water sits longer on the surface and any gap in the gasket seal will eventually draw water through capillary action.
Around Fasteners and Screws

Exposed-fastener aluminum roofs rely on neoprene or EPDM bonded washers under each screw head to create a watertight seal at every penetration. When those washers harden, crack, or compress unevenly, you get a leak at every fastener. Walk the roof and press on each screw head: if it spins freely or the washer looks cracked and flat, it needs attention.
The correct fix is to replace the fastener with a slightly larger diameter screw of the same type (stainless steel or coated to match the roof system) with a fresh washer. Do not over-tighten: you want the washer to compress just enough to seal without distorting the panel. After replacing, run a small dome of compatible sealant over each new fastener head as an additional barrier. Don't glob it on: a neat, small bead is enough. Common mistake: using roofing tar or fibered aluminum coating here. It looks sealed but cracks in two seasons.
End Caps, Trim Pieces, and Corner Joints
End caps at the open end of a patio cover and any trim-to-panel joints are often factory-assembled with foam or butyl gaskets. Over time those gaskets dry out. Remove the trim piece if you can, clean the mating surfaces, apply fresh butyl tape or MS polymer sealant, and re-install. If the trim piece can't be removed without damaging it, run a bead of sealant along the entire joint, tool it smooth, and make sure it's feathered so there are no edges for wind-driven rain to catch.
Roof Penetrations (Lights, Posts, Conduit)
Any hole cut through an aluminum panel is a potential leak. The sealant around a penetration needs to bond to both the aluminum panel and the penetrating material (plastic conduit, metal fixture housing, wood post). Make sure your chosen sealant is compatible with both materials. Apply sealant in a continuous collar around the penetration, sloped so water sheds away from the pipe or fixture. For larger penetrations, use a purpose-made pipe flashing boot cut to size, sealed with butyl tape under the flange and MS polymer at the outer edge.
Make Sure Water Has Somewhere to Go
Here's the thing a lot of people miss: sealing every joint perfectly won't help if the roof's drainage path is wrong. If you’re dealing with a leaking patio roof, start by confirming water can drain and that the drainage path directs runoff away from the failure areas. Water that can't drain will eventually find any tiny gap. Before you call the job done, check these drainage details.
- Slope: An aluminum patio roof should have at least a 1/4 inch of fall per foot of run. If the roof is flat or drains backward toward the house, no amount of sealant will fix it long-term. You may need to adjust the pitch of the supporting beams.
- Panel overlap direction: Panels should always overlap so the upper panel sheds onto the top of the lower panel, not underneath it. If you see a reverse-lap anywhere, that seam will always leak under wind-driven rain regardless of sealant.
- Drip edge: There should be a drip edge or gutter at the low end of the roof so water clears the fascia and rafters rather than running back underneath the panel edge.
- Gutter alignment: Check that gutters are pitched toward their downspout, are securely attached, and aren't holding standing water. A sagging gutter can back water up under the roof edge.
- Clear debris from all channels and ribs: A single leaf dam in an aluminum panel rib can redirect water sideways into a joint. Clean out ribs and channels while you're up there.
If your roof has been leaking repeatedly in the same spot despite previous sealing attempts, drainage is almost always the underlying cause. Think of sealant as the last line of defense, not the only line.
Safety, Structural Red Flags, and When to Call a Pro
Working Safely on the Roof
Aluminum patio roofs are not designed to be walked on unless the manufacturer specifies otherwise. Most residential aluminum patio panels will dent or crack under a person's weight. Use a proper extension ladder with standoff brackets so you can access the roof from the side without stepping on the panels. If you need to reach the center of a wide roof, use a crawl board or a sheet of plywood spread across the purlins to distribute your weight. Never work on a wet or frost-covered roof, and always wear non-slip footwear. For anything above single-story height, tie off to a secure anchor point or work with a partner.
Don't Void Your Warranty or Damage the Structure
Many aluminum patio cover systems come with a manufacturer's warranty that covers finish and structural components. Using incompatible sealants (especially silicone on factory-painted surfaces) or drilling new fastener holes in the wrong locations can void that coverage. Check your product documentation or contact the manufacturer before using a sealant type you're not sure about. When in doubt, MS polymer or butyl tape are the safest default choices for factory-coated aluminum.
When the Problem Is Structural, Not Just a Sealant Failure
Some leaks can't be fixed with a tube of sealant, and trying will just delay the inevitable. If you are wondering about the exact reason for the leak, you may also need to vent a patio roof before you can fully solve the problem do you need to vent a patio roof. Call a professional if you find any of these conditions:
- The roof has zero or negative slope and water is pooling in the middle of panels
- Flashing is missing entirely at the wall-to-roof junction (not just failed, but absent)
- Fasteners are pulling out of the support structure, indicating rot or a failed ledger connection
- Multiple panels are buckled, cracked, or severely dented, suggesting a structural load issue
- The roof was not professionally installed and the panel overlaps are reversed or inconsistent
- You can see daylight through the roof from underneath
These are structural problems, not maintenance ones. Sealing over a compromised structure creates a false sense of security and can cause further water damage to your home's framing or wall structure. If you're seeing signs like these, get a qualified contractor or building inspector to assess the roof before doing any sealant work. It's also worth reading up on the broader topic of repairing or stopping leaks on patio roofs if you're not yet sure whether your situation calls for a patch or a more involved fix.
Realistic Expectations for DIY Sealing
A competent DIYer can handle most aluminum patio roof sealing jobs in a half-day to full day, depending on the size of the roof and the number of failure points. If you need a practical guide for leaks, this is the core process for how to repair a patio roof without guesswork. If you want the full walkthrough on replacing worn or damaged patio roof components, start by assessing what sections have failed and whether you can swap panels, flashing, or the entire cover how to replace patio roof. Budget for a solvent (IPA or mineral spirits), a tube or two of MS polymer sealant, a roll of butyl tape, replacement fasteners with fresh washers, and possibly a self-adhered flashing membrane for wall transitions. Total material cost is typically under $80 to $120 for most residential patio covers. The job is genuinely beginner-friendly as long as you work methodically, respect the prep steps, and don't cut corners on surface cleaning.
FAQ
What should I do if I can’t reproduce the leak with a hose?
If the leak still does not show up during a slow garden-hose test, the most likely issue is not the sealant. Common causes are condensation from an unvented space, a structural gap in the panel system, or a drainage problem that only appears when water volume is higher. In that case, look for signs like recurring wet spots after misting, drip lines that match a different roof zone than the stain, or rust/corrosion around hidden fasteners before adding more sealant.
Can I seal my aluminum patio roof when it is humid or slightly damp?
Do not seal on damp aluminum, because moisture and residues block adhesion and can trap water behind the new bead. Plan repairs for a dry forecast, then after washing or solvent-wiping, wait until the metal surface feels fully dry and cool to the touch before applying MS polymer or setting butyl tape.
If a panel overlap seam looks cracked, can I just caulk over it?
Yes, but treat it like a re-lap repair rather than a quick patch. Lift the upper panel only as much as needed, remove degraded tape, clean both mating ribs thoroughly, then install fresh butyl tape on the weather-protected (uphill) side so the gasket seal prevents wicking past the fastener lines.
How tight should I make screws when sealing a leaking fastener?
For exposed fasteners, “tight enough to stop leaks” is not the same as “fully tightened.” Over-tightening can distort the panel and cause the washer to fail sooner, even if it looks sealed. Replace with the same screw type plus a fresh washer, then apply a small, neat dome of compatible sealant over the head to add a secondary barrier.
What’s the best way to seal the top edge of flashing where the roof meets the wall?
On wall-to-roof flashing transitions, you generally want a continuous top-edge strategy (sealant or a flexible membrane) rather than isolated dots. If the gap to the wall is small, a continuous MS polymer bead along the flashing top edge that tools to a concave profile helps shed water. If the gap is larger, a self-adhered flashing membrane provides better bridging than trying to fill with caulk alone.
How long can butyl flashing tape be left exposed to sunlight on an aluminum patio roof?
Do not rely on UV-exposed butyl tape left uncovered. Many butyl flashing tapes have limited UV rating windows, and direct sun can harden them or degrade the bond over time. Cover the tape with the proper trim/lap piece or paint-compatible covering during the repair so it stays protected.
Is MS polymer sealant strong enough for aluminum, and how thick should I apply it?
If you use MS polymer, apply it at the minimum bond thickness the manufacturer specifies (the article recommends at least 6 mm for structural performance). Also, ensure the area is cleaned and solvent-wiped, because oxidation alone is usually not enough. For coated or anodized aluminum, do a small adhesion test patch and verify the sealant’s compatibility before committing to a full application.
How do I choose sealant around pipes or fixtures that pass through the roof?
If you need to bond sealant to both the aluminum panel and a penetrating material, check compatibility for each substrate. A practical approach is to use the recommended collar or boot solution for pipes (butyl tape under the flange, MS polymer at the outer edge) and avoid generic sealants that bond to one material but debond from the other.
How can I tell if my leak is caused by drainage instead of a failed seal?
In most cases, you can tell you have a drainage-path issue when the same area leaks repeatedly after multiple seal attempts, especially along low-slope sections or where water would pool and then find a tiny gap. Before sealing again, inspect slope, gutters/downspouts, and whether water is allowed to flow under overlaps, then correct drainage rather than adding another layer of sealant.
When should I stop DIY sealing and call a contractor instead?
If you see movement, major sagging, widespread bubbling of coatings, or visible structural deterioration, stop and get an inspection. Sealing over a compromised system can trap water and accelerate rot or corrosion in hidden framing components. Only proceed with sealant work after you confirm the structure is sound.