Most leaking patio roofs can be fixed in an afternoon with a tube of sealant, a roll of butyl tape, and a close look at a handful of common trouble spots: screw penetrations, panel seams, the wall flashing joint, and anywhere the drainage is backing up. You rarely need to replace the whole roof. The key is pinpointing exactly where water is getting in before you reach for any product, because the right fix depends entirely on the right diagnosis. If you want the full start-to-finish repair flow, see how to repair a patio roof for a complete checklist.
How to Fix a Leaking Patio Roof: Aluminum Repair Guide

Celia Vaughn
29 Apr 2026
Start here: figure out exactly where the leak is coming from
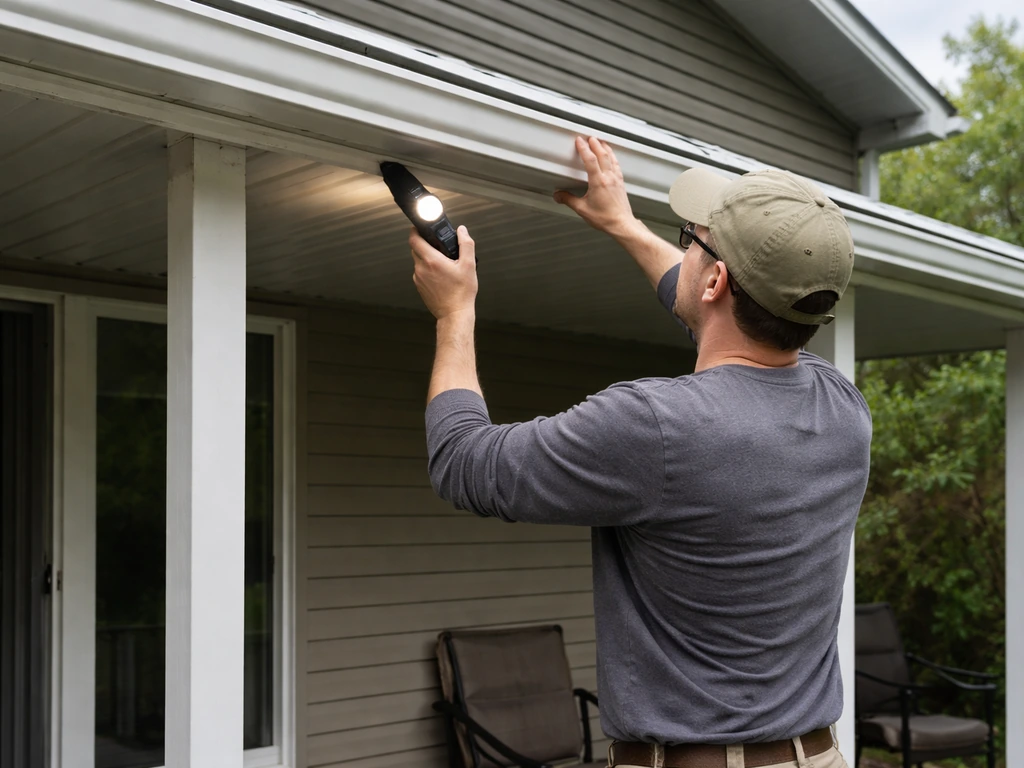
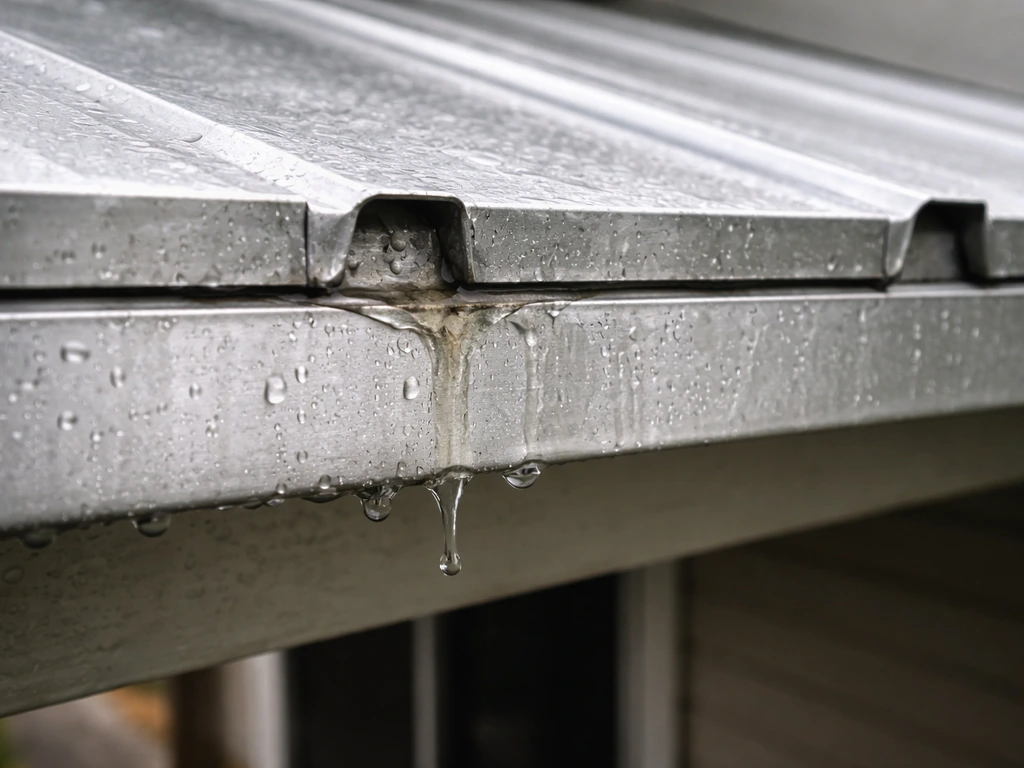
Before you touch a single tube of caulk, spend 10 minutes doing a proper inspection. Grab a flashlight and walk the perimeter of your patio roof from the outside. Look at the underside too, if you can see it. Water is deceptive, it almost never drips straight down from where it entered. It travels along panels, beams, and fasteners before it falls, which means the wet spot inside is often a foot or more away from the actual entry point.
Start by noting exactly where water drips or stains appear inside or on the underside of the roof. Then trace uphill and upslope from that spot on the exterior. Most of the time, the true source is somewhere between the drip point and the highest point of the roof, at a seam, a screw hole, a flashing edge, or a low spot where water pools.
If you can't reproduce the leak visually during dry weather, a hose test works well. Have someone run a garden hose at low pressure along the roof while you watch from underneath or at the drip point. Start at the lowest area near the drip and work your way up, section by section, in about 2-minute intervals. When the drip restarts, you're close. This method saves a lot of guesswork and is especially useful for leaks that only show up in heavy rain or wind-driven conditions, some leaks only open up under pressure or at a specific angle, so recreating that with the hose tells you a lot.
The main spots to check first
- Screw and fastener penetrations: look for rust staining, lifted rubber washers, or missing caps
- Panel seams and overlaps: check whether panels have shifted or whether sealant has cracked and pulled away
- The roof-to-wall flashing joint: the most common failure point on attached patio covers
- Gutter and drainage outlets: blocked or undersized drainage causes ponding, which eventually finds any weak point
- End caps and trim pieces: these often pop loose or were never sealed properly on installation
- Low spots or sags: standing water will eventually force its way through even a sound roof
Why aluminum patio roofs leak (the usual culprits)
Aluminum patio roofs are durable, but they have a specific set of failure modes that show up over time. Knowing what typically goes wrong makes the diagnosis faster.
Sealant failure is the number one cause. The lap sealant or caulk at panel seams, screw heads, and trim edges dries out, shrinks, and cracks over a few years, faster in climates with big temperature swings. Aluminum expands and contracts a lot with heat, and that constant movement tears dried-out sealant loose. What looked fine last spring can be gapping by fall.
Fastener problems are a close second. Screws that were overtightened crush the rubber washer underneath, which eventually leaks. Screws that weren't driven flush let water pool under the head. On older roofs, screws back out slightly from the same thermal expansion cycle, breaking the seal. If you see rust streaks running down from a screw line, that's your leak.
Panel movement and gaps happen when panels weren't secured with enough fasteners, when end laps weren't properly overlapped (standard minimum is about 6 inches), or when the roof structure has shifted slightly. Wind uplift can also pop panel edges up enough to let water in.
Flashing failures at the roof-to-wall connection are extremely common on attached patio covers. The original installation may have used inadequate flashing, or the flashing was sealed with paintable latex caulk (which won't last outdoors) instead of a proper exterior-rated sealant. Caulk at this joint needs to be replaced every few years on most installations.
Drainage and ponding issues cause leaks that aren't really a material failure at all, they're a pitch or blockage problem. If your roof doesn't have enough slope (the minimum recommended pitch for a solid patio roof panel is 1/8 inch per foot, though 1/4 inch per foot is better), water sits until it finds a way in. The U.S. EPA notes that controlling moisture is key to preventing mold growth water sits until it finds a way in.. Clogged outlets make this worse. Check this before you re-seal anything, because re-sealing a low spot is a temporary fix at best.
What you need before you start: tools, materials, and safety
Tools
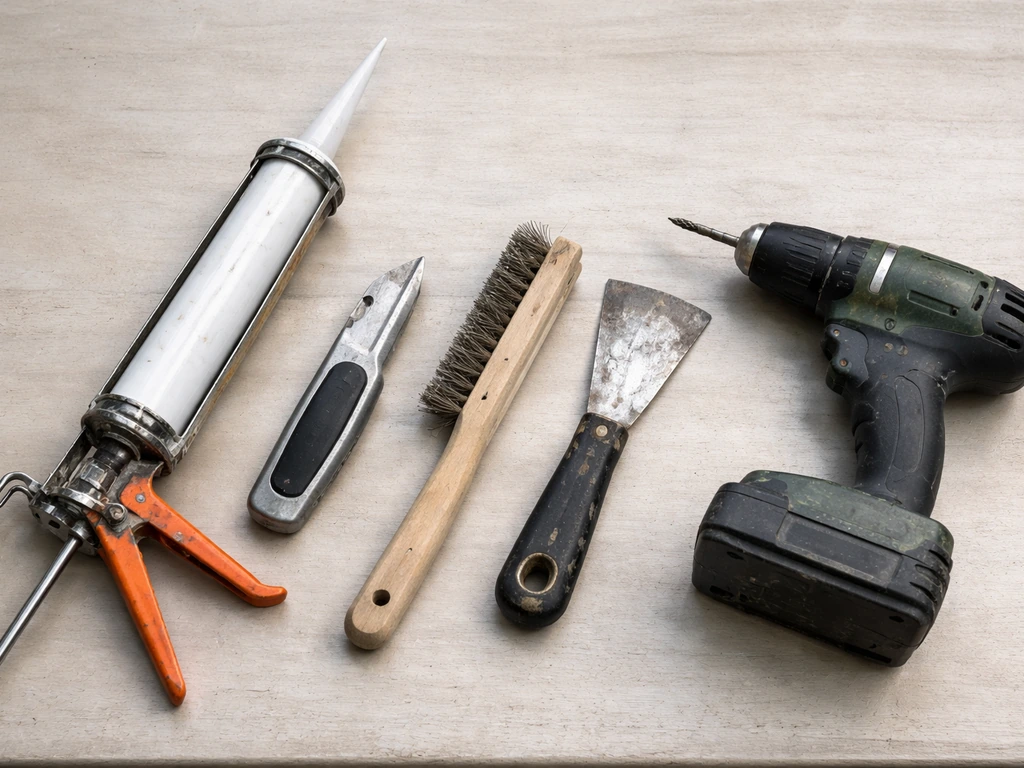
- Caulk gun (standard 10-oz cartridge size)
- Utility knife and wire brush for cleaning old sealant
- Putty knife or stiff-bristle brush for prep work
- Cordless drill with the correct bit for your roof screws (usually hex head, 1/4-inch)
- Garden hose for leak testing
- Flashlight or headlamp
- Tape measure
- Ladder rated for your weight plus tools — a 250 lb rated Type II or Type I ladder for most people
Materials
For aluminum patio roofs specifically, the sealant choice matters. Don't use paintable latex caulk, it will crack and fail within a season. Here's what actually works: Sika’s blank" rel="noopener noreferrer">Sikaflex®-1A product data sheet is available as a PDF and can be used to verify the correct product and specification language.
- Self-leveling polyurethane sealant (like Sikaflex 1a or NP1): excellent for horizontal seams and panel laps where it can flow into gaps; rated for metal-to-metal and metal-to-masonry contact
- Non-sag polyurethane or silicone-hybrid sealant: for vertical joints, wall flashings, and anywhere the sealant needs to stay in place on a sloped surface
- Butyl tape (1/8-inch to 1/4-inch wide): the best option for re-seating panel seams before screwing down, because it compresses and forms a permanent seal — EPDM butyl tape holds up well against UV and heat
- Aluminum-compatible flashing tape (like Vycor or 3M 8067): for sealing around fastener penetrations or small cracks in panel faces; make sure it says 'aluminum compatible' because standard flashing tapes sometimes react poorly with bare aluminum
- Replacement neoprene or EPDM screw washers: if you're re-driving screws, replace the washers — they're cheap (a bag of 100 costs under $10) and the old ones are probably crushed
- Touch-up paint matched to your aluminum panel color: optional, but keeps the repair looking clean and protects any bare metal you've exposed
Safety before you get on that roof
Patio roofs are typically low-slope and close to the ground, which makes people underestimate them. A wet aluminum panel is as slippery as ice. Only work on a dry day, never within 24 hours of rain. Wear rubber-soled shoes. Position your ladder on stable, level ground and secure it, use a ladder stabilizer (the V-shaped arm that keeps the ladder off the surface) if you're leaning against the roof edge. Don't walk directly on aluminum panels unless you know the framing underneath can handle it and you're distributing your weight on the structural members, not the panel spans. When in doubt, work from the ladder rather than on top of the roof.
Step-by-step: patching and sealing your patio roof
Step 1: Clean the repair area thoroughly
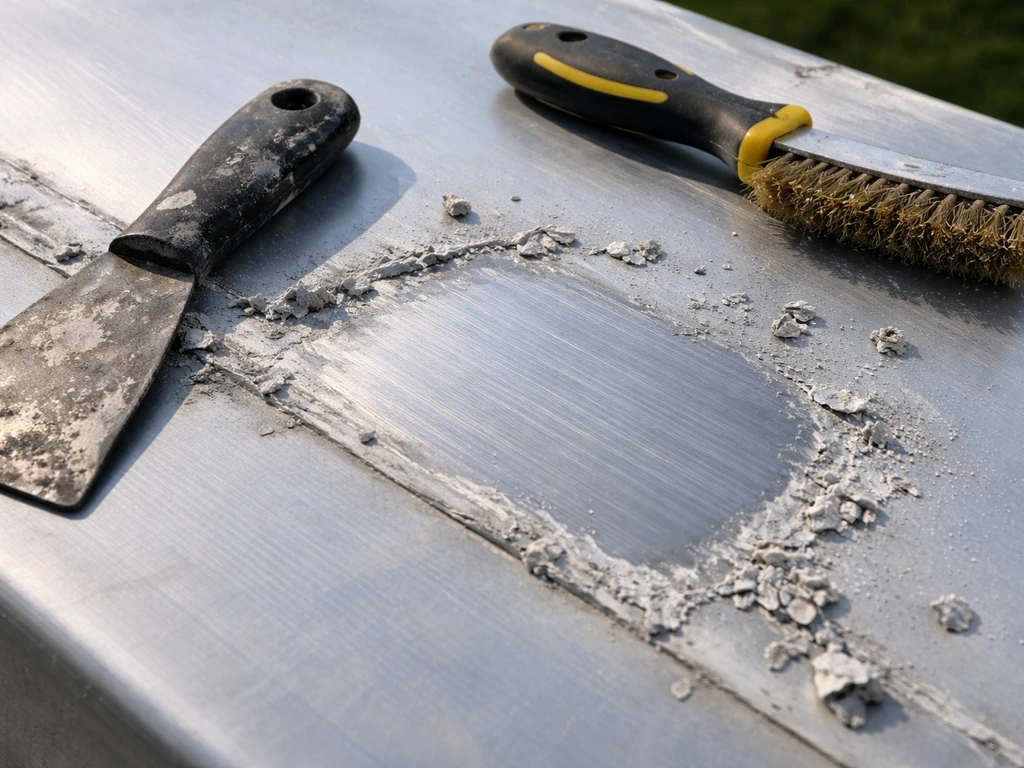
Nothing sticks well to dirt, algae, or old sealant. Use your wire brush and putty knife to remove every trace of the old caulk or sealant at the repair area. Then wipe the surface with isopropyl alcohol (70% or higher) on a rag. Let it dry completely before applying any new product, even 5 minutes of drying time makes a real difference in adhesion. This step is where most DIY repairs fail: people apply new sealant over old cracked caulk and wonder why it leaks again in 6 months.
Step 2: Fix screw penetrations
Back out any screws that look suspect, rust-stained, tilted, or with crushed washers. Replace the washer with a new neoprene or EPDM washer, then drive the screw back in at medium speed until it compresses the washer slightly (you'll feel resistance). Don't overtighten. The washer should deform just enough to seal around the shaft, not pancake out flat. If the existing hole is stripped and the screw just spins, move it to a new position about an inch away and seal the old hole with a dab of polyurethane sealant and a small piece of flashing tape over the top.
Step 3: Re-seal panel seams and laps
If panels have shifted and the seam gap is now visible, the right fix depends on how bad it is. A gap under 1/4 inch can be filled with self-leveling polyurethane sealant applied with a caulk gun, tool it flat with a wet finger or plastic spoon and let it cure for 24 to 48 hours before exposing it to water.
For a gap larger than 1/4 inch, or if panels have actually lifted at the overlap, you'll need to re-seat the panel. That means backing out the fasteners near the seam, sliding the panel back into proper overlap position (minimum 6 inches), pressing a strip of butyl tape between the lapped surfaces before you re-seat them, then re-fastening with new washers. This is the most labor-intensive repair but it's the most durable fix for a shifted panel.
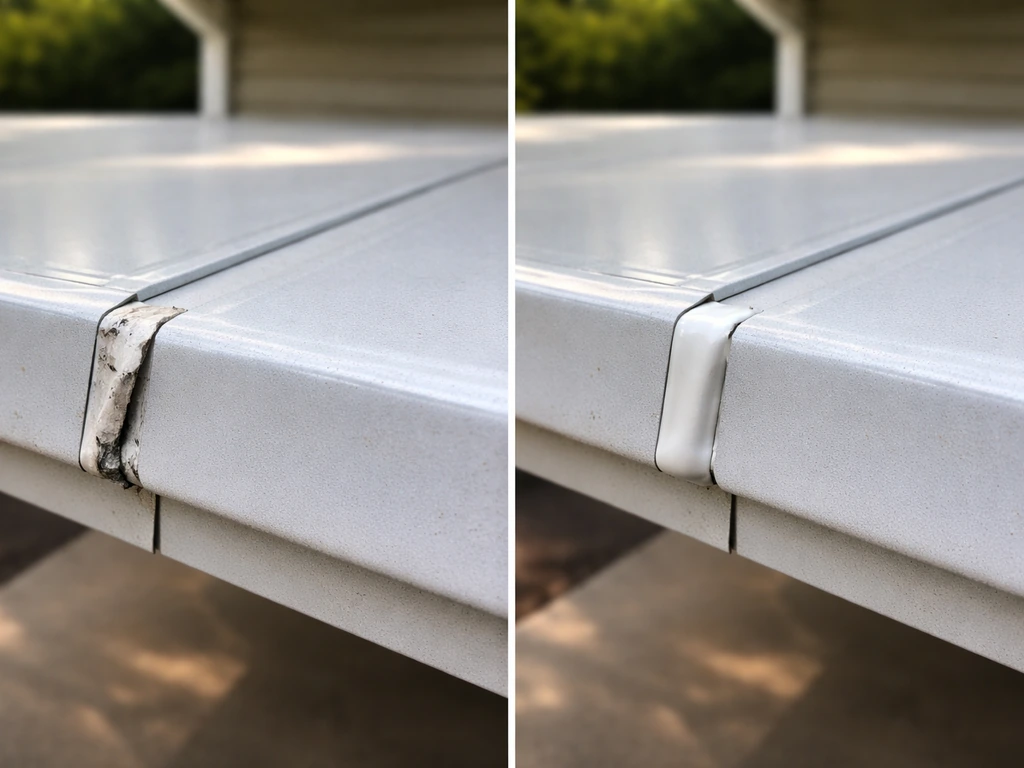
Step 4: Seal end caps and trim
End caps at the low (drainage) edge and fascia trim at the sides are often caulked with whatever the installer had on hand during the original build, which frequently means low-quality caulk that's long since failed. Remove the old caulk completely, clean the joint, and apply a bead of non-sag polyurethane or silicone-hybrid sealant along any gap between the trim piece and the panel. On end caps, also check that the drainage opening isn't plugged with debris. A backed-up end cap creates exactly the kind of ponding that forces water backward under panels.
Step 5: Address drainage and low spots
If your inspection revealed a low spot or inadequate pitch, sealant alone won't solve it. If you are dealing with runoff that is creating a wet, trapped area under the roof, you may also be wondering whether venting the patio roof is necessary do you need to vent a patio roof.
For minor low spots caused by a sagging panel, check whether the panel-supporting purlin or beam underneath has deflected, if it has, that may need a shim or a structural fix before the panel will drain properly. For a blocked outlet or gutter, clean it out completely and check that the downspout is clear.
If the whole roof pitch is too shallow, that's a bigger problem to address, and you may want to look at whether adding a secondary drainage path (like a scupper) is feasible.
Sealing the roof-to-wall flashing (this is where most leaks hide)
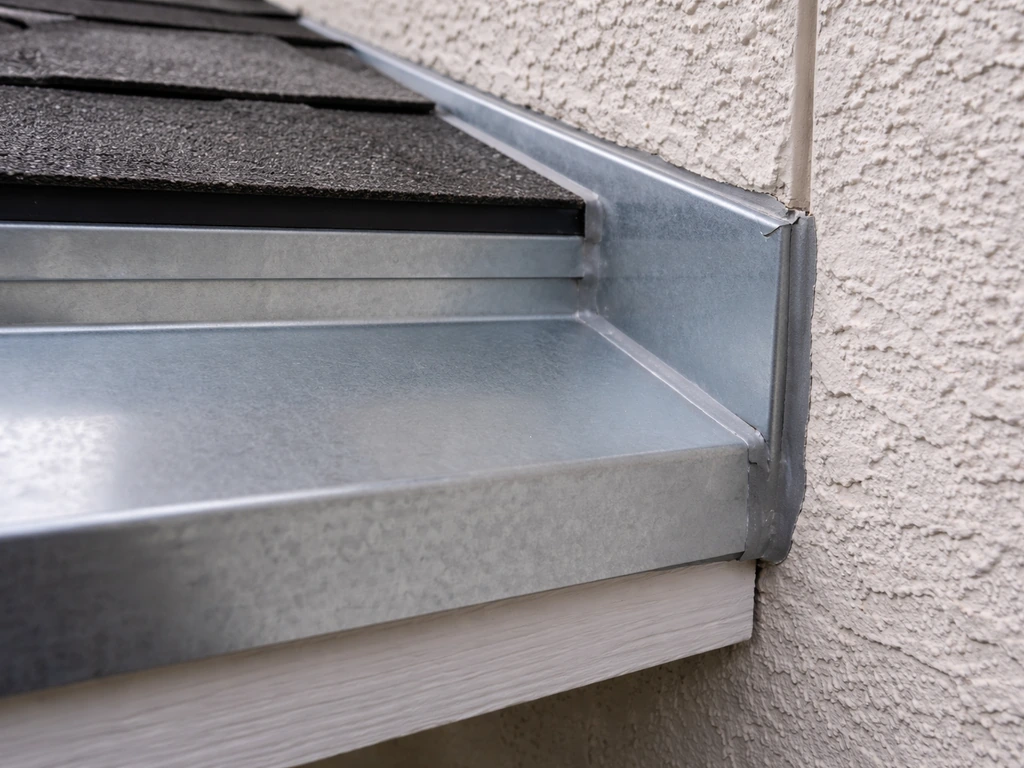
The joint where your patio roof meets the house wall is the highest-risk leak point on any attached patio cover. Water running down the wall hits this junction and, if the seal isn't right, follows it straight inside. This repair deserves its own focus.
First, check what's already there. Ideally you should see a piece of metal flashing tucked under the house siding or stucco, bent down over the top of the patio roof panel or ledger board, with a sealant bead along the top edge where it meets the wall.
If the flashing is there but the sealant has cracked, that's an easy fix: clean out the old caulk, wipe with alcohol, and apply a fresh bead of non-sag polyurethane or NP1 along the top edge where flashing meets wall. If you are wondering how to seal aluminum patio roof joints and edges that keep failing, focus on using an exterior-rated sealant and applying it to the right contact line sealant bead.
Tool it into the gap with your finger and let it cure.
If the flashing itself is missing, corroded, or was never installed, this is a more involved repair. You'll need to install a proper step flashing or continuous Z-flashing (a pre-bent aluminum piece available at any roofing supply or big-box store for a few dollars per linear foot). The flashing needs to slip behind the lowest course of siding or into a saw-cut slot in stucco, then extend over the top of the roof panel with at least a 3-inch overlap. Seal the top edge to the wall with polyurethane sealant and the underside to the roof panel with butyl tape. This is one of those repairs that takes about an hour but makes a dramatic difference.
Column-base flashings where posts or columns meet the roof panel are another common weak point. Check around the base of any vertical supports that penetrate through or meet the roof surface. Any gap there should be sealed with flashing tape first, followed by a collar of polyurethane sealant. If you've already done all the other repairs and the leak is still happening somewhere near a column or post, this is likely where it's getting in.
If you want to go deeper on sealing methods specific to aluminum patio roofs, that topic covers the right products and process in much more detail and is worth reading alongside this repair guide.
Repair vs. replace vs. call a pro, how to make the call
Most leaks on aluminum patio roofs are genuinely fixable with the steps above. This is exactly how to stop patio roof from leaking for most common failure points like seams, fasteners, flashing, and drainage. But some situations call for a bigger decision, and it's worth being honest with yourself about which category you're in.
| Situation | Best approach |
|---|---|
| 1-2 failed screw seals or a single cracked seam | DIY sealant repair — 1-2 hours, low cost |
| Failed wall flashing with missing or corroded flashing piece | DIY flashing replacement — half day, moderate skill |
| Multiple panels shifted or laps opened up across the roof | DIY re-seating if you're comfortable on a ladder, or hire a handyman |
| Sagging or deflected framing member causing a low spot | Structural repair needed — assess framing first, may need a pro |
| Corrosion or cracking on multiple panels | Section replacement or full roof replacement |
| Same leak recurring within one season despite multiple repairs | Professional inspection — there may be a structural or hidden drainage problem |
| Leaks at multiple unrelated points across the whole roof | Full replacement is probably more cost-effective than repeated patching |
Structural concerns are the clearest reason to call a professional. If you see a beam or purlin that's visibly bowing, if the roof feels soft or spongy underfoot (suggesting rot in any wood framing elements), or if there's widespread corrosion in the aluminum structure itself, the problem is beyond sealant and tape. A structural failure that's causing the leak will just keep causing it no matter how well you seal the surface.
Repeated leaks at the same spot after a good-faith repair effort usually mean there's hidden damage, a crack in a panel face that isn't obvious, a framing member that's shifted, or a flashing installation that was never done correctly in the first place. At that point, getting a second set of eyes from a roofer or a patio cover contractor is worth the cost of a service call. They'll often spot in 10 minutes what you've been chasing for weeks.
If your patio roof is more than 15 to 20 years old and you're dealing with leaks at multiple points, do a realistic cost comparison. Ongoing repairs on an aging roof can easily add up to half the cost of a new installation, with none of the reliability. If replacement starts making financial sense, it's also an opportunity to fix any pitch or drainage problems that were built into the original structure. There's a full guide to replacing a patio roof that walks through when and how to make that transition if you get to that point.
For everything in between, a repair you've made that seems solid but you want to ensure it lasts, the most important follow-up step is a hose test 48 hours after your sealant has fully cured. If you want a complete, start-to-finish approach, this guide on how to seal a patio roof covers the whole process from inspection to final tests. Run water over each repaired area for 2 minutes and confirm no drips. That simple check will tell you whether you're done or whether one spot needs another pass before the next rainstorm.
FAQ
How do I figure out the exact entry point if the stain is a foot away from the drip?
If you can see the leak inside, clean and dry the area, then run a low-pressure hose test only up to that suspected section (start at the lowest point, stop when the drip restarts). This prevents you from “chasing” water that traveled along seams or fasteners, and it also helps you avoid resealing the wrong contact line.
What’s the most common sealant mistake when fixing an aluminum patio roof leak?
Do not rely on standard roofing caulk in the first place, because aluminum movement and low-slope pooling break many generic products. Use an exterior-rated non-sag polyurethane (or a silicone-hybrid when compatible with your existing system) and tool it so it bridges the contact gap, not just the surface.
Can I test for leaks immediately after caulking or sealing?
Wait at least 48 hours after the sealant has fully cured before a thorough test, and keep water exposure limited during early curing. Even if it feels dry, trapped moisture under tape or old caulk can delay adhesion and cause a repeat leak at the same seam.
What should I do when I find rust streaks along a screw line?
If the screw is already painted over or the washer looks crushed, back it out and replace the washer with new neoprene or EPDM, then reinstall to light-to-medium compression (enough to seal, not pancake flat). Rust streaks running down a screw line are a strong sign you should treat that screw penetration as the source, not just reseal the surrounding seam.
Is sealing a seam gap enough, or do I need to re-seat panels?
A visible seam gap under 1/4 inch can often be stabilized with self-leveling polyurethane sealant, but larger gaps usually mean the panel overlap has moved. If panels lifted at the overlap, sealing alone won’t hold because water will keep finding the edge, so you need to re-seat and re-fastening with new tape between the lapped surfaces.
Why do some DIY patio roof repairs fail even when the sealant looks intact?
Avoid “patching” over dirt or algae. Remove all old sealant, scrub with a wire brush, then wipe with 70% or higher isopropyl alcohol and let it dry completely. Adhesion failures show up quickly on aluminum because the surface contaminants prevent chemical bonding.
What’s the best way to leak-test if the problem only shows up in heavy rain or wind?
If you can’t reproduce the leak during dry weather, use a hose test with low pressure and short runs (about 2 minutes per section) while watching from underneath. Leaks that only happen in wind or heavy rain often open at a specific angle, and the hose test will reproduce that pressure pattern better than a quick spill or bucket pour.
What should I check first if I suspect the roof is ponding water?
If the roof has insufficient pitch or a blocked outlet, resealing seams will be a temporary fix because the water pools until it finds another path. Clean the drainage outlet or scupper completely, verify slope (1/8 inch per foot minimum, 1/4 better), and check whether any underlying purlin or beam deflection is keeping a low spot wet.
When does a patio roof leak become a structural issue instead of a sealing problem?
If you see widespread corrosion, bowing members, spongy feel, or rot in any wood framing, stop and call a pro. A structural problem keeps moving and flexing the roof system, so repeated sealant applications become a cycle without solving the cause.
What should I do if my first repair seems solid but the leak returns?
Yes. Follow up after repairs with a hose test 48 hours after full cure, but also re-check within the first rain that matches the original leak conditions (heavy rain or wind). If multiple areas show new drips after a “good” first test, it usually points to missed flashing contact lines or ongoing drainage issues.
How do I know whether I need to re-seal the wall joint or install new flashing?
If the leak is at the house-wall joint, look for missing step flashing or continuous Z-flashing, a cracked top edge sealant line, or a flashing piece that did not slip behind siding or into a stucco slot. Replace failed sealant only when flashing is present and intact, otherwise install correct flashing and seal both the top edge to the wall and the underside to the roof panel.