
Building a patio cover step by step is genuinely doable for most homeowners with basic carpentry skills, a free weekend or two, and a willingness to pull the right permit. The core sequence is always the same: plan and measure, check your local code, pull a permit, set your posts or attach your ledger, install beams and rafters, add your roofing material, and flash and waterproof every joint where water could sneak in. The style you choose, attached lean-to, attached gable, or freestanding pergola, changes the details but not the sequence. This guide walks you through every stage, with material comparisons, cost estimates, and honest notes on what trips people up. For step-by-step build a patio cover instructions, see the detailed how-to companion covering layout, framing, and finishing techniques.
Step-by-Step Patio Cover Guide: Plan, Build & Install

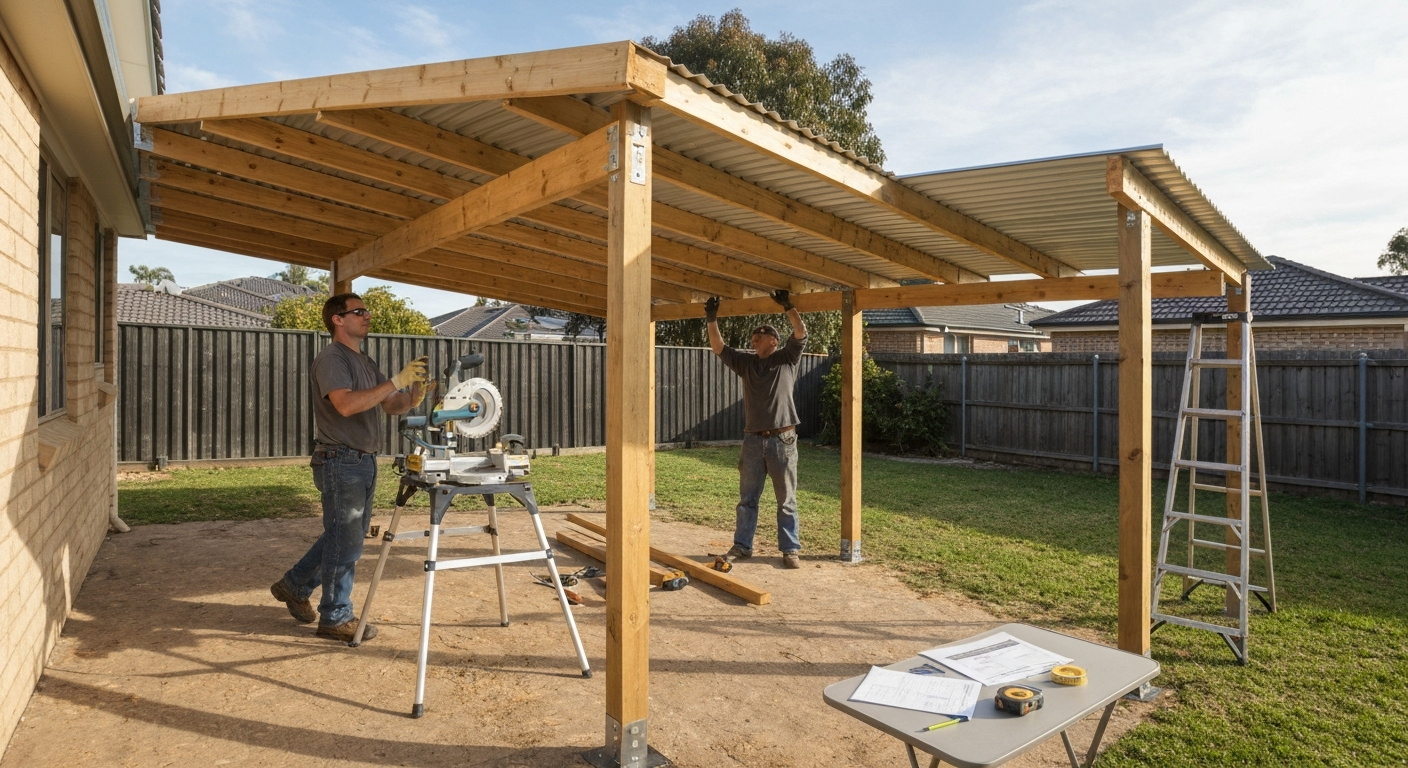
Quick Overview: Who This Guide Is For and What It Covers
This guide is written for DIY-minded homeowners who are comfortable using basic power tools, can follow a plan, and want to build their own patio cover without overpaying a contractor. You do not need to be a framing carpenter. You do need to be willing to read your local building department's handout, dig a footing, and work safely on a ladder. If you are brand new to framing, start with a simple attached lean-to, it is the most forgiving style and still produces a great-looking covered patio.
What this article covers: the full planning checklist, permit basics, site layout and drainage, a materials comparison (wood, aluminum, metal, corrugated roofing, stucco-finished), a complete tool list, and numbered step-by-step build sequences for three common styles. For a detailed, illustrated walkthrough of each build sequence, see how to build a patio cover step by step. It also covers corrugated roofing installation and stucco finishing in detail, ledger attachment and flashing, footing and post anchor requirements, basic structural checks, a cost estimate table, a maintenance schedule, and guidance on finding good how-to videos.
Planning Checklist: Permits, Load Basics, Site Layout, and Budgeting
Before you buy a single board, run through this checklist. Skipping items early is the number-one reason projects stall mid-build or get red-tagged by an inspector.
- Contact your local building department and ask specifically about attached patio cover permits — many jurisdictions publish a prescriptive standard plan packet you can pick up or download, which simplifies the whole process.
- Confirm your property setbacks (how close to a fence or property line your structure can sit) and maximum allowable height.
- Check for HOA rules if they apply — HOAs often have separate design approval requirements on top of city permits.
- Measure your patio area precisely: width, depth, and the height of the house wall where a ledger would attach.
- Identify your roof style: attached lean-to (simplest), attached gable (moderate difficulty), or freestanding pergola or solid roof (moderate to advanced).
- Sketch a basic site plan showing the structure footprint, distance from property lines, and where posts will land.
- Look up your local snow load and design wind speed using the ASCE Hazard Tool (search 'ASCE Hazard Tool by zip code') — you will need these numbers if you have to submit structural calculations.
- Determine your local frost line depth — your footings must extend below this depth to prevent frost heave. The building department can confirm the required depth for your area.
- Get at least two material quotes before finalizing your budget.
- Plan your drainage slope: patio cover roofs need a minimum pitch of about 1/4 inch per foot (roughly 1.2 degrees) to drain properly — more on this below.
Understanding Local Permits, Building Codes, and When Structural Calculations Are Required
Almost every jurisdiction in the U.S. requires a building permit for a patio cover. The specific rules are set at the city or county level, not nationally, but most jurisdictions have adopted the International Residential Code (IRC) as their base code. IRC Chapter 8 contains the prescriptive rafter and joist span tables (Table R802.4.1(1) is the key one for roof rafters) that let you size your lumber without hiring an engineer, as long as your project stays within the table's prescribed limits.
Many California cities, for example, publish an 'Attached Patio Cover' standard plan handout that you can download, fill out, and submit over the counter for same-day or next-day permit approval. The packet typically specifies required inspections: footing, post anchors, roof framing, and final. Other states have similar over-the-counter programs. Check your city's eTRAKiT portal or building department website first, you may find the packet online.
A structural engineer is generally required when: your roof span exceeds prescriptive table limits; you are in a high-wind or heavy-snow-load zone; your soil report indicates poor bearing capacity; or you are attaching to an engineered or unusual wall assembly. The ASCE Hazard Tool (asce7hazardtool.online or the ASCE website) lets you enter your zip code and get site-specific basic wind speed and ground snow load values referenced to ASCE 7-22 or ASCE 7-16, depending on which edition your jurisdiction has adopted. If your ground snow load exceeds roughly 20 psf or your basic wind speed exceeds 115 mph, talk to an engineer before sizing beams and rafters on your own.
- Most residential patio covers are designed for a live load of 10–20 psf (pounds per square foot) plus a dead load of 5–15 psf depending on roofing material weight.
- Wood framing sized from IRC Table R802.4.1(1) is acceptable for most standard residential patio covers within those load limits.
- If you use LVL, glulam, or steel beams, consult the specific manufacturer's span table — APA, Weyerhaeuser, and Boise Cascade all publish free downloadable span tables for engineered lumber.
- Soil bearing capacity matters for footing size. If you are unsure about your soil, the USDA NRCS Web Soil Survey gives free site-specific soil property reports — useful for initial planning even if your inspector will ultimately specify footing size.
- Frost depth varies widely: a few inches in coastal Southern California, up to 48–60 inches in Minnesota. Always confirm the required depth with your local building department before digging.
Site Layout, Measurements, and Key Dimensions to Get Right
Accurate layout saves you hours of re-work. Start by establishing your outside post locations using batter boards and string lines, then verify square using the 3-4-5 triangle method (measure 3 feet along one string, 4 feet along the perpendicular string, if the diagonal between those two points measures exactly 5 feet, your corner is square). For attached covers, the ledger position on the house controls your finished ceiling height, account for rafter depth and any desired slope when choosing ledger height.
Drainage slope is non-negotiable. A minimum slope of 1/4 inch per foot (about 2%) is the practical minimum to prevent standing water on solid-roof panels and corrugated metal. For corrugated roofing specifically, most manufacturers require a minimum 1:12 pitch (about 4.8 degrees or 1 inch drop per foot of run). Check your specific panel manufacturer's manual, some profiles allow lower slopes with special lap sealant, but that is the exception. Set your ledger height to achieve the required slope across the full depth of your roof.
- Measure and mark your post hole centers first, before digging, using stakes and spray paint.
- Double-check setback distances from all property lines and from the house foundation before finalizing post locations.
- For an attached cover, the ledger sits on the house wall — measure down from the desired finished ceiling height, accounting for rafter depth (typically 2x6 or 2x8) plus roofing thickness.
- Mark your slope: for a 10-foot-deep cover at 1/4 inch per foot, the outer beam sits 2.5 inches lower than the ledger.
- Check for underground utilities (call 811 in the U.S. before any digging) before locating post holes.
- Leave at least 6 inches of clearance between the bottom of wood posts and finished grade to prevent rot — use post base hardware instead of setting wood directly in concrete.
Budgeting Guide and Cost Estimate Table
Costs vary significantly by region, material choice, and whether you do all the labor yourself. The table below reflects mid-2025 material prices in the continental U.S. for a typical 12x16-foot (192 sq ft) attached lean-to cover using pressure-treated wood framing with corrugated metal roofing. Labor costs are shown for reference if you hire out any portion. Permit fees vary widely, budget $150 to $600 for most residential patio cover permits, though some jurisdictions charge more for plan review in high-seismic or high-wind zones.
| Item | DIY Cost (Materials Only) | If Hiring Out | Notes |
|---|---|---|---|
| Permit fee | $150–$600 | $150–$600 | Non-negotiable — always required |
| Concrete (footings, 3–4 holes) | $60–$120 | $60–$120 | Premix bags or ready-mix |
| Post anchors and hardware | $80–$150 | $80–$150 | Simpson Strong-Tie or equivalent |
| Pressure-treated lumber (posts, beams, rafters) | $400–$700 | $400–$700 | Prices vary by region and species |
| Corrugated metal roofing panels (192 sq ft) | $300–$500 | $300–$500 | Exposed-fastener panels are most affordable |
| Flashing, tape, closure strips, sealant | $80–$150 | $80–$150 | Do not skip — this is where leaks come from |
| Fasteners, post caps, joist hangers | $100–$200 | $100–$200 | Use hot-dip galvanized or ZMAX in treated lumber |
| Ledger bolts and lag screws | $30–$60 | $30–$60 | Per IRC R507 spacing requirements |
| Misc (paint, stain, drill bits, etc.) | $50–$100 | $50–$100 | Depends on finish choice |
| Labor (if hired) | $0 (DIY) | $1,500–$4,500 | Framing contractor day rates vary widely |
| TOTAL (DIY estimate) | $1,250–$2,580 | $2,750–$7,180 | 12x16 attached lean-to with metal roof |
Upgrading to a gable roof adds roughly $300 to $600 in lumber and hardware costs due to the ridge beam and additional framing. A stucco-finished patio cover adds $400 to $900 in materials (lath, scratch coat, finish coat, paint). A freestanding structure with a full solid roof runs $200 to $500 more than an attached version of the same size because you need additional posts and a doubled-up beam instead of a ledger. These are realistic DIY material-only ranges, your local lumber yard or big-box store quotes will tell you exactly where your project lands.
Materials Comparison: Choosing the Right Roofing and Framing System
The most common question I get is 'wood or aluminum?' The honest answer is: it depends on your budget, your climate, and how much you want to maintain it over the next 20 years. Here is a straight side-by-side comparison of the main options.
| Material | Typical Cost (DIY, 200 sq ft) | Lifespan | DIY Friendliness | Maintenance | Best For |
|---|---|---|---|---|---|
| Pressure-treated wood framing + corrugated metal roof | $1,200–$2,500 | 25–40 years (metal), 20–30 years (wood) | High — standard tools, widely understood | Stain/seal wood every 3–5 years; inspect fasteners annually | Budget-conscious DIYers in most climates |
| Aluminum patio cover kit (lattice or solid) | $1,800–$4,500 | 30–50 years | High — kit systems snap or bolt together | Very low — wipe clean, no painting | Low-maintenance preference, sun/heat climates |
| Wood framing + wood decking/sheathing (open or solid) | $1,500–$3,000 | 15–25 years | High — most familiar to DIYers | Moderate — paint or stain every 3–5 years, check for rot | Traditional look, custom shapes, paintable finishes |
| Steel/metal framing + metal roofing panels | $2,000–$4,000 | 40+ years | Moderate — requires metal cutting tools | Low — inspect sealant and fasteners every 2–3 years | High-wind or heavy-snow areas, industrial aesthetic |
| Corrugated polycarbonate or fiberglass panels | $800–$1,800 | 10–20 years | High — lightweight, easy to cut and fasten | Low — rinse panels; replace closure strips as needed | Light-diffusing covered areas, pool patios |
| Stucco-finished wood-framed cover | $2,500–$5,000 | 20–35 years | Moderate-low — requires stucco skills or learning curve | Low once cured — inspect for cracks every 2–3 years | Mediterranean/Spanish style homes, solid attached covers |
My recommendation for most first-time builders: pressure-treated wood framing with corrugated metal roofing. It uses standard lumber sizes that are easy to cut, connects with familiar fasteners, and the metal roof panels install in under a day once framing is done. Aluminum kit systems are a close second if you want the lowest long-term maintenance, many kit manufacturers provide pre-cut panels and illustrated assembly instructions that make the job even more approachable. Stucco-finished covers produce the most polished look but add real complexity; that process is broken out in its own section below.
Tools, Fasteners, and Hardware: What You Actually Need
Complete Tool List
- Circular saw (a miter saw is a major upgrade for accurate rafter cuts)
- Drill/driver (18V or higher cordless) and a separate impact driver for driving lag screws
- Post hole digger or rented power auger (a power auger pays for itself for 4+ holes)
- Level (4-foot and 2-foot minimum), plus a line level or laser level for setting beam heights
- Tape measure (25-foot minimum) and a speed square for checking rafter angles
- String line and batter boards for layout
- Hammer and nail gun (a framing nailer speeds up rafter installation significantly)
- Caulk gun for sealant and flashing tape
- Safety glasses, work gloves, hearing protection, and a hard hat for overhead work
- Ladder (extension ladder rated for your working height, with a standoff stabilizer for roof work)
- Tin snips or an angle grinder with a metal-cutting disc for trimming corrugated panels
- Chalk line for snapping alignment marks on panels
- Concrete mixing tools or a rented mixer for footings
Fasteners and Hardware: Do Not Cut Corners Here
Fastener selection is one of the areas where I see the most costly mistakes. Pressure-treated lumber (ACQ or CA treated) is highly corrosive to ordinary zinc-plated fasteners, they will rust through in 5 to 10 years in a wet climate. Use hot-dip galvanized fasteners per ASTM A153, or Simpson Strong-Tie ZMAX connectors, for any hardware in contact with treated lumber. For coastal environments (within about a mile of salt air), step up to Type 304 or 316 stainless steel hardware. Importantly, when you use stainless connectors, pair them with stainless fasteners, mixing metals accelerates corrosion.
| Connection Point | Recommended Fastener / Connector | Notes |
|---|---|---|
| Ledger to house band joist | 1/2" hot-dip galv. lag screws or through-bolts per IRC R507 spacing | Spacing depends on ledger depth and joist size — follow the IRC table exactly |
| Post base anchors to concrete footing | Simpson Strong-Tie ABU or ABA post base, ZMAX finish | Set anchor bolts in wet concrete before it cures; verify alignment before pour sets |
| Post-to-beam connection | Simpson BC post cap, ZMAX; two 16d HDG nails each side minimum | Use a post cap — notching posts weakens them significantly |
| Rafter-to-ledger or rafter-to-beam | Simpson LUS or H2.5A hurricane tie, ZMAX | Hurricane ties are required in many wind-exposure categories |
| Corrugated metal roofing panels to purlins | Neoprene-washered self-drilling screws (#12 or #14) | Follow manufacturer's specified pattern — do not reduce fastener count |
| Flashing at ledger / wall intersection | Self-adhered flashing tape (Grace Vycor or equivalent) + metal Z-flashing or drip cap | WRB must lap over flashing; never caulk-only at wall-to-roof joint |
| Treated lumber to treated lumber (general) | 16d or 10d hot-dip galvanized ring-shank nails, or structural screws rated for treated lumber | Check screw manufacturer's ICC ESR for treated-lumber compatibility |
Step-by-Step Build: Attached Lean-To Patio Cover
The attached lean-to is the most popular style for good reason: one side attaches to the house, which means fewer posts and simpler framing. Difficulty: beginner to intermediate. Time: 2 to 3 weekends for a 12x16-foot cover. You will need one helper for lifting beams and setting posts.
Parts List (12x16 Attached Lean-To, PT Wood + Metal Roof)
- 2x8 ledger board, 16 feet long (1 piece)
- 4x4 or 4x6 PT posts, 8–10 feet long (2–3 depending on layout)
- 2x8 or 2x10 outer beam, 16 feet long (doubled or single depending on span — verify with span table)
- 2x6 rafters, 12 feet long (7 pieces at 24" o.c., or 10 pieces at 16" o.c.)
- Corrugated metal panels or other roofing (approximately 210 sq ft to allow for overlaps)
- Post bases, post caps, joist hangers, hurricane ties (as detailed in hardware table above)
- Concrete (two to three 80-lb bags per hole, or order ready-mix for 3+ holes)
- Self-adhered flashing tape (at least 20 linear feet for ledger detail)
- Metal drip edge and Z-flashing for eave and wall termination
- Closure strips (foam or formed metal) for corrugated panel ends
Step-by-Step Instructions
- Pull your permit and confirm footing depth with your inspector before digging.
- Lay out post locations using batter boards and string lines. Verify square with the 3-4-5 method. Mark hole centers with spray paint.
- Call 811 (U.S. underground utility locator service) and wait for clearance before digging.
- Dig post holes to the required frost depth plus 6 inches for gravel drainage. Typical diameter is 10–12 inches for 4x4 posts, 12–16 inches for 6x6.
- Set post anchor hardware in wet concrete (do not set wood posts directly in concrete). Use a level to plumb each anchor before the concrete sets. Let cure 24–48 hours minimum.
- Cut posts to rough length and attach to anchors. Use a temporary brace to hold posts plumb while you work.
- Mark the ledger location on the house wall. Remove siding or stucco in that zone — do not install a ledger over siding. Attach ledger using 1/2-inch hot-dip galvanized lag screws into the band joist per IRC R507 spacing requirements. Typical spacing is two lags per rafter bay, staggered.
- Flash the ledger immediately after installation. Apply self-adhering flashing (Grace Vycor or equivalent) to the wall sheathing above the ledger, then fold it over the top of the ledger. Re-lap the house WRB (house wrap) over the top of the flashing — never tuck the WRB behind the ledger. Install a metal Z-cap or drip cap over the top of the flashing for extra protection.
- Set the outer beam on the post caps. For a 12-foot span using 2x8 lumber with a 10 psf live load, a doubled 2x8 is typically adequate — verify with the Southern Pine or IRC span table for your specific lumber species and grade. Level the beam and check it is parallel to the ledger.
- Cut and install rafters. Rafters get a bird's mouth cut at the outer beam and a plumb cut at the ledger. Spacing is typically 24 inches on center. Install joist hangers at the ledger and hurricane ties at the beam for every rafter.
- Install purlins (horizontal strapping perpendicular to rafters) if your corrugated metal panels require them — check the panel manufacturer's manual for required purlin spacing based on your roof slope and load zone.
- Install corrugated roofing panels starting from the low end (eave), working up toward the house. Overlap panels per manufacturer's spec (typically one full corrugation on sides, 6–12 inches on ends). Install foam closure strips at the eave and ridge ends before fastening panels. Use neoprene-washered screws in the pattern specified by the manufacturer — do not skip fasteners to save time.
- Install a drip edge at the eave (low end) and a wall flashing or Z-flashing where the top of the panels meets the house wall. Seal all penetrations and the top panel edge with compatible sealant.
- Schedule required inspections: typically framing rough-in and final. Do not close in any work before the inspector has seen it.
- Trim any exposed post bottoms, paint or stain wood as desired, and caulk any remaining gaps at the wall-to-roof transition.
Common mistake at this stage: people flash the ledger after installing roofing, which means pulling panels back off to do it right. Do the flashing immediately after the ledger goes up, before rafters are installed. Also, do not rely on caulk alone at the wall-to-roof joint, sealant cracks and shrinks over time. The self-adhered flashing plus metal counter-flashing detail is the reliable solution.
Step-by-Step Build: Attached Gable Patio Cover
An attached gable cover has two sloping roof planes meeting at a ridge, with a triangular gable end on the outer side. It looks more finished and sheds water to the sides rather than toward the house or yard. Difficulty: intermediate. Time: 3 to 4 weekends for a 12x16-foot cover. You will want two helpers for ridge beam work.
- Complete all planning, permitting, footing, and post work using the same steps 1 through 5 from the lean-to guide above.
- Set your outer posts and beam the same way. For a gable, you will typically have posts on both sides of the cover and a double or triple outer beam spanning between them.
- Determine ridge beam height. The ridge sits above the centerline of the span — at minimum 6 inches above the outer beam for a shallow pitch, higher for a steeper look. A 4:12 pitch (4 inches of rise for every 12 inches of run) is a common, visually pleasing choice.
- Set a temporary ridge support post at the center of the outer beam to hold the ridge beam in place while you work. For an attached gable, the ridge connects to the house wall (via a ridge hanger or ledger block) at the house end.
- Install the ridge board (typically a 2x8 for spans up to 12 feet). It connects to the house wall at the high end and rests on the temporary support (which will be removed and replaced by the gable frame) at the outer end.
- Cut and install common rafters in opposing pairs — work from the house outward. Each rafter gets a bird's mouth at the outer beam and a plumb cut at the ridge. Install hurricane ties at every rafter-to-beam connection.
- Frame the gable end: install a gable stud wall or ladder framing between the outer beam and the ridge board to close in the triangular gable. This is where you add any decorative gable trim.
- Install blocking between rafters at the outer beam to close the rafter bays and prevent birds and pests from nesting.
- Install roofing, flashing, and fascia using the same approach as the lean-to. On a gable, add rake trim (angled fascia) at the gable ends and step flash or counter-flash at the house wall where the ridge meets the house.
- Schedule inspections and complete finishing as with the lean-to.
What often goes wrong here: the ridge beam is set at the wrong height, producing unequal rafter lengths on opposing sides. Before committing, dry-fit one opposing rafter pair and measure both sides to confirm symmetry. It is much easier to adjust the ridge height before all the rafters are cut.
Step-by-Step Build: Freestanding Pergola or Solid-Roof Structure
A freestanding structure is not attached to the house at all, it stands on four or more posts with its own beams and roof. It is the right choice when you cannot (or do not want to) attach to the house, or when you want to place the cover away from the building. Difficulty: intermediate. Time: 3 to 4 weekends for a 12x16-foot structure with a solid roof. The major addition versus an attached cover is the need for a doubled perimeter beam on all sides and careful post spacing.
- Lay out all four corner posts (and any intermediate posts for spans over 10 feet) using batter boards and string lines. Verify square on all four corners using the 3-4-5 method — a freestanding structure has no house wall to reference, so layout accuracy is critical.
- Dig and set all post footings. For a 12x16 freestanding cover, plan for four corner footings minimum, plus one or two intermediate footings on each 16-foot side if your beam span requires it. Use the IRC span tables or your engineer's sizing.
- Set all post anchors in concrete and let cure fully (48 hours minimum for structural anchors).
- Install and plumb all posts. A freestanding structure's posts must all be the same height — measure down from a laser level line or string line to confirm all post tops are at the same elevation before cutting.
- Install the perimeter beam system. On a freestanding cover, beams typically run on all four sides, creating a box. Use post caps at every post-to-beam connection — do not notch posts.
- For a pergola-only structure (open shade, no solid roof), install decorative rafters or purlins on 16 to 24-inch spacing, allow them to cantilever a few inches past the beam for aesthetics, and you are done with framing. Seal all end grain.
- For a solid roof freestanding structure, install rafters spanning the shorter direction (typically the 12-foot direction). Set your slope by lowering one beam slightly on the drainage side, or build in slope at the rafter seat cut.
- Install roofing, flashing, and fascia as described in the lean-to section. A freestanding structure drains to both sides, so install drip edge on all four sides.
- Check all post plumb and beam level one final time before calling for inspection. Freestanding structures have no house to lean against — any out-of-plumb condition is permanent once the roof load is applied.
Building a Corrugated Patio Cover: Panel-Specific Details
Corrugated metal is one of my favorite roofing options for DIY patio covers, it is affordable, long-lasting, and installs fast once framing is complete. But it has specific requirements that differ from shingles or solid decking, and ignoring the manufacturer's manual is how you end up with leaks and panel blow-offs. Whether you are using a standard 2.67-inch corrugated profile or a deeper rib like a 5V-crimp panel, the principles are the same.
- Minimum slope: most corrugated metal panel manufacturers (McElroy Metal, Tri-County Metals, and similar) require a minimum 1:12 pitch (about 4.8 degrees or 1 inch of rise per foot of run). Some profiles allow 1/2:12 with additional lap sealant — check your specific product's manual before setting your slope.
- Panel overlaps: side laps must cover at least one full corrugation. End laps (where one panel overlaps the next panel going up the slope) require a minimum 6-inch overlap on slopes above 3:12, and 12 inches on shallower slopes. Apply continuous butyl or foam lap sealant at all end laps.
- Closure strips: install foam or formed metal closures at the eave end (low end) to seal the corrugation valleys against water, insects, and debris. Install ridge closures or foam-fill at the high end where panels terminate at the wall. Closures are not optional — they prevent a huge amount of future pest and moisture problems.
- Fasteners: use manufacturer-specified neoprene-washered self-drilling screws (#12 or #14 depending on panel profile and substrate thickness). Drive them through the panel rib peaks (not valleys) into purlins or structural members. Over-driving crushes the neoprene washer and creates a leak point; under-driving leaves a gap. Manufacturers like McElroy Metal and Tri-County Metals publish fastener patterns specifying exact spacing in the field and at panel edges — follow these exactly.
- Purlin spacing: your panel manufacturer specifies maximum purlin spacing for given load conditions. A 2.67-inch corrugated panel in a standard residential load zone typically requires purlins no more than 24 to 36 inches apart, but check the specific load table for your snow and wind zone.
- Wall termination flashing: where panels meet the house wall (at the top of an attached lean-to), install a formed metal headwall flashing that kicks water away from the wall. Seal the top edge with compatible sealant and integrate with the house WRB.
For more detailed corrugated panel installation specifics, including alternative panel profiles like twinwall polycarbonate, a companion guide covering corrugated patio cover builds in depth is worth bookmarking alongside this one.
Stucco-Finished Patio Covers: How to Do It Right
Stucco is the finishing system that turns a basic wood-framed patio cover into something that looks like it was always part of the house. For step-by-step instructions on how to build a stucco patio cover, see our detailed how-to guide on building stucco-finished patio covers. It is particularly popular in the Southwest, California, Florida, and on Spanish- or Mediterranean-style homes. The framing is essentially the same as a standard attached or freestanding cover, but the ceiling and soffit (and sometimes the beam faces) are covered with lath and stucco instead of wood or aluminum panels.
- Frame your cover structure as normal. For stucco, the framing must be rigid and well-fastened — stucco will crack if the substrate moves. Double up connections and use blocking between rafters wherever the stucco substrate will be attached.
- Install a water-resistive barrier (WRB, typically Grade D building paper or two layers of Grade D at stucco applications) over all wood framing surfaces that will receive stucco. This step is required by code in most jurisdictions and is critical for preventing moisture intrusion.
- Install self-furring expanded metal lath (2.5 lb/sq yd minimum for ceilings) over the WRB, fastened with galvanized screws or staples at 6 to 7 inches on center into framing. At ceiling applications, use self-furring lath or create a 1/4-inch furring gap so the scratch coat can key into the lath properly.
- Apply the scratch coat (first coat of stucco, typically 3/8 inch thick). Use a Portland cement-based pre-mix or job-site mixed stucco. Scratch horizontal grooves into the surface with a scarifier tool before it sets — these grooves give the brown coat something to grip.
- Let the scratch coat cure 2 to 3 days (keep it damp/misted in hot weather to prevent cracking). Then apply the brown coat (second coat, approximately 3/8 inch thick) and float it level. Let cure another 5 to 7 days.
- Apply the finish coat (typically 1/8 inch thick) in your chosen texture. Common textures include smooth (requires practice), sand float (easiest for beginners), and dash (applied by throwing or spraying). Match the texture of your house exterior if possible.
- Once cured (allow at least 28 days before painting), apply a breathable elastomeric paint in an exterior-grade finish. Do not use non-breathable coatings — stucco must be able to release moisture vapor.
- Inspect for cracks every 2 to 3 years. Small hairline cracks (under 1/16 inch) are cosmetic; fill with paintable acrylic caulk and repaint. Wider cracks may indicate substrate movement and warrant closer investigation.
The most common mistake with stucco patio covers is skipping or shorting the WRB layer to save time. Even a small gap in the moisture barrier behind the lath leads to rot in the framing underneath, sometimes within 3 to 5 years in a wet climate. Take the extra hour to lap and tape every seam in the building paper before the lath goes on.
Ledger Attachment and Flashing: The Details That Matter Most
The ledger connection is the single most failure-prone element in attached patio covers and decks. Structural failure at the ledger, where it pulls away from the house, has caused serious injuries. Flashing failure at the ledger is the most common cause of hidden rot in wall framing. Both problems are completely preventable with proper technique.
IRC Section R507 governs prescriptive ledger attachment to wood-framed houses. The critical rules: the ledger must attach to the band joist (the rim joist at the floor or ceiling level), not just to wall sheathing; fastener type and spacing are specified in R507 tables based on ledger depth and joist depth; and the ledger should never be installed over siding, stucco, or EIFS, the siding must be removed in the ledger zone to get solid wood-to-wood bearing.
For flashing, the correct sequence is: (1) Remove siding in the ledger zone. (2) Apply self-adhered flashing tape (Grace Vycor Deck Protector or equivalent) to the wall sheathing, starting below ledger height and extending up the wall. Manufacturer guidance such as Grace Vycor Self‑Adhered Flashings, Contractor’s Guide (Vycor Deck Protector/Vycor Plus) documents these ledger flashing and WRB integration best practices blank" rel="noopener noreferrer">Manufacturer guidance such as Grace Vycor Self‑Adhered Flashings — Contractor’s Guide (Vycor Deck Protector/Vycor Plus) documents these ledger flashing and WRB integration best practices.. (3) Install the ledger. (4) Fold the upper portion of the self-adhered flashing over the top of the ledger. (5) Re-lap the house WRB over the top of the flashing, not tucked behind it. (6) Install a metal Z-cap or drip edge over the ledger-to-wall junction as a final counter-flashing. EPDM and other flexible through‑wall flashings (see Project Manual, Typical EPDM thru‑wall flashing specifications (Carlisle/Firestone examples)) are accepted for ledger and wall‑to‑roof intersections where metal counterflashing is not used; follow manufacturer requirements for thickness, primer, and termination bar to satisfy warranty and code intent blank" rel="noopener noreferrer">Project Manual — Typical EPDM thru‑wall flashing specifications (Carlisle/Firestone examples). This layered system is redundant by design: if one layer fails, water hits the next layer and drains away.
Structural Checks and When to Call an Engineer
For most standard residential patio covers in moderate climate zones, the IRC prescriptive span tables handle sizing. Pull up Table R802.4.1(1) in the IRC (your local building department may have a simplified version in their handout), match your rafter species, grade, spacing, and span to the table, and read off the maximum allowed span. The Southern Forest Products Association also publishes free Southern Pine span tables with clearly organized live/dead load combinations, very practical for hands-on builders who want to double-check their lumber sizing.
You need a licensed structural engineer when any of these conditions apply: your rafter span exceeds the prescriptive table limits; your ground snow load (from the ASCE Hazard Tool) exceeds about 20 psf; your design wind speed (also from the ASCE tool) is in a high-hazard zone; you are using engineered lumber (LVL, glulam) and need beam sizing beyond what manufacturer tables cover; or the inspector or building department specifically requires engineered drawings. Paying for a few hours of engineer time ($300 to $800 typically) is far cheaper than rebuilding a collapsed structure.
Finding Good YouTube How-To Videos (and Spotting the Bad Ones)
YouTube is a genuinely useful resource for patio cover builds, especially for understanding rafter cuts, flashing installation, and panel fastening technique, things that are hard to convey in text. But the quality varies dramatically. Here is what to look for and what to skip. For step-by-step visuals, check a curated YouTube how to build a patio cover playlist that demonstrates rafter cuts, flashing, and panel fastening in real builds.
- Look for channels or videos where the builder shows the permit card on the job site — that is a good signal they are building to code, not just to 'good enough.'
- Prioritize videos that show the ledger flashing detail in full, not just the ledger installation. If a video glosses over flashing, the rest of the technique may be shortcut-heavy too.
- Check the upload date — anything more than 3 to 4 years old may reference older code editions or discontinued products, especially for metal roofing panels.
- Prefer longer, process-focused videos over short highlight reels. A real patio cover build takes time; a 5-minute video is almost certainly skipping critical steps.
- Comment sections are useful. If multiple commenters are asking the same question about a step the video skipped, that is a red flag.
- Be skeptical of any video that does not mention permits, structural connections, or moisture barriers. Those are not optional elements.
Using videos alongside a written guide like this one tends to work better than videos alone, you can use text to understand the why behind each step, then use video to see the how. When you find a good video series that covers the same style you are building, cross-reference the framing dimensions and fastener specs against the material in this guide to catch any gaps.
Maintenance Schedule: Keep Your Cover in Shape
A well-built patio cover should last 20 to 40-plus years with basic maintenance. The common causes of early failure are all preventable: flashing separation at the ledger, failed sealant at panel laps, untreated wood end grain absorbing water, and corrosion at fasteners. Here is a simple annual and periodic checklist.
| Task | Frequency | What to Look For |
|---|---|---|
| Inspect ledger flashing and wall-to-roof joint | Annually (fall) | Separation, cracking, or dark staining indicating moisture intrusion |
| Check all fasteners on metal roofing panels | Annually (fall) | Backed-out screws, failed neoprene washers, rust streaks below screw heads |
| Inspect panel lap sealant and foam closures | Every 2–3 years | Cracked, dried-out, or missing sealant; deteriorated foam closure strips |
| Re-stain or repaint exposed wood | Every 3–5 years (wood) | Fading, checking (surface cracking), or peeling paint |
| Check post base hardware and anchors | Every 2–3 years | Rust, gaps between post and base, any post movement |
| Inspect stucco for cracks (stucco covers) | Every 2–3 years | Hairline cracks (fill and paint), wider cracks (investigate substrate) |
| Clear debris from roof surface and gutters | 2x per year (spring/fall) | Leaves and debris retaining moisture against panels and flashing |
| Inspect aluminum kit systems for fastener looseness | Every 3–5 years | Panel rattle, visible gaps at seams, loose screws |
Knowing When to Call a Pro
Most of this guide is designed to help you do this yourself, and for a standard 12x16 attached lean-to or pergola in a moderate climate zone, the DIY path is genuinely realistic. But there are situations where hiring a contractor or at minimum a licensed inspector is the right call: you are attaching to a masonry or ICF wall (ledger attachment is significantly more complex); your local jurisdiction requires a licensed contractor to pull structural permits; your soil conditions are poor or your site is on a slope; you are in a high-wind or heavy-snow zone that requires engineering calculations; or your project involves electrical (fans, lighting, heaters) that require a licensed electrician regardless of what you build yourself.
The permit process itself is not something to avoid, inspectors are there to catch mistakes before they become expensive problems. A footing inspection, framing inspection, and final inspection are all opportunities to have a second set of experienced eyes on your work. I have learned something useful from almost every inspector I have worked with on a project.
FAQ
What building codes and standards must I research to ensure the patio cover guide is code‑accurate and safe?
Consult the adopted local building code (e.g., IRC edition enforced by jurisdiction) and relevant national standards: IRC Chapter 8 (roof/ceiling/ledger prescriptive provisions and span tables), ASCE 7 for wind and snow loading (use the edition required by the adopted code), and any state/local amendments. Verify required inspections and permit submittal requirements from the local municipal building department. Source types: code texts (ICC/IRC), ASCE standard and hazard tool, municipality permit handouts/standard plans, and local code amendment documents.
What site‑specific hazard and load data do I need to gather?
Collect site wind speed (basic wind speed and exposure category), ground snow load or rain‑on‑snow risk, and seismic design category if applicable. Use ASCE Hazard Tool (or jurisdiction design maps) for wind/snow; check local ordinances for exposure/seismic requirements. Source types: ASCE hazard maps, local code adoption documents, county climate/meteorological data, and local engineering guides.
Which structural tables and manufacturer resources should be consulted for member sizing and spans?
Use prescriptive span tables from IRC, Southern Pine, American Wood Council (AWC), and manufacturer technical bulletins for LVL/glulam/steel (APA, Weyerhaeuser, etc.). For conditions beyond prescriptive tables, consult design standards (NDS for timber, manufacturer data) and consider structural-engineered calculations. Source types: IRC tables, Southern Pine span tables, AWC/WoodWorks guidance, APA/manufacturer span/allowable‑load tables.
What local permit and plan‑submission research is required before publishing the guide?
Research typical municipal requirements: whether attached covers require plans or over‑the‑counter permits, standard plan templates, mandatory inspections (footing, anchor, framing, final), and plan‑check submittal checklists. Download example standard‑plan handouts from representative cities to include realistic permit checklists. Source types: city/county building department websites, permit portals (eTRAKiT), and PDF handouts of attached‑patio‑cover standard plans.
What soil and footing information must be researched to advise on foundations and frost considerations?
Obtain local/region soil bearing capacity, drainage, and shrink/swell potential via USDA NRCS Web Soil Survey and local geotechnical resources. Research local frost‑depth requirements and frost‑protected footing rules from the local code or state/county references. Source types: NRCS Web Soil Survey, local county frost‑depth tables, geotechnical reports, and building department footings/anchor guidance.
What ledger attachment and waterproofing details and sources are essential to prevent rot and failure?
Investigate IRC ledger provisions (R507 series), connector manufacturer technical notes (Simpson Strong‑Tie), and building‑science best practices for flashing and WRB integration. Consult self‑adhering flashing manufacturers (Grace Vycor, Carlisle) and EPDM/firestone product details for through‑wall flashing; obtain termination/primer/termination‑bar requirements. Source types: IRC, Simpson Strong‑Tie guides, Grace/Vycor product literature, EPDM manufacturer specs, and building‑science resources.