You can build a patio cover in a weekend to a few weekends depending on size and complexity. The basic sequence is: pick your style and materials, pull a permit, prep and lay out your site, set footings and posts (if freestanding) or attach a ledger board (if attached to the house), frame beams and rafters, install roofing panels or shade material, flash every water-entry point, and finish with weatherproofing.
How to Build a Patio Cover Step by Step DIY Guide

Celia Vaughn
7 May 2026
Each of those steps has details that can make or break the result, so here's the full practical walkthrough. Each of these steps is the basis of a step by step patio cover plan, so you can estimate time and materials before you start. If you need build a patio cover instructions end to end, use the checklist and sequence above to plan each stage before you start cutting and installing.
If you want to see the whole process start to finish, search YouTube for patio cover build walkthroughs that match your roof type and whether you’re attaching to the house full practical walkthrough.
Pick your patio cover style and materials
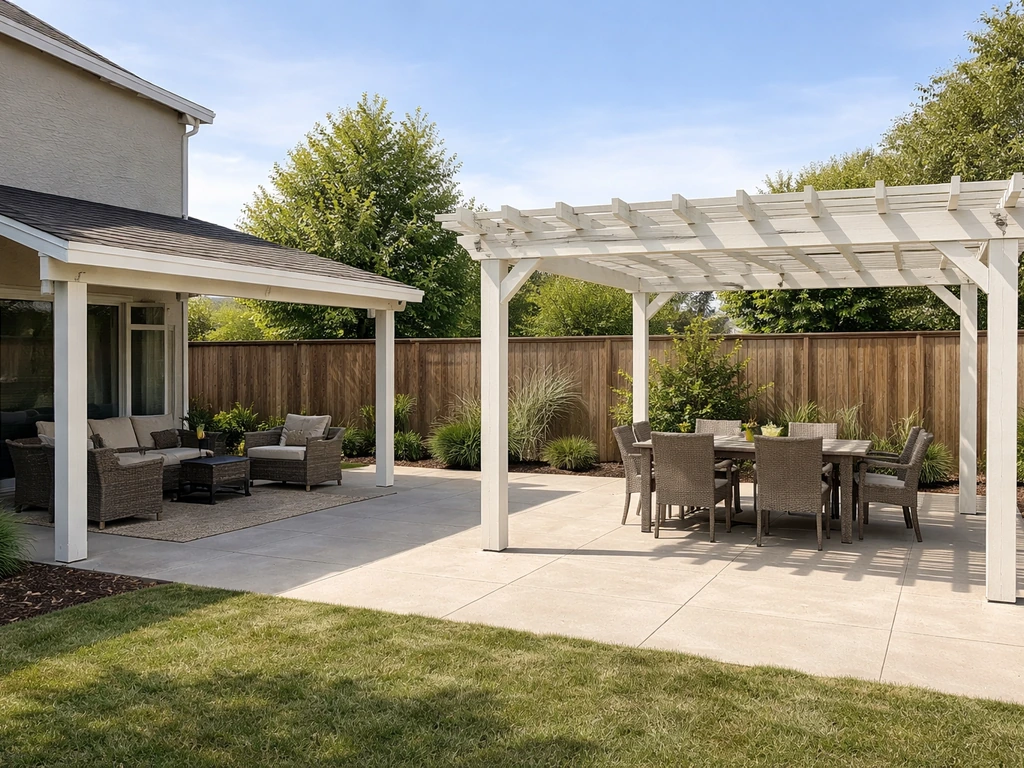
Your first real decision is whether the cover attaches to the house or stands on its own. An attached cover (a lean-to style) shares load with the house wall via a ledger board and typically needs fewer posts, which makes it feel integrated and is usually simpler to build. A freestanding cover needs four or more posts and its own footings on all sides, giving you placement flexibility but more digging. A hybrid uses the house on one side and posts on the other, which is the most common DIY setup. If you're just starting out, the attached lean-to is the easiest place to begin.
Next, decide on your roof type. A solid roof (whether wood sheathing with shingles, corrugated metal panels, or aluminum flat panels) gives you full weather protection. Louvered or adjustable systems let in light and air when open and block rain when closed. Open-lattice pergola styles give shade but no rain protection. For most homeowners who want a usable outdoor space year-round, a solid roof is the practical choice.
Now pick your framing material. This choice affects cost, maintenance, how long it lasts, and how complex the build gets.
| Material | Typical Lifespan | Maintenance | DIY Difficulty | Best For |
|---|---|---|---|---|
| Pressure-treated wood | 10–20 years | Seal/stain every 2–3 years | Easy to moderate | Budget builds, classic look |
| Cedar or redwood | 15–25 years | Annual sealing recommended | Easy to moderate | Aesthetics, natural look |
| Aluminum (kit or custom) | 30+ years | Very low, rinse occasionally | Moderate | Low maintenance, modern look |
| Steel/metal framing | 25+ years (galvanized) | Minimal, watch for rust at cuts | Moderate to hard | High-load or large spans |
Aluminum kits are worth serious consideration if you want something that handles rain and sun without recurring maintenance. Wood is cheaper upfront, easier to cut and adjust on-site, and looks great if you're willing to seal it regularly. Corrugated metal roofing panels (used over a wood or metal frame) hit a good middle ground on cost and durability and are popular for DIY builds. If you're aiming for a finished look beyond corrugated panels, see how to build a stucco patio cover for a stucco-focused approach that still depends on solid framing and correct flashing. If you want to go deeper on corrugated metal roofing specifically, that's a build style worth its own deep dive.
Tools, permits, and safety checklist
Pull your permit before you touch the ground. Almost every jurisdiction requires one for a roofed patio cover, and many require stamped engineering drawings showing that the structure is designed for local wind speed and snow load. IRC wind design criteria are provided through Table R301. 2(1) “Climatic and geographic design criteria,” including wind design speed used for the code’s design approach [wind speed and snow load](https://www.
crcog. net/vertical/Sites/%7B6AD7E2DC-ECE4-41CD-B8E1-BAC6A6336348%7D/uploads/Table301. 2%281%29. pdf).
Under the International Residential Code, patio covers must be designed for a minimum vertical live load of 10 psf plus dead load, and they must resist the wind loads from your local Table R301. 2(1) design criteria. Snow loads govern where applicable. Your local building department will tell you exactly what design wind speed and ground snow load applies to your address.
Don't skip this step. A cover built without a permit can create problems when you sell the house or file an insurance claim.
If the jurisdiction asks for engineering, hire a structural engineer for that piece. It's usually a few hundred dollars and saves you from an unsafe structure. If the project involves major modifications to the house's structural wall, that's also a case where a pro should be involved.
Here's what you need in the tool kit before you start framing:
- Measuring tape (25 ft minimum), speed square, and framing square
- Chalk line and pencil for layout marks
- Circular saw and miter saw for cutting framing lumber
- Power drill and impact driver with appropriate bit set
- Level (4 ft torpedo and a longer 6 ft level)
- Post hole digger or rented power auger for footings
- Concrete mixing tub or rented mixer
- Safety glasses, work gloves, and hearing protection
- Ladder rated for your working height (check the duty rating)
- Hammer, pry bar, and a stud finder if attaching to the house
- Caulk gun and exterior-grade sealant
- Metal snips if cutting flashing or corrugated panels
Safety points to keep in mind throughout the build: always have a helper when lifting beams into place, never work on a ladder alone when setting headers or ridge boards, and wear eye protection when cutting metal panels. Wear knee pads during concrete and footing work. When working near the roofline, use a properly secured ladder or scaffolding. Don't rush the concrete cure, typically 24–48 hours minimum before loading posts.
Measure, plan, and create a build layout
Measure your patio slab or ground area first. Confirm the existing patio surface is reasonably level. Note the exact dimensions and sketch a simple plan showing where posts will go, how far out the cover extends from the house, and the roof pitch direction (water needs to drain away from the house). A minimum roof slope of 1/4 inch per foot is the practical floor for drainage; steeper is better if you're using corrugated or flat panels.
For an attached cover, measure the wall height at the attachment point and decide on your finished header/ledger height. You want enough clearance to walk under comfortably (8 feet minimum finished height is typical) while still leaving the roof pitched enough to drain. Mark the ledger height on the house wall with a chalk line.
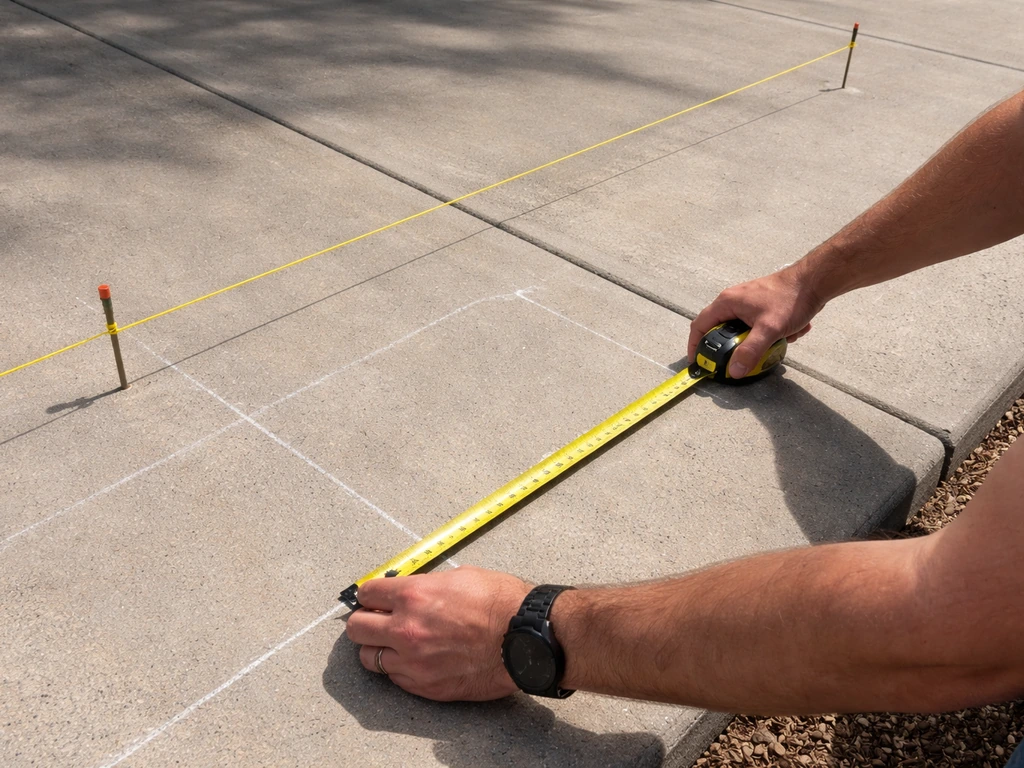
Lay out post locations on the ground using stakes and string lines. Use a framing square to confirm corners are 90 degrees. The reliable way to square a layout is the 3-4-5 triangle method: measure 3 feet along one string and 4 feet along the other, and the diagonal between those two points should be exactly 5 feet if the corner is square. Scale up (6-8-10 or 9-12-15) for larger layouts. Mark your footing centers with spray paint or stakes. Common rafter spacing is 16 inches on center for typical spans and loads, but verify against the lumber span tables for your specific lumber size and local design loads.
What often goes wrong here: people measure from the house wall without accounting for siding thickness or the ledger itself projecting out. Measure from the finished face of the ledger to the center of your outermost post so your beam seat lands in the right place.
Site prep and securing the structure (house and/or posts)
Setting post footings
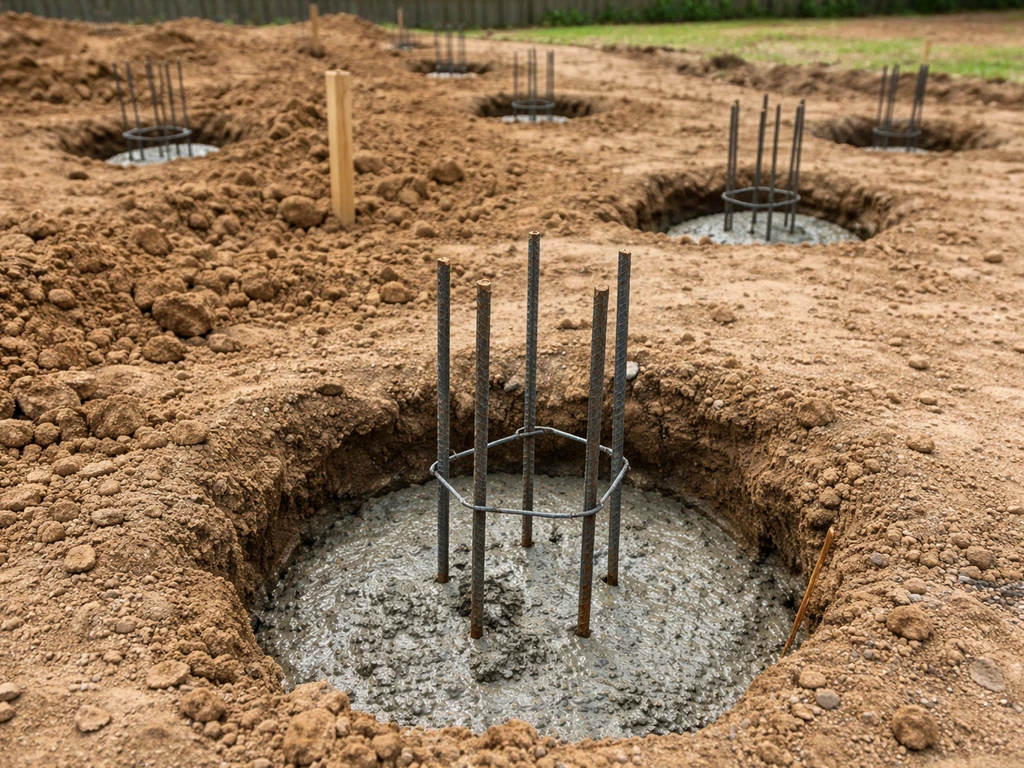
For freestanding or hybrid covers, dig footings at each post location. A common depth for residential patio covers is 18 inches minimum (check your local frost depth, which may require deeper footings in cold climates). If you're on expansive soil, your permit may require special footing design to handle soil movement. When in doubt, ask your building department or engineer.
Dig the hole, add a few inches of gravel at the bottom for drainage, set a tube form, mix and pour concrete (a bag-and-a-half to two bags per footing is typical for a standard post hole), and set a post base anchor while the concrete is wet. Use a level to confirm the anchor is plumb before the concrete sets. Let it cure at least 24 hours before setting posts.
Attaching the ledger to the house
This is the most critical connection in the whole build, and it's also where most DIYers make mistakes. The ledger must attach to structural framing in the house wall, specifically rim joists, floor joists, or wall studs, not to siding, stucco, or veneer alone. Use a stud finder to locate framing. Remove or cut back siding where the ledger will sit so you can get a direct structural connection through the sheathing into the framing. Use structural lag screws or through-bolts (not deck screws) in a pattern that matches code requirements, typically staggered pairs every 16 inches along the ledger length.
Flashing at the ledger is non-negotiable. Slide Z-flashing up under the siding above the ledger so water running down the wall is directed over the ledger and away from the house, not behind it. The ledger-to-house interface is the most common source of rot and structural failure in attached patio covers. Seal the top edge of the flashing with a bead of exterior caulk where it meets the siding. Do not caulk the bottom of the flashing, that edge needs to be open so any trapped water can escape.
Once the ledger is up, set your posts in the anchors. Plumb each post with a level on two adjacent faces and brace it temporarily with scrap lumber stakes driven into the ground. Keep the bracing on until the beam is fully installed and the frame is rigid. Common mistake: removing temporary bracing too early and ending up with a frame that's out of plumb when you go to nail off the rafters.
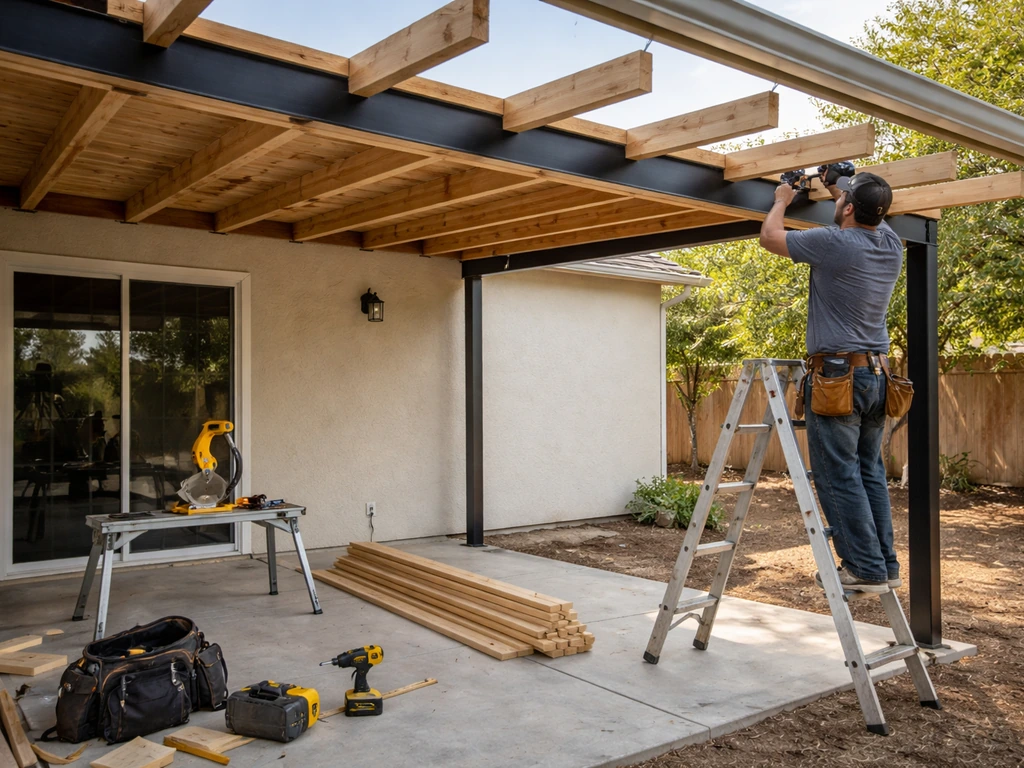
Build the frame: beams, joists, and rafters
With posts plumb and footings cured, set the beam on top of the posts. A beam for a typical DIY patio cover is often a doubled 2x8 or 2x10, but the right size depends on your span, spacing, and local load requirements. Consult a span table or your permit drawings. Secure the beam to the post tops with post caps (metal hardware connectors), not just toenails. Post caps are rated for uplift loads, which matters a lot in wind events.
Now cut and install your rafters. Rafters run from the ledger board (at the house) to the outer beam, spanning the depth of the cover. Cut a bird's mouth notch at the beam end if needed to seat the rafter flat on the beam, and use rafter hangers or hurricane ties at the ledger connection. Space rafters according to your plan, typically 16 inches on center. Use galvanized or stainless steel joist hangers and framing connectors throughout. Interior-grade fasteners rust quickly in outdoor exposure and will fail, so don't cut corners here. Every connector and every fastener should be rated for exterior use.
After setting all rafters, re-check the whole frame for square and level before moving on. Sight down the rafters from the end and confirm they're all in the same plane. If a rafter is twisted or bowed, address it now before you install roofing on top of it. Install blocking or fascia boards at the outer ends of the rafters to tie them together and give the roof edge a clean finish. For aluminum kit systems, follow the manufacturer's sequence because the channel extrusions often function as the fascia and rafter tie at the same time.
Install roofing/shade panels and flashing for water control
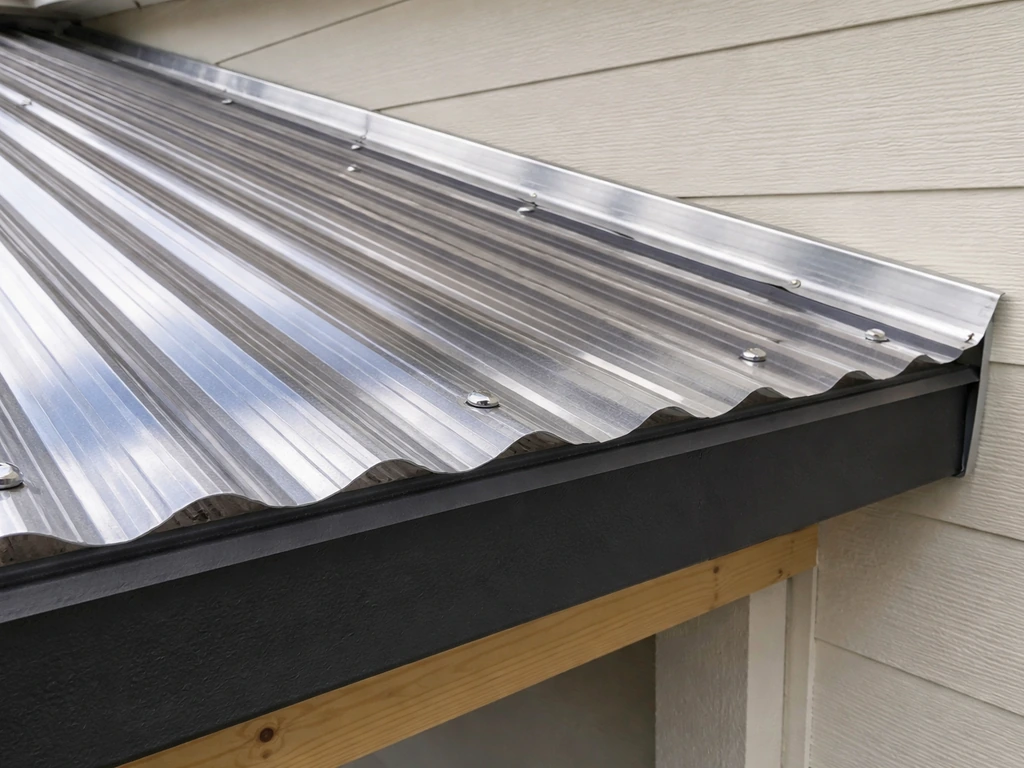
Start at the eave edge (the outer low end) and work up toward the house. For corrugated metal or polycarbonate panels, lay the first panel with the low edge overhanging the fascia by about an inch for drip clearance, and fasten with appropriate panel screws (self-drilling with rubber washers for metal panels).
If you are planning how to build a corrugated patio cover, focus on correct panel overlap and fastening so water runs off and seals stay intact corrugated metal or polycarbonate panels. Overlap successive panels by at least one full corrugation on the side laps, and follow the manufacturer's minimum end lap (typically 6 to 12 inches depending on roof slope). The steeper the pitch, the smaller the end lap you can get away with.
On low-slope roofs, use generous overlap and seal end laps with butyl tape before fastening.
At the wall end (where the roof meets the house), install a wall flashing that slips under the siding above and laps down over the roofing panels below. This is the L-flashing or step-flashing detail depending on your roof configuration. The goal is a continuous water-managed path: water hits the roof, flows to the panel lap, hits the flashing, and drains off the eave. No horizontal gaps or upturned edges that can catch water.
At the eave edge, install drip edge metal (an L-shaped metal strip that clips over the fascia) before the panels go on. Drip edge directs water off the fascia and protects the fascia board from wicking moisture. On the rakes (sides of the roof), use a rake trim flashing to cap the panel edge and prevent wind-driven rain from getting under the panels.
A common mistake at this stage: people install panels and forget to seal around any fasteners or penetrations in the roofing plane. Every fastener that goes through a metal panel needs its rubber washer seated flush, not overtightened (which crushes the washer and creates a leak path). Check each fastener by hand after driving.
If you're building a solid wood-framed roof with plywood sheathing and shingles, the process follows standard roofing sequence: sheathing, roofing felt or synthetic underlayment, drip edge, and then shingles from eave to ridge. The principle is the same: every layer sheds water onto the layer below it, never under it.
Weatherproofing, finishing, and DIY quality checks
With the roof on and flashing installed, do a full water test before calling it done. Run a garden hose along the wall flashing and watch where the water goes. Check inside the wall transition area after a few minutes. Any water showing up behind the ledger or dripping from the wrong place means a flashing gap you need to find and fix now, not after the next rainstorm.
For wood framing, apply a coat of exterior wood sealer or paint to all exposed cut ends and surfaces that weren't pre-treated. Pay special attention to any end-grain cuts on rafters or fascia boards. End grain soaks up moisture much faster than face grain and is where rot typically starts. If you used cedar or redwood, a penetrating oil sealer works well. For pressure-treated lumber, wait for the wood to dry out (usually 2 to 6 weeks) before applying a sealer or stain so it can penetrate properly.
Run a final quality checklist before scheduling your inspection:
- Confirm all posts are plumb and post bases are fully fastened with the correct bolts
- Confirm the ledger has been flashed top and sides and all lag screws are tight
- Confirm all rafter hangers and post caps are fully nailed with the correct number of nails per manufacturer spec (check the hanger label)
- Confirm rafters are evenly spaced and the roof plane is flat without obvious dips or high spots
- Confirm all panel fasteners are seated with washers flush, not over-driven
- Confirm drip edge and wall flashing lap in the correct direction (upper over lower)
- Confirm any electrical or lighting rough-in is inspected before closing up, if applicable
- Confirm temporary bracing has been removed and the structure is self-supporting
- Run the hose test and verify no water intrusion at the wall interface
- Take photos of ledger connection and footing details before covering for your permit file
Once the inspector signs off, add any finishing touches: fascia trim paint, post skirts, lighting fixtures, or ceiling fans if the framing was designed for the load. For aluminum kit systems, the finishing step often involves snapping on decorative trim caps that cover the structural extrusions. For wood builds, a final coat of exterior paint or stain ties everything together and starts the clock on your maintenance schedule.
Know when to call in help. If your permit requires engineered drawings and you don't have them, stop and hire an engineer. If the ledger attachment involves removing structural siding or modifying a load-bearing wall, get a contractor or structural engineer involved for that piece. If your roof framing spans more than about 12 to 14 feet without intermediate support and you haven't verified the lumber sizing against a span table or engineering, don't guess. The framing and flashing on a well-built patio cover should last 20 or more years. The time spent getting the details right at each stage is what separates a cover you'll be proud of from one that leaks or wobbles two winters later.
FAQ
Do I really need to hire an engineer, or can I just follow lumber span tables?
If your permit requires stamped engineering, you must comply, span tables alone are not a substitute. Even when engineering is optional, get an engineer involved when the cover will be wider or higher than typical, when you have heavy snow loads, or when you plan to attach to a house wall that was not designed for an added ledger load.
How do I know which parts of the house wall are structural for ledger attachment?
Use a stud finder to locate studs or rim joists, then confirm by drilling a small test hole and checking where solid framing is behind the sheathing. Avoid fastening to siding or veneer finishes, also avoid fastening to framing that is only blocking that might not be load-rated, the ledger needs connection to structural members.
What is the correct way to handle siding removal around the ledger?
Remove enough siding and trim so the ledger can sit flat against the sheathing and you can fasten into structural framing. Don’t just “wedge” the ledger behind loose siding, then flash over the mess, water can wick behind the siding and cause rot at the interface.
How much roof slope do I need, and what happens if my pitch is too low?
The practical minimum is about 1/4 inch per foot for drainage, flatter roofs increase the chance of standing water, faster panel wear, and leaks at end laps. If your site or ledger height forces low pitch, increase overlaps and consider adding additional drainage detailing, but the safest fix is correcting the frame geometry.
How do I prevent panel leaks at fasteners on corrugated metal or polycarbonate roofs?
Seat the rubber washer flush and stop before you crush it, overdriving fasteners collapses the washer and creates a leak path. Use screws of the exact specified diameter and length for your panel thickness, and keep fasteners aligned to avoid distorting corrugations.
What do I do if my layout is not perfectly square after I set post locations?
If you catch it before posts are set, re-mark the layout using the diagonal check (3-4-5 method or a measured equivalent). If posts are already in concrete, you may need to adjust by shaving beam ends or changing rafter layout, do not force rafters into twist, frame the roof true instead.
How long should I wait before setting posts after pouring footings?
Plan on at least 24 hours minimum before installing posts, and longer if temperatures are cool or the concrete is not fully set. Also confirm anchors are plumb before the concrete fully cures, if you discover misalignment later, straightening after cure can loosen the base instead of fixing it.
Can I build a patio cover on top of existing concrete that has cracks?
You can sometimes, but don’t assume the slab is structurally suitable for post loads. Evaluate cracks for movement, check for level and soundness, and confirm your local code requirements for post anchoring or new footings. In questionable conditions, install proper footings below and avoid relying on surface cracking.
What is the water test supposed to prove, and how long should I watch the results?
The water test should confirm that runoff routes correctly through roof laps and flashing, and that nothing appears at the wall transition behind the ledger. Check immediately and again after a short wait (several minutes), because trapped water can take time to find a pathway.
Should I caulk everything around flashing to be safe?
No. Seal the top edge where water pressure can drive into the wall system, but leave the bottom edge unsealed so any trapped water can drain out. Also avoid gap-filling inside the flashing overlap where it prevents the designed drain path.
How do I handle rain during construction before the roof is finished?
If you cannot install panels and flashings right away, cover exposed sheathing or connectors temporarily with waterproof tarps that shed water, and keep water from pooling. Avoid leaving long-term exposed holes or penetrations in the wall area near the ledger, even small openings can start rot quickly.
What finishing choices are safe, especially around loads like ceiling fans?
Only install lighting or fans if the framing plan accounts for the added point loads. If you want a ceiling fan, reinforce or add blocking where the fan mounts, and use hardware rated for outdoor exposure where appropriate, regular drywall anchors are not enough.