
You can build a solid, code-compliant patio cover yourself in a weekend or two if you plan well. The basic sequence is: pick your design and materials, pull the right permits, set your posts and ledger, frame the rafters, install roofing with proper slope and flashing, and lock everything down with the right hardware. The details in each of those steps are what separate a cover that lasts 20 years from one that leaks, sags, or gets flagged by an inspector. This guide walks you through all of them. If you want the full process from planning to final weatherproofing, follow this patio cover guide step by step how to build a patio cover step by step.
Build a Patio Cover Instructions: Step-by-Step DIY Guide

Celia Vaughn
8 Jul 2026
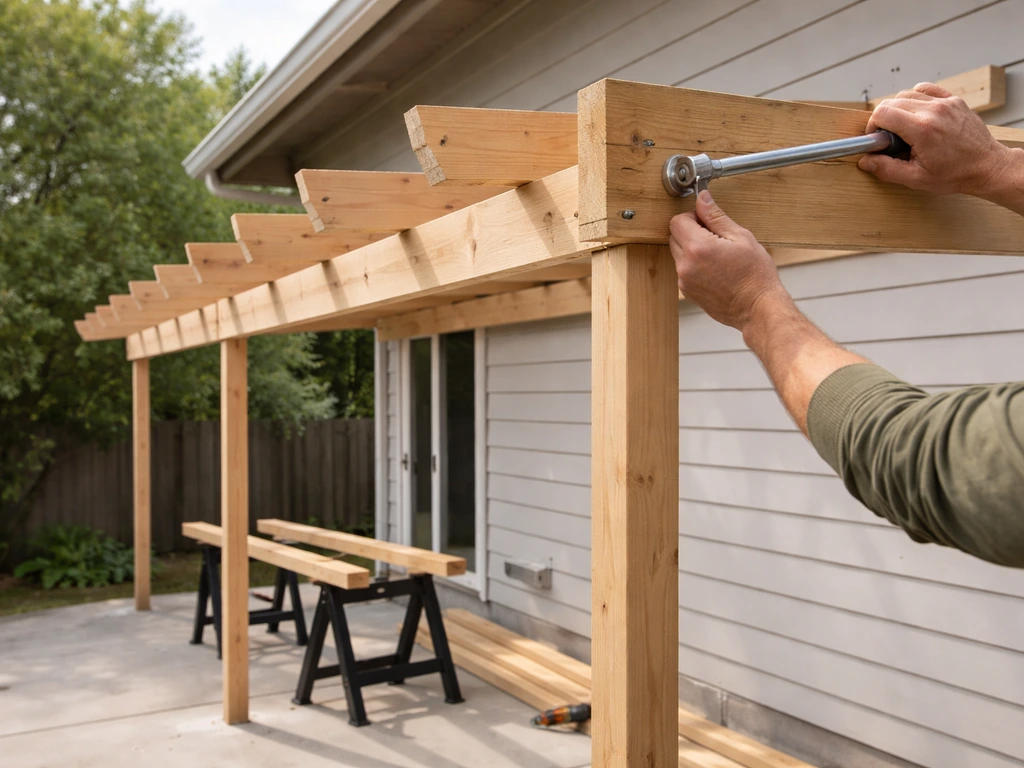
Choose the right patio cover design and materials
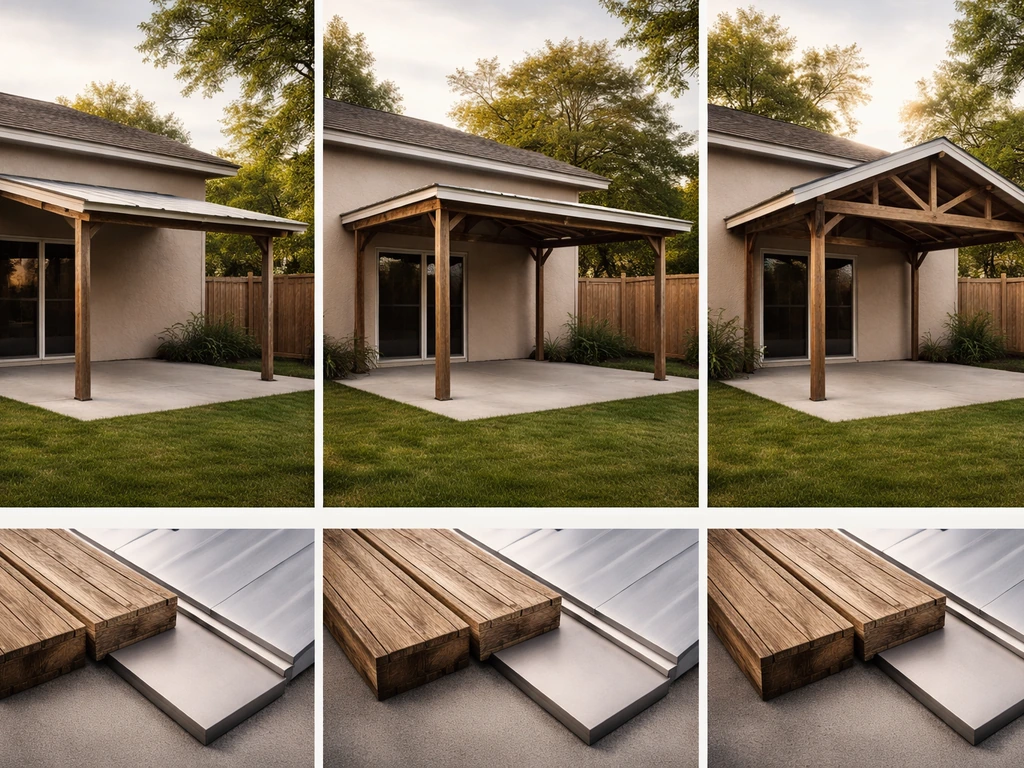
Before you buy a single board, get clear on which style fits your space, your budget, and your skill level. The three most common DIY-friendly designs are the attached lean-to (sometimes called a flat-roof or shed-roof cover), the attached gable, and the freestanding structure. Lean-tos are the easiest and cheapest to build because one side ties directly to your house and you only need to set two or four posts on the outer edge.
Gable roofs look more finished and handle rain better, but they require a ridge beam and a more complex rafter layout. Freestanding covers work when you can't attach to the house or want the structure away from the wall, but they need posts on all four corners and a more robust footing plan.
Material choice comes down to three main options: pressure-treated wood, aluminum, and steel. Pressure-treated lumber is the most DIY-friendly, widely available, and easy to cut and fasten with standard tools. For above-ground framing use lumber rated for above-ground exposure; for any post or beam that contacts soil or sits in a wet footing area, you need ground-contact rated lumber, typically marked UC4B.
HUD durability guidance is clear on this: using the wrong treatment category for the exposure level invites rot within a few years. Aluminum kits are lighter, rust-proof, and great for spans up to about 12 feet with minimal maintenance, but custom sizing and cutting requires different tools and the connections are more system-specific.
Steel (including corrugated metal roofing panels over a wood or steel frame) is extremely durable and can give a modern look, but it adds weight and usually requires some welding or specialized fasteners for the frame itself.
| Material | Best For | Typical Lifespan | DIY Difficulty | Relative Cost |
|---|---|---|---|---|
| Pressure-Treated Wood | Most attached covers, lean-tos, gables | 20-30+ years with maintenance | Beginner-friendly | Low to moderate |
| Aluminum | Low-maintenance covers, spans up to 12 ft | 40+ years | Moderate (kit-based) | Moderate to high |
| Steel / Metal Roofing | Modern aesthetics, durable roofing layer | 30-50 years | Moderate | Moderate |
| Cedar / Redwood | Decorative pergola-style, premium look | 15-25 years | Beginner-friendly | High |
For most first-time builders, a pressure-treated wood lean-to attached to the house is the right call. It's the fastest to build, the easiest to permit, and the most forgiving if you need to make adjustments mid-project. If you're leaning toward corrugated metal panels for the roof surface, that's a great choice for drainage and durability and can be laid over a standard wood frame.
Plan the project: permits, layout, measurements, and site assessment
Don't skip the permit step. A lot of homeowners assume a patio cover is always exempt, but that's almost never true for an attached, roofed structure. Requirements vary a lot by location: Fort Collins, Colorado, for example, requires a permit for any patio cover taller than 8 feet at any point. San Diego has its own bulletin (Information Bulletin 206) that spells out exactly when a permit is required.
Douglas County, Colorado, requires engineered plans if you're using trusses. Ceres, California, has engineered plan sets available for standard attached cover designs.
The safest move is to call your local building department before you start buying materials. Ask specifically whether your proposed size, height, and attachment method require a permit, and what submittal documents they need. Most jurisdictions want a scaled site plan showing distances to property lines and the house, a construction drawing with post/beam/rafter sizes, and footing/pier details.
Once you know your permit requirements, do a thorough site assessment. Walk the perimeter and check for: underground utilities (call 811 before any digging), overhead wires, existing drainage patterns, and the condition of the house wall where the ledger will attach. If your house was built before 1980, test for asbestos before drilling or sawing into any siding or roofing material. The EPA is explicit that you should not drill, sand, scrape, or saw materials suspected of containing asbestos. Use a licensed inspector or certified testing service if you're unsure.
For layout, measure the width of your patio and how far out you want the cover to extend. Standard covers run 10 to 20 feet wide and 8 to 14 feet deep, but your site may dictate otherwise. Mark the post locations with stakes and string, then square the layout using the 3-4-5 triangle method: measure 3 feet along one string, 4 feet along the perpendicular string, and the diagonal should be exactly 5 feet if your corner is square.
Double-check your measurements before digging any footings. The patio cover code minimum for vertical live load is 10 psf (pounds per square foot), which sounds low but gets more demanding in snow country where snow loads govern. If you're in an area with significant snowfall, your beam and rafter sizing needs to reflect that load, not just the minimum.
Tools and materials you'll need

- Circular saw and miter saw (or a miter saw alone for most cuts)
- Drill/driver with a long bit set and impact driver
- Post hole digger or rented power auger
- Level (4-foot and torpedo), speed square, tape measure
- String line and stakes for layout
- Ladder rated for your working height (6-foot minimum, 8-foot recommended)
- Hammer, nail gun if available
- Safety glasses, hearing protection, work gloves
- Post bases, joist hangers, rafter ties, hurricane ties (Simpson Strong-Tie or equivalent)
- Lag screws (1/2-inch diameter for ledger), structural screws, and through-bolts for masonry
- Concrete mix for footings
- Pressure-treated lumber in your chosen sizes (2x6 or 2x8 rafters, 4x4 or 6x6 posts, doubled 2x10 or LVL beams for longer spans)
Prep and install the structural frame (posts, beams, ledger, rafters)
This is the heart of the build, and getting the sequence right matters. Work in this order: ledger first (if attached), then footings and posts, then beam, then rafters. Following a step by step patio cover sequence helps you avoid layout mistakes and keeps each structural part aligned before you move on. Don't try to set posts and install the ledger simultaneously with one person.
Ledger installation
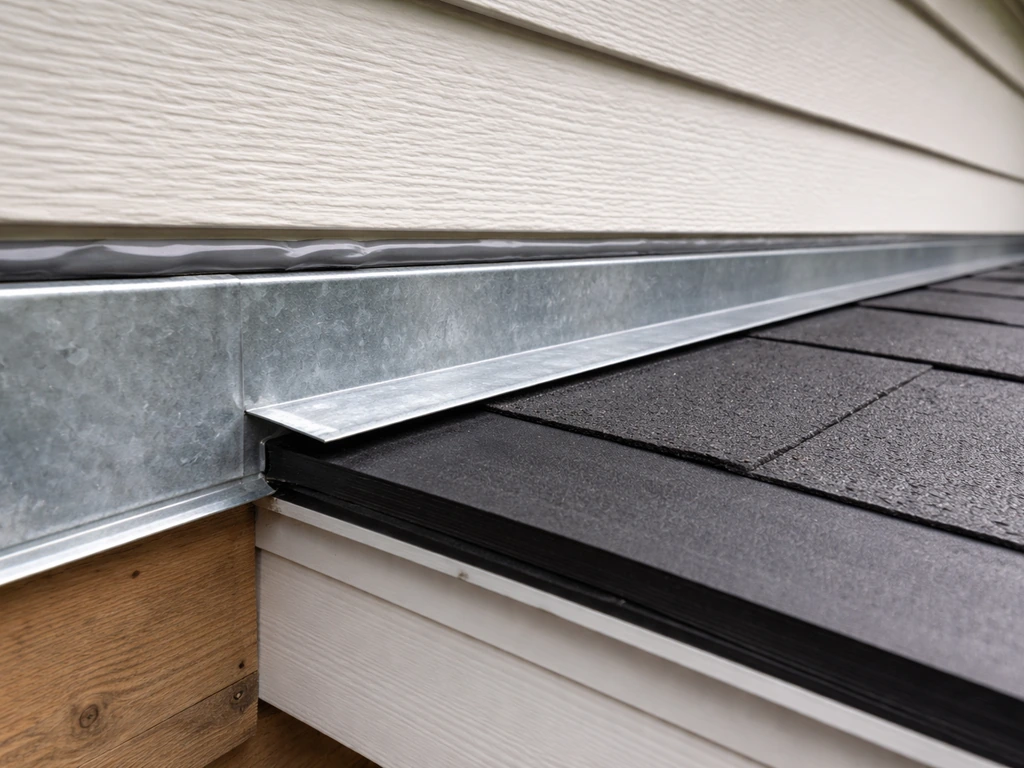
The ledger is the horizontal board that attaches to your house framing and carries one end of all your rafters. It needs to be fastened into the house's rim joist or wall studs, not just into siding or sheathing. Remove the siding in the ledger zone, install Z-flashing above it to direct water away, and fasten with 1/2-inch lag screws or structural bolts spaced no more than 16 inches apart.
Each fastener must hit solid framing, so use a stud finder and pre-drill to confirm you're in the right place. If you're attaching to a masonry wall (brick or block), you'll need wedge anchors or post-installed adhesive anchors that meet ICC-ES acceptance criteria. Common mistake: people attach the ledger through the stucco or siding and wonder why it pulls away after the first big rain. The connection has to reach framing.
Footings and posts
Dig your footing holes below the frost line for your area. Check your local building department or the frost map for the minimum depth; in warmer climates like the Southwest, 12 to 18 inches may be sufficient, but northern climates may require 36 to 48 inches. Hole diameter should be at least 3 times the post width, so a 6x6 post needs at least an 18-inch diameter hole.
Set post bases in the concrete while it's wet, check them for level and alignment with your string lines, and let the concrete cure for at least 48 hours before loading them. Use adjustable post bases (like Simpson ABU or ABA series) rather than setting posts directly in concrete. This keeps the end grain of the post off the concrete surface and dramatically reduces rot risk.
After curing, set your posts in the bases, plumb them with a level on two adjacent faces, and brace them temporarily with 2x4 diagonal braces nailed to stakes in the ground. Don't remove the braces until the beam and at least some rafters are in place.
Beam and rafter installation
The beam sits on top of the posts (or in beam pockets on the post caps) and carries the outer ends of your rafters. For spans up to 10 feet, a doubled 2x8 pressure-treated beam is typically sufficient; for 12 to 16-foot spans, move to doubled 2x10 or consult a span table. Attach the beam to post caps using the manufacturer-specified fasteners, not random screws or nails.
Simpson and USP both publish load tables for their post cap hardware, and those ratings assume specific fasteners in every hole. What often goes wrong here is builders use whatever screws are nearby and then wonder why the connector doesn't pass inspection. Use the specified connector screws, period. With the beam in place, lay out your rafters at 16 or 24 inches on center along both the ledger and the beam.
Cut the rafter tails to your desired overhang, typically 12 to 18 inches. Use hurricane ties or rafter ties at every connection point, both at the ledger and at the beam. This isn't optional in most jurisdictions, and it's what keeps your cover attached to the house during a windstorm.
Roofing and weatherproofing details (slope, flashing, sealing, drainage)
A patio cover that doesn't shed water properly will rot, leak, and eventually fail no matter how good the framing is. Slope is the first thing to get right. A minimum slope of 1/4 inch per foot (a 1:48 pitch) is the absolute minimum for a flat-appearing cover with solid roofing, but 1/2 inch to 1 inch per foot is better and strongly recommended.
For asphalt shingles, you need at least a 2:12 pitch to use low-slope application methods, and a 4:12 pitch or greater for standard installation with underlayment lapped 2 inches in shingle fashion starting from the eave. Corrugated metal and polycarbonate panels can work at much lower slopes, down to about 1:12, which makes them popular for lean-to covers where the slope is minimal.
Flashing at the ledger/house wall junction is the most critical waterproofing detail in the entire build. Water running down the house wall will find any gap between the ledger flashing and the siding. Use a continuous piece of step flashing or Z-flashing tucked under the siding above and overlapping the top of the ledger. Caulk is not a substitute for proper flashing overlap. Montgomery, Illinois, permit requirements specifically call out a flashing detail drawing for framing members attached to the house because this is where most patio cover leaks start.
At the eaves, install drip edge that extends at least 1/4 inch below the roof sheathing and laps up onto the roof deck at least 2 inches, fastened at no more than 12 inches on center. This follows the 2024 IRC requirement and it matters because improperly installed drip edge lets water wick back under the sheathing and rot the rafter tails.
Install underlayment under the drip edge at the eaves and over the drip edge at the rakes. Use a self-adhering membrane in the first 24 inches at eaves if you're in a climate with ice or heavy rain. Seal all fastener penetrations through metal roofing panels with gasketed screws or lap sealant.
For polycarbonate panels, use the manufacturer's closure strips at ridges and eaves to block insects and wind-driven rain without sealing the panels solid (they need to breathe slightly for thermal expansion).
Drainage planning
Think about where the water goes once it runs off your cover. If it drains onto a concrete patio with no outlet, you'll get pooling. Consider adding a gutter on the low side of the cover routed to a downspout that ties into your existing drainage or directs water at least 6 feet away from the foundation. Gutters on patio covers also protect the patio itself from being pelted during heavy rain, which makes the space much more usable.
Secure connections and attachment methods to different surfaces
How you fasten your patio cover to the house and to the ground has more impact on long-term performance than almost anything else. The attachment method depends on what surface you're connecting to.
| Surface Type | Recommended Fastener/Anchor | Notes |
|---|---|---|
| Wood framing (rim joist/studs) | 1/2-inch lag screws or through-bolts | Must hit solid framing; pre-drill; stagger vertically |
| Concrete or masonry block wall | Wedge anchors or ICC-ES approved adhesive anchors | Follow embedment depth from anchor manufacturer; clean holes before inserting |
| Brick veneer over wood framing | Through-bolt through brick to wood framing | Do not rely on brick alone; connection must reach the structural frame behind it |
| Concrete slab (post base) | Simpson ABU/ABA series post bases set in wet concrete | Use hot-dip galvanized or stainless in wet/coastal areas |
| Existing deck ledger | Simpson DTT2Z tension tie devices at two locations per IRC R507.9.2 | Provides 1,500 lb. lateral load capacity per device; required within 24 inches of each end |
Lateral load connections are something a lot of DIYers skip, especially on attached covers, but they're what prevent the structure from racking sideways in a wind event. If your cover attaches to an existing deck or a ledger, use tension tie devices (like the Simpson DTT2Z) at both ends of the ledger run. They're inexpensive, fast to install, and they're the difference between a structure that passes inspection and one that gets red-tagged. Two devices per ledger run, installed within 24 inches of each end, is the IRC minimum. For taller freestanding covers in high-wind areas, your post anchor hardware may need to be rated for both uplift and lateral loads. Check the load table, not just the product name.
When connecting to masonry, hole cleanliness matters as much as hole depth for adhesive anchors. Drill the hole, blow it out with compressed air, brush it, blow it out again, then inject adhesive and insert the anchor. Massachusetts DOT engineering guidance (and most ICC-ES listings) require this cleaning procedure because dust in the hole dramatically reduces adhesive anchor capacity. Don't skip it even on a residential job.
Finish work, safety checks, and when to hire a professional
Once the structure and roofing are in, spend time on the details that make the build last and look finished. Trim all lumber ends that will be exposed to weather and apply a cut-end wood preservative sealer, especially on pressure-treated lumber where the saw has exposed untreated wood fiber. Paint or stain exposed wood if desired, and caulk any gaps between the flashing and the house wall with a paintable exterior polyurethane sealant. If you're adding electrical (a ceiling fan, lights, or an outlet), this is the time to run conduit before any ceiling finish goes on. In most jurisdictions, electrical in an outdoor covered structure requires a separate electrical permit and inspection, so factor that into your schedule.
Safety throughout the build
Working on a ladder or at roof height is where most DIY injuries happen. OSHA standards require fall protection at 6 feet above a lower level, and the CDC/NIOSH reports that falls are the leading cause of fatal construction injuries. For a homeowner working alone, that means: use a ladder rated for your weight plus tool weight, set it at the correct 4:1 angle (1 foot out for every 4 feet up), and never overreach past the side rails.
If you need to work at roof level for any extended time, consider renting scaffolding for a day. It's not expensive and it's dramatically safer than repositioning a ladder every few minutes. Have a helper on site whenever you're lifting beams or rafters into position. A 14-foot doubled 2x10 beam is heavy and awkward, and trying to position it alone while standing on a ladder is how people get hurt.
Final inspection checklist
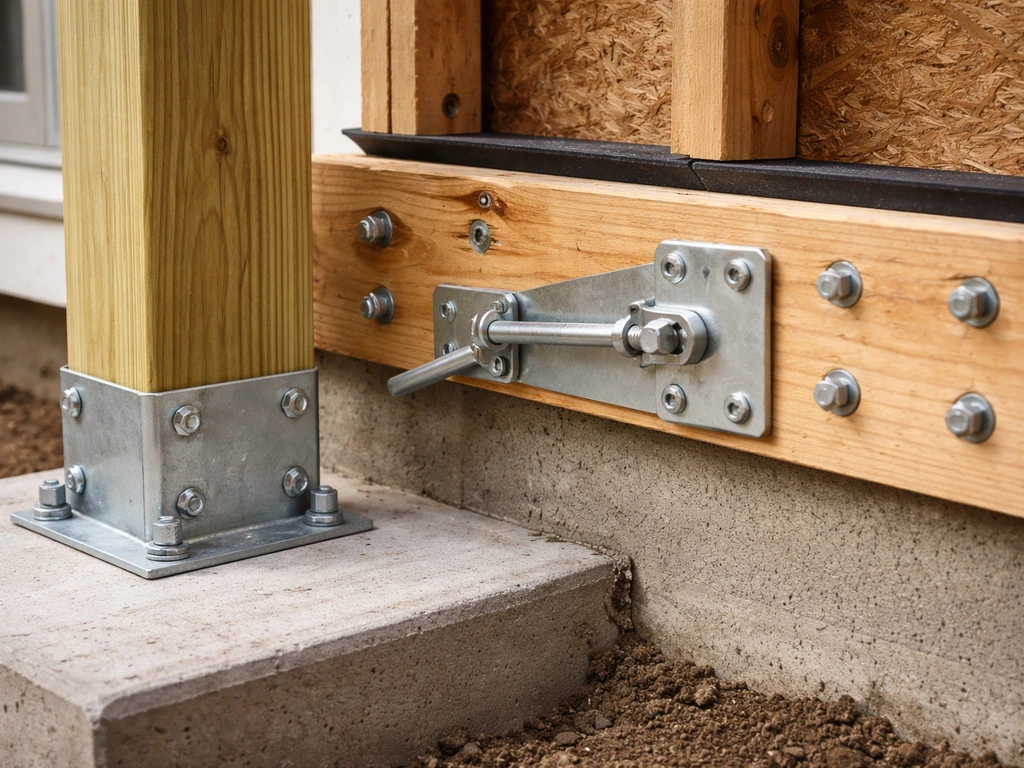
- All post bases are properly anchored and posts are plumb
- Ledger is attached into solid house framing with correct fastener spacing and fully flashed
- Lateral tension ties are installed at both ends of the ledger
- Every rafter-to-ledger and rafter-to-beam connection has a hurricane or rafter tie with full fasteners
- Roof slope is sufficient for the roofing material used
- Drip edge extends 1/4 inch below sheathing and 2 inches onto the deck, fastened at 12 inches on center
- All roof penetrations and transitions are sealed or flashed
- Gutter or drainage plan is in place and routes water away from the foundation
- Permit inspection has been scheduled if required
- All cut lumber ends are sealed with preservative
When to stop and call a professional
Most attached lean-to covers are well within DIY territory if you're comfortable with basic carpentry and working at height. But a few situations call for a structural engineer or licensed contractor. If your cover spans more than 16 feet between supports, get a beam sizing confirmation from an engineer. If your site has unusual soil conditions (expansive clay, fill soil, or a high water table), have an engineer spec the footings.
If you want a gable roof with a ridge beam longer than about 12 feet, or any situation where you're using prefabricated trusses, engineered drawings are typically required by code anyway. And if your home has asbestos-containing materials in the areas where you need to drill or attach, stop and bring in a licensed abatement contractor before continuing.
No patio cover project is worth a health risk or a code violation that affects your homeowner's insurance or your ability to sell the house.
For deeper dives into specific build types, the step-by-step approach for different patio cover styles, and detailed guides on materials like corrugated panels or stucco-finished covers, there's more coverage of those specific builds elsewhere on this site. For a step-by-step walkthrough of building a patio cover, you can also watch YouTube videos on how to build a patio cover youtube how to build a patio cover. But if you follow the sequence laid out here, pull your permit, use the right hardware, and don't cut corners on flashing, you'll end up with a solid structure you can be proud of and that will actually pass inspection.
FAQ
How do I choose the right pitch if my patio is tight on space (like I cannot get enough drop for shingles)?
Start by matching the cover’s slope to the roofing you plan to install. If you choose asphalt shingles, you generally need a steeper pitch (often at least a 2:12 low-slope or higher depending on application), while corrugated metal or polycarbonate can work with much lower slopes. If your site only allows a slight pitch, pick a roof surface that tolerates low slope rather than trying to force shingles.
Can I upgrade the roof material later, for example switching from corrugated panels to heavier shingles or adding more coverage?
Yes, but only if you design it as a structural system, not as “extra framing.” A common approach is adding a second row of rafters or increasing rafter size and using code-appropriate fasteners and ties, then updating load assumptions for snow, wind uplift, and any live load. If you already permitted and framed to a minimum, changing the roof weight or span without recalculating can fail inspection.
What’s the most common reason a patio cover leaks even when the roof looks fine?
Don’t rely on caulk alone at the house wall. Use flashing intended for exterior sheathing and ensure overlaps are correct, with the top layer directing water outward. Also confirm the ledger attachment is into structural members (rim joist or studs). If water can get behind flashing, it will find the ledger fasteners and cause rot or loosening.
Do I always need a gutter on a patio cover, and where should the downspout discharge go?
Plan for gutter overflow and outlet placement, not just “add a gutter.” Route the downspout so it discharges away from the foundation and avoid dumping onto a sloped patio that still pools. If your patio roof edge is close to doors or landscaping beds, add splash protection and keep discharge clear of footpaths.
How should I handle thermal expansion and sealing when using polycarbonate or corrugated metal panels?
Yes, because temperature swings can cause movement, especially with polycarbonate and wide metal panels. Instead of sealing everything solid, use the manufacturer’s recommended closures at ridges and eaves, allow any required expansion space, and use the specified fastener type. Over-tightening panel screws can lead to cracking or water paths when panels expand and contract.
My ledger location lines up with studs sometimes and misses others, can I just “make it work” by fastening into random framing members?
If you’re attaching to a deck board or an exterior finish layer, you’re likely missing the structural connection. Confirm attachment points hit rim framing, joists, or studs, and if you must remove siding/finish in the ledger zone, do it before fastening. A fastener schedule is only valid when the fastener penetrates the correct structural depth.
What’s the biggest mistake people make with adhesive anchors in brick or block?
For adhesive anchors in masonry, hole preparation is not optional. Drill to the correct depth, clean dust thoroughly (typically repeated blow and brush steps), then inject adhesive using the right cartridge style and insert the anchor without rotating it excessively. Even when you get the correct anchor type, poor cleaning can significantly reduce capacity.
How long should I wait after pouring footings before installing posts, beam, and rafters?
Watch the sequencing around concrete cure and bracing. Set post bases, ensure post plumb, then brace, and only remove temporary braces after the beam and enough rafters are installed to stabilize the structure. Also allow concrete to cure long enough before installing structural members that will transfer load into the footing.
How can I catch alignment problems early so my roof panels still line up correctly?
Check the ledger and post line for straightness and confirm the structure is square before you start attaching roof decking or panels. If the frame is twisted or out of square, flashing and panel overlaps will not sit correctly, and you may get water paths or uneven overhangs. A quick measure at each stage (ledger line, beam level, rafter ends) prevents bigger roof problems later.
If I add a ceiling fan or outlet, what’s the practical order of operations to avoid rework and failed inspections?
Electrical under a covered outdoor structure often triggers separate permitting and inspection, and requirements vary by jurisdiction. Plan rough-in conduit before installing ceiling finish, use outdoor-rated components, and confirm grounding and GFCI protection needs with your local inspector. If you install wiring after roofing, you can end up drilling through waterproofing layers in the worst possible spots.
Does a freestanding patio cover avoid engineering or stricter wind requirements compared to an attached lean-to?
When a patio cover is “freestanding,” code requirements can still include engineered footing, especially if it’s tall or in a high wind zone. Freestanding designs generally need robust post anchorage and a footing plan on all corners, and the span and height still affect lateral and uplift demands. If you’re near code thresholds, assume you may need engineering rather than guessing.
What should I do if I discover suspected asbestos while preparing the ledger area?
If you’re unsure about existing materials, treat the job area as suspect before drilling or cutting. Disturbance controls matter, for example avoid dry cutting and abrasive scraping, and use a licensed test or abatement process when required. Stopping early is cheaper than dealing with remediation after you’ve already created airborne fibers.