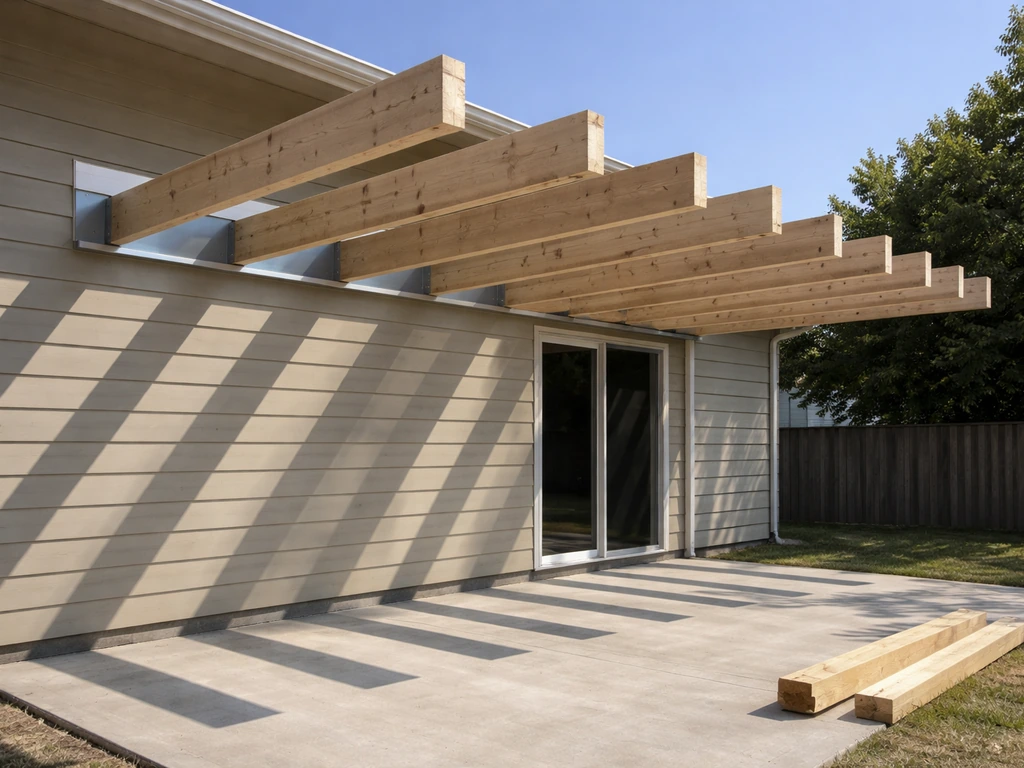
A cantilever patio cover projects outward from your house wall without any posts at the outer edge, giving you a clean, open look and keeping your patio clear of obstructions. You can realistically build one yourself if your house framing is sound, your project is modest in size (typically 6 to 10 feet of projection), and you're comfortable working with structural hardware and basic carpentry. The catch is that the load path all runs through one connection point, the ledger, so getting that attachment right is non-negotiable. This guide walks you through every stage, from planning and permits to flashing and finishing.
How to Build a Cantilever Patio Cover: DIY Steps

Celia Vaughn
18 Jun 2026
What a cantilever patio cover is (and when it makes sense)
A standard attached patio cover uses a ledger at the house and posts at the outer edge to support the roof. A cantilever version eliminates those outer posts entirely. The roof structure extends past its last support point using the principle of cantilever framing, beams or rafters that project beyond their support and rely on the back-span into the building to counter the leverage. Think of it like a diving board: the board extends out freely because the back end is firmly anchored.
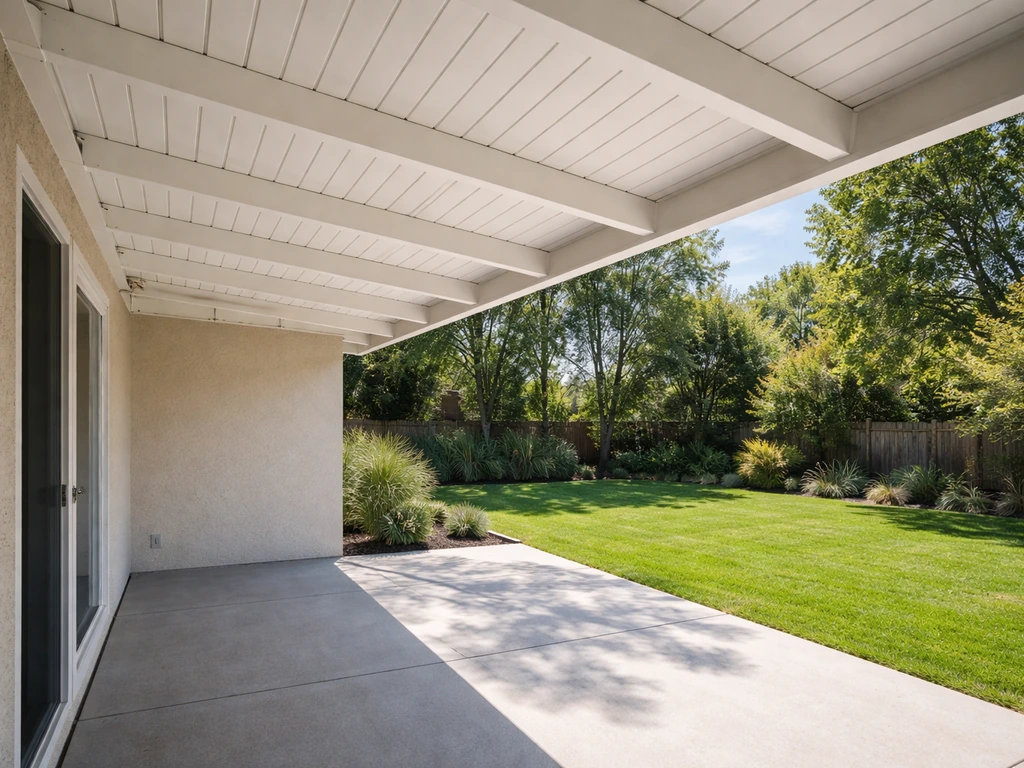
This design is a smart choice when you want an unobstructed view from inside, need to keep a patio furniture layout flexible, or have a ground condition that makes digging post footings impractical (rocky soil, underground utilities, or a slab you'd rather not penetrate). It also works well over narrow spaces, a side yard alley or a porch bump-out, where posts would eat up the entire usable width.
It's NOT the right call when you need more than about 8 to 10 feet of projection without an interior post or intermediate beam, when your house wall framing is weak or non-structural (like some stucco-over-foam systems), or when you're in a high wind or heavy snow region and haven't done a load calculation. More projection means more leverage on the ledger connection, and that multiplies fast. Be honest about your constraints before you fall in love with the look.
Planning and code basics: permits, loads, and feasibility
Most municipalities require a building permit for any permanently attached roof structure. Pull the permit, don't skip it. Inspectors check ledger attachment, beam sizing, and flashing, and those are exactly the things that fail silently and expensively later. Your permit application will typically need a simple site plan showing the cover's dimensions, height, and relationship to property lines, plus a framing plan showing member sizes and spacing.
On the structural side, the IRC Appendix H standard for patio covers requires a minimum live load design of 10 psf (pounds per square foot). If you're in a snow region, your local ground snow load will govern and will likely be higher. Wind uplift is equally important, IRC R802.11 requires a continuous load path for uplift forces from the roof assembly all the way to the foundation, and your wind exposure category (B or C) determines the connector forces you need to design for. Look up your jurisdiction's wind speed map before you size connectors.
A realistic feasibility check before you buy anything: locate your house rim joist and stud layout, find out what your wall sheathing is, and confirm that the framing behind your proposed ledger location is solid. If your ledger will land on a cantilevered rim joist condition, where the house's second floor framing hangs past the foundation, you may need additional structural reinforcement at that connection. That's worth a conversation with a structural engineer before you start.
How the structure works: ledger, beams, cantilever framing, and bracing
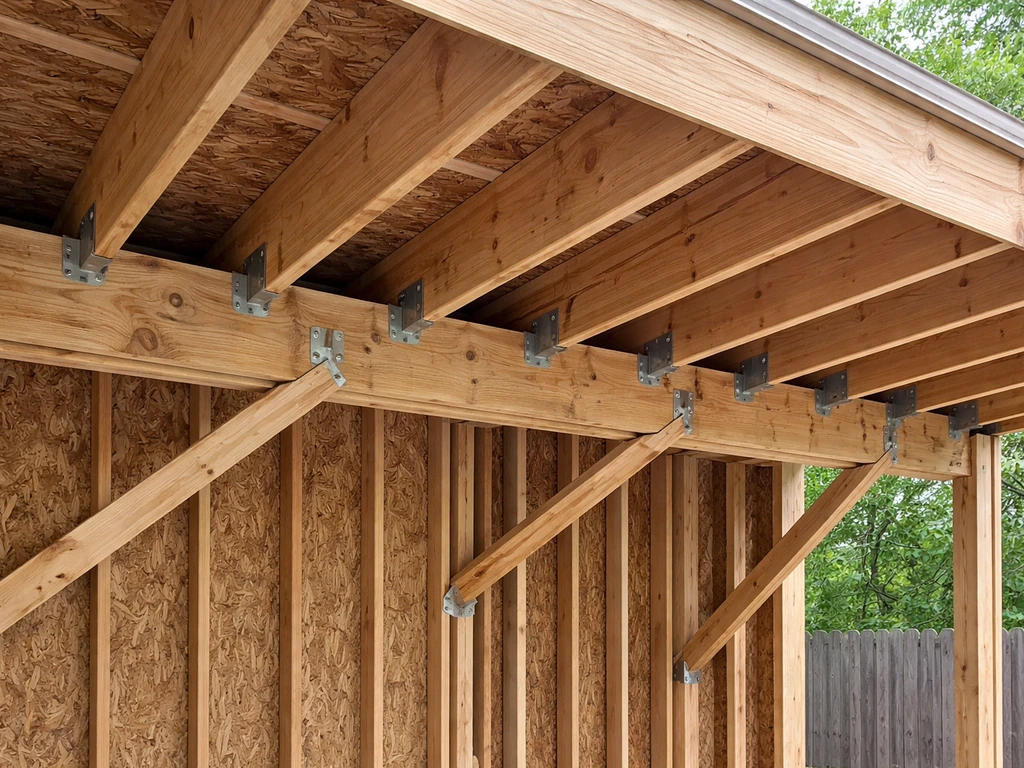
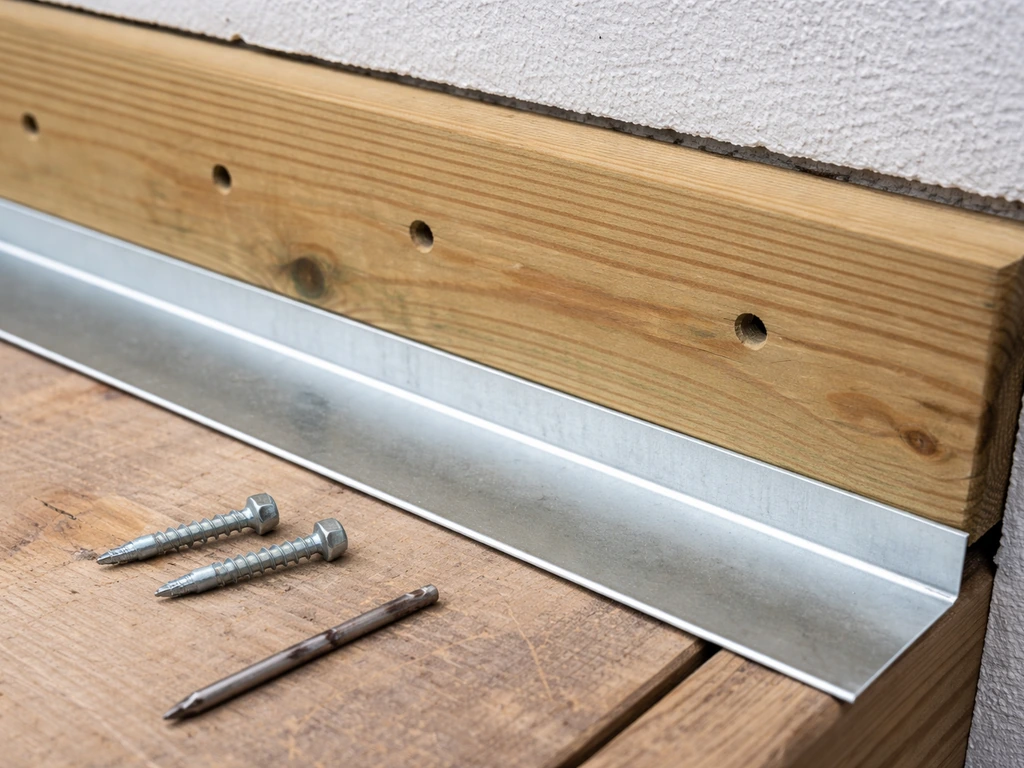
The whole system hangs off the ledger. The ledger is a horizontal board or beam bolted to your house framing (into studs, rim joist, or a header) that carries the inside end of your cantilever beams or rafters. The beams extend outward past the ledger to create the overhang. For a simple cantilever, the rule of thumb many engineers use is that the back-span (the distance from ledger to the last interior support, if any) should be at least twice the cantilever projection. Without any interior support, the ledger itself must be engineered to handle the full moment load.
The IRC places practical limits on pure rafter cantilevers: notches on cantilevered rafter portions can't reduce the remaining rafter depth below 3.5 inches, and the cantilever length of a rafter can't exceed 24 inches without additional engineering per IRC section R802.7.1.1. For projections beyond that, you're working with beams rather than individual rafters cantilevering, and beam sizing needs to account for both the bending moment and shear at the ledger connection. Don't size this from a general span table, use a patio cover span table or get engineer sign-off.
Lateral bracing is the part DIYers most often underestimate. Without posts at the outer edge, there's nothing stopping the roof from racking side to side in a wind. You'll address this with blocking, knee braces back to the house wall, or structural connectors at the ledger that resist lateral load. Some designs use a rim joist along the outer edge of the cantilever tied back with knee braces or hardware to the wall above the ledger. Make sure your design addresses both vertical gravity loads and horizontal wind forces.
Choosing your materials and roof system
You have three main structural material options for the framing: pressure-treated lumber, steel tube/C-channel, or aluminum extrusions. Each has trade-offs worth knowing before you buy.
| Material | Pros | Cons | Best For |
|---|---|---|---|
| Pressure-treated lumber (2x8, 2x10, 4x8 beams) | Widely available, easy to cut and fasten, low cost | Heavy, requires finishing or paint to look good, can warp | Most DIY builds; standard residential projects |
| Steel (tube or C-channel) | High strength-to-size ratio, great for longer spans | Heavier, needs welding or special connectors, will rust without coating | Longer projections or industrial aesthetic |
| Aluminum extrusions (patio cover systems) | Lightweight, rust-proof, clean look, often available as kits | More expensive upfront, limited to kit dimensions without custom fab | Modern look, coastal environments, low maintenance preference |
For most homeowners doing a first cantilever build in the 6 to 8 foot projection range, pressure-treated lumber is the practical choice. Use #2 or better Southern Yellow Pine or Douglas Fir for beams. Hardware should be hot-dipped galvanized or stainless, standard zinc screws will corrode against treated lumber within a few years.
For the roof covering, you have four common options: corrugated polycarbonate panels (light, lets diffused light through), aluminum patio cover panels with a foam core (insulated, part of a system), solid wood decking with a membrane, or asphalt/fiberglass shingles over sheathing. The choice affects your minimum slope requirement. Polycarbonate and metal panels work with very low slopes, a minimum of 1/4 inch per foot rise. Asphalt shingles need at least 2 inches per foot. Plan your slope before you design the ledger height, because the drop from the house wall to the outer edge of the roof determines how it looks and drains.
Drainage matters more than most people realize. A minimum slope of 1/4 inch per foot (roughly 2%) is widely recommended for low-slope patio roofs. If you go flatter than that, water ponds and eventually finds a way in. If your projection is 8 feet, that means the outer edge of the roof needs to be at least 2 inches lower than the high side at the ledger. Build this slope into your layout from the start.
Tools and prep before you pick up a saw
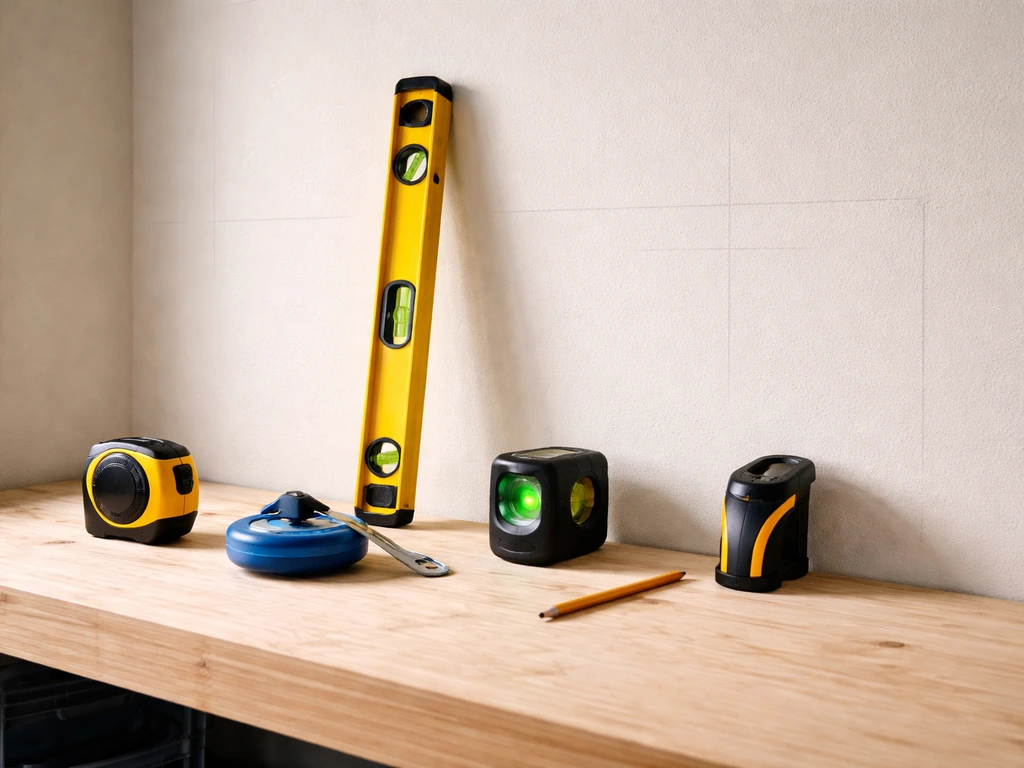
Get your layout and measurements locked down before anything else. You'll need a tape measure, a long level (4-foot minimum), a chalk line, a stud finder, and a laser level or water level to transfer your height marks around corners. On the cutting side, a circular saw handles most lumber cuts, and a reciprocating saw handles notches and tight work. For hardware installation, a hammer drill is essential for lag screws into masonry or through stucco.
- Tape measure, chalk line, and marking pencil
- 4-foot level and laser or water level
- Stud finder (both magnetic and electronic are useful together)
- Circular saw and reciprocating saw
- Hammer drill with appropriate masonry or wood bits
- Impact driver with socket bits (for lag screws and structural hardware)
- Ladder rated for your working height — do not improvise
- Safety glasses, hearing protection, and heavy work gloves
- Fall protection if you'll be working at roof level (6 feet or higher triggers OSHA guidelines)
Weather matters for timing. Don't start ledger installation during or right before rain, you want the wall dry and the flashing properly sealed before any moisture exposure. Also check wind forecast for framing days; large lightweight panels like polycarbonate sheets are dangerous to handle in even moderate wind. Plan for a helper on those steps, this isn't a solo job once you're lifting long beams or roof panels.
Step-by-step: building your cantilever patio cover
Step 1: Establish your ledger height and snap the layout line
Determine your finished roof height at the house and work backward. The ledger sits below the roof surface, so account for your beam depth and any roof covering thickness. Mark the top of ledger elevation on the wall, then use a level to run that mark across the full ledger length. Snap a chalk line. Double-check that this height gives you adequate slope to the outer edge, again, minimum 1/4 inch per foot, so an 8-foot projection needs the outer edge at least 2 inches lower.
Step 2: Locate framing and prepare the wall
Use a stud finder to locate every stud or rim joist along your ledger line. Mark them clearly. If your wall has stucco or siding, you'll need to remove or cut back cladding in the ledger zone so the ledger can sit against the house sheathing (not float on top of siding). Cut a clean horizontal strip approximately the width of your ledger plus 2 inches above for flashing clearance. This is also when you install your weather-resistive barrier (WRB) if any was damaged, before flashing goes on.
Step 3: Install the ledger with correct flashing
This is the most critical step. Pre-drill your ledger board and dry-fit it against the wall. Before final fastening, install your base flashing, typically a continuous piece of Z-flashing tucked behind the existing WRB above the ledger and lapped over the front face of the ledger. The goal is a water-shedding path: water hits the wall above, gets caught by the flashing, and is directed over the ledger face and off, never behind it. Once your ledger and flashing are set correctly, you can proceed with the rest of the steps to cover your lattice patio cover how to cover a lattice patio cover. IRC R703.4 requires corrosion-resistant flashing installed shingle-fashion at all wall/roof intersections, this isn't optional.
Fasten the ledger with structural lag screws or through-bolts into studs or rim joist at code-required spacing (your permit plan will specify this, but a common starting point is 1/2-inch diameter lags at 16 inches on center into solid framing). The key phrase here is 'into solid framing', every fastener must hit a stud, rim joist, or header. Fasteners that land in sheathing only provide essentially nothing under load. Common mistake: people count the fasteners but don't verify they hit framing. Use a stud finder, mark every stud, and confirm with a screw probe before committing to lag placement.
Step 4: Install the cantilever beams
Set your cantilever beams (or primary rafters, depending on your design) into joist hangers or post-cap hardware at the ledger. Each beam should be plumb and level side to side. The outer ends extend to your design projection distance. Cut all beams to the same length for a clean fascia line. At the outer ends, install a rim board or fascia beam connecting all the cantilever tips, this ties the system together laterally and gives you a surface to attach gutters or drip edge later.
Step 5: Add rafters, blocking, and lateral bracing
If your primary beams are widely spaced, install secondary rafters between them to support the roof decking or panels. Add blocking between beams at the ledger and at mid-span to prevent rotation and add diaphragm stiffness. For lateral bracing, install knee braces from the wall to the outer rim, or use plywood gussets at the ledger connection. If you're in a high-wind zone, consult IRC R802.11 uplift connection tables and install hurricane ties or approved uplift connectors at every rafter-to-ledger connection. This is where a lot of builds fall short, the vertical load is handled but wind uplift connections are undersized or missing.
Step 6: Install roof decking and roof covering
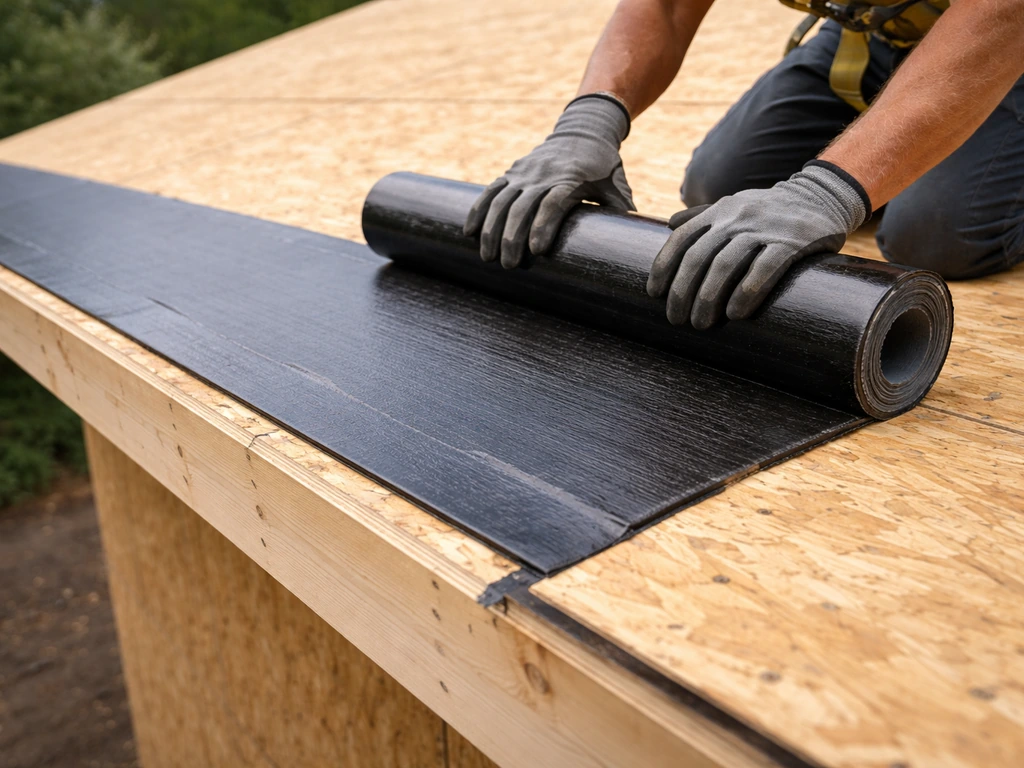
For sheathed roofs, install 1/2-inch CDX plywood or OSB, nailed at 6 inches on center at edges and 12 inches in the field. Then add a layer of self-adhering underlayment or 30-lb felt before your finish roofing. For panel systems (metal, aluminum, or polycarbonate), follow the manufacturer's lapping and fastener spacing requirements, typically a fastener every 12 to 18 inches on the high ribs. If you want a vinyl patio cover, the build process is similar, but you should pay close attention to manufacturer fastening, support spacing, and how the vinyl panels handle wind loads. Never fasten through the flat pan of metal panels without a pre-drilled pilot and rubber-gasketed screw, or you'll create leak points.
Waterproofing and finishing: flashing, trim, and leak prevention
The wall-to-roof junction is where leaks happen. Once your roof covering is on, install counterflashing over the base Z-flashing you installed at the ledger. This is a separate piece of metal that overlaps the top of the roof covering by at least 4 inches and runs up the wall behind the siding or stucco. It should be integrated with the WRB above, caulked at the top with an approved flexible sealant, not relying on caulk alone as the only water barrier.
At the outer edge, install drip edge flashing under the roofing at the fascia line. This directs water off the edge cleanly instead of wicking back under the roof material. At side walls (if your cover runs into a side wall), step flashing is required, individual L-shaped pieces that interleave with each course of roofing material. This is fiddly work but it's the difference between a 10-year roof and a 2-year leak.
Seal all penetrations (fasteners, ledger bolt heads, any pipe or conduit) with appropriate sealant, butyl tape for metal panels, roofing caulk for shingle applications. Do a hose test before you close out the permit: run water at the top of the wall intersection and watch the inside face of the ledger and ceiling for any moisture. Fix it now while access is easy. What often goes wrong here is that people rely on caulk as the primary flashing rather than as a secondary seal over properly lapped metal flashing. Caulk cracks. Lapped metal doesn't.
For the trim and finishing, paint or seal all exposed lumber before the roof goes on, it's much harder to do after. If you used pressure-treated wood, give it 30 to 60 days to dry before painting. Install fascia boards on the outer rim, and add any soffit material you want on the underside of the framing. This step is also when you can add recessed lighting, ceiling fans, or outdoor speakers if they're in your plan, run conduit during framing so you're not fishing wire through closed cavities later.
Comparing cantilever to other patio cover styles
If you're weighing a cantilever build against other approaches, the honest comparison looks like this. A lattice patio cover is much simpler to build but provides shade, not weather protection. A cedar patio cover with posts gives you more structural flexibility and can span farther, but you sacrifice that open post-free aesthetic. Vinyl patio cover systems are low-maintenance but typically need posts because the extrusions aren't designed for pure cantilever loads. The cantilever approach is the most complex to execute correctly, but it delivers the cleanest look and best patio functionality when done right.
Inspection, maintenance, and when to bring in a pro
Schedule your framing inspection before you install the roof covering, inspectors need to see the ledger attachment, flashing base layer, beam connections, and uplift hardware. Don't cover it up first. Final inspection happens after roofing and trim. Keep both inspection reports; they're part of your home's permit history and matter at resale.
On the maintenance side, inspect the ledger flashing every spring. Look for lifted or separated metal, cracked sealant, or any discoloration on the wall below that suggests water is tracking somewhere it shouldn't. Check the ledger bolts for corrosion annually, a slight surface rust on galvanized hardware is normal, but active rust running down the wall means the hardware is failing and needs replacement. Tighten any hardware that's worked loose. Trim back any vegetation that's pressing on the roof covering.
Know when to stop the DIY approach. Call a structural engineer if: your projection exceeds 8 feet with no intermediate support, your house wall has any signs of previous water damage or soft framing at the ledger zone, you're in a high-wind or high-snow region without access to a local engineer-stamped plan, or if your permit application is being rejected due to structural questions. An engineer review typically costs $300 to $800 for a simple cover, that's cheap compared to a failed ledger connection. Similarly, if your flashing work involves integrating with an existing tile or metal roof, bring in an experienced roofer for that portion specifically. Getting the wall-to-roof junction wrong is the single most common and expensive failure point on attached patio cover projects. If you are looking for a lattice-style option, the same ledger and waterproofing principles apply, so review how to build a lattice patio cover before you start.
Before you buy materials: a quick pre-build checklist
- Confirm your projection distance is structurally feasible (under 8 feet for DIY without engineering; larger spans need professional review)
- Locate all framing members behind your ledger zone and confirm they're solid and undamaged
- Check local permit requirements and download any standard plan details your jurisdiction provides for attached patio covers
- Determine your local wind speed zone and snow load (find this on your jurisdiction's building department website or ASCE hazard tool)
- Calculate your roof slope drop: projection in feet times 0.25 inches per foot minimum
- Select your roof covering and confirm the minimum slope it requires matches your design
- Price your structural hardware (joist hangers, uplift connectors, lag screws) before budgeting — this adds up fast
- Have a conversation with your building department about inspection timing so you know when to stop and schedule
- Line up a helper for beam installation and roof panel days — don't attempt those steps solo
- Buy 10 to 15% extra on roofing materials for cuts and waste
FAQ
Can I mount a cantilever patio cover ledger directly into siding or sheathing?
Most cantilever patio covers need the ledger attached to solid framing, not just the sheathing. Before buying hardware, verify the exact stud and rim joist spacing behind the wall cladding, and plan bolts or lag screws so every connector lands in wood or an engineered header. If you cannot align the ledger fasteners with framing, use an engineered reinforcement plate or have an engineer redesign the ledger support.
What if my house has stucco over foam or other non-structural wall layers?
Yes, but the required reinforcement depends on what is behind the wall finish. For example, stucco over foam is often a non-structural layer, so lagging into it creates a weak connection. The practical approach is to expose the ledger zone enough to confirm where the structural members are, then extend steel reinforcement or add blocking to transfer loads to studs or rim joists.
How do I calculate the ledger height for proper runoff?
To hit the minimum drainage slope, you should calculate the ledger height using finished roof surface, not just beam top. For a given projection, a 1/4 inch per foot slope means the outer edge drop equals projection times 0.25 inches per foot, so an 8 foot projection requires about a 2 inch drop. Also confirm the slope still clears gutters, light fixtures, and any doors that open near the cover.
Is it possible to cantilever more than 10 feet without interior posts?
If you want to go beyond about 8 to 10 feet of projection with no intermediate support, the ledger moment and uplift forces increase quickly and rarely remain “simple.” For longer cantilevers, you usually need beam-based cantilever engineering (not just larger rafters) and a stronger ledger connection with verified back-span and bracing. Treat this as an engineer job rather than increasing lumber size based on guesswork.
Should I rely on caulk at the ledger instead of flashing?
Don’t treat the base flashing and caulk as interchangeable. Metal flashing must be lapped in a shingle-style water-shedding order, and counterflashing is typically required where the roof plane meets the wall above the base flashing. Caulk should act as a secondary seal at specific seams, for example under the top edge of counterflashing, but the lapped metal system is what actually prevents bulk water intrusion.
What’s the best way to stop a cantilever roof from racking in wind?
Yes, the roof can rack sideways even if the vertical load path is correct. Add a lateral system by connecting the ledger area to the wall (knee braces or structural connectors), tying the outer rim together with fascia or rim blocking, and adding diaphragm stiffness with sheathing or approved bracing locations. After installation, check alignment side to side, and fix wobble before covering.
How do gutters work on a post-free cantilever patio cover?
If you are planning gutters, mount them to the fascia or outer rim board, not directly to thin roof decking. Ensure the fascia and outer rim beam are sized to handle the extra concentrated loads from full gutters plus maintenance loads. Also keep downspouts and splashback located so runoff does not wet the wall beneath the flashing.
What are the most common roofing mistakes for metal, polycarbonate, or aluminum panel covers?
Panel systems have very specific fastener spacing and edge requirements, and using the wrong screw or skipping pre-drilling can create leaks or fastener pullout. For metal or aluminum panels, use the manufacturer’s gasketed fasteners and never shortcut the lapping pattern. For polycarbonate, keep fasteners in the correct type and location and avoid over-tightening, which can crack the material.
How should I perform a leak test before closing up the project?
A hose test is helpful, but it must test the right zone. Run water at the wall-to-roof intersection from the top down pattern that matches normal rainfall, and look for any moisture on the inside face of the ledger and ceiling below. If the leak shows only during higher flow, increase test duration or test at simulated wind-driven flow angles rather than a gentle spray.
How do I know if ledger hardware corrosion is serious?
If you see active rust streaking down the wall or corrosion-driven loosening at the ledger bolts, stop and replace rather than tightening. Minor surface rust on properly galvanized hardware can be normal, but rust that compromises fasteners indicates water is getting behind flashing or fastener heads. Address the flashing first, then replace hardware with the correct corrosion-resistant type for your environment.
Can I install recessed lights or speakers under a cantilever cover, and what changes structurally?
Yes, penetrations like recessed lights, conduit, and ceiling fixtures require planning during framing because you need clearance and proper weather sealing. Run electrical and low-voltage wiring during framing, add conduit sleeves where needed, and use approved junction box covers rated for outdoor use. After installation, seal penetrations with appropriate roof/wall junction methods so they do not break the WRB and flashing continuity.
When should I schedule inspections during a cantilever patio cover build?
When permits are required, inspection timing matters. Plan for at least one inspection before the roof covering so the inspector can verify ledger attachment, flashing base installation, beam connections, and uplift connectors. If you cover too early, you may have to remove roofing and trim, which is usually more expensive than waiting a few days.