You can cover a slatted patio cover by adding polycarbonate panels, shade fabric, or solid roofing material directly over the existing slats, but the right approach depends on how much sun and rain you want to block, whether your existing structure can handle the added weight, and what your local building department considers a permitted change. Most DIYers can handle a basic polycarbonate or fabric retrofit in a weekend. A full solid-roof conversion takes more planning, possibly a permit, and a harder look at your framing.
How to Cover a Slatted Patio Cover: DIY Guide

Celia Vaughn
5 May 2026
What 'slatted patio cover' actually means and what you're working with
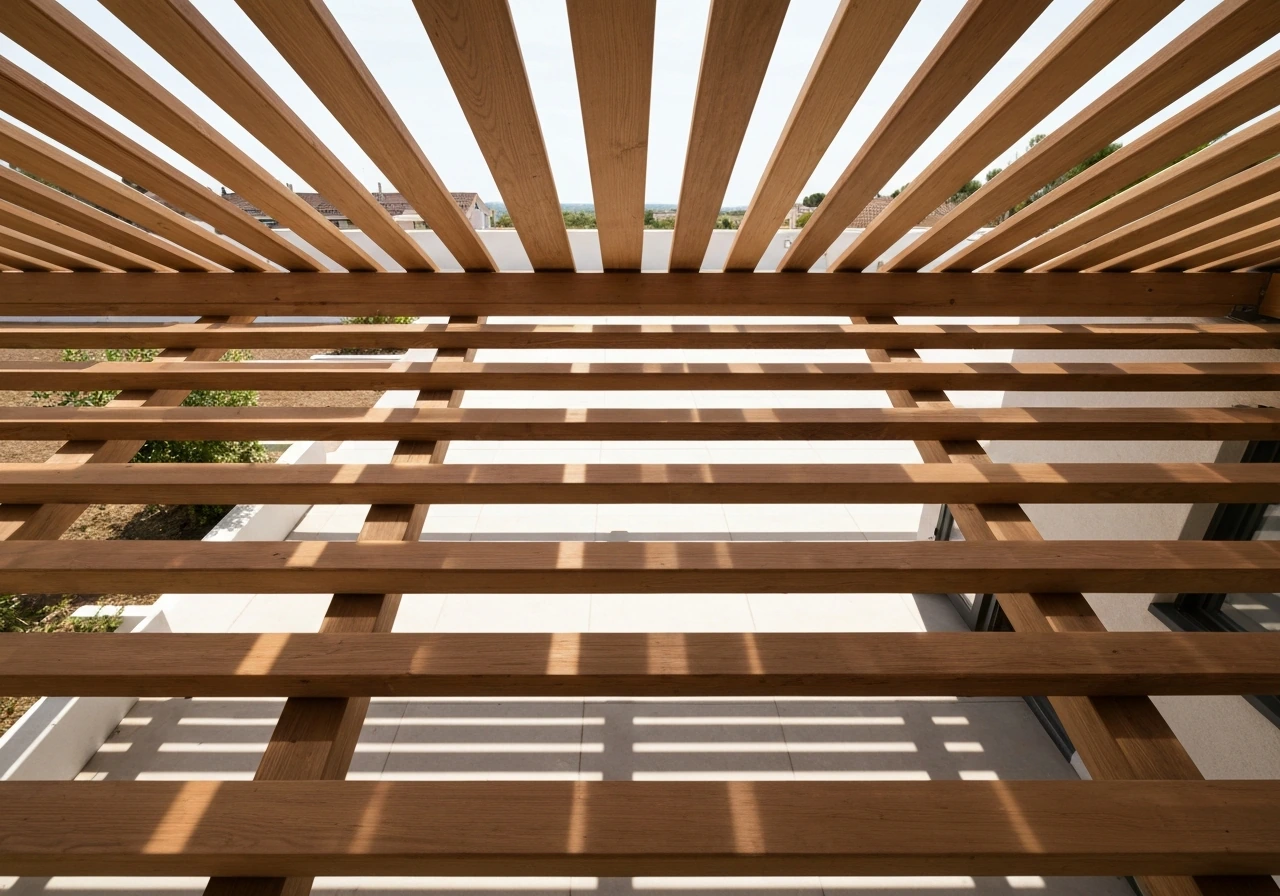
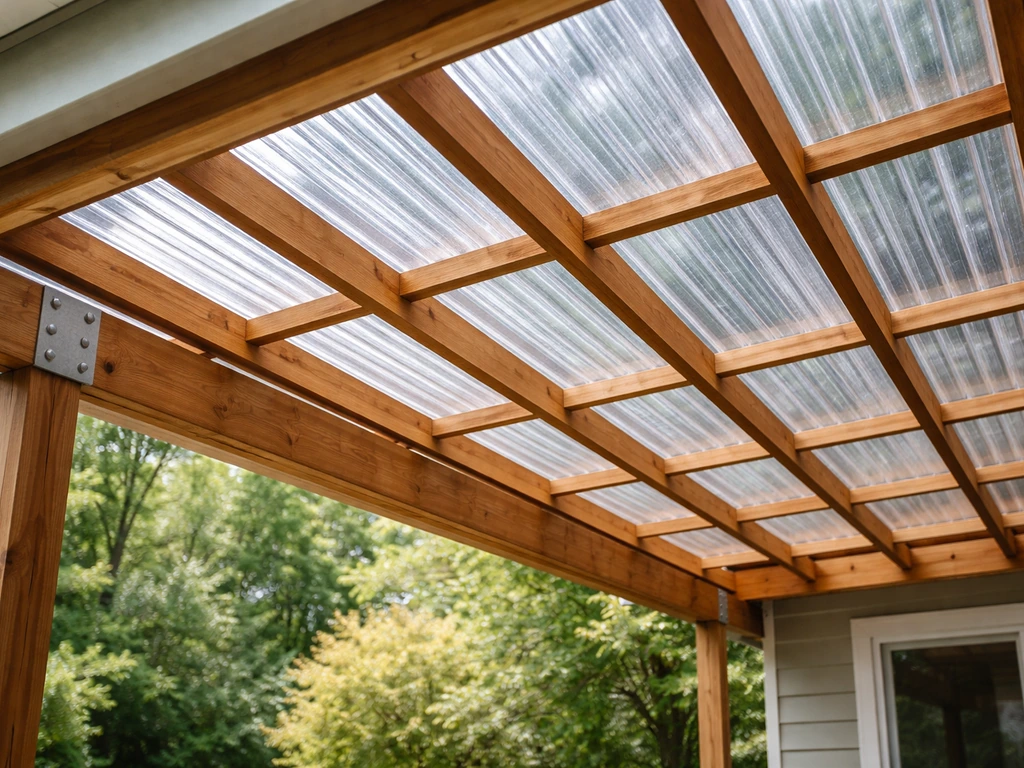
A slatted patio cover is a semi-open overhead structure where parallel boards, blades, or beams are spaced apart to create filtered shade rather than a solid roof. Think of it as the middle ground between a fully open pergola and a watertight patio roof. The gaps let in light and air, but they also let in rain, afternoon glare, and wind-driven debris. When people search for how to cover a slatted patio cover, they usually want one of three things: to block more direct sun without closing off the structure completely, to stop rain from getting through while keeping some ventilation, or to convert the slatted setup into a fully weatherproof roof.
It's worth knowing that if you add a continuous watertight surface over your slatted structure, your building department may reclassify it as a solid patio cover or pavilion rather than an open pergola-style shade structure. That reclassification can change the load requirements and trigger a permit requirement even if you didn't need one before. More on that in the DIY vs. pro section below.
Plan it out before you buy anything
Measurements and layout
Start by measuring the full footprint of your slatted cover: length, width, and height at both the house-side and the outer edge. Write down the slat spacing (center-to-center), the slat width, and the direction they run. This determines what covering material will work and whether you need to add intermediate purlins (horizontal supports running perpendicular to the slats) before you can attach panels or fabric.
Figure out your overhang situation too. If the slats stop flush with the outer beam, you may need to add a few inches of extension to carry water away from the patio edge cleanly. A 2 to 3 inch overhang is a reasonable minimum for most panel systems.
Pitch and drainage
For an open slatted cover, pitch isn't critical because water just falls through the gaps. The moment you add a solid or semi-solid covering, drainage becomes a real concern. A minimum slope of 1/4 inch per foot is enough to move water toward the outer edge, but steeper is better if you can swing it. If your existing slats are perfectly level, you'll need to either shim the covering material or add sloped purlins underneath it to create that pitch. Water that pools on a patio cover surface is a warning sign of a drainage problem, and it leads to corrosion, rot, and eventually structural sagging.
Material choices
The main covering options for a slatted patio cover each have real trade-offs. Here's a straight comparison:
| Material | Sun Block | Rain Block | Weight | DIY Difficulty | Rough Cost |
|---|---|---|---|---|---|
| Polycarbonate panels | Moderate (tinted) to high | Full when sealed | Light (0.5–1.5 lb/sq ft) | Moderate | $2–$6/sq ft |
| Shade fabric/canopy | Moderate (70–90%) | Partial to none | Very light | Easy | $1–$4/sq ft |
| Aluminum roofing panels | Full | Full when flashed | Light–moderate | Moderate | $3–$8/sq ft |
| Wood solid decking | Full | Full when sealed | Heavy (3–5 lb/sq ft) | Harder | $4–$10/sq ft |
| Motorized louvered system | Adjustable | Full when closed | Moderate | Complex | $15–$40/sq ft |
Polycarbonate panels are the most popular DIY choice for slatted cover retrofits. They're lightweight, cut with a circular saw, and can be trimmed to fit over either your existing slats or added purlins. Shade fabric is the easiest install and works well if rain protection isn't your priority. Aluminum roofing panels give you a solid weatherproof result and are common in kit-based patio cover systems. Wood adds a lot of weight and needs more maintenance but looks great with existing cedar or redwood structures. If you are planning how to build a cedar patio cover, focus on proper framing support and exterior-rated fasteners to handle moisture and wind cedar or redwood structures. Motorized louvered systems are beautiful and fully adjustable, but they're expensive and usually require professional installation for the motor/control wiring.
Get your structure ready before anything goes on top
Check the framing and ledger
The biggest mistake people make is skipping straight to the covering material without checking whether the existing framing can handle the added load. Start at the ledger board, which is the horizontal member bolted to your house wall that carries the load back to the structure. Press on it, look at the hardware, and check for rot, rust, or movement. A proper ledger connection has to resist both vertical load (the weight of everything above it) and lateral forces like wind trying to push or pull the whole structure away from the house. If the ledger is just nailed in or attached with inadequate hardware, stop there and fix it before you add any weight.
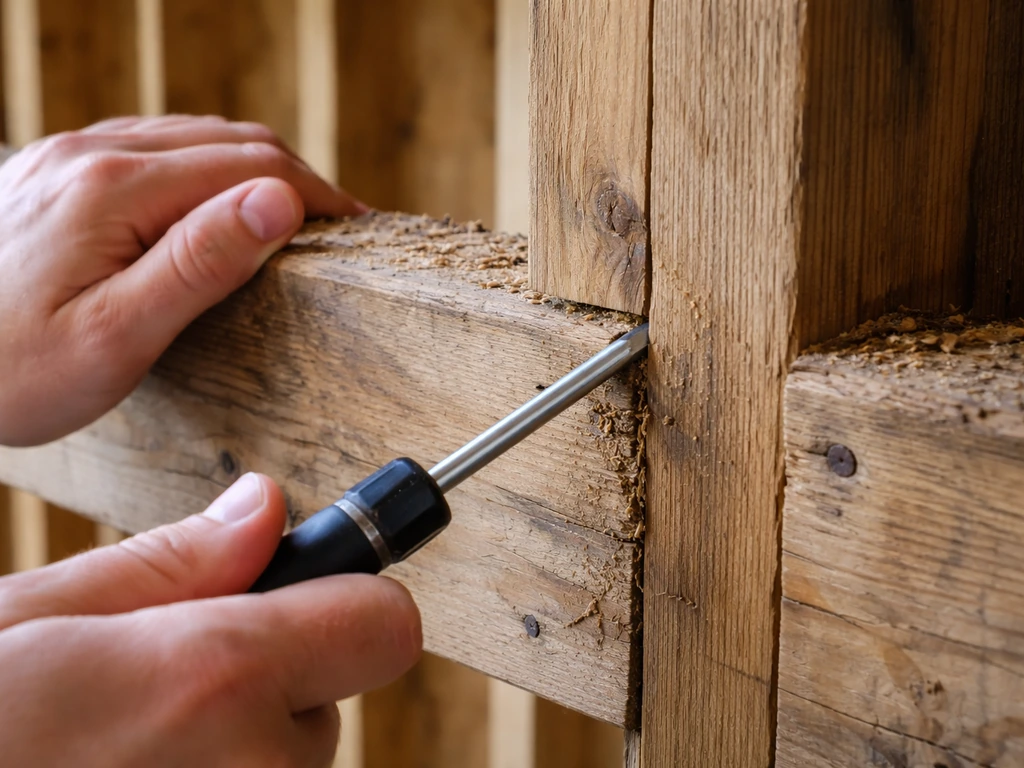
Walk the perimeter beams and posts. Probe any wood with a screwdriver to check for soft spots indicating rot. Look at post bases for standing water or rust. Check that posts are plumb and beams are level or properly sloped. Any structural deficiency here gets worse once you add a covering that traps water and adds weight.
Load capacity reality check
Residential roof structures are typically designed to handle a minimum live load of around 20 pounds per square foot, but your slatted patio cover was probably built to a lighter standard since it was open. Snow load, wind uplift, and the weight of the covering material all factor in. A lightweight polycarbonate panel adds very little. Wood decking or tile can push past what the existing posts and beams were sized for. If you're unsure, this is the exact scenario where a quick consult with a structural engineer or your local building department is worth the time before you start.
Adding purlins if needed
Most panel systems need support every 24 to 48 inches depending on the panel thickness and wind load in your area. If your slats run the wrong direction or are spaced too far apart for your chosen covering, add purlins (2x4 or 2x6 members running perpendicular to the slats) before you attach anything. Toe-nail or use joist hangers to connect purlins into the main beams, and make sure they're pitched correctly to carry water toward the outer edge.
Attaching the covering: hardware, fasteners, and weatherproofing
Fastener selection matters more than people think
Using the wrong fasteners is one of the most common installation errors, and it causes problems that show up months later. For aluminum panels, use stainless steel or aluminum screws, never plain steel, which will corrode and stain the panels. For polycarbonate, use screws with neoprene or EPDM washers that compress to form a seal around the hole. Over-driving these screws creates a depression in the panel surface that collects water, which then works its way under the washer and causes leaks and corrosion underneath. Drive them until the washer just compresses, then stop.
For wood slat additions or wood decking, use exterior-grade coated deck screws at minimum. Pre-drill near board ends to prevent splitting, and leave a 1/8-inch gap between wood boards to allow for expansion and drainage if you're going for a semi-open look rather than a solid seal.
Sealing penetrations
Every screw hole, every panel joint, and every edge where the covering meets a wall or beam is a potential leak point. Use 100% silicone caulk or a sealant specifically rated for outdoor roofing applications at all penetrations. Silicone stays flexible through temperature swings, which matters because panels expand and contract significantly in sun. Butyl tape works well under panel overlaps to create a compression seal at seams. Do not rely on caulk alone at panel-to-panel seams where water flow is heavy.
Panel installation sequence
- Snap a chalk line along the first purlin or slat to establish a straight reference edge.
- Install the first panel starting at the high end (house side) and working toward the outer edge so overlaps shed water correctly.
- Apply butyl tape or weatherstripping along each support member before laying the panel down.
- Pre-drill fastener holes slightly oversized (about 1/8 inch larger than the screw shank) to allow thermal expansion.
- Drive fasteners following the manufacturer's spacing, typically every 12 to 24 inches along each support.
- Lap each successive panel over the previous one according to the manufacturer's spec, typically 2 to 4 inches.
- Seal all exposed edges and the wall-side junction immediately after installation.
Going further: options for blocking more sun and stopping rain
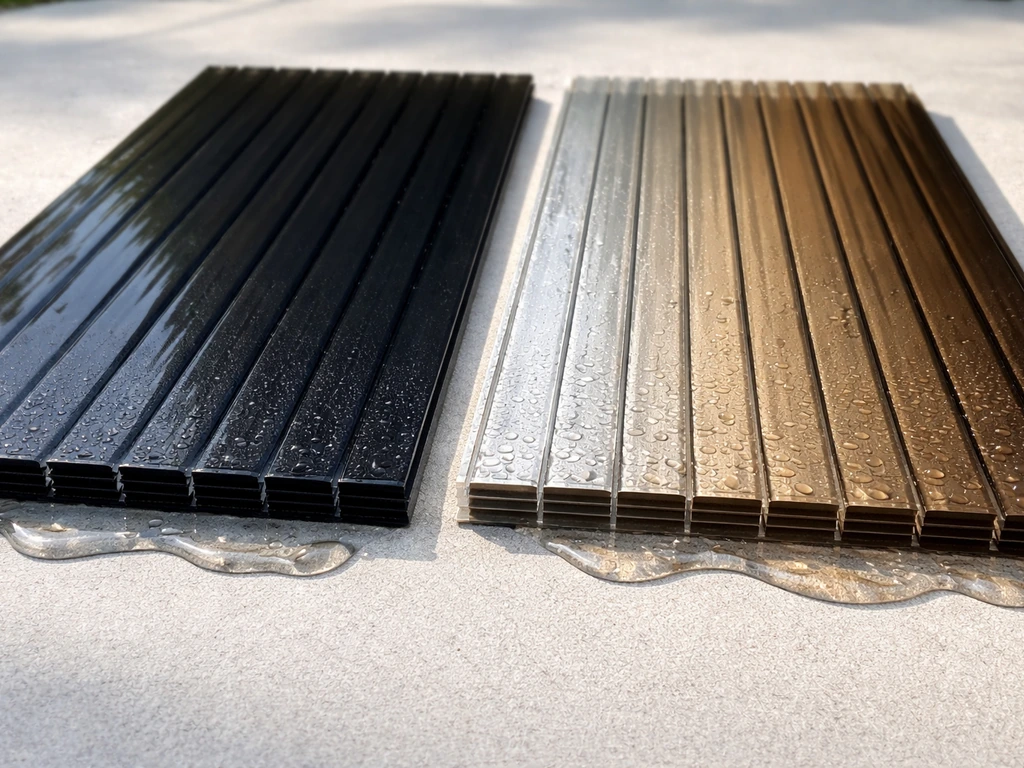
If you want more sun control without a fully solid roof, you have a few practical add-on options. Tinted or bronze-colored polycarbonate panels block 40 to 90 percent of UV while still letting diffused light through. Shade fabric panels stretched over the existing slats and tensioned with grommets and bungee-style cord are the fastest install and work well for sun control, though they won't stop rain. Retractable fabric canopies designed to attach beneath rafters are available as retrofit systems that let you pull shade open or closed as needed.
For rain protection specifically, polycarbonate is the best balance of cost and performance for a DIY retrofit. If you want the adjustable-louver look, fixed-angle aluminum louvered panels are available as a DIY kit option at a fraction of the cost of motorized systems. They're pre-set at an angle that blocks direct overhead sun while shedding rain. Just be aware that fixed louvers don't seal completely during wind-driven rain the way a motorized system with full-close capability does. If waterproofing is your main goal, a continuous panel system with proper flashing is more reliable.
If you've been looking at lattice cover options or thinking about a full vinyl or cedar patio cover build, those are different enough in scope that they deserve their own approach. A lattice patio cover can be covered in a similar way, but you will need to confirm the lattice and framing can handle the added panels or roofing material lattice cover options. If you're specifically planning a lattice patio cover, the open design still needs careful framing and waterproofing details to keep water from getting trapped or pooling. A slatted cover retrofit is generally faster and less expensive than starting from scratch with a new structure.
Finishing details that actually prevent leaks
Flashing at the wall
Where your covered patio meets the house wall is the most common leak location. The correct installation uses a Z-flashing (also called step flashing or wall flashing) that tucks up behind the wall cladding and laps over the top of the panel edge. On stucco walls where you can't easily tuck flashing behind the surface, run the flashing as high as possible against the wall and caulk the top edge with 100% silicone, then paint over it to match. This isn't as bulletproof as integral flashing, but it works if done thoroughly and inspected every year or two.
The key principle with any flashing is layering: water should always flow from a higher piece of material onto the face of a lower piece, never underneath it. If you look at your flashing installation and find any place where water could work behind the flashing, that's where it will eventually leak.
Drip edge at the outer edge
A drip edge is a formed metal channel that attaches to the outer edge of your covering and directs water to drip free of the structure rather than running back along the underside of the panel and dripping onto anyone sitting below. Install it so the leg of the drip edge sits on top of the panel surface, not underneath it. If you're using polycarbonate, most manufacturers sell a matching U-channel or drip-cap profile that snaps onto the cut edge and serves the same function while also sealing the open cellular channels in the panel.
Drainage routing
Think about where the water goes after it leaves the drip edge. If it's going to drip directly onto the patio surface right where people walk, consider adding a small gutter along the outer beam to route water to the side. A vinyl gutter with a downspout is cheap and installs in an afternoon. If you’re planning a vinyl patio cover build, this same drainage mindset helps you route water away from the structure and prevent leaks vinyl gutter. Make sure the downspout terminates at least 3 feet from the house foundation.
Checking your work and fixing common problems
After installation quality check
Once everything is installed, run a garden hose over the structure and watch carefully. Check the wall junction, all panel seams, each fastener location, and the outer drip edge. Any water that doesn't exit cleanly at the outer edge or runs back toward the house is a problem to fix before the first real rainstorm. It's much easier to add sealant now than to troubleshoot a leak from underneath while it's raining.
Common problems and what causes them
- Light leaking through gaps at panel seams: Panel overlap is insufficient or butyl tape was skipped. Add a bead of silicone along the seam from above.
- Water pooling on the panel surface: Not enough slope. Add shim material or sloped furring strips under the panels to create at least 1/4 inch per foot pitch.
- Dripping at fastener locations: Washers were over-driven or the wrong type was used. Remove the screw, let it dry, apply silicone in the hole, and replace with a properly torqued fastener and fresh washer.
- Wood slats warping or cupping: This happens when untreated or improperly dried wood is used and moisture gets absorbed unevenly. Seal all six sides of wood slats before installation, especially the end grain.
- Panel rattling in wind: The panels are unsupported in the middle or the fasteners have loosened. Add an intermediate support or re-drive fasteners and check washer compression.
- Rust streaks from fasteners: Wrong fastener material was used. Replace with stainless steel or coated fasteners and treat any rust staining on the panel below.
- Leak at the wall despite flashing: The top edge of the flashing wasn't sealed, or the flashing isn't tall enough. Extend it with a second piece of Z-flashing and re-seal the top edge.
DIY vs. hiring a pro: permits, codes, and when the stakes go up
Covering a slatted patio cover is genuinely DIY-friendly when you're adding lightweight material like polycarbonate or fabric to an existing sound structure and the scope doesn't change the footprint or structural members. Before you start, review the steps for building a cantilever patio cover so the structure, framing, and attachments are sized correctly for your span and loads how to build a cantilever patio cover. The moment you start adding weight, modifying posts or beams, changing the attachment to the house, or creating a continuous watertight surface that reclassifies the structure, the stakes go up.
Many jurisdictions require a permit for any permanent patio cover modification, especially if it involves attachment to the house or changes to structural elements. Some cities, including San Clemente in California and Denver in Colorado, require structural calculations signed by a licensed engineer before they'll issue a permit. That's not just bureaucratic friction: it's the system catching situations where amateur sizing of posts, beams, or fasteners could fail under snow load, wind uplift, or seismic forces in ways that hurt people.
Call your local building department and describe the project honestly before you start. Ask whether it requires a permit and whether you need engineering drawings. The phone call is free and takes ten minutes. Getting caught with unpermitted work during a home sale or an insurance claim is far more expensive.
Here's a simple way to decide whether to DIY or call a pro:
| Situation | DIY or Pro? |
|---|---|
| Adding polycarbonate or fabric over existing sound slats, no structural changes | DIY with a permit check |
| Existing ledger or framing looks damaged, rotted, or improperly attached | Call a pro first |
| You need to add or resize posts or beams to carry more load | Structural engineer review required |
| Converting to a fully solid watertight roof (structure reclassification likely) | Permit + possible engineering |
| Installing a motorized louver or electric shade system | Hire an electrician for wiring at minimum |
| You're not sure what the existing framing is attached to or how it's built | Have a contractor inspect first |
A good local patio cover contractor can often look at your structure in 20 minutes and tell you what you're actually working with, which is worth paying for if there's any doubt. If the framing is solid and the scope is limited, handle it yourself and enjoy the result.
FAQ
If my slatted patio cover already leaks, can I just add panels or fabric over the top?
You can, but only if the leaks are not coming from failed framing or a bad house-wall flashing. If water is entering at the ledger or the wall junction, adding a top layer can trap moisture and worsen rot. Fix flashing, check for rot at posts and ledger areas, then do a dry fit and hose test before fully fastening panels.
How do I choose between polycarbonate panels and shade fabric when I still want airflow?
Polycarbonate gives real rain shedding while still letting light diffuse, but you need correct pitch and sealed edges to prevent pooling. Shade fabric is better for sun reduction and airflow, but it will not stop rain, and it can sag if it is not tensioned and grommeted to account for wind.
What pitch should I use if I want a more watertight covering but my slats are level?
For any solid or semi-solid covering, plan for at least 1/4 inch per foot slope toward the outer edge. If your slats are level, you typically create pitch with sloped purlins rather than relying on shimming panels, since purlin pitch helps keep panel joints aligned and reduces stress on fasteners.
Do I need intermediate purlins even if my existing slats look close together?
Maybe. Panel requirements depend on panel thickness and your local wind exposure. If your slat spacing exceeds what the manufacturer allows for the panel type, you must add purlins perpendicular to the slats to prevent flexing, joint separation, and premature fastener loosening.
How do I prevent water from pooling at the wall where panels meet the house side?
Use proper wall flashing so the upper component overlaps the lower one, then ensure the covering has a path to the exterior, not back toward the house. After installation, run a hose test focusing on the wall junction and look for any water that runs behind flashing or seeps under panel edges.
Can I reuse existing fasteners or should I replace them when installing new coverings?
Replace any corroded, loose, or missing hardware, and do not mix fasteners that were designed for different materials. New coverings rely on correct sealing washers and correct torque, so reusing questionable fasteners increases the chance of leaks at every penetration.
What is the correct way to install screws in polycarbonate so they do not leak?
Drive screws until the sealing washer just compresses, stop before the panel is visibly dented, and keep fasteners straight (not angled). If you over-tighten and create a depressed area, water can migrate under the washer and continue to spread during freeze-thaw cycles.
Is caulk enough to seal panel seams, or do I need other seals?
Do not rely on caulk alone at seams where water can flow along the joint. Use butyl tape under overlapping panel seams when the system calls for it, and use outdoor-rated sealant only at transitions like edges, penetrations, and wall junctions where water concentrates.
How far should the downspout discharge from the house foundation?
Plan for at least 3 feet from the foundation so runoff does not undermine the footing or push water toward basement walls. Also confirm you are routing discharge to a safe area, not to a walkway edge where it will create a slipping hazard.
Do tinted polycarbonate panels affect how much load the cover needs to handle?
They can, indirectly. Even though tinted panels are not usually much heavier than clear options, you still must follow the manufacturer’s span limits and fastener pattern. If you add heavier decking or multiple layers, then load requirements and framing checks become more critical.
What should I check during the hose test before declaring the job finished?
Inspect every fastener line, all panel overlaps, and the drip edge for any water that runs back toward the house. Also test the wall junction with the hose aimed upward slightly, since water can behave differently when it is driven by splashes or wind.
Will adding a continuous roof surface change the building permit requirements in my area?
It might, because some jurisdictions treat a fully watertight surface as a solid patio cover or structure rather than an open pergola-style shade. Call your building department with the material type and whether the cover is continuous, and ask how they classify it before you commit.
At what point should I stop and call a structural pro instead of DIY?
If you find ledger attachment problems, structural rot at posts, sagging beams, or you need to add or modify supports and connections to the house. Also call a pro if your plan includes snow or high wind conditions, tile or heavy decking, or if you cannot verify panel span limits and required spacing.