Most homeowners spend between $20 and $50 per square foot installed to extend a roof over their patio, which works out to roughly $2,000 to $8,000 for a typical 100 to 200 square foot extension. If you're doing the framing and roofing yourself with basic materials, you can cut that down to $8 to $20 per square foot in materials alone. The final number depends heavily on how far you're extending, what roofing material you choose, whether the new section ties into your house's existing structure, and what your local permit office requires before you start cutting into anything.
How Much to Extend Roof Over Patio Cost and Budget Guide

Celia Vaughn
29 Apr 2026
What 'extend' actually means for a patio roof
When people say they want to extend a roof over their patio, they usually mean one of two things, and the difference matters for both cost and complexity.
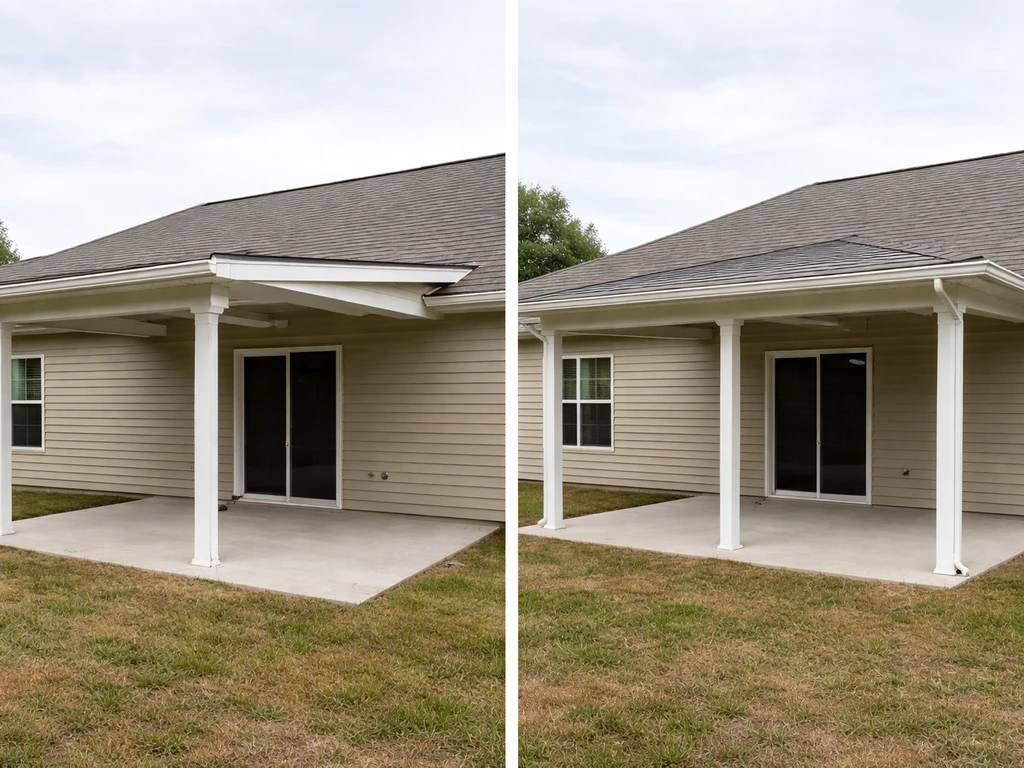
The first is extending the length of an existing patio cover, meaning you want to push it further out from the house to cover more of your patio depth. If your current cover only reaches 8 feet from the wall and you want 12 feet of coverage, you're adding 4 linear feet of depth across the full width of the structure. This usually requires new beams, rafters, and roofing material, and you'll likely need to check whether your existing posts and ledger board can handle the added load.
The second is extending the width or coverage area, meaning you want to run the roof further along the wall to cover more square footage side to side. This involves adding new framing sections that connect to the existing structure and typically requires matching the existing roof style, pitch, and material so the whole thing looks and performs as one unit.
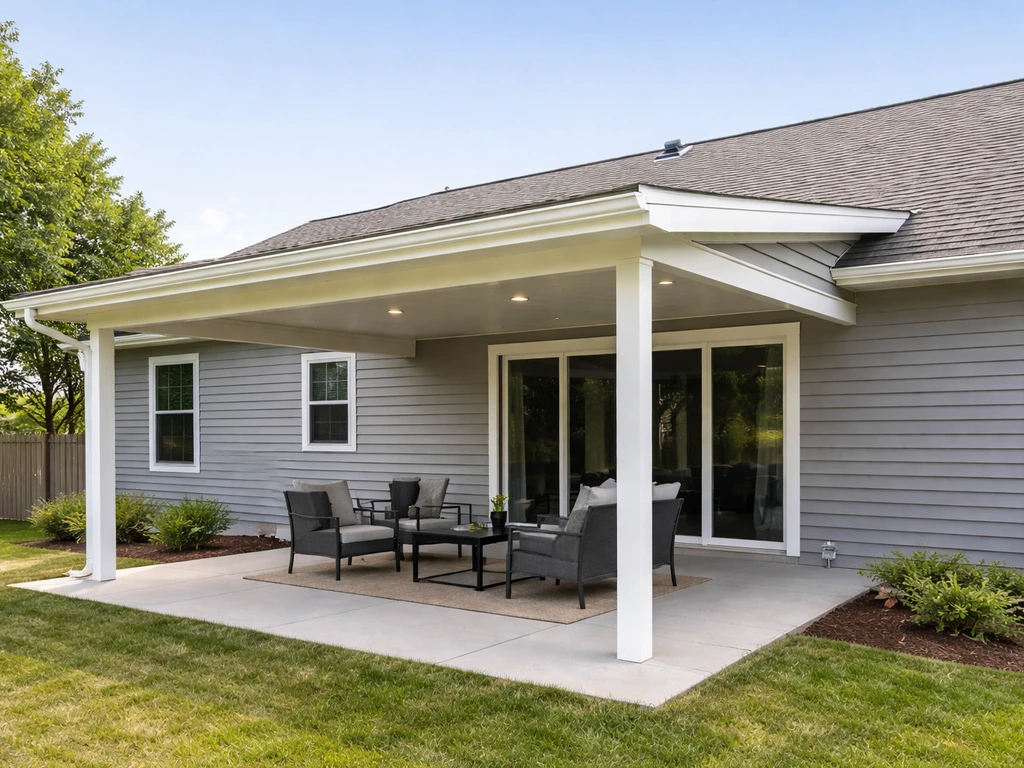
Some homeowners also mean they're starting fresh and building a new patio roof that extends out from the house wall for the first time. All three interpretations involve similar core work: a ledger or beam attachment at the house, posts or columns at the outer edge, a roofing framework (rafters or purlins), and a surface material. How the new section connects to what's already there is usually the trickiest and most expensive part of any extension.
What a patio roof extension realistically costs
Here's a practical breakdown of the cost ranges you're working with, based on current 2026 installed pricing. These numbers assume a straightforward lean-to style (shed roof) extension attached to the house on one side, which is by far the most common patio roof configuration.
| Project size | DIY materials cost | Professionally installed cost |
|---|---|---|
| Small extension (50 sq ft) | $400 – $1,000 | $1,000 – $3,750 |
| Medium extension (100 sq ft) | $800 – $2,000 | $2,000 – $7,500 |
| Large extension (200 sq ft) | $1,600 – $4,000 | $4,000 – $15,000+ |
| Complex gable or insulated roof | Add 30–50% to materials | Add 40–60% to installed cost |
The wide range at the top end reflects Houston-area contractors reporting $15 to $75 per square foot installed depending on complexity, while national averages from aggregators like Angi cluster around $20 to $50 per square foot for standard installations. A basic aluminum patio cover panel system at the low end and a custom timber-framed gable roof with metal roofing at the high end both fall within that spread. Your local labor rates, material costs, and permit fees will shift the number, so treat these as planning ranges rather than fixed quotes.
The factors that move the price up or down
Size and span
This is the biggest lever. A 10x10 extension uses half the material of a 10x20. But cost per square foot actually tends to drop as the project gets bigger because fixed costs like permit fees, equipment rental, and contractor mobilization get spread over more area. If you're planning a small extension, don't be surprised if the per-square-foot price comes in higher than the averages.
Roof style
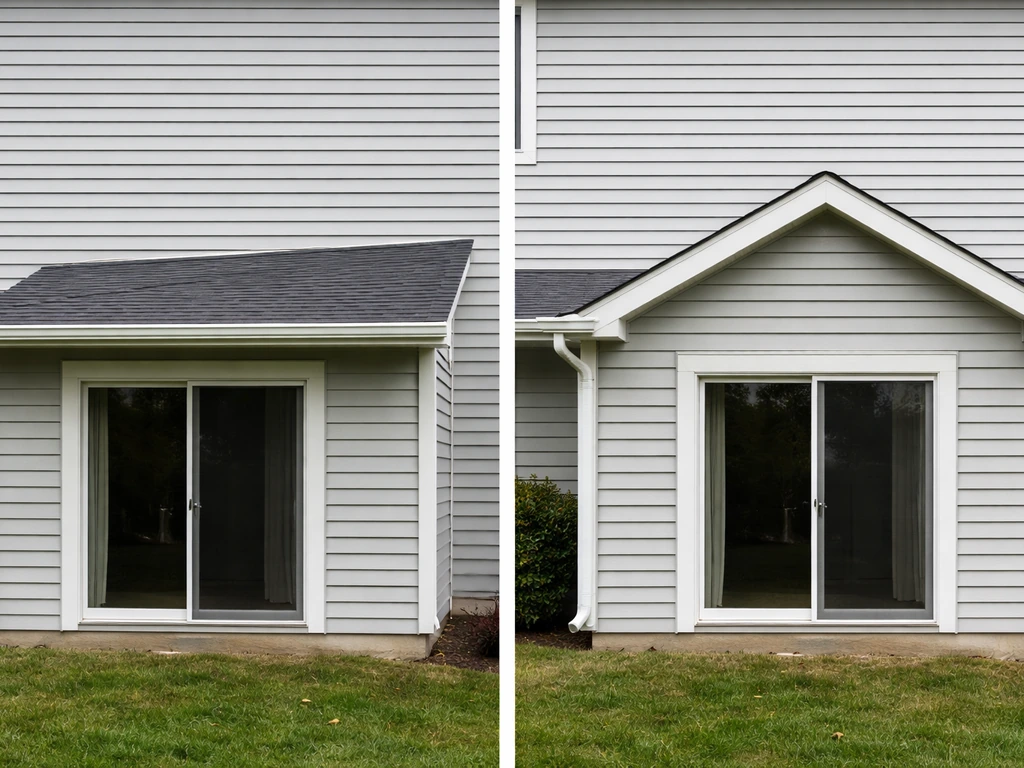
A simple shed roof (single slope, sometimes called a lean-to) is the most affordable option to extend. A gable roof, where two slopes meet at a ridge in the middle, costs more because it needs a ridge beam, doubled rafters at the ridge, and more complex tie-in work at both the house wall and the outer posts. Gable roofs look better and shed water more symmetrically, but they add real cost, especially when tying into an existing roofline. If you're weighing these options, there's more detail on gable construction worth reviewing before you commit to a style.
How the extension connects to your house
This is where most projects get expensive fast. If you're tying the new roof into the existing house roof, you're potentially cutting into existing shingles, flashing, and rafter structure. That work needs to be weathertight and structurally sound. A simple ledger board attachment to the house wall (common in lean-to style covers) is much simpler than cutting into the roof deck and tying new rafters into existing ones. A contractor guide notes that the ledger board attachment and the flashing behind it are a critical, visible failure point for patio-cover longevity and weathertightness ledger board attachment and the flashing behind it are a critical failure point. If your extension requires modifying the house roof itself, budget more time, more money, and likely a structural engineer's sign-off.
Framing material
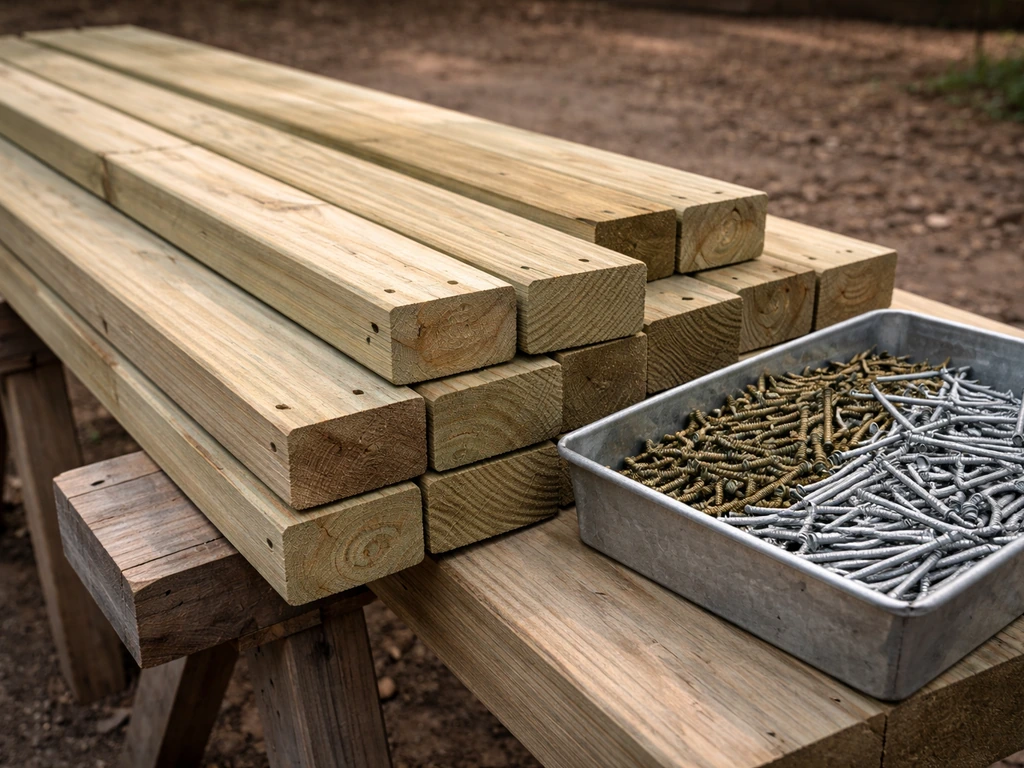
Pressure-treated lumber is the standard framing choice for most DIYers and smaller contractor jobs. It's widely available, easy to work with, and handles outdoor conditions well when sealed or stained. Steel or aluminum framing costs more upfront but requires almost no maintenance and won't warp, rot, or split. For larger spans (anything over 12 to 14 feet between supports), steel or LVL (laminated veneer lumber) beams are often required by code to handle the load, and that adds real cost. Common mistake: people spec regular dimensional lumber for long spans and find out at permit review that it doesn't pass the load calculations.
Roofing surface material
This is where you have real options, each with a different price point and performance profile.
| Material | Approximate material cost per sq ft | Key trade-off |
|---|---|---|
| Aluminum patio cover panels | $3 – $8 | Lightweight, easy DIY install, limited insulation |
| Corrugated metal/polycarbonate panels | $2 – $6 | Very affordable, some light transmission, basic look |
| Standing seam metal roofing | $8 – $14 | Durable, professional look, requires proper substrate |
| Asphalt shingles (over solid decking) | $4 – $9 installed DIY | Matches house roof, heavier, needs solid sheathing |
| Insulated aluminum panels | $10 – $20+ | Best thermal comfort, highest material cost |
Aluminum panel systems are the go-to for DIYers extending a patio cover because they're lightweight, pre-engineered, and don't require a heavy framing structure underneath. Wood-framed roofs with shingles match the house better visually but add significant weight and require a more robust post and beam system. Metal roofing panels sit in the middle, offering durability and a cleaner look than shingles without the complexity of a full shingle roof.
Drainage and gutters
Don't skip this line in your budget. A patio roof extension that dumps water onto your patio foundation or against your house wall creates problems fast. A gutter system along the outer or lower edge of the roof runs $5 to $15 per linear foot installed. If you're in a high-rainfall area or the extension routes water toward the house, this isn't optional.
Site conditions and existing structure upgrades
Sometimes extending a roof means discovering that the existing structure wasn't built to code or can't handle additional load. If your existing posts are undersized, your ledger isn't properly flashed, or your footings are too shallow for your frost depth, those issues need to be corrected before you extend anything. Budget a contingency of 10 to 20 percent for surprises, especially on older homes or existing patio covers that were built without permits.
DIY vs. hiring a pro: be honest with yourself here
A straightforward patio roof extension is genuinely DIY-friendly if you're comfortable with basic framing, can use a circular saw and a drill, and aren't dealing with a complex tie-in to the house's main roof. If you want to follow a complete, step-by-step approach, see our guide on how to put a roof over a patio patio roof extension. Building a lean-to style cover over a patio, setting posts in concrete, running a ledger board, and installing aluminum or corrugated panels is a weekend project for a capable DIYer with a helper. It's the kind of project this site is built around, and it's very doable.
Where it gets risky to DIY: tying the new roof into the existing house roof structure, working around load-bearing walls, dealing with spans that require engineer-specified beams, any project in a high-wind or heavy-snow area with strict code requirements, or anything involving electrical work for lighting or fans under the cover. These aren't reasons to give up, but they are reasons to at minimum consult a structural engineer before you start and potentially hire out the structural connection work even if you do the rest yourself.
What often goes wrong when homeowners push too hard on DIY: the ledger attachment to the house isn't properly flashed and water infiltrates the wall over time, or the beam sizing is undersized for the span and the roof sags or fails under snow load. Both of those failures are expensive to fix after the fact and potentially dangerous. If you're unsure about the structural connection, get a professional to design or inspect it. You can still do 80 percent of the physical work yourself and save significant money.
Permits, engineering, and safety checks before you start
Most jurisdictions require a building permit for any permanent roof structure attached to your house. The 2024 International Residential Code has specific provisions for patio covers (Section R507 and related carport/patio cover guidelines), and your local building department will base their requirements on that or a similar adopted code. A typical permit submittal for a patio roof extension includes a site plan showing the structure's location relative to property lines, a framing plan with beam and rafter sizes, footing specifications, and sometimes a detail showing how the structure attaches to the house.
Permit costs vary widely but commonly run $100 to $500 for a standard residential patio cover addition. If your jurisdiction requires a structural engineer's stamped drawings (common for larger spans, high-wind or snow zones, or when tying into the house roof structure), add $500 to $1,500 for engineering fees. That's money well spent. A stamped plan protects you legally, ensures the structure is safe, and makes resale easier.
Before you pull a permit or buy materials, do these checks:
- Call your local building department and ask specifically whether your planned extension requires a permit. Describe it clearly: attached or freestanding, approximate square footage, material type.
- Check your HOA rules if you have one. Some require design approval before permit submission.
- Verify setback requirements. Most jurisdictions require a minimum distance from property lines, and a covered patio structure counts.
- Look at your existing structure. Are the posts sitting in post bases or buried in concrete? Are footings visible? Is the ledger flashed properly?
- In snow or high-wind areas, confirm the roof pitch and material choice can handle the loads your jurisdiction requires.
Skipping the permit is the most common mistake on these projects and the one that causes the most headaches later. Unpermitted structures can trigger issues when you sell the house, can void your homeowner's insurance coverage for damage related to the structure, and can be ordered removed by the municipality if discovered. It's not worth it.
Building a realistic budget and your next steps
Here's a practical way to estimate your actual project cost. Start by measuring the extension you want in square feet (width times depth of the new covered area). Then use these per-square-foot benchmarks to build a rough range:
- DIY with aluminum panels or basic corrugated roofing: $8 to $15 per square foot in materials
- DIY with wood framing and shingles or metal roofing: $12 to $22 per square foot in materials
- Professionally installed basic lean-to style cover: $20 to $40 per square foot
- Professionally installed gable or complex roof, or insulated panels: $35 to $75+ per square foot
Add permit fees ($150 to $500 typical), any engineering costs if required ($500 to $1,500), and gutters if needed ($5 to $15 per linear foot of the roof's lower edge). Then add your 10 to 20 percent contingency for surprises.
For a concrete example: a 12-foot wide by 8-foot deep extension (96 square feet) as a simple lean-to with aluminum panels, DIY-built, might cost $800 to $1,500 in materials plus $200 in permit fees, so roughly $1,000 to $1,800 all in. When planning roof extensions, it's also smart to estimate how much fall on a patio roof you need so the surface drains correctly and doesn't create standing-water problems. If you want step-by-step help, our guide on how to put a roof over a patio walks you through the planning, materials, and build process. If you are planning a shed roof over a patio, this also aligns with how to build a shed roof over a patio from start to finish for layout, materials, and the key connection details. If you want step-by-step guidance, check out our detailed guide on how to extend a roof over a patio. The same extension installed by a contractor would run $1,920 to $3,840 in labor and materials at $20 to $40 per square foot, plus permit fees.
Your actual next steps right now
- Measure your patio and decide exactly how much coverage you want to add (depth from house, width along the wall). Write those numbers down.
- Decide on your roof style: lean-to or shed roof is the simplest starting point. Gable adds complexity and cost but looks better and may suit your house style.
- Inspect what you already have. If you have an existing cover, look at the ledger attachment, post sizes, and footing condition before planning to extend from it.
- Call your local building department with your planned dimensions and ask about permit requirements, setbacks, and whether engineering drawings are needed.
- Get at least two to three quotes from local contractors if you're considering hiring out. Ask them to break out labor vs. materials so you can compare fairly.
- Decide how much you want to DIY. Framing and panel installation are very learnable. Structural attachment to the house and engineering calculations are where you want expertise on your side.
- Build your budget using the ranges above, add your contingency, and confirm you have the project funded before you start buying materials or pulling permits.
Once you have those numbers in hand, the actual build process is very approachable. The framing steps for a shed roof extension, the overhang construction details, and the specific decisions around roof pitch and drainage all connect closely to the work you'll be doing, and each of those topics has practical depth worth digging into before you start. The planning you do now is what keeps the project on budget and off your problem list later.
FAQ
How do I estimate cost if my patio extension isn’t a perfect rectangle?
Use the actual projected roof footprint (the area directly under the roof), not the patio slab size. For L-shaped or cutout sections, break the area into rectangles, total them, then apply the same $/sq-ft range plus a slightly higher contingency (often 15 to 25%) because odd shapes increase layout, flashing, and material waste.
What does the roof over patio extension price include, and what’s commonly extra?
The headline $20 to $50 per square foot usually covers framing and roof panels/shingles, but extras often include gutter and downspouts, fascia trim, electrical for lights/fans, roof tie-in flashing repairs, new footings if existing ones are inadequate, and engineering/stamped drawings when required. If you’re budgeting, ask for a line-item scope so the contractor cannot price these later as change orders.
Do I need to match the existing roof pitch and materials to keep costs down?
To keep the project simpler and typically cheaper, match the existing roof pitch as closely as practical and use a compatible roofing system (for example, aluminum panels that can tie into the existing drainage line). Big visual or performance mismatches increase flashing complexity at the house connection and can push you toward an engineer-led tie-in.
How much will gutters and downspouts change my total budget?
Gutters are usually one of the smaller line items, but they can become meaningful over long runs. Budget $5 to $15 per linear foot for the gutter itself, then include downspouts plus any splash blocks or drainage work if water will otherwise flow toward foundations. If you’re already seeing pooling near the wall, add more contingency because drainage corrections can cost more than the gutter hardware.
Can I extend the roof without changing the existing posts or footings?
Sometimes, but only if the existing posts, spacing, and bases can carry the added load and wind/snow requirements. A common decision point is span length: if your new rafters or beams create larger unsupported distances, you may need new posts or beefier beams even when the original frame looks fine. Expect inspectors to require proof of capacity for the connection plan.
What span distance triggers extra engineering or different framing members?
In many jurisdictions, if you’re approaching longer spans (often around 12 to 14 feet between supports), you may need engineered beams or LVL/steel rather than regular dimensional lumber. The practical takeaway is to check your planned rafter/beam spacing early, because switching materials late usually costs more than adjusting the layout earlier.
Is a shed (lean-to) roof always cheaper than a gable roof for a patio cover extension?
Often yes, because a lean-to typically has fewer tie-in points and no ridge beam. However, if your house roofline tie-in is already complex (for example, uneven eaves or multiple existing planes), the shed roof may still require significant custom flashing and reinforcement. Always compare by how each style affects where water will go at the house wall.
What are the most expensive DIY mistakes for this type of project?
The costliest failures tend to involve water management at the house ledger (improper flashing, wrong attachment sequence, or missed weatherproofing), and structural undersizing (beam sizing and ledger attachment that cannot handle wind or snow). These are expensive to correct because you may have to remove roof panels, repair framing, and sometimes open walls to fix the leak path.
How do I budget for the structural engineer if I’m not sure I need one?
Ask your permit office what triggers engineering for patio covers in your area, then plan for it if you have any of these: a tie-in to the main house roof, large spans, high-wind or heavy-snow regions, or a layout that changes load paths. If engineering is required, a common budget step is to reserve $500 to $1,500 for stamped drawings, sometimes more for complex connections.
Does adding lighting or a ceiling fan change the roof extension cost a lot?
It can, even if the roof framing cost is unchanged. Wiring under a patio cover usually adds electrical permits, conduit/wiring labor, and safe attachment points. If you’re adding a fan, you may need to reinforce the framing where the fan mounts, not just hang it from lightweight purlins or panels.
How much should I add for permits and contingency if I’m extending an older patio cover?
Older structures often hide undersized posts, shallow footings, or nonstandard flashing. A practical rule is to budget the usual permit range ($100 to $500) plus engineering if required, then keep contingency toward the higher end (15 to 25%) for demolition, foundation corrections, and code-driven upgrades when the inspector reviews the existing conditions.