
Yes, you should insulate your patio roof in most cases, but not every case. If you use your patio regularly, live in a climate with real summers or winters, and your roof is anything other than a basic open pergola, adding insulation will make a noticeable difference in comfort and can cut down on heat and noise. The real question is not whether insulation helps, but which type makes sense for your specific roof material, climate, and budget, and whether the project is a quick weekend retrofit or something that needs a permit and a bit more planning.
Should I Insulate My Patio Roof? DIY Guide for Homeowners

Celia Vaughn
7 Aug 2026
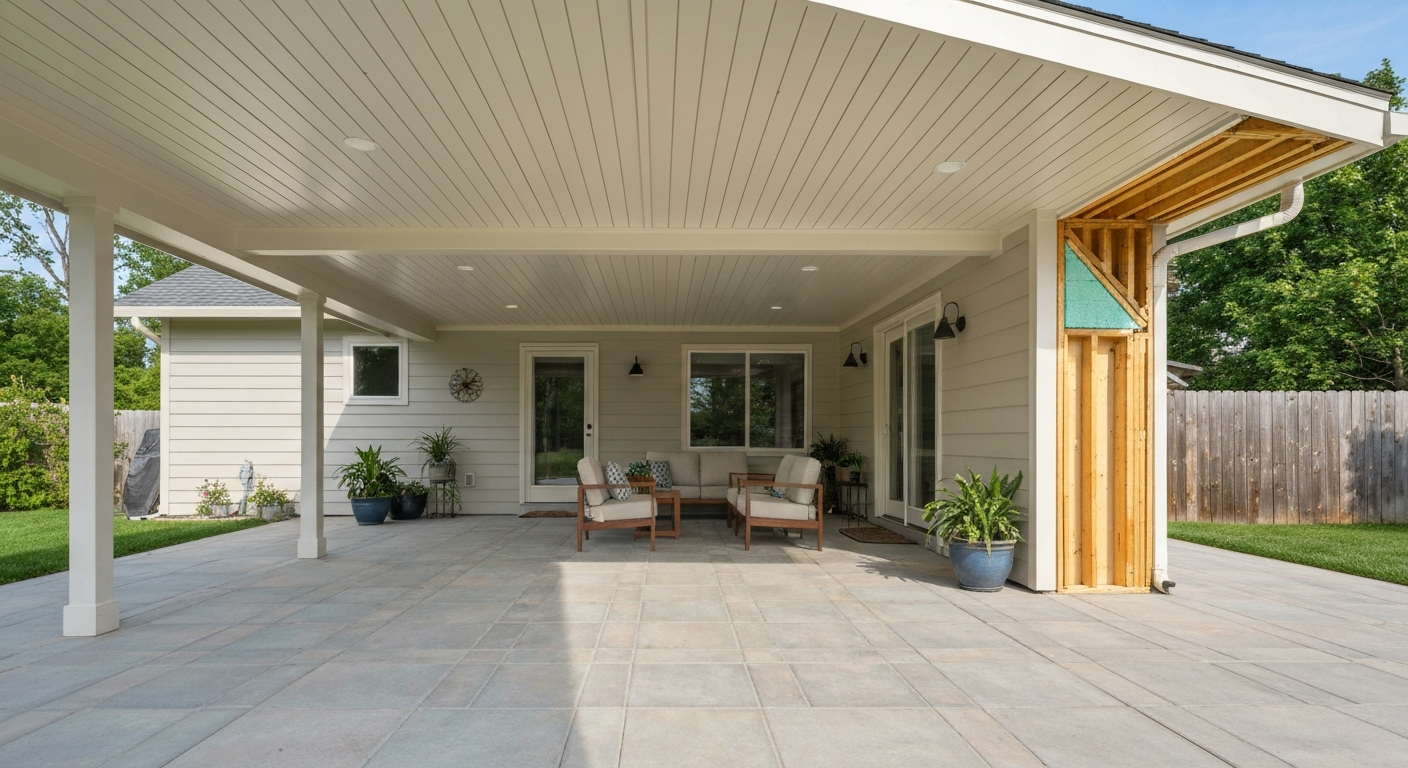
Quick yes/no decision checklist: should you insulate your patio roof?
Run through these four factors before you buy anything. If you check two or more boxes in the 'yes' column, insulating is almost certainly worth it.
| Factor | Insulate — yes | Insulate — skip or wait |
|---|---|---|
| Climate | IECC zones 3–8 (hot summers, cold winters, or both) | Zone 1–2 mild coastal climates with minimal temperature swings |
| How you use the space | Year-round living area, outdoor kitchen, home office, gym | Occasional spring/fall hangouts, open pergola, purely decorative cover |
| Roof type | Solid aluminum panel, metal roofing, wood-framed with sheathing | Open-slat pergola, slatted wood, shade sail |
| Budget | You have $300–$1,500+ for materials and tools | Under $150 — consider a radiant barrier as a low-cost first step |
One extra check: if your patio roof is attached to your house, there is a good chance you need a permit before modifying it. More on that below.
Key factors that determine whether insulation is worth it
Climate zone
The IECC divides the U.S. into climate zones 0 through 8, based on heating degree-days (HDD) and cooling degree-days (CDD). If you are in zones 1 or 2 (think South Florida or coastal Hawaii), the temperature gap between inside and outside is usually small enough that insulation under a patio roof gives modest returns. In zones 3 through 8, which covers most of the continental U.S., including hot-dry Southwest (Phoenix, Las Vegas), the humid South (zones 2A–3A), the Mid-Atlantic and Midwest (zones 4–5), and colder northern states (zones 6–7), summer radiant heat and winter cold both justify insulating. Look up your county's IECC zone using the blank" rel="noopener noreferrer">PNNL county-level maps if you are not sure where you fall.
Sun exposure and roof orientation
A south- or west-facing patio roof that gets direct afternoon sun in zones 3–5 can reach surface temperatures above 150°F on a metal panel. Even a modest insulation layer (R-6 rigid foam or a radiant barrier) cuts the radiant heat transfer into the space dramatically. East-facing and heavily shaded roofs still benefit from insulation in colder months but are a lower priority in summer.
Intended use and seasonal occupancy
If you are turning your patio into a year-round room, adding lights, a TV, outdoor kitchen equipment, or heating, insulation is essentially non-negotiable. Uninsulated metal roofs radiate stored heat for hours after sunset in summer and lose heat fast in winter. Even for a three-season space, you will notice the difference on shoulder-season evenings. For a purely decorative cover you rarely sit under, skip the cost and skip the installation.
Benefits and drawbacks of insulating a patio roof
| Factor | Benefit | Drawback or risk |
|---|---|---|
| Thermal comfort | Dramatically reduces radiant heat gain in summer; keeps the space warmer in winter | None — this is the main reason most people insulate |
| Energy savings | Reduces load on any attached HVAC or patio heater; can lower cooling bills if patio is adjacent to the house | Payback period varies by climate; not significant in very mild zones |
| Noise reduction | Rigid insulation board and foam reduce rain drumming on metal roofs noticeably | Minimal for open pergolas or sparse sheathing |
| Condensation risk | Closed-cell spray foam and properly placed vapor retarders control moisture | Improperly installed insulation traps moisture, causing rust on metal, rot on wood, and mold — especially in humid climates |
| Weight and structure | Most insulation types add minimal load (rigid foam weighs very little) | Spray foam adds negligible weight; however, adding drywall or heavy board finishes can stress undersized rafters |
| Cost | DIY materials typically $0.30–$1.50/sq ft for batts or rigid foam; full spray foam runs $1–$3/sq ft installed | Professionally installed spray foam or insulated panel systems cost significantly more; some methods require hiring a certified installer |
The condensation risk point deserves emphasis. On metal roofs especially, insulation placed on the wrong side of the vapor barrier, or with no vapor control at all, causes moisture to condense on the cold metal surface and drip, rust, or corrode over time. The Metal Building Manufacturers Association (MBMA) specifically recommends vapor retarders on the warm side of the assembly and adequate ventilation or drainage paths to prevent this. Getting this detail right is the difference between a 20-year installation and a 3-year mess.
R-value targets and what to check before you pull a permit
How much R-value does a patio roof actually need?
A patio roof is not a conditioned building envelope, so the prescriptive R-values in the IECC for houses do not apply directly. In practice, most DIYers target R-13 to R-19 for a comfortable semi-conditioned space in zones 3–5, and R-19 to R-30 for zones 6–8 or fully enclosed, heated/cooled spaces. If you are insulating above the roof deck with continuous rigid board (see the unvented assembly notes below), the IRC's Table R806.5 provides minimum rigid-board R-values that must sit above the sheathing to control condensation in unvented rafter assemblies: R-5 for many zone 1–3 locations, R-20 in zone 5, R-25 in zone 6, R-30 in zone 7, and R-35 in zone 8. These minimums are about condensation control, not just thermal performance, so treat them as a floor, not a target.
Permits: when you need one and what to expect
Most U.S. jurisdictions require a building permit for attached patio covers, and many require one for detached structures over 120 square feet. Adding insulation to an existing permitted structure may or may not require a separate permit depending on your city or county, but modifying the structure itself (adding framing to hang insulation, changing the roof assembly) almost always does. Cities like Phoenix require a plot plan, framing cross-section, member sizes, and connection details as part of the patio cover permit submittal. Check your local building department's residential patio cover checklist before you start, it takes 20 minutes and can save you a stop-work order.
Two things that always require a permit regardless of jurisdiction: spray foam applied by a contractor (they pull their own license), and any work that changes the load path or roofline of an attached patio cover. When in doubt, call your local building department and describe what you are doing. They would rather answer a quick question than red-tag your project.
Insulation types and how they perform on a patio roof
| Type | R-value per inch | Best use case | DIY-friendly? | Rough material cost |
|---|---|---|---|---|
| Fiberglass batts | R-3.1 to R-3.7/in | Wood-framed rafters with open bays | Yes | $0.30–$0.60/sq ft |
| Rigid foam (polyiso) | R-5.5 to R-6.5/in | Above or below solid decking, aluminum panels | Yes | $0.70–$1.20/sq ft |
| Rigid foam (XPS/EPS) | R-3.8–5.0/in (XPS); R-3.6–4.2 (EPS) | Below panels, between purlins, framed cavities | Yes | $0.50–$0.90/sq ft |
| Closed-cell spray foam | R-6 to R-7/in | Metal roof decks, unvented assemblies, hard-to-reach areas | Advanced DIY or pro | $1.00–$3.00/sq ft installed |
| Open-cell spray foam | R-3.5 to R-4/in | Wood framing, interior finish applications | Advanced DIY or pro | $0.80–$1.80/sq ft installed |
| Insulated panels (SIP-style) | R-14 to R-28+ (panel-dependent) | New builds, gable and flat aluminum systems | Moderate — best for new construction | $3.00–$8.00/sq ft |
| Reflective/radiant barrier | Not rated in R-value; reduces radiant heat 25–50% | Hot sunny climates, under metal, quick retrofit | Yes — easiest option | $0.10–$0.30/sq ft |
Polyisocyanurate (polyiso) rigid board is usually my first recommendation for retrofit situations because it delivers the highest R-value per inch of any rigid board (useful when headroom is tight), it is easy to cut with a utility knife and straightedge, and it bonds well to aluminum and steel with compatible construction adhesives. Fiberglass batts are the go-to for wood-framed rafters where you have open bays and want a budget option. Spray foam is the best performer for unvented metal assemblies but requires skill, proper safety equipment, and sometimes a fire/ignition barrier coat if the foam is left exposed.
Reflective foil barriers are worth mentioning honestly: they are effective at reducing radiant heat gain in hot sunny climates, but they are not a substitute for R-value insulation when you want temperature regulation on cool nights or in cold climates. Use them as a layer in a larger assembly, or as a cheap first step before a fuller insulation project.
How to insulate an aluminum patio roof
Aluminum patio roofing systems, the kind you buy as pre-engineered panel kits with extruded channels, are among the most common covers in the Sun Belt and they are also the most commonly underinsulated. The panels themselves have almost no thermal mass and heat up fast. Here are the practical options. For step-by-step instructions and detailed material choices, see how to insulate patio roof. For step-by-step guidance on how to insulate a patio cover, see our detailed guide.
Option 1: Rigid foam board between or below the aluminum panels
For aluminum panel systems with hollow-core or twin-wall extrusions, you can fit strips of 1-inch polyiso or XPS foam into the open channels if the profile allows it. More commonly, you attach 1- to 2-inch rigid foam board to the underside of the panels using construction adhesive rated for foam (avoid solvent-based adhesives, they dissolve some foam types) and fasten through into the aluminum framing with self-tapping screws and large-head washers. Cut the foam with a utility knife; score it twice and snap cleanly. Leave small gaps at the edges to allow any condensation to drain rather than pool.
Option 2: Insulated aluminum panels (built-in foam core)
If you are building a new aluminum cover or replacing panels, consider factory-insulated aluminum panel systems. These are essentially a sandwich: two aluminum skins with a urethane or EPS foam core. They cost more per panel (roughly double a hollow panel), but the insulation is already in place, there is no condensation gap to manage, and the finished look is cleaner. Total R-values typically land in the R-10 to R-20 range depending on panel thickness.
Option 3: Reflective radiant barrier under aluminum
In hot-dry climates (IECC zones 2B and 3B), a double-bubble foil radiant barrier stapled or adhered to the underside of aluminum panels is a very cost-effective quick fix. It does not add meaningful R-value but it cuts the radiant heat re-emitted from the hot panel surface. This works well under a covered patio where you are not trying to heat the space in winter, just stay cooler in summer.
Common pitfalls with aluminum
- Using solvent-based adhesive on foam — it melts the foam. Use foam-compatible construction adhesive (look for 'foam board adhesive' on the label).
- Blocking the drainage slots or weep holes built into aluminum extrusion channels — water pools and corrodes the panels from the inside.
- Compressing insulation against the panels with too-tight fasteners — compressed foam loses R-value. Keep it snug but not crushed.
- Forgetting that aluminum expands and contracts with temperature — leave small expansion gaps at panel edges rather than sealing everything airtight.
If you want a fully finished ceiling look under your aluminum cover, clean drywall or tongue-and-groove boards, you will need to build a simple furring-strip or light framing system to hang the finish material below the insulation layer. That is a slightly bigger project but very achievable on a weekend. The detailed process for working with aluminum systems specifically is covered in the related guide on how to insulate aluminum patio roofs.
How to insulate corrugated steel and standing-seam metal patio roofs
Corrugated steel and standing-seam metal panels are common on lean-to patios, workshop-style covers, and free-standing structures. They perform similarly to aluminum thermally but have more installation mass and are more rigid, which gives you more attachment options.
Retrofit: rigid foam board under purlins
The simplest retrofit approach: cut rigid foam panels to fit between the purlins (the horizontal structural members the metal panels sit on) and adhesive-fasten or mechanically fasten them to the underside of the metal. On corrugated panels there will be voids at the corrugation peaks, fill these with foam backer rod or compatible foam sealant before placing the flat board, or use a flexible foam that can conform slightly. A 2-inch polyiso board in this position gives you roughly R-12, which is meaningful in most climates.
Retrofit: thermal blocks and blanket insulation
Blanket or batt insulation laid between purlins (on top of the purlins, below the metal) is a method used in metal building construction, but there is an important warning here: the MBMA and metal roof installation guides consistently note that compressing batt insulation under metal panels reduces its effective R-value and increases condensation risk because the compressed, cool batt creates a surface where moisture can condense. If you use this method, use thermal spacer blocks (small rigid foam spacers that sit on top of the purlin flange) to maintain the batt's full thickness and create a slight gap between the batts and the metal. Do not compress the batts.
New build: continuous rigid board above the deck
On a new-build or full roof replacement, adding a layer of continuous polyiso above the structural deck and below the metal panel is the cleanest approach for condensation control. This keeps the metal panel warm (above the dew point), which dramatically reduces underside condensation. Fasten the metal through the foam into the structural deck using longer screws, typically adding 1.5 to 2 times the foam thickness to the fastener length. Seal seams in the foam with foam-compatible tape.
Vapor control on metal roofs: the rule
The vapor retarder always goes on the warm side, which in winter climates means on the interior (underside) of the assembly, and in hot-humid climates means on the exterior (top) side. For most of the continental U.S. where winters matter, that means your vapor retarder (either a faced batt, a polyethylene sheet, or the foil face of your polyiso) faces down, toward the warm interior of the patio. Getting this backward is one of the most common mistakes and leads to chronic moisture problems that damage the metal from inside. The related guide on how to insulate a metal patio roof covers this in more detail, including specific recommendations by climate zone.
How to insulate wood-framed and raftered patio covers
Wood-framed patio covers, whether a simple lean-to with open 2x6 rafters or a full gable-roof structure with sheathing, give you the most flexibility for insulation methods. You have open bays, nailer surfaces on all sides, and compatibility with virtually every insulation type.
Fiberglass batts in open rafter bays
If your patio has 2x6 or 2x8 rafters spaced 16 or 24 inches on center with a solid sheathed roof above, you can fit R-19 or R-25 unfaced fiberglass batts in the rafter bays. The key rule from IRC R806.3: if you have eave vents, you must maintain at least a 1-inch (preferably 2-inch) clear air channel between the top of the insulation and the underside of the sheathing. Install foam baffles (vent chutes) stapled to the sheathing before placing the batts. This prevents the batts from blocking airflow and causing moisture buildup at the eaves, a very common DIY mistake that leads to mold and sheathing rot within a few years.
Rigid board below the rafters (unvented assembly)
If you want an unvented assembly, no soffit vents, insulation filling the entire rafter bay, you need either closed-cell spray foam in direct contact with the sheathing, or continuous rigid board above the sheathing. See IRC R806.5, condensation control options (GreenBuildingAdvisor copy of code) for the code guidance that unvented roof assemblies must either use sufficient continuous exterior insulation to keep sheathing warm or an air‑impermeable insulation in direct contact with the sheathing plus appropriate vapor control by climate blank" rel="noopener noreferrer">IRC R806.5 — condensation control options (GreenBuildingAdvisor copy of code). The rigid-board-above approach keeps the sheathing warm and dry without requiring ventilation. Per IRC R806.5 and Table R806.5, the above-deck rigid board must meet minimum R-values by climate zone to control condensation (R-20 for zone 5, R-25 for zone 6, R-30 for zone 7). Below that R-value threshold, the sheathing stays too cold and moisture condenses on it from below.
Closed-cell spray foam for unvented wood-frame roofs
Closed-cell spray polyurethane foam (ccSPF) applied directly to the underside of the sheathing is an excellent unvented solution. At R-6 to R-7 per inch, 3 inches of ccSPF gives you around R-20 in a tight package. It air-seals as it goes on, it acts as a Class II vapor retarder at typical thicknesses, and it adheres to wood and most substrates. The catch: ccSPF must be covered with a fire-ignition barrier (like 1/2-inch drywall) if it is left exposed in an occupied space per most building codes. Factor in that finish layer. Also, two-component DIY foam kits are available for small areas but a full patio roof is a job where a certified spray foam installer adds real value, the mixing ratio and temperature sensitivity of the product can cause performance problems when applied by inexperienced users.
Finishing options: from bare insulation to a real ceiling
For a finished look, the most DIY-friendly approaches are:
- Tongue-and-groove pine or cedar boards nailed directly to the underside of the rafters, with batts placed between rafters above the boards before closing up.
- 1/2-inch exterior-rated plywood or OSB as a utility ceiling below the insulation layer — paintable, durable, and handles outdoor moisture better than standard drywall.
- Beadboard or PVC trim panels for a cleaner look — very moisture-resistant and easy to cut with a circular saw.
- If the patio is semi-enclosed, 5/8-inch Type X drywall is required below exposed spray foam as a fire barrier — prime and paint with exterior latex.
Before adding any ceiling material, check that your rafters are sized to handle the added weight. A 2x6 rafter spanning 10 feet can typically handle the load of light tongue-and-groove boards without issue, but heavy tile or thick plywood over long spans may need an engineer's eye. If you have any doubt, the time to address it is before the ceiling is up, not after.
Ventilation and condensation control: the details that matter
Regardless of roof material, moisture management is where most DIY patio insulation projects either succeed or fail. Here is the practical checklist:
- Vented assemblies (with eave or ridge vents): install per-bay foam baffles before placing insulation, maintain a 1–2 inch clear channel at all vent locations, do not compress insulation into the vent path.
- Unvented assemblies: either use enough continuous rigid board above the deck (see R806.5 zone-specific minimums), or use closed-cell spray foam at the deck in direct contact — no air gap between the foam and the sheathing.
- Vapor retarder placement: in heating-dominated climates (zones 4–8), the retarder goes on the warm (interior) side. In hot-humid climates (zones 1A, 2A, 3A), it goes toward the exterior or is omitted — consult your local building department.
- Metal roofs specifically: seal all lap joints and penetrations with compatible butyl tape or foam sealant to prevent humid air from reaching the cold metal surface.
- After installation: check for drips or water staining on the insulation or framing at the end of the first rainy season — early detection prevents a small moisture problem from becoming structural rot.
Tools, safety, and realistic cost ranges
Basic tool list for most DIY insulation jobs
- Utility knife with fresh blades (for cutting rigid foam and batts)
- Straightedge or long level (for scoring straight lines in foam board)
- Tape measure and pencil
- Drill/driver with self-tapping metal screws and large-head washers for foam attachment
- Caulk gun with foam-compatible construction adhesive
- Foil or foam tape for sealing rigid board seams
- Safety glasses, N95 mask (fiberglass batts release irritating fibers), and gloves
- Stepladder rated for your weight plus tools — do not improvise with patio furniture
Rough cost ranges for common approaches
| Method | Typical DIY cost (200 sq ft roof) | Notes |
|---|---|---|
| Radiant barrier (foil bubble) | $20–$60 | Quick summer fix; not a substitute for R-value |
| 1-inch polyiso rigid board | $140–$240 | Best value for retrofit; cuts easily |
| 2-inch XPS rigid board | $160–$280 | Good moisture resistance; heavier |
| R-19 fiberglass batts (wood frame) | $80–$130 | Rafter bays only; needs baffles if vented |
| DIY 2-component spray foam kit (small areas) | $80–$150 per kit (covers ~30–50 sq ft at 2 in) | Temperature-sensitive; better for gaps/edges than whole roof |
| Professional closed-cell spray foam | $400–$900+ installed | Worth it for full unvented metal/wood assemblies |
| Factory insulated aluminum panels | $600–$1,600+ depending on system | Best for new builds; eliminates field insulation work |
When to call a professional
Most rigid foam and batt work is genuinely DIY-accessible, if you can measure, cut, and follow instructions, you can do it. Spray foam is the exception. Two-component kits require careful temperature management, proper mixing ratios, and full respiratory/skin protection (the chemicals are serious irritants until cured). A botched spray foam job is expensive to fix and can cause air quality problems. Hire a certified SPF installer for any job over about 100 square feet, for unvented assemblies where the foam is doing structural moisture work, or if you have any doubts. Also hire a pro or consult a structural engineer any time you are modifying attachment points on an existing attached patio cover, the connection between a patio ledger board and the house is a load-path and flashing issue that matters.
Troubleshooting and maintenance tips
What often goes wrong: the most frequent problem I hear from people who insulated their own patio roofs is unexpected condensation dripping inside the space, usually within the first winter after installation. Nine times out of ten this is a vapor retarder placed on the wrong side, or a vented assembly where the vent channel was blocked by insulation. The fix is to check for blocked baffles and re-examine your vapor retarder orientation, you may need to pull a section of insulation and re-install it correctly.
- Dripping water inside the patio after rain: check that drainage gaps and weep holes in aluminum extrusions are not blocked by insulation or adhesive.
- Sagging rigid foam panels: adhesive-only attachment is not enough for large panels overhead — add mechanical fasteners (screws with wide washers) every 16–24 inches.
- Foam edges delaminating: seal all rigid foam edges with foil tape after installation; unprotected edges absorb moisture and can degrade over time in humid climates.
- Rain noise still loud after insulating: a single thin layer of rigid foam reduces some noise but does not eliminate drumming on metal. Adding a second layer or a finished ceiling below the insulation makes a much bigger acoustic difference.
- Annual maintenance check: once a year, walk the underside of the insulation and look for staining, sagging, or gaps at the edges. Catching a small failure early — a lifted tape seam or a gap at the eave — takes five minutes to fix and prevents years of moisture damage.
FAQ
Should I insulate my patio roof? (short decision checklist)
Yes or no depends on climate, use, and roof type. Insulate if: you live in a climate with significant heating or cooling loads (moderate–high HDD or CDD), the patio is used as a conditioned or frequently-occupied space, you want to reduce radiative heat from a metal roof, or you need noise reduction from rain. Skip or deprioritize insulation if: the patio is strictly unconditioned and used infrequently, budget is very tight, the roof is lightweight metal where adding insulation would void warranty or create condensation risk unless reworked, or adding insulation would require major structural or permit work you can’t or don’t want to do. Quick red flags that push toward professional help: persistent underside condensation, manufacturer warranty exclusions for insulation/venting, or converting an attached roof that changes building envelope lines (likely requires permit).
What are the main benefits and drawbacks of insulating a patio roof?
Benefits: improved thermal comfort (cooler in summer, warmer in winter), lower adjacent indoor loads if patio is semi-conditioned, reduced radiant heat from metal/aluminum panels, better rain/impact noise reduction, and potential energy savings if the patio is conditioned. Drawbacks: added cost and weight, possible condensation/corrosion risk under metal roofs if done incorrectly, potential warranty or code complications, altered drying paths that can increase moisture risk in retrofit situations, and more complex ventilation/finish detailing. Balance these by choosing compatible materials and following moisture-control best practices.
What R-value targets and code/permit notes should I consider?
Targets: match local code for comparable ceiling/roof assemblies—typical practical targets for insulated patio roofs range from R-13 to R-30 depending on climate and whether the space is conditioned. For unvented assemblies placed at or above roof sheathing, use IRC Table R806.5 guidance: required continuous rigid-board R-values vary by climate (examples: lower zones R-5; colder zones R-20+). Codes: converting to an unvented (insulation at/above deck) assembly has specific R-value/vapor-control requirements per IRC R806.5. Many jurisdictions require a permit for new/modified patio covers—attached covers or those over certain areas commonly trigger permits. Check local building department early; submit framing sections and insulation strategy if required.
How does climate affect my choice and moisture strategy?
In warm/humid climates prioritize ventilation and vapor-permeable assemblies with reflective barriers and air gaps to avoid trapping moisture. In mixed climates use balanced strategies (air-sealing, some exterior continuous insulation or closed-cell SPF where appropriate) and follow ASHRAE 160/IRC R806.5 guidance. In cold climates you must keep roof sheathing warm enough to avoid interstitial condensation—use continuous exterior rigid insulation thick enough per R806.5 or closed-cell SPF at the deck and include proper vapor-retarder measures. When retrofitting, plan for improved air sealing and drying paths; DOE/Building America warns insulation changes can increase moisture risk if not addressed.
Material-specific guidance — Metal and aluminum patio roofs
Metal/aluminum roofs are especially prone to underside condensation and corrosion. Avoid simply tucking unfaced blanket insulation flat against panel undersides (it compresses and traps moisture). Preferred methods: 1) Install continuous rigid foam or polyiso above/under the deck when possible (keeps sheathing warm). 2) Create a ventilated airspace beneath the metal panel (furring strips or thermal blocks) and place insulation between purlins or under the purlins without contacting the metal. 3) Use closed-cell spray foam applied by a certified installer directly to the underside of the roof deck for an unvented, air-sealed approach in appropriate climates — check code and warranty. Always follow MBMA/NRCA guidance: place vapor retarder on warm side, seal seams, and maintain drainage/vent channels as recommended by manufacturer.
Material-specific guidance — Wood and framed patio covers (framed/raftered or vaulted)
For wood-framed covers you can use conventional methods: 1) Vented cathedral/lean-to: install baffles/chutes to maintain a 1–2" clear vent channel from eave to ridge, place unfaced batts or mineral wool between rafters, and add a finished ceiling below. 2) Unvented (insulation at/above deck): install continuous rigid board over sheathing or closed-cell spray foam at the roof deck; follow IRC R806.5 for R-values/vapor control in cold climates. Use breathable finishes and allow drying to the exterior where possible. For framed covers with purlins, insulating between purlins plus a separated interior finish is common; avoid compressing insulation.