
Insulating a patio cover is worth doing if you use the space regularly, live somewhere with hot summers or cold winters, or if you hear every rainstorm like you're inside a snare drum. The process is very DIY-able, but the right approach depends heavily on what your cover is made of, whether you're building new or retrofitting, and how your local climate stacks up. This article walks you through the whole decision, the material choices, the R-value math, structural prep, and step-by-step installation for aluminum, metal, and wood covers across lean-to, gable, and freestanding styles.
How to Insulate a Patio Cover: DIY Guide for Metal & Wood

Celia Vaughn
8 Aug 2026
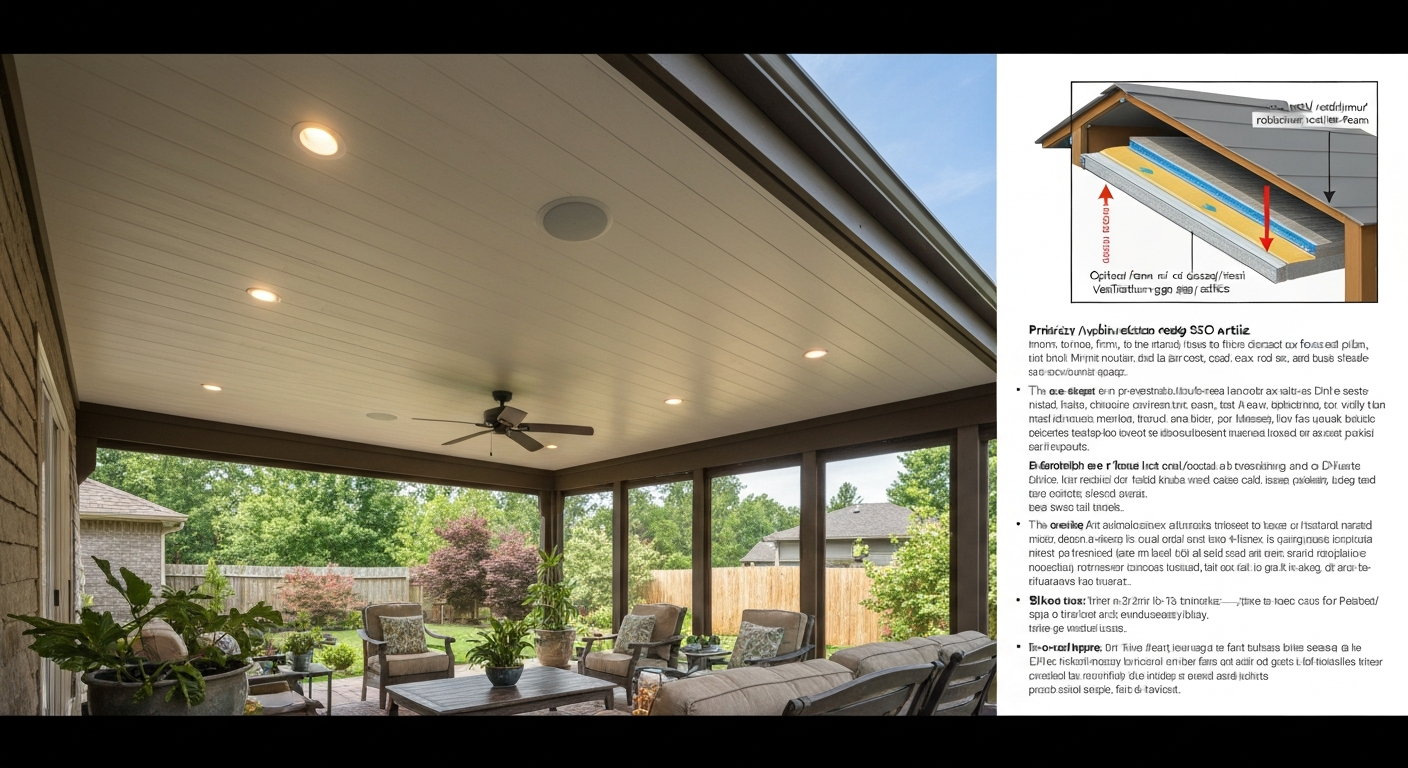
Should you insulate your patio cover? A quick decision guide
Before you buy a single roll of batt or a can of spray foam, spend five minutes honestly answering a few questions. Most homeowners who regret insulating did it without a clear reason. Most who skipped it wish they hadn't. Run through this checklist first.
- Do you use the patio year-round, or at least more than a few months per year?
- Does the space get uncomfortably hot in summer or cold in winter?
- Do you hear rain, hail, or wind noise through the cover and find it disruptive?
- Do you see condensation dripping from the underside of your cover on humid mornings?
- Is the cover attached to the house and part of your living envelope, or is it a purely decorative shade structure?
- Are you adding ceiling fans, lighting, or a heater to the space?
- Is your cover made of bare metal or uninsulated aluminum (both conduct heat and cold aggressively)?
- Are you building new, or retrofitting an existing structure?
If you answered yes to three or more of those, insulation will make a real, noticeable difference. If your cover is a simple open pergola used only on nice afternoons, insulation adds cost and complexity without much payoff. For anything in between, the flowchart below helps you decide quickly.
- Is the cover enclosed or semi-enclosed on at least two sides? Yes: insulation helps significantly. No: radiant barrier only, or skip entirely.
- Is the cover made of bare aluminum or metal? Yes: insulation is highly recommended to control heat and noise. No, it's wood: insulation is optional but beneficial in extreme climates.
- Do you have or plan a finished ceiling below the rafters? Yes: batt, rigid foam, or spray foam all work well. No open ceiling: radiant barrier or foil-faced rigid foam is your easiest option.
- Are you building new or retrofitting? New build: design insulation into the framing from the start. Retrofit: rigid foam panels or spray foam are usually the most practical choices.
- Is the patio attached to the house? Yes: check permit requirements with your local building department before starting anything.
The real reasons to insulate: heat, noise, condensation, and energy
An uninsulated metal or aluminum patio cover in direct sun can reach 150°F or more on the surface. That heat radiates straight down into your space. Insulation with a radiant barrier between the roof deck and the living area can cut that radiant heat transfer dramatically, dropping perceived temperatures by 10 to 20 degrees on a hot afternoon. For wood covers, the gain is less dramatic but still meaningful in hot climates.
Noise is often the reason people insulate and regret not doing it sooner. Metal and aluminum roofs amplify rainfall into a roar. A layer of rigid foam or batt insulation under the roof deck absorbs impact noise and reduces transmitted sound by a significant margin. Closed-cell spray foam does this even better because it bonds directly to the metal and eliminates the air gap that lets vibration travel.
Condensation is a less obvious but serious issue. When warm, humid air hits a cold metal surface, moisture condenses and drips. Over time, that moisture damages framing, promotes mold, and stains your outdoor furniture. Insulation raises the surface temperature of the interior face above the dew point, stopping condensation from forming. This is especially important in coastal climates or anywhere with warm days and cool nights.
From an energy standpoint, if your patio cover is attached to the house and shares a wall or ceiling plane with conditioned space, an uninsulated cover is effectively a gap in your building envelope. Insulating it can reduce heating and cooling loads on your HVAC system, which shows up on your utility bills over time.
When insulation makes the most sense
Climate is the biggest factor. In hot-arid climates like the Southwest, radiant heat through an aluminum or metal roof is the primary problem, and a radiant barrier plus rigid foam is highly effective. In humid-hot climates like the Southeast, condensation control becomes equally important, making closed-cell spray foam particularly attractive because it acts as both insulation and vapor retarder. In cold climates, any insulation that keeps the space above freezing and prevents ice-related moisture problems is worthwhile. In mild climates, you may find that a simple radiant barrier is enough.
Use case matters just as much. A patio you've set up as an outdoor kitchen or home gym that gets daily use year-round justifies the full treatment: rigid foam, vapor barrier, and a finished ceiling. A seasonal entertaining space used May through September in a moderate climate might only need a foil radiant barrier stapled to the rafters. Timing also plays a role: insulating during a new build is always cheaper and easier than retrofitting, because the framing is open and accessible. That said, retrofit projects are very manageable, especially for rigid foam and spray foam.
How your cover material changes everything
Aluminum, metal, and wood covers all behave differently thermally and structurally, and that changes which insulation methods work and which cause problems.
Aluminum and metal covers
These are the most common patio cover materials and also the most challenging to insulate well. Bare aluminum and steel have almost no thermal resistance on their own. They conduct heat and cold directly, create condensation surfaces, and amplify rain noise. The good news is that they're usually structurally strong, and adding insulation below the deck is straightforward. The main cautions: metal expands and contracts significantly with temperature change, so any insulation system needs to accommodate movement. For standing-seam metal panels, hidden clip systems allow thermal movement; rigid fasteners through the panel can cause oil-canning and long-term leaks. Always follow the manufacturer's fastener guidance. Getting this wrong voids warranties and causes water intrusion.
For aluminum specifically, many homeowners and contractors opt for factory-insulated panel systems, which are essentially sandwich panels with a foam core already bonded between two aluminum faces. These are sold under brand names and by aluminum patio cover manufacturers directly. They're the cleanest solution for new builds and some retrofit situations.
Wood covers
Wood has natural thermal resistance that metal lacks, so it starts from a better baseline. A 2x6 rafter bay, for example, gives you 5.5 inches of cavity depth for batt insulation. Wood is also easy to fasten to, easy to modify, and compatible with every insulation type. The main considerations for wood are moisture management (wood rots if vapor is trapped) and making sure insulation doesn't compress against sheathing in a way that blocks ventilation where ventilation is required.
Composite and engineered covers
Composite and engineered wood panel systems typically come with some factory insulation or thermal mass built in. Check the manufacturer's specs before adding more, because some panels are designed as a complete assembly and adding field-applied insulation can trap moisture or interfere with the panel's designed drainage paths.
| Cover Material | Main Thermal Problem | Best Insulation Match | Key Caution |
|---|---|---|---|
| Aluminum panels | High heat gain, condensation, noise | Rigid foam under deck, insulated panels, spray foam | Thermal expansion; follow fastener specs |
| Bare metal (steel/corrugated) | Same as aluminum, plus condensation | Closed-cell spray foam, rigid foam | Vapor management; spray foam needs thermal barrier if exposed |
| Wood framing (open rafters) | Moderate heat, air leakage | Batt/blanket in cavity, rigid foam over or under deck | Ventilation clearance; vapor retarder placement by climate |
| Factory insulated panels | Usually adequate; edge sealing | Seal panel joints; add radiant barrier if needed | Don't add insulation that traps moisture in panel gaps |
| Composite/engineered panels | Varies by product | Check manufacturer specs first | Layering over factory panels can trap vapor |
Insulation types: what they are, what they cost, and where they work
Batt and blanket insulation
Fiberglass batts and mineral wool blankets are the familiar pink or yellow rolls you've seen in walls and attics. They're the cheapest option per R-value, widely available at any home center, and easy to cut and fit into open rafter bays. Kraft-faced batts include a vapor retarder on one face; unfaced batts don't. For patio covers, you'd typically use batts in a wood-framed cover with a finished ceiling below. The catch: batts need to fill the cavity fully without compression, and they need to be in full contact with the interior ceiling material to work correctly. Compressed batts lose R-value fast. They also absorb moisture if exposed to condensation without a proper vapor retarder, so they're not ideal as a standalone solution directly under a metal deck. Typical cost: $0.50 to $1.00 per square foot for the insulation itself.
Rigid foam boards
Rigid foam comes in three main types: EPS (expanded polystyrene, the beadboard look), XPS (extruded polystyrene, usually pink or blue), and polyisocyanurate or polyiso (foil-faced, typically used in roofing). R-values run roughly R-3.8 per inch for EPS, R-5 per inch for XPS, and R-6 to R-6.5 per inch for polyiso under normal temperatures (polyiso's R-value can drop in cold conditions, so check the product data sheet for your climate). Rigid foam boards are the workhorses of patio cover insulation: they cut with a utility knife or circular saw, they're moisture-resistant, they work against metal decks, and they install in retrofit situations without tearing anything apart. You can glue them to the underside of a metal deck with construction adhesive, fasten them to furring strips, or stack layers to hit your R-value target. Cost runs roughly $0.50 to $1.50 per square foot depending on type and thickness.
Spray polyurethane foam (SPF)
Spray foam comes in open-cell (softer, R-3.6 to R-3.7 per inch) and closed-cell (denser, R-6 to R-7 per inch) versions. For patio covers, closed-cell is almost always the better choice because it also acts as a vapor retarder and air barrier, it bonds tightly to metal without gaps, and it adds some structural rigidity. It's excellent at stopping condensation on metal surfaces. The downsides are real though: spray foam costs more than rigid foam (expect $1.50 to $3.00 per square foot installed for closed-cell), it requires professional equipment and safety gear for anything beyond small two-component kits, and per EPA guidance, occupants need to vacate during application because isocyanate exposure during spraying can exceed safe limits. Critically: exposed spray foam requires a thermal barrier in most code jurisdictions, which typically means covering it with 1/2-inch gypsum board or an approved ignition barrier product. Check your local code and the foam manufacturer's listed requirements before leaving spray foam exposed.
Foil radiant barriers
Radiant barriers are reflective foil products (like Reflectix) that bounce radiant heat away rather than absorbing it. They work very differently from mass insulation: they don't slow conductive heat transfer, they reflect radiation. This means they only work when there's an air gap on at least one side of the foil. Stapling radiant foil flat against a metal deck with no air space does essentially nothing. Installed correctly with a 1-inch or greater air gap between the foil and the roof surface above, they can meaningfully reduce radiant heat in hot climates. They're inexpensive (roughly $0.20 to $0.60 per square foot), lightweight, and easy to install. They're not a replacement for real insulation in cold climates or for noise control, but in a hot climate with a metal or aluminum roof, they're often a cost-effective first layer or standalone solution for a lightly used space.
Insulated panels (sandwich panels)
Insulated metal panels (IMPs) or insulated aluminum patio cover panels are factory-made sandwich assemblies: two metal or aluminum faces bonded to a foam core (PIR, polyurethane, or EPS). Products like those from Kingspan advertise R-values up to around R-8 per inch for their best cores in commercial applications; residential patio cover panels typically range from R-11 to R-30+ depending on panel thickness. These are the cleanest, most finished-looking option for new builds. Retrofit is possible if you're replacing the existing deck surface entirely. Cost is higher per square foot than field-applied insulation, but you get insulation, structure, and finish in one product with no secondary finishing work needed.
| Insulation Type | R-Value per Inch | Best Use Case | DIY Friendly? | Approx. Cost/sq ft (material) |
|---|---|---|---|---|
| Fiberglass batt | R-3.1 to R-3.4 | Wood-framed open rafter bays with ceiling below | Yes | $0.50–$1.00 |
| Mineral wool batt | R-3.7 to R-4.2 | Same as fiberglass; better moisture/fire resistance | Yes | $0.80–$1.50 |
| EPS rigid foam | R-3.6 to R-4.0 | Retrofit under metal or wood deck | Yes | $0.50–$0.90 |
| XPS rigid foam | R-5.0 | Retrofit; moisture-prone areas | Yes | $0.80–$1.20 |
| Polyiso rigid foam | R-6.0 to R-6.5 | Highest R per inch for thin assemblies | Yes | $1.00–$1.50 |
| Open-cell spray foam | R-3.6 to R-3.7 | Air sealing; low-cost cavity fill | Small kits only | $1.00–$2.00 installed |
| Closed-cell spray foam | R-6.0 to R-7.0 | Metal/aluminum covers; vapor control | Small kits only | $1.50–$3.00 installed |
| Foil radiant barrier | N/A (reflects radiant heat) | Hot climates; lightweight over metal decks | Yes | $0.20–$0.60 |
| Insulated panels (IMP) | R-4 to R-8+ per inch | New builds or full deck replacement | Moderate | $3.00–$8.00+ installed |
R-value targets: how much insulation do you actually need?
R-value is the measure of thermal resistance: higher is better at slowing heat transfer. For an unenclosed or partially open patio cover, you don't need to hit the same targets as a conditioned interior roof, but you should still aim for meaningful numbers. Here's a practical framework by climate and use case.
| Climate Zone | Patio Use | Recommended R-Value Range | Practical Example |
|---|---|---|---|
| Hot-arid (Zones 2–3) | Year-round outdoor living | R-13 to R-19 | 2 inches polyiso + radiant barrier |
| Hot-humid (Zones 1–2) | Year-round; condensation a concern | R-13 to R-21 | 2 inches closed-cell SPF or 3.5" batt |
| Mixed/moderate (Zones 4–5) | Seasonal or year-round | R-11 to R-19 | 1.5 inches XPS + batt, or insulated panel |
| Cold (Zones 6–7) | Three-season or heated space | R-21 to R-30 | 3.5" batts + 1" polyiso, or thick IMP |
| Very cold (Zone 7+) | Heated enclosed patio | R-30+ | Full rafter-depth batt + continuous foam layer |
For unvented assemblies (where insulation fills the rafter cavity with no air gap), IRC R806.5 sets minimum above-deck or under-deck air-impermeable insulation requirements that vary by climate zone. If you're going fully unvented, meaning closing off all ventilation gaps, check this section of your local adopted code carefully because the minimums are specific and skipping them causes moisture problems inside the assembly.
A note on vapor retarders: in hot-humid climates, the vapor retarder goes on the exterior (warm) side of the assembly because vapor drives from outside in. In cold climates, it goes on the interior (warm) side. In mixed climates, smart vapor retarders (variable permeance) handle both directions. Getting this backward traps moisture and causes rot or mold. If you're unsure, a local building inspector or energy consultant can tell you the right placement for your specific climate zone in about five minutes.
Structural prep before you insulate
This is the step most DIYers skip, and it's the one that causes problems down the road. Before you add any insulation, check these four things.
Framing inspection and load limits
Insulation adds weight. A layer of 2-inch polyiso rigid foam runs about 0.3 to 0.5 lbs per square foot. Spray foam adds more. Insulated panels can add several pounds per square foot. For most patio covers with standard 2x6 or larger framing at 24 inches on center, moderate insulation loads are within design capacity. But if your cover uses lightweight aluminum extrusions, thin-gauge purlins, or small-diameter tube framing, check the manufacturer's load specs before adding any dead load. A 20x16 foot patio cover is 320 square feet. Even 1 pound per square foot of added insulation weight is 320 extra pounds hanging from your framing. When in doubt, have a structural look at the drawings or have a contractor walk the space.
Ventilation: the rule most people miss
If you're insulating a vented assembly (where there's an air space between the insulation and the roof deck above), you need to maintain ventilation pathways. IRC R806.2 requires a minimum net free ventilating area of 1 square foot per 150 square feet of covered area, reducible to 1/300 when intake and exhaust vents are balanced with roughly 40 to 50 percent of the vent area placed high. IRC R806.2 is published in CHAPTER 8 ROOF CEILING CONSTRUCTION - 2024 International Residential Code (IRC). That 1-inch minimum air space between the top of insulation and the underside of the roof deck (per R806.1) is not optional in a vented assembly. Block that space with insulation and you've created a moisture trap.
If you want to insulate fully without maintaining that air gap (an unvented assembly), you need to follow the unvented rafter provisions in IRC R806.5, which require specific minimum thicknesses of air-impermeable insulation (like closed-cell spray foam or rigid foam) above or below the deck depending on your climate zone. This is not complicated, but it's specific, and it varies by zone. Your local building department's plan reviewer can tell you exactly what applies in your area.
Clearances and blocking
Before insulating, walk the structure and identify: recessed lights or electrical boxes (these need IC-rated housings and clearance from insulation unless the box is specifically rated for insulation contact), any gaps where pests or water could enter after insulation blocks your view of the cavity, and the eave overhang detail. At eaves, baffles or blocking channels keep insulation from falling into the soffit and blocking airflow. For rigid foam going against a metal deck, make sure any fastener penetrations through the metal (screws, clips) are sealed with compatible sealant to prevent water intrusion before you cover them up.
Permits: check before you touch anything
If your patio cover is attached to the house, insulating it almost certainly qualifies as work that affects the building envelope, and most jurisdictions require a permit. Under IRC R105.2, the only detached accessory structures that are clearly permit-exempt are one-story buildings under 200 square feet, and attached covers don't qualify for this exemption at all. Cities like Palm Springs, San Diego County, and Pierce County, Washington all explicitly require permits for attached patio cover work. For local permitting guidance, see What to Expect with a Patio Cover Install in Palm Springs - Horizon Patios. The cost of a permit (typically $50 to $200 for this type of project) is nothing compared to the cost of being ordered to remove and redo work during a home sale or after a weather claim. Pull the permit. It also gets you a code inspection, which is free structural review from someone who knows your local requirements.
Tools and materials you'll need
- Tape measure and chalk line
- Utility knife with fresh blades (for cutting rigid foam and batt)
- Circular saw or table saw with fine-tooth blade (for cutting rigid foam boards cleanly)
- Drill/driver with appropriate bits
- Caulk gun and compatible construction adhesive (for gluing rigid foam to deck)
- Staple gun (for radiant barrier and batts with tabs)
- Straight edge or T-square
- Safety glasses, dust mask or N95 respirator, and gloves
- Tuck tape or foil tape (for sealing rigid foam joints)
- Vapor retarder sheeting if required for your climate and assembly
- Furring strips (1x2 or 1x3) if you're mounting a finished ceiling below insulation
- Appropriate fasteners: for metal decks, use self-tapping screws rated for the metal gauge; do not use drywall screws
- For spray foam kits: two-component SPF kit, disposable gloves, full-face respirator or P100 half mask, and eye protection
- Ladder and scaffold that put you at a safe working height without overreaching
Step-by-step installation: lean-to attached patio cover
A lean-to is the most common attached patio cover style: a single-slope roof connected to the house on one side, supported by posts on the outer edge. Insulating from below (between or under the rafters) is the standard approach for both new builds and retrofits.
- Inspect the framing. Check that all rafter connections at the ledger and beam are solid, that there are no loose fasteners, and that the roof deck above (aluminum panels, sheathing, or corrugated metal) is watertight with no gaps or lifted seams. Fix any issues now before you cover them up.
- Mark your rafter bays. Measure the clear depth of each rafter bay (the space between the top of the rafter and the underside of the deck). Subtract 1 inch for ventilation clearance if you're building a vented assembly.
- Cut rigid foam to fit between rafters. For a typical 16-inch or 24-inch on-center wood framing layout, cut polyiso or XPS boards to fit snugly in each bay. Use a utility knife and straight edge for clean cuts. Friction-fit is good; adhesive along the edges seals gaps.
- Seal all joints with foil tape or compatible tape. Every seam between rigid foam boards and between foam and rafter sides is a potential air and vapor leak. Tape them.
- Install a continuous layer of rigid foam over the rafters if you're going for higher R-values. A second layer perpendicular to the rafters eliminates thermal bridging through the wood. Use longer screws to fasten furring strips through the foam layer into the rafters below.
- Install vapor retarder if required for your climate zone. Consult your local code or the vapor retarder placement guidance above.
- Attach furring strips to create a nailing surface for your finished ceiling material (if used). Space them to match your ceiling panel or drywall dimensions.
- Install finished ceiling material (optional). Options include tongue-and-groove wood planks, beadboard, fiber cement panels, or moisture-resistant drywall for semi-enclosed spaces.
Step-by-step: gable patio cover
Gable patio covers have two slopes meeting at a ridge, which creates a larger enclosed volume above the ceiling line. Ventilation is easier to achieve here because you can place intake vents at the soffits and exhaust at the ridge. The insulation approach is essentially the same as the lean-to, but you also need to address the gable end walls and the ridge detail.
- Install soffit vents at the eave on both sides of the gable. Use vents with known NFA ratings, and size them to meet the 1/150 or 1/300 requirement based on your covered floor area.
- Install a ridge vent or end-wall vents at the peak. The goal is balanced intake low and exhaust high so air flows through the cavity.
- Cut and fit rigid foam between rafters on each slope, maintaining the 1-inch minimum air gap at the top of each bay between the foam and the roof deck. Rigid baffles or cardboard channels stapled at the eave end of each bay keep the gap open as you push foam in.
- For the gable end walls (the triangular vertical faces at each end), cut foam to fit the stud bays or attach a continuous layer of rigid foam to the inside face of any sheathing.
- Tape and seal all joints as described in the lean-to section.
- Install ceiling framing and finish material if desired.
Step-by-step: freestanding patio cover
A freestanding cover has no house attachment, which means no shared wall and typically no permit requirement for insulation changes in many jurisdictions (though always verify locally). The insulation approach is the same as a lean-to or gable depending on roof style, but there's one key difference: there's no house wall to block wind-driven rain, so moisture management matters even more. All foam joints and penetrations should be taped and sealed. If the space is open on multiple sides and not enclosed by walls, a radiant barrier alone may be the most practical and cost-effective choice. If you're enclosing the freestanding structure with screens or panels, treat it like any other enclosed cover and choose insulation accordingly.
Retrofitting insulation on an aluminum or metal patio cover
Retrofitting an existing metal or aluminum cover without tearing it apart is very doable. The two most practical methods are rigid foam boards attached to the underside of the metal deck, and spray foam applied directly to the metal surface.
For rigid foam retrofit: clean the underside of the metal deck to remove dirt, mildew, and any flaking paint. Apply construction adhesive in a grid pattern to the back of each foam board (use a foam-compatible adhesive; solvent-based adhesives dissolve polystyrene foam). Press boards firmly against the deck and hold for at least 60 seconds. For larger boards or overhead applications, use temporary bracing until the adhesive cures. Mechanical fasteners through the foam into the metal framing below add security. For metal panels, follow the manufacturer's fastener guidance: self-tapping screws at specified locations only, and pre-drill where required to avoid cracking coatings.
For spray foam retrofit: closed-cell SPF applied at 2 to 3 inches directly to the underside of the metal deck is arguably the best single-product solution for metal and aluminum covers. It bonds tenaciously, eliminates air gaps, controls vapor, and adds R-13 to R-21 in that thickness range. If you're using a two-component DIY kit, follow the manufacturer's mixing ratio and temperature requirements exactly (most kits require substrate temperature above 60°F and below 100°F). Wear a P100 half-mask respirator at minimum during application, and ventilate the space during and for several hours after spraying. Per EPA guidance, anyone who isn't wearing appropriate PPE should not be in the space during application. Remember: exposed SPF must be covered with a thermal barrier (typically 1/2-inch drywall) before the space is occupied, per most building codes.
Condensation and vapor barrier details
Condensation on metal patio covers is caused by warm moist air contacting a cold surface. The fix is raising that surface's temperature above the dew point, which insulation does. But if you add insulation without proper vapor management, you just move the condensation plane into the assembly where it's harder to see and drain.
In cold climates: place vapor retarder (minimum Class II, like kraft-faced batts or 6-mil poly sheeting) on the warm interior side of the insulation, between the insulation and any finished ceiling. This keeps warm interior vapor from migrating into the cold assembly where it would condense.
In hot-humid climates: vapor drive is from outside in. Place vapor retarder on the exterior side, or use closed-cell spray foam which acts as its own vapor retarder on the exterior-facing surface. Do not place poly sheeting on the interior face in hot-humid climates; it traps moisture inside.
In mixed climates: smart vapor retarders (variable permeance membranes like MemBrain by CertainTeed) handle vapor drives from both directions and are the safest choice when you're unsure.
Finishing options for the interior face
Once insulation is in place, you have several choices for the visible ceiling surface. The most popular options for patio covers are tongue-and-groove cedar or pine boards (warm appearance, holds up in outdoor conditions, easy DIY install on furring strips), beadboard panels (lightweight, inexpensive, paintable), fiber cement panels (moisture-resistant, paintable, durable), and moisture-resistant drywall followed by exterior-grade paint (for semi-enclosed spaces that stay reasonably dry). For aluminum covers with factory-finished surfaces, many homeowners simply leave the insulated panel or foam-covered surface visible and paint the foam with an elastomeric exterior paint, though this requires confirming the foam is rated for exposed applications in your jurisdiction.
Realistic cost and time estimates
| Project Type | Insulation Method | Material Cost (200 sq ft) | Time (DIY) | Difficulty |
|---|---|---|---|---|
| Metal/aluminum, retrofit | 2" polyiso rigid foam, taped and glued | $200–$300 | 4–6 hours | Beginner-friendly |
| Metal/aluminum, retrofit | Closed-cell spray foam (pro) | $600–$900 installed | 1–2 hours (pro) | Hire a pro for large areas |
| Wood framing, new build | R-19 batts + vapor retarder | $150–$250 | 3–5 hours | Easy |
| Wood framing, new build | Batts + 1" polyiso over rafters | $300–$450 | 5–8 hours | Intermediate |
| Any cover, hot climate | Foil radiant barrier only | $60–$120 | 1–3 hours | Very easy |
| New build, any material | Factory insulated panels | $1,000–$2,500+ | Full day+ (framing) | Intermediate to advanced |
These are material-only cost estimates for a 200-square-foot cover. Labor for a professional installation typically adds $1.50 to $4.00 per square foot depending on access difficulty and your region. Permits, where required, typically run $50 to $200 for this type of project.
Safety reminders worth repeating
Working overhead on a ladder or on the roof surface of a patio cover is where most DIY injuries happen on this type of project. OSHA's roofing fall-protection rules require fall protection for any work on a roof edge 6 feet or more above the ground, and while those rules technically apply to employers, the physics are the same for homeowners. If your cover is elevated, use proper scaffolding or a pump-jack setup rather than overreaching from a ladder. A two-person team makes overhead insulation installation dramatically safer and easier.
For spray foam specifically: isocyanate exposure during SPF application is a real health risk. Use a P100 half-mask respirator at minimum, nitrile gloves, and eye protection. For large areas, a full-face respirator with organic vapor cartridges plus a P100 filter is appropriate. The EPA's guidance is clear: anyone not wearing appropriate PPE should not be in the application area during spraying or until the foam has fully cured (typically 24 hours for full cure, though off-gassing drops sharply after the first few hours with good ventilation).
When to call a pro instead of DIYing
Most patio cover insulation projects are solidly within DIY territory, especially rigid foam and batt work. But there are specific situations where calling a professional is the smart, cost-effective move.
- Spray foam applications over 50 to 100 square feet: two-component kits are manageable for small areas, but larger jobs require professional spray equipment for consistent thickness, adhesion, and yield
- Any time you're unsure about the structural capacity of your framing for added insulation loads
- If your project requires a permit and structural drawings to submit for review
- When insulating in an unvented assembly configuration (fully enclosed rafter cavity): the code requirements and moisture management are specific enough that a building inspector or energy consultant review is worth the cost
- If the patio cover shares a roof plane with the house's main roof and you're not sure where one assembly ends and the other begins
- Any electrical modifications needed to install recessed lights or fans within the insulated assembly: hire a licensed electrician for the electrical work even if you do the insulation yourself
- If you discover rot, mold, or structural damage during prep work: address it professionally before insulating over it
Troubleshooting common problems
The most common issue after insulating a metal or aluminum cover is persistent condensation drips. If you're still seeing moisture after insulating, the most likely cause is incomplete coverage: gaps around fasteners, at panel edges, or at the house wall connection where cold metal is still exposed. Inspect every penetration and edge with your hand on a cold morning. Seal gaps with compatible caulk or foam, and add insulation to any missed areas. A secondary cause is a vapor retarder placed on the wrong side for your climate, as described in the condensation section above.
If rigid foam boards are sagging or detaching from the deck, the adhesive either wasn't compatible with the foam type, wasn't applied in sufficient coverage, or the substrate wasn't clean enough. Remove the board, clean both surfaces, and reapply with the correct adhesive. Add mechanical fasteners through furring strips as backup.
If noise reduction didn't improve as expected after insulating, you likely have rigid foam with no mass, and mass is what absorbs impact sound. Adding a layer of mineral wool (which has better acoustic properties than fiberglass) or a dense layer of closed-cell spray foam bonded to the deck will improve sound attenuation significantly compared to glued-in rigid foam with small gaps.
For deeper dives into specific cover materials, the topics of insulating aluminum patio roofs and insulating metal patio roofs specifically cover fastener details, thermal movement, and product-specific installation steps that go beyond what this overview addresses. For step-by-step instructions specific to aluminum covers, see our guide on how to insulate an aluminum patio roof. If you're still deciding whether the project is worth it for your situation, a closer look at the pros and cons of insulating a patio roof at all is also covered in this guide's sibling articles. See the full decision checklist in Should I insulate my patio roof for a quick yes/no walkthrough Should I insulate my patio roof?. For step-by-step methods and material comparisons, see our detailed guide on how to insulate patio roof.
FAQ
What are the essential facts and code requirements I must know before deciding to insulate a patio cover?
Check local building department and the IRC references: ventilation rules (IRC R806.1/R806.2 require minimum net free ventilating area—1 sq ft NFA per 150 sq ft attic floor area, or 1/300 if intake/exhaust are balanced or an approved vapor retarder is used), and R806.5 for unvented (hot roof) assemblies. Many jurisdictions treat attached patio covers as changes to the building envelope and require permits (IRC R105.2 exempts only detached accessory structures ≤200 sq ft). Also follow manufacturer instructions for metal/aluminum roof fasteners and expansion allowances; noncompliance can void warranties. For safety, follow OSHA rules for fall protection when working on roofs 6 ft or higher.
How do I decide “Should I insulate my patio cover?” (clear decision guide)
Ask these questions: Is the patio cover under a conditioned space or directly over outdoor living area? Do you want cooler summer temps, warmer winter comfort, noise reduction, or condensation control? If it’s primarily for shade and ventilation is adequate, a radiant barrier or reflective layer may be enough. Insulate when: you need measurable thermal comfort (reduce radiant heat through metal/aluminum covers), want noise reduction, or need to reduce condensation. Skip heavy insulating if you need continuous venting, want low cost, or if structure can’t support added materials. For metal/aluminum roofs prone to solar gain use: reflective/radiant barrier + an air gap for best cost-effectiveness; for winter heat retention or converting a covered patio to semi-conditioned space, use rigid foam, insulated panels, or spray foam (subject to code/thermal barrier requirements). If you plan an unvented (under-deck insulated) assembly, follow IRC R806.5 and manufacturer TDS for minimum insulation above deck by climate zone.
Which insulation types work best for aluminum, metal, and wood patio covers, and what are their pros/cons and R-value targets?
Batt/blanket (fiberglass/mineral wool): Pros—cheap, easy; Cons—must avoid compression, limited for direct contact under metal, moisture concerns; R≈3–4 per inch. Use when you have enclosed framed ceiling and ventilation/vapor control. Rigid foam (polyiso, XPS, EPS): Pros—good R/inch (polyiso ~6–6.5/in), moisture-resistant options, can be applied above or under deck; Cons—cutting/fastening, flammable (needs thermal/ignition barrier), edges require sealing. Spray polyurethane foam (SPF): open-cell R≈3.6–3.7/in, closed-cell R≈6–7/in; Pros—air-seals, conforms to irregulars; Cons—cost, ventilation/occupant safety during install, must follow thermal/ignition barrier rules and manufacturer data sheets. Radiant/foil barriers: Pros—very cost-effective vs solar heat with adjacent air space; Cons—needs air gap, less effective in winter or for conduction; follow manufacturer gap guidance. Insulated panels (RIPs/IMPs): Pros—high R/in, integrated panels fast for new builds; Cons—higher material cost, need correct fasteners and thermal expansion details. R-value target: for retrofit under metal roof in hot climates, aim for R-6 to R-13 combined (radiant barrier + foam or panels). For semi-conditioned conversions in temperate/cold climates, target equivalent to local ceiling/attic code (often R-30+), but practical short-term retrofits often use R-13–R-19 effective under a roof. Always check manufacturer TDS for actual R/in and aged values.
What structural, prep and ventilation requirements should I check before insulating?
Confirm framing span and load capacity for added materials/insulation weight and finish. Check roof attachment details and fastener pattern—follow metal roof manufacturer spacing/clip guidance to avoid leaks and warranty issues. For vented assemblies, ensure intake (soffit/eave) and exhaust (ridge/high) vent NFA meets IRC requirements (1/150 or 1/300). Maintain a 1-inch air space where IRC or manufacturer requires it between insulation and underside of roof sheathing or metal deck. Prepare surfaces: repair leaks, remove old wet insulation, seal penetrations, and ensure drip edge and flashing are intact. For retrofits, verify there's room for insulation thickness without compressing vent channels or obstructing fasteners.
How do attachment methods differ for retrofit vs new-build patio covers?
New builds: install insulation where manufacturer recommends—above-deck rigid or insulated panels, or incorporate continuous insulation between rafters before installing roof deck/metal. For metal panels choose through-fastened or clip systems per manufacturer; use insulated metal panels (IMPs) when possible. Retrofits: common methods are (1) adding rigid foam under the metal roof using furring strips to create an air gap and secure foam, (2) installing foil-faced radiant barrier attached to underside of purlins with a continuous air gap, (3) building a soffit/ceiling underneath the existing roof framing and placing batts, rigid board or SPF between/under rafters. For metal roofs, avoid fastening through roof panels unless following manufacturer-approved fastener locations; use under-deck attachments or clip/furring methods to preserve roof integrity and allow expansion.
Step-by-step install checklist for a lean-to patio cover (retrofit aluminum/metal roof)
1) Obtain permits/check local codes and roof manufacturer guidance. 2) Inspect structure, repair leaks, confirm fall protection. 3) Choose strategy: radiant barrier + 1" air gap (low cost) or rigid foam + furring + finished ceiling (higher R). 4) Remove obstructions and clean underside of roof. 5) Install continuous radiant foil or staple foil-faced foamboard to purlins, keeping a 1" gap from metal as recommended. 6) If using rigid foam, fasten 1–2" polyiso to purlins using long-rated screws and washers into framing; seal joints with foil tape/foam-compatible tape and tape perimeter. 7) Install furring strips over foam to create cavity for finish and allow mechanical fasteners (match clip/fastener spacing to metal roofing requirements). 8) Add a vapor/permeable underlayer if required by climate or insulation type (follow TDS). 9) Install finished ceiling (plywood, T&G, or soffit panel) attached to furring. 10) Flash and seal edges, check for condensation after a few weeks and add ventilation if needed.