
You can insulate a metal patio roof yourself using rigid foam board, spray polyurethane foam, foil-faced fiberglass batts, or factory-insulated metal panels, and the right choice depends on your roof type, climate zone, and how much headroom you have to work with. For most lean-to and gable patio covers with exposed rafters, 1.5 to 2 inches of rigid polyisocyanurate (polyiso) board or a closed-cell spray foam application gets you to a practical R-12 to R-15 range that meaningfully cuts heat gain, quiets rain noise, and stops most condensation problems without breaking the budget.
How to Insulate a Metal Patio Roof: DIY Guide & Costs

Celia Vaughn
14 Jul 2026
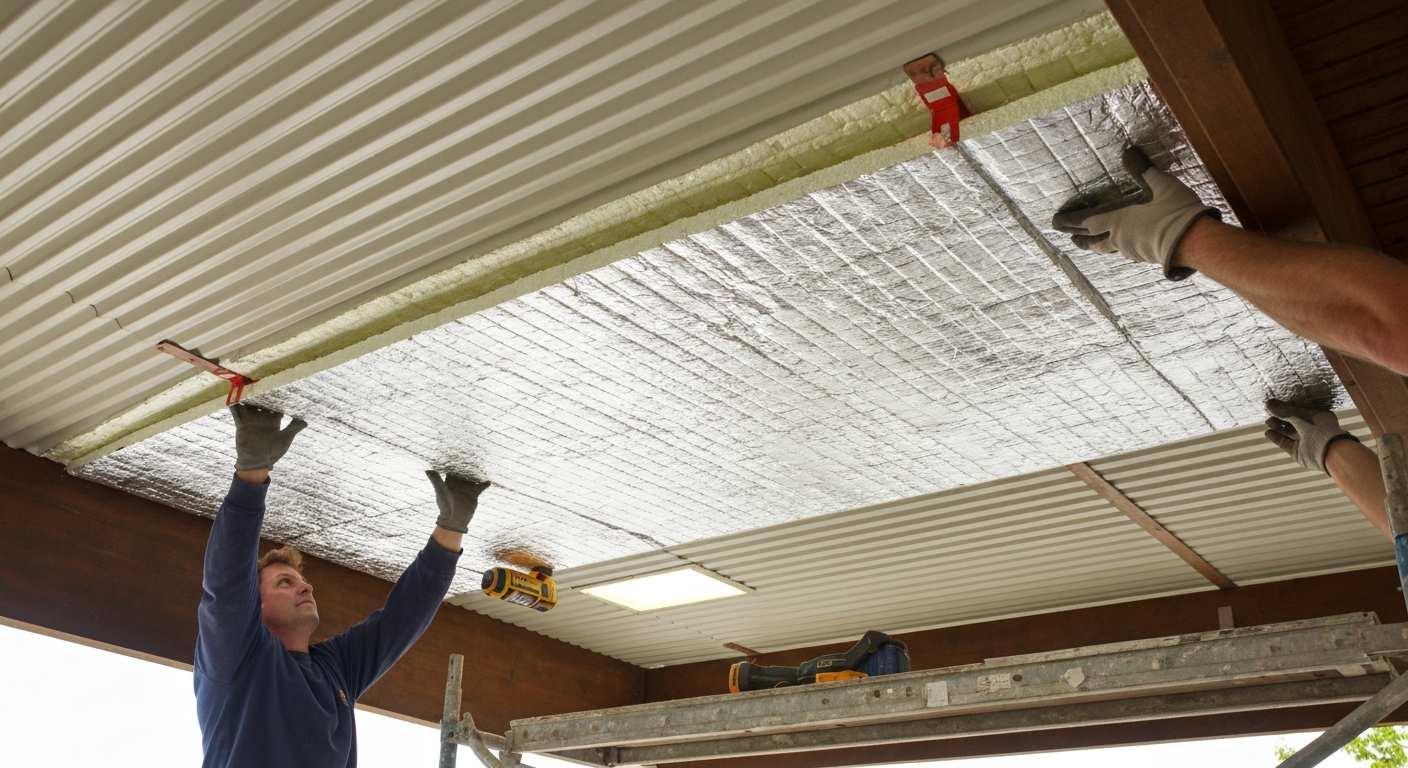
Who this guide is for and what you'll be able to do
This guide is written for DIY homeowners who already have a metal patio roof in place, or who are planning one, and want to add insulation either during construction or as a retrofit. It covers aluminum patio panels, corrugated steel or aluminum sheets, and standing-seam profiles. By the time you finish reading, you'll know which insulation type suits your specific roof profile, how to size it for your climate, how to prep and install it safely, and how to avoid the condensation and corrosion mistakes that cause most DIY insulation projects to fail early.
Should you bother insulating your metal patio roof?
Insulation makes the most sense when you use the patio regularly, the climate is hot, cold, or both, and rain noise on bare metal is driving you indoors. A bare steel or aluminum panel conducts heat almost instantly, on a sunny afternoon in a hot climate, the underside of an uninsulated metal roof can feel like a heat lamp. Add insulation and that effect drops dramatically. If your patio is a shaded structure in a mild coastal climate that you only use a few weeks a year, the payback math may not be there, and you can reasonably skip it.
- Insulate if: you use the patio year-round or for most of the year, summers are hot or winters are cold, rain noise is bothersome, or you want to add a finished ceiling look.
- Consider skipping if: the patio is rarely used, climate is consistently mild, or the structure has very low clearance that makes installation impractical.
- Always insulate if: you plan to partially enclose the patio, add a ceiling fan or lighting, or run any HVAC supply into the space — moisture and condensation risks increase sharply in enclosed spaces.
Inspect and measure your roof before you touch anything
Before buying a single piece of foam board, spend 30 minutes doing a proper inspection. Check the panel condition first: any rust, delamination, or surface corrosion on steel panels needs to be treated before you trap insulation against it. On aluminum panels, look for white oxidation pitting, which is usually cosmetic, but check that fasteners are tight and sealant at overlaps is intact. Note the panel profile, flat, corrugated, or standing-seam, because this determines how you attach insulation and whether you need furring strips to bridge the corrugations.
Measure the clear depth between the underside of the metal panel and the bottom of your rafters or purlins. This is your available insulation cavity depth. Write it down. Also measure the rafter or purlin spacing (commonly 16, 24, or 48 inches on center for patio covers) so you can cut rigid boards to fit without excessive waste. Check the roof slope, flat or very low-slope roofs drain poorly and are more prone to pooling, which affects your moisture management strategy. Finally, note any penetrations: light fixtures, fastener locations, or ridge caps that will need to be worked around.
Key decision factors before choosing an approach
Four factors should drive your insulation decision: climate, how you use the patio, your budget, and your aesthetic goals. In hot climates (IECC Climate Zones 1–3), cutting radiant heat gain is the priority, and reflective assemblies or foil-faced insulation toward the interior does the most work. In cold or mixed climates (Zones 4–6), thermal resistance (R-value) matters more and you need to think carefully about condensation at the metal surface. If you want a finished interior ceiling rather than exposed foam or batts, that narrows your choices toward rigid board with a ceiling panel overlay or factory-insulated panels. Budget matters too: spray foam delivers the highest R-value per inch and handles air-sealing in one step, but professional application typically costs more than rigid board installed by a capable DIYer. Finally, if rain noise is a top complaint, mass and contact coverage matter, rigid board glued directly to the underside of the panel is far better acoustically than an air-gap assembly.
Recommended R-values by climate zone
Patio roofs are not heated living spaces, so you don't need to hit the same R-values as a conditioned attic. That said, if your patio is partially enclosed or has any heating, treat it more like a conditioned space. For an open or semi-open patio, these ranges are practical targets that balance cost and comfort.
| Climate Zone (IECC) | Typical Location Examples | Recommended R-value Target | Notes |
|---|---|---|---|
| 1–2 (Hot-Humid / Hot-Dry) | Southern Florida, Phoenix AZ, Houston TX | R-6 to R-10 | Radiant barrier or foil facing toward interior adds meaningful benefit beyond R-value alone |
| 3 (Warm) | Atlanta GA, Los Angeles CA, Dallas TX | R-10 to R-13 | Balanced approach; condensation risk low but worth managing at transitions |
| 4 (Mixed) | Washington DC, Seattle WA, Albuquerque NM | R-13 to R-20 | Thermal bridging at purlins becomes important to address |
| 5–6 (Cold) | Chicago IL, Denver CO, Minneapolis MN | R-20 to R-25 | Dew-point control is critical; air-impermeable layer required against panel |
| 7–8 (Very Cold / Subarctic) | Northern Minnesota, Anchorage AK | R-30+ | Likely warrants professional assessment; high condensation risk requires careful design |
Building Science Corporation and DOE guidance establishes prescriptive minimums for unvented compact roof assemblies to keep the metal panel surface above the interior dew point: roughly R-20 for Climate Zone 5, R-25 for Zone 6, and R-30 for Zone 7. These are useful benchmarks even for patio applications if your structure is enclosed or semi-enclosed.
Why insulation makes such a difference on metal roofs
Metal is an extremely poor insulator. Bare steel and aluminum have near-zero thermal resistance on their own, which means every British thermal unit of solar radiation hitting the top of the panel transfers almost instantly to the underside. A layer of foam or batts creates a thermal break in that pathway, slowing heat transfer by a factor proportional to its R-value. Equally important: insulation dramatically reduces rain noise. Bare corrugated metal amplifies every raindrop into a drumming sound that makes conversation impossible during a shower. A 1.5-inch layer of rigid foam board glued to the underside of corrugated panels absorbs vibration and cuts perceived rain noise by more than half. Closed-cell spray foam applied directly to the underside is even more effective because it mechanically bonds to the panel and eliminates the air gap that would otherwise resonate.
Comparing your insulation options
There are four practical insulation families for metal patio roofs. Each has a specific situation where it excels, and none is perfect for every scenario. Here is an honest side-by-side comparison.
| Insulation Type | R-value per Inch | Best Use Case | Pros | Cons |
|---|---|---|---|---|
| Closed-cell spray polyurethane foam (ccSPF) | ~7.0 (BASF WALLTITE); typically 6–7 per inch | Retrofit on corrugated or standing-seam; enclosed or semi-enclosed patios | Highest R/inch; acts as air barrier and vapor retarder; bonds to metal; fills irregular gaps | Expensive to hire out; DIY kits cover limited area; requires PPE; can off-gas during cure; difficult to remove |
| Open-cell spray foam (ocSPF) | ~3.5–4.0 per inch | Noise reduction priority; mild climates only | Better acoustic performance per dollar than closed-cell; fills irregular profiles | Not a vapor retarder; absorbs moisture; not suitable in cold or humid climates without separate vapor control |
| Rigid foam board — XPS (extruded polystyrene) | ~R-5.0 per inch | Flat-panel or framed patio roofs; cold climates | Consistent long-term R-value; moisture resistant; easy DIY cutting; widely available | Lower R/inch than polyiso or ccSPF; edges need sealing; can be dislodged without proper attachment |
| Rigid foam board — Polyisocyanurate (polyiso) | ~R-6.0 per inch; slightly lower in very cold temps | Best overall for flat or low-slope patio roofs; mild to hot climates | Highest R/inch of rigid boards; foil-faced versions add radiant benefit; cost-effective | R-value dips slightly in sustained cold (below ~40°F); absorbs moisture if edges not sealed |
| Rigid foam board — EPS (expanded polystyrene) | ~R-3.8–4.4 per inch | Budget retrofit; low-slope applications | Lowest cost; does not absorb moisture over time like XPS can long-term; easy to work with | Bulkier for equivalent R-value; less compressive strength than XPS |
| Foil-faced fiberglass batts | ~R-2.5–4.0 per inch of glass; foil adds radiant benefit | Framed cavities between rafters in mild climates; hot climates where radiant barrier matters | Low cost; easy DIY handling; foil facing reflects radiant heat | Must face an air gap to function as radiant barrier; can be compressed (losing R-value); not suitable against metal without vapor management |
| Insulated metal panels (IMP) | R-13 to R-42+ depending on panel thickness | New construction or full panel replacement; cleanest look | Factory-controlled R-value; integrated vapor barrier; fast installation; professional finish | High upfront cost; not practical for retrofit without replacing panels; requires proper flashing details |
For most DIY retrofits on existing patio roofs, polyiso rigid board with a foil face offers the best balance of R-value per inch, cost, and ease of installation. If your roof profile is corrugated and filling the flutes is important for both noise and moisture control, spray foam (either hired out or using a DIY kit for smaller areas) is the upgrade worth budgeting for. Project specification excerpt (spray foam application: pass thickness 15–50 mm, max 4 in/day), public project manual (example spec quoting ULC/industry limits) Project specification excerpt (spray foam application: pass thickness 15–50 mm, max 4 in/day) — public project manual (example spec quoting ULC/industry limits).
Condensation control: the issue most DIYers miss
This is where most DIY insulation projects go wrong on metal roofs, and it is worth slowing down here. Metal panels cool quickly at night. If warm, moist interior air reaches the cold metal surface, it drops below the dew point and water condenses on the underside of the panel. Over time that moisture causes corrosion on steel panels and can soak any adjacent fibrous insulation. The Metal Roofing Alliance explicitly warns that installing insulation against metal panels without allowing drying or ventilation increases condensation and corrosion risk, and some manufacturer warranties are voided if their installation details are not followed.
There are two reliable strategies to manage this. The first is the vented assembly: leave a continuous air gap (typically at least 1 inch) between the insulation and the metal panel, with ventilation openings at the low end (eave) and high end (ridge or peak) to allow air to flush moisture out. The minimum net free ventilation area for a vented rafter space is 1/300 of the total area if you have both low and high vents, or 1/150 if only low vents can be provided. The second strategy, which is more effective for enclosed patios, is the unvented compact assembly: apply an air-impermeable insulation (closed-cell spray foam or continuous rigid foam taped at all joints) directly to the underside of the metal panel with enough R-value to keep the panel surface above the dew point. BASF's WALLTITE closed‑cell spray foam, BASF SPF (product features and datasheets) is reported to act as an air barrier at typical installed thicknesses, have low water absorption (<4% v/v), and function as a vapor retarder when applied at sufficient thickness; consult the product datasheet for air‑leakage, perm characteristics, and manufacturer recommendations for substrate preparation and temperature ranges WALLTITE closed‑cell spray foam — BASF SPF (product features and datasheets). In cold climates, this means hitting those prescriptive minimums of R-20 to R-30 depending on your zone.
Vapor barriers go on the warm side of the insulation, between the insulation and the interior space, not between the insulation and the metal panel. In hot-humid climates this relationship reverses (the warm-humid side is exterior), so a vapor retarder against the metal and open drying to the interior is correct. If you are confused about which way your climate runs, check IECC climate zone maps. When in doubt on a closed or semi-enclosed patio in Climate Zones 4 and above, use closed-cell spray foam against the panel (it acts as its own vapor retarder) and skip the separate vapor barrier entirely.
Material-specific guidance: corrugated, standing-seam, and aluminum patio panels
Corrugated metal panels
Corrugated panels (the wavy-profile steel or aluminum sheets common on DIY patio covers) present a challenge for rigid board because the board only contacts the high points of the corrugation, leaving air pockets at the valleys. Those pockets collect moisture and can trap water against the back of the panel. For corrugated roofs, the best approach is either to fill the corrugation profile first, closed-cell spray foam does this in one step, or to apply the insulation to a flat substrate below the panel, bridging the corrugated profile with furring strips attached to the rafters. If you use rigid board below corrugated panels without spray foam filling the flutes, seal the ridge and eave ends of those channels with foam backer rod or pre-formed foam closure strips made specifically for your corrugation profile. These are available at most metal roofing suppliers and at big-box stores and prevent insects, water, and rodents from entering the flute channels.
Standing-seam metal roofs
Standing-seam panels are attached with concealed clips, not exposed fasteners through the panel face, which is a significant advantage for insulation work. You can apply rigid foam board to the underside of the purlins or rafters without disturbing the panel system. The key issue on standing-seam roofs is thermal bridging at the purlins: each purlin is a direct conductive path from the interior to the cold exterior panel. MBMA guidance addresses this directly, installing continuous rigid insulation below the purlins (on the interior side) is the most effective way to break that thermal bridge. Alternatively, thermal spacer blocks between the purlin tops and the panel underside restore the intended R-value by preventing compression at contact points. For DIY purposes, applying a continuous layer of 1 to 1.5 inches of polyiso below all purlins, then a second layer of batts or additional foam in the rafter cavities, gives you both the continuous layer and the cavity fill. Follow your panel manufacturer's installation manual for any fastener or clip spacing requirements, MBCI and Metal Sales both publish installation manuals that give clip spacing for field and edge zones, and these vary by panel profile and wind load.
Thin aluminum patio cover panels
Factory-extruded aluminum patio cover panels (the hollow-channel or solid flat panels sold at home improvement stores or patio specialty suppliers) are typically 2 to 4 inches deep and often include an integral ribbed or hollow profile. Some are already sold in insulated versions with a foam core factory-installed between two aluminum skins, these are insulated metal panels at a patio-cover scale. If you have plain flat or hollow-channel aluminum panels, your best retrofit option is to attach rigid foam board or foil-faced polyiso to the underside using construction adhesive compatible with aluminum (check that the adhesive does not contain solvents that attack polystyrene if using EPS or XPS), supplemented with mechanical fasteners through the foam into the rafter below. Do not compress the foam tightly between a bottom trim piece and the panel if the foam has no room to expand thermally, aluminum and foam have different expansion rates, and binding the assembly can buckle the panel or crack sealants over time. Leave a 1/8-inch perimeter gap and seal it with a flexible sealant.
Materials and tools checklist
What you need varies by insulation type. Here is a consolidated checklist with rough quantities. For area calculations, measure your actual roof panel area (length times width, accounting for slope) and add 10 percent for cuts and waste.
| Insulation Type | Key Materials | Key Tools | Estimated Coverage Note |
|---|---|---|---|
| Rigid foam board (polyiso/XPS) | Foil-faced polyiso or XPS sheets (4x8 standard), construction adhesive (foam-compatible), butyl or foil tape, foam backer rod or canned foam for gaps, 1x2 or 1x3 furring strips if needed, corrosion-resistant screws + washers | Utility knife or hot-wire cutter, straight edge, measuring tape, drill/driver, caulk gun, safety glasses, gloves | One 4x8 sheet covers 32 sq ft; buy 10% extra for cuts |
| Spray foam (DIY kit, closed-cell) | Two-part ccSPF kit (sizes range from 15 to 600 board-feet coverage), primer if substrate requires, masking/plastic sheeting for overspray protection | Kit applicator gun and tips, disposable gloves, chemical respirator (P100 + OV cartridge), eye protection, coveralls, drop cloths | 600 board-foot kit covers 100 sq ft at ~1.5 in thickness; plan kits accordingly |
| Foil-faced fiberglass batts | Pre-cut or roll batts (R-13 or R-19), foil tape, vapor retarder (if needed separately), staple gun staples, 1x4 or 2x4 retainer strips or wire hanger inserts | Staple gun, utility knife, measuring tape, safety glasses, dust mask (N95 minimum), gloves, long sleeves | Standard 15-in wide batts fit 16-in OC framing; 23-in wide for 24-in OC |
| Insulated metal panels (IMP) | Pre-ordered IMP panels cut to size, system-specific clips and fasteners, compatible flashing and sealant | Panel handling equipment, drill/driver, snap-lock or mechanical seaming tool (system-specific), sealant gun | Order to exact dimensions from manufacturer; minimal waste if measured correctly |
Step-by-step DIY workflow: the shared prep steps
Regardless of which insulation type you choose or which roof style you have, these prep and sequencing steps apply to every project. Do them in order and do not skip the inspection step, what you find there may change your material choices.
- Safety setup first: lay drop cloths or plastic sheeting on the patio floor, set up scaffolding or a stable work platform if needed (do not work off an extension ladder while holding sheet goods), put on your PPE before handling any material.
- Clean the underside of metal panels: brush away debris, dirt, and any cobwebs. On steel panels, treat any rust spots with a rust converter before proceeding. On aluminum, wipe down with isopropyl alcohol if using adhesive — it dramatically improves adhesion.
- Mark your framing: use a chalk line or pencil to mark rafter/purlin centerlines on the underside of panels so you know where to drive fasteners. If you cannot see framing from below, probe with a thin finish nail from underneath.
- Measure and plan your cuts: lay out your insulation sheets on a flat surface and dry-fit them against the framing layout before cutting anything. For corrugated profiles, decide now whether you are filling flutes with spray foam or using closure strips.
- Cut insulation to size: use a sharp utility knife and straight edge for polyiso or EPS. XPS requires a few scoring passes or a hot-wire cutter for clean edges. Cut slightly undersized (1/8-inch gap at edges) to allow for thermal expansion.
- Apply adhesive or mechanical fasteners: for rigid board against a flat panel, use a compatible construction adhesive in a serpentine bead on the back of the board, press into place, and temporarily support with bracing until cured. Add mechanical fasteners (screws with large fender washers) through the foam into the rafter or purlin below — do not over-torque and crush the foam.
- Seal all joints and gaps: use foil tape rated for foam board (not standard duct tape) at all board-to-board seams. Fill any remaining gaps at edges, penetrations, or corrugation flutes with canned low-expansion foam or foam backer rod and sealant.
- Finish and trim: add furring strips, trim pieces, or a ceiling panel if required by your finishing choice (see finishing section below).
Installing insulation on a lean-to patio cover
A lean-to (single-slope) patio roof attached to the house is the most common DIY scenario and the most straightforward to insulate. The slope runs from the house wall down to the outer beam, so water drains naturally and you typically have clear access from below.
- Confirm attachment at the ledger board: check that the ledger is fully flashed and that no moisture is migrating from the house wall into the roof assembly before you seal insulation against it. Any water infiltration needs to be resolved first.
- Start at the high end (house wall): cut your first rigid board panel to fit snugly against the ledger flashing, leaving the 1/8-inch expansion gap. Apply adhesive, press into place, and drive two screws with fender washers through the foam into the rafter above.
- Work down the slope toward the outer beam: each successive board should overlap the preceding board's seam line by at least 12 inches in a running bond pattern (like staggered brickwork) so there are no continuous vertical seams from one side to the other.
- At the outer beam (low end): cut the last board to fit and seal the exposed edge with canned foam or a foam-compatible trim piece. This is the most common location for cold-air infiltration on lean-to roofs.
- Check for and seal penetrations: any light fixture boxes, ceiling fan mounting brackets, or wire runs through the insulation plane need to be air-sealed with a compatible foam or sealant before finishing.
- If using spray foam on corrugated lean-to panels: work in passes of no more than 1.5 to 2 inches per lift, letting each lift cool before adding the next, per the product technical data sheet. On a lean-to, start at the high end and work toward the low end so any overspray falls away from completed sections.
Installing insulation on a gable patio cover
A gable roof has two slopes meeting at a ridge, which adds complexity at the peak. The core process is the same as the lean-to, but you need to handle the ridge and the gable ends carefully.
- Work each slope separately: treat each side of the gable as its own lean-to, starting at the eave (low edge) and working up toward the ridge on each side.
- At the ridge, cut boards to meet tightly at the peak: the two sloped boards should meet at the ridge board face with minimal gap. Seal the joint with foil tape from below and fill any remaining gap with canned low-expansion foam. Do not leave an open air channel at the ridge — this is a primary condensation trap.
- Gable end walls: the triangular gable end walls are typically framed and covered separately from the roof panels. Insulate them with rigid board cut to fit the triangle, or use batts in a stud cavity if the gable end is framed. Seal the junction between the gable wall insulation and the roof insulation with canned foam or sealant — gaps here allow cold air to bypass the roof insulation.
- Check the ridge cap flashing: on a gable roof, the ridge cap sits on top of both panel slopes. Make sure your insulation installation does not push the panels up and break the seal under the ridge cap. If you are adding insulation to the underside of the panels (not above them), this is not an issue, but confirm before finishing.
- Ventilate if using a vented assembly: on a gable roof with a vented gap, you need airflow from eave to ridge on each slope. Install proper continuous ridge venting and soffit venting to allow moisture to escape. The minimum net free ventilating area is 1/300 of the roof area when both high and low vents are present.
Installing insulation on a free-standing patio cover
Free-standing structures (posts with a beam-and-rafter roof, not attached to the house) have one extra challenge: both the eave and the opposite eave are exposed, so there is no house wall to use as a stopping point, and wind-driven rain can get under the structure from any direction. This increases the importance of edge sealing.
- Establish your work sequence: on a free-standing flat or single-slope roof, start in the center and work outward to both edges. This minimizes the number of cut pieces and keeps full sheets in the most visible central area.
- Seal all four edges: unlike a lean-to where one end is against the house, every edge of a free-standing insulated roof assembly is exposed. Add a continuous drip edge or trim piece at all four sides that captures and seals the edge of the insulation board. Use a foam-compatible flexible sealant between the trim and the foam edge.
- Account for wind uplift: free-standing patio covers experience higher wind uplift forces than attached structures, especially at the outer edges. Use more mechanical fasteners (screws with fender washers) than you think you need — a minimum of four fasteners per 4x8 sheet in the field, and six along any edge zone. Consult your local wind speed maps if you are in a hurricane-prone or high-wind area.
- Post and beam connections: where roof beams connect to posts, you will often have gaps or transitions in the insulation plane. Cut insulation to wrap around beam tails or column connections where possible, and seal remaining gaps with canned foam.
- Finish the ceiling: free-standing patio covers are typically viewed from all sides, so a finished ceiling matters more aesthetically. Plan your insulation thickness to allow for your ceiling panel or material of choice below it without reducing headroom below a comfortable level (7 feet is a practical minimum for a patio cover).
Fastening, sealing, and edge details that make or break the installation
Thermal bridging at fasteners and open seams are responsible for most of the performance loss in DIY insulation projects. Every bare steel screw that passes through insulation and contacts the metal panel above is a direct thermal short circuit. Use screws with EPDM or neoprene bonded washers (common in roofing supply stores) that create a seal at the panel penetration. For attaching furring strips through foam to rafters, use long structural screws (minimum 1.5 inches longer than the foam thickness) so they get solid purchase in the framing. Stainless steel or hot-dipped galvanized screws are required for aluminum panels to prevent galvanic corrosion, using dissimilar metals in contact with moisture creates a galvanic cell that corrodes the less-noble metal rapidly. The Metal Construction Association technical guidance makes this plain: the presence of moisture acts as the electrolyte in a galvanic couple, and using incompatible fasteners accelerates corrosion of aluminum or zinc-coated steel.
At all board-to-board joints, use a foil-faced tape rated for continuous service (not the shiny tape from a hardware store labeled 'duct tape', that is not the same product). Real foil tape rated for foam board sealing is sold at insulation supply houses and building supply stores. Apply it with firm pressure using a J-roller or the back of a putty knife to ensure full adhesion, especially at cold temperatures. Expansion gaps of about 1/8 inch at all edges against walls, beams, and trim pieces should be filled with a paintable polyurethane or butyl-based sealant, not caulk, sealants maintain flexibility through thermal cycling where caulks crack.
Finishing options for the interior ceiling
Exposed foam is not a finished look, and in most jurisdictions, exposed foam insulation must be covered with a thermal barrier (typically 1/2-inch drywall or equivalent) to meet fire codes, even on an open patio, check your local code. For patio applications, drywall is generally impractical outdoors, so the common alternatives are PVC tongue-and-groove ceiling planks, aluminum soffit panels, composite wood panels, or a second layer of metal panel used as a ceiling skin.
PVC tongue-and-groove planks are the most popular DIY choice: they snap together, can be cut with a circular saw or miter saw, are paintable, and handle outdoor humidity without warping or rotting. Attach them to furring strips screwed through the foam into the rafters. Leave a 1/16-inch gap at the end walls to allow for thermal expansion. If you want a radiant barrier as part of your assembly, install a foil-faced foam board or a standalone foil-faced underlayment between the insulation layer and the ceiling skin, with the foil face pointing toward the interior air space. The foil must have an air gap on its reflective face to function as a radiant barrier, it does nothing sealed tightly between two solid layers.
Rough cost estimates per square foot
| Insulation Option | Material Cost (per sq ft, installed thickness) | DIY Labor (hrs/100 sq ft) | Total Rough DIY Cost (per sq ft) |
|---|---|---|---|
| EPS rigid board (~R-8 at 2 in) | $0.25–0.45/sq ft | 3–5 hrs | $0.30–0.55 (materials only; add $0.10–0.20 for tape/adhesive) |
| XPS rigid board (~R-10 at 2 in) | $0.50–0.75/sq ft | 3–5 hrs | $0.65–0.95 |
| Polyiso rigid board (~R-12 at 2 in) | $0.55–0.85/sq ft | 3–5 hrs | $0.70–1.05 |
| Foil-faced fiberglass batts (~R-13) | $0.35–0.55/sq ft | 2–4 hrs | $0.45–0.70 |
| Closed-cell spray foam (~R-12 at ~1.75 in, DIY kit) | $1.50–2.50/sq ft | 4–8 hrs (including masking) | $1.75–3.00 |
| Closed-cell spray foam (hired contractor) | $2.00–4.00/sq ft installed | N/A | $2.00–4.00 |
| Insulated metal panels (IMP) | $4.00–10.00/sq ft | 5–10 hrs/100 sq ft | $5.00–12.00+ including fasteners/trim |
These are rough material-cost ranges based on typical retail pricing as of mid-2026. Prices vary by region and supplier. For a 200-square-foot patio cover, budget $150 to $600 in materials for a rigid board approach, or $350 to $800 for a DIY spray foam kit approach. Add ceiling panel materials (PVC planks typically run $1.50 to $3.00 per square foot) if you want a finished look.
Common installation mistakes and how to avoid them
- Skipping vapor and moisture management: installing insulation against metal without a plan for condensation is the single most common mistake. Metal panel warranty coverage can be voided if manufacturer installation details are not followed. Decide upfront whether you are building a vented or unvented assembly and execute it completely.
- Compressing fiberglass batts: if you staple batts into a rafter cavity and then nail a ceiling panel that compresses the batt, you lose R-value proportionally to the compression. A batt compressed to half its installed thickness loses roughly half its R-value. Use the right thickness batt for your cavity depth and do not compress it.
- Using incompatible fasteners: steel fasteners in aluminum panels without separation or a galvanic barrier will corrode. Use stainless steel or hot-dipped galvanized fasteners with EPDM washers for all penetrations through or near aluminum panels.
- Leaving open flute channels on corrugated panels: unsealed corrugation channels at eaves and ridges allow insects, birds, and water to enter. Always use foam closure strips matched to your corrugation profile.
- Thermal bridging at purlins: installing insulation between purlins only (not a continuous layer below them) leaves the purlins as direct cold-to-warm conduction paths. Add a continuous layer below the purlins even if it means losing 1.5 inches of headroom.
- Poor seam sealing: using standard duct tape instead of rated foil tape means the tape fails within a season. Use the right tape and apply it with pressure.
- Blocking ventilation paths in vented assemblies: placing insulation so it covers soffit vent openings or ridge vent channels defeats the entire moisture management strategy. Keep vent pathways clear.
- Applying spray foam in thick single lifts: applying more than about 2 inches of closed-cell foam in a single pass generates heat that can scorch the foam and produce a poor-quality layer. Apply in multiple lifts as specified in the product technical data sheet, allowing each lift to cool before the next.
Maintenance and inspection after installation
Insulation on a patio roof is largely maintenance-free once correctly installed, but a seasonal check takes only 15 minutes and catches problems before they become expensive. Do a visual inspection twice a year: once in spring after winter moisture, and once in fall before cold weather.
- Check seam tape: look for lifting edges or bubbles in foil tape at board joints. Re-adhere with a J-roller and add new tape over any failed sections.
- Inspect sealants at edges and penetrations: flexible sealants can crack or peel at fastener edges or wall junctions. Re-apply sealant where gaps have opened.
- Look for water stains on the ceiling skin: any brown staining or sagging of ceiling panels indicates moisture getting through. Find the source before it damages the insulation.
- Check corrugation closure strips: foam closure strips at eave and ridge can compress or shrink over time. Replace any that have gaps or are pulling away from the panel.
- Verify ventilation paths in vented assemblies: make sure soffit vents and ridge vents are not blocked by debris, bird nests, or settled insulation.
- On spray foam installations: inspect the foam surface for cracks, shrinkage gaps at panel edges, or UV degradation on any exposed surfaces. ccSPF must be covered to protect it from UV — if the covering has degraded, re-coat or cover the foam.
- On aluminum panels: check for white powdery corrosion near any steel fasteners — this indicates galvanic activity. Replace any incompatible fasteners and seal the area.
Permits, building codes, and when to call the building department
Adding insulation to an existing patio roof does not always require a permit, but the rules vary significantly by jurisdiction. In general, a permit is more likely required if you are: changing the structural configuration of the roof, adding electrical work (new light fixtures or fans), enclosing a previously open structure, or if your project value exceeds a threshold amount (commonly $500 to $1,000 depending on the municipality). Contact your local building department before starting if you are unsure, a quick phone call is easier than a stop-work order.
If your patio is in a homeowner's association (HOA), check the CC&Rs before starting. Some HOAs have restrictions on visible changes to patio structures, including ceiling materials or panel colors. If you are in a high-wind or hurricane zone (particularly in Florida, coastal Texas, and the Gulf Coast), your local code may require documentation of wind-resistance design for any change to a patio structure's assembly. In those cases, a structural engineer's letter or a permit drawing may be required even for insulation work.
Safety: what you need to know before you start
Working overhead on a metal roof or under metal panels involves a few specific hazards worth taking seriously. Working at height is the biggest one: even a 6-foot fall from a low patio cover can cause serious injury. Use a stable work platform or scaffolding for overhead work, not an extension ladder where you are reaching sideways with sheet goods. Metal panel edges are sharp, wear leather gloves when handling cut or uncut panels. Eye protection is non-negotiable when cutting foam or metal.
Spray foam deserves special attention. Two-part spray polyurethane foam contains isocyanates, which are respiratory sensitizers. Once sensitized, even brief exposures can trigger severe asthmatic reactions. A half-face respirator with combination P100 plus organic vapor cartridges is the minimum for DIY spray foam application. Wear full coveralls, chemical-splash goggles (not safety glasses), and nitrile gloves. Keep the work area well-ventilated and do not re-enter the space until the foam has fully cured, the product TDS will specify the re-entry wait time, typically a few hours to a day for DIY kits. Foam is also combustible before a fire-rated coating is applied, so no open flames or hot work nearby.
- Always wear safety glasses when cutting foam, fiberglass, or metal.
- N95 dust mask minimum for fiberglass work; respirator with P100 + OV cartridges for spray foam.
- Leather gloves for handling cut metal panels or corrugated sheets.
- Non-slip footwear if stepping on or near the roof surface.
- Stable work platform — do not work with both hands full on an extension ladder.
- Check product labels for skin and eye irritants — many foams and adhesives have specific first-aid instructions.
When to hire a professional instead
Most rigid board and batt insulation projects on typical residential patio covers are genuinely within DIY capability. Where a pro makes more sense: if your patio cover is large (over 400 square feet), if the roof structure is complex or steeply sloped, if you need spray foam over the entire surface (DIY kits cover limited areas and the cost-per-square-foot of DIY kits versus a contractor quote often favors the contractor for large areas), or if there is any existing moisture damage that needs remediation before new insulation is applied.
If your project requires a building permit with a structural or energy-code plan review, a contractor who is familiar with your local code can pull the permit and provide the required documentation. The same applies if you are in a high-wind or hurricane zone where engineering documentation is required. For any spray foam work requiring specialty equipment beyond a DIY two-part kit, hire a licensed spray foam contractor, improper application of professional-grade spray foam equipment is a genuine safety and fire hazard.
Project planning checklist and sample timeline
A 200-square-foot patio roof insulation project using rigid board and a PVC ceiling finish is realistically a two-weekend job for one person working at a comfortable pace. Here is a sample timeline and pre-start checklist.
| Phase | Tasks | Estimated Time |
|---|---|---|
| Week 1 — Planning | Measure roof, determine framing layout, choose insulation type, check permit requirements, order or source materials | 2–4 hours |
| Weekend 1, Day 1 — Prep | Inspect and clean roof underside, treat any rust or corrosion, install closure strips on corrugated profiles, mark framing | 3–4 hours |
| Weekend 1, Day 2 — Insulation install | Cut and fit insulation boards (or first spray foam lift), tape seams, seal edges and penetrations | 4–6 hours |
| Weekend 2, Day 1 — Second layer or touch-up | Install second foam lift if needed, add furring strips for ceiling, address any gaps found after first pass | 2–3 hours |
| Weekend 2, Day 2 — Ceiling finish | Install PVC planks or ceiling panels, trim out edges, paint if needed, final sealant touchups | 3–5 hours |
| After project | Seasonal inspection, check tape and sealant condition | 30 min, twice yearly |
- Confirm roof structure is sound and all fasteners are tight before starting.
- Check permit requirements with your local building department.
- Choose insulation type and confirm it is compatible with your specific panel type.
- Buy 10% extra insulation material for cuts and waste.
- Have all PPE on hand before opening any spray foam or cutting any fiberglass.
- Plan your vapor/moisture management strategy before the first piece of insulation goes up.
- Identify and source foam closure strips if working with corrugated panels.
- Confirm fastener material compatibility with your panel type (stainless or hot-dipped galvanized for aluminum).
- Plan ceiling finish and have materials ready before second weekend.
Where to go from here
If you have a standard lean-to or gable patio cover with corrugated or flat metal panels, you now have everything you need to plan and execute a solid insulation project. Pick your insulation type based on the climate and budget guidance above, confirm your vapor management approach, and work through the prep and installation steps in sequence. If your roof is specifically a factory-extruded aluminum patio cover system, the principles are the same but the attachment details are slightly different, that topic is covered in more detail in the guide on how to insulate aluminum patio roofs. If you are still deciding whether insulation is worth the investment at all, the discussion on whether you should insulate your patio roof walks through the decision criteria in more depth. For a deeper look at the pros, cons, and decision criteria, see the guide titled should i insulate my patio roof. For step-by-step instructions on materials, measurements, and installation techniques, see how to insulate patio roof. For step-by-step instructions, materials lists, and downloadable cut-sheets, see our guide on how to insulate a patio cover. Take your time on the planning phase, get your materials staged before you start, and you will find the actual installation moves faster than you expect.
FAQ
When is it worth insulating a metal patio roof?
Insulate when you want improved comfort (lower heat gain in summer, reduced heat loss in winter), noise reduction from rain/hail, condensation control, or to make the patio a year‑round conditioned or semi‑conditioned living space. Prioritize insulation if you use the patio frequently, live in hot or cold climates, or plan to install a finished ceiling. If the patio is unconditioned, used only seasonally, and budget is tight, simple radiant barriers or ventilation may suffice.
Which insulation type is best for a metal patio roof: spray foam, rigid foam, foil‑faced batts, or insulated panels?
Choice depends on goals and budget: Closed‑cell spray foam (ccSPF) gives high R‑value per inch, air‑sealing, and condensation control but is the most expensive and typically requires a pro. Rigid foam (polyiso, XPS, EPS) provides continuous thermal break options and is moderate cost; polyiso offers best R/in. Foil‑faced batts or foil‑faced insulation reflect radiant heat if installed with an air gap but have lower bulk R. Factory insulated panels (sandwich panels) are highest performance but cost and replacement concerns limit DIY use. For DIY balance: rigid foam plus a furring/air gap or mineral‑wool batts with a ventilated air space are common.
How do I prevent condensation under a metal patio roof?
Control interior moisture/air leaks first (seal gaps and vents), provide ventilation under the panels (continuous ridge and soffit/high/low vents) when using vented assemblies, or use an air‑impermeable insulation layer thick enough to keep the metal above the interior dew point for unvented assemblies. Use vapor‑retarder awareness: foil facings can act as vapor barriers. In humid climates, prioritize ventilation plus drainage paths; in cold climates, ensure sufficient continuous insulation outboard of the deck or use ccSPF per prescriptive minimums.
How much R‑value do I need for a patio roof?
Target depends on climate and whether the space is heated/cooled. For mild climates (CZ 2–4) R‑10 to R‑19 may be adequate for comfort and noise. For colder climates, follow compact‑roof guidance: roughly R‑20 (CZ5), R‑25 (CZ6), R‑30 (CZ7), R‑35 (CZ8) minimum of air‑impermeable continuous insulation to avoid condensation in unvented assemblies. When using vented assemblies, lower cavity R plus continuous rigid board or reflective strategies can work. Use local code and comfort goals to finalize.
How do I insulate different metal panel types (corrugated, standing‑seam, aluminum)?
Corrugated (through‑fastened) panels: commonly use a ventilated cavity with insulation between purlins or rigid board over purlins; thermal spacer blocks or continuous rigid foam above purlins reduces thermal bridging. Standing‑seam: concealed clips allow for rigid insulation or continuous boards above purlins; follow panel manufacturer's clip/clearance requirements and avoid compressing insulation at clip locations. Aluminum panels: aluminum is highly conductive and can corrode with incompatible metals — use compatible fasteners and separation materials; treat like other panels but be cautious with adhesive or foam that traps moisture on the metal. Always follow panel manufacturer's installation manual for clearances, clip spacing and warranty conditions.
Can I install insulation directly against the metal panels?
Generally avoid direct contact unless the assembly is explicitly designed for it. Direct contact can trap moisture, promote corrosion, and reduce drying. If placing insulation directly against panels (e.g., closed‑cell spray foam as an air‑impermeable layer), ensure the assembly meets minimum continuous insulation thickness for your climate and that manufacturer guidance and metal roof warranty allow it. Otherwise provide a ventilated air space or a breathable underlayment and proper drainage/vents.