To install a patio shade sail, measure the distance between your anchor points, order a sail roughly 10% smaller than that span on each side, then mount brackets at each corner, attach turnbuckles and shackles, clip on the sail loosely, and tension it gradually and evenly until it's taut with at least a 10–20 degree slope for rain runoff. That's the core recipe. The rest of this guide walks you through every decision along the way: sizing, fabric, hardware, attachment methods, and what to watch out for so the sail actually holds up instead of tearing, sagging, or pulling a post out of the ground. If you want a full walkthrough of the process, follow this guide on how to build a patio shade structure from start to finish.
How to Make Patio Shade Sails: DIY Planning and Install

Celia Vaughn
2 Jul 2026
Pick the right patio shade sail size and layout
Start by deciding where your anchor points will be, not by picking a sail size from a product page. Walk your patio and identify the fixed corners: an existing post, a wall bracket, a fence post, or a new post you'll plant. Measure the straight-line distance between each pair of anchor points. Then subtract roughly 10% from each side to find your sail size. That gap isn't wasted space. It accounts for the turnbuckle hardware at each corner, which typically needs about 10–15 inches (25–38 cm) of clearance on each side. A sail that's sized exactly to your anchor span will never tension properly.
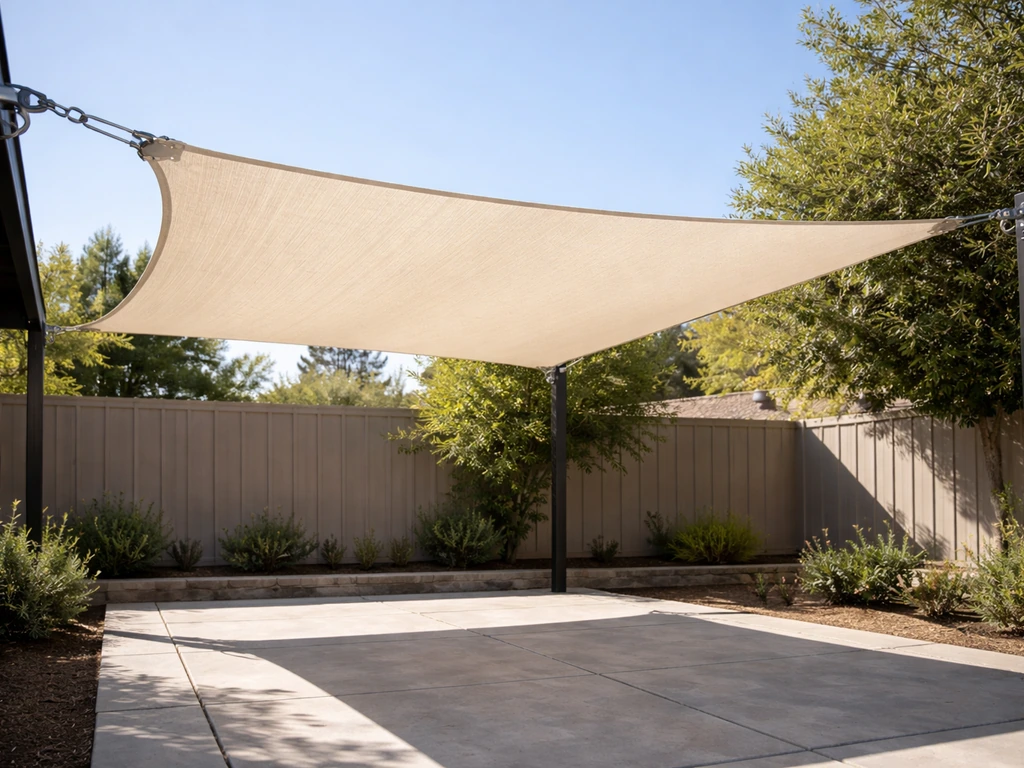
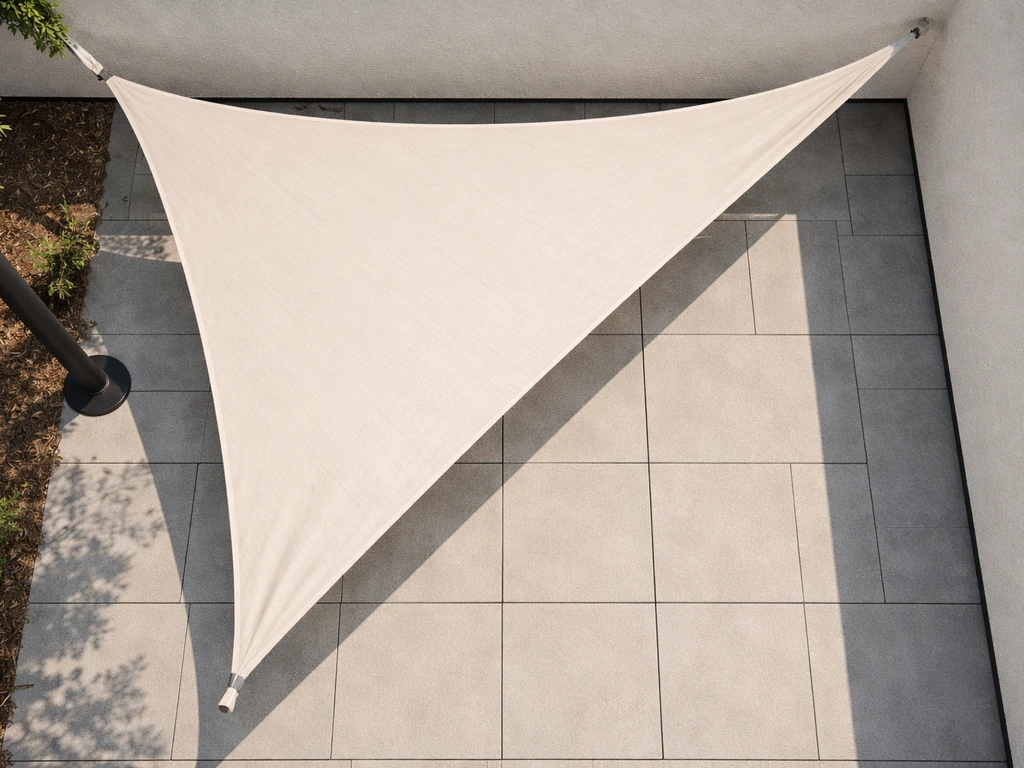
Shape matters too. Triangular sails are easier to tension and work well in asymmetrical spaces or tight corners. Square and rectangular sails cover more area but are harder to keep truly taut because any slack at the corners can cause the center to sag. If you go with a quadrilateral shape, you need all four corners at different heights or the sail will never hold tension correctly. A hypar layout, where two opposite corners are higher and two are lower, is the standard approach. It's also why your finished shade footprint will look somewhat smaller than the sail's actual dimensions. The angle and twist reduce the projected coverage area.
Plan for drainage from the start. Build a slope of at least 10–20 degrees into your layout by setting anchor points at different heights. A flat shade sail doesn't exist in practice. Rain will find the lowest point and pool if you haven't deliberately built the runoff direction into your geometry. Coolaroo's design guide even specifies that posts should tilt outward at a 1-in-10 angle (roughly 10 degrees) to help the sail hold its shape under load. Following Coolaroo patio shade installation guidance can help you get the right angles and drainage so your shade holds up over time. You don't have to replicate that exactly for a simple DIY install, but the principle holds: angle beats flat every time.
Materials, hardware, and tools checklist
Shade sail fabric
Most residential shade sails use knitted high-density polyethylene (HDPE) with UV-stabilizing additives. A quality HDPE sail can block up to 95–96% of UV radiation, and the knitted (rather than woven) structure means it's permeable, so water drains through instead of pooling on top. Better sails have stainless steel wire rope sewn through the perimeter edge and heavy webbing reinforcement at the corners. Those reinforced corners are where almost all the tension loads end up, so this construction detail matters. Avoid cheap sails with simple grommet holes and no perimeter wire. They tear faster and hold tension poorly.
Hardware you'll need at each corner
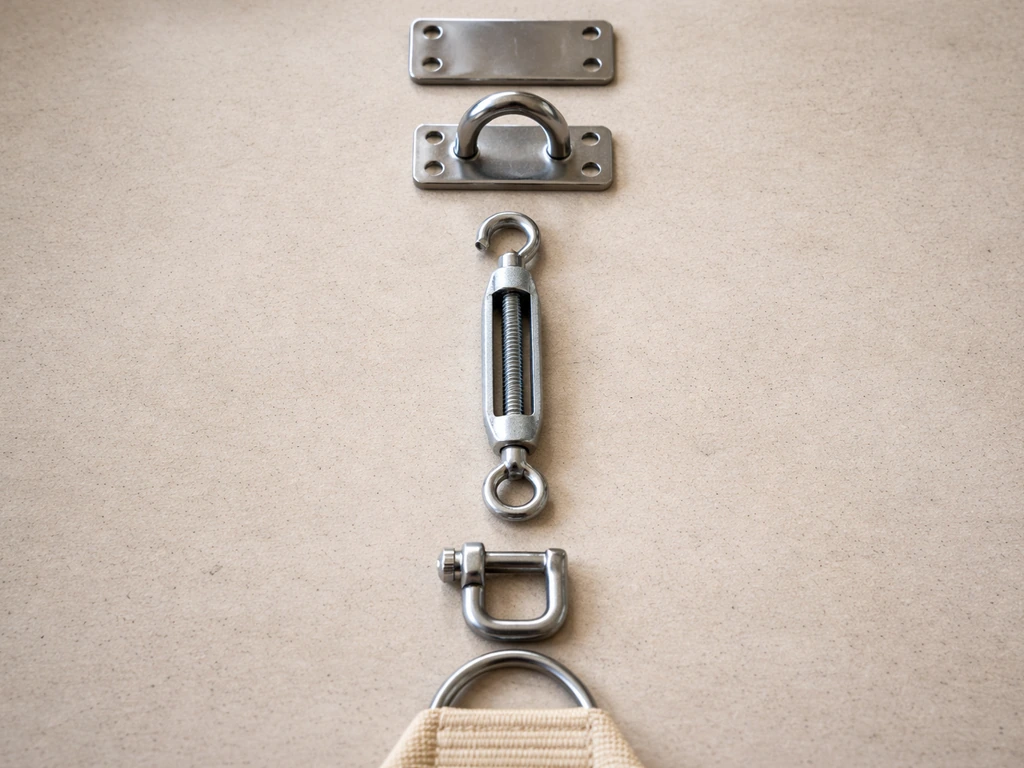
Each attachment point follows the same stack: mounting surface, then a bracket (pad eye or post plate), then a turnbuckle, then a shackle, then the sail's corner ring. That's five components per corner, and on a triangle sail you need at least three sets. Buy stainless steel throughout. Grade 304 stainless is fine for most inland patios. If you're within a mile or two of saltwater, go with 316 marine-grade stainless. It costs a little more but the corrosion resistance difference is significant in humid, salty air.
- Pad eye brackets or post plates (one per anchor point)
- Turnbuckles sized to the sail span (check the working load limit, not just the size)
- Shackles to link the turnbuckle to the sail's corner ring
- Stainless steel lag screws or through-bolts for wall and post brackets
- Optional: snap hooks for seasonal removal instead of permanent shackles
Tools
- Tape measure (at least 25 ft)
- Chalk line or laser level for marking anchor heights
- Drill with masonry or wood bits depending on your surface
- Socket wrench or adjustable wrench for turnbuckles
- Pliers for shackle pins
- Stud finder if mounting to a wall
- Level
- Ladder or scaffolding if any anchor points are above 8 feet
Design choices: grommets vs eye bolts, tensioning, and edge detailing
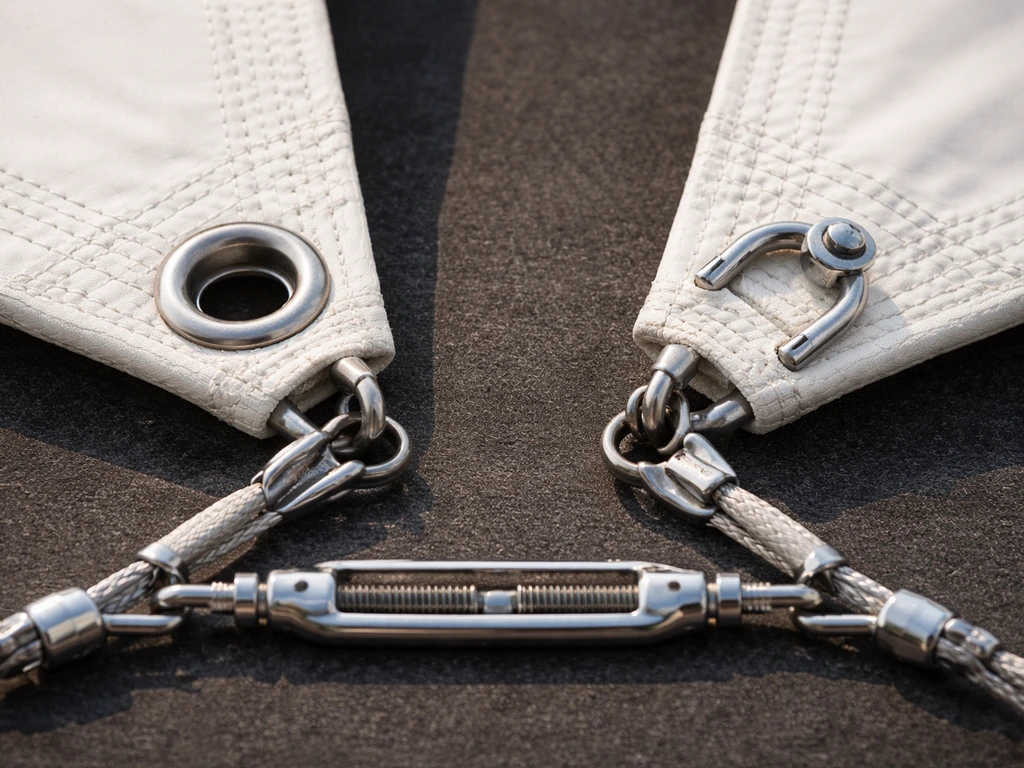
The corner hardware on the sail side is usually a D-ring or a large stainless grommet sewn into reinforced webbing. This is part of the sail itself, not something you choose separately. What you do choose is what connects that ring to your anchor point. An eye bolt screwed directly into a post is the simplest anchor option. A pad eye bracket gives you more surface contact and is better for wall mounting. For a cleaner look and easier seasonal removal, use a snap hook between the shackle and the corner ring instead of a fixed connection.
Turnbuckles are your tension adjustment mechanism. Coolaroo’s triangle shade sail instruction manual defines turnbuckles as hardware used to attach the shade sail corner ring to a fixing point and provide tension. Each turnbuckle has a threaded body that lengthens or shortens as you rotate it, letting you add or reduce tension at that corner independently. Sizing matters: match the turnbuckle's working load limit to your sail size and local wind conditions. Undersized turnbuckles are a common failure point. A 12x12 foot sail in a region that sees 50+ mph gusts needs hardware rated for well over 500 lbs WLL at each corner.
One thing people get wrong about tensioning: more is not better. Shade Sails LLC also emphasizes using a pre-tension concept and avoiding excessive corner extension with cable, rope, or chain so you don't introduce excessive sail movement and shock loads. Over-tightening doesn't make a sail safer. It stresses the corner reinforcements, stretches the perimeter wire, and can crack or strip anchor hardware. The goal is firm and taut, not guitar-string tight. Tenshon's tensioning guidance specifically warns against over-tensioning because of how it concentrates loads at corner geometry points. You want the sail visually flat, with no visible catenary sag along the edges, but still with some give when you press it by hand.
Step-by-step build and install process
- Measure your anchor span and confirm sail size. Measure the distance between each planned anchor point. Subtract 10% per side. Confirm your sail order matches those dimensions, not the raw span.
- Mark anchor point heights. Use a chalk line or laser level to mark where each bracket will go. Remember you need different heights at each point to create the drainage slope. A 10–20 degree pitch across the sail is your target.
- Install the brackets. Drill pilot holes and fasten pad eyes or post plates at each anchor point. Into wood posts, use 3/8-inch or 1/2-inch stainless lag screws, driven at least 3 inches deep. Into masonry or concrete, use sleeve anchors of equivalent size.
- Attach turnbuckles to brackets. Thread each turnbuckle open to near its maximum extension, then connect it to the bracket via a shackle. Having it near-open gives you room to tension the sail later.
- Lay the sail out on the ground. Unfold it near the install area and identify each corner. Note which corner is which, since some sails label them.
- Connect all corners loosely. Attach each sail corner ring to its corresponding turnbuckle with a shackle. Don't tension anything yet. Just get all corners connected with slack in the system.
- Begin tensioning gradually. Work around the sail, tightening each turnbuckle a few turns at a time. Don't crank one corner tight before others are connected. The goal is even, progressive tension across all points simultaneously.
- Check slope and coverage. Once snug, stand back and confirm the slope direction looks right for rain runoff and that the shade coverage is where you need it.
- Final tension and lock off. Add final tension until the sail is taut without visible edge sag. Lock shackle pins with a small pliers twist or mousing wire so they can't vibrate open over time.
- Inspect all hardware. Check that every bolt, shackle, and turnbuckle is fully seated. Give each corner a firm tug. Nothing should shift or creak.
Attachment methods to common patio structures
How you attach the sail depends heavily on what you're attaching to. Here are the most common scenarios. If you want a straightforward walkthrough for your setup, follow this guide on how to install patio shades from measuring to tensioning.
| Attachment Surface | Best Bracket Type | Fastener | Notes |
|---|---|---|---|
| Wood post (4x4 or 6x6) | Post plate or pad eye | 3/8" or 1/2" stainless lag screws, 3"+ deep | Drill pilot hole to prevent splitting; avoid attaching near end grain |
| House wall (wood framing) | Pad eye or wall plate | Lag bolt into stud, 3"+ penetration | Must hit a stud or structural blocking, not just siding or sheathing |
| Masonry/concrete wall | Pad eye with through-bolt or sleeve anchor | 1/2" sleeve anchor or wedge anchor | Pre-drill with hammer drill and carbide bit |
| Existing patio beam or header | Beam clamp or through-bolt pad eye | Through-bolt preferred over lag | Check beam load capacity; large sails can generate hundreds of lbs of pull |
| Freestanding post you're installing | Post plate at top | Concrete footing, minimum 24" deep | Post should lean slightly outward (away from sail) to resist the inward pull |
If you're attaching to your home's wall, finding a stud or structural member is non-negotiable. Shade sails under wind load exert a lot of lateral pull. If you’re wondering how to install shade cloth over a patio, start by planning anchor points and using stainless hardware sized for wind load Shade sails under wind load. A bracket screwed into vinyl siding and OSB sheathing with no stud behind it will pull out, possibly taking a chunk of your wall with it. Use a stud finder and confirm your lag bolt is going at least 3 inches into solid framing. If your anchor point falls between studs, add a structural blocking board behind the siding before mounting.
Freestanding posts are a great option when you don't have existing structures in the right spots. Follow the same install steps for a shade sail on a freestanding patio setup: plan anchor locations, mount turnbuckles at each corner, then tension evenly. Use 4x4 pressure-treated posts minimum, set in concrete footings at least 24 inches deep. Lean each post slightly outward from the sail at about 10 degrees before the concrete sets. When the sail is tensioned, it will pull the posts inward. If they start vertical, that inward load will work against the footing. The slight outward lean pre-loads them in the right direction.
Safety, weather considerations, and when to call a pro
Wind is the main structural concern with shade sails. HDPE fabric marketed as wind-tested to 200 km/h is a fabric performance claim, not an installation safety rating. The real-world load your specific install can handle depends on the anchor points, hardware sizing, post embedment, and local wind zone. ASCE 7 governs wind load design for residential structures in the U.S., and engineered calculations use gust pressure coefficients that most DIYers aren't running. For a small residential sail in a low-wind zone, a sensible DIY install with properly sized hardware is generally fine. For anything over 16 feet per side, in a hurricane or high-wind zone, or attached to a structure you're not confident can handle the load, get an engineer or professional installer to review it.
Rain management comes down to slope, as mentioned. If you’re hanging a blind on a sloping patio cover, the same idea applies: plan the mounting points carefully so the brackets stay secure at the correct angles slope. Permeable HDPE lets most water drain through the fabric itself, but any pooling at a low corner will create additional load and stretch the sail unevenly. If you're seeing a pocket of standing water after rain, you need more slope, not more tension.
For severe weather: take the sail down before a major storm. This isn't optional advice. Even a well-installed sail under hurricane or sustained high winds becomes a load multiplier on every anchor point. Most shade sail failures happen during storms that weren't forecasted to be that severe. Make it a habit. Seasonal removal (fall/winter in most of the U.S.) also dramatically extends the sail's lifespan. Label each corner when you remove it so reinstallation next spring is a 30-minute job, not a puzzle. And never try to take a sail down mid-storm. Wait until the wind drops.
When should you stop and call a pro? If any anchor point connects to a structural element of your home, like a ledger, a load-bearing wall, or roof framing, have a contractor verify it can handle the extra lateral load before you add a sail. Same if you're planning a sail larger than roughly 16x16 feet, if your local building department requires a permit for shade structures (check before you buy anything), or if you're in a Coastal A or V flood zone where wind design requirements are more stringent. Permanent installations in complex structural situations are exactly where professional help is worth the cost.
If this project evolves into something more involved, like a proper shade structure with a frame and posts you're building from scratch, that's a different but related project. A full shade structure gives you more control over attachment points and load paths, though it also requires more planning and possibly permits. The shade sail approach stays popular because it's fast, removable, and cost-effective when the anchor points are already there or easy to add. If you're switching from a shade sail to patio blinds for more privacy and light control, the install steps are a bit different, so review our guide on how to install patio blinds.
Your next steps to get this done
Go measure your space today. Write down the distance between every potential anchor point, mark the height differences, and sketch a rough layout showing where the high and low corners will be. With those numbers in hand, find a sail that's about 10% smaller per side than your shortest span. Then build your hardware list: one pad eye bracket, one turnbuckle, and one shackle per corner. Order 316 stainless if you're anywhere near the coast. Once everything arrives, the actual install on a simple three-point triangular sail over an average patio takes most people three to four hours, including time to get all the anchor bolts set right. Then follow the same step-by-step install approach: set anchor points, attach the corners with turnbuckles, and tension the fabric evenly for a safe, wrinkle-free patio setup how to install shade sail over patio. The tensioning at the end is satisfying once you see the sail pull tight and take shape. Take your time with that step, go corner to corner gradually, and it'll look and perform exactly like the product photos.
FAQ
Can I hang a patio shade sail flat, or does it have to be sloped?
Yes, but only if you keep drainage and tension geometry correct. Use a multi-point setup (at least three corners), and set the “lowest” anchors at different heights so water can run off toward a clear path. A single-surface, flat install is the main reason you see saggy edges and uneven stretching after rain.
What should I do if the sail still pools water after install?
Choose the lowest clear point as your rain runoff direction, then tension until the fabric lies firm without forcing it straight. If you install with correct slope and still get standing water, increase height difference between the lowest corner and the others, rather than tightening further, because tension cannot fix a bad runoff path.
My turnbuckles have no adjustment left, but the sail is still loose. Is my sail too big?
If your sail is sized correctly (about 10% smaller per side), you should be able to reach taut without extreme turnbuckle travel. If you run out of thread, you likely ordered the wrong size or mis-measured anchor spacing. Re-measure corner-to-corner spans, check that brackets are in line, and consider ordering a slightly smaller sail rather than over-tensioning.
How tight should a shade sail be, and is more tension always better?
No, not in most climates. Over-tightening makes corner hardware and corner webbing take peak loads that are much higher than “normal tautness,” and it can stretch the perimeter wire so the sail never sits flat again. Aim for visually taut with minimal edge sag, but some hand-press give, especially after the first week of weather.
Which stainless steel grade should I use, 304 or 316, and where does it matter most?
For inland patios, stainless 304 is usually appropriate. For coastal and humid-salt environments, use stainless 316 for turnbuckles, shackles, and any exposed fasteners, and rinse salt spray off after storms. Mixing stainless types can still work, but corrosion risk rises if any parts are not truly stainless.
How do I pick the right-rated turnbuckles and shackles for my sail?
Use the hardware’s working load limit (WLL), not just the “max” or “breaking strength.” Wind loads can spike at anchors, and corner loads are concentrated, so undersized turnbuckles and shackles fail first. As a practical check, choose hardware rated well above your expected wind conditions and sail size, and avoid generic hardware-store hardware with unknown load ratings.
Should I re-tension the sail after the first week or after hot weather?
It’s common to start with a sail that looks “right” on day one and then loosens slightly or changes shape after the fabric warms up and settles. Re-tension lightly after a few days to a week, not immediately to maximum tightness, because early over-tension often leads to later wire stretching.
What’s the best way to remove and reinstall a shade sail seasonally without messing up the setup?
Yes, and labeling saves time. Mark each corner ring and its matching anchor location (for example, “A, B, C”) before removal, then store hardware so the same corner hardware goes back to the same corner. This prevents twist mismatch, which is one reason reinstallations look crooked even when dimensions are correct.
When should I repair a torn shade sail, and when should I replace it?
Replace it if you see perimeter wire damage, repeated fraying near a corner, or any torn reinforced webbing around the corner ring. Small loose threads can be survivable, but corner reinforcement failures usually spread under wind load. If you patch fabric without addressing the wire or webbing, the sail often tears along the next stress point.
Why does my shade sail sag in the middle or look “wrinkled” along the edges even though it’s tensioned?
That can be a sign of incorrect slope, uneven anchor heights, or a sail shape that does not match your space. Triangles tolerate asymmetry better, quadrilaterals require carefully arranged high and low corners, and hypar layouts depend on two high corners and two low corners. Before adjusting tension, verify anchor height differences and runoff direction.
Can I mount the sail brackets into vinyl siding or OSB without hitting studs?
If you have studs behind a wall, use a stud-mounted bracket or lag into framing that provides proper embedment, then add structural blocking behind siding if studs are not available at your anchor locations. Vinyl siding alone is not a structural anchor. When in doubt, choose a pad eye or plate that spreads load and aligns with framing.
Can I do a freestanding post setup, and do I really need to lean the posts outward?
Yes, but you need to match the hardware stack to the material and weather exposure. For freestanding posts, set proper concrete depth and use the slight outward lean so the sail’s pull pre-loads the post in the right direction. If you plumb posts perfectly vertical, the inward load can work against the footing and create movement over time.
Is it safe to DIY a large shade sail, like over 16 feet per side?
In most cases, yes, but stay realistic about size. If a side is over about 16 feet, wind risk climbs and permitting may apply depending on your location. If your design relies on structural connections to your home (roof framing, ledgers, load-bearing walls), have a contractor confirm the connection can handle lateral loads.
Will a patio shade sail significantly reduce heat, or is it mostly for UV and glare?
Typically, not fully. It provides shade and helps with sun, but it can still transmit some heat depending on fabric weight and orientation. If you want cooler conditions, focus on correct height, choose the right fabric coverage, and maintain drainage so the sail stays taut, because wrinkles increase localized hotspots.