Installing patio shades is a solid weekend project for most homeowners. If you're installing a Coolaroo patio shade, follow the manufacturer steps and double-check your bracket leveling and mounting points before you hang the fabric how to install a coolaroo patio shade. You measure your opening, mount a pair of brackets at the top, drop the roller into them, and secure any side channels or bottom tensioners.
How to Install Patio Shades Step-by-Step DIY Guide

Celia Vaughn
8 Jun 2026
The whole process typically takes two to four hours for a single shade, longer if you're doing multiple panels or working on a tall patio cover. The trickiest parts are getting the brackets perfectly level, drilling into whatever your patio structure is made of without cracking it, and then dialing in the alignment so the fabric rolls straight every time.
Draper’s spring roller shade installation instructions also specify that all Draper window shades should be installed level and that brackets be mounted according to the installation type [brackets perfectly level](https://www. draperinc. com/documentdownload. aspx?
file=Springroller_Inst. pdf&path=WindowShades%2finstructions). This guide walks you through all of it. For step-by-step directions on hanging the right patio shade, see the full section on how to install sunshade on patio.
Choosing the right patio shade type
Before you buy anything, spend a few minutes deciding which shade type actually fits your situation. The main options for an outdoor patio are roller shades, shade sails, shade cloth panels, and drop blinds. If you need a different style, learning how to make patio shade sails can help you choose the right fabric and tensioning setup for open, exposed areas. Each one installs differently and suits different structures.
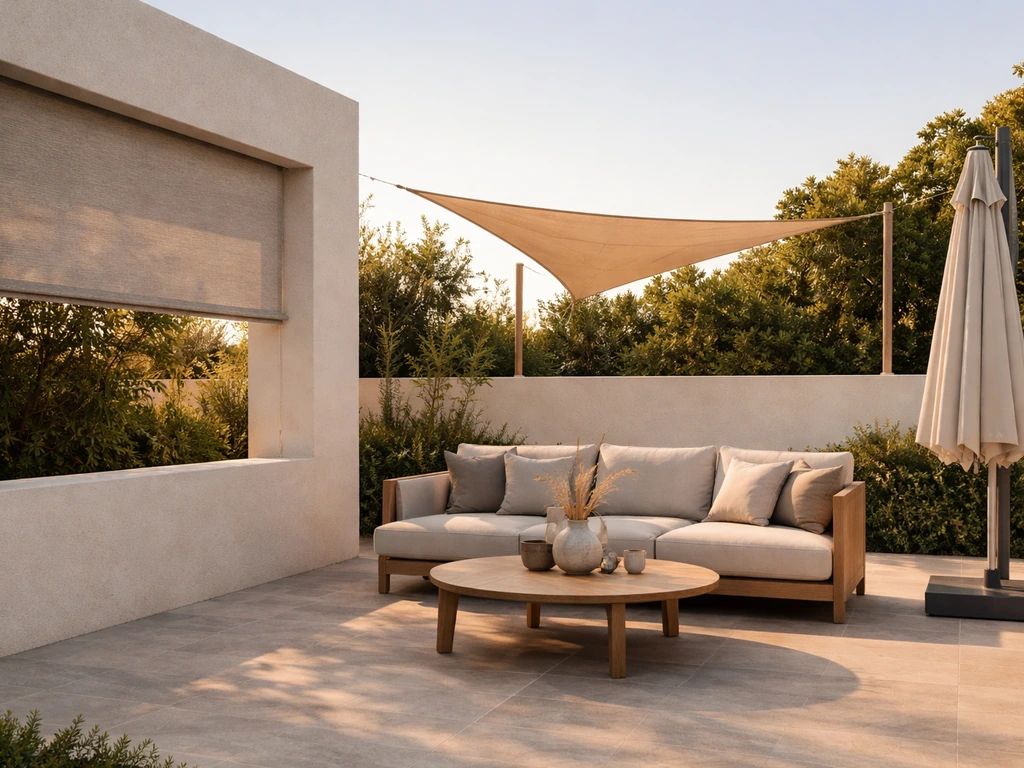
Roller shades are the most popular choice for covered patios and the focus of this guide. They mount to the underside of a patio roof beam, to a wall, or between posts, and they roll up out of the way when you don't need them. Look for shades rated for exterior use: UV-stabilized fabric (HDPE mesh is a common and durable choice), powder-coated aluminum hardware, and stainless or galvanized fasteners. A quality outdoor roller shade will hold up for several years of direct sun exposure without cracking, fading badly, or corroding at the hardware.
Shade sails and shade cloth panels are better suited to open patios where you don't have a solid structure to mount a roller. If you’re specifically trying to install shade cloth over a patio, the best approach depends on whether you’re using a frame, a pergola, or fixed anchor points install shade cloth over patio over patio. They're stretched between anchor points and tend to be less tidy-looking but much faster to install. This guide can also help you with the basics of how to install shade sail over patio areas. If that's more your situation, the installation approach is covered separately. For the pergola-style or covered-patio crowd, roller shades are the cleaner, more functional solution.
Within roller shades, you'll choose between manual (spring-operated or wand-operated) and motorized. For most DIYers, a wand-operated or spring-return shade is the right starting point: no wiring, no app, less to go wrong. Motorized shades are a step up in convenience but add complexity to the installation, especially outdoors where you need weatherproof wiring or a good solar-charging setup.
| Shade Type | Best For | Mounting Surface | DIY Difficulty |
|---|---|---|---|
| Outdoor Roller Shade | Covered patios, pergolas, between posts | Beam, header, wall, or post | Moderate |
| Shade Sail | Open patios, no existing roof structure | Posts, walls, or trees | Easy to Moderate |
| Shade Cloth Panel | Large open areas, budget installs | Frame, wire cable, or posts | Easy |
| Exterior Drop Blind | Enclosed patio walls, wind protection | Wall or beam fascia | Moderate |
If you're comparing roller shades to exterior blinds (sometimes called patio blinds), the main difference is that roller shades use a tubular cassette system with fabric that wraps around a spring or motorized tube, while blinds use horizontal slats. Roller shades are generally better for weather resistance and UV blocking in an outdoor setting.
Tools, materials, and safety before you start
Gather everything before you get on a ladder. Stopping mid-installation to hunt for a bit or a pencil is how mistakes happen.
- Drill/driver with a 3/32" bit for pilot holes in wood or composite, or a 3/16" bit for harder surfaces like aluminum beam flanges (check your shade's instruction sheet for the specified size)
- Level (24" or longer is ideal for checking bracket alignment)
- Tape measure
- Pencil or chalk marker
- Phillips-head and flat-head screwdrivers
- Ladder rated for your working height
- Safety glasses
- Stainless steel or galvanized screws (if your shade kit doesn't include exterior-rated hardware, buy your own)
- Optional: stud finder or awl to confirm solid mounting points behind fascia trim
On safety: roller shade installation looks simple, but working overhead on a ladder with a drill introduces real risk. Improper installation can also cause the shade to drop unexpectedly. Take the Draper installation guide's warning seriously: improper installation can result in serious injury. Set the ladder on firm, level ground. Have a second person hand you the roller assembly when it's time to seat it in the brackets, because juggling a heavy shade tube while balancing on a ladder is exactly how people get hurt. Don't rush the fastener step thinking you'll tighten everything later.
For outdoor use specifically, make sure every screw and bolt you use is rated for exterior exposure. Plain steel screws will rust within a season, staining the fabric and eventually failing. Stainless steel or hot-dipped galvanized is the right call. If you're mounting into aluminum (common on aluminum patio covers), use a self-tapping screw designed for sheet metal or pre-drill carefully to avoid cracking the flange.
Measuring and planning your mounting locations
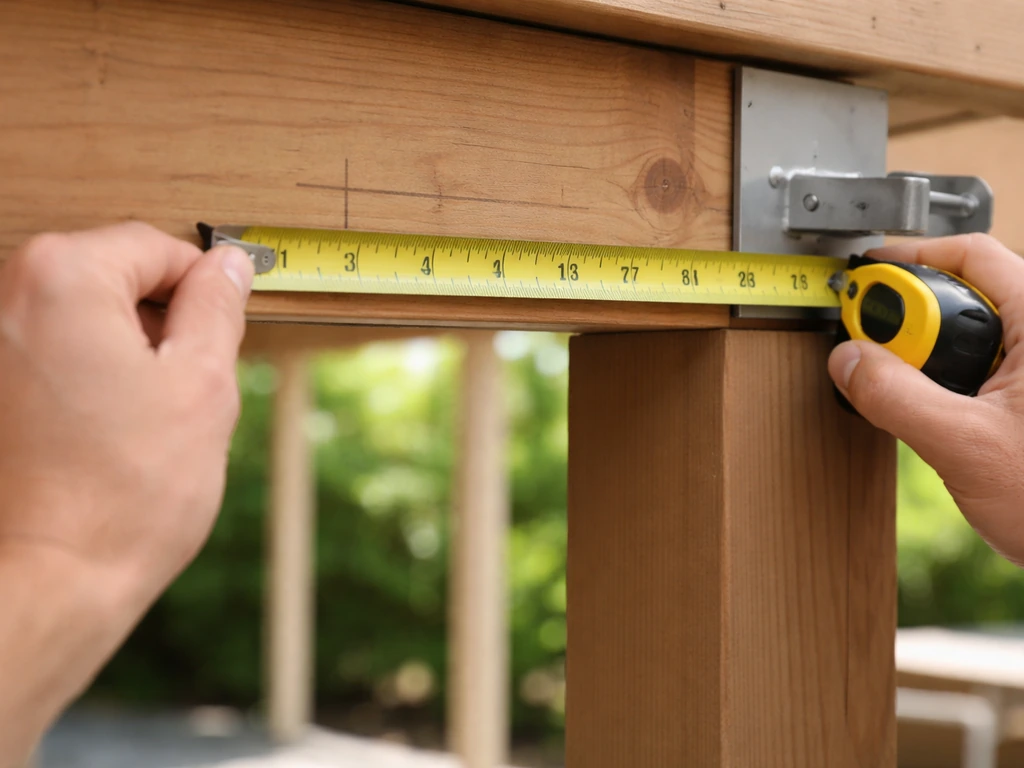
Accurate measuring is what separates a shade that operates smoothly from one that binds, gaps, or looks crooked. Measure your opening width and drop height before ordering or cutting anything.
Width: inside mount vs. outside mount
An inside mount sits within the opening (think between two posts), and the shade width needs to be slightly narrower than the clear opening, usually by about half an inch total. An outside mount sits on the face of the beam or wall and overlaps the opening by two to four inches on each side for better light blocking. Outside mounts are more common for outdoor patios because they give you more flexibility on mounting surfaces and better coverage.
For bracket placement, center the shade width on the opening. Coolaroo’s wand-operated outdoor roller shade manual similarly instructs installers to center the calculated width on the opening and mark each side to set the bracket locations accurately blank" rel="noopener noreferrer">marking the center of the opening first, then marking each bracket location from there. Measure the total opening width, subtract the shade width, divide that number by two, and that's your inset from each side. Mark both sides. Coolaroo's installation guides specifically call out marking the center of the opening first, then marking each bracket location from there, which is a reliable method that reduces asymmetry errors.
Drop height: how far down does it need to reach?
Measure from where the bottom of the bracket will sit to the floor (or to however low you need the shade to drop). Add a few extra inches if you want the shade to reach the ground or sit in a bottom channel. Order the shade to that drop length. Shades that fall short of their target create uncomfortable gaps at the bottom and can billow in the wind.
Confirming solid mounting points
This is the step most people skip and then regret. On a wood-framed patio cover, the fascia board is often thin and not structural enough on its own to hold a heavy shade under wind load. You want your screws going into the beam itself or into blocking behind the fascia. Probe with an awl or use a stud finder to confirm there's solid material behind your planned mounting spot. On aluminum patio covers, mount into the main beam flange or a cross member, not into thin decorative trim panels. On masonry walls, use appropriately sized masonry anchors.
Mounting the brackets and preparing the surface
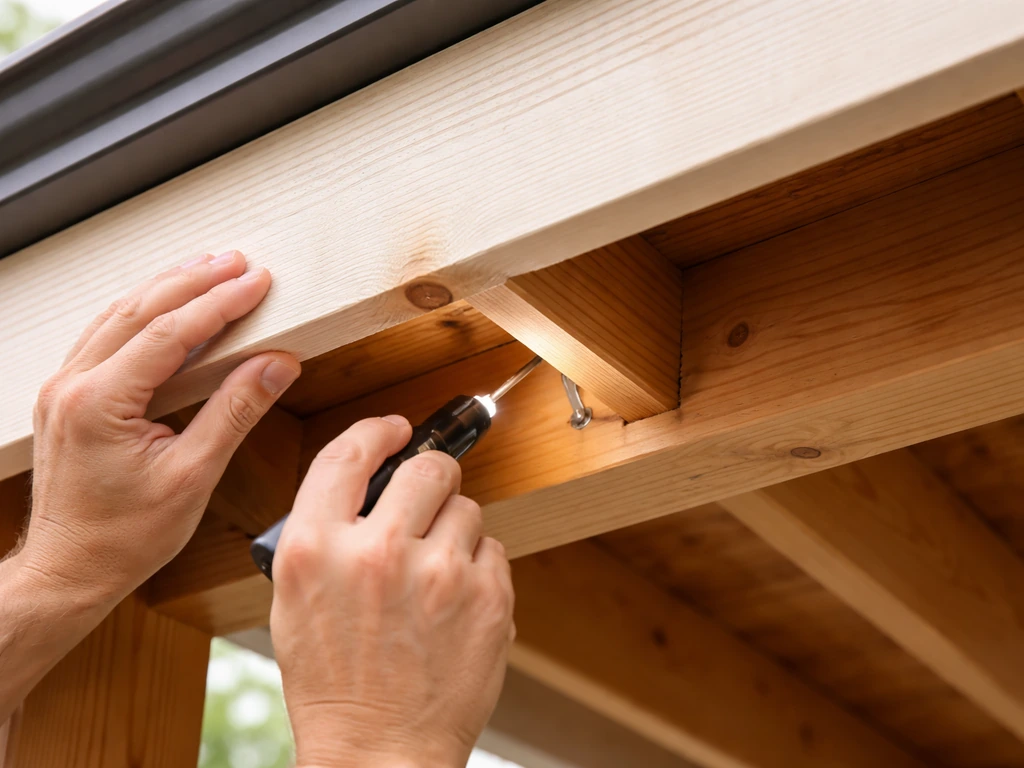
With your measurements marked, you're ready to drill and mount. Work through this sequence to avoid having to undo and redo.
- Hold the first bracket up to your marked position and use a pencil to trace the screw hole locations onto the surface.
- Pre-drill pilot holes at each marked location. Use a 3/32" bit for wood, a 3/16" bit for denser materials, or the size specified in your shade's instructions. Pilot holes prevent splitting in wood and reduce the risk of cracking aluminum flanges.
- Drive the mounting screws through the bracket into the pilot holes. Don't overtighten into aluminum or composite materials as you can strip the hole. Snug is enough.
- Repeat for the second bracket at the opposite side mark.
- Place your level across the front faces of both brackets. Both brackets must be at exactly the same height and their front edges must be flush and aligned with each other. Coolaroo's installation guide specifically calls this out: misaligned brackets are the number-one cause of a roller that won't track straight.
- If one bracket is high or low, remove it, adjust your mark, re-drill, and remount. Don't force a level by shimming brackets with washers unless you have no other option.
If you're mounting to a painted or powder-coated aluminum surface, clean the area with a rag and isopropyl alcohol before marking. Grease and grime will cause the bracket to shift slightly under the screw heads, and your level marks will be off.
For surfaces where you can't get a perfect screw angle (like the underside of a sloped patio cover), some installers add a small wood or aluminum mounting block to create a flat, horizontal face. Cut it square, fasten it to the beam, then mount your bracket to the block. This approach also gives you more thread engagement than driving screws at an odd angle into thin material.
Installing the roller shade and getting it aligned
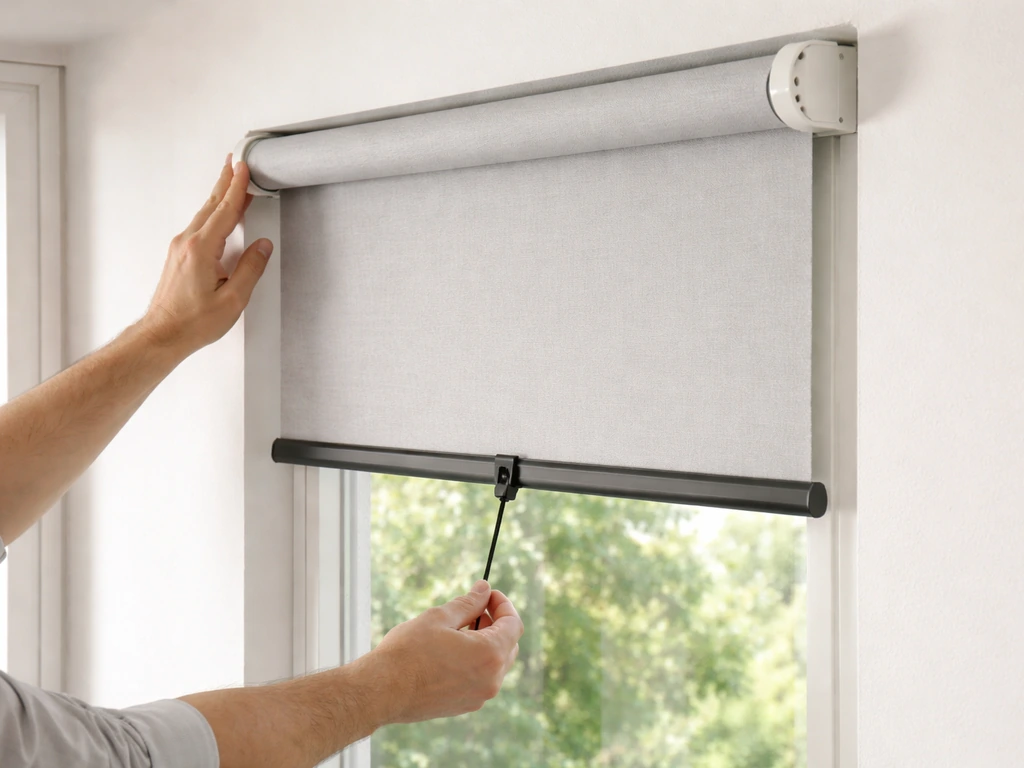
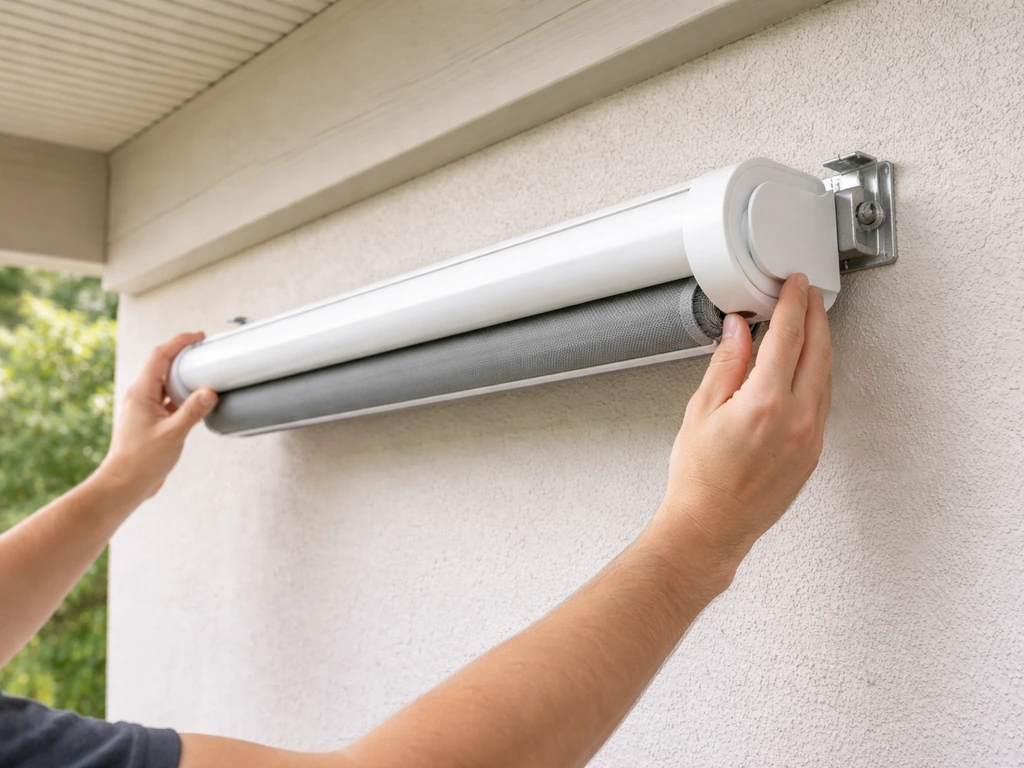
With both brackets mounted, level, and secure, the roller assembly goes in. This part is satisfying when the prep work was done right.
- If your shade came with a cassette (a housing that encloses the roll), snap or slide the cassette into the bracket clips according to the manufacturer's instructions. The cassette brackets typically have a locking tab or pin that clicks into place.
- For open-roll styles without a cassette, seat the pin end of the roller tube into one bracket, then flex the tube slightly to seat the spring end into the other bracket. Some rollers have a flat-cut end for the spring side and a round pin for the idler side. Don't force them in backward.
- Once seated, pull the shade down about twelve inches to check the fabric tracking. Watch the edges as you let it retract. If one edge rises before the other, the roller is sitting slightly tilted in the brackets.
- To adjust tracking, gently lift the roller out of the bracket on the low side and raise that bracket by a millimeter or two. Even tiny adjustments matter here. Re-seat and test again.
- If your shade has a wand, attach it to the operating chain or cord eye. Make sure it hangs freely and isn't twisted.
- Do a full test pull: extend the shade all the way down, then let it retract fully. The fabric should roll back evenly across the entire width. Repeat this two or three times to let the spring tension settle.
If you're installing side channels (tracks that the hembar slides into for a tighter seal against wind and insects), now is the time to mount them. Side channels go on the left and right edges of the opening, plumb (perfectly vertical). Attach them with screws at 12-inch intervals, making sure neither channel is angled inward toward the shade. The fabric and hembar need to slide freely inside the channel without binding. Lutron's side-channel guidance specifically notes that the shade should not be rubbing on the channel edges or on any exposed screw heads inside the channel. Countersink or use flat-head screws if your channels have interior screw holes.
Weatherproofing, routing, and securing for outdoor durability
Outdoor shade installations take abuse that interior shades never see: rain, UV, wind pressure, and temperature swings. A few extra steps during installation will add years to the life of both the hardware and the fabric.
Fasteners and bracket sealing
As mentioned earlier, use stainless steel or galvanized fasteners throughout. After mounting the brackets, add a small dab of exterior-grade silicone caulk around each screw hole, especially if you drilled through a surface that's exposed to rain. This prevents water from tracking into the hole and rotting wood over time, or causing rust staining on aluminum. Don't glob it on; a thin bead around the screw head is enough.
Wind mitigation with the bungee or bottom tensioner
Most quality outdoor roller shades include a bungee cord or hook system at the bottom rail. This is not decorative. Hook the bungee to an anchor point on the floor or deck surface to keep the shade taut in wind. Coolaroo's instructions are specific about this: crank the shade up slightly after hooking to make the bungee taut, not slack. A loose bungee flaps and does nothing. In high winds, the bungee system is what prevents the shade from ballooning out and straining the brackets.
That said, outdoor roller shades should always be rolled up during severe weather. No tensioner system is a substitute for retracting the shade before a storm. The fabric and hardware are built for normal wind exposure, not hurricane-force loads.
Side channel airflow (if applicable)
If your installation uses enclosed side channels or a top pocket/cassette housing, you may notice the shade blowing out of the channels even in moderate wind. This happens because of pressure buildup inside the enclosed space. The fix, as outlined in Lutron's side-channel troubleshooting documentation, is to equalize the air pressure by creating a small airflow path, such as drilling a few small holes in the top back cover or pocket. It sounds counterintuitive, but it works. Two or three 1/4" holes drilled in an inconspicuous spot at the top of the housing can eliminate the problem entirely.
Routing motorized shades
If you installed a motorized roller shade, all wiring should run through weatherproof conduit or use wire rated for outdoor wet locations. Any junction box or receiver unit needs to be in a protected location or rated for outdoor exposure (IP44 or higher). Keep low-voltage wiring away from the shade fabric itself, and use wire clips or staples rated for exterior use to secure the run cleanly along the beam or post.
Final adjustments, testing, and fixing common problems
After the installation is complete, run through a full test cycle before calling it done. Extend the shade all the way down, check the hembar position, engage the bungee, then retract it fully. Do this several times. Most operational issues reveal themselves in the first five cycles.
Troubleshooting guide
| Problem | Likely Cause | Fix |
|---|---|---|
| Shade won't retract fully | Spring tension too low or roller seated crooked | Re-seat roller ensuring both ends click fully into brackets; if spring is weak, the roller may need replacement or rewinding |
| Fabric rolls on a diagonal (one side higher than the other) | Brackets are not at the same height | Adjust the lower bracket upward by loosening and repositioning; even 2mm makes a difference |
| Shade binds or stops mid-travel in side channels | Channel is angled inward or screw heads are protruding inside track | Straighten the channel; countersink any exposed screw heads inside the track |
| Shade blows out of side channels | Air pressure buildup behind enclosed cassette or housing | Drill small ventilation holes in the top of the cassette housing to equalize pressure |
| Brackets feel loose after use | Pilot holes stripped or screws too short for the material depth | Remove screws, fill holes with wood filler or epoxy (for wood) or use a larger anchor, let cure, re-drill, and remount |
| Bottom rail gaps at the floor | Shade drop length is short or bungee anchor is too high | Reposition the bungee floor anchor lower; if the fabric is genuinely short, a weighted hembar extension or new shade may be needed |
| Shade won't extend smoothly by hand | Wand cord is twisted or hembar is catching on channel edge | Untwist the wand cord; check that the hembar floats freely inside the channel without contact on the edges |
When to call a pro
Most single-shade installations on a standard covered patio are well within DIY range. If you want the shade to be more than a mounted roller, you may also want to review how to build a patio shade structure as an adjacent option for your setup. Call in a professional when you're installing multiple large shades (wider than 10 feet or heavier than 30 pounds per panel), when your mounting surface is structurally questionable and you're not sure whether it can handle the load, or when the installation requires electrical work for motorized shades beyond a simple plug-in setup. Motorized systems that integrate with smart home platforms or require hardwired connections should be run by a licensed electrician for the wiring portion, even if you handle the shade mounting yourself.
Once everything is working smoothly, take five minutes to write the shade dimensions and hardware specs on a piece of tape stuck inside the cassette housing or bracket cover. When you need a replacement part two years from now, you'll be grateful you didn't have to re-measure from scratch.
FAQ
How do I install patio shades if the patio cover underside is sloped?
If your patio has a slope, measure the shade drop from the point you want the hembar to land, not from a flat reference line. When you install on a slanted underside, create a flat mounting face with a small block, then keep the brackets level on that new face so the roller doesn’t bind as it rolls.
What if my screws feel like they are going into thin fascia or trim?
Use the shade type’s intended mount, then verify you can hit structural material. If you only have thin trim or fascia, the fasteners may hold at first but fail under wind load, leading to a crooked or dropping shade. Probe behind fascia with an awl or stud finder, then mount into the beam or blocking.
How much should outside-mount patio shades overlap, and what can interfere with the overlap?
For outside mounting, use the overlap guidance as a starting point, then confirm the cassette and hembar won’t strike the wall trim, post caps, or gutters when the shade rolls up. Dry-fit with the roller assembly temporarily held in place before drilling your final bracket holes.
How do I prevent the fabric or hembar from rubbing inside side channels?
Plan for a small gap so the shade can operate freely. If the system uses side channels, the fabric should slide without rubbing the channel edges. If you see rubbing after installation, stop and adjust bracket alignment, because stretched or sagging hems can worsen binding when the shade is fully extended.
My shade rolls unevenly and looks crooked, what should I check first?
Do a test with the shade rolled down, then gently push and pull the bottom rail side to side while it’s taut. If it shifts or the hembar doesn’t stay centered, your brackets are likely not aligned or not level relative to each other. Recheck level and inset measurements before you tighten everything permanently.
Which fasteners should I use for wood, aluminum, and masonry patios?
Do not assume one bushing or one screw size works for all substrates. Use exterior-rated fasteners that match the mounting surface, for example stainless or hot-dipped galvanized for wood or aluminum, and correctly sized masonry anchors for brick or concrete. Using plain steel is a common reason for early rust staining.
What should I do if the bottom rail sags or the shade doesn’t stay taut?
If the bottom sags when extended, shorten the effective drop target or confirm the bungee is hooked to an anchor that keeps tension, then crank slightly to remove slack. If the hembar still droops, check for a mis-seated roller in the brackets, because a roller that is not fully seated can roll correctly at first but lose tension as it extends.
How do I mount patio shades on aluminum patio covers without cracking the structure?
If you mount to an aluminum patio cover, avoid drilling into decorative panels and instead fasten into the beam flange or a structural cross member. Use sheet-metal style self-tapping screws and consider pre-drilling to prevent flange cracking, then keep a light sealant bead around holes exposed to rain.
What is the best way to test operation before calling the installation finished?
After you seat the roller, run several full down and up cycles while watching for rubbing, uneven travel, and hembar alignment. If you have side channels, check that screws inside the channel are countersunk or flat-head so nothing catches the hembar.
What wiring mistakes cause problems with motorized patio shades?
For motorized shades, keep all wiring outside the path where fabric or the moving hembar could contact it. Run low-voltage lines in UV-resistant conduit or exterior-rated cable, keep junction boxes protected or rated for the outdoors, and confirm the wiring routing does not interfere with the roller travel.
My enclosed side channels look like they balloon out in wind, how can I fix it?
In moderate wind, airflow buildup inside enclosed channels or pockets can cause the fabric to blow out. Create an airflow path by drilling a few small holes at the top back of the housing area, then re-test in the first breezy conditions to confirm the fabric stays seated.
When should I hire an electrician for a motorized patio shade?
If your installation requires a hardwired motor connection, or you need weatherproof electrical work beyond a simple plug-in, hire a licensed electrician. DIY mounting is fine, but incorrect wiring or improperly protected junctions can create safety hazards and shorten motor life due to moisture exposure.
Should outdoor roller patio shades be rolled up in storms?
Yes, keep the shade rolled up during severe weather, because bungee or tension systems are meant for normal wind, not storm loads. If a shade was left down during strong gusts, inspect brackets, side channels, and the roller seating for looseness before using it again.
Are there size or weight limits where DIY installation becomes unsafe?
Most single shade setups fit DIY, but get help when the shade is large and heavy, for example wider than 10 feet or heavier than 30 pounds per panel. Also consider help if your mounting surface is uncertain, because incorrect structure loading can lead to long-term failures that aren’t obvious right away.
Why should I record shade dimensions and hardware specs after installation?
Write the exact shade dimensions, hardware type, and model details onto tape inside the cassette or bracket cover for future replacement. This saves time because replacement parts often require matching tube length, bracket style, and fabric roll specifications.