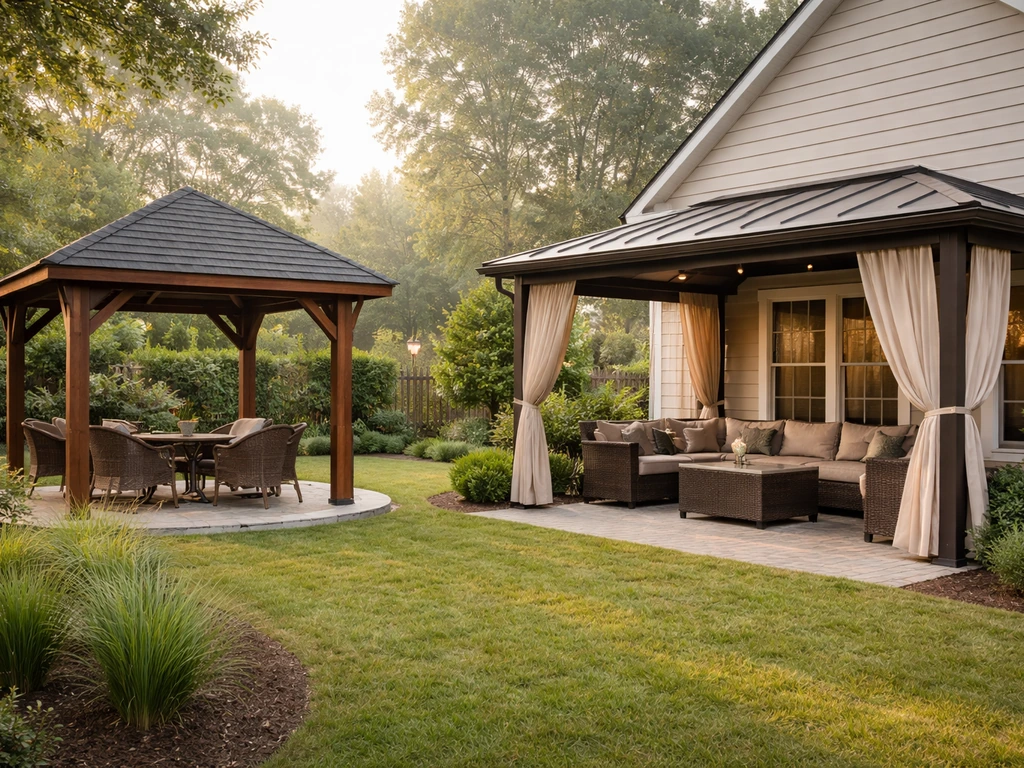
You can absolutely build a patio gazebo yourself. A freestanding 10x10 or 10x12 structure takes a solid weekend for two people, costs roughly $800 to $2,500 in materials depending on whether you go wood or aluminum, and ends up far sturdier than most pop-up canopies. The key is treating it like a small building, not yard furniture: real footings or proper anchor hardware, a framed roof with correct load path, and weatherproofing details that keep water out for years rather than seasons.
How to Build a Patio Gazebo Step by Step DIY Guide

Celia Vaughn
6 Jun 2026

Pick the right gazebo style first
The style you choose determines nearly everything else: how much framing work is involved, what kind of roof you're installing, and whether you need permits. Get this decision right before you spend a dollar on materials.
Freestanding vs. patio-attached
A freestanding gazebo sits anywhere in your yard or on your patio surface and stands on its own six or eight posts. It's the most common DIY choice because it doesn't touch your house structure, which usually means a simpler permit situation. A patio-attached gazebo shares one wall or a ledger board with your house, similar to a pergola or lean-to, which requires a proper ledger connection to your home's rim joist and often triggers a building permit in most jurisdictions. For most homeowners building on an existing concrete or paver patio, freestanding is the easier, smarter call.
Roof shape options
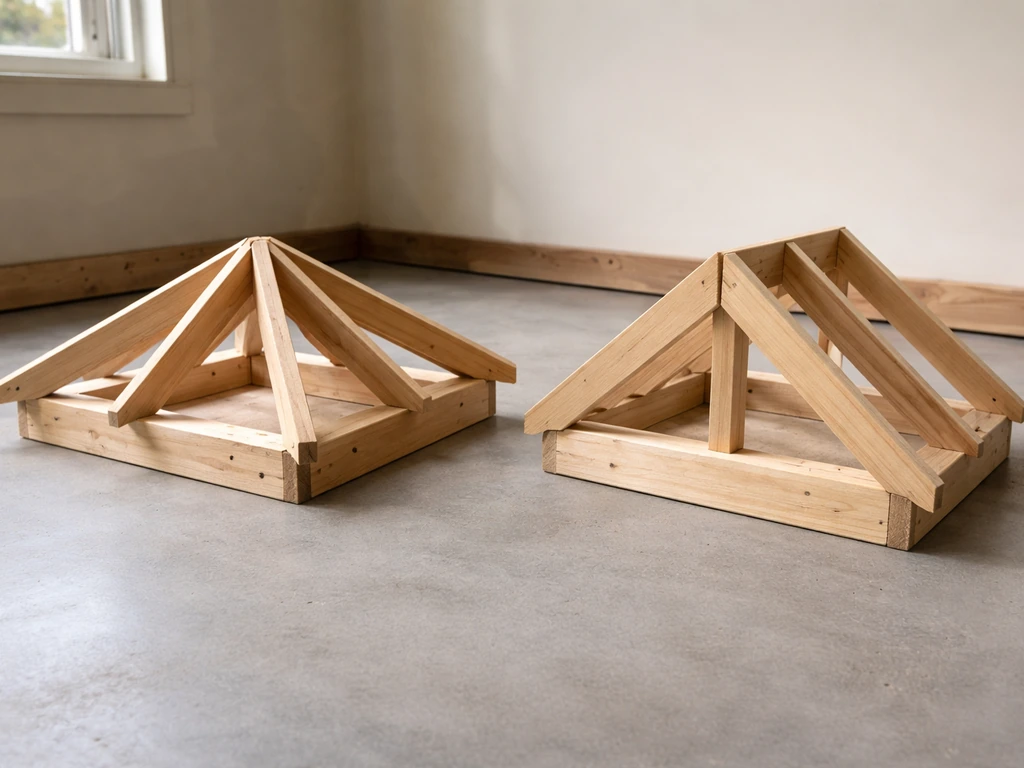
The three practical shapes for a DIY build are a hip roof (four sloping sides meeting at a center peak, the classic octagonal gazebo look), a gable roof (two sloping sides, much easier to frame), and a flat or shed-style roof (simplest to build, fine for mild climates but not ideal in heavy rain or snow regions). If this is your first major outdoor build, a gable roof on a rectangular footprint is the most forgiving option. Hip roofs on octagonal bases look great but involve a lot of compound angle cuts that will slow you down significantly if you're new to framing.
Gazebo kits vs. full custom builds
Kit gazebos from brands like VersaTube, Yardistry, or big-box store options give you pre-cut parts, hardware, and installation instructions. They're a legitimate option and not a compromise. A full custom build gives you exact dimensions to fit your patio footprint and full control over materials, but it adds significant planning and cutting time. If your patio is an odd size or you want a specific look, go custom. If your patio is roughly 10x10 or 10x12, a kit will probably drop right in and save you 20 or more hours of work.
Measure your patio, plan your layout, and prep the site
Accurate measurements before you buy anything will save you from the most painful mistake in any outdoor build: cutting too small or buying too much material. Measure your patio's usable square footage, then subtract at least 12 inches of clearance on all sides if the gazebo sits on an open patio (so the roof overhang doesn't drip directly onto your patio edges or run into fences). A 12x14 patio can comfortably fit a 10x12 gazebo.
Laying out post positions

Mark your post locations using batter boards and string lines, not just tape on the ground. Square up your layout using the 3-4-5 triangle method: measure 3 feet along one string, 4 feet along the perpendicular string, and confirm the diagonal is exactly 5 feet. If it isn't, your posts will be out of square and the roof framing will fight you the whole way. Double-check diagonal measurements corner to corner; they should match within 1/8 inch.
Site prep for different patio surfaces
On a concrete slab, your prep work is minimal: clean the slab, mark post locations, and plan for anchor hardware (more on that in the anchoring section). On pavers, you have two choices: pull the pavers at each post location and pour small concrete footings, or use weighted base plates designed for paver surfaces. Poured footings into the ground below the pavers are structurally superior, especially in high-wind areas. On a wood deck, you'll anchor post bases to the deck framing below, not just to the decking boards themselves. Always check what's beneath the surface before you commit to an anchoring method.
Permits: don't skip this step
Most municipalities require a permit for any permanent outdoor structure over a certain square footage, commonly 100 to 200 square feet, though this varies widely. A 10x10 gazebo sits right at that threshold in many places. Call your local building department before you break ground. Unpermitted permanent structures can create problems when you sell your home and may not be covered by homeowner's insurance if they cause damage. The permit process also often requires you to submit a simple site plan, which forces you to finalize your measurements anyway.
Materials and tools: wood, metal, or aluminum
Your material choice affects cost, maintenance, lifespan, and how much cutting and fitting work you'll do. Here's an honest comparison:
| Material | Cost (materials only) | Lifespan with maintenance | DIY difficulty | Maintenance level |
|---|---|---|---|---|
| Pressure-treated wood | $800–$1,500 | 20–30+ years | Moderate | Moderate (staining/sealing every 2–3 years) |
| Cedar or redwood | $1,200–$2,500 | 25–40+ years | Moderate | Low to moderate (naturally rot-resistant) |
| Powder-coated steel kit | $600–$1,400 | 15–25 years | Easy to moderate | Low (check for rust spots annually) |
| Aluminum kit or custom | $900–$2,000 | 30+ years | Easy | Very low (won't rust or rot) |
Pressure-treated lumber (rated for ground contact, commonly labeled UC4B) is the workhorse choice for posts and beams. It's widely available, strong, and forgiving to work with. The trade-off is that it needs corrosion-resistant fasteners. Use hot-dipped galvanized (HDG) or stainless steel nails, screws, and connector hardware throughout. Standard zinc-plated hardware will corrode quickly in contact with pressure-treated wood's preservative chemicals, and you'll have rust staining and weakening connections within a few years. This is one of those details that separates a structure that lasts from one that falls apart.
Aluminum is the low-maintenance winner for longevity. It doesn't rust, doesn't rot, and needs almost no upkeep. Kit-based aluminum gazebos are the easiest DIY path because the parts arrive pre-cut and pre-drilled. The limitation is that aluminum kits are often fixed in size and style, so if you want a custom footprint or a specific look, wood gives you more flexibility.
Tools you'll actually need
- Circular saw or miter saw (for cutting lumber or rafters to length and angle)
- Drill/driver with impact driver (for driving structural screws and anchor bolts)
- Hammer drill with masonry bits (for drilling into concrete for anchor bolts)
- Level (24-inch and 4-foot versions both useful)
- Speed square and framing square
- Tape measure (25-foot minimum)
- String lines and batter boards
- Post level or temporary bracing to hold posts plumb while you work
- Wrench set for tightening anchor nuts and hardware
- Safety glasses, hearing protection, and work gloves
If you don't own a hammer drill, rent one. You'll need it for concrete anchoring and it's not worth trying to substitute a regular drill for that task.
Building the frame: step by step with safety built in
Frame construction is where the structural integrity of your gazebo is determined. Take your time here. Rushing the framing to get to the fun roof part is the most common mistake, and it shows up later as wobbling, racking, or roof panels that don't align.
Step 1: Set and plumb your posts
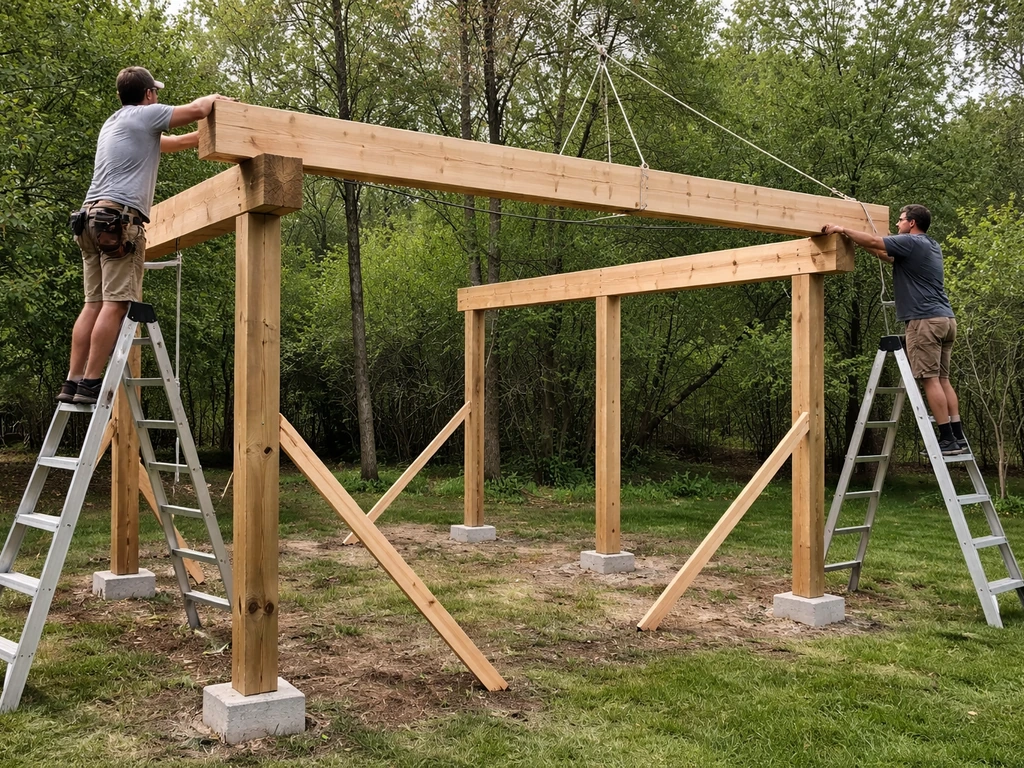
Install your post bases at your marked locations (see anchoring section for concrete specifics). Set your posts into the bases and brace them temporarily with 2x4 braces running diagonally to stakes in the ground. Use a post level or check two faces with a standard level to get each post perfectly plumb before fastening permanently. Common mistake: people eyeball the posts and assume they're close enough. Even a half-degree of lean multiplies across the full height of the structure and causes headaches when you try to square up the beam.
Step 2: Install the top beams
Cut your top beams (typically doubled 2x8 or 2x10 for spans over 8 feet) to length and lift them into position connecting the post tops. Use post cap hardware (Simpson Strong-Tie or equivalent) rather than just toe-nailing. These metal connectors create a real load path between the beam and post, which is what actually holds the roof load down into the posts and out to the anchors. Toe-nailed connections alone are not adequate for wind uplift forces.
Step 3: Frame the roof structure
For a gable roof, cut your ridge board and common rafters to your calculated pitch. A 4:12 pitch (4 inches of rise for every 12 inches of run) is a good practical choice: it sheds rain and snow well, looks proportional, and isn't so steep that it's dangerous to work on. Use rafter ties or hurricane ties at every rafter-to-beam connection. These small metal straps are inexpensive and create the continuous load path from roof to post to anchor that keeps the structure together when wind tries to lift it. Skipping them is a code violation in most areas and a real safety risk in any significant wind event.
Step 4: Add diagonal bracing
A rectangular frame with only vertical posts and horizontal beams will rack sideways under lateral wind load. Add knee braces running diagonally from each post to the beam above it, at roughly 45 degrees. For extra stability, especially if you're planning to add screen panels or solid walls, add cross-bracing or tension straps between posts. Adding enclosed panels to a gazebo significantly increases the wind-catching surface area, so bracing that felt adequate for an open structure may not be enough once you close it in.
When to get a structural engineer involved
If you're in a high-wind zone (hurricane or tornado country), building anything over 12x12, or your local permit office asks for stamped engineering drawings, get a structural engineer to review your plan. The cost is typically $300 to $600 for a simple residential structure review and it's genuinely worth it. An engineer can specify the right anchor bolt size, post size, and connector type for your specific wind loads rather than you guessing from general guidelines.
Roof installation, screen walls, and weatherproofing
Once the frame is solid and all connections are hardware-fastened, you're ready for the roof. This is also where weatherproofing happens, and the details here are what separate a gazebo that's comfortable to sit under in rain from one that drips on your head.
Sheathing and roofing material options
For a solid roof, install 1/2-inch exterior-grade plywood sheathing over your rafters. Then choose your roofing surface: asphalt shingles are the most common and easiest to source and install, metal roofing panels are increasingly popular for their longevity and fast installation, and polycarbonate panels are a good choice if you want filtered light rather than a fully opaque roof. Asphalt shingles on a gazebo work exactly like shingles on a house: felt underlayment goes down first, then shingles are laid from the bottom up with each row overlapping the one below.
Install drip edge flashing, always
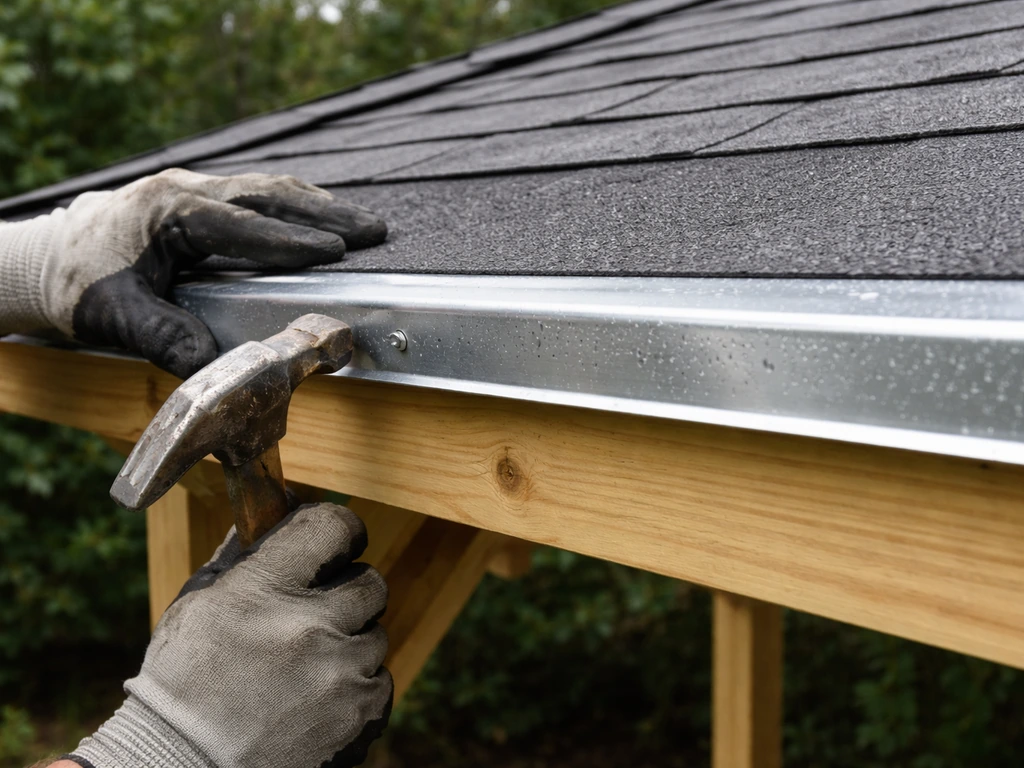
Drip edge flashing at the roof edges is not optional, even on a small gazebo. It does two critical jobs: it directs water away from the roof edge so it doesn't wick back up under the shingles or sheathing, and it protects the sheathing edge itself from moisture damage over time. At the eaves, the drip edge should extend at least 1/2 inch below the sheathing edge and overlap the top of the sheathing by at least 2 inches. At the rakes (the angled sides of a gable roof), the drip edge goes on after the underlayment. On the eaves, it goes on before. Get the sequence right or water will find a path in. This is one of those details that's worth looking up a diagram for before you start nailing.
Screen walls and partial enclosures
Screen panels between posts transform a gazebo into a bug-free outdoor room. You can build simple screen frames from 1x4 cedar or composite trim, stretch fiberglass screening across them, and attach them with barrel bolts or hinges so they're removable for storage. If you want partial solid walls (like lattice panels or lower privacy walls with screens above), those get installed the same way but remember that enclosed panels add wind load. Go back and verify your cross-bracing is adequate before you button it all up.
Sealing and finishing the wood
Even pressure-treated lumber benefits from a quality exterior sealant or stain. Apply it after the wood has had a few weeks to dry (freshly treated lumber is often too wet to accept stain immediately). Pay special attention to the end grain on cut lumber and the tops of posts, which are the most vulnerable to water infiltration. Cedar and redwood can be left to weather naturally or finished with a penetrating oil. For a painted look, prime with an exterior oil-based primer before topcoating.
Anchoring your gazebo and finishing it off
A gazebo that isn't properly anchored is a liability in any serious wind event, regardless of how well it's built otherwise. This step is non-negotiable for a permanent structure. The right method depends on what your patio surface is made of. For a patio, the key is choosing a suitable anchor method for your surface and installing it correctly so the gazebo resists wind uplift how to hold a gazebo down on a patio.
Anchoring to concrete
For concrete slabs, wedge anchors are the standard and most reliable option. A 1/2-inch diameter wedge anchor in solid concrete provides serious holding power. The installation process: mark your post base hole locations, drill into the concrete with a hammer drill and correctly-sized masonry bit (match the bit diameter exactly to the anchor diameter), blow out the dust, drop in the anchor, set the base plate over it, add the washer and nut, and torque to the manufacturer's specification. The expansion mechanism at the bottom of the wedge anchor is what creates the holding power, so proper embedment depth matters. Follow the manufacturer's minimum embedment requirement, typically around 2.5 inches for a 1/2-inch anchor, though deeper is better.
Space your anchors correctly. Keep anchors at least 5 anchor diameters away from any unsupported edge of the slab and at least 10 anchor diameters apart from each other. For 1/2-inch anchors, that means staying at least 2.5 inches from the slab edge and at least 5 inches between anchors. Installing too close to the edge can cause the concrete to crack under load rather than the anchor holding properly. Important note: blank" rel="noopener noreferrer">wedge anchors are designed for solid concrete only, not brick or hollow block. If you have a brick patio, use the anchoring method designed for brick surfaces to keep your gazebo stable in wind. If you have a brick patio or hollow block footing, sleeve anchors are the right choice instead.
Anchoring to pavers or a wood deck
On pavers, the most secure method is to remove the paver at each post location, dig down to the soil or gravel base, and pour a small concrete footing (at least 12 inches in diameter and extending below the frost line in cold climates). Set a post anchor bolt in the wet concrete, let it cure, then set your post. On a wood deck, use post base hardware that bolts through the decking and into the structural framing below. Never rely on just the decking boards themselves to hold a post anchor under load. Anchoring methods for specific patio surfaces, including detailed guidance on brick patios, are worth researching per surface type since the hardware and technique differ meaningfully.
Finishing details that make the difference
Once the structure is anchored and the roof is on, cover any exposed anchor hardware with post base trim or decorative post wraps if aesthetics matter to you. Caulk the joint where any roofing material meets a wall or post with a high-quality exterior polyurethane or silicone caulk. Check that all your rafter ties and hurricane ties are fully nailed (they have specific nail patterns on the hardware, follow them). Then walk around the whole structure and tighten every nut and bolt you installed. Vibration during construction often loosens hardware that felt tight at installation. Plan to come back and do a tightening check after the first hard rain or wind event as well.
A realistic take on the whole project
A solid 10x12 freestanding gazebo on an existing concrete patio is genuinely achievable for a DIYer with basic carpentry skills and a free weekend. What often goes wrong is underestimating the importance of the foundation and anchoring work, cutting corners on structural connectors, or skipping the permit process and ending up with an unpermitted structure that causes headaches later. If your goal is to anchor a gazebo to a concrete patio, focus on using the correct anchor hardware and embedment depth for your slab. For specific steps on anchoring a gazebo to a concrete patio, focus on the right anchor type, correct spacing, and proper embedment depth secure a gazebo to a concrete patio. Do those parts right and the rest of the build is satisfying and straightforward. If at any point your local inspector or permit office asks for engineering documentation you can't produce, treat that as a signal to bring in a pro for that specific piece rather than proceeding without it.
FAQ
Do I need to brace or level the posts even if I have a flat patio surface?
Yes. A patio can be level while the post bases land on slightly uneven spots. Before you fasten permanently, shim under post bases as needed (or adjust where allowed by the base hardware) and recheck plumb on two perpendicular faces. If you fix a lean early, you avoid roof framing misalignment later.
Can I build a patio gazebo directly on pavers without digging or concrete?
You can, but it is usually less stable than options that provide a true footing. If you use paver base plates, confirm they are specifically rated for post loads and intended for freestanding structures, then still verify the post base is bolted into a solid, stable substrate beneath the pavers. In high-wind areas, poured footings into the ground typically perform better.
What’s the safest roof pitch to choose for a first-time DIY gazebo?
A 4:12 pitch is a practical default because it sheds rain and snow without being overly steep to frame and install. If you live where heavy snow is common, do not rely on a flat or near-flat roof, and verify your rafter sizing and connector choices for the increased load.
How do I avoid the most common framing mistake, racking, in a free-standing gazebo?
Build the frame square and keep it square while you fasten. Use diagonal bracing or temporary wind bracing early, then measure diagonals again after the beams are in place. If the structure racks, add knee braces at about 45 degrees and confirm the bracing is installed where it creates a continuous load path, not just cosmetic support.
Is there a difference between using hardware connectors and just toe-nailing everything?
Yes, connectors are doing the structural job of resisting uplift and lateral forces. Use the specified post cap hardware at beam-to-post locations and strap ties at rafter-to-beam connections. Toe-nailing might hold during construction, but it typically cannot reliably transfer wind uplift loads the way rated connectors do.
What should I do if my patio isn’t a perfect square or is slightly off dimensioned?
Center and choose a layout that preserves your diagonal accuracy rather than forcing the gazebo to the patio edge. Measure the usable interior area, account for the clearance you want for overhang and water runoff, then adjust your footprint within that space. If your diagonals cannot hit your target within about 1/8 inch, fix the layout before cutting roof framing.
How far should I place anchors from the slab edge, and why does it matter?
Keep anchors well away from unsupported edges. A common rule of thumb is at least 5 anchor diameters from an unsupported edge and adequate separation between anchors (so you do not split the concrete where the anchor is supposed to hold). Too close to an edge can cause concrete breakout or cracking instead of letting the anchor’s expansion mechanism do its work.
Can I use wedge anchors in brick patios or hollow block?
Not reliably. Wedge anchors are intended for solid concrete. For brick or hollow block, use the anchoring method designed for that substrate (for example, sleeve anchors for those conditions). If you are unsure what is beneath your patio surface, investigate before drilling so you choose the correct anchor system.
How do I make sure my concrete drilling is accurate for anchor placement?
Mark post base hole locations carefully, drill with the correct masonry bit size that matches the anchor diameter, and blow out dust before setting the anchors. Even with the right hardware, dust in the hole can reduce proper seating and embedment, which weakens holding power.
Do I need to tighten bolts after installation, or is once enough?
Tighten once during build, then do a second check after the first significant weather event, such as a hard rain or wind. Construction vibration can loosen hardware even when it felt tight at installation. A quick walkaround with a wrench is cheap insurance for long-term stability.
What caulk or sealant should I use on joints around posts and roof edges?
Use an exterior-grade polyurethane or silicone designed for outdoor exposure, and apply it where roofing transitions meet posts or wall surfaces. The goal is to block water paths at penetrations and edges, not just to improve appearance, so clean surfaces and follow the product’s cure-time requirements.
When should I consider engineering review or a structural pro?
Consider a structural engineer review if you are in a high-wind or tornado-prone region, your gazebo exceeds typical DIY footprints (like 12x12 and larger), or your permit office asks for stamped drawings. If you can only partially produce documentation for the inspector, that is a signal to bring in a pro for the specific load-bearing and anchoring details.