You can absolutely build an Alumawood-style patio cover yourself, and plenty of homeowners do it every weekend. The key is understanding that Alumawood is a specific engineered aluminum system with proprietary parts, not just any wood-look aluminum trim you find at a hardware store. Once you get that distinction, the whole project becomes a lot clearer: you're assembling a kit of matched components (beams, rafters, roof panels, posts, and connectors) according to a manufacturer-provided installation guide, and the hardest parts are planning correctly, pulling a permit, and making sure your ledger attachment to the house is solid. If you can do those three things well, the rest of the build is very manageable for a motivated DIYer over a weekend or two.
Do It Yourself Alumawood Patio Covers: Step-by-Step Guide

What Alumawood actually is and how the system goes together
Alumawood is a registered brand by Amerimax Exterior Home Products. It's embossed aluminum extruded into shapes that mimic the look of wood grain, then factory-painted in colors like white, almond, or brown. The result is a patio cover that looks like painted wood from a distance but never rots, splits, or needs repainting. It's not a generic product: the system uses specific matched components that are engineered together, and it carries an ICC-ES Evaluation Report (ESR-1398P), which means independent engineers have verified it meets building code standards for freestanding and attached structures, including carports and commercial shade structures.
The two most common product families you'll encounter are the Newport (solid roof, good for rain coverage and shade) and the Laguna (open lattice, more decorative and ventilated but not waterproof). The Newport line also includes an blank" rel="noopener noreferrer">insulated option called the MAXX Panel, which adds a foam core between two aluminum skins for better thermal performance. For a true weatherproof patio roof, you want the Newport solid panel. For a pergola-style look with filtered light, the Laguna lattice works well. This article focuses mainly on the Newport solid-roof system since that's what most homeowners want when they search for a real patio cover.
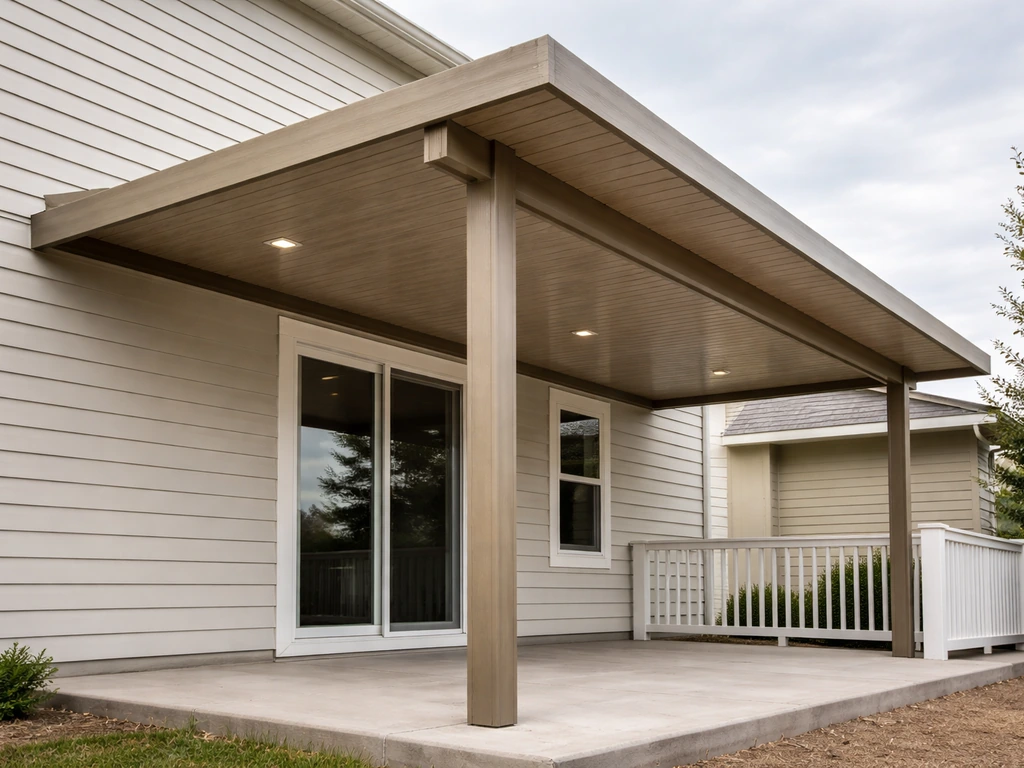
Structurally, an attached Alumawood patio cover works like a lean-to: a ledger (called a top plate or ledger channel in the system) fastens to your house wall, posts support the outer beam, and aluminum rafters span between them. Roof panels or lattice members drop into the rafter channels, and then you add trim, fascia, and flashing to finish it off. Freestanding versions use four or more posts with beams on all sides. The components are lighter than wood, which makes solo lifting possible for many parts, but the structural logic (load paths, post sizing, span limits) still needs to respect the engineering tables in the installation guide.
Planning your project before you buy a single piece
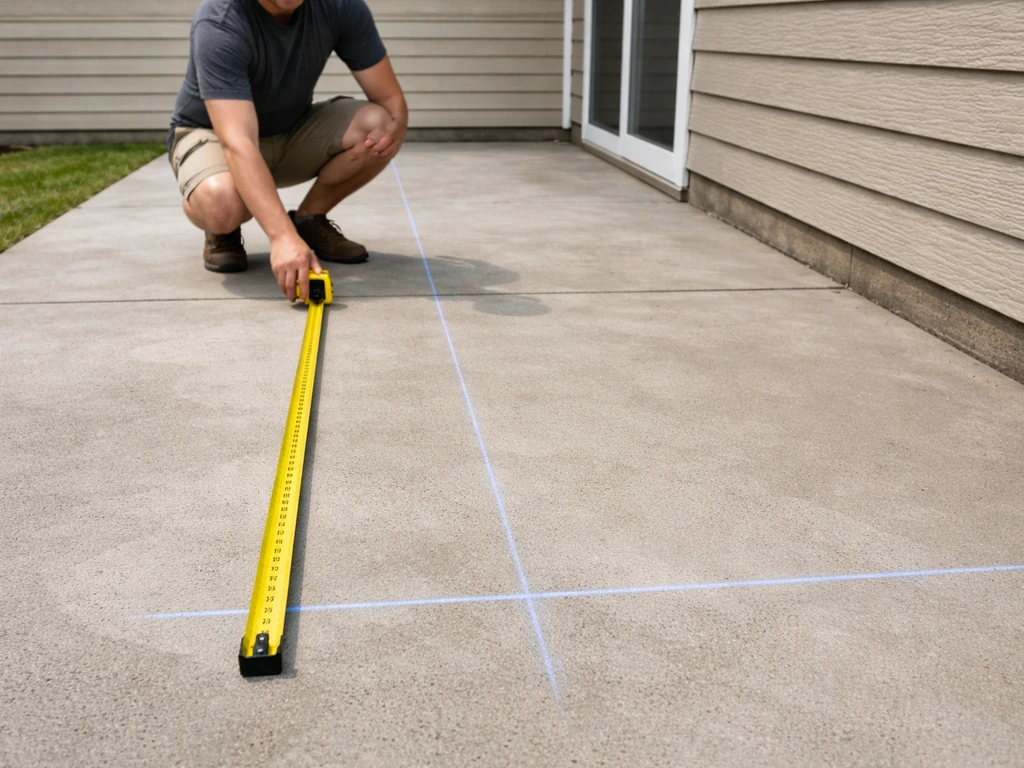
The planning stage is where DIY patio cover projects succeed or fail. Measure your patio footprint carefully: width (along the house wall) and projection (how far out from the house). Most residential Alumawood setups run 10 to 20 feet wide and 8 to 16 feet deep, though the system supports larger spans with the right beam sizing. You also need to decide on your finished height, which affects both the aesthetic and your permit. Most jurisdictions require a minimum clearance of 7 feet at the lowest point. Aim for 8 to 9 feet at the post tops for a comfortable feel.
Choose your cover style
For most homes, the attached lean-to (single-slope) is the right choice. It's simpler to build, requires fewer parts, and ties into your existing roofline naturally. The roof pitches away from the house, which handles drainage easily. For a do it yourself patio roof, focus on choosing the right cover style first, then follow the installation steps carefully so it drains correctly and stays code-compliant. If you want a gable roof (peaked center), the system supports that too, but gable builds are significantly more complex: you need a ridge beam, two sets of rafters, and more precise framing. For a first Alumawood project, stick with the lean-to unless you have framing experience. If you're leaning toward a full freestanding structure or a gable, that's closer to the territory covered in a broader DIY patio roof build.
Account for your local conditions
Your local snow load, wind speed, and rain exposure all affect which beam sizes and post spacings the manufacturer allows. The Alumawood installation guide includes span tables, and your local building department will reference your area's design loads. In low-snow, mild-wind areas (much of California and the Southwest, where Alumawood is extremely popular), standard span tables usually apply. In higher-load zones like mountain areas or Gulf Coast wind regions, you may need engineering review or a PE stamp before the permit is issued. Don't skip this check: undersized spans are the most common structural failure in DIY patio cover builds.
Permits and code basics
Almost every jurisdiction requires a building permit for an attached patio cover. Some require one for freestanding structures too, especially above a certain square footage. Getting the permit is worth it: it means a building inspector verifies your ledger attachment and post footings, which protects you structurally and protects your home's resale value. Unpermitted patio covers can create serious problems during home sales or insurance claims. The ICC-ES evaluation report for Alumawood (ESR-1398P) helps significantly here: it's documentation you can hand to a plan checker showing the product meets code. You'll typically submit a simple site plan showing dimensions, attachment detail, and product specs.
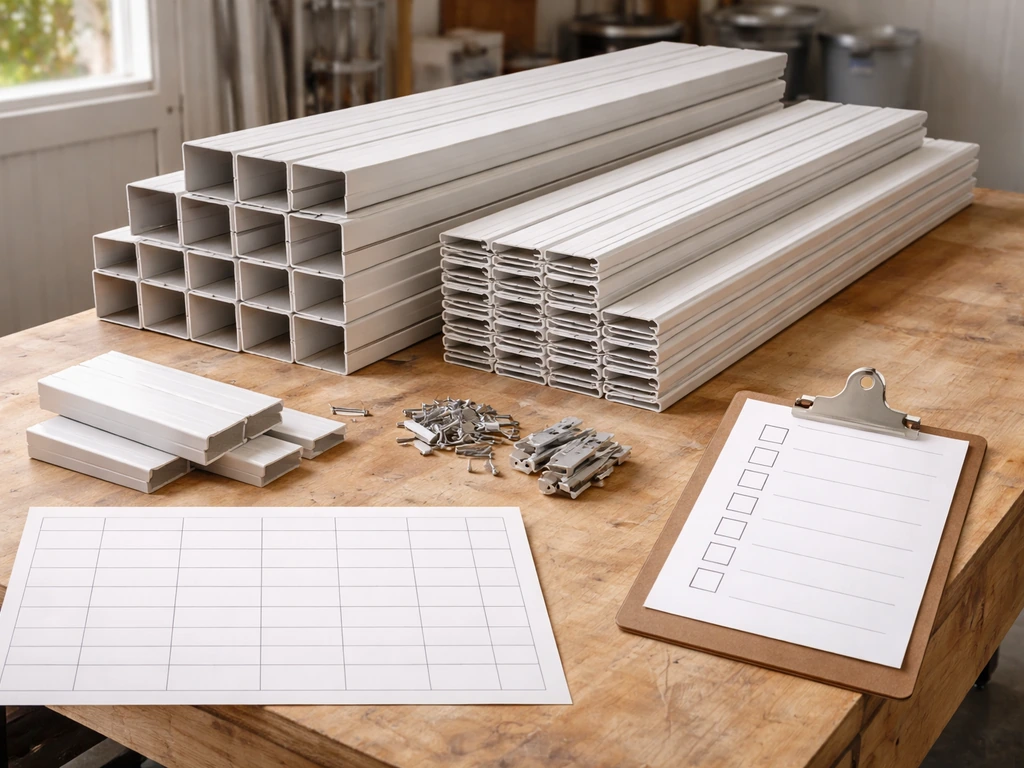
Everything you need to buy and bring to the job site
Alumawood components are sold through specialty patio cover dealers and some online distributors, not typically at big-box stores. You'll order parts as a system matched to your design. Here's what a standard attached Newport lean-to requires:
Structural and framing components
- Ledger channel (top plate): mounts to the house wall, supports the rafter tails at the high end
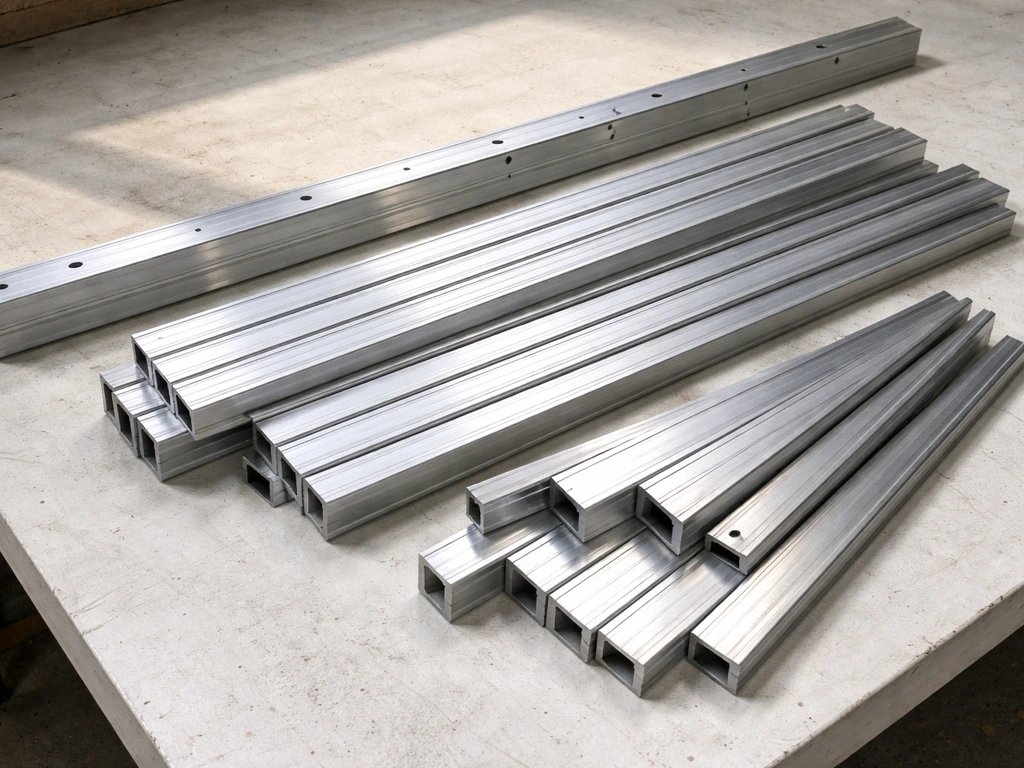
- Aluminum beams: carry the outer ends of the rafters; size (4-inch, 6-inch, 8-inch) depends on your span
- Aluminum rafters: span from ledger to beam; typically spaced 24 inches on center
- Aluminum posts: 4x4 or 4x6 aluminum posts set in concrete footings or on post bases
- Solid roof panels (Newport) or lattice panels (Laguna): drop into rafter channels
- MAXX Panel (optional insulated version): for better shade and thermal performance
- Post caps and base caps: decorative and protective covers for post tops and bottoms
- Fascia boards: trim the outer beam face and rafter ends for a finished look
Fasteners and connectors
- Stainless steel or zinc-coated screws sized for aluminum-to-aluminum and aluminum-to-wood connections (use only manufacturer-recommended fasteners to avoid galvanic corrosion)
- Lag screws (typically 1/2-inch x 3-1/2-inch or longer) for ledger-to-house attachment into studs or blocking
- Post anchor hardware (Simpson Strong-Tie or equivalent) if using above-grade post bases
- J-channel and end caps for panel edges
- Drip edge or gutter system for the outer beam
Weatherproofing materials
- Self-adhering flashing tape (at least 4-inch wide) for the wall-to-ledger junction
- Continuous aluminum flashing or Z-flashing above the ledger
- Butyl or silicone caulk rated for aluminum and exterior use
- Gutter sections, end caps, and downspout if adding drainage
Tools you'll need
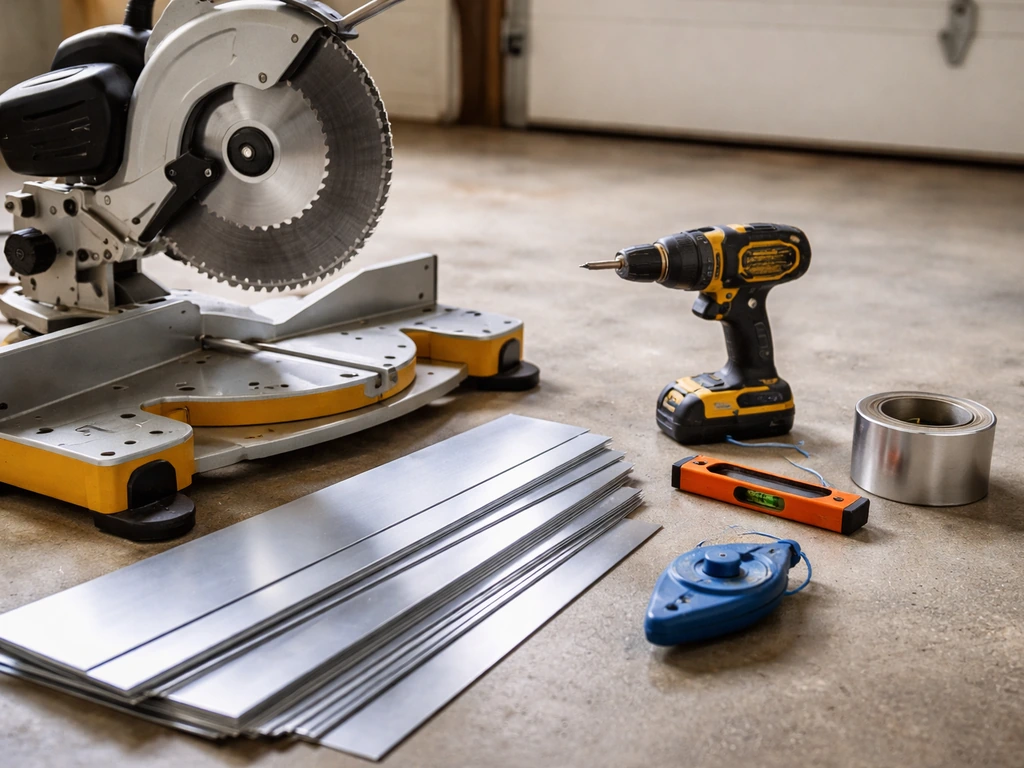
- Miter saw with a non-ferrous metal cutting blade (fine-tooth carbide works well on aluminum)
- Cordless drill and impact driver
- Level (4-foot and torpedo levels both)
- Chalk line
- Tape measure and speed square
- Stud finder
- Post hole digger or rented power auger for concrete footings
- Concrete mix (for setting posts or post anchors)
- Ladder (6-foot and 8-foot at minimum)
- Safety glasses and gloves (aluminum edges are sharp)
Step-by-step: from site prep to finished roof
Step 1: Lay out your footprint and dig footings
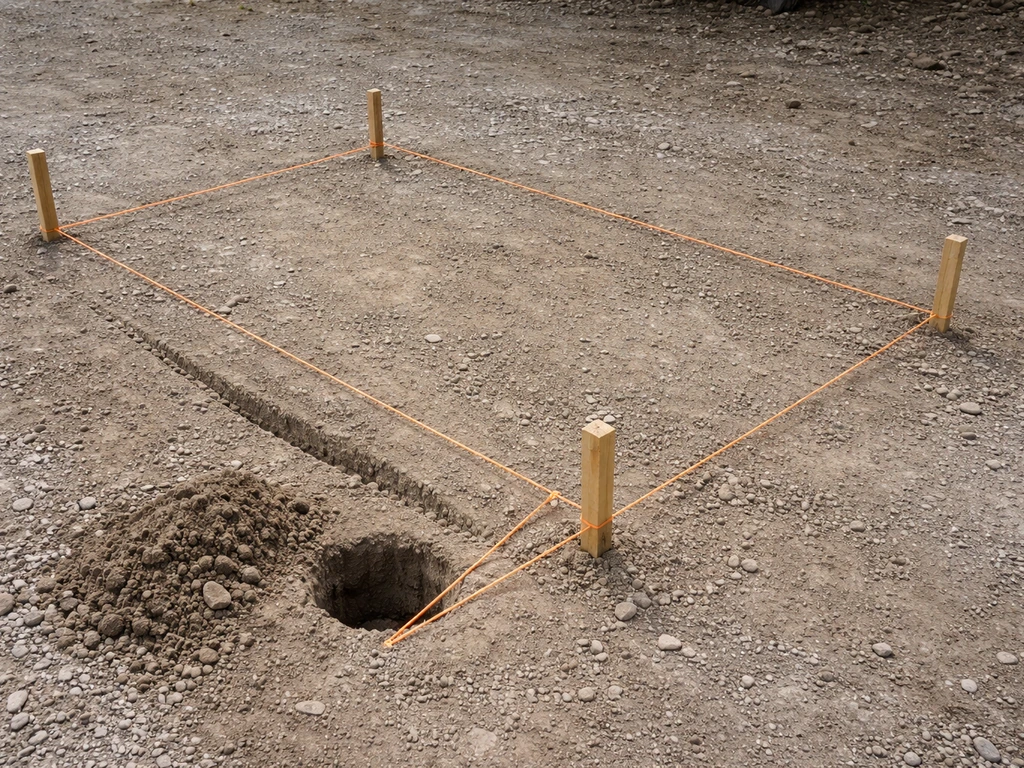
Mark your post locations with stakes and string. Use the 3-4-5 triangle method to confirm square corners (or a large framing square). Your footing depth depends on your frost line and local code, but 18 inches is a common minimum in mild climates, and 24 to 36 inches in freeze-thaw zones. Footings should be 10 to 12 inches in diameter for a standard residential post. Mix concrete per bag instructions, set your post anchors at the exact layout marks while the concrete is wet, and let it cure fully (at least 24 to 48 hours) before loading them.
Step 2: Locate studs and attach the ledger
The ledger is the most structurally critical part of an attached build. Use your stud finder to mark every stud in the attachment zone, then snap a level chalk line at your target ledger height. Your ledger height controls the finished roof pitch: for every foot of projection, a 1/8-inch to 1/4-inch drop toward the outer beam is typical for good drainage. Remove any siding or trim in the ledger zone (you'll flash over and under it), drill pilot holes into the studs, and fasten the ledger with lag screws into every stud. Typically that means lags every 16 inches on center. Do not attach a structural ledger to sheathing alone: you must hit framing.
Step 3: Set posts and install the outer beam
Set aluminum posts into the cured anchors and check plumb on two faces before tightening. Aluminum posts are hollow: if your installation guide calls for concrete fill inside the post base section, do it. It adds rigidity and prevents crushing at the base. Cut posts to length so the beam sits at the correct height (remember, slightly lower than the ledger for drainage pitch). Once posts are plumb and locked, lift the beam into place. On a 12- to 16-foot span, a two-person lift is safe; anything longer, use a third person or a temporary prop. Attach the beam to the post caps per the manufacturer's fastener schedule.
Step 4: Install rafters
Rafters slide into or hook onto the ledger channel at one end and rest on (or hook into) the beam at the other. Space them 24 inches on center unless your span tables require tighter spacing. Start from one end, check the first rafter for square to the beam, then work across. Most Alumawood rafters snap or screw into place with minimal fuss. What often goes wrong here is an out-of-level beam: if your beam isn't level side to side, your rafter spacing at the ledger and beam won't match up cleanly. Fix the beam level problem before you start setting rafters.
Step 5: Install roof panels or lattice
Solid Newport panels or lattice Laguna members slide into the channels on top of the rafters. Work from one end to the other. Each panel interlocks with the next, and end caps close off the final panel at each end. For the MAXX Panel insulated system, panels are heavier (two aluminum skins with foam core), so staging them on the roof before sliding into position saves a lot of effort. Once all panels are in, install the fascia on the outer beam face and the rafter end caps on the house-side ends.
Weatherproofing and finishing: don't skip these steps

The ledger-to-wall joint is where most patio cover leaks start. After the ledger is bolted on, install self-adhering flashing tape along the top and sides of the ledger, lapping it at least 3 inches onto the wall sheathing and 3 inches down onto the ledger face. Then install a continuous Z-flashing or aluminum step flashing that runs behind any remaining siding and laps over the top of the ledger. Caulk any penetrations (lag screw holes, corners) with a silicone rated for exterior aluminum. When you re-install siding above the ledger, keep a gap of at least 1/2 inch above the flashing to prevent water wicking.
At the outer beam, install a drip edge that directs water off the fascia face and away from your posts. If your patio is enclosed on sides or if you're in a high-rainfall area, adding a gutter along the outer beam is a good idea. Standard residential aluminum gutters attach directly to the fascia and carry water to a downspout at one or both ends. This isn't required for a basic open patio, but it's a nice upgrade that keeps your patio dry during rain.
Maintenance on Alumawood is genuinely low. Rinse the structure with a garden hose once or twice a year to clear debris from panel channels. Inspect the flashing and caulk at the ledger joint annually and recaulk if you see cracking or separation. The aluminum won't rust, but steel fasteners in humid environments can stain the aluminum over time, which is why using stainless or properly coated fasteners from the start matters. The factory finish is baked-on paint that holds up for decades without repainting in normal conditions.
Common DIY mistakes and when you actually need a pro
The most expensive mistake DIYers make is skipping the permit and then needing to tear out or modify work during a home sale or insurance claim. Pull the permit. It's usually not expensive (often $200 to $500 for a residential patio cover), and the inspection process is a genuine safety check on your ledger attachment, which is the part that, if it fails, brings the whole structure down.
The second most common problem is an under-engineered ledger attachment. Lagging into siding or OSB alone, using too few lags, or hitting a zone with no framing behind it are all serious errors. If your wall framing is unusual (older balloon frame construction, steel stud framing, or a masonry wall), get a professional assessment of the attachment before you build. Masonry attachment in particular requires anchor bolts into concrete block or brick, and the spacing and embedment depth need to be right.
- Skipping permits and inspections (biggest long-term risk)
- Ledger attached to siding or sheathing only, not into studs or blocking
- Posts set without concrete footings, or footings too shallow for local frost depth
- Beam not level, which cascades into rafter and panel alignment problems
- Using the wrong fasteners (regular steel screws will corrode and stain aluminum)
- Not flashing the ledger-to-wall joint, leading to water intrusion behind siding
- Ignoring manufacturer span tables and overspreading rafters beyond allowed limits
- Cutting aluminum with a wood saw blade (produces dangerous metal chips and rough cuts)
Call a pro or at minimum consult a structural engineer if: your local jurisdiction requires a PE-stamped plan (common in high-wind or high-snow zones), your attachment wall is masonry or has non-standard framing, you're building a freestanding structure larger than about 200 square feet, you're doing a gable-roof configuration, or the permit plan checker asks for engineering documentation beyond what the ICC-ES report covers. For a straightforward attached lean-to on a standard wood-framed house in a mild climate, most capable DIYers can handle the full build independently.
What it'll cost you and how long it realistically takes
Material costs for an Alumawood patio cover vary by size, system type, and your region, but here are realistic numbers for a typical attached lean-to as of 2026:
| Project Element | Typical DIY Cost Range | Notes |
|---|---|---|
| Alumawood components (12x14 solid Newport) | $1,800 to $3,200 | Varies by dealer; includes framing, panels, trim |
| MAXX Panel insulated upgrade | Add $400 to $800 | Worth it for hot climates or rooms below |
| Post footings (concrete + hardware) | $100 to $250 | Higher if you rent a power auger |
| Flashing, caulk, fasteners | $80 to $150 | Don't cheap out on flashing tape quality |
| Gutter system (optional) | $150 to $400 | Standard aluminum gutters, DIY installed |
| Building permit | $200 to $600 | Varies widely by municipality |
| Total DIY materials estimate | $2,400 to $4,800 | For a 12x14 to 14x16 attached lean-to |
| Comparable contractor-installed price | $5,000 to $12,000+ | Labor adds significantly to cost |
On timeline: a well-planned first-time DIY build on a 12x14 attached lean-to takes most homeowners two full weekend days with a helper, plus a day or two spread across the week for permit pickup, concrete curing, and material delivery. If you've done any structural framing before, you might knock out the build in a single long weekend. Budget extra time if your wall attachment requires removing and replacing siding, or if your soil conditions make footing digging difficult.
A realistic phasing approach: Week 1, measure and finalize design, order materials, submit permit application. Week 2 or 3 (while permit processes), gather tools, prep the site, dig footings and pour concrete. Day 1 of build: ledger attachment and flashing, post anchor setting if not already done. Day 2: set posts, install beam, hang rafters. Day 3: panels, fascia, trim, gutter. That's a manageable schedule that doesn't rush any single step. The permit timeline is often the longest variable, ranging from same-day over-the-counter approval to several weeks depending on your city.
If you're comparing this to other DIY patio cover approaches, Alumawood kits cost more upfront than raw wood construction but save significant time and maintenance costs over the life of the structure. If you are specifically looking at do it yourself patio cover kits, this kind of kit comparison helps you match the right system to your budget, timeline, and local requirements DIY patio cover approaches. Generic aluminum patio cover kits are available too, but they don't carry the engineering documentation that Alumawood's ICC-ES report provides, which can matter when talking to a building department. For simpler shade needs, a DIY patio awning is much faster and cheaper, but you give up structural durability and weatherproofing. Alumawood is the middle ground: real structural coverage with manageable DIY complexity and long-term low maintenance.
FAQ
Can I use “wood-look” aluminum trim instead of an Alumawood system for a do it yourself alumawood patio covers project?
No. A DIY patio cover only stays code-compliant if the components match an engineered system, including the specific beams, rafters, and connectors. Generic trim usually has no span tables or evaluation report, so you may fail permit review or create an unsafe load path.
How do I know whether I need the insulated MAXX Panel or the standard Newport solid roof?
Choose MAXX Panel if you want better temperature comfort under the cover, but plan for extra handling because those panels are heavier. If your primary goal is rain-proofing, the standard Newport solid panel typically meets that need with less staging and effort.
What is the biggest water-leak risk in an attached Alumawood patio cover?
The ledger-to-wall interface. Even if the roof panels fit well, leaks often start where flashing overlaps siding and where penetrations are sealed. Use flashing tape plus continuous step or Z flashing, then keep at least a 1/2-inch gap when re-installing siding to reduce wicking.
Is it okay to attach the ledger to sheathing if I can’t hit studs?
No. You must fasten the ledger into structural framing, not just sheathing or OSB. If studs aren’t aligned where you need the ledger, you may need a different layout or professional help to reach framing without compromising the wall.
How should I handle a masonry exterior wall for an attached patio cover?
Masonry attachment typically requires proper anchor bolt selection, spacing, and embedment depth into block or brick. Because this differs from wood-framed guidance, get an assessment or engineering input before drilling so you do not rely on incorrect anchor assumptions.
Do I need a gutter even if the patio cover is open on the sides?
Not always, but it helps in heavy rain or if water runoff will splash onto foot traffic or landscaping. A gutter along the outer beam reduces direct impact on fascia and helps keep the area under the cover cleaner.
What happens if my beam is slightly out of level before installing rafters?
It can create a cascade problem, where rafters do not align with ledger and beam channels and spacing ends up inconsistent. Fix beam level first, because adjusting rafters later often breaks panel interlock fit or causes uneven overhang.
How strict are footing and post spacing measurements for a DIY alumawood patio cover?
Very. Small layout errors can cause posts to sit out of plumb, which stresses connectors and misaligns rafters. Use string and a square check (for example, 3-4-5), then set anchors while concrete is still workable so you can hit exact marks.
Should I grout or fill the hollow aluminum posts with concrete?
Only if your installation guide calls for it. When it is required, concrete fill increases rigidity and helps prevent base crushing. If your guide does not require fill, do not add it because it can conflict with how the system was engineered.
How often should I inspect and maintain flashing and seals?
At least once per year, focusing on the ledger flashing edges, step or Z-flashing seams, and any caulked penetrations. In humid or coastal areas, re-caulk sooner if you see separation, and confirm fastener heads are not leaving corrosion staining on the aluminum finish.
Can I start construction before the permit is approved if the materials are already delivered?
It’s risky. Even if you complete parts quickly, you may have to modify or dismantle work to pass inspection. Many jurisdictions also require specific inspection points like ledger attachment and post footings, so plan to be ready for those steps after approval.
When should I call a pro instead of doing it fully DIY?
If you live in high-snow or high-wind zones, need a PE-stamped plan, are building a gable roof, are attaching to unusual framing types (steel studs, balloon framing), or are dealing with masonry attachments. Also call for help if the permit plan checker requests engineering beyond what the ICC-ES evaluation report covers.