To secure a pergola to a patio, you need to anchor each post using a code-rated post base bolted into the concrete slab or footing below, or lag into solid structural framing if you're attaching to an existing patio cover. The right method depends on what your patio surface actually is: a poured concrete slab, pavers over a sand bed, a wood deck, or existing patio cover framing. Each one has a different anchoring approach, different hardware, and a different set of things that can go wrong if you skip steps. If you want a step-by-step plan for the full process, including how to choose the right anchors and attachment points, see how to put a pergola on a patio.
How to Secure a Pergola to a Patio: DIY Steps

Celia Vaughn
4 Jul 2026

Assess the patio and pergola connection points first
Before you buy a single bolt, figure out exactly what you're anchoring into. Walk your patio and knock on the surface. A solid concrete slab sounds dense and feels unyielding. Pavers will shift slightly underfoot or have visible sand joints. A wood deck flexes a little and shows framing below through gaps. If you're adding a pergola to an existing patio cover structure, you may be connecting to existing beams or a ledger board instead.
The most important thing to figure out is whether there's real structural material under your attachment points. A standard residential concrete slab is typically 4 inches thick, which gives you enough embedment for expansion anchors if the concrete is in good condition. But if you're near the slab edge, the rules change: anchor bolts require minimum edge distances from slab edges (often 6 times the bolt diameter or more, depending on anchor type) or the concrete can crack out and your post base fails. Fine Homebuilding also cautions that anchor bolts need minimum edge distances away from slab edges or pier boundaries, otherwise the concrete can crack out and the post base can fail. A 1/2-inch wedge anchor, for example, typically needs at least 3 to 3-3/4 inches of edge distance. Check your anchor spec sheet before you mark anything.
Pavers over a sand base are not a direct anchoring surface. You'll need to pull pavers, dig down, and either pour a concrete footing or find the concrete sub-base underneath. If you just drive stakes through sand, your pergola will rock in the first windstorm. With a wood deck, you need to find and anchor into the beams or doubled joists below the decking, not just the decking boards themselves. If you're attaching to an existing patio cover's beam, confirm that beam is structural and properly supported before adding a pergola's load to it.
Choose the right attachment hardware and fastening method
The hardware choice flows from the surface type and your pergola material. Here's how those combinations break down in practice.
Concrete slab: post bases and wedge anchors
For a concrete slab, a surface-mount post base (like the Simpson Strong-Tie PPBF or PBST series) is the standard and correct approach. You set the base using expansion anchors (wedge anchors or sleeve anchors) or, for the best holding power, epoxy-set threaded rod anchors. Wedge anchors expand as you tighten them and work well in solid, uncracked concrete. Epoxy-set anchors are stronger and better for cracked concrete or situations near slab edges where mechanical anchors lose capacity. Do not use simple tap-con screws as your primary post anchor for a pergola: they don't provide the uplift resistance you need.
One feature worth paying attention to on post bases: the standoff. A quality post base like the Simpson PBST holds the post bottom about 1 inch above the concrete. That gap prevents the post end grain from sitting in water that pools on the slab, which is the number one cause of post rot at the base. Never skip that standoff or shim the post base down flat. Even pressure-treated wood will rot eventually if the end grain is constantly wet.
Wood deck or existing patio framing: lag screws and structural connectors
On a wood deck, anchor post bases or standoff bases directly to the doubled joists or beam below the decking. Use structural lag screws (typically 1/2-inch diameter, minimum 3 inches into solid framing) or through-bolts where framing depth allows. Do not attach only to decking boards. If your pergola sits on an existing patio cover's beam, confirm the beam is engineered for the additional load, then use through-bolts or structural hardware rated for that connection. A ledger-to-beam connection for a pergola should use hardware equivalent to what the IRC requires for deck ledger connections: the connection needs to handle real lateral load, not just vertical weight. Simpson Strong-Tie’s Deck Connection and Fastening Guide includes ledger connection details and guidance tied to building-code requirements for the 2018, 2021, and 2024 IRC and IBC.
Metal and aluminum pergolas

Modular aluminum and metal pergola kits usually come with their own surface-mount base plates. In high-wind areas, those base plates still need to be anchored with expansion or epoxy-set anchors rated for uplift, even if the manufacturer's instructions show a basic lag into concrete. Follow the manufacturer's hardware spec, but if you're in a high-wind zone, go to the top of their recommended anchor options. Some aluminum kits specify 1/2-inch wedge anchors at specific embedment depths; don't substitute shorter anchors to save money.
| Patio Surface | Recommended Anchor Type | Post Base Option | Watch Out For |
|---|---|---|---|
| Poured concrete slab | Wedge or epoxy-set anchor | Simpson PPBF / PBST or equivalent | Edge distance, slab thickness, cracked concrete |
| Pavers over sand | Dig to sub-base or pour footing | Cast-in-place or surface-mount on footing | No anchoring through sand/pavers alone |
| Wood deck framing | 1/2-in lag screws or through-bolts | Structural post base bolted to beam/joist | Attaching only to decking boards, not framing |
| Existing patio cover beam | Through-bolts or structural connector | Per beam spec and load calc | Unknown beam capacity, overloading existing structure |
| Aluminum/metal pergola kit | Manufacturer-spec wedge or epoxy anchors | Kit base plate with rated anchors | Under-speccing anchors in high-wind zones |
Structural considerations: loads, wind uplift, and beams/joists
A pergola looks simple, but the structural forces on it are real. You're dealing with three main things: gravity load (the weight of the structure itself plus any climbing plants, shade fabric, or snow), lateral load (racking from wind pushing sideways), and uplift (wind trying to pull the whole thing off the ground like a sail). The IRC's lateral load requirements for decks give a useful reference point: connections must resist at least 1,500 lbs per connection in most configurations, or 750 lbs each if you use four connections. A pergola isn't a deck, but that magnitude of force is the right mental model for what your anchors are up against in a real wind event.
Racking (the wobble you feel when you push a pergola sideways) is usually caused by inadequate diagonal bracing or posts that are anchored only at the bottom with no lateral connection at the top. If your pergola connects to the house at the top with a ledger board, the house handles the lateral load on that side. If it's freestanding, you need either knee braces between the post and beam, solid diagonal bracing, or a base connection with moment resistance. A simple post base does not provide rotation resistance on its own: the top of the structure must be tied together solidly, and the overall geometry needs to resist racking.
Wind uplift is the one that surprises people. In a windstorm, the roof-like surface of a pergola (especially one with fabric, lattice, or louvered panels) generates real uplift force. In a high-wind area, a standard 4-inch slab may not have enough mass to resist the uplift through the anchor bolt alone. This is where epoxy anchors with deeper embedment, or a proper poured footing, beat surface expansion anchors. If your area is in a high wind zone (ASCE 7 wind speed map above 115 mph design wind speed roughly), check your anchor manufacturer's published uplift values for the anchor and embedment depth you're using, and make sure the concrete footing has enough weight and the anchor has enough embedment to match.
Step-by-step: how to secure the pergola to a patio
This sequence works for the most common scenario: a wood or aluminum pergola being anchored to a poured concrete slab with surface-mount post bases. Adjust for your specific surface and material using the hardware guidance above. If you need the full walkthrough, follow a step-by-step plan for how to build a pergola patio from the right base anchors to final fastening how to build pergola patio.
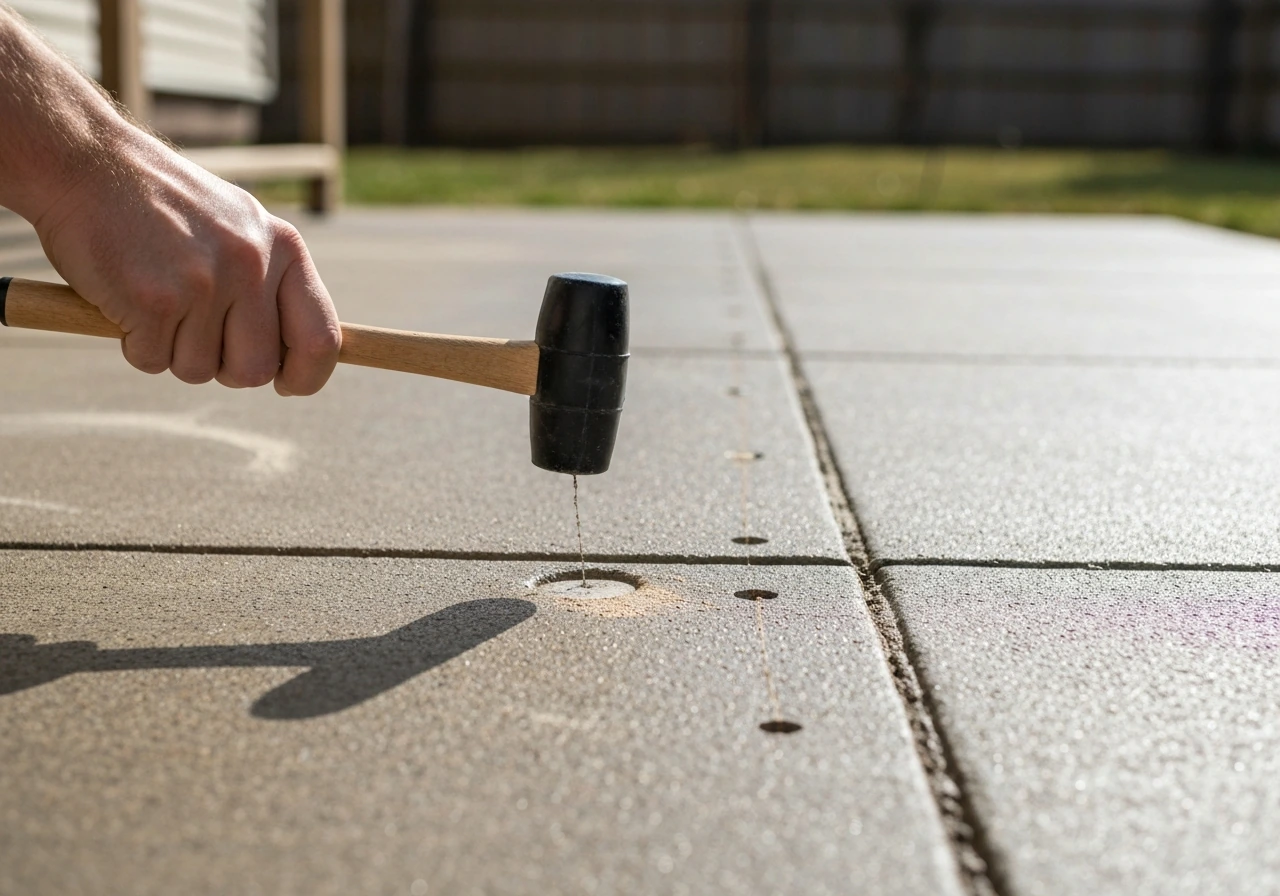
- Lay out your pergola footprint using batterboards and string lines. Confirm all four corners are square using the 3-4-5 triangle method before marking anything on the slab. Mark the exact center of each post base location with a pencil or chalk.
- Check edge distances. Measure from each marked post center to the nearest slab edge. For most 1/2-inch wedge anchors, you need at minimum 3-3/4 inches of edge distance, but check the spec sheet for your specific anchor. If you're too close, shift the layout or switch to an epoxy anchor with smaller edge distance requirements.
- Drill anchor holes using a hammer drill and the bit size specified for your anchor (typically 1/16-inch larger than the anchor diameter for wedge anchors). Drill to the required embedment depth plus a little extra for debris. Vacuum or blow out the hole thoroughly, especially for epoxy anchors where dust in the hole will kill the bond.
- Set the anchors. For wedge anchors, insert and hand-tighten, then torque to the manufacturer's spec (typically 25-40 ft-lbs for 1/2-inch wedge anchors). For epoxy anchors, inject epoxy, insert the threaded rod, and wait the full cure time before loading (often 24 hours, longer in cold weather). Do not rush the epoxy cure.
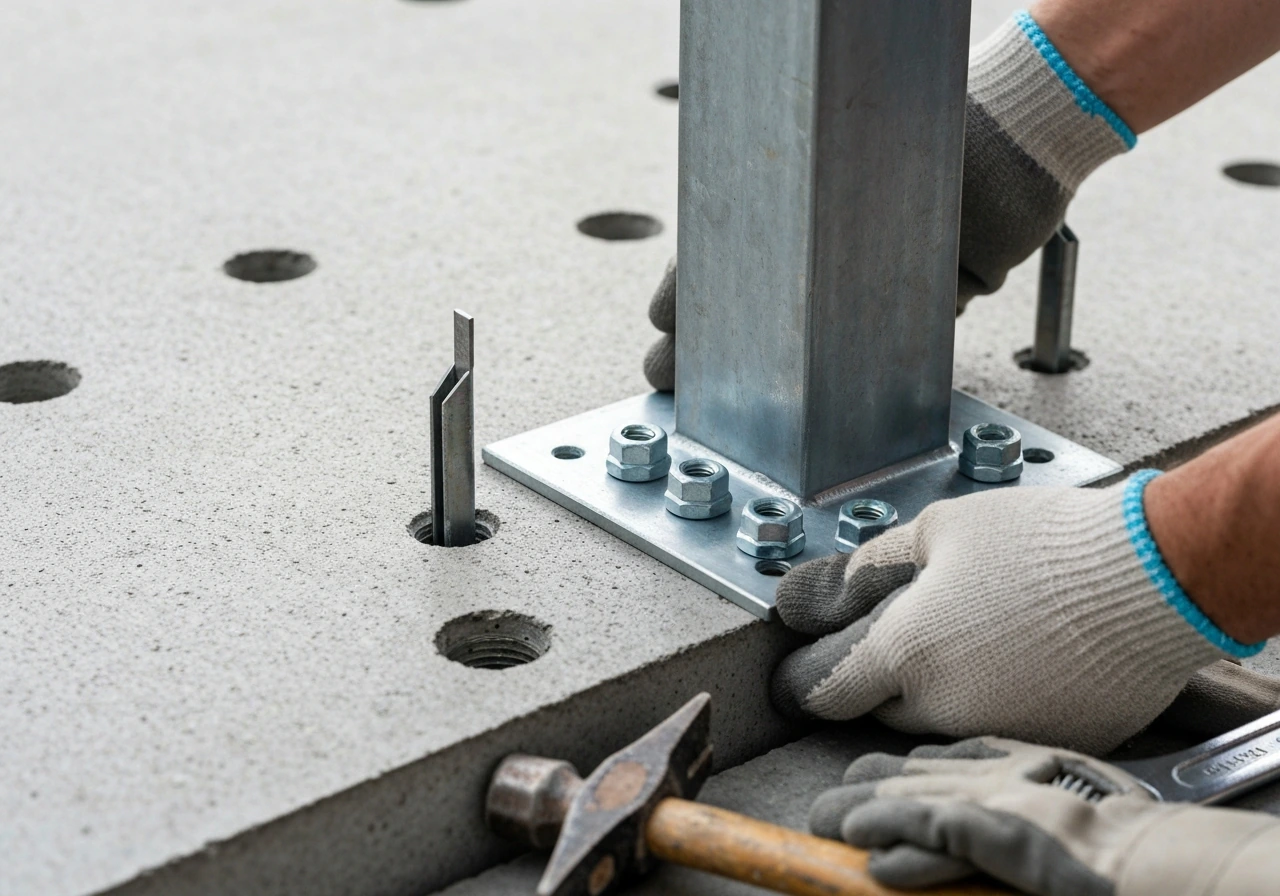
- Set post bases on the anchors. Use a level to confirm the base plate is flat and the post cup is plumb in both directions. Shim with stainless steel shims if needed. Snug down the nuts but don't final-torque until you've confirmed all bases are level relative to each other.
- Check all bases for level across the whole footprint using a long level or a level stretched on a straight board between bases. All post bases should sit in the same plane so your pergola doesn't end up twisted. Adjust now: it's much harder after the posts are up.
- Set the posts into the bases and secure them with the base's nail/screw pattern fully installed. Every hole in that base plate gets a fastener. Skipping fastener holes in post base flanges is a common shortcut that reduces the connector's rated capacity.
- Install the beams and rafters per your pergola plan. As you build up, check for plumb and square constantly. Install any diagonal knee braces or cross-bracing before the structure gets heavy.
- If attaching one side to the house as a ledger connection, use a structural ledger connection with lag screws or through-bolts into the house's rim joist or band joist, not just into siding or sheathing. Follow ledger-to-house flashing steps (see sealing section below).
- Once the full structure is assembled, do a final check: try to rock each post, check all fastener torque, and confirm bracing is fully secured.
Sealing, leveling, and corrosion/water management
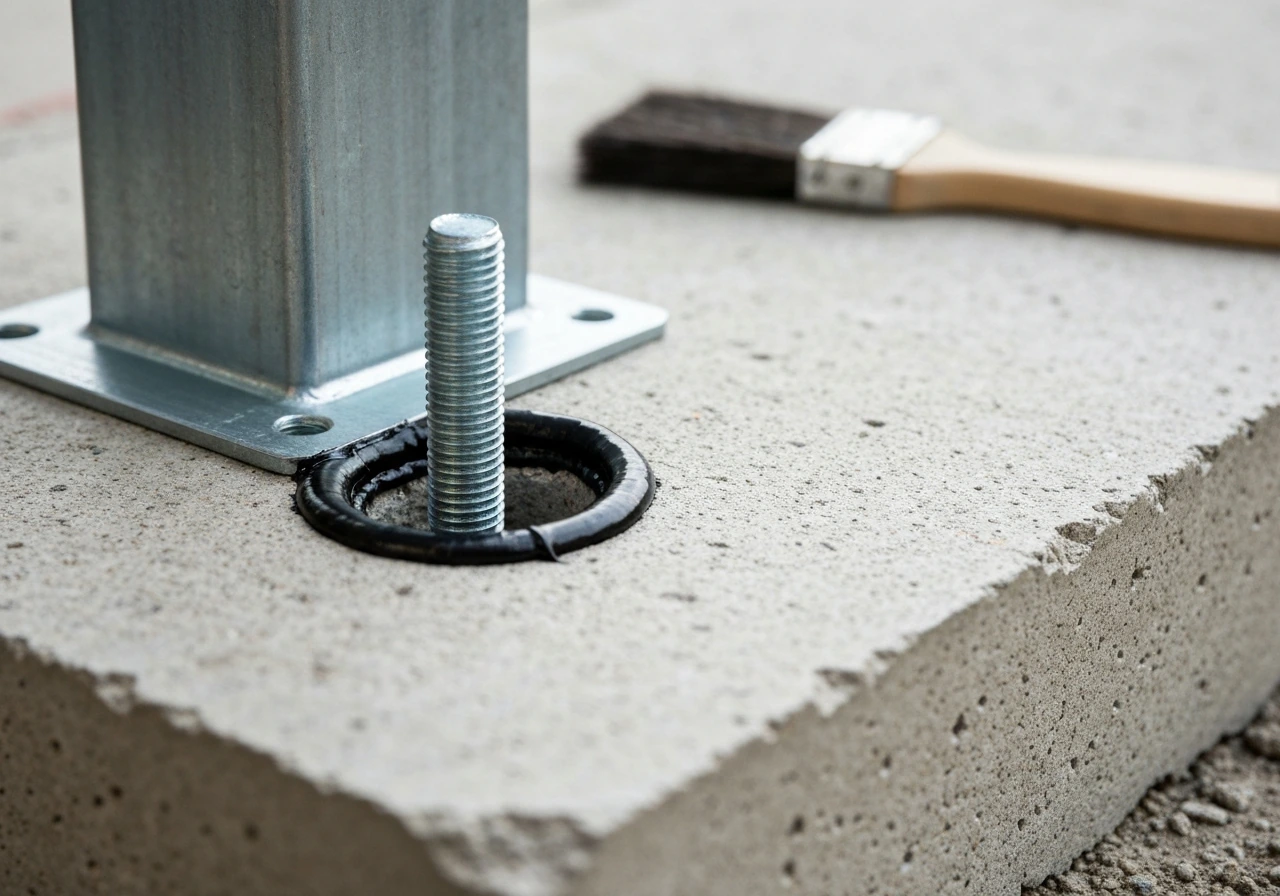
Water is the long-term enemy of every pergola connection, and the places water loves most are exactly the places you just drilled and bolted. At anchor bolt locations on concrete, the drill hole that's slightly larger than the bolt creates a path for water to get under the base plate and sit there. Use a small bead of exterior-grade sealant (polyurethane or silicone) around the base of each post base plate after installation, but leave a small gap on the downhill side so any trapped water can escape rather than being sealed in.
If your pergola connects to the house with a ledger board, flashing is non-negotiable. Water that gets behind an unflashed ledger will rot the rim joist and house framing, sometimes for years before you notice. Install z-flashing over the top of the ledger, lapping over the house's water-resistant barrier above and out over the ledger below. Any lag screw holes through the ledger into the house should be sealed with butyl tape or a compatible sealant before driving the fastener.
Corrosion at mixed-metal connections is a real issue. When two dissimilar metals touch in the presence of moisture, the less noble metal corrodes faster: this is galvanic corrosion. The most common problem spot on a pergola is using standard steel fasteners to connect an aluminum structure, or using plain steel hardware on pressure-treated wood (the copper compounds in ACQ and CA treated lumber accelerate steel corrosion significantly). Use hot-dip galvanized or stainless steel fasteners with pressure-treated wood. Use stainless steel or aluminum fasteners with aluminum structures. Do not mix aluminum fasteners directly against steel connectors without a barrier. Simpson Strong-Tie and other connector manufacturers specifically rate their products for use with treated lumber and list the correct fastener specs in their guides.
- Use hot-dip galvanized (ASTM A153) or stainless steel (Type 304 or 316) fasteners with pressure-treated lumber
- Use stainless steel or aluminum fasteners when connecting to aluminum pergola components
- Never use bare steel bolts in direct contact with ACQ or CA treated wood: they'll corrode visibly within a season
- Seal post base plate perimeters with exterior sealant, leaving a small weep gap on the downhill side
- Flash any ledger-to-house connection with z-flashing, and seal lag holes before driving fasteners
- Check all connection points annually and re-torque any fasteners that have loosened
When to call a pro (and quick safety checklist)
Most pergola-to-patio anchoring is solid DIY territory, but there are a handful of situations where you genuinely need an engineer or contractor before you start drilling. If you don't know the thickness or condition of your concrete slab (old slab, cracked slab, or slab that was poured without rebar), get a professional assessment before trusting it to hold pergola anchors. If you're in a high-wind or high-seismic zone and your pergola is large (over 10 x 12 feet roughly), you may need a stamped engineer's drawing to pull a permit. If you're attaching to an existing patio cover structure and you're not certain of that structure's load capacity, don't guess: have someone who knows structural framing look at it. If you're planning to convert a carport into a patio, you can apply the same anchoring and footing principles to your new pergola or cover setup.
Permitting is the other thing people want to skip and shouldn't. Most jurisdictions require a permit for a permanently anchored pergola, and the permit process exists partly to catch situations where the proposed installation would be unsafe. If you're building something that could collapse on your family or your neighbor's property in a storm, it's worth the permit fee and the inspector visit. If you're attaching to an existing patio cover that's part of your home's structure, a permit is almost certainly required.
- Slab condition unknown or visibly cracked: consult a structural engineer before anchoring
- Pergola footprint over roughly 10 x 12 feet in a high-wind zone: check permit requirements and consider engineered drawings
- Attaching to an existing patio cover beam or house framing: confirm load capacity before adding pergola loads
- Any anchor bolt landing within 3-4 inches of a slab edge: use an epoxy anchor with confirmed edge-distance rating or relocate
- Pavers with no confirmed concrete sub-base: dig down and verify before committing to a layout
- You're unsure of your local wind exposure category: check ASCE 7 maps or ask your local building department
- Structure will support a green roof, heavy shade panels, or significant live loads: get an engineer involved
Your next steps right now
The most productive thing you can do today is go out to your patio and figure out exactly what you're anchoring into. Knock on the surface, check how close your planned post locations are to slab edges, and measure your available concrete thickness if you can (a core sample or a measurement at a slab edge works). Then pull up the spec sheet for the post base you're planning to use, check the anchor bolt requirements, and compare them to your slab conditions.
While you're at it, check whether your city or county requires a permit for a permanently anchored pergola. A quick call to the building department takes five minutes and can save you a lot of trouble later. If you're still in the planning phase and haven't decided on the full structure yet, it's worth thinking through the whole build process together: from how you put a pergola on a patio through the full structural build. If you are also planning a sunroom on that same existing patio, make sure your anchoring plan supports the additional structure and load how to build a sunroom on an existing patio. Getting the anchoring right is the foundation, but the framing decisions above also affect what your anchoring needs to handle.
FAQ
Can I secure a pergola post base to a cracked or questionable concrete patio slab?
Yes, but only if the manufacturer and post base are designed for it. The cleanest approach is to use a surface-mount post base with an epoxy-set or code-rated anchor into sound concrete, not by “scraping in” with short mechanical anchors. If the slab is cracked or you are close to an edge, epoxy anchors typically outperform standard expansion anchors because they rely on bond strength rather than solely expansion pressure.
What if my patio is a wood deck, can I anchor the pergola to the decking boards?
Do not. Attaching through only the deck boards is a common failure point because boards can pull up or flex under racking. Instead, locate the doubled joists or beams below the decking and fasten the post base to that framing with lag screws or through-bolts long enough to reach solid framing.
Is it okay to shim a pergola post base to make it sit flat?
If you are using a post base with a standoff, keep the post bottom above the concrete, then let the standoff do the job. Shimming the base flat forces end grain to stay wet if water pools, which accelerates rot. Use shims only to level the base once, and then return to the manufacturer’s standoff height without compressing it away.
What should I do if my planned post locations are close to the edge of the concrete slab?
If the measured distance is less than the minimum edge distance required by your anchor type, you usually have three options: move the post locations, use a different anchor system with approved edge clearances, or install a footing to increase concrete edge distance. Never assume a larger wedge anchor “fixes” poor edge clearance.
Do I have to use epoxy anchors for aluminum pergola kits in high-wind areas?
Yes, but confirm the kit’s base plates are meant for uplift resistance and match your wind zone. Many kits include lag-to-concrete details for average conditions, but in high-wind areas you may need the next-approved anchor option the manufacturer specifies (often deeper embedment or epoxy-set anchors) to meet uplift loads.
Can I use the same pergola anchoring approach if I convert a carport into a patio?
Usually you should not install them yourself. If you are converting a carport that originally had different load paths, the old posts, beams, and slab may not have the uplift and lateral capacity a pergola needs. Have the structure assessed, then match the anchoring plan to what the framing and concrete can actually carry.
Why does my pergola feel wobbly even if the posts are firmly anchored?
Measure and plan for diagonal bracing or moment resistance at the top, not just strong anchor bolts at the bottom. A pergola can still rack and loosen if the structure is not triangulated, the beam-post connections are weak, or the top is not tied together (for example with proper knee braces, diagonal braces, or a continuous rigid connection to a house ledger where appropriate).
How do I verify the anchors I’m using can handle wind uplift?
Check the anchor spec for both tension (uplift) and embedment depth, and compare to the wind design conditions for your location. If the concrete slab is thin, edge-located, or has poor condition, the anchor may not reach the required uplift capacity even if the bolt is “properly installed.” In those cases, switching to deeper embedment epoxy or using a poured footing is often the correct fix.
What’s the right way to seal around the pergola post base on concrete so it doesn’t trap water?
Two things often go wrong: water sealing and drainage. Apply an exterior sealant around the base plate to limit water entry, but leave a small drainage gap on the downhill side so trapped moisture can escape, then ensure the sealant does not bridge that escape path.
If I attach a pergola to a ledger board, do I really need flashing?
Flashing is required whenever the ledger connection is exposed to water. Use the correct flashing style for a ledger (for example, z-flashing), lap it so water sheds over the house weather barrier above, and seal any fastener penetrations through the ledger with compatible sealants (often butyl tape) before installing fasteners.
How do I prevent corrosion at the pergola joints and anchors?
Yes, mixed-metal corrosion can silently weaken connections. Use hot-dip galvanized or stainless fasteners for pressure-treated lumber, and use stainless or aluminum hardware for aluminum structures. When dissimilar metals must meet, use approved barriers and only connector-fastener combinations that are rated for treated lumber or that specific metal pairing.
Do I need a permit to secure a pergola to a patio?
For many areas, permitting is required when a pergola is permanently anchored, and it is especially likely if you connect to the home structure. If you are unsure, call the building department with the pergola size, anchoring method, and whether it is ledger-attached. Getting a quick determination before drilling avoids retrofits.
When is it worth hiring an engineer or contractor before I start drilling into my patio?
If you cannot identify slab thickness and condition, or the slab is old, cracked, or poured without proper reinforcement, get a professional evaluation before relying on surface anchors. Similarly, for large pergolas (roughly over 10 x 12 feet) in high wind or high seismic areas, you may need engineered load calculations and a stamped plan for the anchor and framing layout.