You can install a pergola on a patio in a weekend or two if you plan it right. The basic process is: choose your pergola type (attached to the house or freestanding), mark and prepare your post locations on the patio surface, anchor your posts securely to concrete or footings, then build up the frame with beams and rafters. The part that trips most people up is the anchoring and leveling step, because if your posts aren't level and properly fastened to solid concrete, nothing above them will sit right and the whole structure becomes a wind hazard. Get that foundation step right and the rest follows logically.
How to Put a Pergola on a Patio: Step-by-Step DIY Guide

Celia Vaughn
20 Jun 2026
Choosing the Right Pergola Type for Your Patio
Before you buy a single piece of lumber or a kit, you need to decide whether you're building an attached pergola or a freestanding one. This choice affects your anchoring method, your permit requirements, and how much structural work is involved.
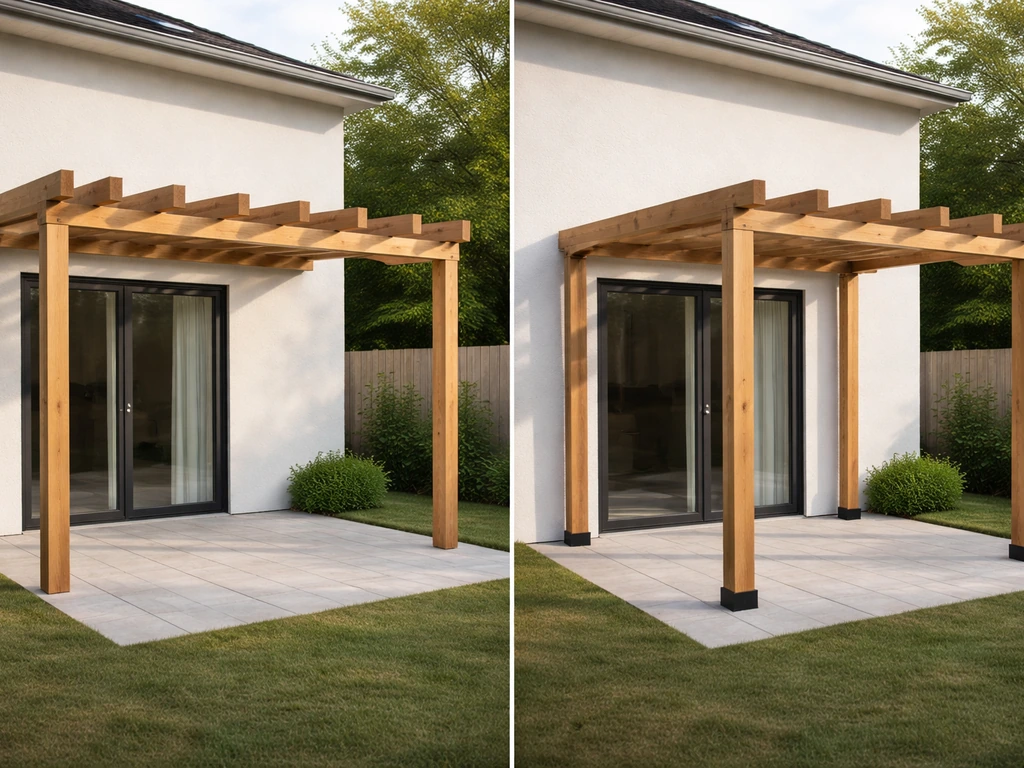
An attached pergola connects directly to your house using a ledger board. One end of the rafters rests on that ledger, and the other end rests on posts you anchor into the patio. This style works well for smaller patios right up against the house and gives you a clean, integrated look. The tradeoff is that ledger attachment is a code-sensitive connection, similar to how a deck attaches to a house. You'll need lag screws with correctly sized pilot holes threading into the house's rim joist or structural framing, not just nails, and you need proper flashing around every penetration to stop water from sneaking into your wall. Attached pergolas almost always require a permit because they create a structural connection to the building.
A freestanding pergola stands on its own four (or more) posts with no connection to the house at all. This is the more forgiving option for DIYers because you don't have to worry about ledger flashing or finding the right framing inside your wall. Every post gets anchored independently into the patio slab or into its own footing, and you level each one before building up. Freestanding structures may still require a permit depending on your municipality and the size of the structure, so check locally before you start.
Material choice matters too. Wood (typically cedar, redwood, or pressure-treated pine) is the classic option and easiest to cut and customize on site. Aluminum pergola kits are lighter, rust-proof, and nearly maintenance-free, but they're harder to modify in the field. Vinyl and fiberglass kits exist but limit your design flexibility. For most patio installs, a wood or aluminum kit gives you the best balance of workability and longevity.
| Type | Best For | Anchoring | Permit Likely? | DIY Difficulty |
|---|---|---|---|---|
| Attached (ledger) | Patios adjacent to house wall | Ledger to house + posts to slab | Yes, almost always | Moderate to Hard |
| Freestanding | Any patio, standalone shade | All posts to slab or footings | Depends on size/location | Moderate |
| Freestanding (kit) | Quick install, consistent sizing | Post bases to concrete | Depends on size/location | Easy to Moderate |
Planning Measurements, Layout, and Materials List
Measure your patio carefully before you order anything. Note the full length and width of the usable space, then decide how much of it the pergola will cover. Standard residential pergolas run anywhere from 10x10 feet up to 20x20 feet, but your patio dimensions and house setback requirements will set the real limit. Leave at least 12 to 18 inches of clearance from any property line or fence, and check your local setback rules because they vary widely.
Once you have your footprint, lay it out on paper. Mark where each post will land. For a 4-post freestanding pergola, you're placing one post at each corner of your rectangle. Confirm that your post spacing works with the beam span you're using: a 2x8 or 2x10 beam can typically span 10 to 12 feet between posts without sagging, while longer spans need beams sized up or a center post added. If you're using a kit, the manufacturer's instructions will specify all of this.
Materials and Tools Checklist
- Posts: 6x6 pressure-treated lumber or aluminum/kit posts at your planned height (typically 8 to 10 feet for patios)
- Beams: 2x8, 2x10, or doubled lumber depending on span and design
- Rafters: 2x6 or 2x8, spaced 16 to 24 inches on center
- Post bases: galvanized steel post bases rated for your post size (6x6 bases for 6x6 posts), with a standoff that keeps wood up off the concrete
- Concrete anchors: 5/8-inch wedge anchors or epoxy anchors for fastening post bases to the slab
- Ledger hardware (attached only): 1/2-inch lag screws or through-bolts with washers, plus galvanized joist hangers
- Flashing tape and metal drip cap (attached only)
- Structural screws or hurricane ties for rafter-to-beam connections
- Lumber sealer, stain, or paint appropriate for your material
- Tools: drill with hammer drill bit, socket set, level (4-foot minimum), speed square, chalk line, tape measure, circular saw, post level, clamps
Buy lumber rated for exterior use. If any wood will be close to or in contact with concrete, it must be pressure-treated (rated UC4B for ground contact situations) per IRC R317.1. For above-ground post bases with a proper air gap, standard exterior-grade lumber works, but pressure-treated is still the safer long-term choice.
Preparing the Site and Patio Attachment Points
Walk your patio and check the surface condition before anything else. You need solid, cured concrete (or properly installed concrete footings) under every post location. If your patio has cracks, heaving, or is less than 4 inches thick, you may need to add concrete piers at the post locations rather than relying on the slab alone. If you are converting a carport into a patio, you can apply the same site prep and anchoring approach so the pergola and any shade structures stay secure convert a carport into a patio.
If you have a paver patio, do not anchor through the pavers. Pavers are not structurally bonded to the base and will shift under load. Instead, pull up the pavers at each post location, dig down to solid ground, pour a concrete footing (typically 12 inches in diameter and below your frost line depth), and anchor the post base to that footing once it cures. This adds a few days to your project but is the only safe way to do it.
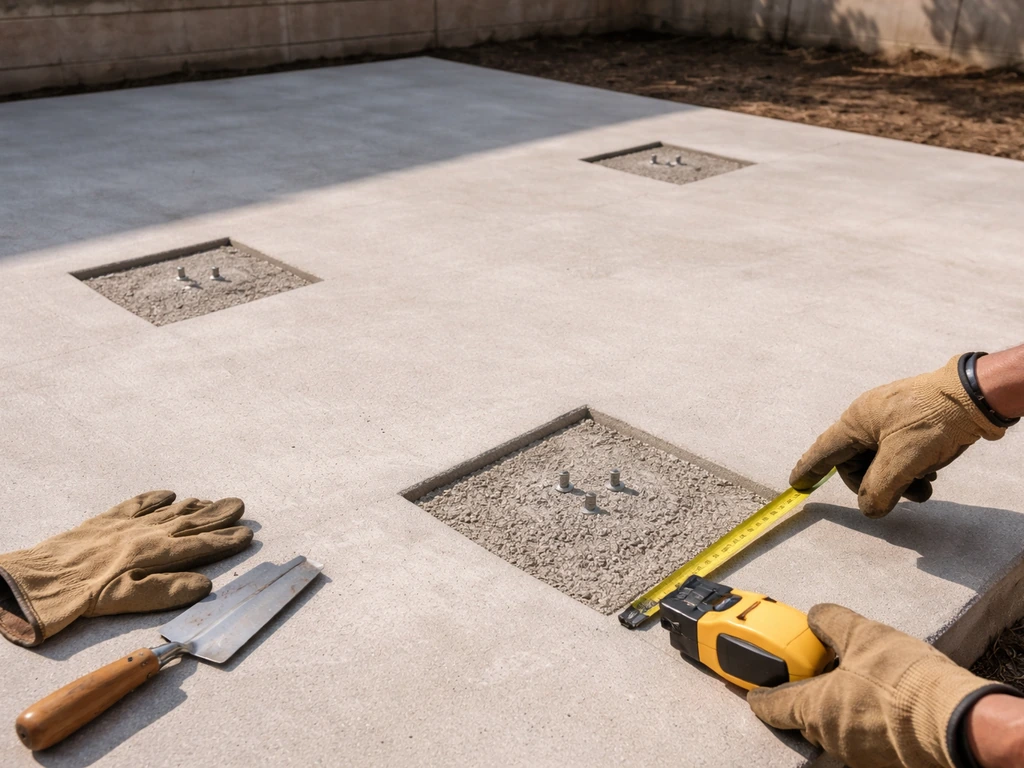
For a concrete slab, use a chalk line to mark your exact post locations. Here's how to square up a 4-post layout: measure diagonally from corner to corner in both directions. When both diagonal measurements are equal, your layout is square. This step matters more than most beginners realize. As one kit manufacturer puts it directly in their instructions: if your posts aren't level and square, your beams and rafters won't be level either, and you'll be fighting that error for every subsequent step.
For attached pergolas, identify the structural framing inside your house wall where the ledger will attach. Use a stud finder to locate the rim joist or band joist. Never attach a ledger to just the sheathing or siding. Mark the ledger height on the wall and snap a level chalk line across the full attachment span.
Drilling Into Concrete
Use a hammer drill with a carbide-tipped masonry bit sized for your anchor diameter. Drill to the depth specified by your anchor manufacturer, then clear the dust from the hole with a blow-out bulb or compressed air before setting the anchor. For 5/8-inch wedge anchors, you typically drill to a depth of 3 to 3.5 inches into the concrete. Set the post base plate over the hole, drop in the anchor, and tighten until the base is snug and immovable. Do this for all post base locations before you start cutting or setting posts.
Step-by-Step Installation: Beams, Rafters, and Posts
Here's the actual build sequence. Work through these steps in order and don't skip ahead, especially the leveling checks.
- Set the post bases: With all your anchor hardware installed and tightened, confirm each base is exactly where it needs to be according to your layout marks. Check that the bolt pattern on each base is aligned consistently so your posts will face the same direction.
- Cut your posts to length: Determine your finished post height based on your desired pergola height (typically 8 to 10 feet from the patio surface). If your patio surface isn't perfectly level, measure each post location independently from the slab to the correct height, because post bases at different elevations mean posts of slightly different lengths. Cut each post individually and label them so you know which post goes where.
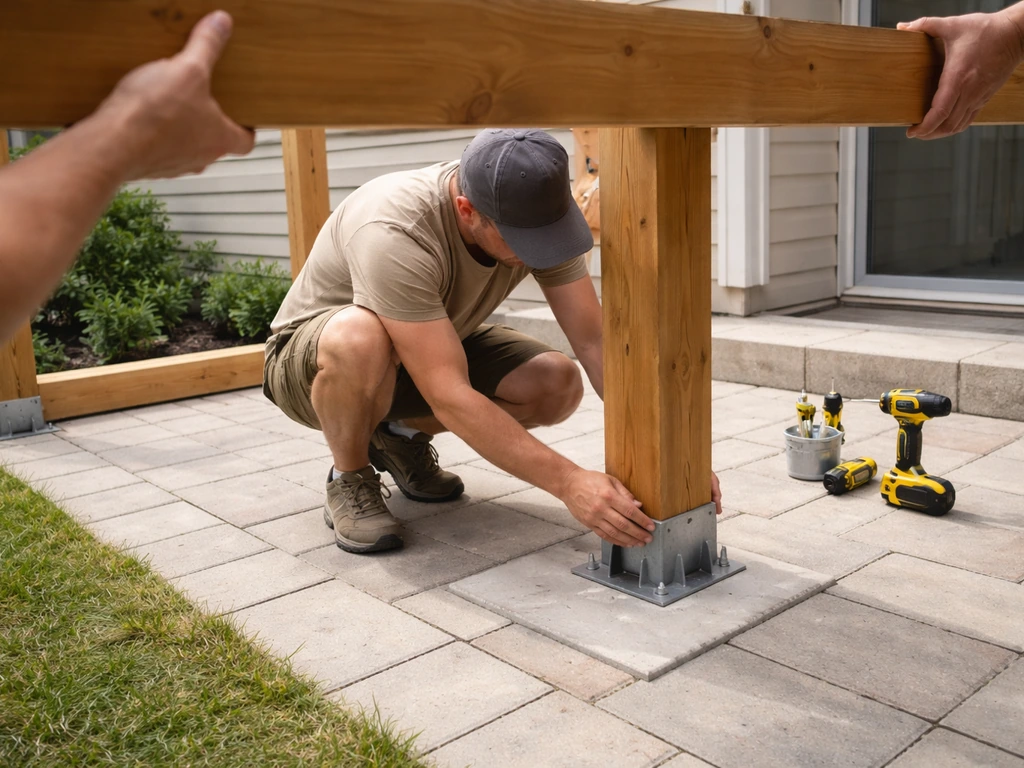
- Set and plumb the first post: Slide the post into the post base and use a post level (the kind that checks plumb in two directions simultaneously) to confirm it's perfectly vertical on both faces. Clamp it temporarily with a brace screwed to a scrap board staked into the ground or clamped to the slab. Tighten the post base hardware once plumb is confirmed.
- Set the remaining posts: Repeat the plumb-and-brace process for every post. Don't remove the braces yet. This is not the moment to rush. Common mistake here: people set all posts and assume they're close enough, then wonder why the beams don't line up. Use a long level or a string line at the post tops to confirm all posts sit at the same height before moving on.
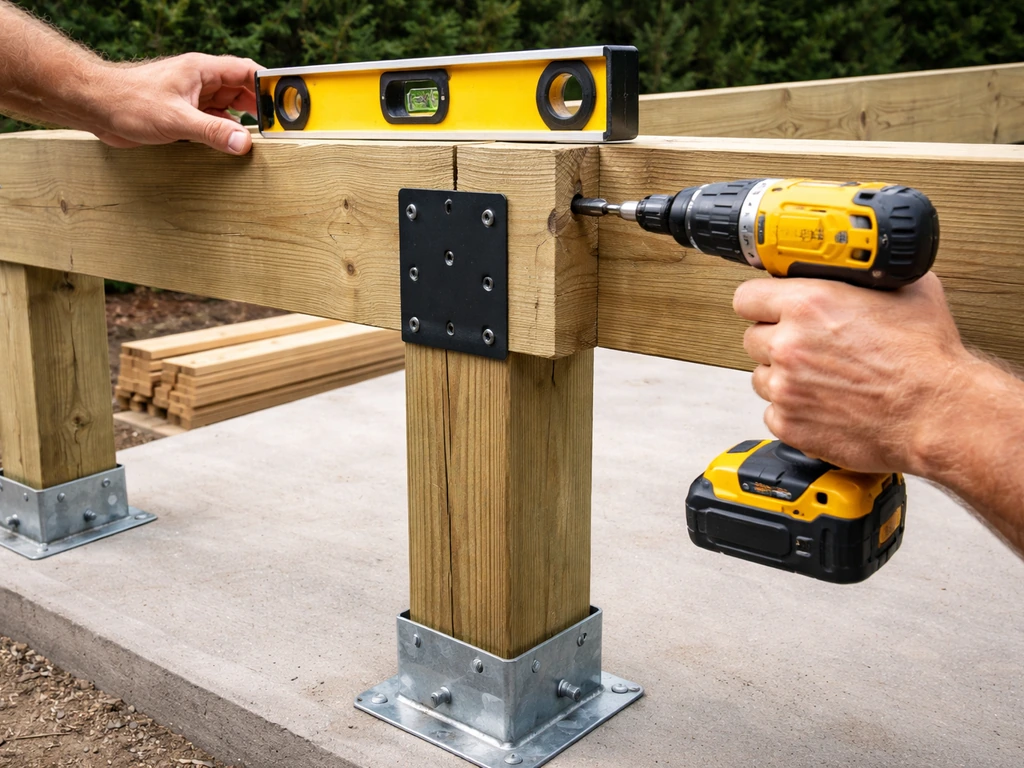
- Install the beams: For a freestanding pergola, the beams run along the two long sides, resting on top of the posts (or in post-cap hardware if your design uses that). For an attached pergola, one beam is the ledger itself on the house side. Lift the beam into position with a helper, check that it's level along its length, and fasten it with structural screws or bolts through the post cap hardware. Don't rely on toe-nailing alone.
- Install the rafters: Rafters span across the two beams at your chosen spacing (typically 16 to 24 inches on center). Set each rafter in a joist hanger or rafter tie on both ends. This hardware keeps the rafter from rolling or pulling off the beam over time, especially under wind load. Nail or screw the hangers per the manufacturer's spec, usually with 10d or 16d structural nails or equivalent screws.
- Install decorative cuts or end details (optional): Many pergola designs call for notching or angling the rafter tails and beam ends. If your design includes this, cut the profiles before installation whenever possible. It's much easier on the ground than up on a ladder.
Securing, Leveling, and Anchoring for Wind and Water Safety
A pergola that isn't properly anchored is a liability in high winds. This section isn't optional reading even if your area doesn't get extreme weather. Wind uplift and lateral load are real forces that will test every connection in your structure.
Post Anchoring Details
Your post bases are doing the heavy lifting here. Use galvanized or stainless steel post bases rated for the post size you're using. Standard bases for 6x6 posts use 5/8-inch concrete anchors driven into the slab. Each anchor should engage at least 2.5 to 3 inches of solid concrete. Once the posts are set and fully braced, go back and confirm every anchor bolt is fully tightened and the base plate sits flat against the slab with no rocking.
Moisture protection at the post base is critical for wood posts specifically. When a wood post sits directly on concrete, moisture wicks up through the concrete and rots the post from the bottom, often invisibly for years. Use a post base with a built-in standoff that keeps the bottom of the post at least 1 inch above the concrete surface. This air gap prevents moisture transfer. If you're installing in-ground posts (in a non-slab scenario), wrap the buried portion of the post with peel-and-stick roofing membrane before backfilling, and use pressure-treated lumber rated for ground contact.
Ledger Attachment for Attached Pergolas
The ledger connection to the house is the most structurally and weatherproofing-critical part of an attached pergola. Use 1/2-inch lag screws or carriage bolts with washers, staggered in two rows, driven into the rim joist of the house framing. Pre-drill pilot holes sized correctly for the lag screw shank so the threads fully engage the wood without splitting it. Connections made with nails only are not adequate and can fail under load. After fastening, install metal flashing that runs up behind the house siding and laps over the top of the ledger, then apply flashing tape over all bolt penetrations. Water infiltration at the ledger is one of the most common sources of serious structural rot in attached outdoor structures.
Leveling the Full Structure
Before you call the frame done, do a final level check everywhere. Run a string line across the top of the beams from end to end and check that rafters sit consistently without shimming. Check that each post is still plumb after all the frame load went on. Any shimming corrections are much easier now than after the structure is complete. If shimming is needed at a post base (because the slab surface isn't perfectly flat), use stainless steel shim stock between the base plate and the slab, never wood, before tightening the anchors.
Permits and Inspections
Check your local permit requirements before you start. Attached pergolas almost universally need a permit. Freestanding pergolas may or may not depending on square footage and jurisdiction. In some municipalities, structures over 200 square feet trigger a permit regardless of attachment method. Getting an inspection isn't just about following rules: it's a free structural check by someone whose job is to find problems. If you're unsure, a single call to your building department takes five minutes and can save you from having to tear out work.
Finishing, Roofing Options, and Maintenance
Once the frame is structurally complete, you have options for how far to take the finishing. A classic pergola with open rafters provides filtered shade and a defined outdoor space without full weather protection. If you want more coverage, you can add a roofing layer. Here are the most practical options for a patio pergola. If you plan to enclose that pergola for more sun and rain protection, you'll want to adapt the same patio layout and framing ideas for how to build a sunroom on an existing patio.
Roofing and Shade Options
Polycarbonate panels are the most popular semi-transparent roofing add-on for pergolas. Multiwall polycarbonate in 6mm to 10mm thickness handles most residential applications well: thicker panels block more heat and hold up better to snow load, thinner ones are cheaper and lighter. Install panels with the UV-protected face pointing up toward the sun. Most pergola designs use purlins (horizontal supports running perpendicular to the rafters) spaced 6 to 12 inches apart to support the panels. Lap each panel under the ridge cap or flashing at the high end so water sheds away from the house.
Retractable fabric canopies are another popular choice, especially for patio pergolas where you want the ability to open up the space on nice days. These mount to tracks or tension cables along the rafters and pull open and closed manually or with a motorized system. Maintenance involves periodic washing of the fabric with mild soap and water, and retracting the canopy during severe storms to reduce wind load on the fabric and frame.
Shade sails, climbing plants on wire, and cedar or redwood slats spaced across the rafters are all lower-cost shade additions that work well on a pergola frame without adding significant structural load.
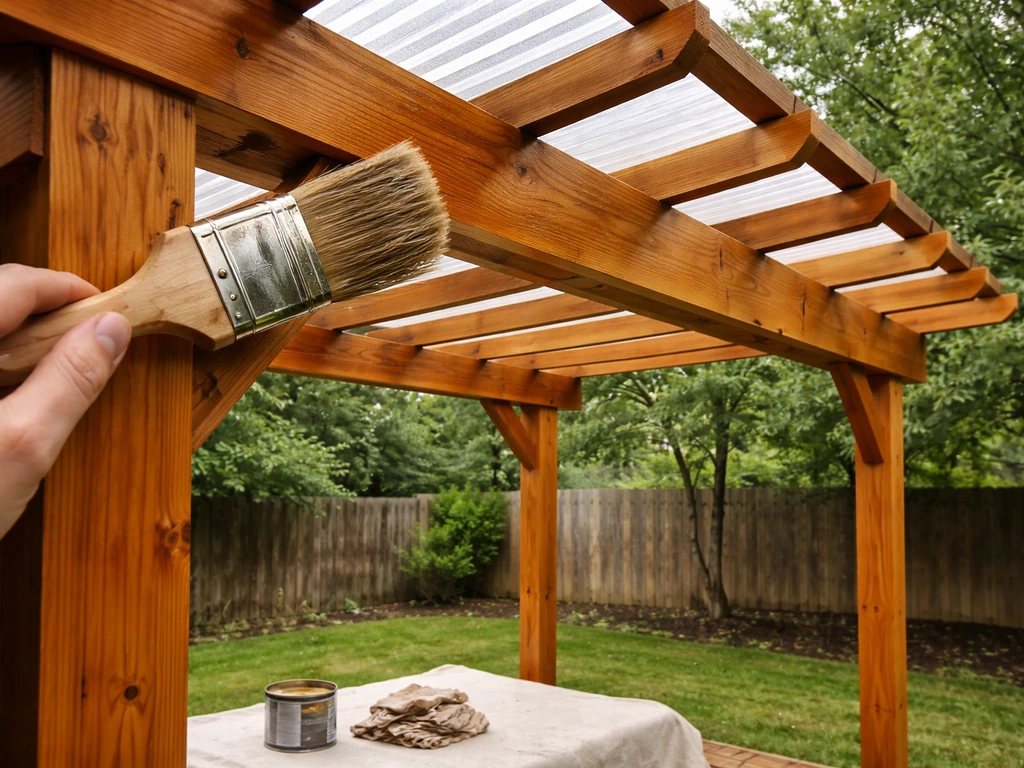
Finishing the Wood or Metal Frame
For wood pergolas, apply an exterior penetrating oil or sealant within a few weeks of installation, before the wood weathers and checks. Cedar and redwood benefit from a UV-blocking oil stain that preserves their natural color. Pressure-treated lumber should be allowed to dry for at least a few weeks before staining, then sealed with a water-repellent preservative. All end cuts on lumber (anywhere you cross-cut a board) should be treated with end-cut preservative or sealer immediately after cutting, since the exposed end grain absorbs water faster than the face.
Aluminum and powder-coated steel frames need very little finishing at install, but check all connection hardware for any scratched coating and touch up with a rust-inhibiting primer before moisture gets into the scratch.
Annual Maintenance Checklist
- Inspect all post bases annually: look for standing water around the base, corrosion on the hardware, or soft wood at the post bottom
- Check all bolts and hardware for looseness: seasonal temperature swings cause wood to expand and contract, which can back out fasteners over time
- Inspect ledger flashing (attached pergolas): look for lifted tape, gaps at the wall, or staining on the house siding below the ledger that might indicate water intrusion
- Reapply wood sealant or stain every 2 to 3 years depending on sun and rain exposure in your climate
- Check rafter-to-beam connections for any separation or hardware corrosion
- Wash fabric canopy panels with mild soap and rinse thoroughly at least once per season
- Clear debris from any polycarbonate panels and inspect for cracking or UV yellowing annually
Once you've been through the installation process once, the maintenance side feels easy in comparison. Most of what keeps a pergola solid for 15 to 20 years comes down to keeping water out of connections and catching small hardware issues before they become structural ones. Build it right, seal it properly, and check it once a year, and a well-built patio pergola will outlast a lot of the house improvements around it.
FAQ
Can I install a pergola on a patio without drilling into the concrete slab?
You generally need anchored connections for structural stability. If you cannot drill into the slab, use a design that bears on properly installed footings, such as a freestanding layout with post bases anchored to separate concrete piers below frost depth, rather than relying on friction over the surface or straps on top of the slab.
What if my patio slab is sloped or uneven across where the posts will go?
You can correct small flatness issues with post-base shims, but plan for a true plumb, not just “level beams.” If the slope changes more than a few inches across the footprint, consider resetting post locations, using different pier heights, or redesigning the pergola layout so the frame does not end up twisted.
Is there a way to keep paver patios stable if I want to keep the pavers instead of removing them?
For structural safety, you typically must remove pavers at each post location to reach solid ground and pour a proper footing. If you try to bolt through pavers or set posts on compacted bedding, the pavers can shift under load and the posts can loosen over time.
How do I choose the right beam span for my pergola if my kit options do not match my dimensions?
Do not assume the same span ratings apply to your wood size and local wind conditions. Use the kit’s specified layout when possible, or have a local structural pro confirm beam sizing. If you need longer spans, the common solutions are adding a center post or reducing the clear distance between posts.
How many posts do I need, and can I use fewer than a 4-post layout?
A 4-post rectangle is the baseline, but fewer supports increases bending and connection stress, especially during wind uplift. Adding intermediate posts or using a different framing pattern is usually safer than reducing the number of posts and trying to “make up” with thicker beams.
What is the minimum clearance I should maintain from fences or property lines?
Plan for the clearance your local code or setback rules require, then add practical buffer so you can access the structure for maintenance. Many patios need more than just the legal minimum, because you will still need room for staining, replacing panels, and tightening hardware after settling.
Can I attach an attached pergola ledger to siding if I can find the studs or rim joist nearby?
Ledger fasteners must penetrate to structural framing, not the sheathing or siding. Even if you can hit studs, attach at the rim joist or band joist level where the connection is designed to resist uplift and lateral load, and install flashing for each penetration so the wall stays protected.
How should I handle wood rot risk at the post base on a patio slab?
Use post bases with an air gap so the wood does not sit directly on concrete. Also check that the base plate sits flat, then keep water from pooling near the posts by grading and using good surface drainage. This combination prevents wicking and slows deterioration that often starts at the bottom of posts.
Do I need metal post bases if I’m using pressure-treated lumber?
Pressure-treated lumber helps with ground contact, but it does not replace the need for proper post bases and air gaps on slab installs. Metal bases distribute load, keep the post off the concrete surface, and provide a reliable fastening location for anchors.
What’s the best way to prevent a pergola from shaking or separating at the connections?
Start with correct anchoring and leveling, then verify all bolts and hardware are tight and rated for outdoor exposure. If your design allows movement, add proper cross-bracing or diagonal elements and confirm the beam-to-post connections are installed with the specified fasteners and spacing, because loose framing becomes noticeable quickly.
When is it safe to stain or seal a wood pergola after installation?
For pressure-treated wood, allow adequate drying time before applying stain or sealant. Cedar and redwood often benefit from UV-blocking products soon after install, but apply after the structure is fully assembled and the wood has had time to acclimate, especially if you installed in cooler or very humid weather.
How often should I inspect and maintain an installed pergola?
A practical schedule is a once-per-year walkaround where you check for loose anchor bolts, cracks at connections, and corrosion at any metal hardware. After severe wind, storms, or unusual loads, inspect sooner, because small gaps or loosened fasteners can worsen quickly.