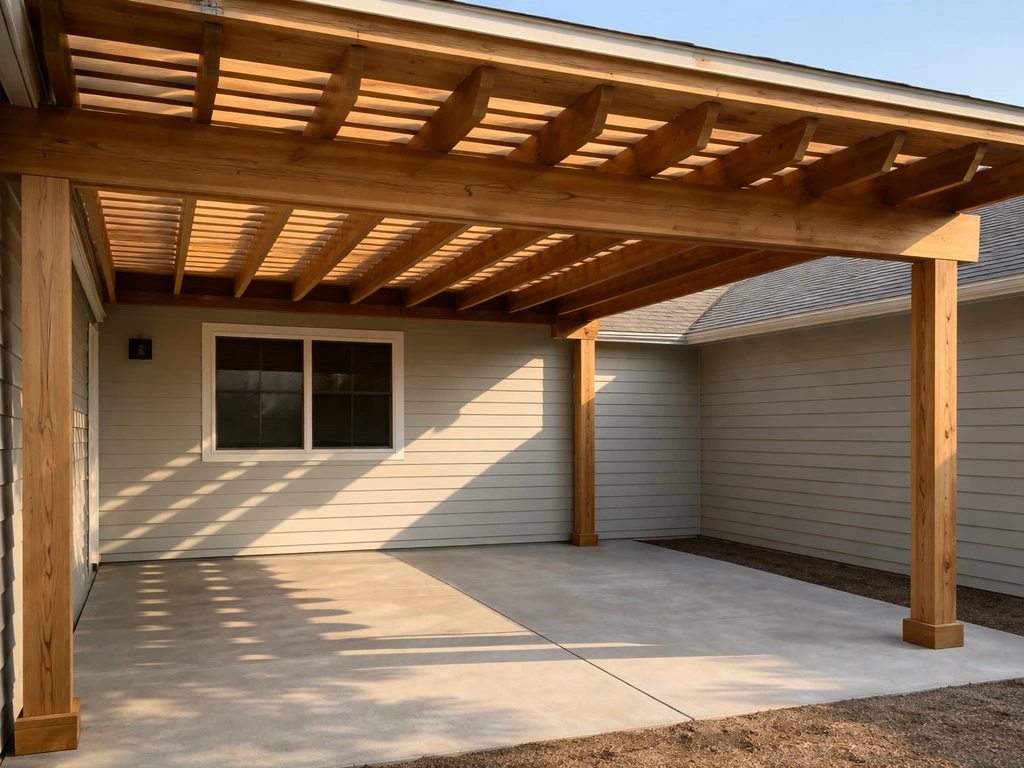
You can absolutely build a pergola patio cover yourself in a weekend or two, as long as you plan the design first, pull any required permits, and anchor the structure properly to your existing patio slab. The basic sequence is: pick your design and coverage style, measure and lay out the footprint, get a permit if required, set post bases in your concrete, frame up posts and beams, install rafters, and add your cover material. Each of those steps has real details that matter, especially anchoring and ledger attachment if you're tying the pergola to the house, so this guide walks through all of it in order. Once your design is chosen, you can follow the step-by-step process for how to put a pergola on a patio, including layout, permitting, anchoring, and cover installation.
How to Build a Pergola Patio Cover Step by Step

Choosing the Right Pergola Design and Coverage Level
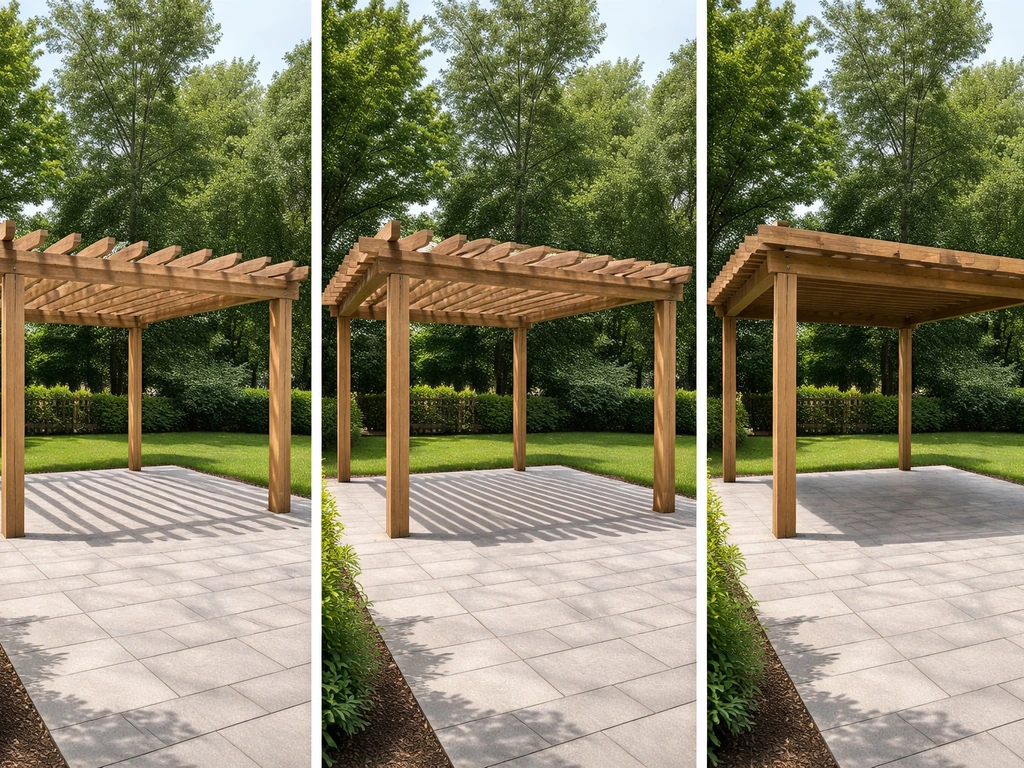
The first decision is how much shade and weather protection you actually want. A traditional open-rafter pergola looks great but gives you maybe 30 to 40 percent shade. If you want real coverage, you're choosing between a few practical options: polycarbonate panels, corrugated metal roofing, louvered aluminum systems, or fabric canopies. These cover materials are commonly used to balance shade-only goals versus shade plus rain protection, including polycarbonate panels, corrugated metal roofing, and louvered roof systems. Each changes what the structure has to carry and how you build it.
Here's how to think about the three main coverage types in plain terms. A solid roof (polycarbonate or metal panels) gives you the most rain protection and the most predictable load, but it also commits you to a pitch requirement and a heavier structure. Polycarbonate panels typically need a pitch of about 1:10 to 1:12 minimum so water runs off cleanly. Metal roofing needs at least 1:12 with proper laps. A louvered aluminum roof system is motorized and adjusts from fully open to fully closed, giving you flexible sun and some rain control, but louvered roofs add roughly 8 to 15 lbs per square foot to the frame so you need stouter posts and beams. Fabric canopies and retractable shades are the lightest option at around 2 to 5 lbs per square foot and are great for shade-only situations.
On design, you'll also decide between attached and freestanding. An attached pergola connects to the house with a ledger board, which saves one row of posts and looks cleaner but requires flashing and proper ledger attachment into structural framing. A freestanding pergola sits on its own four or more posts and is easier to place anywhere on the patio without worrying about the house wall. If you're later considering enclosing the space, the freestanding route keeps your options more open.
| Coverage Type | Approximate Added Weight | Rain Protection | Best For | Build Complexity |
|---|---|---|---|---|
| Open rafters only | Structural only | None | Shade aesthetics, climbing plants | Low |
| Fabric/retractable canopy | 2–5 lbs/sq ft | Light | Shade with minimal structure changes | Low–Medium |
| Polycarbonate panels | 2–4 lbs/sq ft | Good | Full rain cover, light transmission | Medium |
| Corrugated metal roofing | 3–5 lbs/sq ft | Excellent | Full weather protection, durable | Medium |
| Louvered aluminum system | 8–15 lbs/sq ft | Good (adjustable) | Premium, adjustable sun/rain control | High |
Pick your coverage type before you finalize anything else, because it drives your beam sizing, post sizing, and footing requirements. Don't design a lightweight open-rafter structure and then try to add a louvered system later without re-engineering the posts and footings.
Measuring, Layout, and Permit Basics You Can't Skip
Measure your patio slab first and decide how much of it the pergola covers. Standard pergola depth runs 10 to 16 feet off the house for attached builds; width matches your patio or a portion of it. Sketch a simple site plan showing the footprint, dimensions, setbacks from property lines, and height above grade. You'll need this sketch for your permit application anyway, so do it now.
Speaking of permits: if you're adding any kind of roof cover to the pergola, you almost certainly need a permit. Adding a roof introduces snow load, wind uplift, and drainage considerations that change the structural requirements, and most jurisdictions treat a covered attached pergola as an addition to the home for permitting purposes. Even a freestanding covered pergola usually triggers a permit once it has a solid or louvered roof. Your permit package will typically need your site plan, the footprint dimensions, height above grade, and if you're in snow country, snow load data. Check your local building department's requirements, but plan on permitting rather than hoping you can skip it.
Wind load compliance is also required in most jurisdictions for attached pergolas. If you're in a high-wind area, your connection hardware, post sizes, and bracing all need to be sized accordingly. When in doubt, your local building department can point you to the prescriptive tables that apply in your area, or a structural engineer can stamp a simple plan for a few hundred dollars, which is well worth it for a covered structure.
- Sketch your site plan with exact dimensions, height, and property line setbacks
- Contact your local building department to confirm permit requirements before you buy materials
- Ask specifically about wind load and snow load requirements for your zone
- If attaching to the house, confirm the wall framing type (wood stud, brick veneer, or block) — it affects your attachment method significantly
- Note any HOA restrictions on structure height, materials, or finish colors
Wood vs. Metal vs. Aluminum: Which Material Makes Sense
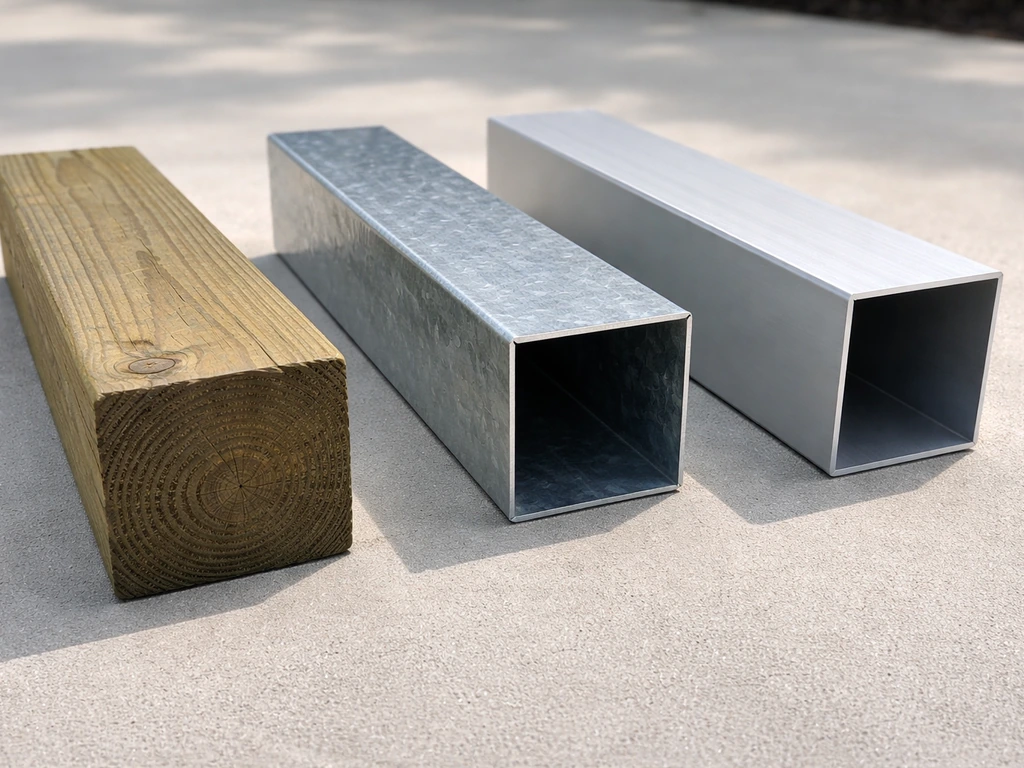
Wood is the most common DIY choice because it's easy to cut, widely available, and looks great. Pressure-treated lumber rated for ground contact (UC4B for post bases) handles moisture exposure well. For a pergola in a typical residential climate, 6x6 posts, doubled 2x10 or single 4x10 beams, and 2x6 or 2x8 rafters are a solid starting point for a 12 by 16 foot open structure. Size up for any covered roof system. One critical note: if you use ACQ or CA pressure-treated wood, you must use hot-dip galvanized hardware conforming to ASTM A153 or stainless steel. Standard zinc-electroplated hardware corrodes quickly in contact with ACQ-treated lumber.
Aluminum framing kits are the other strong option for DIYers, especially for louvered roof systems where the manufacturer typically supplies the aluminum extrusion profiles as part of a kit. Aluminum doesn't rot, doesn't need staining, and handles coastal and humid environments better than wood long-term. The trade-off is that aluminum framing requires specialized cuts and connections, and most aluminum pergola systems come with proprietary hardware that limits customization. If you want a louvered or motorized roof, aluminum kits are often the most practical path.
Steel/metal framing is less common for residential DIY pergolas but comes up in commercial-style builds or very large spans. It's heavy, requires welding or bolted connections, and is generally not the first choice unless you have metalworking experience or you're spanning more than 20 feet.
| Material | Typical Cost Range (DIY) | Rot/Corrosion Resistance | DIY Ease | Best Roof Cover Compatibility |
|---|---|---|---|---|
| Pressure-treated wood | $ (lowest) | Good with proper hardware | Easiest — standard cuts/tools | All types |
| Cedar or redwood | $$ (moderate) | Very good naturally | Easy | Open rafters, fabric, polycarbonate |
| Aluminum kit/extrusion | $$–$$$ (moderate–high) | Excellent | Moderate — proprietary connections | Louvered systems, metal panels |
| Steel | $$$ (high) | Good with coating | Difficult — welding required | Heavy solid roofs |
Setting Footings and Anchoring Posts to Your Existing Patio
This is where most DIY pergolas either succeed or fail. Your existing concrete patio slab is typically 4 to 6 inches thick, which is enough to anchor post bases with epoxy anchors, but it's probably not engineered for the point loads of a covered pergola. For an open-rafter pergola with modest loads, surface-mounted post bases with epoxy anchors into the slab work well. For a covered structure or any roofed pergola in a wind or snow zone, you're better off drilling through the slab and installing a deeper concrete pier below grade, then anchoring the post base to that pier. If your goal is to turn a carport into a patio, the same anchoring and footing decisions are what keep the new covered layout safe and stable. Your permit reviewer will often tell you which approach is required.
For epoxy anchoring into existing concrete, the process works like this: drill the anchor hole with a hammer drill to the specified diameter and depth (usually 3 to 4 inches into solid concrete for a residential post base), clean the hole thoroughly with compressed air and a brush (debris in the hole kills bond strength), inject two-part epoxy into the hole, insert a threaded rod, and let it cure fully before applying any load. Follow the epoxy manufacturer's cure time exactly, especially in cold weather where cure times extend significantly. This method creates a very strong bond when done correctly.
Post base hardware like Simpson Strong-Tie PB-series bases gives you a code-recognized connection between the threaded rod anchor and the post, keeping the post bottom up off the concrete to avoid moisture wicking. Once the bases are set and cured, check that all bases are level with each other before the posts go in. Use a long level and a string line across all base tops. Correcting a 1/4-inch height difference at the base is trivial; correcting it after the frame is up is a real headache.
Framing the Pergola: Posts, Beams, Ledgers, and Bracing
Setting and Plumbing the Posts
Set posts in their bases and brace them temporarily with 2x4 braces staked to the ground. Check plumb on two faces with a level before tightening anything. Common mistake: people tighten the post base bolts before checking plumb, which makes correction almost impossible without loosening everything. Get the post plumb, then tighten. Use at least two temporary braces per post at 90 degrees to each other so the post can't rack in any direction.
Beams and Ledger Attachment

For an attached pergola, the ledger board replaces the house-side beam and carries the rafter load directly into the house framing. Ledger attachment has to be done right. IRC R507.9.1 requires 1/2-inch lag screws or through-bolts into the band joist or rim joist of the house, and the fastener spacing is determined by a table based on your joist spans and ledger geometry. Do not attach a ledger into brick veneer alone. Brick veneer is not structural; your lags need to reach the wood framing behind it. On stucco or EIFS walls, this gets even more complex and usually requires professional assessment.
Ledger flashing is non-negotiable on an attached pergola, especially under any roof system. JLC’s deck-ledger flashing feature also emphasizes properly installed flashing at the house-to-ledger interface to keep the connection watertight and protect the rim area Ledger flashing is non-negotiable on an attached pergola. Water that gets behind the ledger can rot the rim joist and wall sheathing for years before you notice it. A proper flashing assembly includes back flashing against the house wall, a drip-cap or Z-flashing above the ledger with at least a 1/4-inch turned-down leg, and bottom flashing to direct water away from the wall. This is worth doing carefully even if it slows you down a day.
For freestanding pergolas, the beams span post to post and are typically through-bolted or connected with structural hardware like Simpson Strong-Tie post caps. Two-bolt connections at each post cap are the standard minimum. Use the corrosion-resistant fastener appropriate for your lumber species: hot-dip galvanized ASTM A153 carriage bolts for pressure-treated wood, or stainless steel for cedar and coastal installs.
Diagonal Bracing
If your pergola is taller than about 8 feet or freestanding, diagonal bracing keeps it from racking under wind load. IRC prescriptive guidance for deck/pergola framing requires diagonal braces to be a minimum of nominal 2x4 lumber, fastened securely to the framing members at each end. In practice, a pair of 2x4 knee braces running at 45 degrees from post to beam on each corner does the job for most residential pergolas. Don't skip this step and plan to add it later. A pergola that wobbles under load is not safe, and racking failure under wind is a real risk.
Installing Rafters, Cover Elements, and Making It Weather-Ready
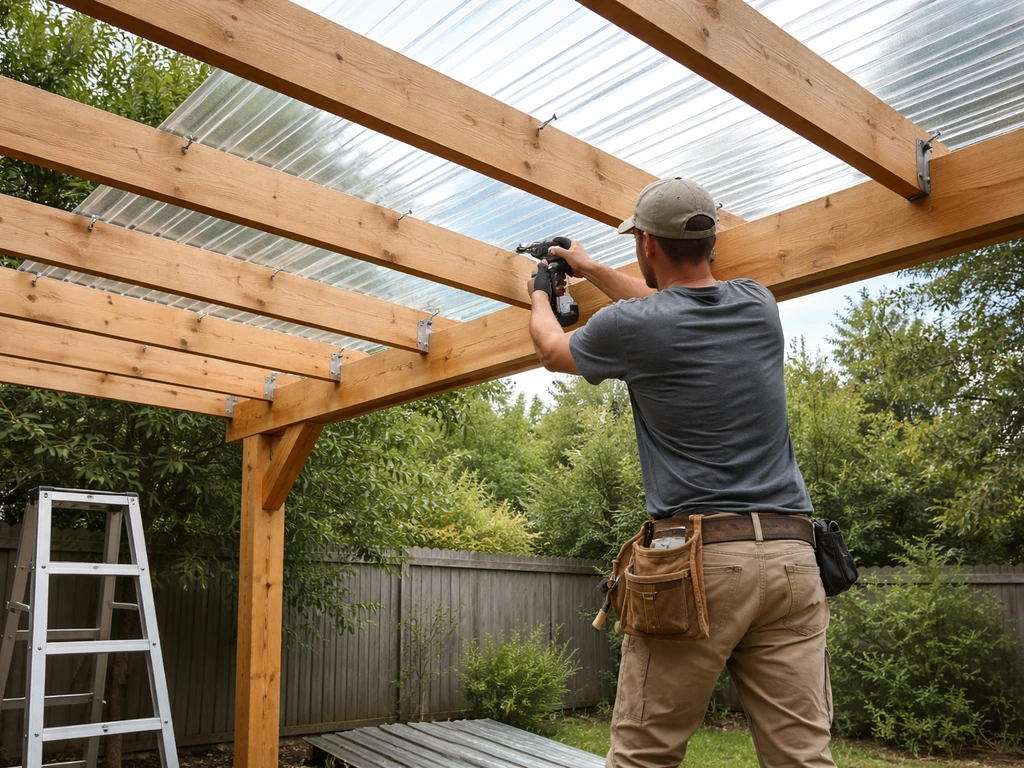
Rafters span from the ledger or front beam to the back beam (or house-to-front on an attached build). Typical rafter spacing for an open pergola is 16 to 24 inches on center. For a covered roof, follow the span table for your lumber size and spacing, and check that the rafter tails are cut consistently so the fascia or trim line looks clean. Use rafter hangers at the ledger end for a solid connection, and toe-nail or use hurricane ties at the beam end.
If you're adding polycarbonate panels or metal roofing, install purlins (horizontal nailers spanning between rafters) first to give the roofing material something to fasten to. For polycarbonate, use pre-drilled panels with rubber-gasketed screws, seal the cut panel ends with aluminum tape, and use the H-channel connectors between panels. Never over-tighten polycarbonate screws; the panels expand and contract with temperature and need a small amount of float.
For metal roofing, overlap panels by at least one corrugation on the sides and about 6 inches at end laps, with the laps running in the direction of the slope. Use butyl tape sealant at end laps in any area that gets significant rain. Fasten into the high ribs of corrugated metal, not the valleys, to avoid pooling water at fastener penetrations.
For a louvered aluminum kit system, follow the manufacturer's sequence exactly since the aluminum frames, channels, and motor mounts are designed to assemble in a specific order. The most common DIY mistake with kits is assembling out of sequence and having to partially disassemble to install a component that should have gone in earlier.
Once the cover is on, check the drainage direction. Water should run away from the house, not toward it. If you've built a flat or nearly flat cover, you may need to add a guttered fascia board or a drip edge to control runoff onto the patio rather than onto the house wall or foundation.
Tools and Materials You'll Need Before You Start
- Hammer drill and masonry bits (for post base anchors in concrete)
- Circular saw and miter saw (for lumber cuts)
- Drill/driver with impact driver (for structural screws and hardware)
- 4-foot level, string line, and line level (for layout and plumb/level checks)
- Post hole digger or rented auger (if installing grade-level piers)
- Two-part epoxy anchoring system with threaded rod and post bases
- Structural hardware: post bases, post caps, joist hangers, hurricane ties
- Corrosion-resistant fasteners: hot-dip galvanized ASTM A153 bolts or stainless steel as appropriate
- Ledger flashing kit (back flashing, Z-flashing, butyl tape)
- Lumber: 6x6 posts, doubled 2x10 or LVL beams, 2x6 or 2x8 rafters, 2x4 diagonal braces
- Cover material of choice: polycarbonate panels, metal roofing, louvered kit, or fabric canopy hardware
- Safety gear: eye protection, hearing protection, work gloves, hard hat for overhead framing work
The Build Sequence, Start to Finish
- Finalize design: coverage type, attached vs. freestanding, dimensions, and pitch if roofed
- Draw your site plan and submit your permit application before buying materials
- Mark post locations on the patio slab with chalk lines and verify square using the 3-4-5 triangle method
- Drill anchor holes, clean them thoroughly, inject epoxy, and set threaded rods (let cure fully — typically 24 hours minimum at room temperature)
- Install post bases, check that all bases are level with each other, and make corrections now
- Set posts in bases, brace plumb in both directions, and tighten base hardware
- Attach ledger to house with correctly spaced lag bolts, install all three layers of ledger flashing
- Install beams with post caps or through-bolts; confirm level across full beam span
- Install diagonal knee braces at corner posts
- Hang rafters with structural hangers at ledger end, connect at beam end with hurricane ties
- Install purlins if adding panel roofing; install cover material with appropriate fasteners and sealing
- Check drainage direction and add guttered fascia or drip edge as needed
- Schedule your framing inspection before closing in any wall or cover element if required by your permit
- Final trim, finishing, and staining or sealing of wood components
DIY Feasibility, Common Mistakes, and When to Call a Pro
An open-rafter freestanding pergola on a flat patio is a genuinely achievable weekend project for a competent DIYer with basic carpentry skills. An attached pergola with a solid or louvered roof, especially in a wind or snow zone, is a medium-difficulty project that requires careful structural thinking. Be honest with yourself about which one you're building.
The most common mistakes that cause real problems are: skipping the permit (which can mean forced removal later), attaching the ledger into brick veneer or the wrong substrate, not making posts plumb before tightening hardware, skipping diagonal bracing, and using the wrong corrosion-class fasteners in treated lumber. None of these are hard to avoid if you know to look for them, but they all come from moving too fast.
Hire a structural engineer or experienced contractor if: you're in a high-wind or high-snow-load area; the covered structure is larger than about 200 square feet; you're attaching to a masonry, stucco, or EIFS wall; or if your building department requires stamped drawings. Paying an engineer for a review and stamp typically runs $300 to $600 and removes all the guesswork on post and beam sizing. For complex covered pergola structures, that's money very well spent.
If you want to eventually go further and enclose the space into a real room, your planning now matters a lot. Framing and footing decisions you make for a covered pergola can either support or complicate a future enclosure. It's worth thinking through that possibility before you finalize post placement and footing depth.
One last thing worth noting: securing the pergola properly to the patio surface is often the step people underestimate the most. The anchoring method directly affects how the structure handles wind uplift, and a pergola that isn't properly fastened can become a hazard in a storm. Taking the time to do the anchor installation correctly is the single highest-value thing you can do on this project.
FAQ
Can I build a pergola patio cover directly on top of existing pavers instead of a concrete slab?
Usually not safely. Most post-base systems and epoxy anchors depend on solid concrete thickness and strength, pavers move and cannot resist uplift. If you only have pavers, plan on either removing to pour new footings, or installing new piers below grade and then redoing the patio finish, a permit may be required because the structural base changes.
What if my patio slab is cracked or spalled where the posts will go?
Do not anchor through visibly damaged concrete. You typically need to assess the crack cause and either core out and repair to sound concrete, or shift post locations. For a covered pergola in wind or snow areas, weak slab zones can concentrate loads and fail anchors, so a structural review is worth it.
How far should a pergola be from the house wall if it is attached?
The attached side is set by where the ledger sits and how beams rafters tie in, but the practical rule is to maintain clearances for flashing, drainage, and roofing installation details. If you use a solid or louvered roof, verify you can install the full flashing assembly and still keep water from backing under siding or trim, especially near windows and doors.
Can I use lag screws into a rim joist/band joist through brick veneer or siding?
You generally should not rely on brick veneer alone, you need the structural wood behind it. Even if a screw “catches,” it may not have the embedment and load path required. For stucco or EIFS, getting to structural framing often requires opening and resealing, many jurisdictions will want correct fastener embedment.
Do I need diagonal bracing if I only build an open-rafter pergola with no solid roof?
Often you still do, even if loads feel light. Wind can rack posts and beams, and open rafters can behave like a frame without lateral stability. At minimum, ensure the design includes the bracing guidance required by your local code and consider it mandatory for freestanding layouts and anything tall or close to prevailing wind exposure.
What is the best way to choose a beam and post size for a covered pergola, not just an open one?
Start from the coverage type and span, then match lumber size to the span table for that specific roof loading, spacing, and cantilever details. If you do not change post footings when you change roof type, you are likely underbuilt. For any roofed pergola, if you cannot confidently calculate spans and loads, get a structural engineer review for member sizing and connections.
How long should epoxy anchors cure before I load the pergola?
Follow the epoxy manufacturer’s temperature-adjusted cure guidance, not a generic “overnight” rule. In cold weather cure time can extend significantly, and loading too early can reduce bond strength. Keep post bases supported and avoid any structural tightening that applies load to anchors before full cure.
Is it okay to tighten post base bolts after the posts are no longer perfectly plumb?
It is a bad idea. If you tighten hardware while posts are out of plumb, you often cannot correct alignment without loosening and reworking connections. Level and brace first, verify plumb on two faces, then tighten only once alignment is correct and the bases are level.
How do I prevent polycarbonate panels from leaking at fastener points?
Use the correct pre-drilled holes, rubber-gasketed screws, and the manufacturer’s recommended screw spacing and edge clearances. Do not over-tighten, polycarbonate needs room to expand and contract. For multi-panel roofs, install the specified connectors and seal cut ends, then confirm the roof pitch and overlap direction are correct before final tightening.
What is the most common metal roofing mistake on a pergola roof?
Using the wrong fastener placement or sealant locations. Fasten into high ribs on corrugated sheets, keep laps oriented in the slope direction, and use butyl tape (or the kit’s approved sealant) at end laps where rain will drive. Also, confirm panel overlap matches the slope, otherwise water can reach fasteners and pool.
How should I handle rainwater runoff if the pergola cover is close to a foundation or walkway?
Check drainage direction and plan a controlled path away from the house and toward an acceptable discharge point. If the cover is nearly flat, add drip edge or a properly directed fascia/gutter solution so water does not dump onto the patio surface in a way that splashes the foundation or under-clears. Verify that runoff does not cross expansion gaps or undermine patio edges.
Can I motorize a louvered pergola later if I start with an open-rafter frame?
Sometimes, but not without re-evaluating the frame and electrical planning. Louvered systems add weight and require specific mounting points, rails, and clearances, so you need to ensure the original posts, beams, and brace layout can handle the extra load. If you might add motorization, plan conduit routes and power access early so you do not open up finished roofing later.
When should I hire an engineer instead of relying on code tables?
Hire help if you are in high-wind or high-snow regions, your covered area is large (for example above about 200 square feet), you attach to masonry or EIFS, you want a long span, or your design includes nonstandard connection details. An engineer can also confirm ledger attachments and bracing requirements for your specific ledger geometry and joist spans.
If I plan to enclose the pergola later, what should I decide now?
Plan post locations, beam heights, and how future wall framing will connect. Your current footings and bracing should handle lateral loads from wind and doors or screens added later. Decide whether enclosure plans will turn the structure into more like a screened room or full roofed area, then size foundations and connections for that future load case.