
Replacing patio awning fabric is a solid weekend project for most DIYers. On a fixed residential awning, plan on half a day to a full day depending on size. On a retractable or RV roller-tube awning, budget a full day and recruit a helper. The payoff is real: new fabric from a reputable brand like Sunbrella or Sattler runs $150–$400 for most residential sizes, compared to $800–$2,000+ to have a shop do everything. If you can measure carefully, work safely at height, and follow your awning manufacturer's manual, you can handle this yourself.
How to Replace Patio Awning Fabric: DIY Guide for Home & RV

Celia Vaughn
24 Jul 2026
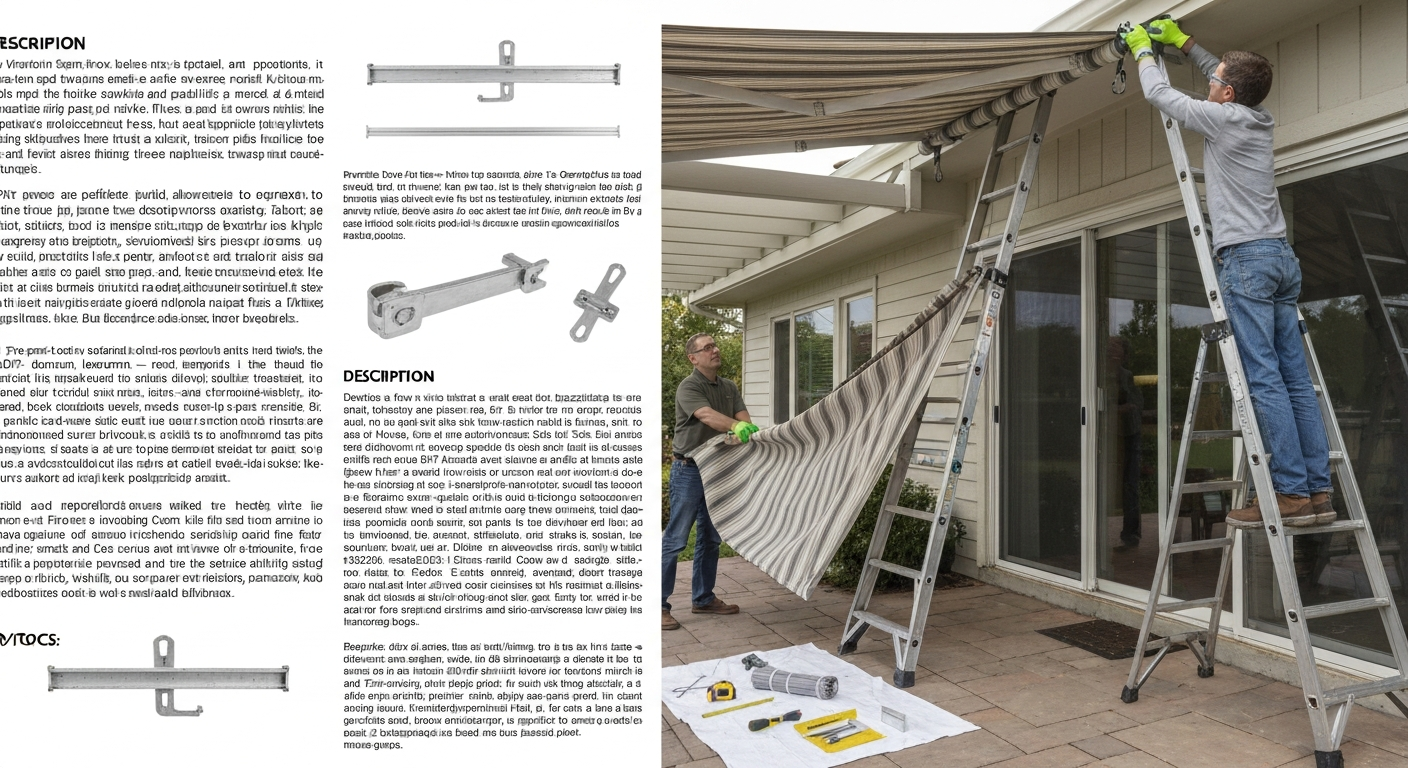
What this project actually involves
Replacing awning fabric breaks into three phases: remove the old cover, order or cut the new one to size, and install it. The tricky parts are measuring accurately before you order, managing spring tension safely on retractable and RV awnings, and getting the fabric seated evenly so it tracks and tensions without wrinkles. Fixed residential awnings (the kind bolted to a wall with stationary arms or rafters) are generally the simpler case. Retractable awnings and RV roller-tube awnings add the complication of torsion springs inside the roller tube, which can spin fast and cause injury if you release them without the right precautions.
The techniques for retractable awnings overlap meaningfully with installing a retractable awning from scratch, and if you plan to upgrade your arm hardware at the same time, the rafter arm slider is worth understanding before you start. For step-by-step instructions on how to install a patio awning, see how to install patio awning. Both topics live in the same project family as this one, so it is worth reading up on them if your awning has articulating arms or a cassette-style housing. For hands-on guidance specific to articulated arms, see our guide on how to install patio awning rafter arm slider.
Repair or replace? Run this inspection first
Before ordering anything, spend 20 minutes doing a honest inspection. Small issues are patchable. Structural fabric failure or serious distortion means replacement is the only sensible answer.
- Spread the fabric fully and check for UV fade, chalking, or brittleness — if the fabric cracks when flexed, it cannot be reliably repaired
- Look for tears longer than about 6 inches or any tear near a seam or hem — these propagate fast under wind load
- Check for mold or mildew penetration: surface discoloration usually cleans off; if the mold has degraded the fibers themselves (fabric tears easily near the stained area), replace
- Inspect seams and hems for separation — a single delaminated seam on a sewn acrylic awning can be re-sewn; multiple failed seams mean the fabric is at end of life
- Diagonal square check: measure corner to corner across the full fabric panel in both directions. If the two diagonal measurements differ by more than 1 inch, the fabric is out of square and needs replacement, not just re-tensioning (this is a spec from A&E/Dometic service manuals)
- Check the hem rope channel and bead cord — if the poly rope has pulled through or the bead cord is frayed, the fabric cannot seat properly in the track; replacement is the right call
- On retractable awnings, check for permanent creasing or accordion folds that do not roll out — these stress the coating and shorten remaining life significantly
- On vinyl (PVC) awnings, check welded seams for delamination; welded seams cannot be field-repaired the same way sewn seams can without a heat-welding tool
If you checked two or more boxes above, replace the fabric. If you only have a small puncture, a short clean tear, or a single minor seam separation on a fabric that is otherwise UV-stable and structurally sound, a patch or re-stitch buys you another season or two. Patch kits using peel-and-stick acrylic fabric tape work fine for holes under about 3 inches in diameter, but they are not a permanent fix on heavily loaded or frequently retracted awnings.
Project snapshot: time, cost, and skill level
| Factor | Fixed / Residential Awning | Retractable or RV Roller-Tube Awning |
|---|---|---|
| Typical project time | 4–8 hours | 6–10 hours |
| DIY fabric cost (materials only) | $150–$400 for most sizes | $200–$500+ depending on width and brand |
| Professional installation cost (labor + fabric) | $800–$2,000+ | $1,000–$2,500+ |
| Skill level | Beginner to intermediate | Intermediate (spring tension adds risk) |
| Minimum crew | 1 person (2 strongly recommended) | 2 people required |
| Key tools needed | Measuring tape, seam ripper, ladder, screwdrivers | All of the above plus blocking rope or locking straps for roller |
These cost ranges assume you are buying fabric by the yard or ordering a pre-cut replacement panel from a specialty supplier. Sunbrella-brand awning fabric runs roughly $25–$45 per yard in standard 46-inch widths; wider widths (used on large retractable awnings) cost more per yard and may require seaming. Custom-sewn replacement panels from an awning shop add $100–$300 in labor on top of fabric cost, which is still much less than a full professional replacement job.
Materials and tools to gather before you start
Fabric and finishing materials
- Replacement awning fabric (see the comparison table in the next section for type guidance) — measure before ordering
- Poly-rope or awning bead cord for hem channels (match diameter to your existing track: typically 3/16" or 1/4")
- UV-stabilized bonded polyester thread or ePTFE (Gore Tenara) thread for sewing hems and seams
- Heavy-duty brass or stainless steel grommets and matching washers — #2 or #3 Stimpson-style (approx. 3/8"–7/16" hole) for typical awning work
- Grommet setter / grommet press
- Seam sealer (clear, flexible, outdoor-rated) for any raw cut edges on vinyl panels
Hardware and fasteners
- #6 self-drilling stainless screws (used to pin the poly rope in track per A&E/Dometic technique)
- 304 stainless hardware for sheltered residential installs; upgrade to 316 stainless for coastal, high-humidity, or marine/RV environments
- Replacement endcap screws if any stripped during removal
- Touch-up paint or metal primer if hardware is aluminum and was scratched during removal
Tools
- Tape measure (25 ft minimum)
- Seam ripper and utility knife
- Heavy-duty sewing machine with walking foot (if fabricating or re-hemming fabric yourself) — or use an awning shop for the sewing
- Screwdrivers (flathead and Phillips), nut driver or socket set
- Ladder (height-appropriate for your awning; see safety section)
- Blocking rope or ratchet straps (for securing roller tube on retractable/RV awnings)
- Work gloves and safety glasses
- Marker or chalk line for layout
- Clamps (for holding fabric in position while fastening)
Choosing the right replacement fabric
The three fabric types you will realistically encounter or choose between are solution-dyed acrylic, marine-grade vinyl (PVC-coated polyester), and standard polyester. Serge Ferrari Soltis/Précontraint technical lines are engineered composite/coated textiles (e.g., Soltis Proof and Précontraint ranges), offering waterproof and dimensionally stable options such as Soltis Proof 502, which is marketed as waterproof with a 10‑year warranty on some systems. Each has a different weight, waterproofing behavior, durability profile, and finishing method. Here is how they compare:
| Fabric Type | Typical Weight | UV Resistance | Mildew Resistance | Waterproof? | Durability / Warranty | Best For |
|---|---|---|---|---|---|---|
| Solution-dyed acrylic (e.g. Sunbrella, Sattler Elements, Docril) | 8–9 oz/yd² (approx. 290 g/m²) | Excellent — color dyed into fiber, not surface-coated | Excellent — breathable, dries fast | Water-resistant, not fully waterproof | 5–10 year limited warranty (Sunbrella 10-year awning/marine grade) | Fixed residential awnings, pergola covers, high-quality retractable fabric |
| Marine-grade vinyl / PVC-coated polyester (e.g. Sunbrella Marine vinyl, Serge Ferrari Soltis) | 14–22 oz/yd² (varies by product) | Good to excellent depending on coating formulation | Good — non-porous surface resists surface mold | Yes — waterproof | 10-year on some engineered composites (e.g. Soltis Proof 502) | RV roller-tube awnings, coastal installs, shade sails needing full waterproofing |
| Standard coated polyester / economy grade | 6–10 oz/yd² | Moderate — UV degrades coating over time | Moderate — can trap moisture at seams | Varies — often water-resistant only | 1–3 years typical | Budget replacements, temporary covers, low-UV-exposure locations |
My recommendation: start with solution-dyed acrylic for any fixed residential patio awning. It breathes, which means it dries faster and resists mildew far better than a fully coated fabric in a sheltered location. If your awning is on an RV or needs to shed rain completely, marine-grade vinyl is the right call. Avoid economy polyester for anything that will see direct sun for more than a few months a year, the UV degradation is fast and you will be doing this project again in two seasons.
One more consideration: valances. Some replacement fabric is sold as a flat panel and you add a valance (the decorative scalloped or straight drop at the front) separately. Others come as a single unit. Confirm which construction your awning uses before ordering. Valance depth on most residential awnings runs 8–14 inches, and the pattern repeat (if you choose a striped fabric) needs to be accounted for when calculating yardage.
How to measure a fixed residential patio awning
Measurement errors are the most common reason a DIY fabric replacement fails. Measure twice, write everything down, and confirm the model and brand of your awning hardware before placing an order. Common measurement checklist: record wall‑mount height, projection (how far the fabric extends), drop/valance length and pattern repeat, front bar width, mounting bracket center‑to‑center spacing, and slope/pitch, these items prevent the most common ordering mistakes. Here is the sequence I use:
- Record the awning brand and model number from the hardware (usually stamped on the wall bracket or front bar endcap) — different brands have different track bead sizes and hem constructions
- Measure the width: distance center-to-center between the two outermost mounting brackets on the wall. This is not the same as the fabric bead width — the bead typically extends a bit past the brackets, and vendors will account for this if you give them the bracket center-to-center measurement
- Measure the projection: from the wall (or back of the track) to the front bar, measured horizontally, not along the fabric slope
- Measure the drop: the vertical length of the valance from the front bar bottom to the lowest point of the valance hem
- Measure the wall-mount height from the ground — this affects how much working room you have and whether you need a step ladder or a full extension ladder
- Check the slope or pitch angle of the awning — note it for your records; it affects how the fabric lays and whether water drains correctly
- If your fabric has a pattern repeat (stripes, checks), measure the repeat distance and add one full repeat to your yardage estimate to allow for alignment
- Add hem and hardware allowances: typically 1–2 inches total on each edge for the bead channel hem; confirm exact allowance with your fabric supplier or the awning manufacturer's replacement panel spec sheet
- Do the diagonal square check: measure corner-to-corner in both directions across the opening. If the difference is more than 1 inch, your hardware may be racked and needs to be corrected before the new fabric goes in
- Write down: bracket center-to-center width, projection, valance drop, mount height, model number, and hem/bead rope diameter
Common mistake: measuring the valance hem instead of the actual fabric projection. The valance is part of the front drop, not the top cover. Measure the projection separately along the top plane of the awning, from wall track to front bar, or you will end up with fabric that is too short in one dimension.
How to measure a retractable or RV roller-tube awning
RV and retractable awnings have a few measurements that residential awnings do not: the roller tube diameter, the spring/clip spacing, and the difference between cassette length and actual fabric length. Get these wrong and the fabric will not fit the hardware.
- Identify your brand and exact model (Dometic 8700, 9100, 9700, Carefree, Thule Omnistor, etc.) and pull the OEM service manual — each brand has specific fabric-length conventions and endcap geometry
- Measure the cassette or overall awning length from the outside face of one endcap to the outside face of the other endcap
- Measure center-to-center between the mounting brackets or arm-pivot centers — this is often the correct dimension to give a replacement fabric supplier
- Note the cassette-to-fabric length difference: on Thule Omnistor units, for example, the fabric is approximately 180 mm shorter than the cassette overall length. Other brands have their own offsets. Always confirm the specific offset for your model in the OEM manual before ordering
- Measure the roller tube outer diameter (typically 60mm, 75mm, or 100mm depending on brand/series) — this affects how the fabric attachment strip, bead, or velcro rail wraps around the tube
- Check clip or staple spacing on the roller tube if your model uses clips to retain the fabric edge (note the spacing so you can replicate it on the new fabric)
- Measure the fabric travel (how far it extends when fully open) and confirm it matches the arm extension length so the new fabric is neither too short nor too long when tensioned
- Measure valance drop and note whether the valance is sewn in or a separate snap-on component
- Record the wire or bead rope diameter in the front bar channel and in the roller-tube track — mismatched bead diameters are a common install failure
- Double-check all measurements with the awning extended and arms locked before disassembly
One thing worth saying directly: RV cassette awnings are not interchangeable between brands. A Dometic replacement fabric will not fit a Carefree cassette without modification, even at the same nominal width. Order by model number, not just by measurement, whenever possible.
Safety setup before you touch a single screw
Most awning injuries happen because someone moved too fast, worked alone, or underestimated the energy stored in a retractable roller tube. Here are the non-negotiables before you start either type of job.
Ladder and fall safety
- Use a ladder rated for your weight plus tools (Type I or Type IA for most residential work)
- Set the ladder on stable, level ground — use ladder levelers on uneven surfaces
- Never overreach: your belt buckle should not go outside the ladder rails
- On a retractable awning where you need access to both endcaps, plan to reposition the ladder rather than reaching across
- Have a helper on the ground to steady the ladder and hand up tools
Roller tube and spring tension
This is the part that injures people. The torsion spring inside a retractable or RV roller tube stores significant rotational energy, and the tube will attempt to spin rapidly when the fabric tension is released. Dometic service manuals are explicit on this: block the arms or tie them before removing endcaps, and do not release the roller until it is secured. For step-by-step guidance on securing and releasing roller-tube springs, see how to install retractable patio awning. The Sailrite, Retractable Awning Fabric Replacement video shows step-by-step removal and installation: secure arms, remove endcaps, slide out the fabric, feed the new fabric onto the roller or into the track, and re-tension springs per manufacturer instructions blank" rel="noopener noreferrer">Sailrite — Retractable Awning Fabric Replacement video/article. Use a rope or ratchet strap to hold the roller tube against a fixed point before you loosen anything. Follow your exact OEM manual for the number of spring tension turns to release and the sequence for doing it. Do not improvise.
General worksite setup
- Work in calm, dry weather — wind makes fabric handling dangerous and wet surfaces make ladder work slippery
- Do not work on a retractable awning during or after rain: water adds weight to the fabric and makes spring-tension work unpredictable
- Wear safety glasses when drilling or driving screws near the awning rail — debris falls directly toward your face
- Keep a clean work surface below the awning: lay a drop cloth or old carpet to protect fabric from grit and provide a clear area to lay out the new panel
- Disconnect any motorized drive or 12V power to electric retractable awnings before starting — a helper accidentally pressing the switch during disassembly is a real risk
- Tell someone you are working at height and approximately how long the project will take
Removing the old fabric
Fixed residential awnings
- Fully extend the awning and lock the arms or prop the front bar so the awning does not collapse on you while you work
- Remove the front bar: typically two screws at each endcap hold the front bar to the fabric bead and valance. Unscrew these and slide or lift the front bar off
- Locate the fabric bead channel at the wall-mounted top rail — there is usually a small retaining screw or pin near one end holding the bead from sliding out
- Remove that retaining screw or pin, then slide the fabric bead out of the track from one end. On longer awnings, have a helper support the fabric weight as it slides free
- Lay the old fabric flat and note how the hem, bead rope, and valance are constructed — take photos before discarding it, as this is your template for finishing the new panel
- Clean the track channel with a stiff brush and damp cloth. Check for corrosion, cracked endcaps, or bent track — address these now before the new fabric goes in
Retractable and RV roller-tube awnings
- Extend the awning fully and lock or strap the arms so they cannot retract
- Secure the roller tube with a rope or ratchet strap tied to a fixed point before loosening endcaps — the spring inside will try to spin the tube
- Follow your OEM manual to release spring tension: this typically means removing a retaining pin or screw, rotating the tube a specific number of turns in the release direction, and re-securing it before proceeding. Do not skip this step
- Remove the endcap screws and carefully pull the endcaps free, keeping the roller restrained
- On cassette-style awnings: remove the front bar from the fabric (usually clips or a bead channel), then unroll the fabric from the roller tube — have a helper support the fabric as it unrolls
- Note how the fabric leading edge is attached to the roller tube: some use a wrap-and-staple method, some use a fabric velcro strip bonded to the tube, some use a bead track. Take photos before removing
- Slide or unwrap the fabric from the roller tube, coiling it loosely as you go
- Lay the old fabric flat — measure it, check its actual finished dimensions, and compare to your pre-order measurements. This is your quality check before the new fabric arrives
Installing the new fabric
Finishing and hemming (if fabricating your own panel)
If you ordered raw fabric rather than a pre-finished replacement panel, you will need to finish the edges before installation. Use UV-stabilized bonded polyester thread or ePTFE (Gore Tenara) thread in your sewing machine. Tenara is worth the extra cost for outdoor seams: it is chemically inert, UV-resistant, and will not degrade faster than the fabric itself. Sew a double-folded hem with a rope channel along the top and bottom edges using a bead rope that matches your track diameter. For grommets along the valance or side hems, use #2 or #3 Stimpson-style stainless steel or brass grommets with backing washers, set with a proper grommet press, not just a hammer and punch.
If your original was a vinyl/PVC panel with welded seams, note that field-sewing a PVC panel is not a durable substitute for heat welding. If you need welded seams, have an awning or canvas shop do this work. Sewn seams on vinyl will hold temporarily but are prone to wicking water and tearing at needle holes under repeated stress.
Installing on a fixed residential awning
- Feed the top bead rope into the wall-mounted track channel starting from one end, with a helper guiding the fabric to keep it from dragging on the ground
- Work the bead through the full length of the track until the fabric is centered left-to-right between the mounting brackets
- Once centered, drive a #6 self-drilling stainless screw approximately 2 inches from the fabric edge through the track and into the sewn poly rope — this is the A&E/Dometic technique to prevent the fabric from shifting while it self-adjusts to tension
- Attach the front bar by sliding its bead channel over the front edge of the fabric and securing the endcap screws
- Extend and retract the awning several times to let the fabric settle, then check for even tension side-to-side and confirm water sheds toward the front
Installing on a retractable or RV roller-tube awning
- Lay the new fabric flat and confirm it matches the old panel's dimensions before starting the install
- Attach the fabric leading edge to the roller tube using the method you photographed during removal (wrap-and-staple, velcro strip, or bead track — match the original method and hardware)
- With the roller still restrained, carefully roll the fabric onto the tube, keeping even tension side-to-side and making sure the fabric stays aligned with the tube ends
- Re-install endcaps with the roller still held by your blocking rope or strap
- Apply spring tension per the OEM manual (typically a specific number of rotations noted in the service manual for your model) and re-install the retaining pin or set screw that holds the spring tension
- Remove the blocking rope and slowly release the arms — the awning should retract smoothly
- Extend and retract the awning three to five times to let the fabric seat on the roller, then check for even tracking and smooth operation
Testing, tensioning, and troubleshooting
After installation, extend the awning fully and step back to look at it from ground level. The fabric should lay without visible sags or tight spots, and the left-to-right tension should look even. Run through these common issues if something looks off:
- Wrinkles running diagonally from corner to corner: the fabric is out of square or one side of the bead is seated deeper in the track than the other. Re-center the fabric in the track and re-check the diagonal measurements
- Pooling water in the middle: insufficient pitch or the fabric is too long for the projection. Check that the awning arms are set to the correct angle and that the fabric projection measurement was correct
- Poor retraction on roller-tube awnings: not enough spring tension. Add tension in small increments per the OEM manual until the awning retracts positively but does not slam
- Fabric sliding sideways in the track over time: the retaining screw in the bead channel was omitted or is loose. Re-drive a #6 self-drilling stainless screw through the track and into the rope channel as described above
- Seam failure near the roller tube attachment: the fabric-to-tube connection was not secure enough. This is more common when stapling into fabric that was not wrapped far enough around the tube. Re-attach with additional staples or the appropriate adhesive strip per the OEM method
- Valance flapping excessively: the valance drop may be longer than the original, or the valance hem is not weighted enough. Confirm valance dimensions match the original
Quick repairs and patching
If you catch a small problem early, a field repair can extend the fabric's life meaningfully. For punctures or tears under 3 inches on acrylic fabric, clean the area and apply a peel-and-stick acrylic repair tape on both sides of the fabric, pressing firmly and working out any air bubbles. For a more durable repair, cut a patch of matching fabric with rounded corners (rounded corners resist peeling far better than square-cut patches), apply marine-grade contact cement to both surfaces, let it tack, then press together and clamp or weight overnight. Sewing around the patch perimeter with outdoor thread after the adhesive cures gives the best long-term hold.
Maintenance habits that make fabric last longer
- Brush debris off the awning weekly during active use — leaves and twigs trap moisture and accelerate mildew
- Clean with mild soap and cool water twice a season; avoid bleach-based cleaners on solution-dyed acrylic (bleach degrades the fiber)
- Retract the awning during high winds (sustained winds above 20–25 mph stress both fabric and hardware) and during heavy snow or ice
- Re-apply a fabric protector (like 303 Fabric Guard or Scotchgard Outdoor) to solution-dyed acrylic once a year to restore water repellency — the fiber itself does not absorb water, but the finish that makes water bead can wear off
- At the end of the season, retract the awning and let it dry completely before leaving it closed for winter; storing it wet is the primary cause of mildew
- Inspect hardware mounting points, arm pivot bolts, and wall brackets annually for corrosion or loosening — a fabric replacement done right can outlast the hardware if the hardware is not maintained
When to call a pro instead
Most homeowners can handle this project, but there are situations where professional help is the smarter call. If the wall mounting brackets are anchored into stucco over a non-masonry substrate and you are not sure of the backing, have a contractor verify the anchorage before loading new fabric. If the roller tube on an RV awning shows visible corrosion, cracking, or the spring assembly has already been disassembled by a previous owner without documentation, the risk of mishandling the spring tension rises sharply, an awning shop has the tools and experience to handle it safely. If the awning is larger than about 16 feet wide, the fabric weight and handling logistics during installation become difficult for a two-person crew without additional rigging. And if you find rotten fascia, cracked structural rafters, or damaged wall-mounting surfaces during your inspection, fix the structure before the fabric, a new cover on a compromised frame will fail fast.
FAQ
How do I decide whether to repair my awning fabric or replace it entirely?
Inspect for UV degradation (fading, brittle threads), mildew/rot, seam separation, large tears, out‑of‑square panels or repeated wrinkling after tensioning. Small punctures, edge frays or localized seam failure can often be patched or re‑stitched. Replace the fabric when: multiple seams have failed, fabric is brittle or heavily faded, diagonal measurements differ by more than ~1 inch (out of square), or repeated tensioning won’t remove creases. For retractable/RV awnings also replace if roller springs or cassette damage accompany fabric failure.
What measurements do I need before ordering replacement fabric for a fixed residential awning?
Record: mounting wall height, projection (how far the front bar extends), valance/drop length and pattern repeat, front bar width, and center‑to‑center spacing of mounting brackets or rafter arms. Also measure diagonal corner‑to‑corner to check square (diagonals should match within ~1 inch). Note model/brand and any special hardware or bead/track dimensions so the fabric bead will fit the rail.
What measurements are critical for RV/retractable awning fabric replacement?
Measure center‑to‑center distance between mounting brackets or arm‑pivot centers (this is often the ordering length). Measure cassette overall length, roller‑tube diameter, and endcap clearances, and note whether the manufacturer lists fabric shorter than cassette (common). Record the bead/hem style, front bar width, arm pivot heights, and awning model/serial so spring/tension specs can be matched to the new cover.
Which fabrics are best for awnings and how do I choose between them?
Common options: solution‑dyed acrylic (Sunbrella/Sattler) ~8–9 oz/yd² — breathable, UV/mildew resistant, good colorfastness, good for residential and marine awnings; coated vinyl/PVC — waterproof, easier to weld, heavier and less breathable, common for motorhome cassettes; engineered composites (Serge Ferrari Soltis/Précontraint) — dimensionally stable, waterproof options available. Choose acrylic for shade/appearance and long color life, vinyl for waterproofing and easy welding, and composite products where dimensional stability or specific warranty/performance is required. Consider weight, UV rating, mildew resistance, warranty length, and whether seams will be sewn or welded.
What tools, fasteners and materials will I need for a DIY awning fabric replacement?
Basic tools: drill/driver, ladder(s), socket set, pliers, rivet gun, awning bead roller (or flat screwdriver), seam roller, clamps, measuring tape, chalk, and helper(s). Materials: replacement fabric, poly‑rope for bead, UV‑stabilized thread (Gore Tenara or bonded polyester) or welding equipment for vinyl, stainless grommets/washers, corrosion‑resistant fasteners (316 stainless in marine exposures, 304 acceptable for sheltered sites), sealant for fasteners, and temporary straps to secure arms/roller. For retractable awnings: blocking wedges, axle supports, and spring‑turn tools per OEM manual.
What safety steps should I follow before starting removal or installation?
Work with a helper. Read the OEM manual for retractable/RV models. Secure or block arms and roller tubes to prevent spring spin (tie or wedge arms). Use proper ladders on stable ground and wear gloves and eye protection. Disconnect power to motorized awnings. For rooftop or high installations use fall protection. Never remove endcaps or release spring tension until the roller is blocked and restrained per manufacturer instructions.