
You can install a wall-mounted retractable awning yourself in one to two hours if your mounting surface is solid, you have a helper, and you follow the manufacturer's fastener specs exactly. The process comes down to four things: locating a strong attachment point, getting the mounting brackets perfectly level, securing them with correctly sized fasteners for your wall type, and extending the awning to verify tension and alignment. This guide walks you through every step, from measuring and planning through wiring a motor, and tells you honestly when a particular situation crosses the line from confident DIY into professional territory.
How to Install Retractable Patio Awning: DIY Guide & Steps

Celia Vaughn
22 Jul 2026
What this project actually involves
A retractable awning install is not a complicated project structurally, but it rewards careful planning more than almost any other patio shade job. The awning itself is a finished product, the frame, fabric, and mechanism ship together, so your job is mostly about mounting hardware into the right substrate at the right height and spacing, then setting up the extension arm tension correctly. Wall-mounted installs on wood-framed houses are the most straightforward. Masonry or stucco walls, roofline mounts, and motorized setups add steps and require slightly more planning.
This guide is written for DIY-minded homeowners who are comfortable using a drill, a level, and a stud finder, and who can read a tape measure accurately. You do not need construction trade experience. You do need a second person for lifting and positioning, and you need to take the structural and fastener specs seriously, an awning that shakes loose in a windstorm can cause real damage and injury.
Should you do this yourself? A practical decision checklist
Most standard wall-mounted retractable awnings are well within DIY range. Manufacturer manuals from brands like SunSetter, ALEKO, and Awntech are written specifically for homeowner installation, and typical completion times run one to two hours for a two-person team on a straightforward wood-framed wall. That said, a few situations genuinely call for professional help, and it is worth running through this checklist before you commit.
DIY is reasonable when
- You are mounting to a wood-framed wall and can locate studs or a continuous ledger board
- The awning projection is 10 feet or less (well under most permit-trigger thresholds)
- You have a solid, flat mounting surface at a consistent height
- The awning is manual or you are comfortable with basic low-voltage wiring and your motor runs on a standard 120V circuit already present
- You have two adults available for the lifting phase
- Your local jurisdiction treats the install as exempt or requires only a simple permit you can pull yourself
Call a pro or at least get an inspection when
- You are anchoring into hollow-block masonry, unreinforced brick, or aging concrete — adhesive anchor specification (Hilti HIT-HY or equivalent) requires load table calculations that should be verified by a contractor or engineer
- The awning projection exceeds 54 inches on a wall with no additional support and your jurisdiction enforces the IRC/IBC 54-inch exemption threshold
- You need new electrical circuit work for a motorized unit (NEC Article 430 motor circuit rules require a licensed electrician in most jurisdictions)
- Your home is in a high-wind zone (basic design wind speed above 130 mph on your local ASCE 7 map) and no stamped engineering came with the awning
- The awning is freestanding and requires new concrete footings (IRC Chapter 4 footing rules apply, and frost-line depth varies by location)
- Your HOA or municipality requires a permit and structural drawings before installation
- The mounting wall has rot, damaged sheathing, or inconsistent framing that makes solid fastener placement uncertain
Types of retractable awnings and how the parts fit together
Before you order anything or start drilling, it helps to know exactly what type of awning you are dealing with, because the mounting method, the hardware list, and the installation sequence all differ meaningfully between styles.
Wall-mounted awnings
This is the most common residential style. The awning head (the tube that holds the rolled fabric) mounts to the wall via two or more wall brackets. A pair of rafter arms (also called extension arms) unfold as the fabric extends, supporting the front bar of the awning. Wall-mounted units can attach to the wall face, to the soffit, or to the fascia depending on available height. They are the easiest to install and the most widely available in kit form.
Freestanding awnings
Freestanding retractable awnings mount to posts rather than a wall, which gives you flexibility in placement but adds significant complexity. You need to pour or set concrete footings for the posts, which triggers IRC Chapter 4 foundation rules and often requires a permit. The awning itself installs the same way as a wall-mounted unit once the posts are in, but the structural load path is entirely different, all wind uplift and lateral load transfers through the posts and into the footings.
Cassette vs. open-roll
A cassette awning encloses the fabric roll, motor, and arms inside a protective housing when retracted. This protects the fabric from UV and weather when not in use and is the right choice if the awning will spend long periods retracted. Open-roll (or semi-cassette) designs leave the tube and arms exposed, cost less, and are slightly lighter, which can matter when you are mounting high on a wall.
Rafter-arm sliders
The rafter arm connects the head bar to the front bar of the awning. Each arm has a slider (also called a carriage or shoe) that rides along the front bar as the fabric extends and retracts. The slider must be properly seated in the front bar channel before you attach the arm to the wall bracket, it cannot be inserted after the arm is locked in position. Getting this sequence right is one of the most commonly missed steps in DIY installs, and it is covered in detail in the step-by-step section below.
Manual vs. motorized
Manual awnings use a hand crank or pull cord. They are simpler, cheaper, and require no electrical work. Motorized awnings use a tubular motor (typically 25 to 60 Nm torque range for residential sizes, per Somfy LT50/LT60 spec documentation) inside the fabric tube. Somfy and similar brands offer both RTS (radio/wireless) and wired control options. The motor adds about 15 to 30 minutes to the installation if the wiring is already present, but adds significantly more time and cost if a new circuit is required.
Materials: frames, fabric, motors, and hardware
Frame materials
Most retractable awnings sold for residential use have aluminum frames. Aluminum is lightweight (important during the two-person lift), corrosion-resistant, and strong enough for typical awning loads. Some commercial-grade and custom units use steel, which is heavier and stronger but requires more attention to corrosion protection, especially near the coast. Wood-framed DIY retractable awnings are possible, the sibling topic on how to make a retractable patio awning covers that path in detail, but for a purchased awning kit, you will almost certainly be working with aluminum. For a detailed, step‑by‑step walkthrough on building a wood-framed DIY retractable awning, see how to make a retractable patio awning (internal resource 5d28435e-a589-495b-af42-810d81025752).
| Frame Material | Weight | Corrosion Resistance | Best For | Relative Cost |
|---|---|---|---|---|
| Aluminum | Light | Excellent | Most residential kits, coastal areas | $ |
| Galvanized Steel | Heavy | Good (with coating) | Larger spans, commercial or custom builds | $$ |
| Powder-coated Steel | Heavy | Good | Heavy-duty freestanding frames | $$ |
| Wood (DIY only) | Medium | Poor (requires sealing) | Custom DIY builds, rustic aesthetic | $–$$ |
Fabric types
Awning fabric is rated by its weave, UV block, and water resistance. Acrylic solution-dyed fabric (Sunbrella is the most recognized brand) is the standard for quality residential awnings: it blocks 95 to 98 percent of UV, resists mold and fading, and typically lasts 8 to 12 years before replacement is needed. Open-weave fabrics let some light through and are cooler underneath. Solid vinyl-coated fabrics are waterproof (not just water-resistant) but trap more heat and are heavier. If you are replacing fabric rather than installing a new awning, the sibling topic on how to replace patio awning fabric goes through the full replacement procedure.
Motors and controls
For a standard 10- to 14-foot wide residential awning, a motor in the 25 to 35 Nm range is typical. Wider or heavier awnings (16 to 20 feet) generally need 50 to 60 Nm. Somfy's documentation for the LT50 and LT60 series shows rated current draws of roughly 1.1 to 2.5 amps depending on model, meaning these motors run comfortably on a standard 120V, 15-amp circuit. Per NEC Article 430, motor branch-circuit conductors must be sized to at least 125% of the motor's full-load current, and a proper disconnecting means is required. If you do not have an existing circuit at the mounting location, hire a licensed electrician, this part of the job is not a gray area.
Brackets and hardware
Wall brackets are the most structurally critical components. They come with the awning and are engineered for specific load paths, do not substitute them. The fasteners, however, depend on your wall type and are often specified in ranges by the manufacturer. SunSetter's 900XT and 1000XT installation instructions, for example, specify 1/4-inch lag screws for upper wall brackets and 1/4-inch bolts and nuts at the rafter ends. These are minimum specs; your wall substrate determines whether you need longer lags, concrete anchors, or adhesive anchors.
Tools, consumables, and fasteners you will need
- Cordless drill/driver with clutch settings (18V or higher recommended)
- Hammer drill (required for masonry mounting)
- Masonry bits sized to your anchor diameter (typically 3/8" or 1/2" for sleeve or wedge anchors)
- Standard drill bits for pilot holes in wood (1/8" and 3/16" are most common)
- 4-foot level (longer is better — do not trust a 2-foot level for a 12-foot span)
- Tape measure (25-foot minimum)
- Stud finder (magnetic or electronic)
- Chalk line or laser level for marking bracket positions
- Pencil and painter's tape for marking wall
- Socket set and wrenches (3/8" drive, metric and SAE)
- Step ladder or scaffold (get the right height — don't overreach)
- Safety glasses and gloves
- Silicone sealant or butyl tape (exterior grade) for sealing fastener penetrations
- Thread-locking compound (for arm pivot bolts)
- 1/4" lag screws (length depends on substrate — 2.5" to 3.5" into solid wood framing minimum)
- 1/4" machine bolts and nylock nuts for rafter arm ends
- Wedge or sleeve anchors for concrete/masonry (Simpson Strong-Tie Wedge-All or equivalent)
- Adhesive anchors for hollow masonry (Hilti HIT-HY or equivalent, with correct embedment per load tables)
- Stainless or hot-dipped galvanized fasteners for coastal or high-humidity environments
Fastener sizes, spacing, and mounting surface options
This is where most DIY awning installs either succeed cleanly or fail dangerously. The fastener spec is not just about holding the static weight of the awning, it is about resisting wind uplift and lateral forces that can be many times heavier than the awning itself. Use this section alongside your manufacturer's hardware list, not instead of it.
Wood-framed walls (including stucco or siding over wood framing)
Locate studs and drive lag screws directly into them. A minimum of 1.5 inches of embedment into solid framing is a code floor; 2.5 to 3 inches is more appropriate for awning loads. Use 1/4-inch diameter lags at minimum, 5/16-inch is better if the bracket hole allows it. If brackets land between studs, install a horizontal ledger board (minimum 2x6 Douglas fir or equivalent) spanning at least three studs, then lag through the siding and sheathing into the ledger. This is the preferred method for most awning installs because it lets you position brackets at exactly the right spacing regardless of stud layout.
Masonry (concrete block, poured concrete, brick)
Use mechanical wedge or sleeve anchors (3/8-inch diameter minimum, embedment per Simpson Strong-Tie allowable load tables for your concrete strength, typically 2 to 2.5 inches for poured concrete). For hollow CMU block, mechanical anchors are unreliable, use an adhesive anchor system such as the Hilti HIT-HY with an appropriate all-thread rod sized to carry the calculated load. Hilti's technical data tables provide allowable bond loads by rod diameter, embedment depth, and block condition. Always blow dust from drilled holes and follow injection sequence instructions precisely, adhesive anchors that are installed incorrectly have dramatically reduced capacity.
Ledger board vs. through-bolting
For most residential wall-mounted awnings, a ledger board is the most practical mounting method. It spreads load across multiple studs, gives you flexibility in bracket spacing, and is easy to install correctly. Through-bolting (running a bolt completely through the wall and backing it with a washer and nut on the interior side) is stronger but requires interior access and is typically reserved for situations where the wall framing is unusually light or the awning is unusually heavy or wide.
| Wall Type | Fastener Type | Minimum Diameter | Minimum Embedment | Notes |
|---|---|---|---|---|
| Wood framing (direct) | Lag screw | 1/4" | 2.5" into stud | Hit studs only; 16" or 24" on-center typical |
| Wood framing (ledger) | Lag screw into ledger | 1/4"–5/16" | 2.5" into ledger | Ledger must span min. 3 studs |
| Poured concrete | Wedge/sleeve anchor | 3/8" | 2"–2.5" | Per Simpson Strong-Tie load tables for actual concrete psi |
| Hollow CMU block | Adhesive anchor (HIT-HY) | 3/8" all-thread | Per Hilti tables | Clean hole, follow injection sequence exactly |
| Solid brick | Sleeve anchor or screw anchor | 3/8" | 2" | Avoid mortar joints for primary load anchors |
| Stucco over wood | Lag screw (through stucco into stud) | 1/4"–5/16" | 2.5" into framing | Seal penetration with exterior silicone |
Bracket spacing should follow the manufacturer's spec exactly. Most residential awnings use two or three wall brackets. The outer brackets typically land within 12 inches of each end of the head bar; a center bracket is added for spans over roughly 14 feet. Do not improvise bracket spacing, the head bar is engineered to distribute load to specific bracket positions.
Wind loads, structural forces, and when you need an engineer
Even a manual retractable awning creates significant force on its wall anchors when the wind catches it. Understanding the scale of those forces helps you make good decisions about fastener sizing and whether your wall can handle the load, without needing to be a structural engineer.
The standard method for calculating wind pressure in the U.S. comes from ASCE/SEI 7, which all model building codes reference. The velocity pressure formula is: qz = 0. See an ASCE‑based velocity pressure calculator / explanation (ASCE formula: qz = 0.00256×Kz×...×V^2) for a worked example, using qz = 0.00256×Kz×V^2, a 90‑mph basic wind speed with Kz≈0.85 gives qz≈17.6 psf and a 12'×10' awning (≈120 sq ft) would see about 2,112 lb, plus guidance on distributing that force into bracket/anchor loads. 00256 × Kz × Kzt × Kd × Ke × V², where V is the basic wind speed in mph from your local ASCE wind map, and the K factors adjust for exposure, topography, and directionality. As a concrete example: a 90-mph basic wind speed in a typical suburban setting (Kz approximately 0.85, other factors near 1.0) gives a design velocity pressure of roughly 17.6 psf. A 12-foot by 10-foot awning presents about 120 square feet of projected area, which means a total design wind force near 2,100 pounds distributed across the wall brackets. That is not a number to ignore when selecting anchor size and embedment.
Most manufacturers address this practically by warning you to retract the awning in winds above a certain speed (ALEKO, for example, explicitly instructs users to retract in wind, heavy rain, or snow). This is the correct operating guidance, retractable awnings are not designed to be permanent wind barriers, and their wind ratings typically assume the awning is retracted in storms. However, even in moderate wind the forces on extended arms and brackets are real, and your anchors need to be sized appropriately for normal operating conditions.
You need a licensed structural engineer or a PE-stamped awning design when: your jurisdiction is in a high-wind coastal area on the ASCE 7-22 maps (basic wind speed above 130 mph), the awning is freestanding and requires engineered footings, the mounting wall has no clear load path to foundation (for example, a lightweight screen enclosure wall), or local code specifically requires stamped calculations for any awning permit. FEMA's summary of ASCE 7-22 wind highlights is a useful starting point for understanding which map your jurisdiction uses, the 2022 update changed wind speed contours in several regions compared to ASCE 7-16.
Permits, codes, HOA, and neighbor issues, handle these first
Many homeowners skip permit research and regret it later. Do this before you order the awning, not after it arrives.
When a permit is likely required
The IBC Section 3105 and IRC model codes give some guidance, and many jurisdictions have adopted an exemption for small awnings: typically, an awning supported entirely by the exterior wall, projecting 54 inches (1,372 mm) or less, and requiring no additional structural support may be exempt from a building permit. The moment you exceed that projection, add footings, mount over a public right-of-way, or install on a commercial property, a permit is very likely required. These rules vary by municipality, the 54-inch rule is a model code reference, not a universal standard, so confirm with your local building department before starting.
When a permit is required, you will typically need to submit a site plan showing awning location, dimensions, and setback from property lines, along with product specs or (for custom builds) structural drawings. For standard manufacturer-engineered awnings, the product manual and spec sheet often satisfy the structural documentation requirement. For freestanding awnings with footings, stamped engineering drawings are commonly required.
HOA considerations
If you live in an HOA community, check the CC&Rs before choosing a color, style, or size. Many HOAs restrict awning visibility from the street, limit fabric colors to approved palettes, or prohibit certain mounting styles on front elevations. Getting HOA approval after installation can mean removal at your expense. Submit your product specs and a photo rendering to the architectural review committee first, the approval process typically takes two to four weeks.
Neighbor and setback considerations
Setback requirements for awnings are usually less restrictive than for permanent structures, but they are not zero. If the awning projection would overhang a shared fence line or a utility easement, check with your local planning department. Overhanging a public sidewalk or alley almost always requires a special encroachment permit.
Measuring and layout: get this right before you touch the wall
Measure the available wall width first and confirm it is at least 6 inches wider than your awning on each side to allow room for the arm pivot brackets. Measure the distance from the desired mounting height to any obstruction above (roofline, soffit, window trim), you need clearance for the cassette or head bar plus the mounting bracket height, typically 8 to 12 inches total. The ideal mounting height positions the front edge of the extended awning at least 7 feet above the patio surface for comfortable clearance; work backwards from that to set your bracket height.
- Mark the centerline of the awning on the wall with a light pencil mark
- Measure out equally from the centerline to each end bracket position per the manufacturer's spec
- Use a laser level or long straight level to draw a level horizontal line through both bracket positions
- Mark stud locations across the mounting zone using a stud finder — mark both edges of each stud
- Confirm that bracket positions land on studs or plan your ledger board to bridge between studs
- Mark pilot hole locations for each bracket within the bracket slot range
- Double-check all measurements before drilling anything
A common mistake here is trusting a short level on a long span. A 2-foot level can show level while your overall line is off by an inch or more over 12 feet. Use the longest level you have, or better yet, snap a chalk line between two points you have confirmed level with a water level or laser.
Step-by-step wall-mounted installation
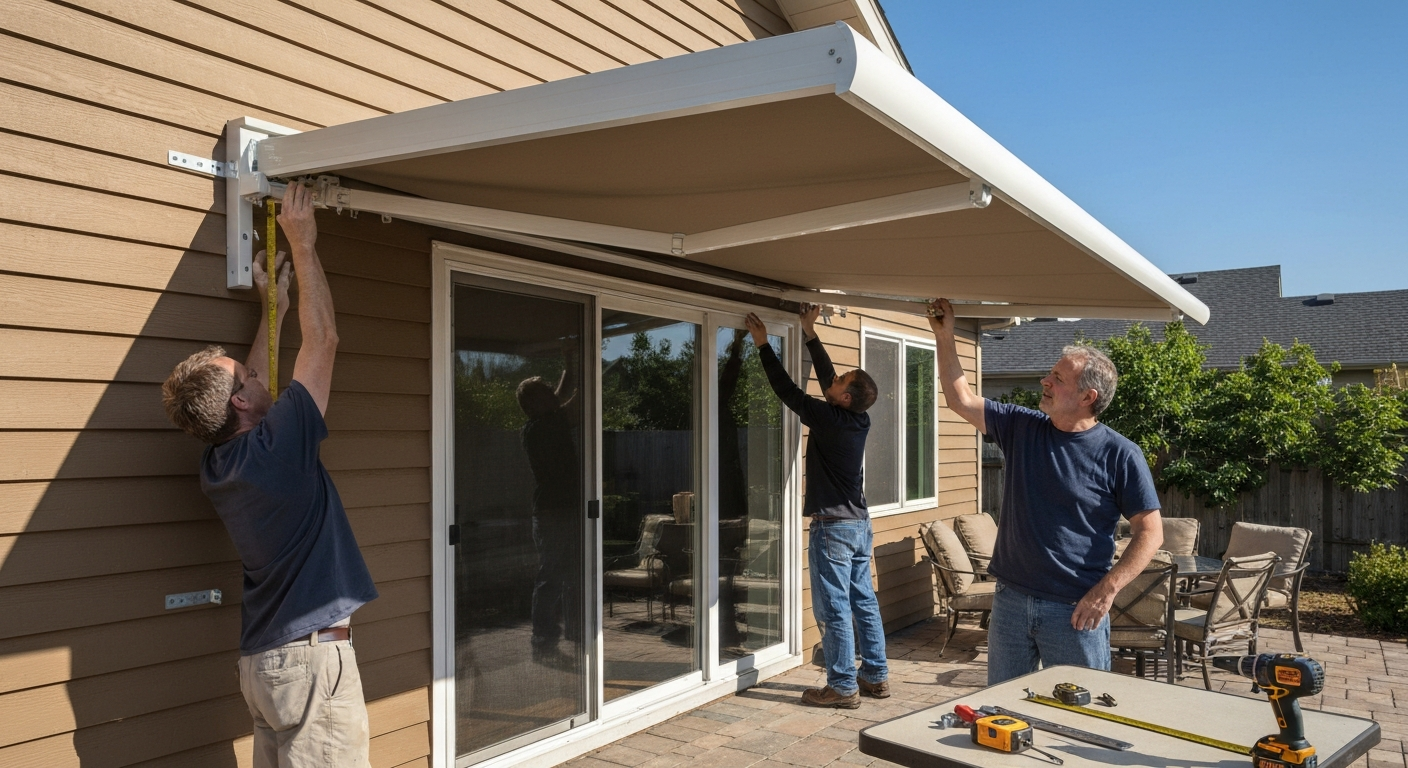
This sequence covers a standard wall-mounted retractable awning with two rafter arms. For a general overview and checklist, see how to install patio awning. Have your second person present from Step 4 onward, the awning tube and cassette are heavy and awkward, and trying to hold it while drilling is how brackets end up crooked and people end up hurt.
- Unbox the awning and lay all components on the ground. Compare against the parts list in the manual and identify the wall brackets, arm pivot brackets, rafter arms, front bar, and fabric tube or cassette.
- Install the rafter-arm slider (carriage) into the front bar channel BEFORE assembly. Slide it in from the open end of the front bar. This cannot be done after the arm is attached. This is the most commonly missed step.
- Attach the rafter arms to the fabric tube/head bar pivot points per the manual. Use thread-locking compound on pivot bolts and tighten firmly but not so hard you bind the arm movement.
- Hold or temporarily support the awning assembly at the planned mounting height and mark the wall bracket hole positions through the bracket mounting slots. A laser level line drawn earlier makes this fast.
- Remove the awning from the wall. Drill pilot holes (wood) or hammer-drill anchor holes (masonry) at each marked position.
- For wood framing: drive lag screws partway, hang the wall brackets on the lags, level the bracket, then drive the lags to full torque. Do not fully torque one bracket before the other is at least roughly positioned — you need to confirm level across both before locking down.
- For masonry: insert anchors, set brackets on anchor bolts, check level, then torque to specification per the anchor manufacturer's torque table.
- With both wall brackets secured, have your helper assist in lifting the awning head bar/cassette and dropping the mounting sleeves onto the wall brackets. Secure the locking pins or bolts that retain the head bar to the brackets.
- Attach the lower end of each rafter arm to the arm pivot brackets on the wall (or to the wall directly, depending on design). Insert the arm end slider into the front bar channel if not already done (step 2).
- Extend the awning manually about halfway. Check that both arms extend evenly and that the front bar remains parallel to the wall. Adjust arm tension per the manufacturer's adjustment procedure — most arms have a tension bolt at the pivot end.
- Extend fully and check the fabric for even tension across the width. The fabric should be taut without pulling the head bar off the wall brackets.
- Retract fully and confirm smooth, even retraction. The arms should fold back symmetrically.
- If motorized: connect the motor lead to the control wiring per the Somfy or manufacturer wiring diagram, program the limit switches (open and close positions), and test with the remote or wall switch.
- Seal all fastener penetrations through siding or stucco with exterior silicone caulk. This prevents water infiltration behind the wall bracket base plates.
Installing a freestanding retractable awning
Freestanding installs follow the same awning assembly sequence above from Step 1 onward, but the mounting surface is a post-and-beam structure rather than a wall. The critical added work is the footing design and post installation.
Post footings must extend below the local frost line, which ranges from zero inches in frost-free areas to 48 inches or more in northern climates (IRC Table R301.2 lists frost depth by location). A common residential approach is a 12-inch diameter Sonotube form filled with 3,000 psi concrete, with a post base anchor set while the concrete is wet. Post base selection (Simpson Strong-Tie ABA or equivalent) should match post size and load requirements. The post-to-beam connection and beam-to-awning head bar connection must be engineered to resist the same wind uplift forces discussed in the structural section above. This is the part of freestanding installs where a structural engineer review is most commonly warranted.
Rafter-arm slider installation and tensioning in detail
The rafter arm slider deserves its own focused treatment because it is the most mechanically complex part of a retractable awning and the source of most operational problems after installation. The slider (carriage) allows the front bar to move up and down slightly as the arm extends and retracts, keeping the fabric tensioned correctly through the full range of motion.
The slider must be inserted into the front bar channel from the open end before the arm is mounted. Once the awning is assembled and hung, you cannot insert it. If you find your front bar has no slider after mounting, you will need to partially disassemble the arm attachment to access the bar end. Arm tension is set at the pivot bracket: tighten the tension bolt clockwise to increase tension (stiffer arm, fabric stays tighter when extended) and counterclockwise to decrease. Most manufacturers give a target extension angle of 30 to 45 degrees from horizontal at full extension, below 30 degrees and water pools on the fabric; above 45 degrees and you lose coverage. Adjust both arms equally or the front bar will tilt.
Motorized awning wiring and programming
If the awning comes with a tubular motor pre-installed in the fabric tube, the wiring is usually straightforward: the motor lead exits from one end of the tube and connects to a junction box or switch box at the bracket. Somfy motors are available in both RTS (radio, wireless remote) and wired configurations. The RTS option is much easier to install because no wire needs to run from the motor to a wall switch, the receiver is built into the motor and pairs to the remote.
For wired controls, the motor lead runs to a surface-mounted junction box, then to a wall switch. This wiring must be done in conduit or in a weatherproof raceway if run on an exterior wall surface. NEC Article 430 requires that motor branch-circuit conductors be sized to at least 125% of the motor's full-load current, that a disconnect means be provided within sight of the motor, and that motor-rated overcurrent protection be installed. For a typical awning motor drawing 1.5 amps, a 15-amp circuit with appropriately sized conductors is fine, but a licensed electrician should confirm the circuit and pull any required permit.
Limit switch programming sets the fully open and fully closed stop positions. This is done through a brief programming sequence with the remote or a programming button on the motor head, follow your specific motor's instructions. Setting limits incorrectly is the most common cause of motor overheating (the motor runs past the stop and stalls against the mechanical end of travel).
Troubleshooting and post-install testing
| Problem | Likely Cause | Fix |
|---|---|---|
| Front bar not level when extended | Arms tensioned unequally or brackets not level | Re-level brackets; adjust arm tension bolts equally |
| Fabric bunches or creases on one side | Slider not seated correctly or arm pivot misaligned | Check slider engagement; realign arm pivot bracket |
| Motor runs but awning doesn't move | Limit switch set wrong; motor disconnected from tube | Reprogram limits; check tube drive connection |
| Awning won't retract fully | Arm tension too high or slider binding in channel | Reduce arm tension; lubricate front bar channel |
| Water pools on fabric | Extension angle too shallow (under 30 degrees) | Increase arm tension to raise front bar angle |
| Brackets flex or creak in wind | Fasteners not fully torqued or into wrong substrate | Re-check fastener engagement; torque to spec |
| Motor overheats and trips | Limits set past mechanical end stops | Reprogram open and close limit positions |
| Fabric tears at attachment point | Over-tensioned or damaged hem track | Replace fabric; check hem profile seating |
Maintenance and safety best practices
Retractable awnings are lower-maintenance than most patio structures, but they are not zero-maintenance. Build these habits in from the start and the awning will last the full expected fabric life of 8 to 12 years or more.
- Retract in winds above 20 to 25 mph and in any rain or snow — this is the single most important maintenance habit
- Clean fabric two to four times per year with mild soap and cold water; rinse thoroughly and allow to dry fully before retracting
- Inspect all wall bracket lag screws annually for tightness and any signs of rust or movement at the wall
- Lubricate arm pivot points, slider channel, and any exposed metal-on-metal contact points with a dry PTFE or silicone spray (not petroleum-based grease, which attracts dirt)
- Inspect fabric seams and hem channels at the start of each season for fraying, tears, or mold
- Check motor limit switch settings after any manual override event
- If storing for winter in cold climates: retract fully, cover the cassette or open tube end with a breathable cover, and confirm all fasteners are tight before re-opening in spring
- Re-seal fastener penetrations through siding or stucco every two to three years with fresh exterior silicone
Realistic cost and time estimates
For a straightforward wall-mounted awning on a wood-framed wall, plan on two to three hours of total installation time including layout, mounting, and testing, longer if you are installing a ledger board first or running wiring for a motorized unit. Manufacturer guidance (Awntech, for example) cites one to two hours for many standard models with two people, and that is achievable on a clean install. Add an hour if this is your first time and you are working carefully through the manual steps.
| Component / Task | Typical Cost Range | Notes |
|---|---|---|
| Manual retractable awning (10'–14' wide) | $400–$1,200 | Kit price varies widely by brand and quality |
| Motorized retractable awning (10'–14' wide) | $800–$2,500+ | Includes motor; excludes electrical circuit work |
| Ledger board materials (2x6, lags, sealant) | $30–$80 | If not mounting directly to studs |
| Masonry anchors and drill bits | $20–$60 | If mounting to concrete or masonry |
| Electrician (new circuit for motor) | $200–$600 | Highly variable by region and run length |
| Building permit (where required) | $50–$300 | Depends entirely on jurisdiction |
| Professional installation (labor only) | $150–$400 | For standard wall-mounted awning |
| Total DIY (manual, wood frame wall) | $450–$1,350 | Most common residential scenario |
When to stop and call a pro
Most homeowners who are comfortable with a drill and a level can complete a wall-mounted retractable awning install successfully. The situations where I genuinely recommend stopping and calling a licensed contractor or structural engineer are: you discover the wall framing behind your planned mounting location is damaged, undersized, or missing; your anchor calculations (using the ASCE wind pressure approach) show loads that exceed what your wall substrate can reliably carry; you are in a high-wind coastal area and no stamped engineering was provided with the awning; or the electrical circuit for a motorized unit requires new panel work. In those cases, the cost of a professional consult is small compared to the cost of an awning that fails in a storm or a permit violation that requires removal.
FAQ
What primary authoritative sources should be cited to ensure the article is safety‑first and technically accurate?
Cite model codes and standards (ASCE/SEI 7 for wind loads; IBC Section 3105 and IRC Chapter 4 for awning, canopy, footing and frost‑protection rules), manufacturer installation and fabric‑replacement manuals (SunSetter, ALEKO, Awntech) for hardware and procedural details, motor and control datasheets (Somfy) for torque, current and wiring guidance, anchor manufacturer load tables (Simpson Strong‑Tie, Hilti) for anchor sizing/embedment, NEC/NFPA 70 Article 430 for motor branch‑circuit rules, and local building department/permit guidance (municipal code pages) for permit triggers.
Which specific technical questions must the article answer about wind and structural loads?
What design wind speed and exposure category applies locally (use ASCE maps and local code edition); how to compute velocity pressure and resultant force on the projected awning area (show ASCE qz formula and a worked example); how to convert total wind/uplift force into bracket loads and required anchor capacities; what safety factors to use and when engineered attachments or stamped calculations are required (e.g., large spans, commercial occupancy, or heavy wind regions); and limits for DIY installs (suggest maximum projected area and expected wind rating for DIY without an engineer).
What permit and code questions must be answered for homeowners?
When does an awning trigger a building permit (projection >54"—check local code, new footings, structural modifications, covering public right‑of‑way, or commercial use usually trigger permits); which code edition your jurisdiction enforces (ASCE/IBC/IRC editions affect wind speed); fire and combustibility requirements for fabrics per IBC; whether electrical work (motor) requires an electrical permit and licensed electrician per local code; and how to obtain and what documentation (drawings, load calcs) the authority may request.
What mounting‑surface and anchoring technical details must be covered?
How to evaluate common mounting surfaces—solid concrete/masonry, hollow/block masonry, wood‑framed stucco/siding with continuous ledger, and metal studs—plus recommended anchor types for each (mechanical wedge or sleeve anchors for solid concrete, adhesive anchors per Hilti for conditions requiring chemical anchors, through‑bolting to a continuous ledger or structural beam for wood framing). Include embedment depth, anchor diameters and spacing examples derived from manufacturer tables, how to check substrate condition, and when to use backing plates or ledger beams.
What exact fastener sizes, spacing and a sample table should be provided?
Provide a practical table (by awning size range) mapping required anchor type, minimum anchor diameter, recommended embedment, minimum edge distances and spacing. Example rows: up to 10' projection—(4) 3/8" wedge anchors, 3" embedment, spacing 24" o.c.; 10'–14' projection—(6) 1/2" wedge anchors, 3.5" embedment, spacing 18–24" o.c.; through‑bolt ledger—1/2" bolts with washers and nuts into 2x ledger/beam; adhesive anchors—3/4" rebar or threaded rod per Hilti tables for high uplift. State these are example starter values and must be confirmed with anchor manufacturer allowable loads and local wind design loads.
What are the exact measuring and layout steps users need before ordering or starting?
Measure awning width (clear opening width), projection from wall to outer edge, mounting height (bottom of roller relative to desired clearance), roof slope/ceiling obstructions, and positions of windows/doors. Check for interior structural members behind siding/stucco (use stud finder and confirm with small exploratory hole). Mark bracket locations at the required centerline height, plumb and square the layout, and record distances between bracket centers. Measure projected area (width×projection) for wind‑load sizing and motor torque selection.