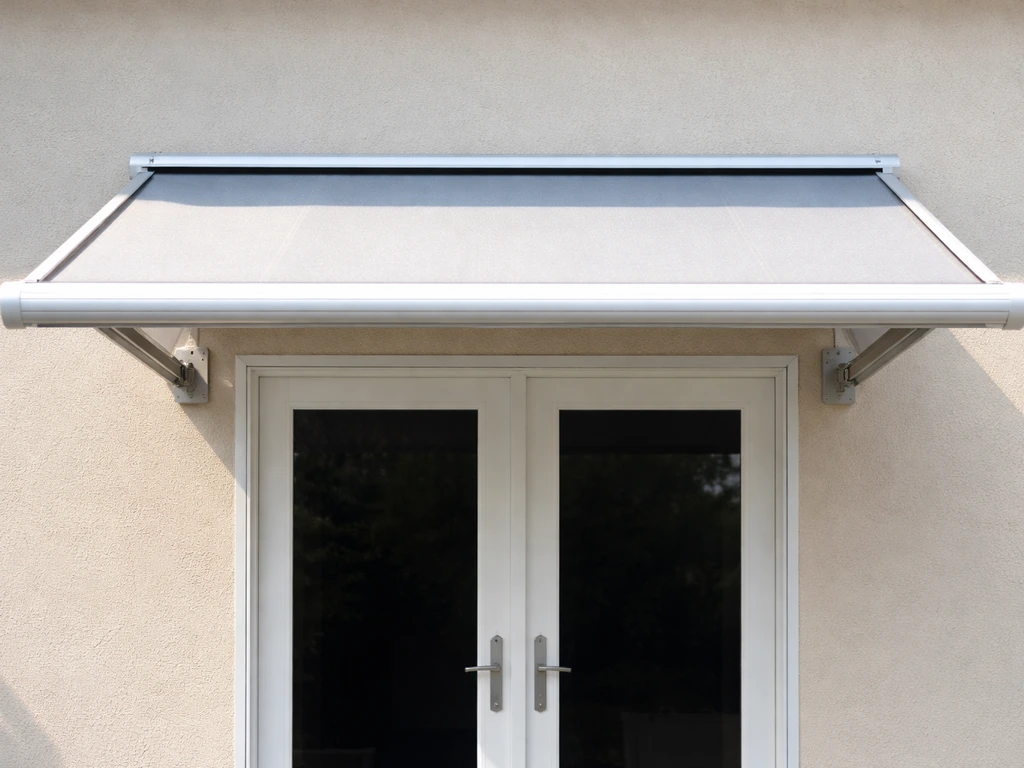
To install a patio awning, you mount an awning rail level on your wall (at least 6 inches above any door or window, and at least 2 inches below the roof overhang), drive lag screws into solid framing or properly anchored masonry, seal every penetration with silicone, then attach your arm assemblies and brackets before checking pitch, level, and smooth operation. The full job takes most homeowners a half-day with one helper, and the single biggest mistake is rushing past the leveling and anchor steps.
How to Install a Patio Awning Step by Step DIY Guide

Celia Vaughn
5 May 2026
Choosing the right patio awning (and why aluminum usually wins)
Aluminum patio awnings are the go-to choice for DIY installation, and for good reason. The frames are lighter than wood or steel, they don't rot, they don't need painting every few years, and the components are engineered to bolt together consistently. That consistency matters a lot when you're working off a ladder and trying to keep things square.
There are two main styles you'll encounter: stationary (fixed) awnings, and retractable awnings with arm assemblies that fold back when you want full sun. If you want to know exactly how to install a retractable patio awning, focus on the arm mounting and the fabric tracking steps alongside the basic rail installation retractable awnings with arm assemblies.
Fixed aluminum awnings are simpler to install and cheaper, but retractable units give you more flexibility and have become much more affordable. If you're considering a retractable option, the installation process shares a lot with what's covered here, though there are additional steps specific to the arm tension and fabric tracking.
To get the patio awning arm slider working correctly, follow the steps for installing the rafter arm slider hardware and setting the track so it moves smoothly arm tension and fabric tracking.
When buying, look at the projection (how far it extends from the wall) relative to your patio width, and check whether the awning comes with a manufacturer installation manual. Brands like Carefree of Colorado label their components consistently across manuals, using terms like awning rail, upper mounting bracket, lower mounting bracket, and arm assembly. Get familiar with your kit's terminology before you open the hardware bag.
| Material | Weight | Maintenance | DIY Friendliness | Cost Range |
|---|---|---|---|---|
| Aluminum | Light | Very low (no rot, no paint) | High — consistent parts, clear manuals | $$–$$$ |
| Wood | Heavy | High (stain, seal, rot risk) | Moderate — more custom fitting needed | $–$$$ |
| Steel/Iron | Very heavy | Moderate (rust risk) | Low — harder to cut and drill on site | $$$–$$$$ |
For most homeowners, aluminum is the clear recommendation. It's what the major residential awning brands build around, the hardware is standardized, and you can find replacement fabric or parts years later without a custom search.
Tools, materials, and safety prep
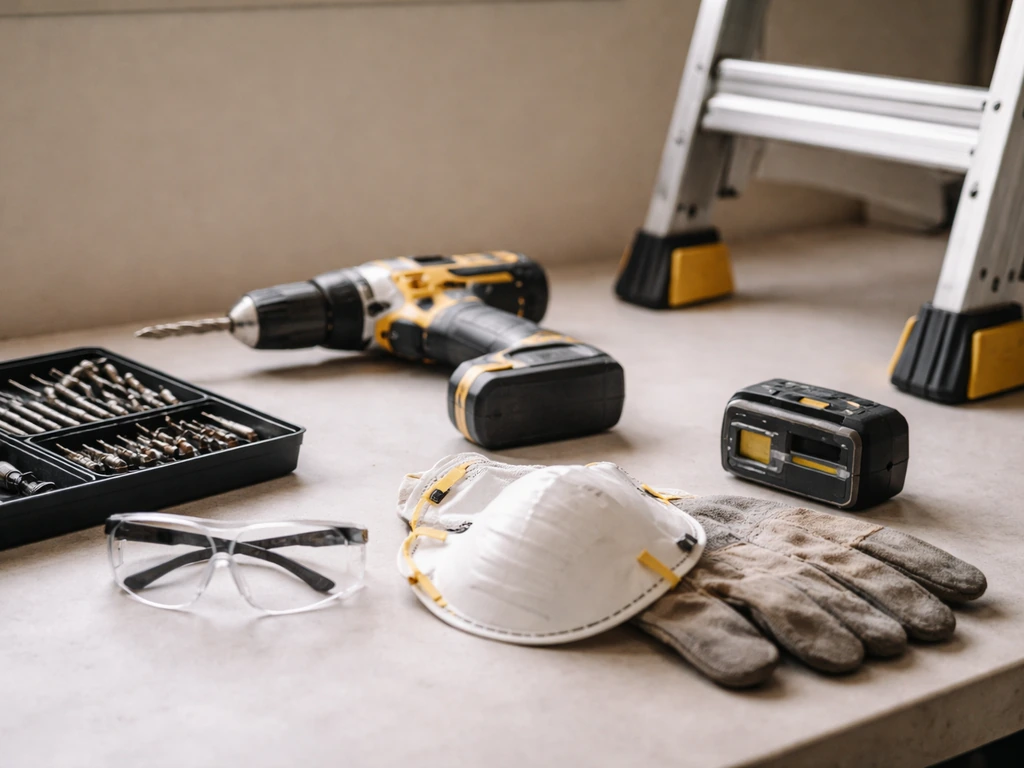
Get everything staged before you touch the wall. Hunting for a drill bit mid-install while standing on a ladder is how things go wrong.
- Cordless drill with Phillips, square-drive, and hex bit set
- Drill bits: 5/32" for wood pilot holes, 3/16" for awning case holes (reamed to 5/16"), 1/4" for wire routing or clearance holes, 3/8" masonry bit if drilling into brick or concrete
- 4-foot level (at minimum) — a longer level is better for getting the rail truly horizontal across wide spans
- Tape measure and pencil
- Chalk line or laser level for marking long horizontal runs
- Stud finder
- Socket set and adjustable wrench
- Caulk gun with exterior-grade silicone sealant
- Putty tape (as an alternative to silicone behind the rail)
- Step ladder or scaffolding rated for your weight plus tools
- Safety glasses and work gloves
- Anti-seize lubricant if you're using stainless steel hardware (stainless bolts can gall and bind when tightening without it)
- All supplied lag screws, lock washers, nuts, shims, and mounting brackets from the kit
On safety: awning rails and retractable arm mechanisms can be heavy and awkward. You really need a second person for this job, especially when lifting the rail into position. Don't attempt it solo. Also, if your awning has a spring-tensioned arm system, be aware that those springs are under significant tension. Follow the manufacturer's instructions exactly for any tension adjustments, and wear eye protection. Springs under load can release unexpectedly.
Measuring, planning clearance, and getting your layout right
Measure twice, drill once. This stage determines whether your awning sits correctly, drains properly, and clears your doors and windows without problems.
Height placement and clearance rules
The awning rail needs to sit at least 6 inches above the top of any door or window it spans, and at least 2 inches below the roof overhang above. If you want your awning mounted higher within the allowed limits, the Carefree of Colorado residential patio awning installation manual specifies clearance from doors or windows to the awning rail and clearance from the roof overhang [clearance from doors or windows to the awning rail and from the roof overhang](https://www.
carefreeofcolorado. com/wp-content/uploads/2022/06/Patio-Awning-Installation-Manual. pdf). Mount it as high as possible within those limits.
Higher placement gives you better pitch range and more head clearance when you're walking in and out. If your awning has a variable pitch system, the mounting height directly affects how steep or shallow you can set the angle, so don't cut it close at the top.
For retractable awnings with lower arm brackets, each arm needs a minimum flat wall area of roughly 81 inches tall by 3.5 inches wide to operate without obstruction. Mark that zone on your wall before committing to a bracket location.
Setting your horizontal line
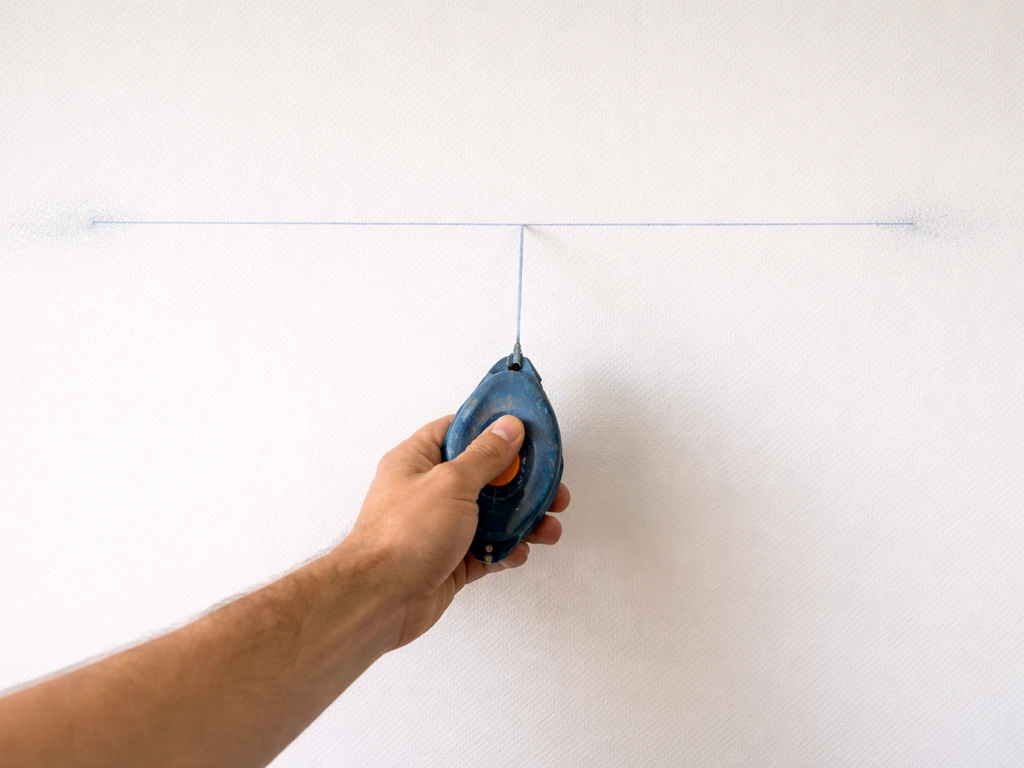
Snap a chalk line or use a laser level to mark the horizontal mounting line across the full width of the installation. The awning rail must be level and parallel with your floor line. Even a small tilt causes water to pool on one side of the fabric and will eventually sag or tear it. Use your 4-foot level to verify the chalk line at multiple points, especially if you're spanning 10 feet or more.
For retractable systems with a square bar or header tube, Sunsation's installation guidance recommends running a rope line across the full bracket span to confirm everything sits in a straight horizontal plane before you drill anything. It's a low-tech check that catches a lot of problems early.
Pitch planning
Awnings need a forward pitch so rainwater runs off the front edge rather than pooling or tracking back toward your wall. A common reference pitch is around 6 degrees, though most retractable systems let you adjust this. If you have an adjustable-pitch awning, plan to set the pitch after the rail and arms are mounted. In rainy conditions, you can also intentionally set one arm slightly higher than the other to direct runoff to one side. The key is that no part of the fabric sags flat or tilts backward.
Finding solid mounting points and picking the right anchors
This is the most important structural step in the whole installation. An awning loaded with wind or a heavy rain can exert serious force on those mounting points. Getting this wrong is how awnings pull away from walls and cause damage.
Wood-framed walls
All brackets must hit studs or other structural framing members. Not drywall. Not sheathing. Studs. Use your stud finder and mark every stud location along your mounting line before you pick final bracket positions. For retractable awnings, place wall brackets within 10 inches of the arm shoulder joint, and space additional brackets as required for your awning's width. The rail or mounting bar needs to land on at least two solid stud hits, more for wider spans.
If you have solid wood siding that's at least 3/4 inch thick, you can mount directly into it with proper lag screws into the framing behind. If your wall is covered with stucco, fiberboard, EIFS, or foam insulation board, do not rely on those surfaces alone. Attach a 1x4 board to the studs first, running the full width of the awning, and mount your rail to that board. This distributes load into the framing and prevents the softer surface material from crushing or cracking under the fastener.
Masonry walls (brick, concrete, block)
For brick or concrete, the standard approach from Sunsation's installation guide is to use 3/8-inch long lag shields with 3/8-inch by 4-inch lag screws, or 3/8-inch concrete drop anchors. Drill into the solid body of the brick, never near the outer edges where the material is weakest and most likely to crack. Some installers mount a 1x4 board to the masonry first using these anchors, then attach the awning rail to the board. That's a solid approach that also makes future servicing easier.
If you're not confident in your masonry anchor work or the wall material is questionable (crumbling mortar, hollow block sections, or you can't confirm what's behind the surface), stop and consult a structural contractor. Improperly anchored masonry fasteners fail silently until a wind event proves the point.
Step-by-step: mounting brackets, rails, and supports
- Mark your horizontal mounting line using a chalk line or laser level, then verify it's level with a 4-foot level at several points across the span.
- Use a stud finder to locate and mark all studs along the mounting line. Cross-reference your bracket spacing requirements against actual stud locations and adjust bracket positions within allowed tolerances.
- For stucco, fiberboard, or foam walls: cut your 1x4 mounting board to the full width of the awning, hold it on the line, mark through the board into the stud locations, then pre-drill through the board and attach it to the studs with lag screws before moving on.
- Apply silicone sealant or putty tape to the back of the awning rail (the surface that will sit against the wall or mounting board) before fastening. This seals the rail-to-wall joint and prevents water from tracking behind it.
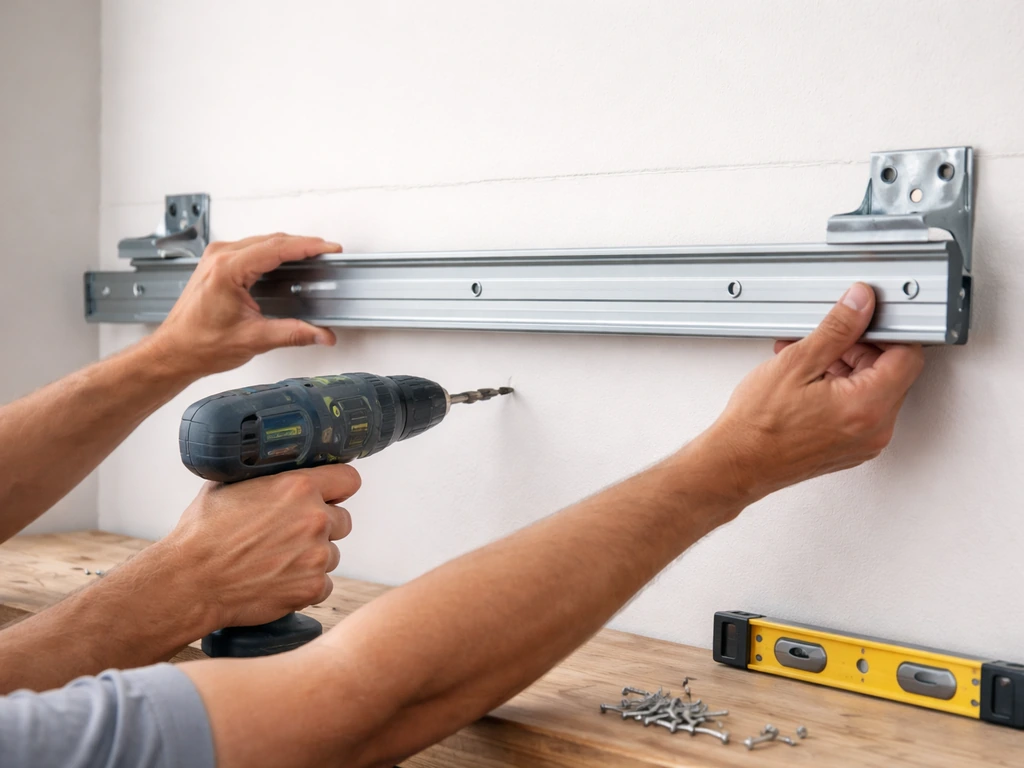
- With your helper, lift the awning rail to the mounting line and hold it in position. Use clamps or temporary screws to tack it in place while you confirm level one more time.
- Drill pilot holes at each bracket or lag screw location. For wood framing, use a 5/32-inch bit for pilot holes. For the awning case, drill 3/16-inch pilot holes first, then ream them out to 5/16 inch before installing the lag screws.
- Drive your lag screws with lock washers through the rail or mounting brackets into the studs or anchors. Snug them firmly but don't over-torque aluminum components. If you're using stainless steel hardware, apply anti-seize lubricant to the threads first to prevent galling.
- Attach the upper mounting brackets to the rail per your manufacturer's diagram. For retractable awnings, position the upper brackets within 10 inches of where each arm shoulder will sit.
- Install arm assemblies by connecting them to the upper brackets, then extend the arms to locate and mark the lower bracket positions. Lower brackets on freestanding or wall-projection styles typically land 37 to 50 inches below the bottom of the awning housing.
- Drill pilot holes for the lower brackets using a 5/32-inch bit, then attach each lower bracket using two #10 x 3/4-inch flat head screws or the hardware specified in your manual.
- If your system is motorized, drill the wire routing hole (typically 1/4 inch) at the specified location, route the wire, and seal the hole immediately with silicone sealant.
- Confirm that no screw heads protrude into the arm travel path. Arms must be able to close completely without contacting any hardware.
Weatherproofing, sealing, and checking alignment and operation
Once everything is mounted, go back and seal every penetration point where a lag screw or anchor entered the wall. Carefree of Colorado awning owner’s manual guidance hosted on Manuals.plus also emphasizes sealing each wall penetration during attachment to support weatherproofing seal every penetration point where a lag screw or anchor entered the wall. Use exterior-grade silicone and tool it into a smooth bead. This isn't optional. Water that gets into wall penetrations causes rot in wood framing and staining or corrosion in masonry, often months before you notice any visible damage inside.
The back of the awning rail should already be sealed with silicone or putty tape from the mounting step. Check the top edge of the rail where it meets the wall and add a caulk bead there too if any gap is visible. On masonry, pay extra attention to the interface between any mounting board and the wall surface.
Alignment and pitch check
Extend the awning fully and step back. The lead rail (the front bar at the outer edge of the fabric) should be parallel to the awning housing at the wall. If it's not, your arm tension or pitch is uneven. On adjustable-pitch systems, use the 6mm hex screw and 3/4-inch adjustment nut on each arm knuckle: clockwise raises the pitch, counterclockwise lowers it. Make small adjustments and recheck. Both arms should reach the same pitch so the lead rail stays parallel.
Retract the awning fully and confirm it closes without fabric bunching or the arms catching. Extend and retract it two or three times to feel for any resistance or binding. For manual awnings, the hand crank or pull rod should engage smoothly. For retractable awnings with fabric center supports, verify that bracket placement doesn't interfere with the support mechanism.
Final level check
Put your level on the awning rail one more time after everything is tightened down. Tightening screws can subtly shift a rail, especially on uneven surfaces. If the rail has shifted, loosen the screws slightly, add a shim where needed, and retighten. Most kits include shims for exactly this reason.
Troubleshooting common problems (and when to call for help)
Awning won't retract or extend smoothly
The most common cause is an arm that's binding because the rail isn't level or the lead rail isn't parallel to the housing. Check alignment first. Also look for debris or obstructions in the arm joints, and check whether the pivot points need lubrication. Spray silicone or dry PTFE lubricant on arm pivot points, not WD-40, which attracts dirt. If a manual awning has a spring tension issue, be very careful. Springs in retractable arm systems are under high tension, and adjusting them incorrectly can cause injury. If you're not comfortable with spring tension work, this is a legitimate reason to call a professional.
Fabric is sagging or pooling water
Sag usually means the pitch is too flat or one arm is set lower than the other. Adjust the pitch upward slightly using the arm knuckle adjustment. If the awning has a center fabric support, confirm it's properly engaged. For fixed awnings, sag after installation often means the rail wasn't mounted level, which is harder to fix after the fact. Check level, and if the rail has drifted, you may need to remount it with shims.
Water is tracking back toward the house
If rain is running toward the wall instead of off the front edge, your pitch is insufficient or backward. Increase the forward pitch on your adjustable arms. Also re-check the silicone seal at the top of the rail. If water is finding a way behind the rail, it'll run down the wall regardless of pitch.
Uneven walls and shimming
Walls are rarely perfectly flat. If your awning rail rocks or gaps against the surface, don't force it tight. Use the shims supplied with your kit (or cut your own from composite shim stock) to fill the gaps before tightening. Forcing a rail tight against an uneven wall can bow the rail and cause the fabric to track unevenly.
Brackets pulling away from the wall
If you notice any movement at the bracket connection points after installation, stop using the awning and investigate immediately. This usually means the lag screws didn't reach solid framing, or masonry anchors weren't set properly. Do not just re-tighten and hope. Pull the brackets, confirm what's behind the wall surface, add a mounting board to reach the framing, and reinstall with correct anchors. An awning that pulls free in a windstorm can cause serious damage.
When to get professional help
Call a professional if: you can't locate solid framing within a workable bracket spacing, you're dealing with significant masonry work and aren't confident in anchor placement, your wall surface is damaged or structurally questionable, or the awning is very large (wider than 16 feet or projecting more than 10 feet) and the wind load calculation isn't clear. There's no shame in getting a structural assessment before drilling into your home.
The cost of a consult is a fraction of what pulling a damaged awning off a wall repair costs. For specialized setups like motorized retractable systems with complex wiring, or if you're replacing awning fabric rather than doing a full installation, those are separate processes worth looking at individually.
If you are replacing awning fabric, you can usually start by removing the end caps and sliding the old fabric out, then re-threading the new fabric to match the roller or arm tracking system.
FAQ
Can I install a patio awning directly into drywall or sheathing?
Most awnings need mounting into solid framing, and the rail should land on at least two stud hits. If your stud spacing does not line up with the bracket spacing, use the kit’s mounting board approach (for example, a 1x4 ledger) or adjust bracket positions to hit studs, rather than anchoring into drywall or sheathing.
Is caulk or silicone sealant really necessary if the awning is lag-screwed tightly?
It is a bad idea to skip the seal, even if the screws feel tight. Exterior-grade silicone should be tooled smooth around every penetration (and where the top of the rail meets the wall) to prevent water from migrating behind the rail, which can cause hidden rot or corrosion over time.
How do I choose the correct rail height if I have a low roof overhang or multiple doors?
Because the rail height determines pitch range and clearance, measure your door clearance again after you account for the rail being at least 6 inches above the top of any door or window it spans, while also staying at least 2 inches below the roof overhang. If you are using an adjustable-pitch system, confirm you still have enough adjustment travel once the rail is set.
My wall has stucco or foam board. What changes for mounting the awning?
Check the wall behind the surface, not just the surface thickness. For stucco, fiberboard, EIFS, or foam board, mount through a ledger that is fastened into studs, so the fasteners transfer load into structure instead of into brittle or compressible materials.
What should I check to avoid hitting electrical wiring or plumbing behind the wall?
Before drilling, verify where wiring or plumbing runs. If you are not sure, use a non-contact stud finder and look for marked electrical zones, then keep fasteners within the bracket paths that land on studs or within the ledger you install into studs. Avoid guessing, because retractable and motorized systems can hide additional wiring.
What’s the most common reason a retractable awning binds when it opens or closes?
If the awning housing or rail is not level, alignment will be off and the lead rail will not stay parallel during extension and retraction. Re-check level before tightening fully, then loosen slightly, shim, and retighten, because once fasteners are tightened on a slightly tilted rail, fabric tracking problems usually persist.
What lubricant should I use on awning arm joints, and what should I avoid?
Avoid WD-40 on pivot points. Use a lubricant recommended for outdoor awning pivots, or silicone spray / dry PTFE on the arm joints, then remove any excess so dirt does not build up and cause future sticking.
When should I stop and call a professional instead of continuing the DIY install?
If you cannot confirm solid backing behind the mounting points, stop and reassess. For questionable masonry (crumbling mortar, hollow sections) or when you cannot locate framing within workable bracket spacing, call a structural contractor rather than relying on anchors that may fail under wind.
My mounting surface is uneven, how do I handle gaps between the rail and the wall?
Add shims only before you fully tighten, and do not force the rail flat against an uneven wall. If the rail rocks, use the kit shims (or equivalent composite shim stock) to fill gaps so the rail stays stable, because bending the rail can cause uneven tracking and premature wear.
Can I use the same lag screws and bracket placement for brick or concrete as I would for wood framing?
No, the anchoring method matters. Lag shields and anchors for masonry require correct hole size and embedment, and they should be placed into solid body material, not near weak outer edges. If you drill near edges or use the wrong anchor type, the fastener can fail silently until a wind event.
What should I do if a bracket feels loose or the awning shifts after installation?
If you see movement at the bracket connections after installation, do not keep using the awning. Remove the brackets, confirm what is behind the wall surface, install a proper ledger into studs if needed, then reinstall with correct anchors and re-seal the penetrations.
Are spring tension adjustments on retractable awnings something I can safely do myself?
For spring-tensioned retractable systems, the springs are under load, so incorrect tension changes can cause injury and component damage. Only adjust tension using the manufacturer’s instructions and safety precautions, and if the steps feel unclear, have a pro handle the tension work.
What if it rains and water runs toward the wall instead of off the front edge?
If rain runs toward the wall, first confirm pitch direction and re-adjust forward pitch on adjustable arms. Then re-check that the top rail seal is continuous, because water can get behind the rail even with correct pitch if the upper interface seal is compromised.
If I only want to replace the fabric, do I still need to redo the rail and bracket installation?
If you are not replacing a full awning kit, fabric replacement is typically different from a full install. For many systems, you remove end caps and slide the old fabric out, then re-thread the new fabric to match the roller or arm tracking path, but you should follow the specific kit instructions to avoid mismatched tracking.