You can install asphalt shingles on a patio roof yourself if your roof framing is solid, your deck is at least 3/8-inch exterior-rated plywood or OSB, and your slope is 2:12 or steeper. Anything below 2:12 and asphalt shingles are off the table regardless of what you do with underlayment.
How to Install Shingles on a Patio Roof Step by Step

Celia Vaughn
14 Jun 2026
Get those two things confirmed first, then the rest of the job follows a clear sequence: deck prep, drip edge, underlayment, starter course, shingle courses, flashings at every wall and penetration, and ridge caps. If you are wondering how to install flashing on a patio roof, focus on step flashing at walls, apron/base flashing at the wall head, and correct overlap at each joint flashings at every wall and penetration.
This guide walks you through every step in that order.
Planning your shingle patio roof project
Before you buy a single bundle of shingles, you need three numbers: your roof slope, your deck span rating, and your square footage. These will determine whether shingles are even the right material, what underlayment system you need, and how many materials to order.
Measuring slope and confirming shingle compatibility
Roof slope is expressed as rise over run: a 4:12 slope rises 4 inches for every 12 inches of horizontal run. To measure it, hold a level horizontally against a rafter, measure 12 inches along the level from one end, then measure straight down from that point to the rafter. That vertical distance is your rise. Both GAF Timberline HDZ and Owens Corning Duration shingles list 2:12 as the absolute minimum slope for asphalt shingle installation.
If your patio roof sits between 2:12 and just under 4:12, you're in what manufacturers call the low-slope range, and it requires a modified underlayment approach (more on that below). At 4:12 and above, you follow standard steep-slope procedures. If your pitch is below 2:12, switch to roll roofing or a modified bitumen membrane instead.
If your patio roof is below that minimum slope, roll roofing is an option, and you’ll need to follow the product’s overlap and underlayment requirements for best results.
Checking your deck and framing
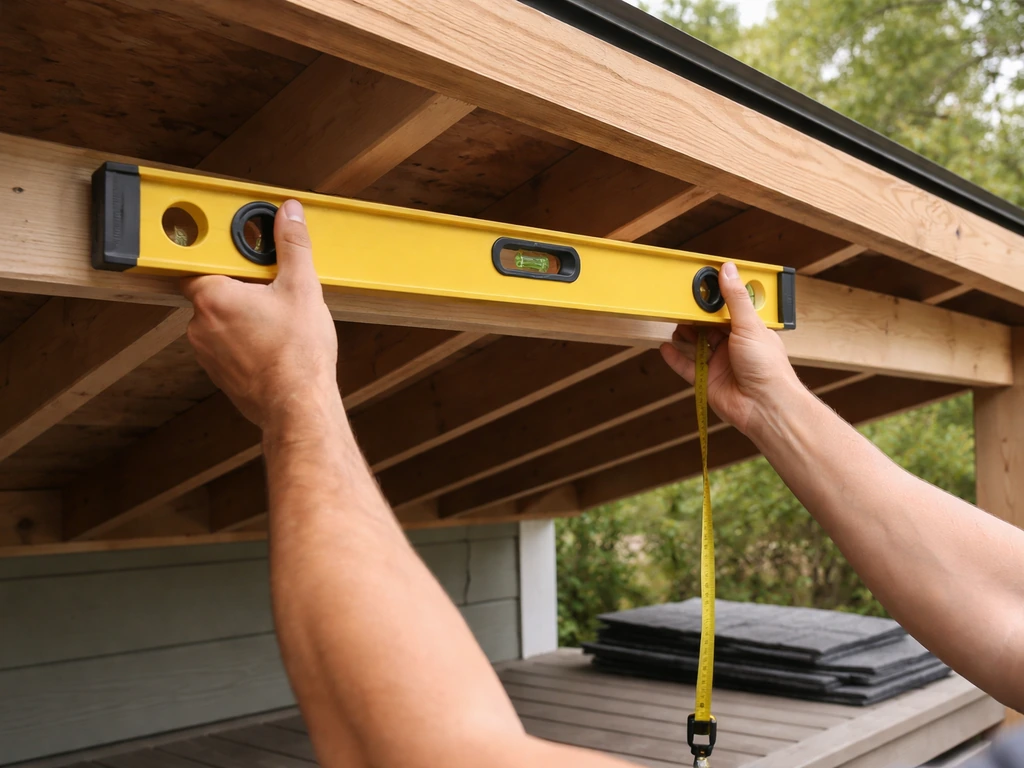
Walk the deck before you do anything else. It should feel solid underfoot with no bounce, no soft spots, and no visible rot or delamination. Look for the span-rating stamp on the sheathing panels: this tells you the maximum rafter spacing the panel is rated for. If your rafters are spaced at 24 inches on center, your deck panels need to be rated for that span.
Thin or underrated decking causes deflection between rafters, which kills fastener holding power and leads to shingles lifting or leaking over time. The minimum thickness for any major shingle brand is 3/8 inch exterior-rated plywood or OSB, but 1/2 inch or 5/8 inch is better on 24-inch spacing. Replace any damaged panels before you start.
Permits and measurements
Most municipalities require a permit for a new patio roof structure, and many require one even for a re-roof if you're changing the material or doing significant deck work. Check with your local building department before you start. When it comes to measurements, calculate your roof area in squares (one roofing square equals 100 square feet). Measure length times width for a simple shed-style patio roof, then add 10-15% for waste and cuts. For a gable patio roof, calculate each slope separately and add them together. Order materials based on that number plus your waste factor.
Materials and underlayment for patio roof shingles
Getting the material list right before you start saves you two trips to the supply house and one expensive mistake on the roof. Here's what you need and why each piece matters.
Shingle types
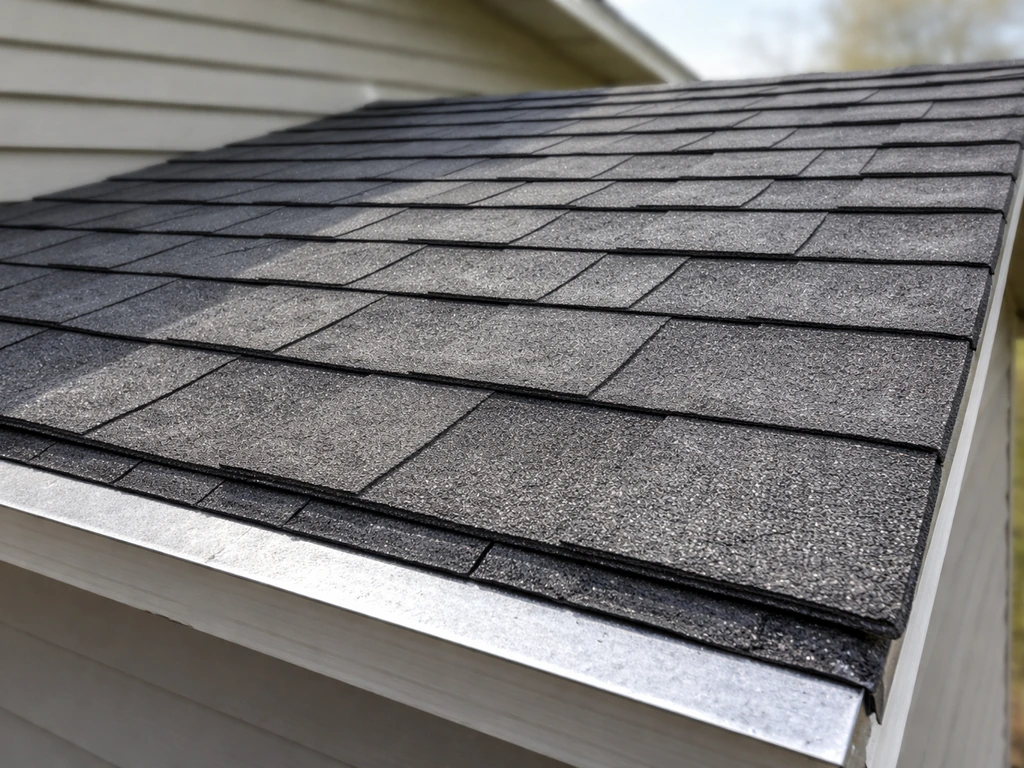
For most patio roofs, a standard 3-tab or architectural (dimensional) asphalt shingle works fine. Architectural shingles like GAF Timberline HDZ or Owens Corning Duration are thicker, heavier, and more wind-resistant than 3-tab, and they're worth the modest price difference for anything you're attaching to the house. On a patio roof that will get walked on for cleaning, architectural shingles also hold up better underfoot. Both product lines require the same minimum 2:12 slope and 3/8-inch deck substrate.
Underlayment options by slope
This is where slope really drives your material selection. The IRC (Section R905.2) requires underlayment for all asphalt shingle installations, and manufacturers specify different systems depending on slope. NRCA emphasizes that underlayment is critical to steep-slope asphalt shingle roof system performance, and while codes set minimum requirements, manufacturer system specifications can add further constraints.
| Slope Range | Underlayment Required | Notes |
|---|---|---|
| 2:12 to <4:12 (low slope) | Self-adhered ice & water barrier (full coverage or per manufacturer) | Owens Corning requires self-adhered barrier with specified overlaps; standard felt is not sufficient alone |
| 4:12 to <21:12 (standard slope) | One layer of #30 felt or synthetic equivalent, or one layer of #15 felt | Minimum per IRC R905.2; manufacturer may require more in cold climates |
| 21:12 and steeper | Two layers of #15 felt or one layer #30 | Rarely applies to patio roofs |
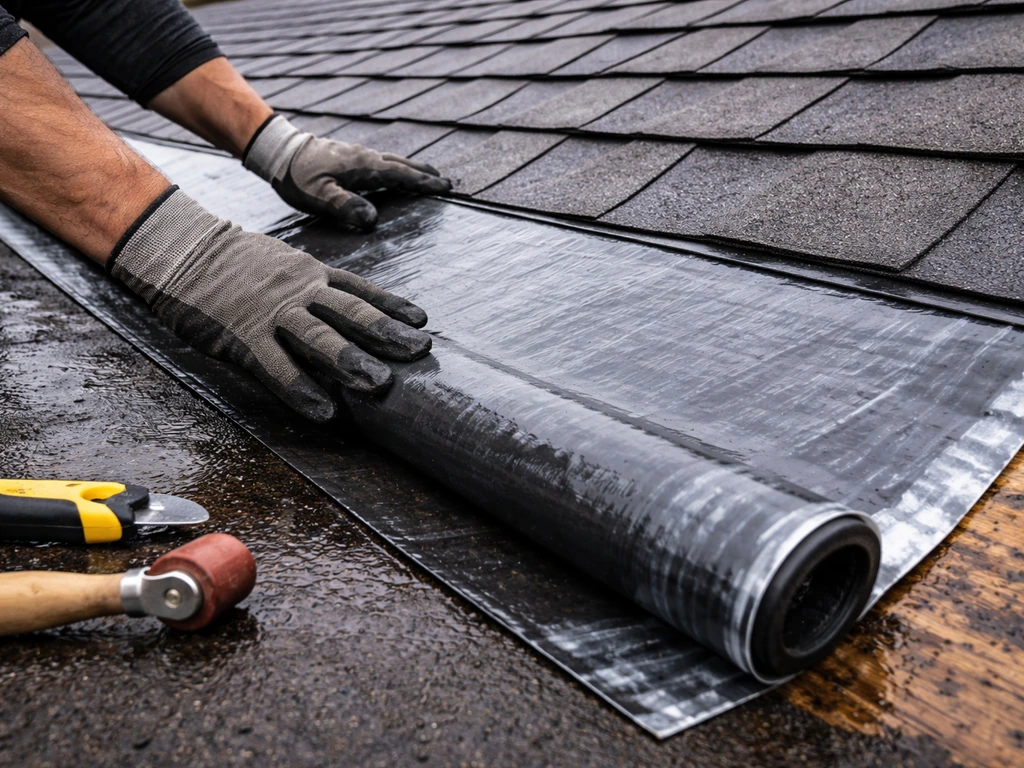
For low-slope patio roofs (2:12 to just under 4:12), use a self-adhered ice and water barrier like Owens Corning WeatherLock Mat across the entire deck. This gives you the secondary water barrier that compensates for the slower water runoff at low pitches. On standard slopes (4:12+), a quality synthetic underlayment is easier to work with than felt, stays in place better in wind, and has become the go-to choice for most DIYers. Whatever you use, the underlayment must meet ASTM standards referenced in IRC Chapter 9. The IRC Chapter 9 roof assembly requirements reference applicable ASTM standards for underlayment materials ASTM standards referenced in IRC Chapter 9.
Flashing, drip edge, and fasteners
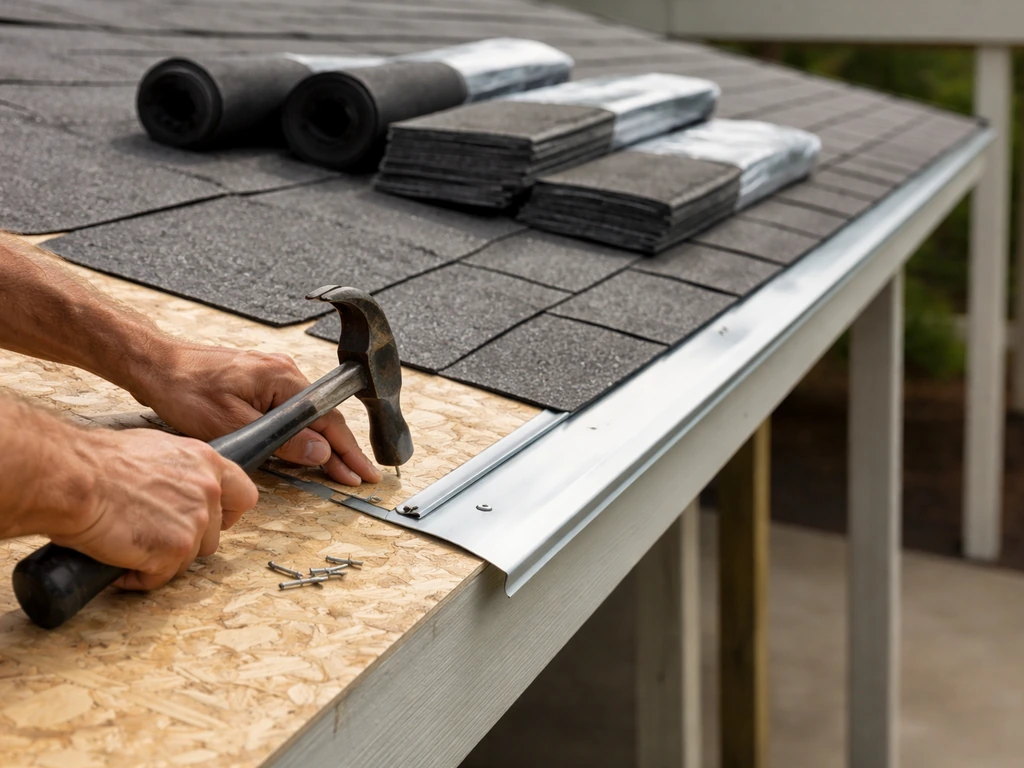
You'll need corrosion-resistant metal drip edge for the eaves and rakes (aluminum or galvanized steel), step flashing and base flashing for any wall intersections, and valley metal if you have intersecting roof planes. IRC R905.2.8.5 requires drip edge on all shingle roofs at both eaves and rakes. For fasteners, use roofing nails with a minimum 3/8-inch head diameter, driven flush (not countersunk, not proud of the surface). Galvanized or stainless ring-shank nails hold better than smooth-shank in high-wind areas. Most shingles require four nails per strip in normal conditions and six nails in high-wind zones.
Step-by-step: installing shingles on your patio roof
Work from the bottom of the roof up. Every layer laps over the one below it to shed water away from the structure. Don't skip steps or change the order here: the sequence is specifically designed so that water never has a path back under a layer.
- Install eave drip edge first, nailed to the deck at roughly 8-10 inch intervals before underlayment goes down. The drip edge goes under the underlayment at the eaves so water drains off the edge properly.
- Roll out underlayment starting at the eave, working horizontally across the roof. Lap each course over the one below by 2 inches minimum (more overlap for low slopes). Fasten per the IRC pattern: mechanically fastened underlayment requires a grid fastening pattern, not just edges. Use cap nails or staples depending on your product's spec sheet.
- Install rake drip edge on top of the underlayment at the rakes (sides). This is the opposite order from the eaves and it's intentional: rake drip edge over underlayment, eave drip edge under.
- Snap a chalk line 11 7/8 inches up from the eave edge (for standard architectural shingles with a 5 5/8-inch exposure). This is your first course guideline.
- Install the starter strip course along the eave first. Starter strips are either purpose-made starter shingles or field-cut from regular shingles with tabs removed. They provide the sealant strip under the first full course. Overhang the eave edge by about 1/4 to 3/8 inch so water drips clear of the fascia.
- Lay the first full shingle course with joints offset from the starter strip joints by at least 6 inches. Nail each shingle in the nail strip (the designated fastener zone printed on the shingle), not in the exposure area and not above the adhesive strip. Drive nails flush.
- Offset each subsequent course by half a tab (about 6 inches) to stagger the vertical joints. Most manufacturers provide a specific racking pattern or step pattern in their installation guides. Snap horizontal chalk lines every 10 inches or so up the roof to keep courses straight.
- Cut shingles at rakes with a straight edge and utility knife (score-and-snap works cleanly). Leave a consistent 1/4-inch overhang past the drip edge at the rake.
- At hips and ridges, use ridge cap shingles (purpose-made or cut from 3-tab shingles). Work ridge caps from both ends toward the center on hips, and from the end away from prevailing wind toward the wind side on the main ridge. Nail through the cap shingle's top portion with two nails per cap.
- At the ridge on a shed-style patio roof that butts a wall, you won't have a traditional ridge: you'll have a wall intersection that needs flashing (see next section).
Common mistake: people rush the layout and don't chalk enough lines. After three or four courses, a small drift compounds and you end up with wavy, off-pattern rows that look bad and can affect water shedding. Take the extra five minutes to re-snap lines every few courses.
Flashing details at walls, valleys, and penetrations
Flashing is where most DIY shingle jobs either succeed or fail long-term. The shingles themselves rarely leak. Leaks happen at transitions: where the roof meets a wall, where two roof planes meet in a valley, or where a vent pipe punches through the deck. Get these right and your roof will outlast the shingles.
Wall intersections (step flashing)
Any place your patio roof runs alongside a house wall needs step flashing. Step flashing pieces are individual L-shaped metal pieces (typically 4 inches by 4 inches or larger) that interleave with each course of shingles: one step flashing piece per shingle course, bent so one leg lays on the roof deck under the shingle and the other leg runs up the wall. Each piece overlaps the one below by at least 2 inches. Over the step flashing, install a continuous counterflashing (either embedded in the wall's mortar joint for masonry or tucked under the house's siding). Do not caulk in place of flashing. Caulk fails; metal doesn't.
Head walls (where the ridge meets a vertical wall)
At the high end of a shed-style patio roof where the deck meets the house wall, install a continuous base flashing that runs up the wall at least 4 inches and extends out over the shingles at least 4 inches. This is sometimes called an apron flashing. Run it under the house's siding or counterflash it over siding with a separate metal cap. The IRC requires all flashing to be corrosion-resistant metal; don't use plastic or caulk-only solutions here.
Valley flashing
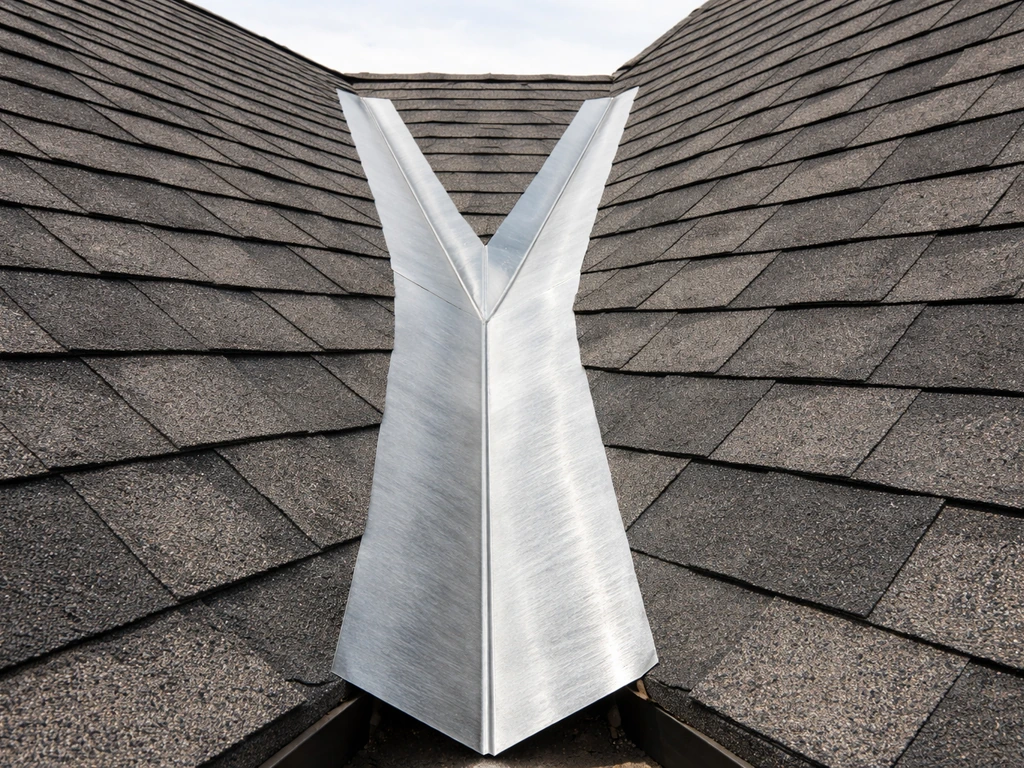
If your patio roof has two slopes meeting in a valley (common on gable-style patio covers), you have two main options: open metal valleys or closed/woven valleys. Open valleys use a continuous piece of valley metal at least 24 inches wide (as required by IRC R905. 2. 8.
2), installed over the underlayment with shingles trimmed back to leave the metal exposed. Open valleys are more forgiving of debris accumulation and easier to install correctly, so they're the better choice for most DIYers. Woven or closed-cut valleys look cleaner but require more precision and more experience to waterproof reliably.
What often goes wrong with valleys: people don't start the valley metal low enough at the eave, so the bottom of the valley drains onto the fascia instead of into the gutter.
Penetrations (vent pipes, fans, skylights)
For vent pipes, use a purpose-made rubber boot flashing that slides over the pipe and nails to the deck. Shingles overlap the front of the boot and tuck under the back and sides. For larger penetrations like exhaust fans or skylights, you need a full four-sided flashing kit (base flashing on the low side, step flashing on the sides, and saddle/counterflashing on the high side). Seal the top of the metal flashing to the penetration housing with roofing-grade sealant, but rely on the physical metal lap for the actual waterproofing. Sealant is secondary; metal overlap is primary.
Ventilation, weatherproofing, and keeping water moving
Patio roofs often get overlooked on ventilation because people assume they're open structures. But if you're building an enclosed patio roof with insulation or a finished ceiling below, you need airflow through the roof assembly to prevent moisture from building up in the rafters and sheathing. Trapped moisture leads to rot, mold, and sheathing delamination within a few years.
The basic rule for a ventilated roof assembly is a 1:150 ratio of net free ventilation area to attic floor area (or 1:300 if you have both intake and exhaust balanced). For a simple patio lean-to attached to the house, this usually means soffit vents at the eave and either a ridge vent or gable vents at the high end. If your patio roof is a simple uninsulated structure with open rafters below, ventilation is less critical since the cavity isn't enclosed.
On water-shedding: overlap direction is everything. Underlayment laps over, not under. Shingles lap over, not under. Flashing laps over, not under. Every layer sheds water onto the top of the layer below it, all the way to the gutter. One reversed lap anywhere in the system creates a pocket that holds water. Double-check your work at the eave especially, since this is where many installers make the drip-edge sequencing error.
For low-slope sections (2:12 to just under 4:12), the self-adhered ice and water barrier over the full deck is your main defense. On standard slopes, pay extra attention to the first two or three feet at the eave (ice and water barrier here is a good idea even when not required, especially in climates with freeze-thaw cycles). Seal all nail penetrations through the underlayment with roofing cement when you can, particularly around flashing.
Safety, structural checks, and when to call a pro
Working on a roof is genuinely dangerous, and a patio roof adds some specific hazards: the structure may not yet be fully braced when you're working on it, the slope can be deceptively slippery even at 4:12, and patio roofs often sit over concrete or hard paving where a fall is serious. None of this means you can't do it yourself, but it means you need to set up properly.
Safety setup before you start
- Use ladder standoffs to keep the ladder stable and protect the gutter. Set the ladder at the correct 4:1 angle (for every 4 feet of height, the base sits 1 foot out from the wall).
- On slopes of 6: 12 or steeper, use roof jacks and plank staging to give yourself a flat working platform. They're cheap to rent and make the work dramatically safer and more efficient.
- Wear rubber-soled shoes with good grip. Leather-soled work boots on a shingle roof are a hazard.
- On any roof where a fall could send you off the edge, use a personal fall arrest system: a harness, a rope grab, and a lifeline anchored to the ridge. This is non-negotiable if you're working alone.
- Keep the roof clear of excess materials. Stacking bundle after bundle of shingles on the deck adds unexpected point loads.
Structural checks before loading the roof
Shingles are heavy. A square of architectural shingles can weigh 250-350 pounds. Before you load any materials onto a patio roof structure, confirm that the framing was designed for the load. If you built the structure yourself following a plan that accounted for roofing material dead load, you're likely fine. If you're adding shingles to an existing patio cover that previously had a lighter covering (like aluminum panels or polycarbonate), check the rafter sizing and spacing against a load table or have an engineer or building inspector look at it. Overloading a patio structure is a real risk, especially on older or contractor-built covers that were sized for lighter materials.
When to hire a roofer instead
This is an honest conversation to have with yourself before you start. The job is DIY-friendly when: the framing is solid and verified, the slope is clearly in the 4:12+ range, there are no complicated valley intersections, and you're comfortable working at height with proper safety gear. If you are specifically trying to follow how to install patio roof shingles yourself, the steps and underlayment choices above will help you stay in the DIY-friendly range. The job moves into professional territory when:
- The deck or framing has rot, soft spots, or you can't verify the span ratings. Structural repairs under a roofing job need to be right the first time.
- Your slope is in the 2: 12 to 4:12 range and you're not confident about the low-slope underlayment system. Mistakes here aren't forgiving.
- You have multiple intersecting roof planes, complicated valleys, or the roof geometry is non-standard. Complex geometry multiplies the number of flashing details and the opportunities for water infiltration.
- Your local permit office requires inspections at specific stages and you're not comfortable navigating that process. A licensed roofer handles this as part of their normal workflow.
- The roof meets a wall with existing siding or cladding that you can't easily remove and replace to properly integrate the step flashing. Improvised flashing solutions in these situations almost always leak eventually.
- You're unsure whether the existing patio structure can carry the additional dead load of asphalt shingles. This is worth an hour with a structural engineer before you commit to the material.
If you're going the DIY route but still want backup, consider pulling the permit yourself and having the building inspector check your work at the underlayment and flashing stage before you cover everything up. Inspectors catch things that are hard to see once the shingles are down, and it costs you nothing beyond the permit fee.
If you've also been looking at other patio roofing options like aluminum patio roof panels or metal roofing, those systems have their own installation processes and may actually be a better fit for very low slope patio covers that fall below that 2:12 threshold where shingles won't work. If you are installing an aluminum patio roof instead of shingles, the hardware and fastening steps are different from the shingle underlayment and flashing process aluminum patio roof panels.
If you are converting an aluminum patio roof cover, double-check the framing load and water-shedding details before stepping onto the surface aluminum patio roof panels. If you need to walk on an aluminum patio roof surface, make sure the framing and panels can safely support you, and use proper, non-slip footing and a stable access method before you step up stepping onto the surface aluminum patio roof panels.
FAQ
Can I install asphalt shingles on a patio roof that is exactly 2:12 slope?
Yes, if the deck and products are approved for the minimum slope, use the low-slope approach (full-deck self-adhered ice and water barrier). Also be extra strict about shingle alignment and sealing of nail penetrations near the eave, since wind-driven rain is more likely to find its way under layers at that minimum pitch.
How do I know whether my patio roof decking is strong enough for shingle fastening?
Use the span-rating stamp to confirm rafter spacing compliance, then verify the deck thickness. If you have 24 inches on center rafters, 3/8-inch often works but 1/2- or 5/8-inch holds nails better, especially after temperature movement. Replace any panel that is soft, swollen, or delaminating before underlayment.
What is the best way to lay out shingles so the rows stay straight?
Snap a vertical chalk line and use the starter course as your reference, then re-snap horizontal alignment lines every few courses (not just at the beginning). Avoid “eyeballing” at the edges, because small offsets at the first 2 or 3 feet can create visible waves and uneven exposure later.
Should I install shingles over existing decking and roof coverings?
In most cases you should not layer shingles over an unknown or damaged roof surface. The article assumes you start with solid, correctly rated exterior sheathing and a proper underlayment layer. If you are re-roofing, remove down to the deck, fix rot or loose panels, and then rebuild the system in the correct order.
Do I need to seal every nail hole or only some of them?
Most of the time the system is waterproofed by overlaps, not by sealant. However, the article recommends sealing nail penetrations through the underlayment when you can, especially around flashing and in the eave area. If your climate has freeze-thaw cycles, prioritize sealant at those critical zones rather than trying to seal every fastener.
How do I handle eave drip-edge and the underlayment overlap so water always sheds the right way?
Focus on sequencing at the first 2 or 3 feet from the edge. Underlayment should lap so water runs over it toward the gutter, and the drip edge should be integrated with the shingle course so no reversed lap creates a pocket. Dry-fit the pieces and confirm overlap directions before fastening, especially if you are working around fascia boards.
What’s the safest choice for valleys on a DIY patio roof?
Open metal valleys are usually more forgiving. Use valley metal wide enough for your installation requirements, start the valley metal at the correct height so runoff goes to the gutter system, and trim shingles away cleanly to expose the metal surface. Precision matters, but woven or closed valleys require tighter workmanship to maintain consistent waterproofing.
How should I flash a wall intersection when the patio roof abuts a house?
Use step flashing for the full height of the shingle courses at the wall, overlap each piece by at least 2 inches, then install a continuous counterflashing arrangement (masonry embed or siding tuck with a cap). Avoid caulking “in place of flashing,” and instead rely on the physical metal laps to block water.
What roofing boot should I use for vent pipes, and how do I prevent leaks around them?
Use a purpose-made rubber pipe boot sized to the pipe, nail it to the deck, then shingle over the front and tuck the back and sides under the shingles. The key is a snug fit and correct shingle overlap so water flows down the boot and into the shingle layers, not into the seam.
Do enclosed, insulated patio roofs need ventilation even if they are covered by shingles?
Yes, if the roof cavity is enclosed, you need airflow to prevent moisture buildup in the framing. Aim for the net free ventilation ratio rule (1:150, or 1:300 when intake and exhaust are balanced). Provide soffit intake and ridge or gable exhaust for typical lean-to configurations.
Can I install shingles on a patio roof that has complicated geometry, like multiple valleys?
It becomes harder fast when you have intersecting planes. If you have more than one valley or other complex transitions, consider professional help because consistent waterproofing depends on correct valley start heights, clean shingle trimming, and flawless overlap direction. If you DIY, plan the flashing layout before starting and stage materials for each intersection.
How can I tell if my patio roof framing is at risk of overloading once shingles are installed?
Compare the existing design to the heavier dead load of asphalt shingles (architectural shingles can be hundreds of pounds per square). If the patio cover originally carried a lighter system (like polycarbonate or panels), have the rafter sizing and spacing checked against load tables, or ask for an inspection, before loading more weight onto the structure.