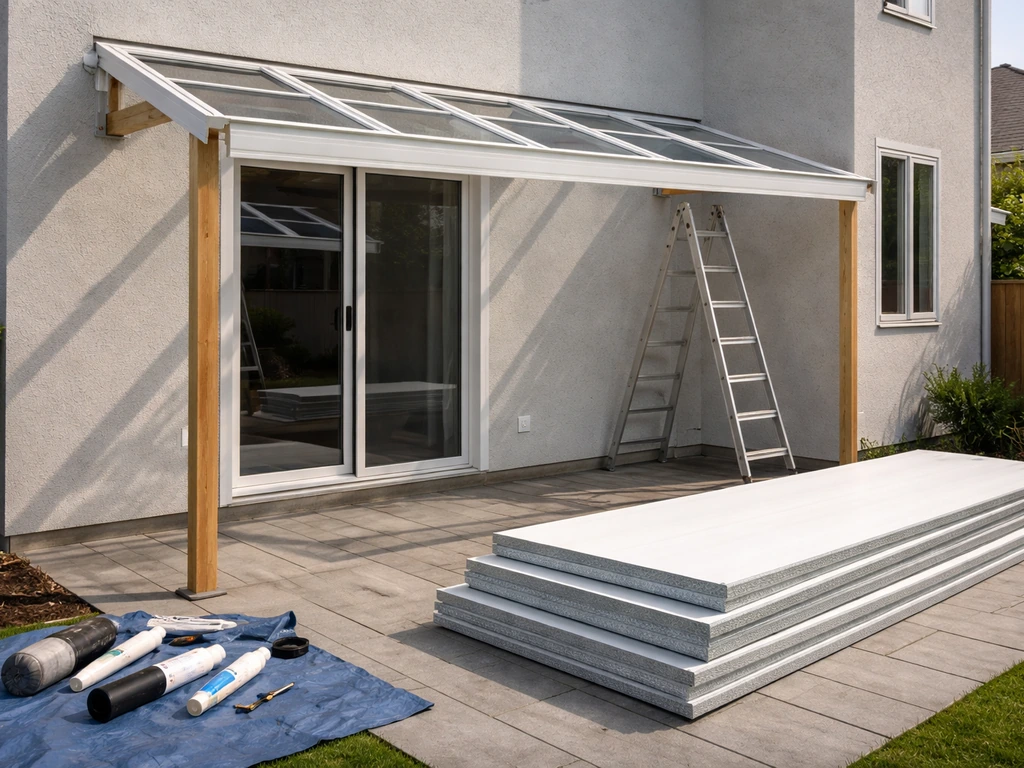
Installing a patio roof yourself is completely doable for most homeowners. The general process goes like this: pick your roof style and panel material, plan your slope and layout, build or attach your framing, install the panels working from one edge across, seal every joint and edge, then do a final structural check before you call it done. The trickiest parts are getting the slope right (even a quarter inch per foot matters), and sealing panel joints well enough that you never see a drip. This guide walks you through every step, with extra detail on insulated panels since they handle a little differently than standard metal or polycarbonate panels.
How to Install a Patio Roof Step by Step DIY Guide

Celia Vaughn
7 May 2026
Choosing the right patio roof system and materials
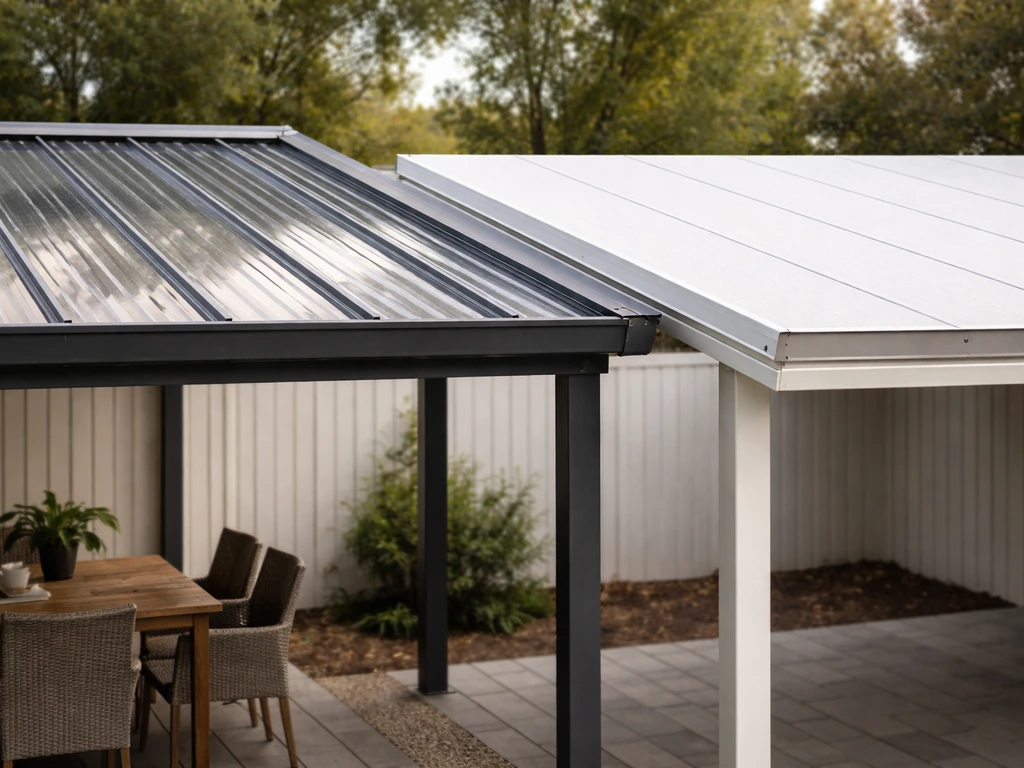
Before you buy anything, decide on two things: the roof style and the panel type. The most common style for a DIY patio roof is the lean-to (also called a shed-style), where one side attaches to your house and the other side drops to a lower elevation. Gable roofs are also possible but involve more framing complexity. For panels, your main options are aluminum, metal (R-panel or PBR-panel profiles), insulated roof panels (IRP), and polycarbonate. PBR panels have an extra purlin-bearing leg, often described as an overlap flange on one side, which changes how the panels overlap and support compared with R-panel profiles PBR-panel or R-panel profiles. Each has real trade-offs.
| Material | Best for | Typical lifespan | DIY difficulty | Key limitation |
|---|---|---|---|---|
| Aluminum panels | Lightweight, low-maintenance, rust-free installs | 30+ years | Moderate | Can dent; thermal expansion needs room |
| Metal R-panel / PBR-panel | Budget-friendly, strong, wide spans | 25-40 years | Moderate | Heavier; cut edges rust if not treated |
| Insulated roof panels (IRP) | Year-round comfort, condensation control, noise reduction | 20-30+ years | Moderate-high | Heavier, costlier, sealing is critical |
| Polycarbonate | Natural light transmission, DIY-friendly fastening | 10-20 years | Low-Moderate | UV yellowing over time; more flex |
If comfort under the patio is a priority (think: a covered outdoor kitchen you use year-round), insulated roof panels are worth the extra cost. They prevent the drum-noise of rain on bare metal and eliminate the condensation dripping that plagues uninsulated roofs in humid climates. If budget is the priority and you just want shade and rain protection, standard aluminum or R-panel metal is the practical pick. Polycarbonate works great if you want light to filter through, but expect to replace it sooner.
For the lean-to style, you will also decide between attaching the roof directly to your house (attached patio cover) or building a freestanding structure. Attached covers are more common, but they require proper flashing at the house wall, and that wall connection is the most common leak point on the whole roof. Flashing on a patio roof is typically installed at the house wall connection first, with step flashing or counter-flashing details to direct water over the panel surface flashing at the house wall. Plan for it from the start.
Planning measurements, slope, and layout
Get the measurements right before you buy materials. Measure the width and depth of the patio area you want to cover, then add your intended overhang (typically 6 to 12 inches past the outer beam). Sketch a simple top-down layout showing post locations, beam spans, and rafter spacing. Post spacing is not a one-size-fits-all number; it depends on the load requirements for your climate (snow load, wind load) and the span rating of your panel system. If you are ordering a kit, the supplier will usually specify post spacing based on your location's loading requirements.
Slope is where a lot of DIYers cut corners, and it causes every leak and ponding problem they deal with later. For metal and insulated panels, the minimum is about 1/4 inch of drop per foot of run (a 1/4:12 pitch). Some insulated panel systems under IAPMO ER-783 require a minimum of 0.5 inch of rise, so check your specific panel manufacturer's requirement. A common range for aluminum patio cover systems is 1/4 inch per foot minimum up to about 1 inch per foot maximum. More slope sheds water faster; less than the minimum and you will get ponding even with a watertight install.
To calculate slope: multiply the depth of your patio (in feet) by the slope rate. For a 12-foot-deep patio at 1/4 inch per foot, the ledger board at the house sits 3 inches higher than the outer beam. Mark that height difference clearly on your plans before you set any posts. Also factor in that the structure will deflect slightly under load over time, which can work against drainage if you build exactly at minimum slope. Building in a little extra slope is cheap insurance.
Rafter spacing depends on your panel type. Most aluminum and insulated panel systems run rafters at 24 inches on center, though some heavier spans go to 48 inches. Check your panel's span table. Mark all rafter locations on the ledger board and outer beam before you start building so your layout is consistent end to end.
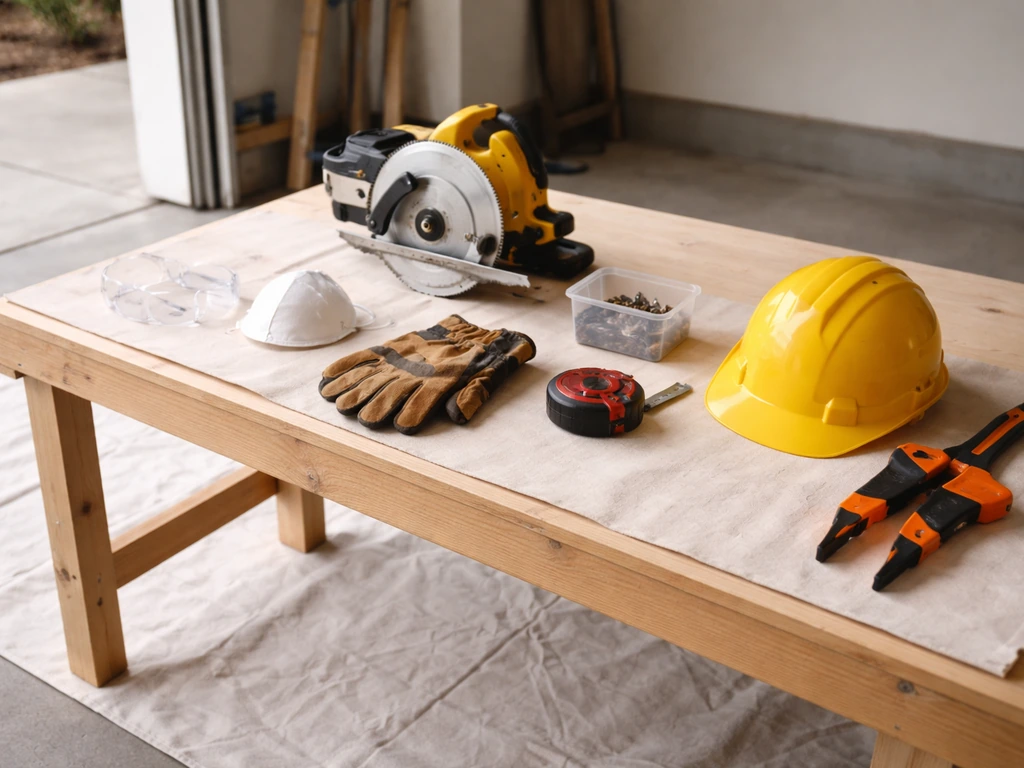
Tools, prep work, and safety for installation day
Get everything staged before the panels arrive. Panels are awkward to maneuver alone, so plan to have at least one helper on site, ideally two for panels over 10 feet long. Insulated panels in particular are heavy and stiff, and trying to wrestle one into position solo on a ladder is how people get hurt.
- Circular saw with a metal-cutting or fine-tooth blade (for trimming panels to length)
- Drill/driver with appropriate bits for your fastener type (self-tapping hex head screws for metal panels)
- Chalk line and tape measure
- Level (4-foot minimum) and a laser level if you have one
- Speed square and framing square
- Ladder and/or scaffolding rated for your working height
- Safety glasses, work gloves, and hearing protection for cutting
- Caulking gun for sealant application
- Tin snips for cutting closure foam and flashing
- Pry bar and hammer for general framing adjustments
Before installation day, confirm your permit status. Many jurisdictions require a permit for permanent patio covers, especially attached structures. Pull the permit if required; it protects you when you sell the house and ensures an inspector checks your structural connections. Check with your local building department; some areas have a simplified process for patio covers under a certain square footage.
Prep the site by clearing the patio surface, marking post locations, and digging footings if you are using posts (typically 12 to 18 inches diameter, 24 inches or deeper below frost line). If you are attaching to the house, locate the wall studs or ledger framing and have your hardware ready. Lay out all your lumber, hardware, and panel materials nearby so you are not climbing down the ladder to dig through a pile every ten minutes.
Installing the roof framework and structure
For an attached lean-to patio roof, the framework goes up in this order: ledger board at the house wall, posts (if needed), outer beam, then rafters or purlins across the span.
- Install the ledger board: Attach a pressure-treated 2x8 or 2x10 ledger to the house wall at the correct height (accounting for your slope calculation). Use lag screws into wall studs or structural framing, not just into sheathing. This connection carries a significant portion of the roof load, so do not shortcut the fastener count.
- Set posts and footings: Pour concrete footings and set post bases or embedded posts at your planned locations. Let concrete cure fully (typically 24 to 48 hours) before loading posts. Use a plumb bob or level to keep posts vertical.
- Install the outer beam: Set and fasten the outer beam (or header) to the top of your posts. Check that the beam is level side to side and at the correct elevation relative to the ledger to achieve your planned slope. This is the most important structural alignment step.
- Install rafters: Attach rafters from the ledger to the outer beam at your planned spacing using hurricane ties or rafter hangers at both ends. Check each rafter for level from side to side and consistent slope front to back. A common mistake here is letting rafters bow or twist slightly, which makes panel installation much harder later.
- Install purlins (if required): Some panel systems, especially metal R-panel, use purlins (horizontal members running perpendicular to rafters) as the direct support for the panels. Attach purlins at the on-center spacing specified by your panel manufacturer.
Once the frame is up, step back and check the whole structure: every rafter slope should look consistent, the outer beam should be straight and level, and nothing should wobble when you push on a post. Fix any alignment issues now. Trying to correct a twisted rafter after panels are on is miserable.
Installing patio roof panels: standard and insulated
Panel installation always starts at one end of the structure (typically the end away from prevailing wind or at a clean architectural edge) and works across. If you are installing a metal patio roof, the next step is choosing the right panel type and fastening method for your framing layout how to install metal patio roof. This ensures panel overlaps shed water correctly and that any cut panels end up at the less visible end.
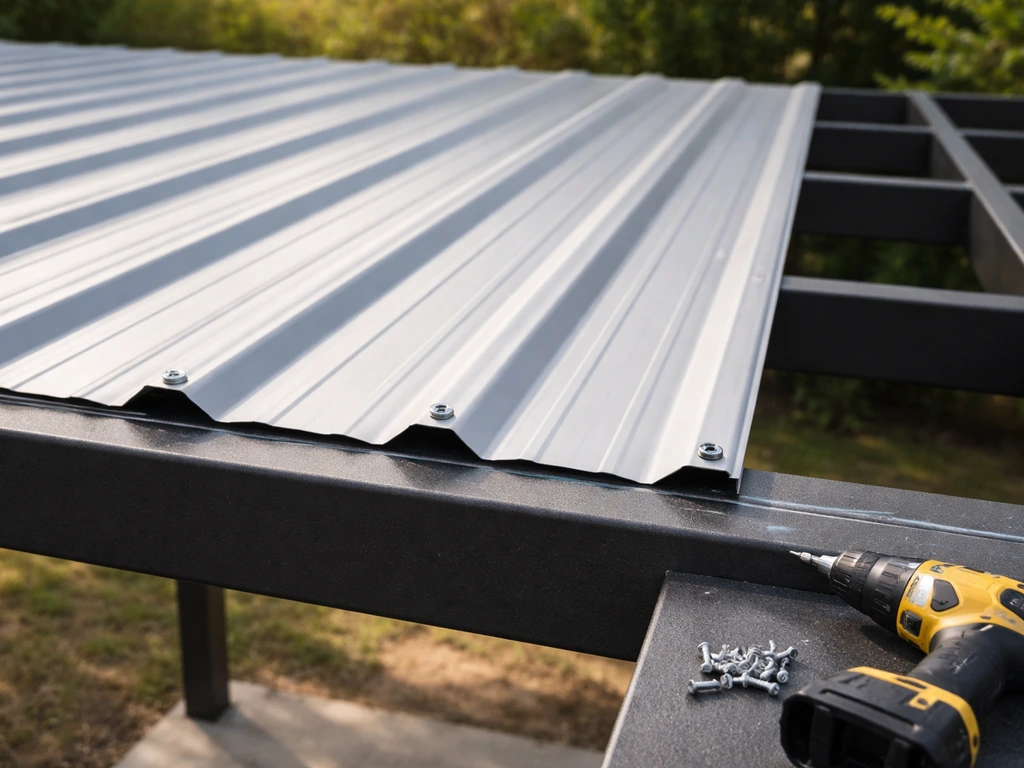
Standard metal panels (R-panel, PBR-panel, aluminum)
Lay the first panel square to the frame. Use a chalk line snapped along the eave to confirm alignment before fastening anything permanently. Most metal panels overlap at the side ribs: the raised rib of one panel tucks under or over the adjacent panel's rib (check your specific panel profile for the correct overlap direction).
Fasteners for metal panels are typically self-tapping hex-head screws with neoprene washers, placed through the flat (valley) of the panel into the rafter or purlin below. Spacing is typically 12 to 24 inches on center along the rafter, with additional fasteners at the eave and ridge. For endlaps (where one panel ends and another begins along the length), [apply butyl sealant tape across the full width of the lower panel just below the fastener line](https://bcimetalroofing. com/wp-content/uploads/2021/03/RPanel_Installation.
pdf) before laying the upper panel on top. The overlap at endlaps is typically 6 inches minimum for low-slope applications.
One thing that trips up DIYers on metal panels: thermal expansion. A large aluminum panel can move roughly 1.5 inches between winter and summer temperatures. Do not overtighten fasteners to the point where the panel cannot move, and do not apply rigid sealant in places where you need to allow expansion. Use flexible butyl tape for endlap sealing rather than hard caulk.
Insulated roof panels (IRP)
Insulated panels are essentially a sandwich: two metal face sheets with a rigid foam core. They are heavier and thicker than standard panels, so you need more helpers and more care during placement. The installation sequence is the same (start at one end, work across), but sealing is more involved because you have a foam core that must be protected from moisture intrusion at every joint and cut edge.
At every panel-to-panel joint and at any cut edge, use the manufacturer's approved sealant and panel seal tape. Generic silicone from the hardware store is not a substitute; the adhesion chemistry matters for long-term performance. At the ends of each panel (where the foam core is exposed), seal the core with manufacturer-approved foam or tape before installing the end cap or closure. If moisture gets into the foam core, you will eventually see delamination and structural degradation of the panel. Take the sealing steps seriously on insulated panels even if they feel redundant.
Condensation control is another insulated-panel-specific concern. Insulated panels perform well in this area compared to bare metal, but you still need to make sure the panel-to-rafter connections are not creating thermal bridges. Follow the manufacturer's fastening instructions for insulated panels; they often specify a particular fastener length and placement to minimize this issue.
For polycarbonate panel roofs, the installation approach is different again, with aluminum base-and-cap glazing bars, specific ridge cap details, and UV-protective film orientation. That is a topic deep enough to deserve its own walkthrough.
Sealing, waterproofing, flashing, and finishing details
This is where patio roofs fail or succeed. A structurally perfect roof that leaks at the house wall or drips at a panel joint is a failure. Plan to spend as much time on sealing details as you do on framing.
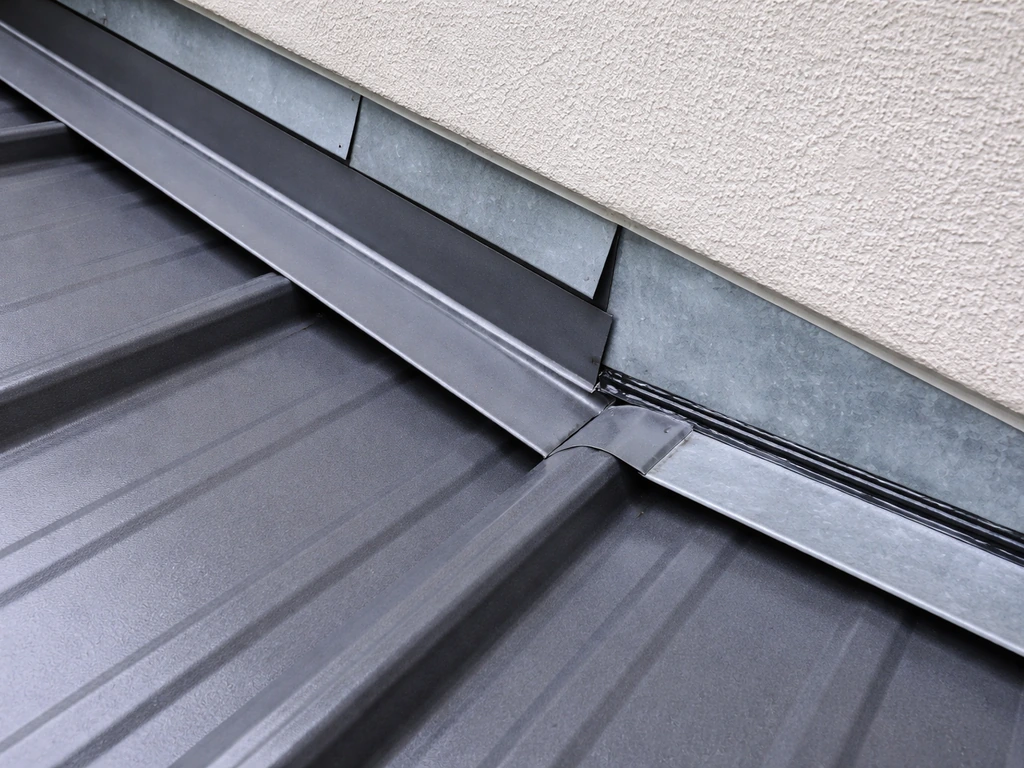
Flashing at the house wall
The roof-to-house connection requires step flashing or a continuous counter-flashing that tucks behind the house siding and laps over the top panel surface. A two-piece flashing system works well: a base flashing that goes on first (over the panel surface) and a counter-flashing that is tucked into a saw-cut reglet in the house wall or slid behind existing siding. Apply a bead of flexible sealant (not hard caulk) at the flashing-to-wall interface. For metal panel profiles, use rubber closure strips that mirror the panel profile to seal the gap between the panel ribs and the flashing. Trying to seal a corrugated panel gap with a flat piece of flashing and caulk alone always fails eventually.
Edge closures
At the eave (low edge) and rake (side edges), use die-cut foam closures engineered for your specific panel profile. These foam pieces fill the void between the panel ribs and the supporting framing, blocking insects, wind-driven rain, and debris from entering under the panel. They are cheap and easy to install, and skipping them is a common mistake that leads to persistent pest and moisture problems. Apply them before fastening the final eave trim.
Ridge caps
If your patio roof is a gable style, the ridge cap seals the peak. For polycarbonate ridge caps, overlap each section by at least 4 to 6 inches (confirm your manufacturer's spec; some require 6 inches). Apply sealant tape at the overlap before fastening. For metal panel ridge caps, apply panel sealant at the ends of each ridge cap piece and at the interface with the top of the panels. Use foam ridge closures under the cap to fill panel profile gaps, just as you would at the eave.
Gutters and fascia
Finish the eave with a fascia board or trim piece that captures the panel edge and gives you a surface to hang a gutter. Even a simple gutter channel on an attached patio cover protects your foundation from concentrated roof runoff. Install the fascia tight to the panel underside, caulk the top edge, and attach the gutter with enough slope (typically 1/16 inch per foot) to drain to your downspout.
Structural checks, anchoring, and when to hire a pro
Before you call the project done, walk through a final structural checklist. Shake each post: nothing should feel loose or rocking. Check every post base connection and confirm the hardware is fully tightened. Pull on the ledger board connection at the house; it should feel absolutely solid. Look along the rafters from the end to confirm they are all parallel and consistent. If anything feels uncertain, address it before loading the roof with furniture or people. If you do need to walk on an aluminum patio roof, stay on the structural support lines and use clean, non-slip footwear to avoid damaging the panels or sealant.
- All post bases bolted and set in concrete footing (not just surface-mounted on a deck without adequate support)
- Ledger board lag-screwed into structural framing, not just sheathing
- Rafter or truss hangers at every connection point, not just toe-nailed
- Hurricane ties installed in high-wind zones
- All panels fastened at every rafter/purlin with correct fastener count
- All panel edges capped with closures or trim
- Flashing fully installed and sealed at house wall
- Permit final inspection scheduled if required
Knowing when to call a professional is part of being a smart DIYer, not an admission of failure. Hire a structural engineer or licensed contractor if: your roof span exceeds what standard framing tables cover for your local snow or wind load; you are in a high-seismic zone; the roof geometry involves hips, valleys, or complex intersections with the existing roofline; you are not confident in the ledger connection to the house structure; or your jurisdiction requires licensed contractor installation as a condition of the permit. Getting a structural review on a complex job is typically a few hundred dollars and is worth every cent.
Also consider calling a pro for the flashing work if your house has stucco, EIFS, or any wall cladding where improper flashing penetration causes expensive water damage inside the wall. A flashing mistake on a stucco house can cost ten times the price of hiring it done right the first time.
For most standard attached lean-to patio roofs using aluminum or metal panels on a single-story house, this is a realistic weekend-to-two-weekend project for a confident DIYer with a helper. If you are specifically planning how to build aluminum patio roof, the panel overlap, fastener spacing, and sealing details are the sections to focus on most aluminum or metal panels. If you are installing insulated panels for the first time, budget an extra day for the sealing details. Go slow at the sealing steps, read your panel manufacturer's instructions fully before you start, and do not skip the permit if your area requires it. A properly installed patio roof lasts decades and adds real value to your home.
FAQ
How do I make sure the house-wall flashing matches my specific patio roof panel system?
In many installs you should first ask for the correct flashing details for your exact panel profile (rib height and overlap direction vary). If you cannot match the manufacturer’s flashing or closure strips to the panel, it is safer to pause, confirm the system compatibility, and only then buy metal panels, because a mismatch can create a permanent leak path at the wall or rakes.
What sealant should I use for insulated patio roof panels, and where are mistakes most common?
Do not rely on random sealant from a hardware store for insulated panel joints. Use only the manufacturer-approved sealant or panel seal tape for foam-core systems, and seal any factory cut ends the same way you seal factory edges. Also keep sealants away from locations that need panel movement, especially near endlaps.
How tight should I fasten metal patio roof screws to avoid leaks and buckling?
For metal panels, overtightening is a common reason people get leaks later, even when everything looks sealed. Use self-tapping hex-head screws with neoprene washers, tighten enough to compress the washer, then stop. If the washer is crushed flat or the panel can feel locked in place, back off, because thermal expansion needs some freedom.
What should I check if I’m worried my slope is too close to the minimum?
If your roof is near minimum slope, small framing errors can create ponding. A practical approach is to measure the height difference at both ends of the run, not just one ledger mark, then re-check every rafter line before panels go on. Adding a little extra slope during framing is usually cheaper than replacing or re-sealing panels later.
Can I adjust post spacing after I start framing, or do I need to stick to the kit layout?
Yes, but only within your panel system’s span and fastening rules. If you change post spacing after buying panels, you might exceed the rated load for your panel span table. Always confirm that your post spacing, rafter spacing, and panel profile are all consistent with the kit or manufacturer spec.
What’s the most common polycarbonate installation mistake to avoid?
For polycarbonate, the UV-protective film side matters. Install the film side up (or facing the sun) and keep it oriented correctly, then remove or protect the film per the manufacturer so it does not bake on. Also, use the recommended glazing bars and ridge cap details, since polycarbonate panels expand differently than metal.
How do I keep my first row of panels square so overlaps stay correct across the whole roof?
A helpful workflow is to stage panels based on direction and overlap sequencing, then pre-mark fastener lines on the frame with a chalk line or template. Start with a clean, square first panel, fasten it lightly, verify alignment with the layout marks, then fully fasten only after the second panel confirms the row is straight.
Besides sealant, what weatherproofing parts matter most at the eave and rakes?
If panels will be exposed to freeze-thaw or strong wind-driven rain, prioritize mechanical sealing components like foam closures, rubber closure strips, and correct endlap tape, then ensure fastener spacing matches the system. Caulk alone is rarely enough for long-term weather performance at edges, rakes, and endlaps.
If I need to walk on the patio roof during installation, where is it safe to step?
Plan a path so you never step on unsupported panel areas. In general, only walk where rafters or purlins are under you, and use clean, non-slip footwear. Avoid dragging tools across the panel surface because scratches can compromise coatings and sealants over time.
What should I do if I cannot confidently locate studs or solid backing for the ledger board?
Yes, and it is often tied to your house connection method. If you are attaching to siding on a wall that is not backed by solid framing, you may need to locate studs and use a properly secured ledger. When you are unsure about the house-wall structure, consider a pro review, because an incorrect ledger connection is one of the most failure-prone issues on attached patio covers.
When is the best time to do a leak check, and how do I troubleshoot small drips?
You should usually do a structural check before calling it complete, but also re-check after the first heavy rain or temperature swings. Look specifically for water tracking at the house wall flashing and any slow forming drips at panel joints or endlaps, then tighten or reseal only the affected areas, not the entire roof.