
You can install a patio swing safely in a weekend if you match the mounting method to your actual structure, size the hardware correctly, and test the installation before anyone sits down. The three practical options are hanging the swing from an overhead beam or ceiling joist, bolting into a concrete or brick surface with masonry anchors, and building a freestanding A-frame with tube brackets. For step-by-step instructions on how to use patio tube brackets when building a freestanding A-frame, see the guide on how to use patio tube brackets. Each method works well when the underlying structure is sound and the hardware is rated for the load. Where people run into trouble is skipping the structural check, grabbing whatever bolts are on the shelf, and skipping the load test at the end.
How to Install Patio Swing: Mounting, Anchors & A-Frame Guide

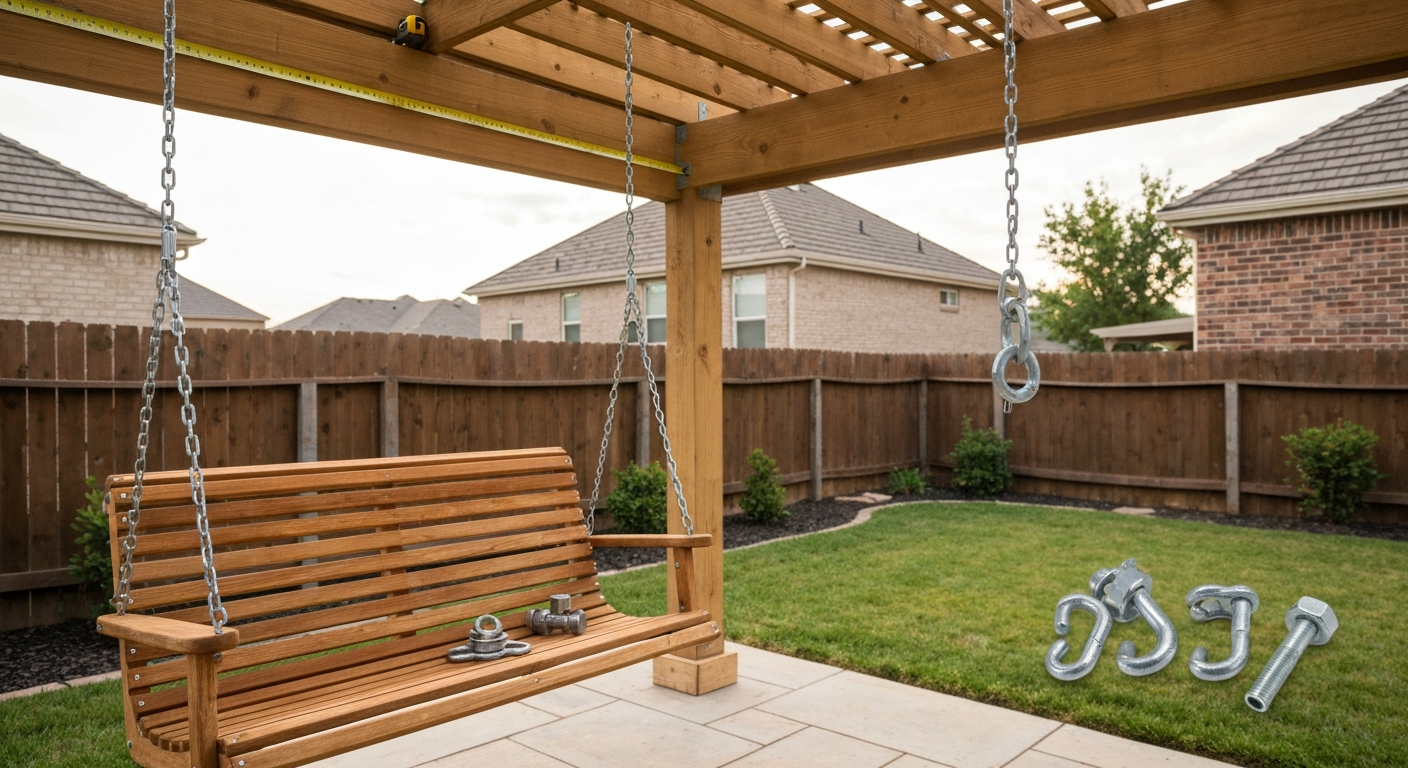
Who This Guide Is For
This guide is written for DIY homeowners who already have a patio, pergola, or patio cover in place and want to add a swing without guessing on hardware or structural limits. If you're comfortable using a drill, reading a tape measure, and following a torque value, you can handle this project. I'll walk through all three mounting methods step by step, give you real anchor and bolt sizing numbers, and be straight with you about the handful of situations where you genuinely need an engineer or licensed contractor before you proceed.
Patio Swing Types: What Works Where
Before you buy any hardware, decide which swing type fits your space and structure. Each has a different load path, so the mounting method drives every hardware choice that follows.
| Type | How It Mounts | Best Use | Main Pro | Main Con |
|---|---|---|---|---|
| Hanging (ceiling/beam) | Overhead joists, beams, or patio cover rafters | Covered patios, pergolas, porch ceilings | Clean look, no footprint on ground | Requires verified structural member overhead |
| Masonry-mounted | Concrete wall, brick column, or concrete slab overhead via anchors | Covered patios with concrete or masonry structure | Very rigid and permanent | Anchor sizing and drilling technique are critical; errors are hard to reverse |
| Freestanding A-frame | Self-supporting frame using tube brackets, anchored to ground | Open patios, decks, lawns — no overhead structure | No structural evaluation of existing building needed | Largest footprint; frame must be anchored against tipping |
For most homeowners with a covered patio or pergola, the hanging method is the most straightforward if the overhead member is a solid dimensional-lumber beam (not a prefabricated truss). The freestanding A-frame is the lowest-risk option structurally because you're building the support from scratch rather than depending on an existing member, but it takes more material and floor space. Masonry mounting is reliable when done right but has the least margin for error in drilling and anchor selection.
Load Capacity: What You Actually Need to Check
A patio swing isn't a static load. When people swing, the dynamic forces can reach two to three times the static weight of the occupants. A common rule used in residential swing design is to design the attachment for at least four times the maximum intended live load, which gives you a comfortable safety margin for dynamic effects and material variability. For a single swing carrying two adults (combined 400 lb is a reasonable design figure), that means your attachment point and every piece of hardware in the chain needs to handle 1,600 lb before failure. A double or larger bench swing designed for three adults should use 600 lb as the live load figure, requiring 2,400 lb capacity at each critical connection.
The load doesn't sit at one point uniformly. A typical two-point hanging swing puts roughly half the total load on each attachment. So each hang point for a two-person swing needs to resist at least 800 lb working load. Always verify the rated working load (WLL) stamped on every piece of hardware in the assembly, including chain, quick links, and eye bolts. Never assume hardware-store chain or generic eye bolts are rated for overhead loading unless they are explicitly labeled with a WLL.
For wood beams and joists, the AWC National Design Specification (NDS) provides withdrawal values for lag screws and through-bolts by lumber species and member size. A 1/2-inch lag screw driven 3 inches into the side grain of Douglas Fir-Larch has a reference withdrawal value around 290 lb per inch of penetration, or roughly 870 lb for 3 inches of thread engagement, before applying adjustment factors. A 1/2-inch through-bolt in double 2x10 lumber handles far more in bearing than in withdrawal. When in doubt, run through the NDS table 12.2A values for your specific lumber species, or use a through-bolt configuration that loads the fastener in shear/bearing rather than withdrawal.
Site and Structure Assessment
Overhead Joists, Beams, and Rafters
The first thing I do on any hanging swing install is knock on the ceiling or beam and confirm I'm hitting solid wood, not a hollow space or a prefabricated truss. If your patio cover or pergola uses dimensional lumber beams, a 4x6, 4x8, doubled 2x10, or larger, those are workable candidates. Measure the actual width and depth at the member. A single 2x6 joist is marginal for a heavy swing; a 4x8 or larger beam is far more appropriate for a two-person swing with dynamic loading.
Prefabricated roof trusses are a hard stop. The truss industry (TPI/SBCA guidance, echoed by Simpson Strong-Tie installation notes) is explicit: do not cut, drill, notch, or otherwise alter truss members without written approval from the truss engineer of record. The bottom chord of a roof truss is under tension, and adding a concentrated point load changes the force distribution in ways that can cause progressive failure. If you have trusses overhead, either plan a freestanding A-frame, or consult a structural engineer before proceeding.
Check the IRC as well. Section R105 of the International Residential Code defines permit triggers, and adding a concentrated live load to an existing structural member can qualify as a structural alteration requiring a building permit in many jurisdictions. Check with your local building department before drilling into load-bearing members.
Clearances, Ground Surfaces, and Nearby Features
You need at least 8 feet of overhead clearance between the floor and the swing attachment point for a standard bench swing to arc safely, and 14 to 16 inches of side clearance from walls or posts at the widest point of swing travel. If your patio cover includes gutters along the eave, keep the swing path well clear of those, a swinging occupant catching a gutter is a real risk and gutters are usually not structurally significant members. Similarly, if you've installed patio railings along the perimeter, verify that the swing's arc doesn't bring riders within arm's reach of the railing. For step-by-step guidance on installing or modifying patio railings, see how to install patio railing (ref a041e875-b12c-4094-ab61-d3d754646fa1).
For ground surface considerations: a swing hung over a decomposed granite (DG) patio is fine as long as the DG is compacted and stable, DG can shift, so anchor any freestanding frame with ground stakes or concrete footings rather than relying on friction. Concrete slabs are the best base for a freestanding frame and the best substrate for masonry anchors. If your patio has a misting system installed overhead, route hardware away from misting lines and confirm no anchor locations conflict with embedded tubing. If you need guidance on routing and installing overhead lines, see our guide on how to install a patio misting system. Screened rooms and patio enclosures add another constraint: confirm the screen frame is not a load-bearing element before hanging from it, most patio screen room frames are not rated for point loads of this magnitude.
Tools and Materials by Mounting Method
Hanging from Overhead Beam or Joist
- Stud finder or rafter finder (magnetic or electronic)
- Variable-speed drill/driver with twist bits and spade/auger bits
- Torque wrench (0–150 ft-lb range)
- Socket set (3/8" and 1/2" drive)
- Tape measure, pencil, and speed square
- Level
- Safety glasses and work gloves
- 1/2" or 5/8" galvanized or stainless forged eye bolts with nuts and washers (WLL-rated)
- Hex-head lag screws (1/2" diameter, length per lumber thickness — see sizing section)
- Heavy-duty swing hanger hardware rated to manufacturer WLL (often 500–1,000 lb per hanger)
- Grade-70 or Grade-80 chain with stamped WLL, or rated polyester strap/rope
- Rated quick links (WLL-stamped, same WLL as chain)
- Chain shackles or carabiners rated for overhead use
- Thread-locking compound (medium-strength, e.g., Loctite 243) for nut retention
Anchoring into Concrete or Brick
- Rotary hammer drill (SDS-plus strongly preferred over standard hammer drill for clean holes)
- Carbide-tipped SDS masonry bits in the anchor manufacturer's specified diameter
- Torque wrench
- Wire brush and compressed air or manual bellows (for hole cleaning)
- Depth-stop collar or tape-flag depth marker on bit
- Safety glasses, hearing protection, and dust mask (P100 for concrete dust)
- Wedge anchors or sleeve anchors (Hilti Kwik-Bolt 3, ITW Red Head TruBolt, or equivalent ICC-ES/ESR-listed product) sized per load table
- Or: chemical/epoxy anchor system (Hilti HIT-HY 200, HIT-RE 500 V3, or equivalent ESR-listed adhesive) with injection gun and mixing nozzle
- Patio bolts (expansion/shield type) if specified by design
- Forged eye nuts or shouldered eye bolts compatible with anchor rod
- Rated chain, strap, or rope as above
Building a Freestanding A-Frame
- Circular saw or miter saw
- Drill/driver and impact driver
- Tape measure, speed square, and level
- Post-hole digger or concrete mixing bucket (if setting footings)
- Patio tube brackets (rated for the beam/post diameter you're using)
- 4x4 or 4x6 pressure-treated posts (specify ground-contact rated if posts touch soil or concrete)
- 2x6 or 2x8 ridge beam (pressure treated or sealed)
- Structural screws or carriage bolts for bracket assembly
- Lag screws and structural connector plates
- Ground anchors, concrete fast-set mix, or concrete anchor bolts for base
- Rated swing hangers and chain/strap hardware as above
- Exterior wood sealant or paint (water-repellent, UV-stable)
Corrosion-Resistant Materials and Finish Options
Outdoor hardware corrodes. The failure mode for a swing is not gradual sagging, it's sudden and catastrophic. Match your hardware spec to your exposure environment and don't cut corners on this.
For most inland locations, hot-dip galvanized (HDG) hardware is the practical standard. Look for ASTM A153 compliance on the product label; this standard governs zinc coating thickness on iron and steel hardware and is the benchmark for residential outdoor use. HDG fasteners and connectors will last well in most residential environments with periodic inspection.
For coastal or high-humidity environments within roughly a mile or two of the ocean, stainless steel is the right call. Type 304 stainless handles most non-salt exposures well. Type 316 stainless contains molybdenum, which substantially improves resistance to chloride and salt-spray pitting, the IMOA and FEMA Technical Bulletin 8 both point to 316 (or 316L) as the right choice for marine and coastal exposures. Budget-wise, 316 hardware costs roughly 30 to 50 percent more than 304, but the service-life difference in coastal conditions is significant.
For wood components on a freestanding A-frame, use pressure-treated lumber rated for ground contact (UC4B minimum) anywhere wood contacts concrete or soil. Apply a penetrating oil-based sealer or exterior alkyd paint to cut ends and drilled holes before assembly. Unprotected end grain on a ridge beam will wick moisture and begin to check within a season.
Hardware Selection and Sizing
This is where most DIY swing installs go wrong. People buy what's on the shelf rather than what's rated. Here's a practical reference for each hardware type.
| Hardware Type | Minimum Size for 2-Person Swing | Key Spec to Verify | Notes |
|---|---|---|---|
| Forged eye bolt (wood) | 1/2" diameter, 3.5"–4" shank length into member | WLL stamped on product; forged, not cast | Never use cast (brittle) eye bolts for overhead loads; use forged only |
| Lag screw (wood, into beam) | 1/2" diameter, penetration depth ≥ 3.5" into solid lumber | NDS Table 12.2A withdrawal value for species | Pre-drill required; do not use in end grain for withdrawal loads |
| Through-bolt (wood) | 1/2" diameter hex bolt + large fender washers | Bearing/shear load on bolt; nut accessible from both sides | Preferred over lag for high-dynamic loads in accessible members |
| Wedge anchor (concrete) | 1/2" diameter, embedment ≥ 2.25" (verify manufacturer datasheet) | ICC-ES/ESR-listed; manufacturer-tabulated allowable tension and shear loads | Must use exact drill-bit size and torque from manufacturer table |
| Sleeve anchor (concrete/brick) | 1/2" diameter, embedment per datasheet | WLL in tension and shear; suitable for hollow/solid masonry | Less reliable than wedge anchors in cracked concrete; check ESR |
| Adhesive/epoxy anchor | 1/2" threaded rod, embedment ≥ manufacturer minimum | ESR listing (e.g., Hilti HIT-HY 200 ESR); hole cleaning critical | Excellent for hollow masonry or where vibration is a concern |
| Patio bolt (expansion type) | 1/2" diameter | WLL in tension; correct for substrate (solid concrete vs. brick) | Set torque to manufacturer spec; do not over-torque |
| Swing hanger bracket | Rated ≥ 800 lb per hanger for 2-person swing | Manufacturer WLL per hanger unit | Many residential hangers rate 500 lb — verify before buying |
| Tube bracket (A-frame) | Sized for post diameter (typically 3.5" for 4x4, 5.5" for 4x6) | Structural load rating from manufacturer; confirm bolt pattern | Use structural screws or carriage bolts through bracket, not drywall screws |
| Chain (Grade 70) | 3/8" Grade-70 chain WLL ≈ 6,600 lb; 1/4" Grade-70 WLL ≈ 3,150 lb | WLL stamped on link; Grade 43 or Grade 70 minimum | Do not use hardware-store decorative chain; must be stamped with WLL |
| Quick links / shackles | WLL ≥ rated load of chain | Working load stamped; not proof-coil or zinc-plated decorative | Close fully; safety-wire or lock pin shackles under dynamic load |
Torque, Embedment, and Anchor Sizing Reference
Always use the manufacturer's installation datasheet, not generic tables, for final torque and embedment values. Hilti’s Kwik‑Bolt 3 product page provides technical data, ICC‑ES/ESR notes, and manufacturer‑tested allowable loads, edge/spacing limits, and installation instructions blank" rel="noopener noreferrer">Kwik Bolt 3 Wedge anchor — Hilti product page (technical data & ICC‑ES notes). Manufacturers like Hilti (Kwik-Bolt 3), ITW Red Head (TruBolt), and Simpson Strong-Tie (Strong-Bolt 2) publish specific drill-bit diameters, minimum embedment depths, minimum slab thickness, and installation torque (Tinst) for each anchor diameter. The values below are representative for 1/2-inch diameter wedge anchors in normal-weight concrete, always confirm against your product's datasheet and ESR report.
| Anchor Diameter | Nominal Drill Bit Size | Typical Min. Embedment (Normal-Weight Concrete) | Typical Tinst (Installation Torque) | Min. Concrete Thickness |
|---|---|---|---|---|
| 3/8" | 3/8" | 1.75" | 20 ft-lb | 3.5" |
| 1/2" | 1/2" | 2.25" | 45 ft-lb | 4.5" |
| 5/8" | 5/8" | 2.75" | 90 ft-lb | 5.5" |
| 3/4" | 3/4" | 3.25" | 110–130 ft-lb | 6.5" |
A few rules of thumb that hold across most manufacturers: minimum edge distance for a wedge anchor is typically six times the anchor diameter (so 3 inches for a 1/2-inch anchor), and minimum spacing between anchors is also typically six times the diameter. If you're placing anchors closer than these critical distances, consult the Simpson Anchor Designer software or Hilti's PROFIS software, or get an engineer to run the numbers, because the tabulated allowable loads no longer apply and you need to apply reduction factors per ACI 355. See ACI 355.2, Qualification of Post‑Installed Mechanical Anchors in Concrete (preview) for the laboratory qualification requirements and the ICC‑ES/ACI/IBC acceptance criteria used when applying capacity reductions to post‑installed anchors blank" rel="noopener noreferrer">ACI 355.2 — Qualification of Post‑Installed Mechanical Anchors in Concrete (preview). 2 / ICC-ES methodology.
For lag screws into wood, a practical rule from NDS: the lead hole (pilot hole) for the shank should match the shank diameter, and the lead hole for the threaded portion should be 60 to 75 percent of the shank diameter in softwoods (Douglas Fir, Southern Pine) and 65 to 85 percent in harder species. Thread engagement depth of at least 1.5 inches in solid lumber is a minimum; aim for 3 to 3.5 inches for a loaded swing connection.
Pre-Drilling, Tapping, and Epoxy Anchor Tips
Clean, accurately sized holes are what separate a reliable anchor from a loose one. For masonry anchors, use a rotary hammer with SDS-plus bits rather than a standard drill with a masonry bit. The SDS action pulverizes concrete cleanly and produces a round, consistent hole. A standard hammer drill can work in softer brick but often produces oversized, tapered holes in hard concrete that reduce anchor capacity.
Set a depth-stop collar on the bit or mark depth with tape before drilling. For wedge anchors, the hole needs to be at least the minimum embedment depth plus the fixture thickness plus any nut/washer clearance, drill a little deeper than minimum embedment to give the anchor room to set fully. After drilling, clean the hole thoroughly: blow out debris with compressed air (two passes), brush with a wire brush, and blow out again. For adhesive anchors this cleaning step is non-negotiable; Hilti's HIT-HY 200 and HIT-RE 500 V3 installation instructions require specific cleaning cycles, and skipping them measurably reduces bond strength. For step-by-step guidance on how to install patio bolt, see the dedicated installation guide.
For epoxy/chemical anchors in hollow masonry (concrete block), you need a screen tube sleeve to contain the adhesive. Without the screen, epoxy flows into the void and you get no usable bond. Follow the adhesive manufacturer's instructions on cure time before loading, most epoxy systems require 24 to 48 hours at 70°F before full load application, and cure time extends significantly in cold weather. Hilti's guidance is explicit that increasing embedment depth beyond the product-qualified depth can change the failure mode; stay within the ESR-listed embedment range for the adhesive anchor you're using.
Attachment Options: Chain, Straps, Rope, and Connectors
The attachment between the swing and the anchor point carries the full dynamic load every single cycle. This is not the place to use whatever rope is in the garage.
- Grade-70 transport chain (3/8" for most residential swings): WLL approximately 6,600 lb per link, well above the design requirement for a two-person swing. Stamped WLL visible on chain links. Durable, UV-resistant, easy to adjust length.
- Grade-43 chain (3/8"): WLL approximately 5,400 lb — acceptable for residential swings but step up to Grade 70 for peace of mind.
- Rated polyester round sling or flat webbing strap: flexible, softer appearance, UV-resistant grades available. Must be rated for the WLL and inspected for fraying regularly. A 1" rated polyester strap (WLL typically 2,100 lb in a straight pull) is marginal — use 2" webbing rated at 3,300 lb or higher, or choose chain.
- Wire rope with swaged thimbles and properly crimped ferrules: high strength, but requires proper termination. If you use wire rope, thimbles at the termination points prevent kinking at the eye.
- Quick links: must be WLL-rated and fully closed/threaded before loading. Standard zinc hardware-store quick links are not rated for overhead use. Look for forged, stamped products.
- Safety shackles with cotter pins or screw-pin shackles secured with safety wire: preferred over quick links for permanent installations under dynamic load.
- Carabiners: use only screw-gate or auto-locking carabiners with a stamped kN rating. Recreational climbing carabiners (minimum 20 kN / ~4,500 lb) are technically sufficient for load capacity but are designed for one-direction loading — use with a thimble to prevent side-loading.
Step-by-Step: Mounting to Overhead Joists or Beams
- Locate the structural member. Use a stud finder, strong magnet (to find joist hanger nails), or knock-and-listen method to confirm the joist or beam location. Mark both edges to confirm actual width.
- Confirm member type and size. Visually inspect or measure the member. Solid dimensional lumber (4x6 minimum beam for a swing) is required. If you see evidence of engineered trusses (metal connector plates at intersections), stop and get engineering review.
- Mark attachment points. Measure and mark both hang-point locations centered on the member width. For a standard 48"–54" wide swing, hang points are typically 20"–24" apart to align with the swing's mounting holes. Center both marks on the beam or joist.
- Drill pilot holes. For lag screws: drill a shank-diameter hole through any bottom cladding into the wood (typically 1/2" for a 1/2" lag), then drill a pilot hole at 60–70% of shank diameter to the full thread-penetration depth. For a through-bolt: drill the full bolt diameter through the member.
- Install the eye bolt or lag-eye screw. Thread in by hand first to confirm it's straight, then use a wrench or socket to drive to full thread engagement. Do not overtighten to the point of crushing wood fibers; snug plus a quarter-turn after contact is sufficient for lag connections.
- For through-bolts: insert bolt, place large washer on the back side, and tighten nut to snug plus 1/4 turn — do not crush the wood.
- Attach chain or strap. Connect to eye bolt using a rated shackle or quick link. Check that the pin on the shackle is fully threaded and secured with cotter pin or safety wire.
- Hang the swing. Connect swing chains or straps to the lower end of your drop chains using matched shackles or quick links. Confirm swing is level at rest.
- Perform a static load test before regular use. See the testing section below.
Step-by-Step: Anchoring into Concrete or Brick
- Choose your anchor type. For solid poured concrete overhead (uncommon in residential patios but found in some covered structures): wedge anchors (Hilti Kwik-Bolt 3, ITW TruBolt, Simpson Strong-Bolt 2) are preferred. For hollow or solid masonry block: sleeve anchors or adhesive anchors with screen sleeves are more appropriate. Confirm substrate before purchasing.
- Layout and mark. Using a template or measuring from the swing's mount points, mark both anchor hole locations. Check edge distance: minimum 3" from any edge for 1/2" wedge anchors (6x anchor diameter rule). Check anchor spacing: minimum 3" between anchor centerlines.
- Drill the holes. Use rotary hammer with the exact SDS carbide bit diameter specified in the manufacturer's datasheet (typically matches the nominal anchor diameter). Set depth stop to minimum embedment plus fixture thickness plus 1/2". Drill perpendicular — a misaligned hole creates binding on the wedge and reduces capacity.
- Clean the holes. Blow out debris with compressed air, brush with wire brush, blow again. Repeat twice. For adhesive anchors, follow the manufacturer's cleaning protocol exactly.
- Insert the anchor. For wedge anchors: insert through the fixture into the hole until the minimum embedment depth is achieved. Verify depth with a ruler. For adhesive anchors: inject per manufacturer instructions, insert threaded rod to full embedment, allow full cure time (typically 24 hours at 70°F) before loading.
- Torque to installation torque (Tinst). Use a calibrated torque wrench. For 1/2" wedge anchors: approximately 45 ft-lb (verify against your specific product datasheet). Do not exceed the manufacturer's maximum torque — overtorquing can crack the concrete cone.
- Attach eye nuts or forged eye bolts to anchor rods. Connect rated chain or strap using shackles as described above.
- Hang swing and perform load test before use.
Step-by-Step: Building a Freestanding A-Frame with Tube Brackets
Materials for a Basic A-Frame
- Two 4x4 or 4x6 pressure-treated posts (length: desired height plus 6" for bracket connection), qty 4 (two per A-frame leg)
- One 4x6 or doubled 2x8 ridge/top beam, length = swing width plus 24" on each side
- Patio tube brackets (sized to post dimension, structural-rated, qty 4 minimum for two A-frame joints)
- 3/8" or 1/2" carriage bolts or structural hex bolts, nuts, and washers for bracket assembly
- Structural screws (e.g., structural 3" to 4" screws through bracket flanges into wood)
- Ground anchors or 10" x 10" concrete footings at post bases
- Galvanized post base hardware (e.g., Simpson ABA or ABU series) if setting posts in footings
- Rated swing hangers (min. 800 lb WLL each) for ridge beam
- Chain, shackles, and connectors as described above
- Cut legs to length. Cut all four legs to equal length. For a 7-foot swing height, you need posts approximately 7 feet plus the depth of the tube bracket connection. Seal all cut ends with end-grain sealant or exterior paint immediately.
- Lay out the A-frame angles. A typical A-frame sets legs at 60–70 degrees from horizontal. Mark the angle cut on the post tops if angled, or use the tube bracket to create the angle at the apex.
- Assemble the bracket joints. Slide the patio tube brackets onto the post tops. Follow the manufacturer's bolt pattern — tube brackets use carriage bolts or structural bolts through pre-drilled holes in the bracket and posts. Do not use standard wood screws or drywall screws here. Torque nuts to bracket manufacturer's recommendation.
- Attach the ridge beam to the bracket apex. The ridge beam slides into the apex of the tube bracket assembly or bolts to the top through the bracket's integrated beam cradle. Confirm the beam is level across the full span.
- Install swing hangers on the ridge beam. Space hangers to align with the swing's attachment points. Use lag screws or through-bolts sized per the hanger manufacturer and NDS guidance.
- Set posts. On a concrete slab, attach post base hardware (Simpson ABA/ABU or equivalent) anchored into the slab with wedge anchors — use the same drilling and torquing procedure as the masonry section above. On soil or DG, dig holes at least 18" deep and set posts in concrete footings. DG in particular must have compacted footings or the frame will shift over time.
- Brace if needed. If the frame feels racking-prone side-to-side, add a diagonal knee brace from the post to the ridge beam using a structural connector. A-frames are inherently stable front-to-back but can rack laterally.
- Hang swing and test before use.
Finishing Touches and Corrosion Protection After Installation
Once the swing is hung and tested, spend 20 minutes on protection that will extend the service life by years. Touch up any drilled holes in wood with a penetrating exterior sealant. Apply clear waterproof cap plugs or vinyl protective caps to exposed bolt threads and nut ends above the swing. At masonry anchor locations, apply a small bead of clear exterior-grade silicone or polyurethane caulk around the base plate or washer to shed water from the anchor entry point, water wicking into a masonry anchor hole is a slow but real corrosion driver.
For chain, wipe down with a rag and apply a thin coat of petroleum-based lubricant or chain lube at each link joint and at the shackle threads. This keeps the chain moving freely and slows surface oxidation. For galvanized chain that shows orange surface rust in the first season, wire brush and apply cold galvanizing compound (zinc-rich spray paint) to the affected links before corrosion progresses to the link cross-section.
Inspection, Testing, and Maintenance Schedule
A swing that was safe on install day can become unsafe through corrosion, wood movement, or hardware loosening. Building an inspection habit is as important as the installation itself.
| Frequency | What to Check | Action if Issue Found |
|---|---|---|
| Before first use | Static load test (see safety section); all fastener torques; level of swing at rest | Re-torque or replace before use |
| Monthly (first season) | Eye bolts / lag screws for looseness (hand-check, no torque wrench needed); chain links for cracks or corrosion; quick links fully closed | Tighten or replace hardware; remove swing from service if cracks found |
| Seasonally (every 6 months) | Torque check on all anchor bolts and lag screws; inspect wood members for splitting, checking, or rot at fastener entry points; inspect chain for wear at end links and shackle contact points | Replace any hardware showing 25% or more cross-section reduction; treat wood checks with sealant |
| Annually | Full hardware replacement evaluation: any zinc coating with significant rust bleed through; any chain links showing elongation; any fasteners with cross-thread or stripped heads | Replace worn hardware completely; do not field-repair cracked or corroded structural fasteners |
| After severe weather | Check all anchor points for movement; inspect wood for splits from freeze-thaw; verify plumb/level of A-frame if freestanding | Re-plumb and re-anchor as needed before resuming use |
Safety Best Practices and Load Testing
Before any person sits in the swing, perform a static load test. The simplest version: fill bags of sand or use weight plates to equal 1.5 times the maximum intended occupant weight (so 600 lb for a two-person 400-lb design load). Hang the weight from the swing for 10 minutes while you observe every connection point. Look for any movement, creaking that wasn't there before, any wood fiber pulling away from fasteners, or any masonry dust falling from anchor locations. If any of these happen, take the swing down and reassess before use.
- Never allow more users than the swing was designed and rated for. Post the maximum occupancy on the frame if children will be using it unsupervised.
- Do not allow standing on the swing — dynamic loads from jumping can multiply the static weight by a factor of 3 to 5.
- Check that the swing arc is clear of all overhead features (gutters, misting lines, ceiling fans) before letting anyone use it.
- For masonry-anchored swings: re-inspect anchors after the first 30 days of use. Vibration from use can slightly loosen wedge anchors in the first weeks; re-torque to Tinst if any movement is detected.
- Establish a weight limit. Most residential patio swings are designed for 400–500 lb total occupant load. Confirm the manufacturer's rated capacity for the swing itself, not just your mounting hardware.
- If any hardware is in question, take the swing out of service immediately. The consequence of failure is not a loose board — it is people falling from height.
Common Mistakes to Avoid
- Hanging from a prefabricated truss bottom chord without engineer approval. This is the single most dangerous mistake on a covered patio install.
- Using cast (not forged) eye bolts for overhead loading. Cast eye bolts are brittle and will fracture without warning under shock loading.
- Drilling anchor holes with a standard drill instead of a rotary hammer. Tapered, rough holes in concrete produce anchors at a fraction of rated capacity.
- Skipping hole cleaning for adhesive anchors. Dusty or debris-filled holes for epoxy anchors can reduce bond strength by 50 percent or more.
- Exceeding installation torque on wedge anchors. Over-torquing cracks the concrete cone and can reduce tension capacity significantly.
- Assuming hardware-store chain or snap hooks are rated for overhead loads. Most are not. Buy from a rigging or lifting supplier, and verify the WLL stamp.
- Ignoring edge distance and anchor spacing rules. Anchors too close to a concrete edge or to each other interact in ways that reduce capacity below the table values.
- Setting a freestanding A-frame on DG or gravel without footings. A-frames can tip or walk forward under dynamic loads without proper base anchoring.
- Not accounting for swing arc in placement. A swing placed too close to a wall, railing, or gutter post is an impact hazard every time it's used.
- Skipping the load test. The load test is the one step that catches every installation error before a person does.
DIY vs. Professional: When to Call a Pro
Most patio swing installs are solidly within DIY territory if you have a concrete slab with no overhead obstructions, a verified solid-lumber beam overhead, or a clear open area for a freestanding frame. The tools are accessible, the hardware is available at well-stocked hardware stores and rigging suppliers, and the skills required are basic drilling and torquing.
Call a structural engineer when: (1) you're attaching to a member you can't visually confirm is solid dimensional lumber, if there's any doubt about trusses, have an engineer review it; (2) the overhead concrete structure is thinner than 4.5 inches and you need to anchor into it; (3) your anchor locations have edge distances less than the 6x-diameter rule and you need to calculate reduced capacities; or (4) the patio cover itself is attached to the house and you want to confirm the existing structure can absorb additional concentrated loads without permit issues.
Call a licensed contractor when: the scope expands to adding or modifying structural members of the patio cover to create a new beam, or when your jurisdiction requires a permit and inspection for the installation. Some counties are low-key about residential swings; others will want a permit for any structural attachment. A 30-minute call to your local building department before starting costs nothing and can save you a stop-work order or a required demo later.
Quick Reference Cheat Sheet
| Method | Anchor/Fastener Type | Min. Size (2-Person Swing) | Min. Embedment / Penetration | Install Torque / Drive Value | 3-Step Checklist |
|---|---|---|---|---|---|
| Overhead wood beam | 1/2" lag screw or through-bolt + forged eye bolt | 1/2" diameter lag; 3.5" thread penetration into solid lumber | 3.5" thread engagement minimum | Snug + 1/4 turn (lag); NDS withdrawal check for species | 1. Verify solid dimensional lumber. 2. Pilot-drill correct sizes. 3. Load test at 1.5x design load. |
| Concrete overhead / wall | 1/2" ICC-ES wedge anchor (e.g., Hilti Kwik-Bolt 3 or ITW TruBolt) | 1/2" diameter; verify ESR allowable tension ≥ 800 lb per anchor | Min. 2.25" embedment (verify datasheet) | ~45 ft-lb (verify manufacturer datasheet) | 1. Rotary hammer with exact bit size. 2. Clean hole twice. 3. Torque to Tinst, load test. |
| Brick / hollow masonry | 1/2" sleeve anchor or adhesive anchor with screen tube | 1/2" diameter; verify WLL in hollow masonry (often lower than solid concrete) | Per manufacturer ESR/datasheet for substrate type | Sleeve: ~25–30 ft-lb; Adhesive: snug after full cure | 1. Confirm hollow vs. solid substrate. 2. Use screen tube for hollow block epoxy. 3. Allow full cure before loading. |
| Freestanding A-frame | 4x6 pressure-treated posts + patio tube brackets + post base anchors into slab | 4x6 posts minimum; tube brackets manufacturer-rated for post size | Post base anchors: 1/2" wedge anchor at 2.25" embedment in slab | Bracket bolts: per manufacturer; post base anchors: ~45 ft-lb | 1. Set post bases in concrete or slab anchors. 2. Assemble frame with carriage bolts through brackets. 3. Brace laterally; load test. |
Next Steps and Final Reminders
Before you head to the hardware store, confirm which mounting method matches your actual structure. Print or screenshot the manufacturer's datasheet for your specific anchor or lag hardware and bring it with you, the torque value and drill bit diameter you need are on that sheet, and the staff at most home centers can't reliably give you that information off the top of their heads.
If your patio project is part of a larger build that includes railings, gutters, a misting system, or a screened enclosure, plan the swing location before finalizing any of those features. For related guidance on positioning and securing shade structures, see how to install patio sails. A swing installed after railings and gutters are in place often ends up too close to a post or in conflict with an eave line. Sequence matters, and a few minutes with a tape measure at the planning stage saves a lot of rework.
Here's a condensed shopping checklist to take with you: rated forged eye bolts (WLL-stamped), lag screws or through-bolts in the correct diameter, a torque wrench if you don't already have one, Grade-70 chain with WLL stamp, WLL-rated shackles or quick links, patio swing hangers rated to your load, and corrosion-appropriate hardware for your climate (hot-dip galvanized for inland, 316 stainless for coastal). Buy hardware from a reputable fastener or rigging supplier rather than a general merchandise store when possible, because the WLL labeling and material compliance is far more reliable.
Do the load test. Every time. It's 20 minutes and some sand bags, and it is the one step that tells you everything you need to know about whether the installation was done right.
FAQ
What manufacturer data and technical tables do I need to write a safe patio-swing installation guide?
Manufacturer datasheets and installation manuals for the exact anchors, hangers and fasteners you plan to recommend: drill-bit diameters, minimum embedment depths, required hole-cleaning/installation sequence, installation torque or Tinst values, allowable working loads and edge/spacing limits. Examples: Hilti Kwik‑Bolt/Kwik‑Bolt 3 and adhesive anchor (HIT) datasheets, ITW Red Head / TruBolt tables, Simpson Strong‑Tie anchor/hanger datasheets and swing-hanger product instructions. Use the manufacturer’s published loads (or ICC‑ES ESR tables) — do not substitute generic numbers.
Which building codes and consensus standards must be consulted or cited?
Relevant codes and standards: International Residential Code (IRC) for permit triggers and framing/roof/ceiling rules (R105 and roof/ceiling chapters); ACI 355.2 for qualification of post‑installed mechanical anchors in concrete; ICC‑ES acceptance criteria and ESRs for specific anchors (e.g., AC193 for mechanical anchors, AC308 for adhesive anchors); AWC NDS (National Design Specification) and AWC DCA‑6 / Deck Construction Guide for fastener withdrawal/bearing and concentrated load evaluation; ASTM A153 for hot‑dip galvanizing. Cite these when explaining structural checks, anchor qualification and corrosion specification.
What corrosion and material specifications should be referenced for outdoor hardware?
Reference ASTM A153 for hot‑dip galvanizing for steel hardware and specify stainless grades by exposure: Type 316 (or 316L) stainless for coastal/salt-spray exposures and Type 304 for less severe environments. Cite FEMA TB‑8 (corrosion protection in coastal areas) and IMOA guidance on 304 vs 316 stainless. Also note manufacturer corrosion ratings and proven finishes (hot‑dip galvanize, G‑185, duplex coatings) on their datasheets.
What anchor design guidance and qualification requirements must I include for masonry/concrete mounting?
Require anchors qualified per ACI 355.2 or supported by ICC‑ES Evaluation Reports (ESRs). Use manufacturer allowable loads (ESR/technical table) and observe cracked vs uncracked concrete values, minimum edge distance, spacing and minimum embedment. When required anchors or layouts are not covered by published tables, flag the need to run an anchor design using ACI/ICC methods or consult the anchor vendor’s design tools (e.g., Simpson Strong‑Tie Anchor Designer or Hilti design software).
What wood‑fastener design references are needed for joist/beam ceiling mounts?
Cite AWC/NDS withdrawal and bearing design values and calculation procedures for lag screws and wood screws (NDS tables for common species and engineered wood). Use DCA‑6/NDS guidance to convert swing loads to equivalent point loads on joists/beams, and check bending, shear and deflection per NDS. Do not recommend anchoring to truss bottom chords without written approval from the truss manufacturer or a structural engineer (TPI/SBCA/truss guidance).
What are the essential load-capacity checks and simple calculations to show readers?
Provide a concise checklist and formulae: - Identify intended maximum live load (swing occupant(s) + dynamic factor; typical design: 400–600 lb for two-person swings; use higher for heavy benches). - Apply a dynamic/multiplier (commonly 1.5–2.0) to estimate peak loads from swinging. - For beam/joist check: compare concentrated load to local bending capacity and shear per NDS or use conservative rule-of-thumb: avoid attaching heavy point loads to midspan of undersized joists without reinforcement. - For anchors in concrete: verify anchor’s allowable tensile/shear from manufacturer table (reduced for cracked concrete if applicable) and check edge distance/spacing. - For chain/strap hardware: select connectors with stamped WLL and use at least a 4:1 safety factor for suspension hardware unless manufacturer specifies otherwise. Include worked numeric examples using a 500 lb live load with 2.0 dynamic factor to show required anchor WLL and embedment.