You can install a patio misting system yourself in a weekend. Run 1/4-inch or 3/8-inch poly or stainless tubing along the perimeter of your patio cover or shade structure, clip in brass or stainless misting nozzles every 2 feet, connect the line to your garden hose spigot or a booster pump, add an anti-siphon valve to protect your drinking water supply, and you're cooling your patio by 10 to 20 degrees on a hot afternoon.
How to Install a Patio Misting System Step by Step

Celia Vaughn
14 Jun 2026
The details below walk you through every step, from measuring your space to blowing the lines out before winter. If you are wondering how to install patio sails, the tubing and nozzle setup is similar, but you will mount the anchors and tension the fabric or shade sail correctly for outdoor wind. If you also need a safe barrier around the patio, follow these guidelines for how to install patio railing.
What a patio misting system actually is (and what to sort out before you buy anything)
A misting system pushes water through tiny nozzles at enough pressure to break it into a fine spray. That spray flash-evaporates in hot, dry air and pulls heat out with it. The key word is evaporates. If your climate is already humid, the mist doesn't evaporate as quickly and you end up wet instead of cool. Misting systems work best in climates where summer humidity stays below about 60 percent. In humid regions, low-pressure misters feel more like a drizzle, while high-pressure systems (which produce much finer droplets in the 5 to 15 micrometer range) can still provide some relief.
A basic residential system has four main parts: a water supply connection, a filter or strainer, the misting line (tubing with fittings), and the nozzles. Higher-end setups add a booster pump, an electronic timer or controller, and a solenoid valve. Before you buy, nail down these three things: what your water pressure actually is, where your nearest outdoor spigot sits relative to your patio, and whether your patio cover or structure gives you something solid to mount the tubing line to. A pergola, aluminum patio cover, wood beam structure, or gable roof overhang all work well. If you're still planning your shade structure, keep misting in mind when you design it because mounting points matter.
- Check your water pressure with a cheap gauge threaded onto a hose bib. Typical household supply runs 35 to 90 psi. Most low-pressure nozzle kits are designed for 40 to 60 psi and work fine with direct city supply.
- If your pressure tops 90 psi you'll want a pressure regulator inline. If it's below 35 psi and you want fine mist, you'll need a booster pump.
- Confirm your outdoor spigot has a shutoff you can isolate and that it's within a reasonable run of your patio. Longer runs mean more tubing and a slight pressure drop.
- Know your patio dimensions before ordering. Rough out a sketch: length of perimeter you want to cover, ceiling or beam height, and whether any walls or screens block airflow.
Planning your layout, coverage, and nozzle placement
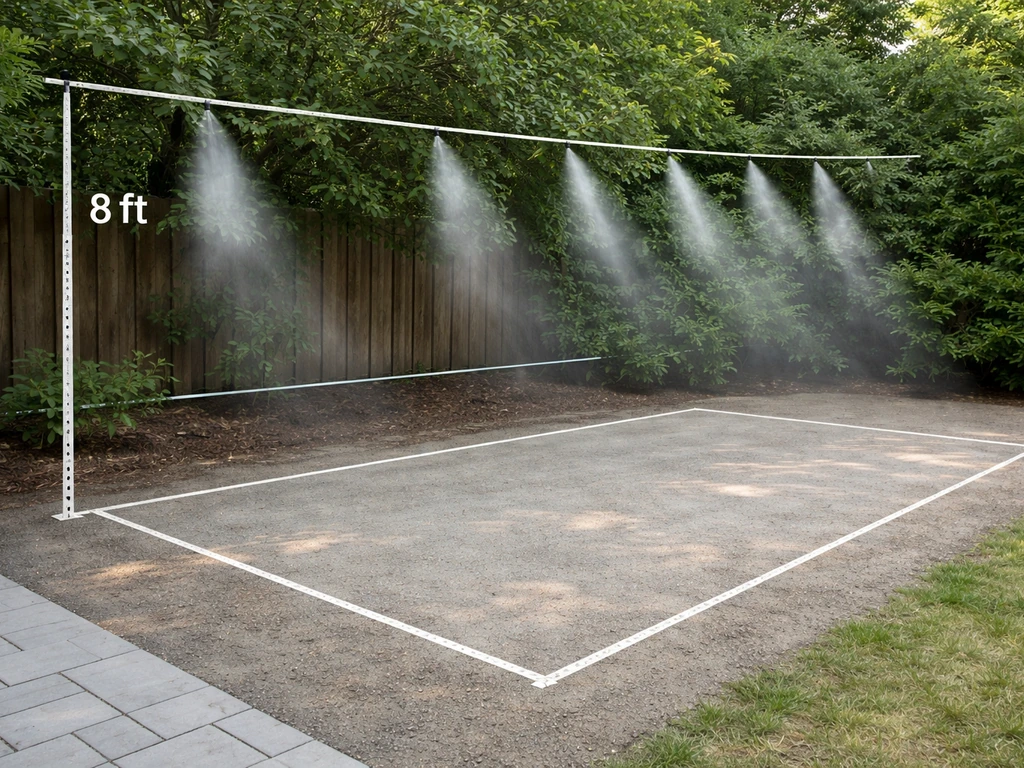
Height and spacing are the two variables that determine whether your mist cools the air or soaks your cushions. Mount the misting line at least 8 feet off the ground, and ideally between 10 and 12 feet. If your patio kit includes tube brackets, attach the misting line tubing and fittings to solid mounting points so the spacing stays consistent while the system runs. Below 8 feet the mist doesn't have enough airtime to evaporate and you'll feel the water on your skin. Above 14 feet it disperses too far before it reaches the occupied zone and loses most of its cooling effect.
For nozzle spacing along a single line, place nozzles every 2 feet for maximum coverage without excessive overlap. Tighter spacing oversaturates the air; wider spacing leaves gaps. For coverage area, the environment around your patio matters a lot. In a fully open outdoor space with no roof, plan roughly one nozzle per 6 to 8 square feet. Under a hard-top patio cover or gazebo with all four sides open, you can stretch that to one nozzle per 13 to 15 square feet because the roof traps the cooled air. Point every nozzle inward toward the seating area, not outward. Nozzles aimed away from the space waste mist and increase unwanted wetting on nearby surfaces.
If your patio is large enough to need multiple parallel misting lines, keep inner lines at least 6 feet apart in a fully open space. Under a roofed patio with all four sides open, space parallel lines about 12 feet apart. If one or more sides is enclosed or screened, push that to 14 feet apart so you're not over-saturating a space with limited airflow.
If you’re planning a patio screen room setup, use these same spacing and airflow principles so the mist coverage stays even without over-saturating the screened area install a patio mate screen room. Also keep any nozzle at least 6 feet away from a solid surface directly in its spray path, like a wall or screen panel, or you'll get water stains and mold.
Choosing your components: tubing, nozzles, fittings, pump, and filtration
You have two main pressure tiers to choose from, and that choice drives almost every other component decision.
| System Type | Operating Pressure | Droplet Size | Water Source | Cost Range | Best For |
|---|---|---|---|---|---|
| Low-pressure (direct hose bib) | 40–60 psi | Larger, visible drops | Standard garden spigot | $30–$150 for DIY kit | Dry climates, casual cooling, easy DIY |
| Mid-pressure (with regulator/filter) | 60–90 psi | Medium fine mist | Standard spigot + inline regulator | $100–$300 | Most residential patios |
| High-pressure (pump-driven) | Up to 1,000+ psi | 5–15 micron micro-droplets | Booster or piston pump | $500–$2,000+ | Humid climates, larger patios, commercial use |
For most DIY homeowners, a mid-pressure system running off city water supply is the sweet spot. You get noticeably fine mist, no pump to maintain, and a straightforward installation. High-pressure piston pump systems produce truly impressive micro-droplet mist but they're expensive, require a dedicated pump enclosure, and are overkill for a typical residential patio cover setup. High-pressure misting systems can use positive-displacement piston pumps to deliver a constant flow of micro-droplets for more uniform misting positive-displacement piston pumps to deliver constant flow for uniform misting.
Tubing
Standard 1/4-inch poly tubing (the flexible black kind) is the most common choice for DIY kits and handles pressures up to around 100 psi. It's easy to cut and route around corners and height changes. For longer straight runs along a pergola beam or aluminum patio cover, stainless steel tubing looks cleaner and holds its shape better. A good approach is to use stainless for the main horizontal runs and black poly for corners, drops, and any section where you need flexibility. Most DIY kits include compression fittings that accept both types.
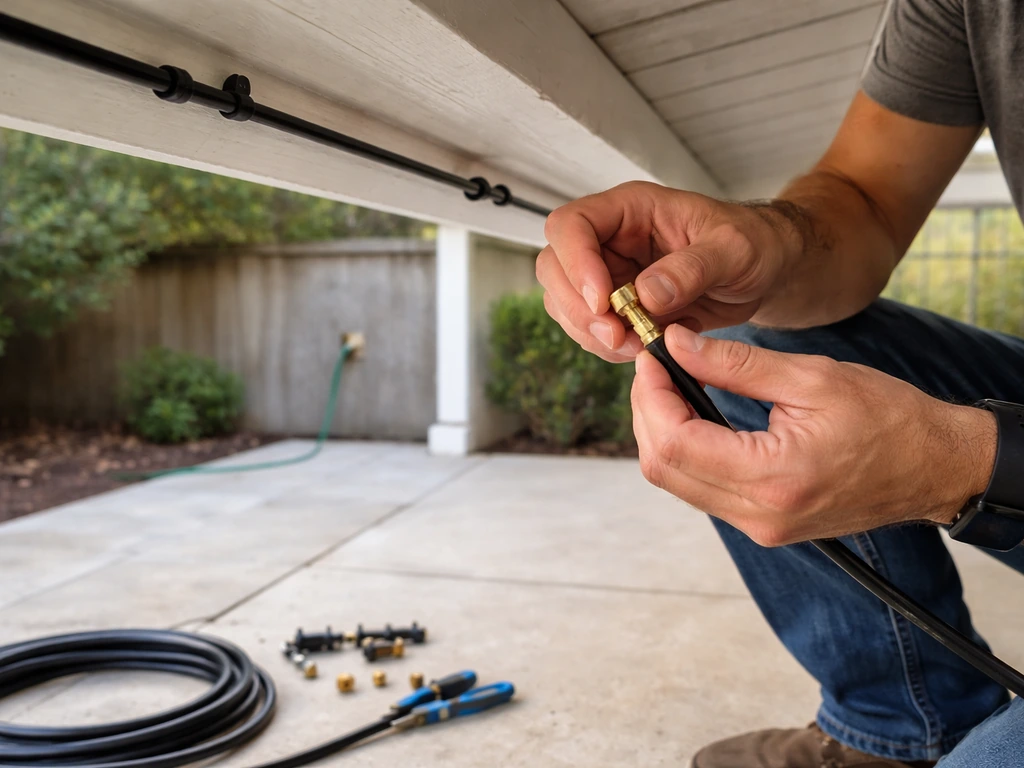
Nozzles and fittings
Brass nozzles are more durable than plastic and resist mineral buildup better. Stainless steel orifice nozzles are the right choice if you live somewhere that freezes in winter, and here's why: draining your misting lines before a freeze won't fully drain water trapped inside the nozzle body itself. Stainless nozzles handle freeze-thaw cycles without cracking the way plastic ones can. Nozzle working pressure matters too. Most residential nozzles are rated somewhere between 20 and 100 psi, so match the nozzle spec to your actual operating pressure or you'll get poor atomization at the low end or a streaming jet at the high end.
Filtration
A filter is not optional. Misting nozzle orifices are tiny (often around 0.012 inches), and a single piece of sediment can clog one permanently. Install a Y-strainer or mesh filter right at the water supply connection, before the tubing run. Some nozzle kits bundle a small filter into the inlet assembly. If yours doesn't, buy a 100-mesh or finer filter separately. Clean it two or three times per season.
Step-by-step installation: mounting hardware to your patio cover or structure
This is where a patio cover or shade structure really earns its keep as a misting platform. The fascia board, rafter tails, or perimeter beam of an aluminum patio cover or wood pergola gives you a clean, solid surface to anchor the tubing line at the right height. If you are mounting parts to your structure, you may also want to learn how to install patio bolt hardware for a secure hold.
If you are also trying to install gutters or add a water collection channel along the patio cover, plan the mounting points so water drains where you want it facia board, rafter tails, or perimeter beam. Patio tube brackets help you secure the misting tubing in place so it stays level and stays aligned with your nozzle plan mount the tubing line at the right height. Here's how to work through the install.
If you're also building out a patio mate screen room, plan your misting tubing and nozzle placement around the screened walls and intended airflow, using the same steps for routing, mounting, and winter drain points. If you're also planning a patio swing, make sure the swing's mounting points are separate from the misting hardware so you don't compromise stability Here's how to work through the install..
- Dry-fit your layout first. Lay the tubing on the ground and measure out the full perimeter run before drilling a single hole. Mark nozzle positions every 2 feet with tape.
- Mark your mounting points on the structure. Use a pencil to mark where each tubing clamp or clip will go on the beam, fascia, or rafter. Keep clips every 18 to 24 inches to prevent the line from sagging.
- Drill pilot holes for the mounting clips. For aluminum patio covers, use a 1/8-inch bit for self-tapping screws. For wood members, a pilot hole prevents splitting. Use stainless or galvanized hardware only, outdoors everything else rusts.
- Install the tubing clips or saddle clamps along the structure. Don't fully tighten yet so you can adjust the line position as you feed tubing through.
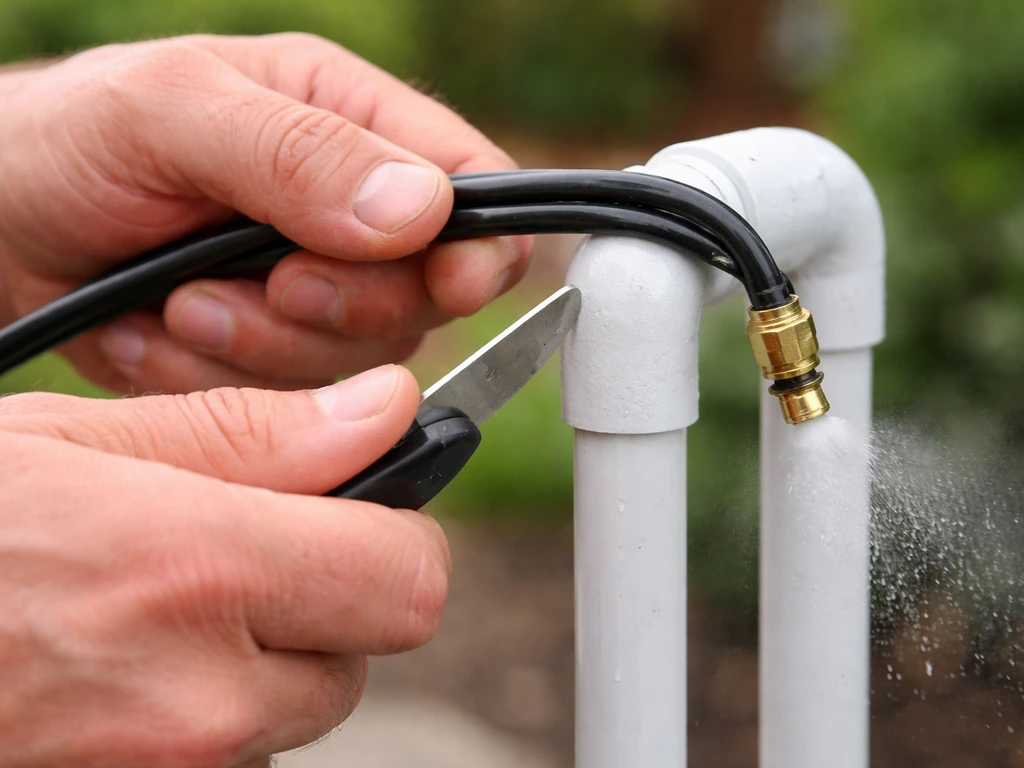
- Cut the tubing to length and push it into the compression fittings at each nozzle position. Tee fittings branch to each nozzle; straight couplers join sections. Hand-tighten compression nuts and give them a quarter turn with pliers.
- Thread brass nozzles into each tee fitting. Wrap two passes of Teflon tape on the threads and snug them in. Don't overtighten or you'll crack the fitting body.
- At each corner or direction change, use an elbow fitting or a short section of flexible poly tubing. This is where having some flex tubing in your kit saves you a lot of frustration.
- At the end of the line, install an end cap. This is what builds pressure in the line. Without it, water just runs out the open end and nozzles never atomize properly.
- Once the line is routed and all fittings are installed, go back and snug all the mounting clips.
- Cap or route the inlet end of the tubing toward your water supply connection point. Leave enough slack to attach the filter and hose fitting without straining the line.
One common mistake: routing the supply connection at the highest point of the line. You want the inlet at one end and any low points in the run to be where you later install a drain plug or remove a nozzle for winterizing. Plan the route so water can drain out by gravity when you shut the system down.
Plumbing and pressure setup: lines, valves, backflow prevention, and draining
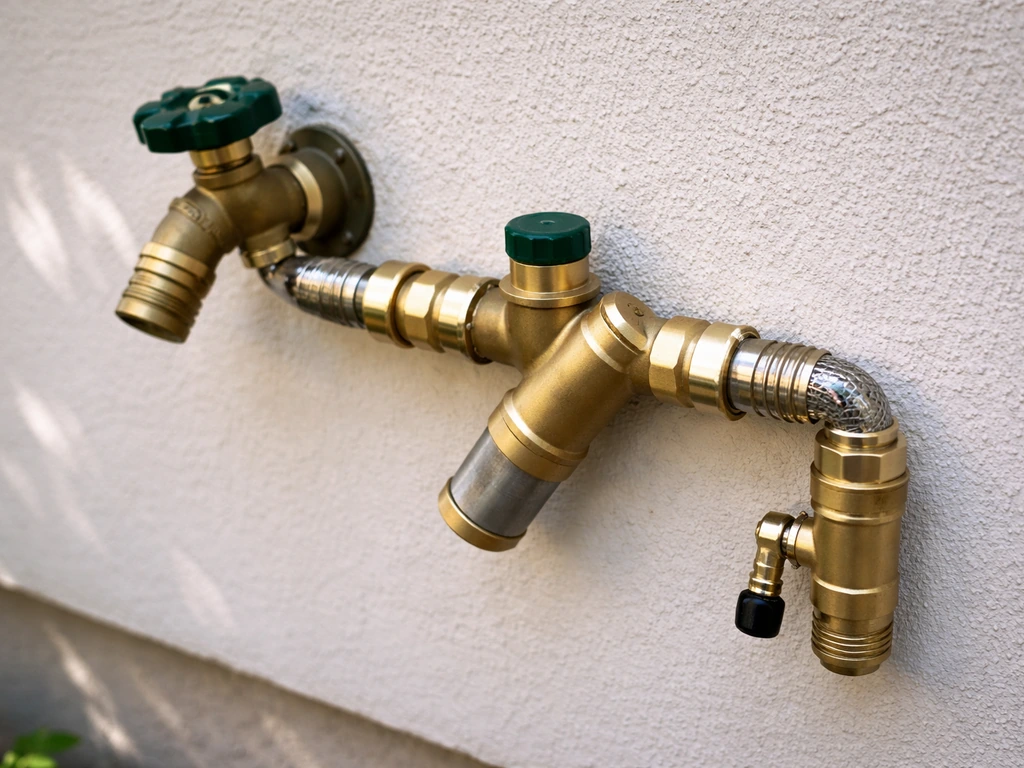
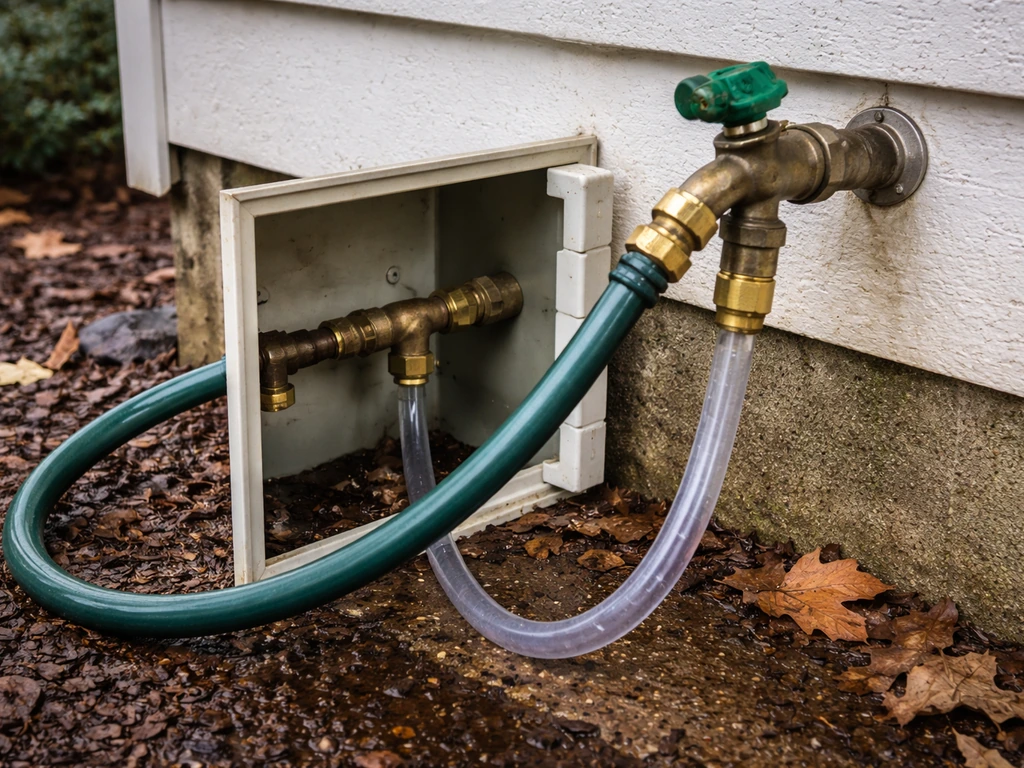
The connection between your house water supply and the misting line needs a backflow preventer or anti-siphon valve. This is not just good practice, it's required by code in most jurisdictions. Without one, misting water (or anything it picks up along the way) can back-siphon into your home's potable supply.
The IRC requires that potable water outlets be protected by accepted backflow prevention methods, and many city water departments (like Portland's) require an approved backflow assembly on any irrigation or misting connection to city water. A simple anti-siphon valve screwed onto your hose bib handles this for a basic direct-connection system.
It also needs to be installed at least 12 inches above the highest point of your downstream misting line, so account for that when positioning your supply connection on the structure.
The full connection sequence from spigot to nozzles looks like this: spigot, then anti-siphon valve or backflow preventer, then shutoff valve (so you can isolate the system without turning off the whole spigot), then filter/strainer, then the misting tubing run, then end cap. If you're adding a pump, it goes between the shutoff valve and the filter. If you're adding a timer or solenoid valve, it goes after the backflow preventer and before the filter.
For pressure management, if your supply pressure runs above 80 psi, add a pressure regulator set to 60 psi inline before the filter. This protects nozzle orifices from wear and keeps spray patterns consistent. If pressure is below 35 psi and you want real misting performance, a small booster pump rated for your nozzle count and flow requirements is the fix.
For draining, route your line so the lowest point is accessible. When you shut down for winter (or even just at the end of a day), close the supply valve, then remove the lowest nozzle on the run to let water drain out by gravity. For a thorough purge, connect a small compressor to the inlet end and blow air through at 50 psi. Run it zone by zone if you have multiple lines, and keep children and pets away from the nozzle ends during blowout.
Electrical, control, and safety basics (pumps, timers, and GFCI)
If your system runs straight off a hose bib with no pump or timer, you have zero electrical work to do. Turn on the spigot and the system runs. But most people eventually want a timer or an automatic solenoid valve so the system runs on a schedule without someone walking out to turn the knob. And if you're adding a pump, you definitely need to think about the electrical side.
Any electrical component outdoors, whether it's a pump, a timer, or a solenoid valve controller, must be plugged into a GFCI-protected outlet or wired on a GFCI-protected circuit. This is non-negotiable. A wet outlet without GFCI protection in a misting environment is a serious shock hazard. If your patio doesn't already have a GFCI outdoor outlet, have a licensed electrician add one.
If you are also planning patio railing installation, double-check all outdoor electrical components so they can be wired safely and code-compliant have a licensed electrician add one. That's a case where calling a pro is clearly the right call, because pulling a new circuit or adding an outdoor box involves permits and panel work that goes beyond most DIY scopes.
For timer enclosures: mount the timer or controller in a weatherproof enclosure rated for outdoor use (NEMA 3R or better). Keep all wire connections inside the enclosure, not exposed to spray. Run any exposed wiring in weatherproof conduit. The misting unit itself should be plugged into a ground fault protected outlet, as every misting system manual you'll find specifies. Don't skip this.
- Use a GFCI outlet for any pump or electronic controller, no exceptions.
- Mount timers and controllers in a weatherproof enclosure away from direct mist spray.
- Use outdoor-rated wire and weatherproof conduit for all runs.
- Never plug a pump or controller into an extension cord as a permanent solution.
- If you need a new circuit or a new outdoor outlet added, call a licensed electrician.
Testing, fine-tuning, and keeping things running all season
Before you turn the system on for the first time, walk the entire line and confirm every fitting is hand-tight plus a quarter turn, the end cap is fully seated, and all nozzles are threaded in with Teflon tape. Then open the supply valve slowly, not all at once. Let pressure build gradually and watch for drips at every fitting. Mark any that drip with tape and snug them down once pressure is equalized.
Check each nozzle's spray pattern. A healthy low-to-mid-pressure nozzle should produce a fine cone of mist, not a stream. If a nozzle is streaming, the orifice may be too large for your pressure, or the nozzle is partially clogged and a jet is shooting through the blockage. Remove clogged nozzles and soak them in white vinegar for 30 minutes to dissolve mineral scale, then rinse and reinstall. If the spray pattern on one nozzle is noticeably weaker than the others, that nozzle is partially blocked or the fitting upstream has a partial obstruction.
For coverage adjustment, aim nozzles inward toward the center of the seating area if you're getting runoff on the structure, or adjust the angle slightly downward if mist is rising and escaping before it cools the zone. Small adjustments to the tee fitting orientation make a real difference.
Seasonal maintenance and winterizing
Clean the filter strainer at least twice per season, more often if your water is hard. Mineral deposits in the filter basket cut flow to all nozzles at once, so if the whole system seems weaker than usual, the filter is usually the first thing to check.
Before the first freeze, winterize the system completely. Close the supply valve and drain the filter canister fully. Remove the lowest nozzle on the line to start gravity drainage. Then connect a compressor to the inlet end set to 50 psi and blow air through the line until no more water comes out the nozzle openings. Remember that water stays trapped inside individual nozzle bodies even after you've drained the line, which is exactly why stainless steel orifice nozzles are worth the extra cost if you live anywhere temperatures drop below freezing. Plastic nozzles crack from ice expansion inside the body and you'll replace a lot of them come spring.
If you have a pump, disconnect it from both the water supply and the power source before freezing weather arrives, bring it indoors, and store it in a space that stays above freezing. Same goes for any electronic timer or controller that isn't rated for below-freezing temperatures. Drain any filter housing and leave it open so residual moisture can dry out. Do all of this before your first hard frost and the system will be ready to go next spring with minimal hassle.
Your end-of-install checklist
- Anti-siphon or backflow preventer installed at the hose bib connection, at least 12 inches above the highest downstream pipe elevation.
- Filter/strainer installed inline before the misting line.
- All fittings and nozzles checked for leaks under operating pressure.
- Nozzle spray patterns confirmed as fine mist cones, not streams.
- All nozzles aimed inward toward the seating area.
- Any pump or timer plugged into a GFCI-protected outlet.
- Timer programmed to run during peak heat hours (typically mid-morning through late afternoon).
- Drain plug or removable lowest nozzle accessible for seasonal winterization.
- Compressor winterization done before first freeze.
FAQ
Do I need a booster pump for an outdoor patio misting system if I have good water pressure?
Not necessarily. If your city pressure is roughly in the mid-pressure range and your nozzle kit is rated for it, you can usually run direct from the hose bib. A booster pump is mainly a fix when your pressure is below the nozzle’s effective operating range or when your system has multiple parallel lines that cause pressure drop.
How do I choose the tubing diameter, 1/4-inch versus 3/8-inch, for how to install patio misting system setup?
Use 1/4-inch tubing for most DIY runs and 3/8-inch if you have longer distances, multiple branches, or you want to reduce pressure loss. Before buying, confirm the kit’s recommended tube size and check how the fittings match, since compression fittings often accept only specific tube diameters.
What is the easiest way to prevent my patio from getting soaked even if the nozzles are spaced correctly?
Aim nozzles inward toward the seating zone and watch for runoff from the structure. If mist is rising and escaping, reduce the nozzle angle so droplets reach the occupied area sooner, and keep nozzle outlets at least several feet away from screens, walls, and solid panels in the direct spray path.
Can I run a patio misting system through a standard garden hose and splitters?
Avoid random hose connections and tee splices unless your kit is designed for it, because extra fittings create pressure drop and uneven spray across nozzles. If you must extend or route with hose or tubing, keep the run lengths reasonable and check that the final operating pressure stays within the nozzle rating.
How do I winterize properly if I forgot and left the system running near freezing?
Shut off the supply immediately, drain what you can by opening the lowest point, then blow air through at about 50 psi as described for full purge. After that, remove and inspect nozzles for cracking or partial blockages, and expect that freezing can damage plastic nozzle bodies even if the line looks like it drained.
What should I do if some nozzles spray fine but others stream or barely mist?
First inspect the filter and look for a partially clogged nozzle or fitting upstream. Then remove the problem nozzle, soak it in white vinegar for scale removal, and re-check the spray cone. If only one side of a multi-nozzle run is weak, suspect a restriction earlier in that branch rather than the nozzles themselves.
Is Teflon tape required on all misting system threads?
Use it on threaded nozzle connections when your kit specifies it, especially on the nozzle side where you want a sealed joint. Do not over-tape or tape fittings that are meant to use a gasket or compression seal, since excess tape can reduce thread engagement or cause leaks.
Where should I put the drain point and how do I plan the slope so it actually drains?
Route the line so the highest section is not the inlet and ensure there is an accessible lowest point where you can remove a nozzle or drain plug. The goal is gravity drainage after shutdown, so plan any dips intentionally rather than allowing trapped low spots you cannot reach.
My misting system is set up for schedule control, do I need a special timer or can I use any outdoor outlet timer?
Use a controller or timer that is intended for outdoor misting or at least rated for the misting system’s electrical load and outdoor conditions. Even with the right timer, all components outdoors should be on GFCI protection, and you should keep connections inside a weatherproof enclosure rated for outdoor exposure.
What’s the best way to clean the system if my water is hard and the nozzles keep clogging?
Clean the filter more frequently (hard water may require more than twice per season) because mineral scale often starts in the strainer. If nozzle performance drops, soak individual nozzles in vinegar, rinse, and also consider upgrading to stainless orifice nozzles if freezing or heavy scale is a recurring issue.
Do patio misting systems need backflow prevention even if I’m not using potable water inside?
Yes. If the system connects to a potable water supply, you should use an anti-siphon valve or backflow preventer as your connection protection. Many jurisdictions require an approved assembly for irrigation or misting connections, and it also needs to be installed at the correct height relative to the highest downstream line.