You can install a metal roof on a patio cover yourself in a weekend or two, provided the existing frame is sound, you get the right permits, and you follow the panel manufacturer's fastening and overlap specs. The basic sequence is: plan and measure, confirm the frame can handle the load, install purlins or skip sheathing if needed, lay underlayment from eave up, fasten panels with proper overlap, then seal every edge and penetration with flashing and butyl tape. The details below will walk you through each step so you don't end up with a leaky or unsafe roof.
How to Install a Metal Roof on a Patio Cover DIY Guide

Celia Vaughn
29 Apr 2026
Plan the project before you buy anything
Good planning saves you from expensive mistakes. Start by measuring the full roof area: length along the eave times the rafter run (horizontal distance from eave to ridge or ledger). Write that number down, then add 10 percent for waste and trim cuts. You also need to know your roof slope because it controls which panel systems are even allowed on your patio cover.
Slope is expressed as rise over run. A slope of 2:12 means the roof rises 2 inches for every 12 inches of horizontal run. Most patio covers are low-slope, somewhere between 1:12 and 4:12. Standing seam panels can go as low as 1/4 inch per foot (roughly 1:48) when properly installed, while lapped corrugated or ribbed panels generally require at least 3:12 unless you use a full bead of lap sealant and follow specific details from the manufacturer. AIA’s Design App for standing seam roof systems specifies a minimum slope of 1/4:12 (2 percent) for standing seam. Check your panel manufacturer's minimum slope spec, not just the building code, because the manufacturer's requirement is usually more restrictive and it's what keeps the warranty valid.
Permits are not optional. Most jurisdictions require a building permit for a roofing project, even on a patio cover. Pull the permit before you start. The permit process forces you to submit basic dimensions and sometimes a simple structural note, and it gives you a code-compliant inspection at the end. If you skip it and your roof leaks or gets damaged in a storm, your homeowner's insurance has legitimate grounds to deny the claim.
Also decide on your panel style now, because it affects every other material choice. Exposed-fastener corrugated and ribbed panels are the most DIY-friendly and budget-friendly option. Standing seam panels look cleaner and perform better on low slopes, but they cost more and require more precise installation. If you want to go deeper on building the cover structure from scratch before roofing it, related guides on how to build a patio cover with a metal roof or how to build a metal roof over a patio cover that whole process. This guide is focused on how to build a metal roof over a patio cover, including material choices and the installation steps that prevent leaks.
Check the frame, slope, and load requirements
Before you order a single panel, inspect the existing patio cover frame carefully. Look for rot, rust, cracked wood, or any post that feels soft at the base. Metal roofing is heavier than a simple shade sail or polycarbonate panel, and it adds dead load. Standard 26-gauge steel panels weigh roughly 1.3 to 1.5 pounds per square foot. Add underlayment and fasteners and you're looking at about 2 pounds per square foot total. A 200-square-foot patio cover roof adds around 400 pounds. If your rafters are undersized or the ledger connection to the house is marginal, that matters.
Wind uplift is actually the bigger concern for patio covers in most regions. Low-slope roofs (less than 2:12) are designed using the wind speed at eave height per IBC and IRC wind provisions. Patio covers with open sides can experience high uplift because wind gets underneath the panels. Check the wind speed zone for your area on the local building department's wind map, and confirm your fastener spacing meets the uplift requirements. If you're in a hurricane or high-wind zone, your municipality may require engineered fastener schedules.
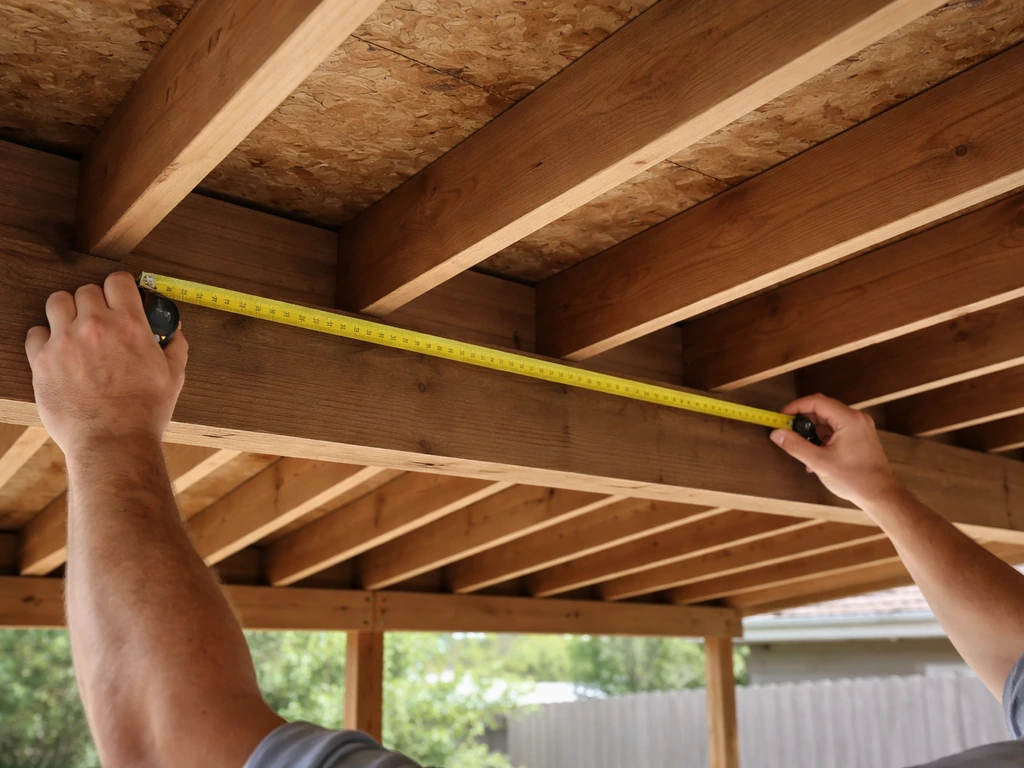
Look at rafter spacing while you're up there. Exposed-fastener metal panels typically need support every 24 inches on center at minimum, and lighter-gauge panels may need purlins at 16 inches on center to avoid oil-canning (that wavy, distorted look). If your existing frame has rafters spaced wider than what the panel manufacturer calls for, you'll need to add purlins before you start roofing. This is a common issue with older patio covers that were built for shade fabric or corrugated fiberglass.
Choose your materials and tools
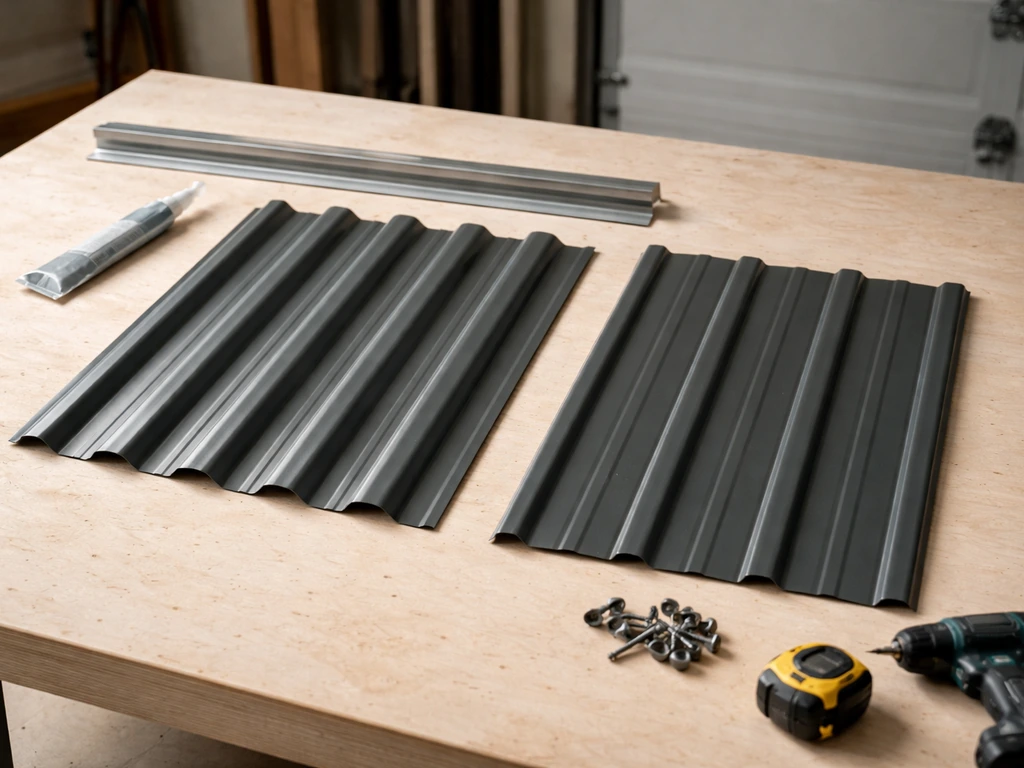
For a typical DIY patio cover, 26-gauge corrugated or ribbed steel panels are the most practical choice. They're available at most home improvement and roofing supply stores, easy to cut with a circular saw and a metal-cutting blade (cut with the blade running backward for cleaner edges), and forgiving to install. If your patio cover has a very low slope or you want a premium look, a snap-lock standing seam panel is worth the extra cost. For corrugated metal patio installations specifically, there's a dedicated guide on how to install a corrugated metal roof over a patio that goes into profile-specific details. For corrugated metal patio installations, this guide covers the profile-specific steps you need to do it right how to install a corrugated metal roof over a patio.
| Panel Type | Min. Slope | Fastener Style | DIY Difficulty | Relative Cost |
|---|---|---|---|---|
| Corrugated steel | 3:12 (or 1:12 with full sealant) | Exposed hex-head screws | Easy | Low |
| Ribbed/R-panel | 1:12 to 2:12 (check spec) | Exposed hex-head screws | Easy to moderate | Low-medium |
| Snap-lock standing seam | 1/4:12 minimum | Concealed clips | Moderate | Medium-high |
| Aluminum corrugated | 3:12 | Exposed screws | Easy | Medium |
For underlayment, use a synthetic roofing underlayment rated for use under metal panels, not felt paper. Felt traps moisture against metal and causes corrosion over time. Synthetic underlayment breathes better, lasts longer, and has an anti-slip texture on the walking surface. You'll also need butyl sealant tape for all lap seams, penetrations, and flashing connections. Butyl stays flexible as panels expand and contract with temperature changes, which is exactly what you want.
- Metal panels (calculate using net coverage width, not nominal width, divided into your eave length, rounded up)
- Synthetic roofing underlayment
- Butyl sealant tape (1-inch and 2-inch rolls)
- Eave drip edge, gable trim, and ridge cap (or lean-to cap for a single-slope patio)
- Wall flashing/step flashing if the roof ties into a house wall
- Hex-head self-drilling roofing screws with EPDM gaskets (for exposed-fastener systems)
- Metal roofing clips (for standing seam)
- Circular saw with metal-cutting blade or tin snips
- Drill/driver with hex bit
- Chalk line and tape measure
- Ladder, roof jacks, and fall protection gear
On panel count: don't rely on nominal panel width to figure out how many panels you need. Effective coverage width is smaller than the label says because of the overlap. A 16-inch standing seam panel, for example, might only cover 14 inches of actual roof width per panel. To calculate count, convert your eave length to inches, divide by the effective coverage width, and round up. Do this math before you order or you will be short.
Prep the frame and install underlayment
Start by clearing the existing patio cover of any old roofing material, screws, or debris. Check all connections: the ledger-to-house connection, post bases, and rafter hangers. Tighten or replace any loose hardware. If you need to add purlins, run them perpendicular to the rafters at the spacing your panel manufacturer requires, and fasten them with structural screws or hurricane ties at each rafter crossing.
Install the eave drip edge before the underlayment. The drip edge gets nailed to the fascia board or the outer rafter face, and it hangs the panel edge out over the gutter or open air so water runs clear of the framing. Then start your underlayment at the bottom eave, with the anti-slip surface facing up and the printed side visible. Let it overhang the drip edge by about an inch so it directs water onto the drip edge, not behind it. Lap each successive course over the one below it by at least 4 inches, or 6 inches if your slope is below 3:12. Work your way up the roof, keeping courses straight and parallel to the eave. Fasten with cap staples or roofing cap nails every 12 inches along the lapped edge.
On gable ends, wrap the underlayment over the edge and fasten it. You'll trim it flush or tuck it under gable trim later. If the patio cover runs along a house wall, install your wall flashing at this stage too. L-shaped metal flashing goes against the house wall (caulked and fastened into the siding or brick), then laps over the top of the underlayment. This step is the one people skip and regret when water finds its way behind the roof and into the wall.
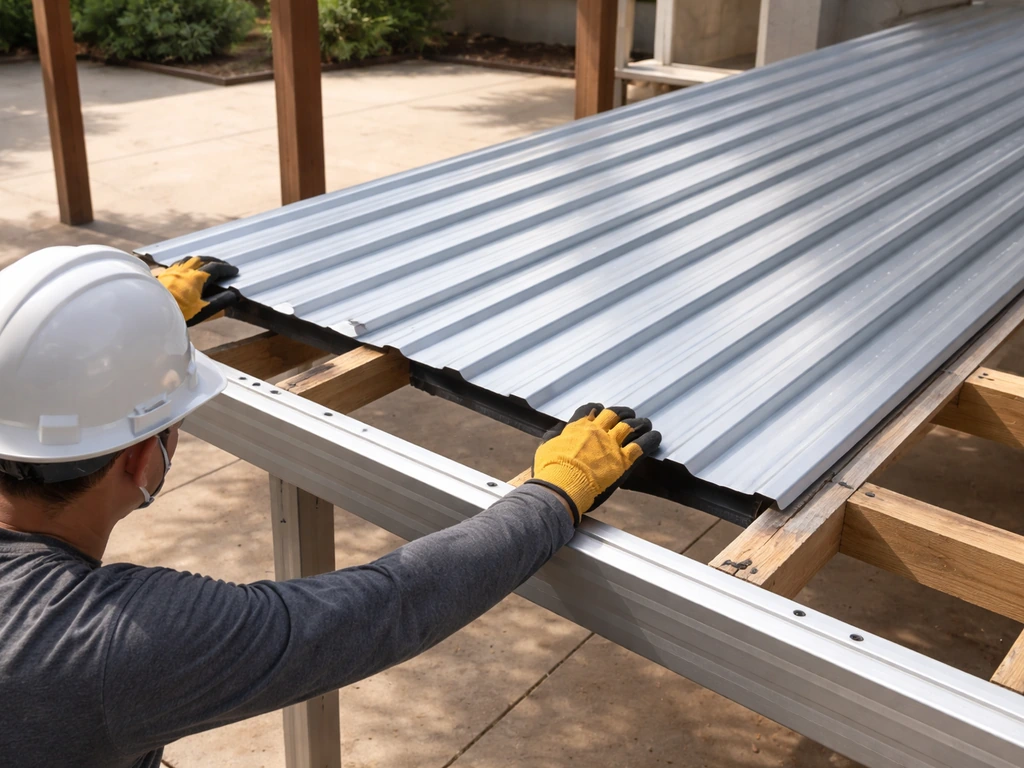
Install the metal panels, fasteners, and flashing
Snap a chalk line parallel to the eave before you set your first panel. Getting the first panel square to the structure is the whole game. If it's even slightly out of square, every panel after it will drift, and by the time you reach the far gable end you'll have a visible angle problem. Measure diagonally from both corners of the first panel to check for square before you drive a single fastener.
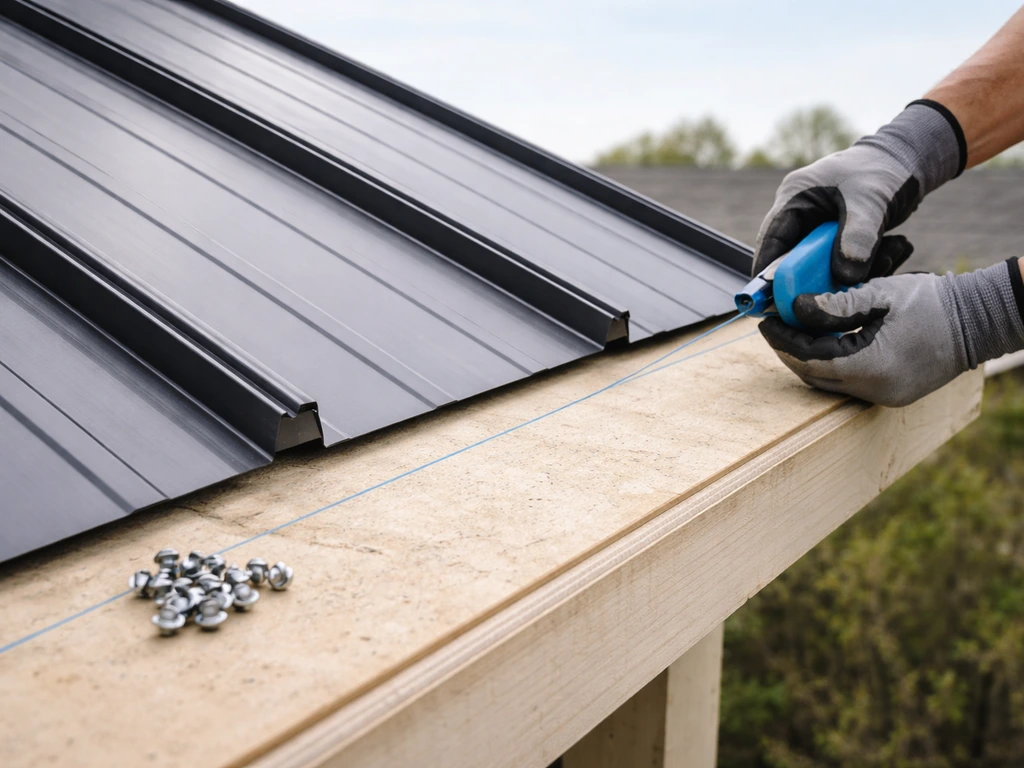
Start at the downwind gable end, which is the end away from the prevailing wind direction. This way overlaps face away from the wind, which reduces the chance of wind-driven rain getting under a seam. For corrugated and ribbed panels, each panel overlaps the previous one by one full corrugation or rib on the side lap. Apply a continuous bead of butyl tape along the sidelap before pressing the next panel down. The tape should end up on the weather side of the sidelap fasteners, not inside. This is a detail that gets skipped constantly, and it's the most common source of seam leaks.
Fasten exposed-fastener panels through the high rib, not the valley. Fastening in the valley traps water at the screw. Use hex-head screws with EPDM rubber gaskets, and drive them snug but not over-torqued. Over-driving compresses the gasket so much that it squeezes out from under the washer and no longer seals. Under-driving leaves the gasket loose. You're looking for the gasket to be compressed just slightly, still round but snug. Space fasteners according to the manufacturer's schedule, typically every other rib at the field and every rib at the eave and ridge to resist uplift.
At the high end of a lean-to or single-slope patio cover, the panel terminates at the house wall or at a ridge. Install a piece of wall flashing that goes up the wall at least 4 inches and laps over the top of the panel by at least 3 inches, with butyl tape under the overlap. For a gable-style patio cover with a ridge, cap the ridge with a pre-formed ridge cap, running butyl tape on both sides of the ridge cap flanges before fastening. Seal the ends of the ridge cap with matching caulk or pre-formed end caps.
Seal every edge and penetration
This is the stage where most leaks either get stopped or get built in. Work your way around every edge of the roof systematically.
- Eave drip edge: Confirm panels overhang the drip edge by 1 to 1.5 inches. If they're short, water will wick back under the panel and into the fascia. Caulk the joint between the drip edge and fascia with polyurethane or metal roofing caulk.
- Gable trim: Install gable trim (also called rake trim) over the panel ends at each gable, lapping it over the panel edge. Run butyl tape under the trim flange before fastening. Trim screws go every 12 inches.
- Fascia and soffit: If your patio cover has a fascia board, the drip edge should already be protecting it. Check that there are no gaps where insects or water can enter. Foam closure strips cut to match your panel profile fill the open corrugations at the eave and prevent birds and debris from getting in.
- Ledger or wall connection: The flashing at the house wall needs to be sealed at the top edge to the siding or masonry. Use a compatible caulk, not standard silicone. If you're attaching to stucco or brick, use a reglet (a groove cut into the mortar joint) or a surface-mounted base flashing with metal lap cap.
- Any penetrations: Lighting conduit, ceiling fan boxes, and similar items that poke through the roof panels get custom flashing collars with butyl tape around the base. Never just caulk around a penetration without flashing. Caulk cracks; flashing lasts.
Condensation is worth thinking about here too. Metal roofs over enclosed or semi-enclosed patio covers can accumulate condensation on the underside of the panels during temperature swings. Synthetic underlayment helps buffer this, but for a tightly enclosed patio cover, consider leaving small ventilation gaps at the eave or using vented closure strips. Standing water or persistent dripping from the underside of panels is a condensation problem, not a leak, but it feels the same if you're sitting under it.
Stay safe throughout the job
Metal roofing work is more hazardous than it looks. The panels are slippery, the edges are razor sharp, and a fall from even a low patio cover can cause serious injury. OSHA requires fall protection for unprotected edges 6 feet or more above the ground for professional roofing work, and that's a good standard for DIYers to follow regardless of whether they're legally required to. Roof jacks and a 2x10 plank give you a solid work platform on the slope and are worth setting up even for small jobs.
Ladder setup matters more than most people realize. When using a ladder for roof access, the side rails need to extend at least 3 feet above the roof edge or landing surface. Set the base out one foot for every four feet of height. Always have someone holding the base or tie the top off. Never carry long metal panels up a ladder by yourself. Set panels on the roof first, then climb up and position them.
- Wear heavy gloves at all times when handling metal panels. The edges cut through work gloves if you're not careful.
- Don't work on the roof in wet conditions, high winds, or if storms are in the forecast.
- If there's any electrical wiring running to patio lights or ceiling fans above the roof deck, turn off the breaker before drilling or fastening anywhere near those runs.
- Keep the work area below clear of people and pets. Dropped screws, trim pieces, and panel offcuts fall fast.
- Wear eye protection when cutting metal. The sparks and metal filings from a circular saw blade travel farther than you expect.
Quality checks and honest troubleshooting
Don't wait until it rains to find out if there's a problem. Run a garden hose across the roof systematically from the bottom up while someone watches from below and inside the patio cover. Start at the eave, then move the hose to the sidelaps, then the wall flashing, then the ridge. This takes 20 minutes and will show you any leaks before they cause damage.
| What to Check | What Good Looks Like | Common Problem |
|---|---|---|
| Panel alignment | Parallel to eave, consistent overhang at eave | First panel set out of square, causing drift across the roof |
| Fastener condition | Gasket compressed snugly, washer flat, screw straight | Over-driven screws with squeezed-out gaskets, or loose screws |
| Sidelap seams | Butyl tape visible at the weather side of the lap | No tape used, or tape on the wrong side of fasteners |
| Eave overhang | 1 to 1.5 inches past drip edge | Panel flush with or short of drip edge, causing wicking |
| Closure strips | Foam fills all open corrugations at eave and ridge | Open voids letting in insects, debris, or wind-driven rain |
| Wall flashing | Minimum 4 inches up the wall, sealed at top edge | Flashing installed but not sealed, allowing water behind it |
| Condensation drainage | Underlayment present, ventilation gap at eave if enclosed | No underlayment, dripping from underside in temp swings |
A common mistake on exposed-fastener roofs is spacing fasteners too far apart at the panel edges. The field of the panel can handle wider spacing, but the eave row, the ridge row, and both gable edges need tighter fastener patterns to resist uplift. If you live somewhere with regular high winds, pull the manufacturer's wind-zone fastener schedule and follow it exactly, not the general recommendation on the product sheet.
When to call a pro instead of doing it yourself
This is a realistic DIY project for most homeowners with basic carpentry skills and comfort working at height, but there are situations where hiring a professional is the right call, not a failure.
- The existing patio cover frame shows rot, significant rust, or damaged post bases. Roofing over a compromised structure just hides the problem until it collapses.
- Your span is wider than 12 to 14 feet and you haven't verified the rafter sizing with an engineer. Wide patio covers can have deflection issues that cause panel cracking, drainage problems, or structural failure.
- Your municipality requires an engineered drawing for the permit. If the building department asks for a stamp, you need to hire a structural engineer.
- The roof connects to a complex roofline with multiple valleys, dormers, or irregular geometry. Simple lean-to and gable patio covers are manageable DIY projects. Complicated tie-ins to existing roofs are not.
- You're in a high-wind zone (110 mph or higher design wind speed) and aren't confident about the uplift calculations. Improperly fastened metal roofs in high-wind areas become projectiles.
- There's active electrical or plumbing work involved in the patio cover that requires a licensed trade contractor.
If you do hire out part or all of the work, you're still better off having read through this guide. You'll know what questions to ask, what to look for during the job, and what the finished product should look like when the contractor is done. Knowing the right fastener pattern or the correct lap sequence is the difference between accepting sloppy work and catching it before you sign off.
For a project like a tin-roof-style patio cover where the aesthetic is as important as the function, there are additional details worth reviewing in a guide specifically on how to build a tin roof patio cover. But for most homeowners starting with an existing patio cover frame and a goal of a clean, leak-free metal roof: measure accurately, check the frame first, start at the eave and work up, tape every lap, and flash every edge. That's the whole job.
FAQ
Do I need solid sheathing under a metal roof on a patio cover, or can I leave it open with purlins only?
It depends on the panel type and your spacing. Exposed-fastener corrugated or ribbed panels are often installed over purlins at the manufacturer-required spacing, but some standing seam systems or flatter slopes may require specific deck support. If the panel label does not show an “open framing” approval for your gauge and span, add the recommended substrate rather than guessing.
What happens if my patio cover is higher or lower than the planned slope when I actually get on the roof?
Metal roofing performance depends on reaching the minimum slope required for the specific panel system. If the finished slope is lower than the panel’s minimum, you may need to reframe to increase fall or switch to a system rated for lower slopes (for example, certain standing seam designs). Do not rely on adding more sealant, because excessive sealant cannot correct improper drainage and may void warranty.
How do I calculate panel length, especially for areas with a gable end or a wall termination?
Plan for both the course length and the extra allowances for flashing laps and trim. Measure from the eave reference line to the top termination, then add allowance for the underlayment overhang and ridge or wall flashing overlap the system requires. For precision, mock up the first and last course on the ground, then verify fit before fastening the entire row.
Can I reuse existing roof screws or fasteners from the old patio cover materials?
In most cases, no. Fasteners should match the metal roof system, including the correct screw type, length, and EPDM gasket condition. Old hardware may not seal properly due to gasket aging or corrosion. If any previous screws are removed, inspect the purlins or framing holes for looseness, and install new fasteners per spacing.
What is the correct way to cut metal panels so they don’t get damaged or rust later?
Use a metal-cutting blade intended for steel (or the panel manufacturer’s recommended tool). Avoid grinding at the cut edges unless the manufacturer allows it, because excessive heat can affect coating. After cutting, remove sharp burrs so you do not slice underlayment or gaskets, and clear metal shavings off the roof to prevent staining and corrosion spots.
Do I need to seal every screw on an exposed-fastener roof?
Typically no. Exposed-fastener systems rely on the gasketed screws sealing at the penetration, plus butyl tape for lap seams and flashing overlaps. Over-sealing screw heads can trap water or prevent proper gasket compression. Follow the manufacturer’s guidance on when tape is used (often sidelaps, eave/edge details, and flashing interfaces), and let the gasket do its job.
How do I handle a patio cover roof that meets the house at an unusual angle or has an irregular wall line?
Irregular wall lines usually require a custom flashing layout using proper wall flashing profiles and careful lapping. Confirm the wall flashing can lap correctly over the underlayment and over the top of the panel, then use butyl tape under required overlaps. If the angle changes along the run, consider segmenting the flashing pieces so each section maintains correct lap directions.
My roof line is long, can panels expand and contract without problems, or do I need to leave gaps?
Metal roofs expand and contract, temperature swings are normal, and the installation must allow movement at certain terminations. Leave the clearances the manufacturer specifies at eave edges, rake ends, and wall transitions, and do not tightly lock trims in a way that prevents panel movement. Butyl tape should be used on lap seams and flashing overlaps as directed, it should not be used to immobilize the panels.
Should I install ridge and hip details with sealant as well as tape?
Often tape is used under the ridge cap flanges, but the exact sealant requirement for end caps or specific ridge models varies by system. Use butyl where the manufacturer calls for tape to maintain a flexible seal, and only add caulk where the detail calls out end sealing. If you use the wrong product at the wrong joint, you can end up with adhesion failures or trapped moisture.
How can I tell if fastener spacing is adequate for wind uplift on my patio cover?
You need the fastener schedule for your panel type and your wind speed exposure. Look up the wind-zone requirement on your local permit documentation or building department info, then match the manufacturer’s fastener spacing for the field, eave, ridge, and edges. If your framing spacing required purlins, confirm the purlin layout also meets the same design, because weak framing can negate proper fastener placement.
What’s the best way to prevent water intrusion at the first and last panel (the most common leak points)?
Treat the first course square installation and the final termination details as critical. Verify the first panel is square using diagonal measurements before fastening, then ensure every lap at the sidelaps is taped correctly with butyl on the weather side of fasteners. For the top termination, confirm wall flashing or ridge cap lapping is correct and fully covered by the underlayment and panel profile.
Is condensation under a metal roof always a leak problem, and what can I do before it becomes one?
Not always. Condensation is caused by temperature swings and moisture in enclosed or semi-enclosed patio covers, while a true leak is water getting in from outside. If you see dripping under the panels but the roof surface remains dry, improve air movement by adding eave ventilation gaps or vented closure strips where allowed by your panel system. Avoid covering potential ventilation paths with improvised sealant.
When is it smarter to hire a pro instead of DIY for a metal roof on a patio cover?
Hire help if the patio cover is large, the framing is questionable, you need structural changes to meet wind or load requirements, or you cannot safely access the roof edges with fall protection. Also consider hiring if the project requires engineered fastener schedules, custom flashing for complex intersections, or if you have limited ability to confirm panel square and alignment.
Do I need to remove the entire existing patio cover roof material, or can I install over it?
You should usually remove old roofing material and debris down to the sound framing. Installing over unknown layers can trap moisture, interfere with underlayment placement, and create uneven support that leads to oil-canning or poor lap drainage. If any existing components remain, they must be dry, solid, and compatible with the underlayment and purlin layout.