You can install a corrugated metal roof over a patio yourself in a weekend or two if the framing is already in place. The process comes down to six things done in the right order: confirm your structure can handle the load, nail down the slope and layout before you buy anything, set your purlins or rafters at the correct spacing, install panels starting from the correct end with proper overlap, seal every penetration and edge with the right closure strips and flashing, and fasten with the right screws at the right spacing. Get those six things right and you'll have a roof that sheds water cleanly for 30-plus years with almost no maintenance.
How to Install a Corrugated Metal Roof Over a Patio

Celia Vaughn
29 Apr 2026
Planning and Measuring Your Patio Roof Footprint
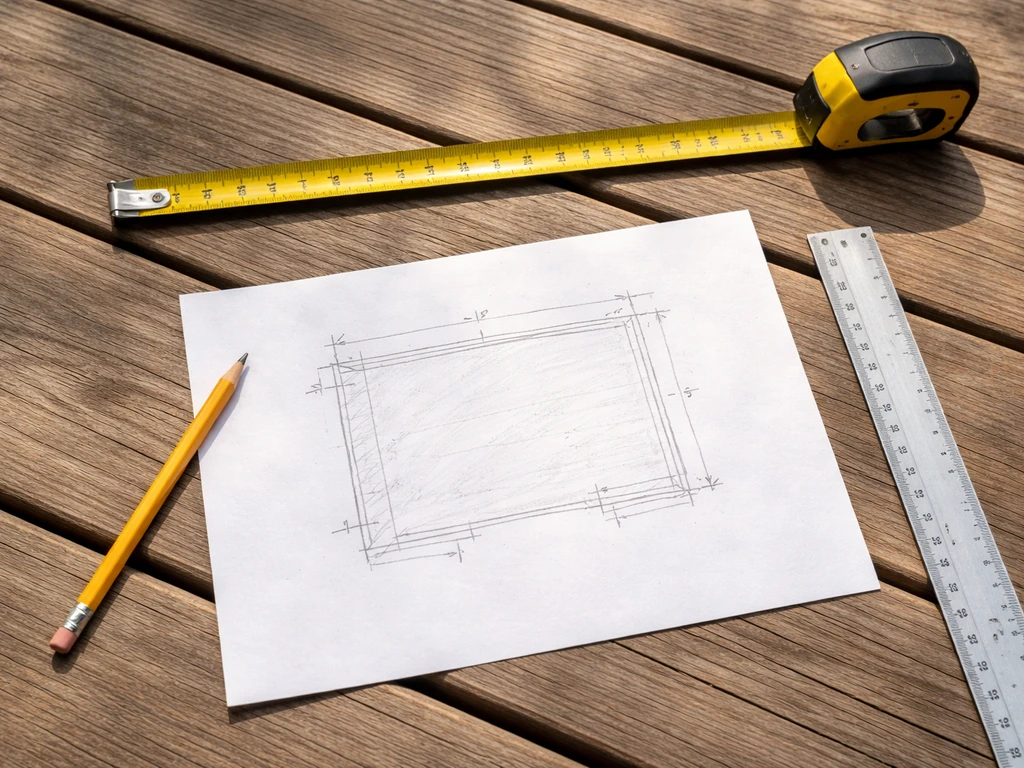
Before you buy a single panel, get exact measurements of your patio slab or deck footprint and sketch it on paper. Measure the width (perpendicular to the house) and the length (parallel to the house). Then decide how much overhang you want beyond the slab edge, typically 2 to 4 inches on the sides and 6 to 12 inches at the drip edge (the low end of the slope). That overhang dimension gets added to your raw measurement when you calculate panel length.
Next, confirm your structural situation. If you have an existing patio cover frame, check that the ledger board or beam attached to the house is solidly anchored and not rotted, that posts are plumb and properly footed, and that the framing can handle at least 20 psf (pounds per square foot) of live load, which is the code baseline under IRC Table R301.
These same steps apply when you’re building a patio cover with a metal roof, from measuring the footprint to installing panels and sealing transitions. Use these same panel, flashing, and sealing basics to guide how to build a tin roof patio cover, step by step. 5 for lightweight roof structures. Corrugated steel panels are typically 1.
2 to 1. 8 psf depending on gauge, so the panels themselves are light. But you also need to account for snow load in your climate and any wind uplift requirements in your area. This is the step most DIYers skip, and it's the one that matters most structurally.
Once you have your footprint dimensions, figure out how many panels you need. Standard corrugated panels are usually 26 inches wide with a coverage width of about 24 inches once you account for the one-corrugation side overlap. Lengths come in 6-foot to 16-foot increments from most suppliers. To minimize seams, buy panels long enough to run the full slope in one piece if possible. Divide your roof length by the 24-inch coverage width and round up. Add 10 percent for waste and cutting. Write this down before you head to the store.
Choosing Corrugated Metal Panels, Underlayment, and Fasteners
For a patio cover, you have three main corrugated panel material choices: galvanized steel, Galvalume steel, and polycarbonate (which is technically not metal but is sold alongside corrugated metal panels). For a permanent, opaque roof, Galvalume steel in 29-gauge is the sweet spot for DIY patio work. It costs less than 26-gauge, handles typical patio spans fine when purlins are spaced correctly, and the Galvalume coating (aluminum-zinc alloy) lasts significantly longer than plain galvanized in humid or coastal environments. If you want natural light, clear or diffused polycarbonate corrugated sheets work with the same installation method but need UV-stabilized fasteners.
| Panel Type | Typical Cost (per sq ft) | Lifespan | Best For | Watch Out For |
|---|---|---|---|---|
| 29-gauge Galvalume steel | $0.80–$1.40 | 40–60 years | Most patio covers, sheds | Condensation on underside without barrier |
| 26-gauge Galvalume steel | $1.20–$2.00 | 40–60 years | High-wind areas, wider spans | Overkill for simple lean-tos |
| Galvanized steel (plain) | $0.60–$1.10 | 20–30 years | Budget builds, temporary covers | Rusts at cut edges without treatment |
| Polycarbonate corrugated | $2.00–$4.50 | 15–25 years | Areas needing natural light | Heat gain, yellowing over time, UV exposure |
For underlayment, a patio lean-to at a low slope does not always require felt underlayment the way a steep house roof does, but a synthetic underlayment or a peel-and-stick vapor retarder on top of your purlins is smart for two reasons: it cushions the panels against vibration noise in rain and it acts as a condensation barrier. If you skip it, expect the underside of steel panels to sweat on cool mornings, dripping onto whatever is below. This matters a lot if your patio is adjacent to living space.
Fasteners are non-negotiable: use hex-head self-drilling screws with a rubber EPDM washer, specifically rated for metal roofing. These are often called roofing tek screws or metal-to-wood screws. Per IRC Section R905. 2.
5, fasteners for metal roofing must be corrosion-resistant. IRC 2024 Chapter 9 also requires metal-sheet roof coverings to be naturally corrosion resistant or provided with corrosion resistance that meets Table R905. 10. 3(2) [fasteners for metal roofing must be corrosion-resistant](https://codes.
iccsafe. org/content/IRC2024V2. 0/chapter-9-roof-assemblies). Do not use plain zinc screws or drywall screws.
For attaching panels to wood purlins, use 1. 5-inch #9 or #10 hex-head screws. For attaching panels at the overlap stitching seam, use shorter 1-inch stitching screws. Buy 50 percent more screws than you think you need because you will strip some and drop more.
Framing Strategy: Attaching to the House vs. Building a Freestanding Cover
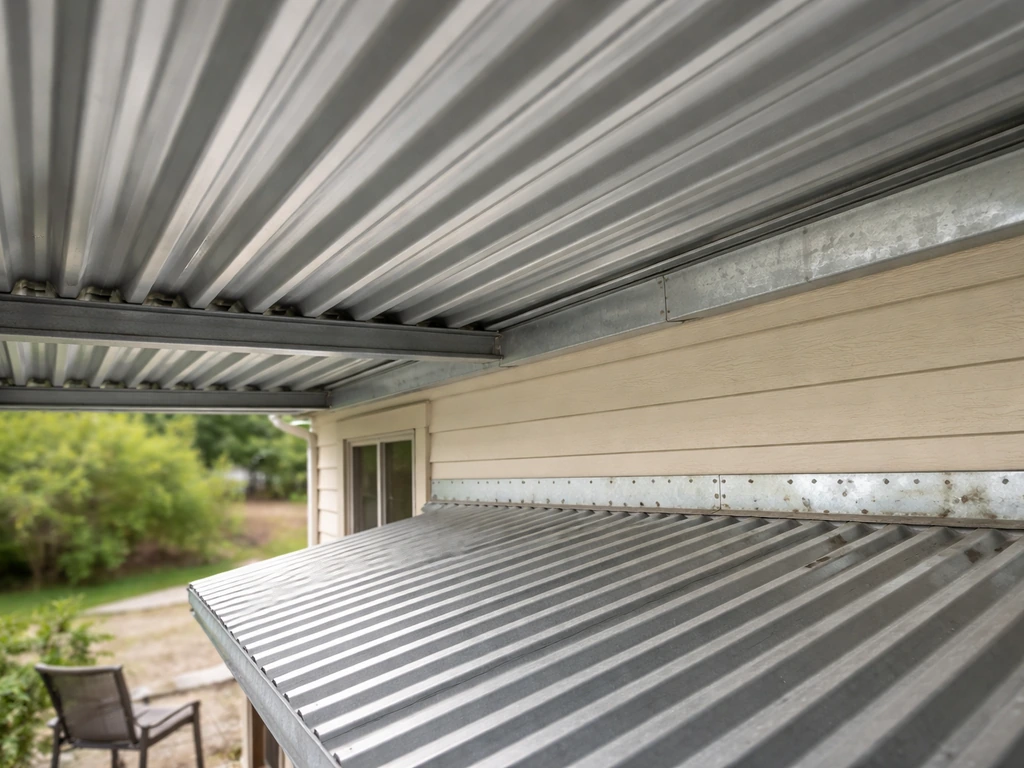
Most patio corrugated roofs are either lean-to style (one end attached to the house, the other supported by posts) or fully freestanding (posts on all sides, no house attachment). Most patio corrugated roofs are either lean-to style (one end attached to the house, the other supported by posts) or fully freestanding (posts on all sides, no house attachment), which are common options if you are learning how to build a metal roof over a patio.
Lean-to is the simpler and more common option. Freestanding gives you more flexibility in placement but requires a ridge beam or a double-pitched design. Both framing approaches are covered in the broader family of metal roof patio cover builds, but for this guide we'll cover lean-to as the primary and note freestanding differences where they matter.
If you prefer the lean-to approach, the steps for installing a metal roof patio cover are the same core process of framing, panel layout, and flashing that you would use for a patio cover with a full roof.
Lean-To Attachment to the House
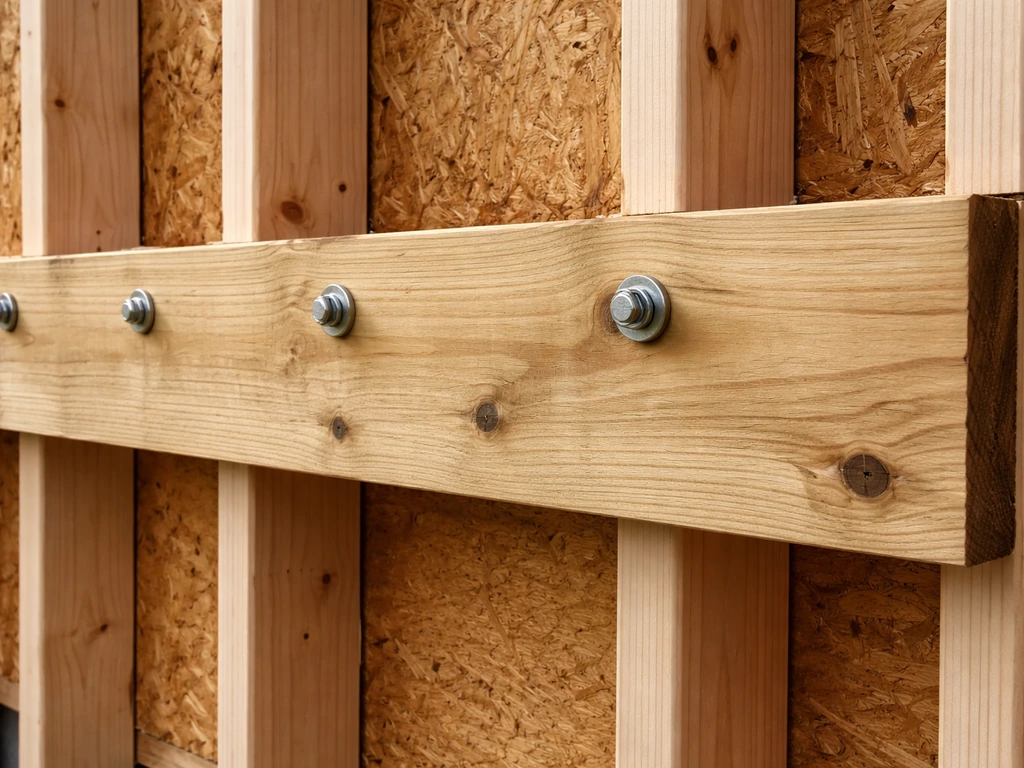
The ledger board is the most critical connection point. It must be lag-bolted into the house's rim joist or wall studs, not just the sheathing or siding. Use 1/2-inch lag screws at minimum 16 inches on center. If you're attaching to stucco, brick, or masonry, you need concrete anchors rated for the tension and shear loads involved. This is one of the situations where calling a structural engineer or at least a licensed contractor for a consultation is worth the couple hundred dollars. A ledger that pulls free in a wind event is a serious safety problem.
Once the ledger is set, establish your post locations at the outer edge. Posts should be 4x4 PT lumber minimum for spans up to about 8 feet, or 6x6 for longer spans or anything in a high-wind zone. Set posts in concrete footings at a depth your local frost line requires (usually 12 to 36 inches depending on where you live). A beam runs across the top of the posts, and rafters or purlins span from the ledger to the beam. For corrugated panels, purlins are usually 2x4s laid flat, spaced 24 inches on center for 29-gauge panels.
Freestanding Patio Cover Framing
For a freestanding structure, you need posts on both sides and a ridge beam or a dual-slope design so water sheds to both sides or to one designated side. The purlin layout is the same as lean-to, but you'll also need to think about lateral bracing: knee braces or diagonal members from posts to the beam to keep the structure from racking in the wind. FEMA wind load guidance references ASCE 7 for structures where uplift and lateral forces matter, and a freestanding patio cover with a large roof area in a windy region qualifies. When in doubt, brace more than you think you need to.
Water-Shedding Design: Slope, Layout, Flashing, and Drip Edge
Corrugated metal roofing can technically drain at very low slopes, but the minimum recommended pitch for a corrugated panel roof is 1:12 (that's 1 inch of rise for every 12 inches of run). Mueller’s corrugated panel installation guide says corrugated panels should not be installed on roofs with a pitch less than 1:12 minimum recommended pitch for a corrugated panel roof is 1:12. Most patio covers work best at 2:12 to 4:12. A steeper pitch sheds water faster, handles debris better, and reduces the chance of wind-driven rain backing up under the panels. If you're in a wet climate, go steeper. If you're in a hot, dry region and want to minimize the visual impact, 1.5:12 is workable.
Establish the slope by setting the ledger height at the house and the beam height at the outer posts so the difference divided by the run gives you your target pitch. For a 10-foot deep patio at 2:12, the ledger sits 20 inches higher than the top of the outer beam. Snap a chalk line along the ledger and use a long level or laser level to confirm everything is consistent before you start framing.
Flashing is what protects the transition between your new roof and the house wall. You need a continuous piece of step flashing or a pre-formed Z-flashing tucked behind the house's siding or water-resistive barrier and lapping over the top of your first panel row. Do not rely on caulk alone at this joint. Caulk is a backup seal, not the primary water barrier. The primary is always overlapping flashing in the direction water flows: upper piece over lower piece.
At the low end (the drip edge), install a metal drip edge that overhangs the outer beam by at least 1.5 inches so water drips clear of the wood. At the sides, install rake trim or bend flashing to cap the panel edges. These edges are where wind-driven rain will try to push in if they're left open.
Step-by-Step Installation of Corrugated Panels
Before the first panel goes up, make sure your ledger flashing is already in place and your drip edge is installed on the outer beam. Install any underlayment now, rolling it across the purlins from the low end to the high end (upslope overlaps downslope by at least 6 inches). Staple or tack it temporarily so it doesn't shift while you're working.
- Start at the end of the roof opposite the prevailing wind direction. This way overlaps face away from the wind, which reduces the chance of rain getting driven under the seams.
- Set your first panel with the correct side and end overhang (typically 1 to 2 inches at the side rake edge, and 2 to 4 inches beyond the drip edge at the low end).
- Check the panel for square by measuring the diagonal from the top corner to the opposite bottom corner. Adjust until it's square with the structure, not just parallel to the beam.
- Drive your first fasteners at the top and bottom purlin only — just enough to hold the panel in place. Don't fully fasten until you've placed the next panel and confirmed the overlap.
- Place the second panel so it overlaps the first by one full corrugation rib. For standard 2.67-inch corrugated profile, that's about 2.67 inches of overlap. In high-rain areas, overlap two ribs.
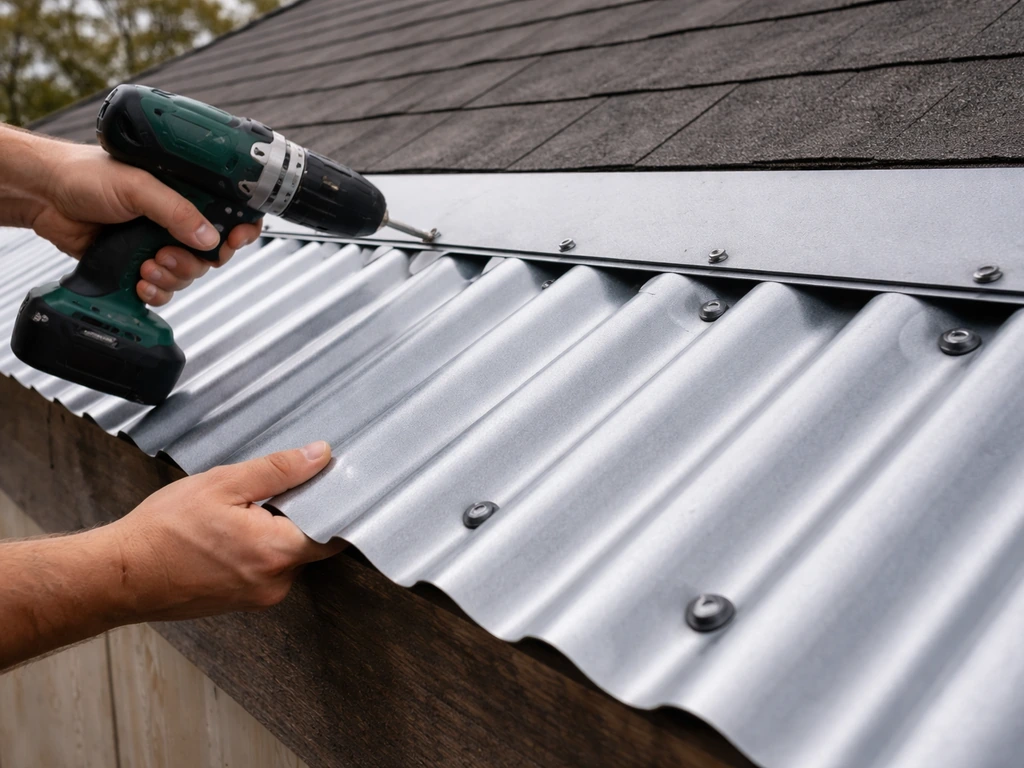
- Once two panels are aligned, fully fasten both: drive screws at every purlin, into the crown (the raised part) of the corrugation, not the valley. Screws in the valley cause leaks. Fasten at 12 inches on center at the top and bottom purlins and 24 inches on center at intermediate purlins.
- At the stitching seam between panels, drive stitching screws through both overlapping panels at every other corrugation peak, about 12 to 18 inches apart.
- Continue panel by panel toward the other end of the roof.
- For the last panel, measure the remaining width and cut the panel lengthwise using aviation snips for short cuts or a circular saw with a metal-cutting blade or carbide-tipped blade for long cuts. Cut with the good face down when using a circular saw to reduce burring on the visible side.
- After all panels are placed, go back and verify every fastener: the rubber washer should be compressed just enough to create a seal without being over-driven (over-driving distorts the washer and actually creates a leak path).
A few cutting notes: tin snips work fine for trimming around small obstructions but they distort the panel edge if you're cutting a long straight line. A circular saw with a fine-tooth metal blade cuts cleanly and fast, but metal shards go everywhere. Wear safety glasses and long sleeves, and blow or brush the metal filings off the panels after cutting or they'll rust and stain the surface within a few weeks.
Sealing and Leak-Proofing: Closure Strips, Flashing Transitions, and Fastener Technique
Closure strips are the foam or rubber pieces that fill the corrugated voids at the top and bottom of the panels. Without them, you have open gaps that let in insects, birds, wind-driven rain, and debris. Install ridge closure strips (the profile matches the panel corrugation) at the high end of each panel under the flashing or against the house wall. Install eave closure strips at the low end, just above the drip edge. These strips come in foam or pre-molded rubber and are usually sold alongside the panels at the same supplier. Make sure the profile matches your panel (2.67-inch corrugated versus 1.5-inch corrugated profiles are different).
At the house wall transition, use butyl tape or a caulked bead of polyurethane sealant behind your Z-flashing before you press it against the wall. At the panel-to-Z-flashing joint, run a bead of clear silicone or metal-roof-rated sealant. Do not use standard white paintable caulk here; it cracks and fails within a season or two on metal that expands and contracts with temperature changes.
Fastener technique is where most leaks originate. The EPDM washer must be sitting flat and just slightly compressed when the screw is fully driven. If you see the washer squeezing out around the sides of the hex head, you've gone too far. Back it out a quarter turn. If the washer looks loose and is spinning freely, go a quarter turn tighter. This sounds fussy but it matters: an over-driven fastener will push the washer to one side and leave a gap for water to wick down the screw shank. Check fasteners on a warm, sunny day after installation when the panels have expanded slightly, and retighten any that feel loose.
Tools and Materials Checklist
- Corrugated metal panels (Galvalume 29-gauge recommended, quantity calculated from footprint plus 10% waste)
- Hex-head self-drilling screws with EPDM washers (1.5 inch for panel-to-purlin, 1 inch for stitching seams)
- Ridge closure strips and eave closure strips matched to panel profile
- Z-flashing or step flashing for house wall transition
- Drip edge (metal, matched to roof pitch)
- Rake trim for side edges
- Synthetic underlayment or peel-and-stick vapor barrier
- Butyl tape and polyurethane or silicone sealant
- 2x4 or 2x6 PT lumber for purlins and framing (if not already in place)
- Lag screws (1/2 inch diameter) for ledger attachment
- Post hardware, joist hangers, and hurricane ties
- Circular saw with metal-cutting blade
- Aviation snips (left, right, and straight cut)
- Drill/driver with hex bit for roofing screws
- Chalk line and tape measure
- Laser level or 4-foot level
- Safety glasses, work gloves, and non-slip roof shoes
- Ladder standoffs and roof anchor/harness if working above 6 feet
Safety, Permitting, and Knowing When to Hire Help
Most jurisdictions require a building permit for a permanent patio cover, even if it's a simple lean-to. Metal roofing on patio structures falls under IRC Chapter 9 (specifically R905.10 for metal roof panels), and local building departments will often want to see your structural plan, footing depth, ledger attachment method, and sometimes a wind uplift calculation. Skipping the permit might seem like it saves time, but it creates real problems when you sell the house or if the structure fails and causes injury. Pull the permit, get the inspections, and you also get a second set of eyes checking your work.
Working at height is the most serious physical risk. Even a 6-foot fall from a ladder can cause serious injury. Use a ladder stabilizer or standoffs so the ladder doesn't rest against the panels. If the patio roof is tall enough that you're working above 10 feet, use a roof anchor and a safety harness. It's uncomfortable but not optional. Have a helper on the ground when you're moving panels: a 12-foot corrugated panel in even a light breeze behaves like a sail and can pull you off a ladder.
Know your limits on when to call a pro. If your existing patio cover structure has rotted wood, undersized posts, or a ledger that was never properly bolted to the house framing, fix those problems first. If you're attaching to masonry or a stucco exterior, the ledger attachment requires the right masonry anchors and ideally a consultation with someone who can confirm the wall assembly can handle the load. For large patio roofs (over 400 square feet), complex shapes, or locations in high-wind or heavy-snow zones, a structural engineer review is money well spent. The panels and trim are the easy part; the structure holding them up is what actually keeps you safe.
Common Problems and Fixes After Installation
Leaks at the House Wall
This is the most common leak point. Nine times out of ten it's because the Z-flashing was installed in front of the siding instead of behind it, or because the flashing was relied on without a butyl or sealant backup. Fix: if the flashing is accessible, pull the bottom course of siding, slide new flashing behind it, and re-seal. If you can't access behind the siding, run a bead of polyurethane sealant along the top edge of the Z-flashing and press a strip of butyl tape over it, then re-flash with a wider piece of metal that laps further up the wall.
Leaks at Fasteners
If you're seeing water around individual screw locations, the washer was either over-driven, under-driven, or the screw is now backed out from thermal cycling. Back out the screw, apply a dab of roofing sealant into the hole, and drive a new screw adjacent to the old hole (the original hole is now enlarged). Use a slightly larger diameter screw if the panel hole feels stripped.
Oil-Canning and Panel Buckling
Oil-canning is that wavy, rippled appearance in flat sections of a metal panel. On corrugated panels it's less common than on standing seam, but it can happen if panels were over-fastened (driven too tight so the panel can't expand), if the purlins aren't level with each other, or if a panel was installed under tension. You can't fully eliminate it once the panel is up, but you can minimize it by making sure all purlin tops are in the same plane before installing panels, and by not over-driving fasteners. Some movement in metal panels is normal and not a structural or waterproofing problem.
Condensation Dripping from the Underside
If you skipped the underlayment or vapor barrier and your patio is in a humid climate, you'll see moisture beading and dripping from the underside of the panels on cool mornings. The fix is to add a product designed for this: anti-condensation paint (a thick rubberized coating applied to the underside of panels), foam-backed panels (some manufacturers sell panels with factory-applied foam backing), or a secondary ceiling layer of polycarbonate panels below the metal with an air gap between them. Adding the underlayment at this stage means taking the panels back off, which is frustrating but doable.
Panels Lifting or Pulling Free at the Edges
Wind uplift is greatest at panel edges and corners. If panels are coming loose at the rake edges or the low end, you don't have enough fasteners there. At the perimeter (first and last purlin, and side edges), fastener spacing should be tighter: 6 to 8 inches on center rather than 12. Add hurricane ties or panel clips at the corners if you're in a windy location. This is much easier to do proactively during installation than after the fact.
Once your roof is installed, walk it with a hose on a still day before you consider the job done. Run water across the top and watch from below for any drips. Check the house wall joint, every rake edge, the drip edge, and around any fasteners that looked questionable during install. A 20-minute hose test now saves you a lot of frustration after the first real rainstorm.
FAQ
Can I install a corrugated metal patio roof if I only have the house connection and not the full existing frame?
Yes, but you should not improvise purlin support. You still need a complete load path from the ledger into posts (and footings) and then into purlins rafters. If you are missing posts or the top beam, build the framing first, because panel screw spacing and overlap cannot compensate for weak or misaligned purlins.
What’s the safest way to plan panel overlap if my patio width isn’t a multiple of the panel coverage?
Use the coverage width (not the raw panel width) to lay out the run and then plan one cut end so the last panel lands cleanly on the perimeter purlin. Avoid creating a floating seam mid-span, and ensure each panel end sits over a purlin so the overlap fasteners land in solid support.
Do I need an underlayment if I’m using a higher pitch like 3:12?
A higher pitch helps, but it does not replace an underlayment when condensation is a concern. If your underside will be visible (near a living space), use a synthetic underlayment or a peel-and-stick vapor retarder to reduce dripping on cool mornings and to cushion rain noise.
What should I do if my roof pitch ends up flatter than 1:12 after framing?
Stop and correct the framing. Flatter slopes increase the chance of water backing up at overlaps and at side edges, and it can overwhelm closure strips and flashing. Adjust ledger or beam heights before panels go on, then re-check with a level or laser to confirm consistent slope.
How can I tell whether my existing ledger is attached to framing rather than just siding or sheathing?
Look for fasteners into rim joist or wall studs, not into the exterior layer. If you cannot verify, remove a small section of trim or siding at the ledger location to inspect, or consult a contractor. A ledger that only grips sheathing is a common failure point during wind events.
What screw length should I use when fixing panels to wood purlins?
Confirm that the screw is long enough to fully bite into the purlin. As a practical rule, the screw should penetrate the purlin with enough thread engagement to clamp the panel firmly without bottoming out. If you feel the screw stop abruptly, you likely hit something or the hole is misaligned, which can lead to leaks if the washer is not properly seated.
How should I seal the panel-to-flashing joints, and is sealant alone acceptable at edges?
Sealant is a secondary layer. At Z-flashing and other transitions, rely on correct lapping first, then add a compatible sealant bead at the joint where panels meet the metal. Do not depend on caulk alone at the house wall transition, because metal expansion and contraction will crack ineffective sealant.
Is butyl tape required at the house wall connection if I already used flashing and silicone?
Butyl tape provides a more resilient, adhesive primary seal under moving metal. If you cannot install flashing correctly behind the siding, butyl plus a wider lapping piece of metal is a better contingency than silicone alone. When possible, still tuck the flashing behind the water-resistive barrier or siding as designed.
What’s the best way to handle small cuts at corrugation peaks and valleys?
Plan cuts so they are not forced under tension. Use a fine-tooth metal blade or proper metal snips for small sections, then check fit before fastening. Misfitting cuts often cause washer misalignment, which can create wicking paths along screw shanks.
If I see oil-canning or waviness after installation, do I need to remove the panels?
Usually no. Minor waviness is not the same as a leak, and you can often correct it by fixing over-driven fasteners and confirming purlins are in the same plane. Remove only if fasteners are clearly mis-seated, seams are not tight, or water tests show actual leakage.
How should I do a hose test to avoid missing leaks?
Use a still day and run water in sections across the roof, starting at the drip edge and then along the house wall joint, rake edges, and perimeter screws. Watch from below for drips at overlaps and at the first and last rows, since many failures show up after a short period of continued flow.
What should I check first if water shows up around one specific screw location?
Treat it as an installation seal issue. Check whether the washer was over-driven or under-driven (washer too tight or not compressed enough), then back out the screw and re-seal. If the hole is enlarged, drive a properly sized replacement screw adjacent to the old hole so the washer sits flat again.
Do I need to retighten fasteners after a few weeks?
Yes, after thermal cycling. Metals expand and contract, and screws can feel slightly loose. Re-check fasteners on a warm sunny day, especially near the perimeter and at corners, then retighten only to the point where the washer is properly compressed without squeezing out.
How do I reduce wind uplift risk on the edges and corners?
Increase fastener density at perimeter purlins and at sides, and add corner-specific clips or hurricane ties if your area is windy. Wind uplift failures often start at the rake edges and the low end, so prioritize tighter spacing there rather than only in the field of the roof.
When is it worth bringing in a structural engineer or contractor?
Get help when ledger attachment is unclear (especially on stucco, brick, or masonry), when spans are large, or when your region has high wind or heavy snow. Also consider professional review for complex roof shapes or roofs over a larger area, because structure sizing and uplift bracing matter more than panel selection.