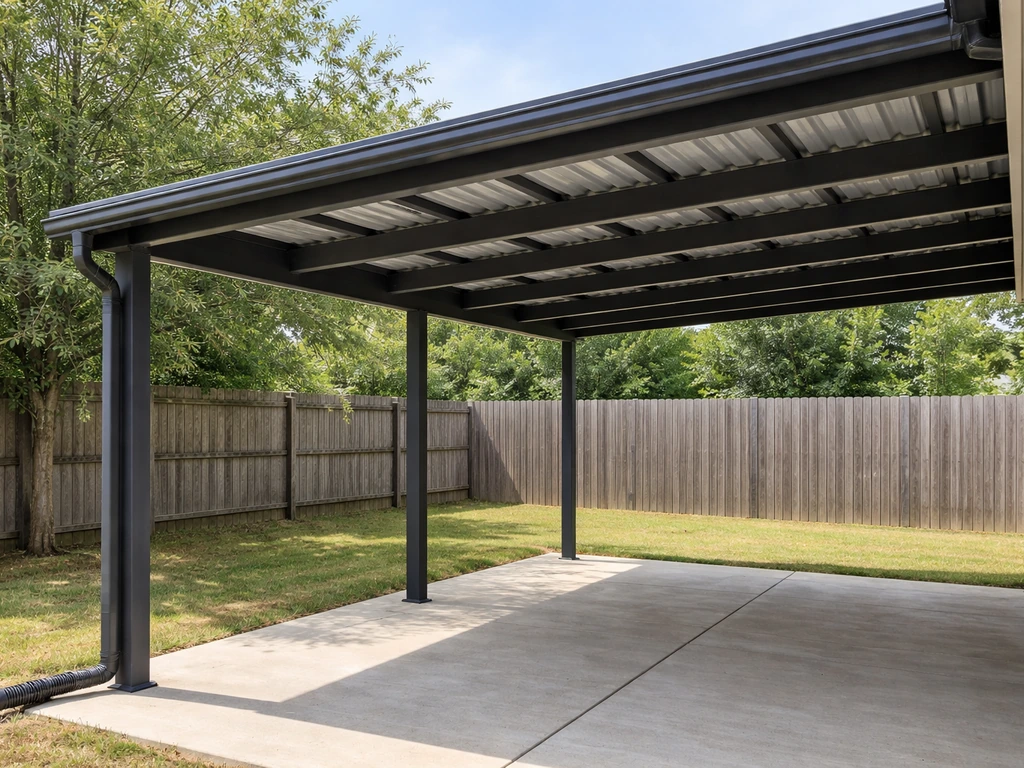
You can build a metal roof over your patio yourself, and it will last 30 to 50 years if you plan it right. The core steps are: design your roof style and slope, pull a permit, frame out posts and beams, install rafters, lay underlayment, flash the edges and wall transitions, then run your metal panels from eave to ridge. The biggest mistakes happen in the planning stage, not during panel installation, so front-loading the design work pays off big.
How to Build a Metal Roof Over a Patio Step by Step

Celia Vaughn
29 Apr 2026
Design and Planning Your Metal Patio Roof
Before you buy a single screw, measure your patio and sketch out the structure. You need three things nailed down at the start: the footprint, the roof style, and the pitch.
Measuring the Footprint
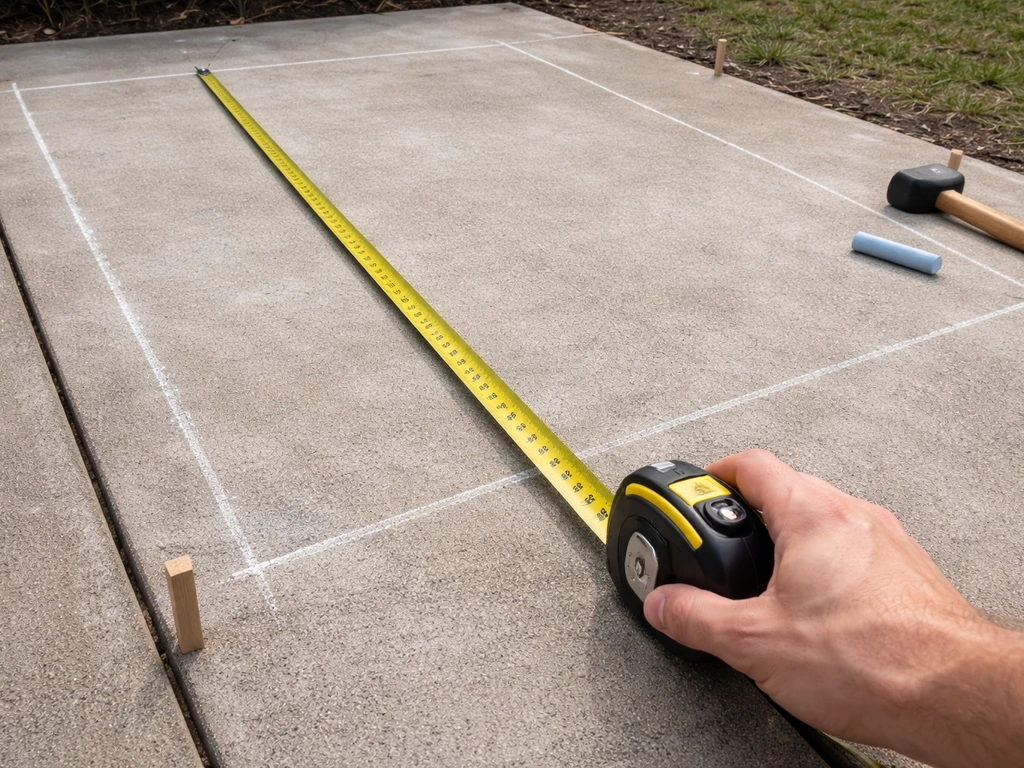
Measure the length and width of your slab. Posts typically sit at the outer edge of the slab. If you want a front overhang of about 1 foot beyond the slab edge, you may need a backset beam to carry that load properly. Write down your existing eave or overhang length from the house wall, because that number goes on your permit drawings.
Picking a Roof Style
A lean-to (shed) roof is the simplest option for most patios and the easiest to attach to the house. It slopes in one direction, sheds water away from the house, and requires the fewest framing cuts. A gable roof looks more finished and handles wind better but roughly doubles your framing complexity. A flat-ish pergola-style roof is tempting but creates real drainage problems with metal panels, so I'd steer clear unless you know what you're doing with low-slope systems.
Setting the Slope
Slope is the detail most DIYers underestimate, and it's the difference between a dry patio and a leaky one. For standing seam metal panels, the minimum is 1:12 (1 inch of rise for every 12 inches of run), per U.S. Army Corps of Engineers standards. For exposed-fastener corrugated or ribbed panels at lower slopes (under 3:12), you need butyl tape at every lap joint or you will get leaks at the overlaps. Many local building codes set the range for solid patio-cover roofs at a minimum of 1/4 inch per foot and a maximum of 3/4 inch per foot. A practical target for most attached lean-to builds is 6 inches of total drop across the run, which gives you enough pitch to drain reliably without raising the house attachment point uncomfortably high. Decide your pitch before you order lumber or panels.
Permits, Safety, and Getting the Site Ready
Almost every city and county requires a permit for a patio cover with a solid roof. This is not optional, and skipping it creates serious problems at resale and with insurance. Structural engineering is commonly required as part of the permit package. The reviewer will check your design against wind uplift loads, snow loads if applicable, and total roof load. Don't guess at these numbers.
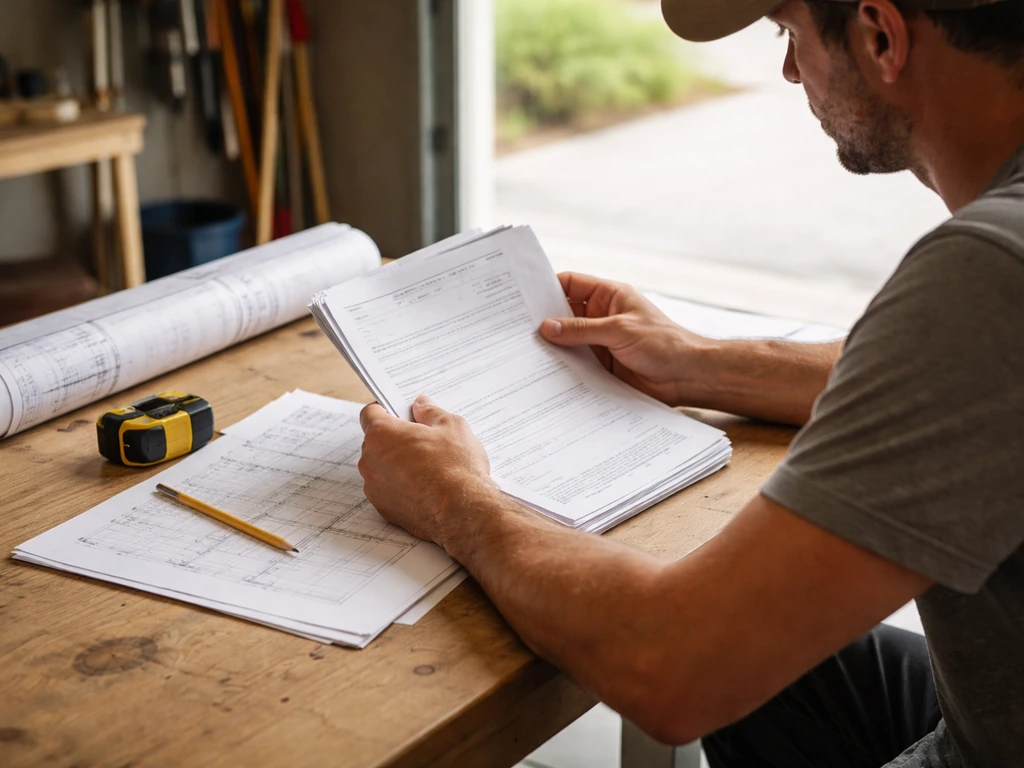
What to Submit with Your Permit Application
A typical permit submittal package for a patio cover includes a plan view with all key dimensions, connection details showing how rafters attach to the ledger or top plate, and post-base connection details to the footing with specified mechanical connectors. Some jurisdictions also want manufacturer catalog sheets if you're using a kit system. Pull the checklist from your local building department's website before you draft anything, because requirements vary a lot by municipality.
Fall Protection and Rooftop Safety
blank" rel="noopener noreferrer">OSHA's fall protection standards for residential construction kick in at 6 feet above the lower level. Even if your patio roof is only 8 or 9 feet off the ground, you are working on a sloped surface with metal panels that are slippery, especially with morning dew. Use a roof anchor, wear a harness, and set up your ladders on stable ground. OSHA’s residential construction fall-protection standard requires guardrail, safety net, or personal fall arrest protection when employees are working 6 feet or more above a lower level, unless an alternative provision applies blank" rel="noopener noreferrer">Fall Protection in Residential Construction. Never stand on an unsecured panel. Have someone on the ground when you're working at height. This is the one area where I'm not going to say 'use your judgment.' Falls are the leading cause of construction fatalities, and a patio roof project is not worth a hospital visit.
Site Readiness
Clear the patio and check the existing concrete slab for cracks or unlevel areas that will affect post placement. If you're attaching a ledger to the house wall, inspect the wall sheathing and siding for rot or damage before you commit to that connection. Mark your post locations with chalk or stakes. Check for overhead utilities before you start digging footings or staging tall ladders.
Choosing the Right Metal Roofing Type and Materials
There are two main panel categories for a DIY patio roof project: exposed-fastener panels and standing seam. Each has real trade-offs.
| Panel Type | Minimum Slope | Install Difficulty | Leak Risk | Cost (Relative) | Best For |
|---|---|---|---|---|---|
| Corrugated / ribbed exposed fastener | 3:12 (use butyl tape below this) | Low — straightforward screwing pattern | Medium — screws can back out or gaskets fail over time | Low to moderate | Budget builds, steeper pitches, DIY-first-timers |
| Standing seam (concealed clip) | 1:12 minimum | Medium to high — layout precision required | Low — no exposed penetrations in the field | Moderate to high | Lower slopes, long-term durability, cleaner look |
| Tin / galvanized corrugated (lightweight) | 2:12 or greater recommended | Low | Medium | Low | Budget utility builds, temporary covers |
For most DIY patio covers, exposed-fastener ribbed or corrugated panels are the practical starting point. They're widely available at home improvement stores and metal roofing suppliers, they cut with standard snips or a circular saw with a metal blade, and installation is forgiving enough for a first build. If your slope is under 3:12 or you want the cleanest possible look, step up to standing seam. Just know that standing seam requires more precise layout because you need to square your panels before you start fastening, and the trim and clip sequences are more involved.
Fasteners, Underlayment, and Other Materials
Use hex-head self-drilling screws with EPDM washers for exposed-fastener panels. Follow the manufacturer's fastener pattern exactly, it's not something you improvise. For underlayment, synthetic underlayment is the right call under metal panels: it handles heat better than felt and stays more dimensionally stable. Lap horizontal seams a minimum of 6 inches and vertical (roll-end) seams at least 20 inches. In high-wind or coastal zones, increase your fastening rate along laps to around 4 inches on center. At eaves and valleys, run ice-and-water shield at least 24 inches up from the eave line before your underlayment goes on. One important note: do not let your metal panels or trim make direct contact with pressure-treated lumber. The chemicals in PT wood corrode certain metals, especially aluminum. Use a barrier tape or choose the appropriate panel coating.
Structural Framing: Posts, Beams, Rafters, and Layout
The frame is what makes the whole thing safe. Skimping here is where patio covers fail, especially in high-wind areas.
Posts and Footings

For a freestanding or partially attached structure, posts need to land on concrete footings. Footing depth and diameter depend on your local frost line and load requirements, which your permit will spell out. Use post-base connectors (like Simpson Strong-Tie post bases) anchored into the concrete. Never just set a post in gravel or directly on a slab without a rated connector. The post-base connection detail is specifically called out in permit submittals, so use hardware with a load rating you can document.
Beams and Ledger
For an attached patio cover, the house-side connection is a ledger board lag-screwed into the rim joist or wall framing. This is a structural connection and requires specific fastener spacing and hardware. The ledger takes the high-side load, so it has to be solid. On the front, a beam spans between your posts and carries the outer ends of the rafters. Size the beam for your span using a span table from your permit package or local code.
Rafters and Spacing
Rafters run from the ledger (or ridge beam on a gable) down to the front beam. Common spacing for patio cover rafters is 24 inches on center, though some metal panel systems do fine at 48 inches if the panel is thick enough. Check your panel manufacturer's span table, because this varies by profile and gauge. Each rafter needs a metal connector at both the ledger end and the beam end. Do not toe-nail only. Rafter-to-ledger connections and post-base connections are exactly what inspectors look for, so use rated hurricane ties or rafter ties and keep the receipts or spec sheets.
Layout and Squaring
Before you start screwing down purlins or sheathing, confirm your frame is square by measuring diagonals: both should be equal. A frame that's even slightly out of square will cause your panels to misalign and create gaps at the edges. This is one of the most common mistakes on first builds, and it's nearly impossible to fix after panels are down.
Water Management: Slope, Flashing, Gutters, and Sealing
Water is patient. If there's a low spot, a gap at a flashing joint, or a missed seam, water will find it within the first heavy rain. Getting water management right is the part of this project that separates a roof that lasts 40 years from one that leaks in year two.
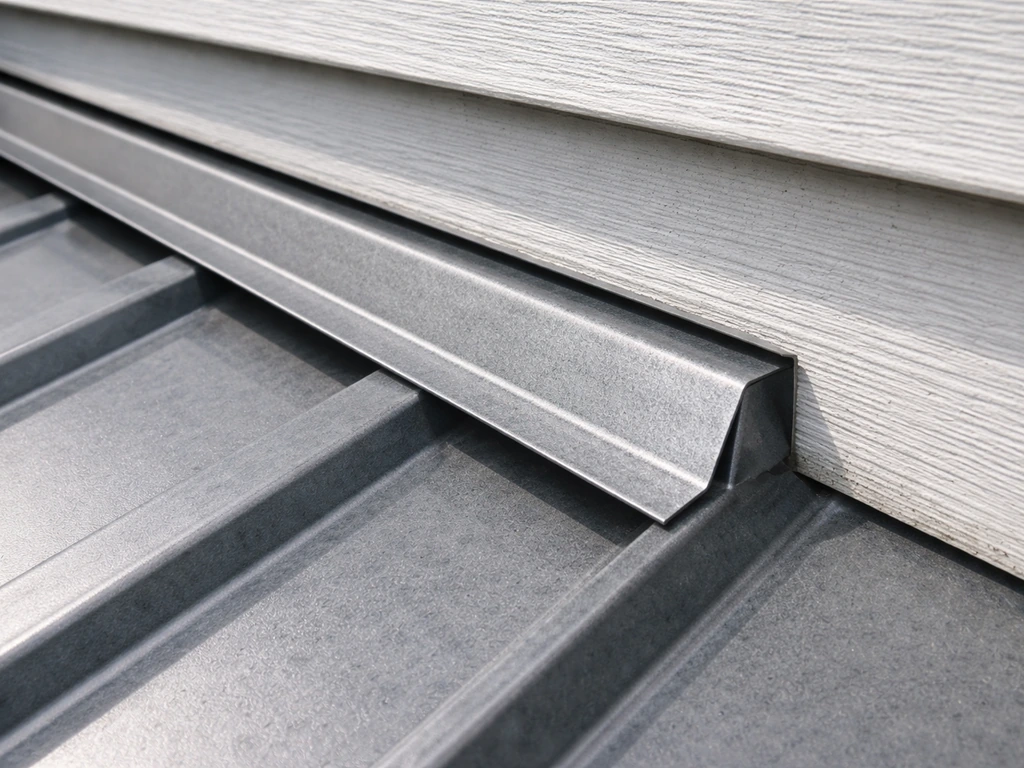
Flashing at the Wall
Where your metal roof meets the house wall, you need headwall flashing tucked under the siding and over the top panel edge. If the roof runs parallel to the wall (like along a gable end), you need step flashing. Step flashing pieces overlap a minimum of 2 inches and step upward from eave to ridge as each course of roofing is installed. Don't skip step flashing and rely on caulk alone. Caulk fails. Properly lapped metal flashing does not.
Eave and Drip Edge
Install drip edge along the eaves before anything else goes on. Your ice-and-water shield then laps over the drip edge, extending at least 24 inches up the roof. Synthetic underlayment goes on top of the ice-and-water shield, overlapping it by several inches. This layering sequence is important: each layer sheds water onto the layer below it, not behind it.
Valleys and Transitions
If your design includes a valley where two roof planes meet, run valley flashing before panels. Metal valley flashing with a center rib works well. Panels then overlap onto the flashing from both sides.
Gutters and Drainage
A metal roof sheds water fast, and without a gutter, that water dumps off the edge and either splashes back onto the patio or erodes the ground along the perimeter. K-style gutters are the standard choice and can be installed on a fascia board at the eave. Slope gutters at least 1/4 inch per 10 feet toward the downspout. Direct downspouts away from the foundation and the patio slab.
Installation Walkthrough: From Framing to Metal Panels
Here is the sequence that keeps you from having to redo work. Order matters in roofing.
- Set and anchor posts on footings using rated post-base connectors.
- Install the ledger board on the house wall with code-compliant lag screws.
- Set the front beam on top of the posts and secure with post caps.
- Install rafters from ledger to beam with rafter ties at both ends, spaced per your plan.
- Add purlins or decking if your panel system requires solid backing (check the manufacturer's span table).
- Install drip edge along the eaves.
- Run ice-and-water shield from the eave upward at least 24 inches, lapping over the drip edge.
- Install synthetic underlayment from the bottom up, horizontal laps minimum 6 inches, vertical laps minimum 20 inches.
- Install eave trim and valley flashing before any panels go down.
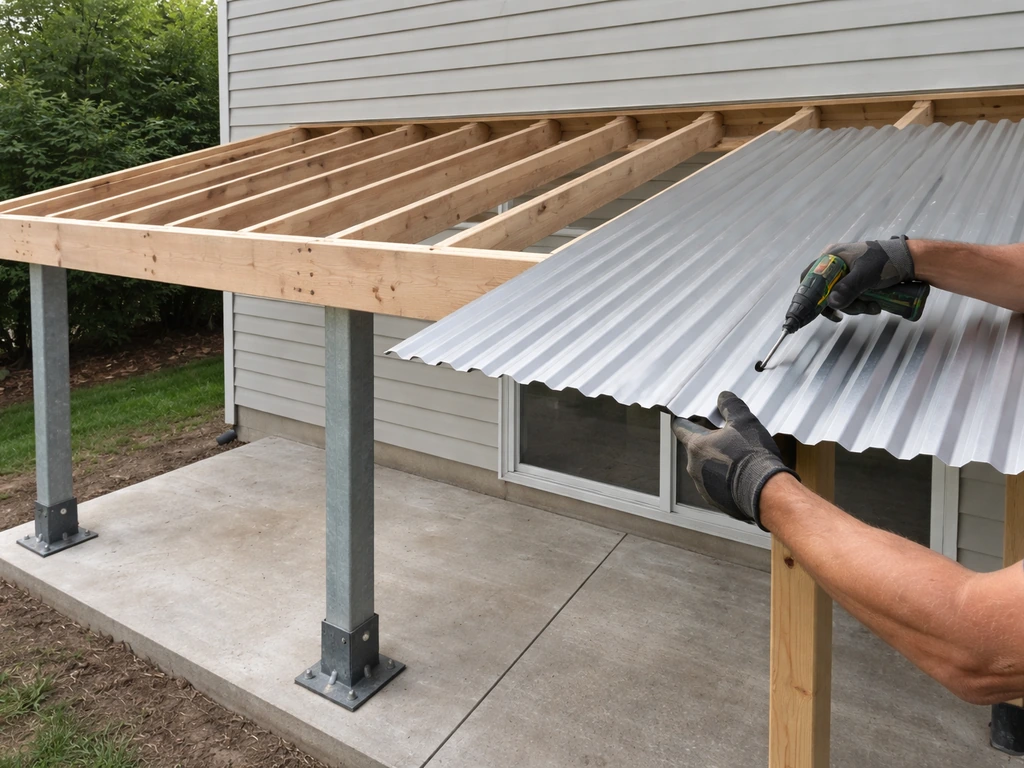
- Start your first panel at one gable end, align it so it overhangs the eave drip edge by about 1 to 1.5 inches, and confirm it's square to the frame.
- Fasten panels according to the manufacturer's fastener pattern — don't guess at screw spacing.
- For panels with lapped seams below 3: 12 slope, apply butyl tape at each lap before overlapping the next panel.
- Install gable rake trim over the panel edges at each side.
- Install sidewall and headwall flashing where the roof meets the house wall.
- Install ridge cap last, following the manufacturer's closure strip or foam filler sequence.
- Install gutters on the fascia at the eave.
Common mistake at panel installation: people start in the middle or forget to check square after the first panel is down. Always set your first panel, step back, measure the overhang at both eave corners, and confirm before screwing in fully. Fixing a misaligned first panel is annoying. Fixing a misaligned tenth panel is a full tear-off.
If you're interested in the specifics of corrugated panel installation, the process of attaching panels to a patio cover frame, or working with tin-style roofing materials, those each have their own set of nuances worth digging into before you order materials.
Finishing, Weatherproofing, and Keeping It in Shape
Final Weatherproofing
Once all trim and panels are down, do a walk-through inspection from the underside. Look for any light visible between panels and trim, any exposed fasteners without washers seated flat, and any gaps at the wall flashing. Use a paintable, UV-stable sealant (not standard silicone caulk) at any penetrations or trim-to-panel transitions that need it. Do not rely on sealant as a substitute for correct flashing, it's a finishing touch, not a structural waterproofing strategy.
Getting Through Final Inspection
Schedule your final inspection before you consider the project done. The inspector will look at your post-base connections, rafter connections to the ledger, and the overall structure. Have your permit paperwork, any engineering stamps, and manufacturer spec sheets on site. Take photos of your connections before you cover them with trim so you have documentation if questions come up.
Basic Maintenance Checklist
Metal roofs are low maintenance, but they're not zero maintenance. Set a reminder to check these things every spring and after major storms:
- Inspect all exposed fasteners for backed-out screws or cracked EPDM washers — re-drive or replace any that look compromised.
- Check all flashing laps at the wall connection and eaves for separation or rust.
- Clear debris from gutters and check that downspouts are draining freely.
- Look for any rust spots on panel edges, especially where cut edges are exposed — touch up with a metal-compatible primer and paint.
- Check the sealant at any penetrations or trim joints and reapply if cracking or pulling away.
- Inspect post-base connectors for rust or movement, particularly if you've had unusually wet or freeze-thaw seasons.
- Look under the roof from inside the patio after a heavy rain for any staining or drips — catching a leak early is a 15-minute fix versus a panel pull.
A well-built metal patio roof is genuinely one of the best DIY investments you can make. It adds covered outdoor living space, protects your patio slab from weathering, and lasts decades with minimal attention. Take your time on the planning and framing stages, get your permit, respect the height work, and the panel installation almost takes care of itself.
FAQ
Can I build a metal patio roof directly on the existing concrete slab without footings?
Usually no. For post-supported structures, posts typically must land on code-compliant concrete footings with rated post-base connectors. Setting posts directly on the slab or in gravel can fail in wind and can also violate permit requirements, especially if your slab thickness or reinforcement is unknown.
What’s the safest way to attach a ledger to the house wall if the siding is already installed?
You need to fasten into framing, not just into sheathing or siding materials. Pull back enough siding to confirm rim joist or stud location, check for rot, then use the specific ledger fastener spacing and hardware size shown on your permit details or structural plan.
How do I know whether my patio roof should use standing seam or exposed-fastener panels?
Choose based on slope and how strict you can be with layout. Exposed-fastener panels are more forgiving for DIY installs. Standing seam is often better for lower slopes, but it requires precise squaring, clip sequence, and careful trim detailing to avoid leaks or misalignment.
If my slope ends up slightly less than recommended, can I “fix it” with sealant?
Don’t rely on sealant to compensate for low pitch. Sealant cannot replace proper overlap, flashing lapping, and manufacturer slope limits. If your pitch is short, the real fix is adjusting the frame height, rafter length, or drainage design before panels and trim go on.
Do I need butyl tape only at the seams, or at every overlap detail?
At minimum, use butyl tape at all lap joints when the panel system requires it due to low slope and overlap exposure. Also pay attention to manufacturer instructions for any special joints, transitions, and skirt or edge conditions, since some systems need extra tape at trim-to-panel interfaces.
What’s the correct order for water-shedding layers near the eaves?
The sequence matters. Install drip edge first, then ice-and-water shield so it laps over the drip edge, and then place the synthetic underlayment on top with proper overlaps. If you reverse the order, water can be forced behind layers during heavy rain or wind-driven storms.
How do I prevent panels from getting damaged during cutting and installation?
Use the correct blade for metal and control debris. Many DIY cuts fail because of burrs and scratch marks that later become corrosion starting points. After cutting, remove sharp edges and check that panel coatings are not gouged where the fasteners will sit.
How should I fasten exposed-fastener panels, what’s the common mistake?
Fasten according to the manufacturer’s pattern, including fastener placement on ribs and lap areas. A common mistake is driving screws too loose or too tight, which can prevent the EPDM washer from sealing correctly or can deform the panel and create leak paths.
My permit checklist asks for “connection details,” what do inspectors usually want to see?
They typically look for how rafters attach to the ledger or top plate and how posts attach to footings using specified connectors. Keep photos before final trim, and have your engineering stamps or spec sheets available so the inspector can match your installed hardware to the approved details.
How do I handle valleys on a patio cover, do I install panels before valley flashing?
Install valley flashing before the metal panels. Metal valleys need their own layered water path, usually a center-rib style works well, and then panels overlap onto the flashing from both sides so water flows toward the valley without being trapped beneath panel edges.
Is caulk acceptable anywhere on the roof system?
Use sealant as a finishing touch, not the waterproofing strategy. Avoid using caulk as a substitute for proper flashing laps, tuck-under details, and correct overlap. Apply only where your installation calls for it, such as certain transition points, and choose a UV-stable, paintable product.
What should I do to protect the patio and foundation from runoff before installing gutters?
At minimum, plan the drainage so water does not splash back onto the slab. If you use gutters, slope them correctly and direct downspouts away from the foundation and patio edges. If you do not use gutters, add splash control at the eave line and keep soil from being eroded near the perimeter.
How often should I inspect and maintain the roof after it’s built?
Do a spring check and an extra check after major storms. Focus on fasteners with washers that may have loosened, any visible gaps at wall flashings, and signs of water staining or rust near seams. Address small issues right away, since leaks usually start at flashing or seam alignment problems.