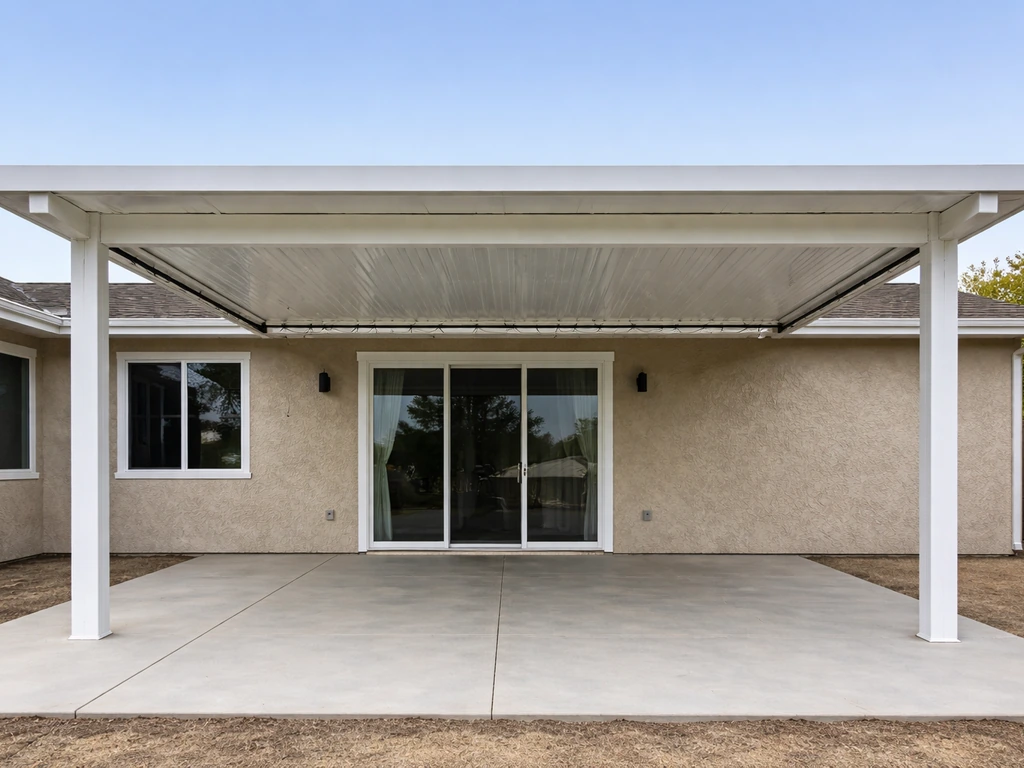
Installing an Integra patio cover is a legitimate DIY project for a capable homeowner, but it goes smoothly only when you work through the steps in order: confirm your exact kit, check permit requirements, lay out the structure carefully, set your posts and hanging rail, assemble the frame, lock in the roof panels, and seal every joint before you call it done. The whole process typically takes two people a full weekend, sometimes two, depending on the size. Rush any of those phases and you end up with leaks, racking, or a structure that fails an inspection.
How to Install Integra Patio Cover: DIY Step-by-Step Guide

Celia Vaughn
26 Jun 2026
Step 1: Confirm Your Exact Kit and What's Included
Before you touch a tool, know exactly which Integra kit you have. Integra Patios makes aluminum frame patio covers in multiple sizes (widths from roughly 10 ft to 28+ ft, depths from 8 ft to 12 ft and beyond) and different post configurations (2-post, 4-post, and more). The model number and dimensions are printed on the box and the packing slip. If you bought through Home Depot, your order confirmation also lists the full model number and engineered load ratings, including the snow load spec.
Once you have that number, download the official installation guide PDF directly from Integra Patios' website under their Installation page. There is also an installation video there, which is genuinely worth watching before you start, especially for the roof panel locking sequence, which is hard to visualize from the PDF alone. The guide covers all size and post configurations, so note which steps apply to your specific variant.
Open the boxes and do a full inventory against the components list in the guide before you start work. The guide lists named kit parts: the hanging rail/channel, front fascia, post brackets (top and bottom), roof panel profiles (each is 13 inches wide), side fascia panels, preformed flashing, fascia pan clips, and fascia drains. Lay everything out and check it off. Missing a fascia drain or a bag of Tek screws will stop you mid-project, and replacement parts from Integra take time to ship.
Step 2: Permits, Planning, and Site Layout
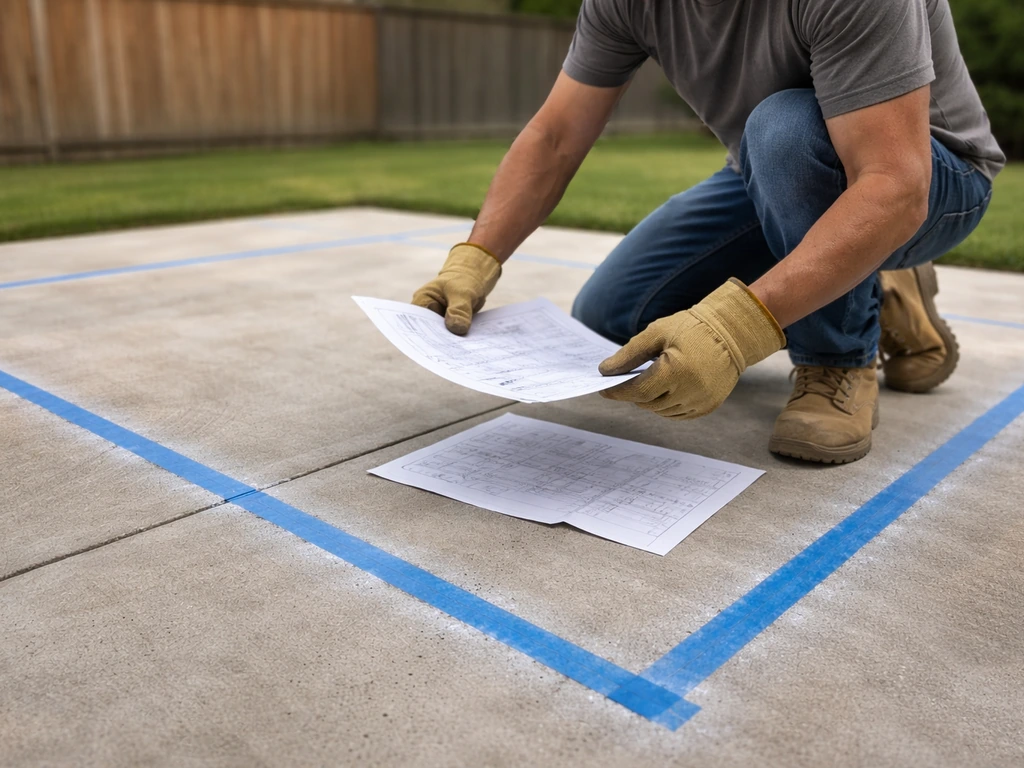
Do not skip the permit question. Many jurisdictions require a permit for a patio cover even when it's a prefabricated kit. San Diego, for example, exempts structures up to 300 square feet of projected roof area in some situations, but triggers a permit requirement if the project is in a coastal zone, historic district, environmentally sensitive land, or a planned residential development. Other counties, like Douglas County in Colorado, may exempt lighter shade structures but still require permits for solid-roof patio covers. The only safe move is to call your local building department or check their website before you pour any concrete or drill any anchors.
If a permit is required, a typical submittal package includes a scaled site plan, foundation and framing plans, and sometimes structural calculations. Some jurisdictions require an engineer's stamped drawings covering wind uplift, snow load, and connection details. Integra's engineered aluminum kits often come with load data that satisfies this, but you need to confirm with your building department. To figure out how much weight an aluminum patio cover can hold, you need to use its specific design load data and verify it with your local requirements. Inspection guidance from your jurisdiction will also tell you which stages need a field inspection before you can cover things up.
For site layout, start by deciding whether your cover attaches to the house (the most common approach) or is freestanding. Measure the full width of the planned cover along the house wall and mark it clearly. For most patio cover kits, the post size and spacing depend on the cover dimensions and span, so match the posts to your specific layout before you cut anything what size post for patio cover. Measure out from the wall for the depth, keeping in mind Integra requires a minimum slope of 1/2 inch per foot of depth. So for an 8-foot-deep cover, the hanging rail at the house needs to sit at least 4 inches higher than the top of the front fascia. The guide also requires a minimum finished height of 6 feet 8 inches to the underside of the front fascia, so work backward from that when calculating your hanging rail height. Snap a chalk line, use a laser level, and verify your numbers twice before drilling anything into the house.
Step 3: Tools and Materials You'll Actually Need
The Integra installation guide includes an explicit tool list, which is worth printing out. Beyond what ships in the kit, here is what you need on hand:
- Tape measure, chalk line, and a quality 4-foot level (a laser level makes the hanging rail step much faster)
- Power drill and impact driver
- Drill bits: 1/4-inch for pilot holes into studs or rafters, plus a 1-1/2-inch or 2-inch hole saw for fascia drain cutouts
- Socket wrench set for the 3/8-inch x 3-1/2-inch anchor bolts used at the post bases
- Circular saw or miter saw to cut posts to height (Integra ships posts as 10-foot lengths to be cut down)
- Caulk gun and urethane sealant (the guide calls out urethane specifically, not standard silicone)
- Stepladder and a 6-foot or taller ladder (two ladders if possible, especially for raising the fascia assembly)
- Safety glasses, gloves, and hard hat if working near the house roofline
- A second person, minimum, and ideally a third for larger kits
For fasteners into the house wall, the right choice depends on your substrate. If you're hitting wood studs or rafter tails, the guide uses lag screws through the hanging rail. If your house exterior is stucco over wood framing, you'll need to locate studs through the stucco layer (a good stud finder or a small exploratory hole works). If you're attaching to masonry or a concrete block wall, you need masonry anchors instead of lag screws, which is not always addressed clearly in the standard guide, so confirm with Integra's support line if that's your situation.
Step 4: Set Your Posts and Hanging Rail
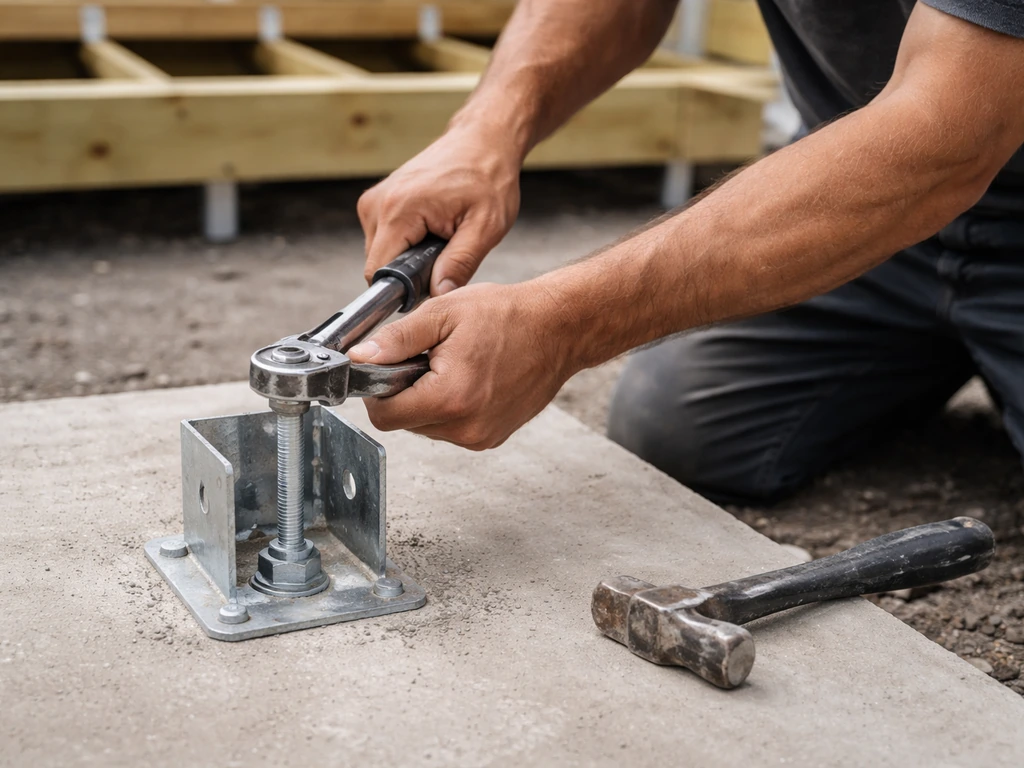
Anchoring posts to concrete or a wood deck
If your posts land on a concrete slab, Integra uses heavy-duty bottom post brackets and the concrete wedge anchors included in the kit. The anchor bolts are 3/8 inch x 3-1/2 inches. Mark your post locations first using the layout from the guide: measure in 1 foot 3 inches from each end of the front fascia to locate the outermost posts, then space any additional posts evenly between them. This is also where you’ll determine the post spacing, since it affects how far apart the posts should be for your patio cover design. Drill the anchor holes with a hammer drill to the depth the anchor requires, insert the anchor, and torque it down before setting the bracket over it.
On a wood deck, the guide says to beef up the subframing beneath the deck boards at each post location, then run lag screws through the bottom post bracket down into the doubled-up joist or blocking below. Do not just lag into a single deck board or thin decking material. If your deck subframing is not accessible or not robust enough, this is a point where a structural carpenter or inspector should weigh in before you proceed.
Cut your posts to the correct height only after you have confirmed the hanging rail height and the required slope. If you are planning patio cover posts from scratch, measure your layout carefully and follow the installation guide for the correct post height and slope confirmed the hanging rail height. Posts are shipped at 10 feet and must be trimmed. Measure twice, cut once, and check the cut end is square. A slightly out-of-square post cut causes headaches during plumb alignment later.
Installing the hanging rail at the house
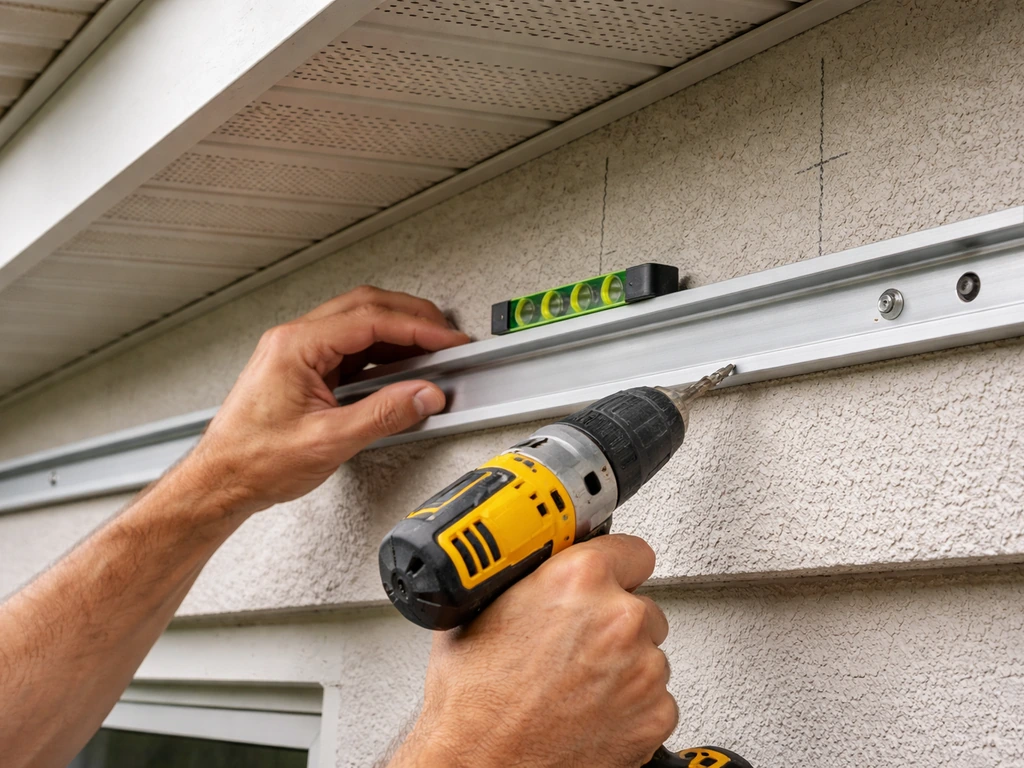
The hanging rail is the aluminum channel that mounts to your house wall or fascia board and carries the high end of the roof panels. Before mounting it, locate and mark every stud or rafter tail along the span, because every screw through the hanging rail must hit solid wood for the structure to be properly supported. Drilling into drywall or sheathing between studs is a common mistake that leaves the connection underloaded. Use a stud finder and verify with a small test drill if you have any doubt.
Hold the hanging rail at your calculated height, check it with a level across its full length, and pre-drill 1/4-inch pilot holes at each stud location before driving the lag screws. If the rail is long, have a helper hold one end while you fasten the other. A rail that is even slightly out of level will create slope problems across the full roof, and correcting it after the panels are in is a major headache.
Step 5: Assemble the Frame
With the hanging rail secured and the post base anchors set, the next phase is assembling and raising the front fascia with the top post connectors already attached. This is the step where a third person is genuinely helpful and where the guide specifically mentions tying the end posts temporarily to your ladders while you raise the assembly upright. That temporary stabilization step is not optional on larger kits. A full-width fascia with posts attached is heavy and top-heavy, and it will tip if you don't brace it.
Once the fascia assembly is upright and the bottom post brackets are bolted down, check that every post is plumb in both directions with a level. Shim if needed under the post base bracket before you fully torque the anchor bolts. A post that is even slightly out of plumb will cause the roof panels to misalign, and gaps between panels are where leaks start.
With the fascia and posts plumb and anchored, you connect the structural members between the hanging rail and the front fascia. Depending on your Integra model, this involves setting the rafter/runner profiles that span from the hanging rail down to the fascia at the required pitch. Space these according to the guide and the roof panel width (panels are 13 inches wide, so rafter spacing follows from that). Confirm each runner sits fully seated in the hanging rail channel and is properly fastened at the fascia end before moving to panels.
Step 6: Install the Roof Panels, Flashing, and Seals
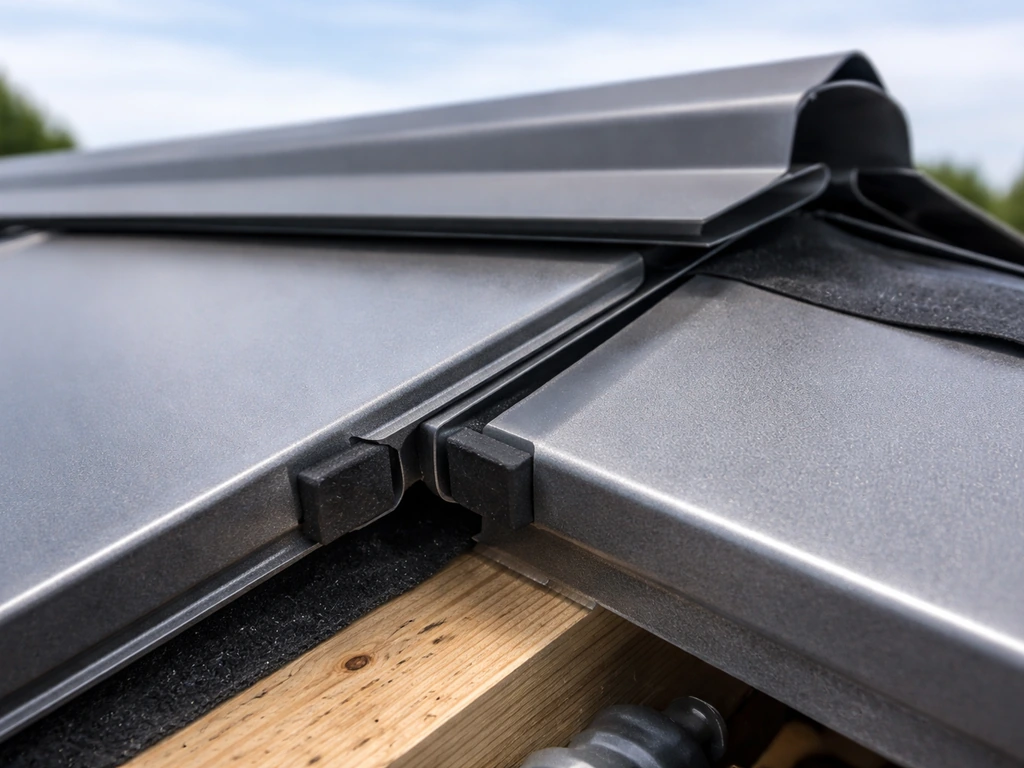
Roof panel installation is where the weatherproofing of your entire project is made or broken. Integra uses a locking panel system: each 13-inch-wide roof panel profile slides into and locks with the adjacent panel. Work from one end of the structure to the other, seating each panel fully before moving to the next. The guide repeatedly calls out applying urethane sealant (not silicone) at connection points as you go, including at panel seams and especially at the tops of panels where the fascia pan clips connect. Do not plan to come back and caulk later. Seal each joint in sequence as the guide directs.
The preformed flashing is the critical piece at the high end of the roof where the panels meet the house wall. The guide instructs applying a bead of caulk sealant under the designated notches where the flashing rests, then fastening through the flashing into the top of the roof panels with #8 Tek screws, and immediately caulking over every screw head. Do not skip the screw-head caulking step. Every unsealed screw hole in an aluminum roof panel is a leak waiting to happen, usually showing up during the first real rainstorm.
Fascia pan clips attach along the top edge of the roof panels at the front fascia. Use #10 x 3/8-inch sheet metal screws and seal every screw head generously with urethane caulk. After all panels are installed and clipped, install the fascia drain(s). Use the 1-1/2-inch or 2-inch hole saw to cut the drain location near the end of the fascia as the guide specifies, install the drain fitting, and fasten with #8 x 5/8-inch Tek screws. Install the fascia dams (the small plugs that block the open ends of the fascia channel) with generous sealant around each one, or the fascia will drain sideways out the ends instead of through the drain fittings.
Step 7: Final Checks, Leak Prevention, and When to Call a Pro
Walk the entire structure before you declare it done. Check every anchor bolt at the post bases for full torque. Check that each post is still plumb after all the panel installation activity (things shift). Verify the hanging rail screws are fully seated and none backed out during panel installation. Look at every caulked seam and make sure there are no skips or voids, especially along the flashing at the house wall and at every screw head.
Then run a hose on the roof for a few minutes and watch the drainage. Water should flow toward the fascia drain(s) and exit cleanly. If water pools anywhere on the roof surface, your slope is insufficient or a panel connection is not fully seated. A pool of standing water will eventually find its way through even a well-sealed joint. Check from inside underneath while someone runs the hose above, and mark any drips immediately.
One thing worth calling out: the Integra guide itself opens with a safety reminder to inspect the area before starting and specifically notes checking for electrical power lines and outlets. That is not just boilerplate. Working on a ladder near a roofline means you can be in the vicinity of service drops and wall-mounted outlets. Do a real scan of the area before you start, not a quick glance.
Know when to stop and call a professional. If your permit requires engineer-stamped drawings and load calculations that go beyond what Integra's kit documentation covers, hire a structural engineer before you build. If your concrete slab shows cracking or heaving near the post locations, get a foundation assessment first. If your house wall attachment points do not land on solid framing (common in older homes with irregular stud spacing or non-standard construction), a contractor who does patio covers regularly can find a workable solution faster than you can. The same goes for complex rooflines, multiple offsets, or situations where the structure ties into the house roof framing rather than just the fascia board. Post sizing, spacing, and footing depth for larger or heavier structures are also worth a second set of eyes, and those topics are worth reviewing separately before you finalize your layout. If you are still wondering how much weight can a patio roof hold for your specific layout, review how post sizing, spacing, and footing depth affect the load.
| Phase | Common Mistake | How to Avoid It |
|---|---|---|
| Hanging rail installation | Missing studs or rafter tails with lag screws | Locate and mark every framing member before drilling; verify with a test hole if needed |
| Post setting | Posts not plumb before torquing anchors | Check plumb in both directions and shim base brackets before final torque |
| Fascia assembly raise | Assembly tips or shifts without bracing | Tie end posts to ladders temporarily as the guide directs; use three people on wider kits |
| Roof panel installation | Skipping sealant steps to move faster | Apply urethane caulk at each connection point in sequence; do not plan to back-caulk later |
| Flashing at house wall | Unsealed screw heads through flashing | Caulk every screw head immediately after driving; use urethane, not silicone |
| Fascia drain and dams | Missing or under-sealed fascia dams | Install dams with generous sealant so fascia drains through fittings, not out the ends |
| Final slope check | Assuming panels slope correctly without testing | Run a hose and observe drainage before declaring the project done |
An Integra patio cover installed correctly is a genuinely durable, low-maintenance addition to your home, and most homeowners with solid DIY skills can handle it. The aluminum frame handles moisture and corrosion well over time, which is a real advantage over wood-framed alternatives in wet climates. Stay methodical, follow the sequence in the official guide, seal everything as you go rather than at the end, and blank" rel="noopener noreferrer">have at least one other person on site for the major assembly stages. That combination gets most people to a clean, leak-free result on the first attempt.
FAQ
What should I do if a roof panel will not lock or seems misaligned while installing?
Test the fit of the roof panels before you permanently lock the next one. If a panel will not slide and seat fully, do not force it with clamps or by pushing from one end. Back up, confirm the runner is fully seated in the hanging rail channel, then re-seat the panel so the locking edge aligns evenly across the full 13-inch width.
If my hose test shows water pooling on the roof, what is the correct way to troubleshoot it?
Yes. If your water test shows pooling, do not rely on extra caulk to fix it. Re-check that the hanging rail height matches the required pitch (minimum 1/2 inch per foot of depth), verify the fascia assembly is level across its length, then check that each runner sits at the correct pitch so the drainage path is formed structurally.
Can I use silicone instead of urethane caulk to seal the Integra patio cover joints?
Urethane caulk is the intended sealant for panel seams and critical connections. Silicone can interfere with later bonding and may not behave the same under aluminum expansion and contraction. If you already used silicone somewhere, remove what you can, dry fully, then apply urethane sealant at the required joints per the installation guide.
When exactly should I apply caulk around Tek screws and other fasteners, during or after panel installation?
You should seal screw heads that penetrate the roof panels, flashing, fascia clips, and any designated fastener covers immediately after fastening, then let the sealant cure. If you wait until after the roof panels are installed, you can miss screw points you cannot easily see later, and you may also disturb already locked seams while trying to reach them.
How do I decide whether I need lag screws, masonry anchors, or something else for my wall type?
If the kit includes masonry anchor instructions, follow the kit and local code for the specific substrate. For stucco, lag screws should go into studs, not just into the stucco layer, so you will still need to locate and confirm stud positions. When you cannot confidently hit structure, stop and get guidance from Integra support or a contractor, because weak attachment is a common inspection failure.
What if my concrete slab is cracked near where the patio cover posts will land?
Use a structural check before pouring or drilling into a slab area that looks suspicious. If you see cracking, heaving, or signs the slab is moving near the proposed post locations, address it first with a foundation assessment. Anchoring into compromised concrete can look secure but fail under uplift or lateral loading.
Can I attach Integra patio cover posts directly to deck boards, or do I need reinforced framing?
On decks, do not fasten through thin decking material only. Reinforce with doubled-up joists or blocking directly under each post base connection point, then drive lag screws into that reinforced structure. If you cannot reinforce where the posts land, that is a point to pause and consult a structural carpenter or inspector.
Is it okay to rely on shims to fix slope or pitch if my measurements are off?
The guide assumes correct slope and correct hanging rail elevation, so shimming is for fine alignment, not for correcting a major height or pitch error. After you set the base brackets, re-check hanging rail height, slope, and post plumb in both directions. Only then shim under post brackets as needed to correct plumb before final torque.
My panels have gaps between them, what usually causes that and how should I fix it?
Common culprits are incorrect stud or rafter tail locations for hanging rail fastening, rail not level across its full length, or posts not plumb after panel installation. Re-level the hanging rail if it is slightly out, verify runner seating, then confirm each post is plumb before unlocking or re-seating panels. Gaps at panel seams almost always trace back to alignment rather than sealant choice.
How many people do I actually need for the Integra patio cover install, and where is a third person most critical?
Plan for help. Having a third person is especially valuable during the fascia-and-post raise because the assembly is heavy and top-heavy. If you only have two people, use temporary bracing exactly as described in the guide and do not leave the fascia unsupported while you change positions on ladders.
Should I re-check torque and plumb after the roof panels are installed?
Perform a torque and alignment re-check after the roof panels are fully installed, not just after the base brackets. Aluminum panel installation can shift components slightly, so verify every post remains plumb and that anchor bolts stayed at full torque, then do another seam and flashing visual check before the final hose test.
What drill type should I use and how do I avoid drilling into the wrong material layer (especially with stucco)?
Choose the drill and bit approach based on wall material and the kit’s anchor requirements, then drill to the specified depth. Use a hammer drill only where required for anchors into concrete, not for wood. For mounting into stucco over wood, you may need to locate studs through the stucco first, then pre-drill pilot holes for the intended fastener type.
What are the most important flashing-related steps so I do not get leaks at the house wall side?
Yes, especially around the high end flashing. Confirm the flashing notch area sits correctly under the panel edge, apply caulk under the designated notches, fasten into the top of the roof panels using Tek screws, and immediately caulk over every screw head. During the hose test, watch that water flows away from the house wall rather than getting under the flashing.
What should I check to make sure the fascia drains work correctly and water does not escape out the fascia ends?
If the fascia drain outlets do not line up with your slope path, water can drain into the fascia channel and out the ends. Verify the fascia dams are installed to block open ends, confirm the drain location is cut exactly where the guide specifies, and then run the hose to ensure water exits at the drain fittings.