
For most standard Alumawood patio covers, the honest answer is: no, you should not stand or walk directly on the panels. See can you walk on aluminum patio covers for a focused discussion on when and how temporary access may be safe. For a deeper, step-by-step explanation and safety guidance, see can you walk on alumawood patio covers. Thin non-insulated lattice or solid alumawood panels are not engineered to support a person's weight as a standing surface. However, if your cover uses engineered insulated sandwich panels and is properly installed on correctly spaced purlins and rafters, occasional service access is possible, but only if you use proper spreader boards, follow the manufacturer's guidance, and keep loads off the panels themselves and onto the structural framing below. The safest default rule, until you have confirmed the specs of your specific system, is to treat any alumawood patio cover as a no-walk zone and use scaffolding, a ladder, or a roof-access system to do any work overhead.
Can You Stand on Alumawood Patio Cover? Safety Guide

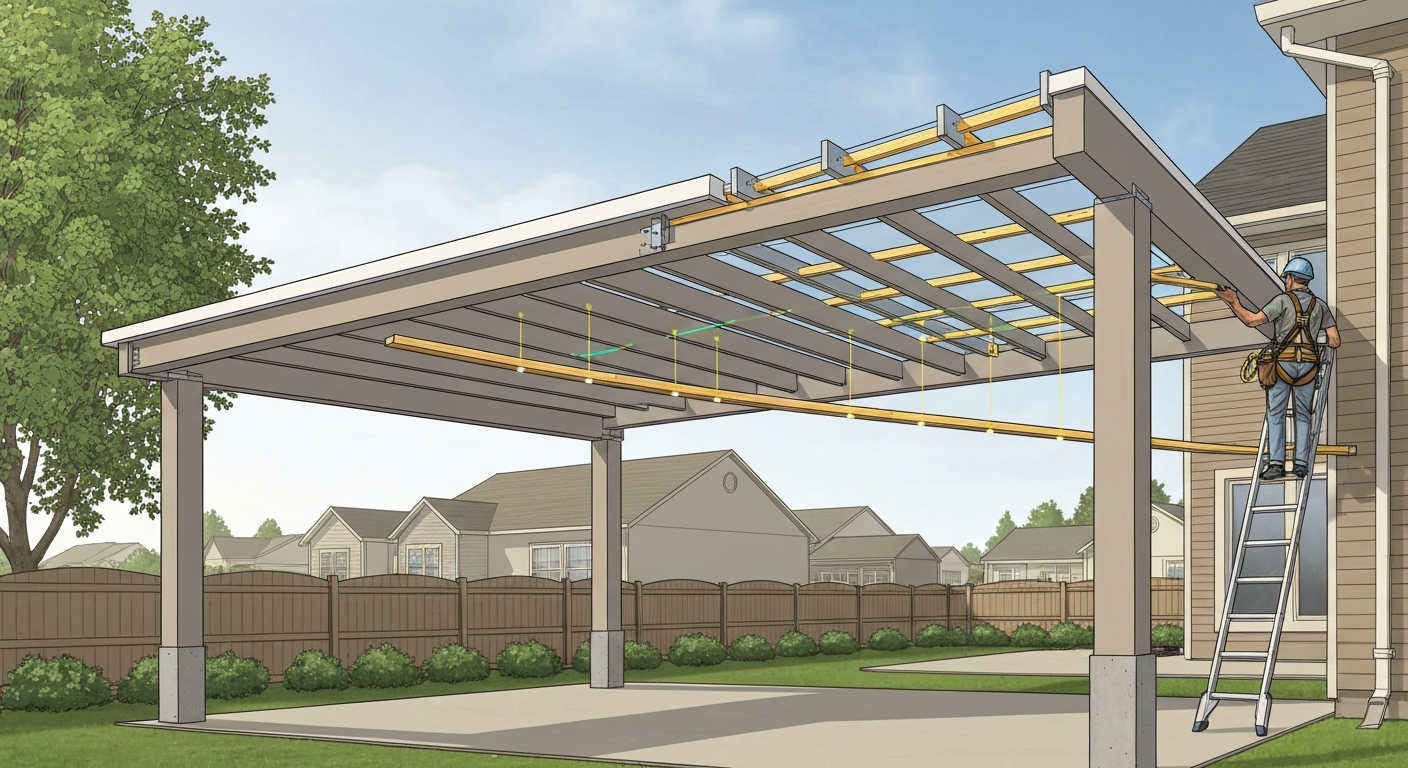
Safety first: what to do before you ever step on a patio cover
I want to address the safety side before anything structural, because the consequences of getting this wrong are serious. A standard residential Alumawood patio cover sits anywhere from 8 to 12 feet off the ground. OSHA's fall-protection rules (29 CFR 1926.501) require conventional fall protection, guardrails, safety nets, or personal fall-arrest systems, for any working surface 6 feet or more above a lower level. That threshold covers almost every patio cover installation. Even if you are just doing a quick maintenance task, treat it like working at height.
- Never step onto a patio cover without first confirming panel type (insulated sandwich vs. thin lattice/solid), purlin spacing, and manufacturer load guidance.
- Use scaffolding or a rated ladder as your primary access method whenever possible. A roofing ladder hooked over the ridge or a scaffold platform eliminates the need to stand on the cover at all.
- If you must access the cover surface, use spreader walk-boards (rated scaffold planking) spanning across at least two purlins or rafters, never resting directly on a panel.
- Choose a Type I or better ladder rated for at least 250 lbs total load (person plus tools plus PPE) per ANSI A14 duty ratings; Type IA (300 lb) or Type IAA (375 lb) is better for tool-heavy jobs.
- Work with a partner on the ground who can stabilize a ladder, call for help, or assist if something shifts.
- Wet alumawood panels are slippery. No exceptions — do not access the cover in rain or after a recent wash.
- Check local code and permit status before modifying any structural member. Many jurisdictions, including Los Angeles County, require a permit for attached patio covers and any structural modification.
Common mistake I see on forums and in real projects: someone climbs up to clear leaves or adjust a light fixture, puts their weight on a panel between purlins, and the panel dimples, cracks, or collapses entirely. At 10 feet off the ground, that is a serious fall. The structural members (purlins, rafters, ledger) can support load. The panels generally cannot. Keep that distinction in your mind at all times.
How Alumawood patio covers are actually built
Alumawood is a brand name that has become a generic term for extruded aluminum patio cover systems styled to look like wood grain. Most residential kits are sold by distributors who provide pre-cut components, and many homeowners install them as a DIY project. For step-by-step guidance on planning and installing these systems on your own, see our aluminum patio covers do it yourself guide. Understanding how these systems go together is the foundation for understanding their structural limits.
The typical Alumawood system starts with posts, usually 3x3 or 4x4 aluminum posts set in concrete footings, that carry the load to the ground. A header beam (often a 3x8 or larger aluminum extrusion) spans between posts along the outer edge. On the house side, a ledger (also called a fascia beam or mounting channel) bolts to the home's rim joist, wall framing, or a structural header using lag screws or through-bolts. Rafters or main beams span between the ledger and the header beam, and purlins run across the rafters, perpendicular to them, to support the roofing panels. The panels, either thin solid or lattice extrusions, or thicker insulated sandwich panels, drop or clip into the purlin channels and span between them. Fasteners throughout the system are typically aluminum or stainless self-tapping screws and proprietary brackets.
The structural components explained
Breaking down each component helps you understand where the load path runs and which members you can actually trust with your weight.
| Component | Role | Typical Size (residential kit) | Load-bearing? |
|---|---|---|---|
| Footings | Transfer loads to soil; must resist uplift and compression | 12–18 in diameter concrete pier | Yes — foundation of the whole system |
| Posts | Vertical columns from footing to beam | 3x3 or 4x4 aluminum extrusion | Yes — carry vertical loads |
| Ledger/Mounting Channel | Attaches system to house; transfers roof loads to wall framing | 3x4 or larger aluminum channel with lag bolts | Yes — critical connection point |
| Header Beam | Spans between outer posts; supports rafter ends | 3x8 or larger aluminum extrusion | Yes — primary spanning member |
| Rafters / Main Beams | Span from ledger to header; primary load-carrying members | 2x6 or 3x6 aluminum extrusion, varies by span | Yes — key structural members |
| Purlins | Run across rafters; support panels | Smaller aluminum extrusion, spacing varies | Partially — carry panel loads to rafters |
| Panels (thin/lattice) | Cosmetic and weather surface only | Thin aluminum extrusion or lattice | No — not designed for point loads |
| Panels (insulated sandwich) | Structural skin with foam core; stiffer | 2–4 in thick insulated panel | Limited — can distribute load with walk-boards; not a walking surface |
The ledger connection to the house is often the weakest point in older or improperly installed systems. If the ledger is only anchored into siding or sheathing rather than into the structural rim joist or wall framing, it can pull away under load. Always inspect the ledger bolts before trusting any load to the system. Simpson Strong-Tie and similar manufacturers publish allowable shear and tension values for lag screws and through-bolts that engineers use to size these connections, and those values depend entirely on the fastener actually hitting solid framing.
Load ratings and building-code basics you need to know
This is where a lot of DIYers get tripped up, so let me walk through the numbers that actually matter. Building codes differentiate between a roof you never walk on and one you might use as a deck or platform.
Under the International Residential Code (IRC), a standard unoccupied residential roof is designed for a minimum live load of around 20 pounds per square foot (psf). An exterior deck or balcony, on the other hand, must handle at least 40 psf. The moment a roof becomes an occupiable surface, something people stand on, work on, or use like a deck, it falls into the deck/balcony category, not the roof category. Some jurisdictions go further: Clark County, Nevada, for example, interprets an occupied single-family roof as requiring 60 psf (1.5 times the 40 psf deck live load), consistent with IBC Section 1607 guidance for balconies and decks serving occupied areas. ASCE 7, the referenced engineering standard behind IBC load requirements, puts typical roof live loads at 20 psf for unoccupied roofs and directs designers to use occupiable/deck loads when the surface is used like a floor.
What does that mean for your Alumawood cover? A standard residential kit is designed and sold as a roofing/shade product, not an occupiable deck. The manufacturer's structural design is almost certainly based on a 20 psf roof live load, snow load for the local region, and wind uplift, not a 40 or 60 psf deck load. A 150-pound person standing on a 2-square-foot area creates a point load equivalent to 75 psf, which can far exceed both the panel capacity and the local structural capacity of a purlin or rafter in that area. That is the engineering reason the no-walk rule exists.
Deflection limits are also part of the picture. IRC Table R301.7 sets allowable deflection standards for structural members; insulated sandwich aluminum panels for sunrooms and patio covers are sometimes listed with a total-load deflection limit of L/120 (span divided by 120), which is more generous than floor framing but still means a panel will visibly flex under a person's weight before anything fails. See 2021 IRC, Table R301.7 and deflection notes (ICC) for the listed deflection limits and specific notes addressing insulated sandwich and aluminum panels (examples include total-load deflection limits such as L/120) 2021 IRC — Table R301.7 and deflection notes (ICC). That flex is not just cosmetic, repeated flexing fatigues the panel connections and can eventually crack the skins or loosen the fasteners.
Factors that actually determine whether your cover can handle the load
There is no one-size answer because Alumawood covers vary widely by product line, installation quality, age, and local conditions. Here are the six factors I check before I ever consider whether temporary access to a cover surface is feasible.
- Panel type: Thin non-insulated lattice or solid panels cannot support a person, period. Insulated sandwich panels (2–4 inches thick with a foam core) are substantially stiffer, and some manufacturers state they can bear a person's weight for service access when properly installed — but you still need walk-boards.
- Purlin and rafter spacing: Tighter spacing means shorter panel spans and better load distribution. A purlin spaced 24 inches on center is meaningfully better than one at 48 inches for any incidental load. Check manufacturer span charts for your specific panel and purlin combination.
- Member gauge and extrusion size: Heavier-gauge aluminum extrusions with larger section profiles carry more load and deflect less. A 3x6 rafter at 0.125-inch wall thickness is a different beast than a thin 2x4 extrusion. You need the actual spec sheet for your product to know what you have.
- Fastener and connection integrity: Loose screws, corroded bracket holes, or ledger bolts that missed the framing all reduce real-world capacity below the design value. A cover that was installed correctly five years ago may have degraded connections today.
- Condition and age: Aluminum does not rust, but it oxidizes, and fastener holes can enlarge over time from cyclical wind loading. Impact damage, prior overloading, or UV-degraded panel cores all reduce capacity.
- Load location and distribution: A load directly over a purlin or rafter is much better than a load at mid-span between two purlins. If you must access the surface, position walk-boards so your weight transfers directly onto the structural framing, not onto the panel span.
Inspection checklist before walking or working on the cover
I run through this checklist any time I am assessing an existing Alumawood cover for a maintenance task or modification. Do it from below first using a ladder at the perimeter, before putting any weight on the structure.
- Purlin spacing: Measure center-to-center spacing. Less than 24 inches is preferable for incidental access with walk-boards; greater than 48 inches is a red flag for any surface loading.
- Panel identification: Look for a thickness stamp or product label on the panel edge. Insulated sandwich panels are typically 2 inches or thicker; thin extruded panels are under 1 inch. If you cannot identify the panel type, assume it is non-structural.
- Material gauge: Check any exposed rafter or purlin edge for wall thickness. Most residential kit extrusions run 0.080 to 0.125 inches; thicker is better. If you have the original product literature, pull the spec sheet.
- Ledger condition and attachment: From inside or at the wall, check that ledger bolts are tight and that you can see them penetrating into solid framing, not just siding or sheathing. Push and pull on the ledger — there should be zero movement.
- Post and footing condition: Look for posts that are loose in their base brackets or that show signs of settlement or tilt. A post that rocks even slightly is a structural problem.
- Corrosion and oxidation: White powdery deposits (aluminum oxide) on structural members are normal. But check fastener holes and bracket flanges for elongated holes or cracks, which indicate fatigue.
- Deflection test (from below): With no load on the cover, press up firmly on a panel at mid-span between purlins using your hand. Any deflection more than about 1/4 inch on a 24-inch span suggests the panel or its connections are not in good shape.
- Slope and drainage: A cover sloped less than 1/4 inch per foot may pool water after rain, adding unplanned dead load. Check that drainage channels are clear and the slope is consistent.
- Existing damage: Look for dents, cracks at panel ends, bent purlins, or out-of-plumb posts. Any visible damage is a stop sign until it is assessed and repaired.
Quick load-calculation guidance and worked examples
You do not need to be a structural engineer to do a basic sanity check. These are conservative back-of-the-envelope calculations, not a substitute for an engineer's review, but useful for quickly identifying whether your cover is in the right ballpark or clearly undersized.
Step 1: Estimate the design load your cover was built for
Start with the IRC minimum: 20 psf roof live load plus whatever dead load the panels and framing add (typically 3–6 psf for a light aluminum system). A conservatively designed residential Alumawood cover is probably rated for 25–30 psf total. Some regions with snow loads will add more; your local building department can tell you the ground snow load for your zip code.
Step 2: Estimate the load a person creates
A 180-pound person with 20 pounds of tools (200 lbs total) standing with two feet roughly 12 inches apart creates a distributed load over approximately 0.5 square feet of contact area (two boot soles). That works out to about 400 psf at the contact points, but the load spreads through the panel and into the purlins. The critical check is what load reaches the purlin. If your purlins are 24 inches on center and your rafters are 48 inches on center, each purlin bay covers 24 x 48 inches = 8 square feet. A 200-lb point load on that bay is 200/8 = 25 psf, right at the edge of the design load for an unoccupied roof with no safety factor. That is why spreader boards matter: they distribute the load across more purlins and reduce the peak load per bay.
Step 3: Check the purlin span against the manufacturer's table
Every reputable Alumawood product line has a span table in its installation guide. Find the table for your panel thickness and type, then cross-reference the purlin spacing against the allowable uniform load. If the table shows your 24-inch purlin spacing is rated for 20 psf and you are adding a 25 psf concentrated load scenario, you are over the rated capacity, even before accounting for the difference between uniform load (snow, wind) and concentrated point loads, which are inherently worse for panels.
Worked example
Scenario: You have a 12x16 ft Alumawood cover with insulated 2-inch panels, purlins at 24 inches on center, and rafters at 48 inches on center. The manufacturer's span table shows the panel is rated for 30 psf uniform load at 24-inch purlin spacing. You weigh 175 lbs and carry 25 lbs of tools. Total person load: 200 lbs. Using a spreader board 8 feet long resting across 4 purlins (4 x 2 ft spacing = 8 ft), your 200 lb load is distributed across 4 purlins over a rafter bay of 48 inches = 8 ft x 4 ft = 32 sq ft tributary area. 200 / 32 = 6.25 psf, well within the 30 psf rating. That is why spreader boards work: they dramatically reduce the concentrated load. Without the board, standing directly on one panel bay (24 x 48 in = 8 sq ft): 200 / 8 = 25 psf, still under the rated 30 psf, but with no safety margin and no accounting for the impact loading of stepping. Always use the board.
| Scenario | Person + Gear (lbs) | Effective Area (sq ft) | Calculated Load (psf) | Within 30 psf Rating? |
|---|---|---|---|---|
| No board, direct on 24x48 in panel bay | 200 | 8 | 25 psf | Technically yes, but no safety margin |
| 8-ft spreader board across 4 purlins, 48-in rafter bay | 200 | 32 | 6.25 psf | Yes — large margin |
| 4-ft board across 2 purlins, 48-in rafter bay | 200 | 16 | 12.5 psf | Yes — reasonable margin |
| No board, thin non-insulated panel (no rated load) | 200 | 8 | 25 psf | No — not rated for person loads |
Temporary vs. permanent access strategies
For one-off maintenance tasks, a rated scaffold platform or a roofing ladder that bridges from the eave to a support point above is usually the cleanest solution. OSHA’s scaffold rules (29 CFR 1926 Subpart L, Scaffolds) and related ANSI guidance define rated scaffold platform load classifications (light ≈25 psf, medium ≈50 psf, heavy ≈75 psf) and require use of platforms and components rated for the applied loads OSHA’s scaffold rules (29 CFR 1926 Subpart L — Scaffolds) and related ANSI guidance define rated scaffold platform load classifications (light ≈25 psf, medium ≈50 psf, heavy ≈75 psf) and require use of platforms and components rated for the applied loads.. You do not touch the cover surface at all. For longer jobs, cleaning gutters, adjusting light fixtures, installing fans, I prefer to set up a light-duty scaffold along the perimeter so I can reach the underside from below and the outer edges from the scaffold deck, again without putting weight on the panels.
If you need regular access, say, you have HVAC equipment on a flat cover or need to clear debris seasonally, then temporary access alone is not the right answer. That situation calls for a permanent modification: adding a catwalk or walkway system with its own dedicated framing, or reinforcing the cover with additional purlins and structural decking rated for the loads you expect. Those modifications almost always trigger a building permit and often require engineered plans. Check with your local authority having jurisdiction (AHJ) before starting. Los Angeles County and many other jurisdictions explicitly list attached patio cover modifications as permit-required work.
How Alumawood compares to wood and other metal covers for walkability
If you are in the planning stage and walkability matters to you, it is worth comparing Alumawood against the alternatives. This comparison also comes up naturally when choosing between material systems for a new DIY build.
| Cover Type | Typical Panel Load Capacity | Walkability (with boards) | Walkability (without boards) | Corrosion resistance | DIY-friendly? |
|---|---|---|---|---|---|
| Alumawood — thin lattice/solid panels | ~10–20 psf (roof load only) | Use boards only | No | Good | Yes |
| Alumawood — insulated sandwich panels | ~25–40 psf (manufacturer-dependent) | Yes, with boards | Marginal only on framing members | Good | Yes, more complex |
| Wood (2x framing + plywood/OSB decking) | 40–60 psf possible with proper framing | Yes, with appropriate decking | Yes, on decked surface | Moderate (needs sealing) | Yes |
| Steel/metal carport framing + corrugated panel | Framing is strong; panels still thin | Use boards on framing | No | Excellent (galvanized) | Moderate |
| Solid aluminum structural roof system | Engineered to spec (40+ psf possible) | Yes, per engineer | Depends on design | Excellent | Usually contractor-installed |
The practical takeaway: wood patio covers built with proper dimensional lumber framing and structural sheathing are the most walkable DIY option because you can design the framing to deck loads from the start. Alumawood is excellent for what it is, a lightweight, attractive, low-maintenance shade and rain cover, but it is not a platform. If walkability is a primary requirement, factor that into your material decision before you build. The comparison between aluminum and wood systems is worth exploring in depth when you are planning a new project. For a side-by-side look at the trade-offs and walkability differences, see our metal vs wood patio cover comparison.
Permits, code triggers, and when to call a pro
Here is my honest DIY-vs.-pro decision guide for this topic. Most Alumawood cover installations and basic maintenance tasks are well within DIY territory. But certain situations absolutely call for an engineer, a contractor, or both.
- DIY is fine: Inspecting the cover from below, doing a visual condition check, clearing debris from gutters using a ladder at the perimeter, adjusting lighting or fans from a scaffold.
- DIY with care: Accessing the cover surface using rated spreader boards and proper fall protection for a one-time maintenance task on an insulated-panel system you have confirmed is in good condition.
- Get a permit first: Any structural modification — adding purlins, replacing panels, changing post sizes, adding a catwalk system, modifying the ledger connection.
- Call an engineer: If your cover is in a high-snow or high-wind zone, if you have any doubt about the ledger attachment, if the cover shows signs of prior overloading or damage, or if you want to use the cover for regular occupancy.
- Call a contractor: If the framing shows corrosion damage, if posts are out of plumb by more than 1 inch in 8 feet, if you find the ledger is not properly attached to structural framing, or if any major member is cracked or bent.
The permit question trips up a lot of DIYers. Many homeowners assume a patio cover is exempt from permits because it is an outdoor structure, but most U.S. jurisdictions require permits for attached covers and for any structural modification to an existing cover. The permit process is not just bureaucracy, it is a check that your structure is designed for the loads your climate imposes, including wind uplift and snow. An engineer review on a $5,000 patio cover project typically runs $300–$800 and can prevent a catastrophic failure or a failed insurance claim.
Maintenance and condition checks after any modification
If you have added purlins, replaced panels, or done any structural work, do a follow-up inspection 30 days after the modification and again after the first significant weather event (first rain, first wind storm, first snow if applicable). Check that all new fasteners are still tight, that new panels have not shifted in their channels, and that any new framing connections are not showing signs of movement. Alumawood systems are low-maintenance by design, but any modification introduces new connection points that need time to settle and a second look. Keep a simple log of what you did, what materials you used, and when you inspected, your future self, and your insurer, will thank you.
FAQ
Can you stand on an alumawood (aluminum) patio cover?
It depends. Thin non‑insulated alumawood panels and lattice-style covers are generally not intended to be walked on and vendors/industry guidance advise against it. Engineered/insulated aluminum sandwich panels or structural aluminum patio roof systems can support occasional service access when installed per manufacturer span charts or an engineer’s design. Always confirm the specific product’s load rating, inspect the supporting members, and use fall protection or temporary work platforms for safety.
What determines whether an alumawood patio cover can support a person?
Key factors: the type of panel (thin lattice vs insulated/structural), rafter/purlin span and spacing, member sizes and gauge, connection details (ledger, brackets, fasteners), post and footing capacity, corrosion or damage, and local live‑load requirements. Even a strong panel can fail if its supporting framing or connections are undersized or deteriorated.
What live‑load values and code rules matter?
Typical code references: ordinary unoccupied roofs are often designed for ≈20 psf live load; residential decks/balconies are commonly 40 psf (IRC). If the roof will be used for occupancy/service, jurisdictions may require design for deck loads or 1.5× the area live load (IBC/ASCE practice), which can mean ~60 psf for occupied roofs. Always follow the adopted local code and ASCE/IBC guidance for occupied or serviceable roofs.
Inspection checklist before you step on a cover
Check: panel type and manufacturer span tables; purlin/rafter spacing and member sizes; gauge/thickness of aluminum members; secure ledger attachment to the house (fastener type, ledge plates, flashing); post and footing condition and sizing; brackets and screw/bolt tightness; visible corrosion, deformation, or crushed/loose panels; slope and ponding; and any manufacturer warnings. If any item is unknown or damaged, don’t walk on it until verified.
Temporary/safer ways to access the roof without reinforcing permanently
Use rated scaffolding/platforms, a roofing ladder, or scaffold planks/walk‑boards that span multiple structural members so you transfer load to supports. Use a ladder with correct duty rating and proper setup. Always use fall protection when working 6 ft or more above the lower level (OSHA). Avoid walking directly on thin panels—use rated bridging planks or temporary supports that are sized per manufacturer/safety guidance.
Permanent reinforcement options to allow safe walking
Options: add larger or closer‑spaced purlins/joists; install structural decking (plywood/OSB or structural composite deck) over the aluminum system where permitted; install a dedicated catwalk/walkway system (aluminum or steel with anti‑slip surfacing) tied to the framing; enlarge posts and footings to support the higher loads; or replace with an engineered panel system rated for foot traffic. Any permanent change that increases live‑load usage should follow manufacturer instructions or an engineer’s design.