You can absolutely build an aluminum patio cover yourself. A standard lean-to kit from a reputable manufacturer, properly planned and installed, takes most homeowners a weekend to a long weekend depending on size. The real work is in the prep: getting your measurements right, pulling your permit, and making sure the structure is sized for your local wind and snow loads before you ever order a panel. Get those things right and the actual build is straightforward.
Aluminum Patio Covers Do It Yourself: Complete Guide DIY

Celia Vaughn
1 May 2026
What you're actually building: aluminum patio cover basics
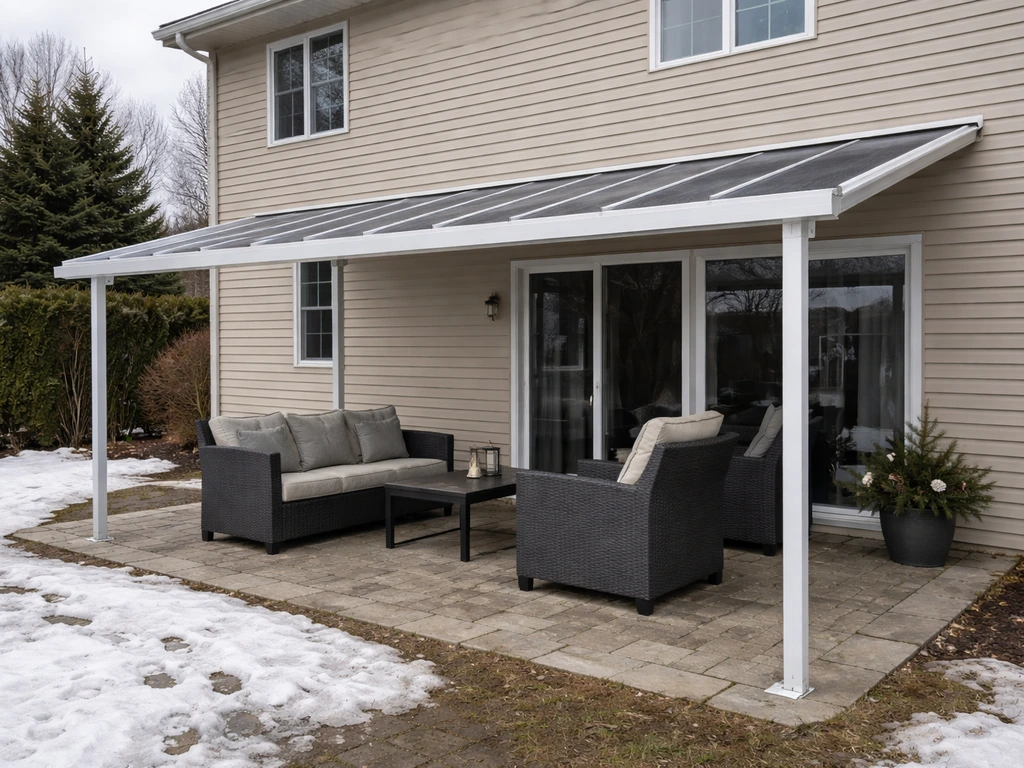
An aluminum patio cover is a roof structure built from extruded aluminum framing and interlocking aluminum panels. Most DIYers buy a kit, which gives you pre-cut or cut-to-size components, an engineering packet, and step-by-step instructions. The kit approach is genuinely the right call for most homeowners because the engineering is already done for you, the components are sized to work together, and you get documentation you can hand to a building inspector.
The three main styles you'll choose from are lean-to (attached), gable (attached with a peaked roof), and free-standing. A lean-to is the most common DIY project: one side attaches to your house via a ledger or wall header, and the opposite side is supported by posts. A gable cover uses a ridge beam and looks more like a miniature house roof. A free-standing cover has no house attachment at all and sits on four or more posts with footings. Each style has different structural and permitting implications, which this guide covers in detail.
Panel types matter too. Solid aluminum panels block sun and shed water but can make the space feel hot unless you have ceiling fans. Lattice panels let air move through and give a more open feel. Insulated panels (an aluminum shell with an EPS foam core) are the premium option and noticeably reduce heat transfer into the space below. Some systems like Alumakit use an interlocking insulated panel system that snaps together and seals as you go. Know which panel type you want before you order because it affects the framing, the slope requirement, and the flashing details.
Planning: measurements, layout, and style options
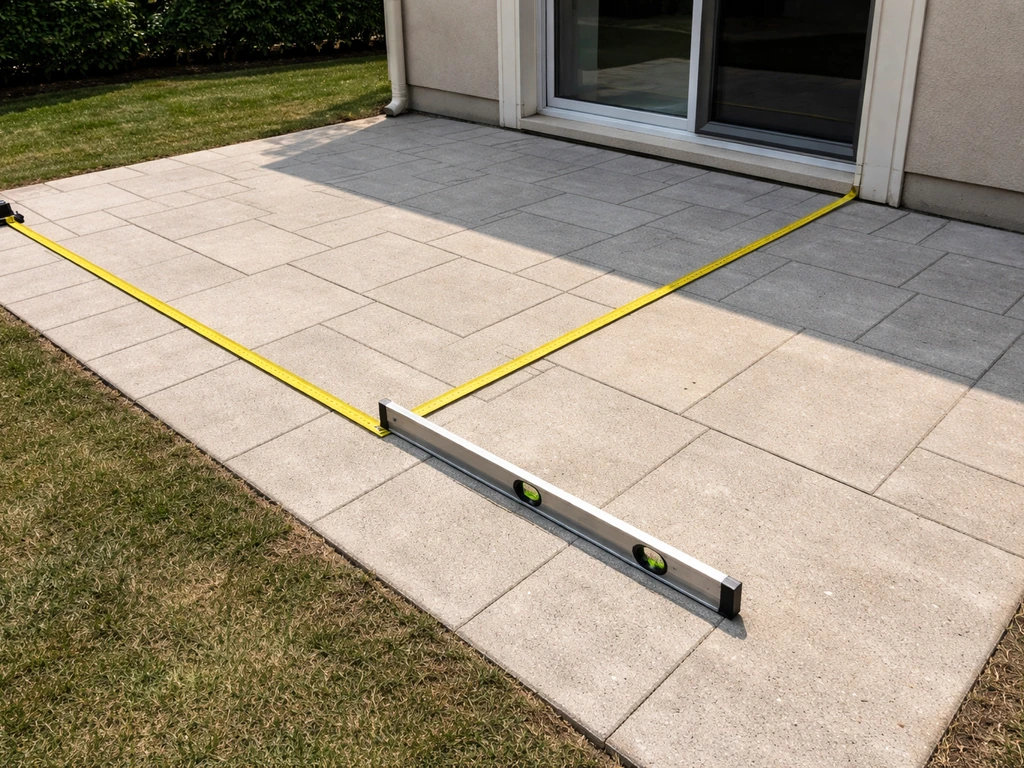
Before you order anything, you need five numbers: the width of the cover (how far it runs along the house), the projection (how far out from the house it extends), the height at the house wall, the desired height at the front posts, and the distance from the cover to any property line. Every structural decision in the engineering packet flows from these measurements.
Slope is non-negotiable for drainage. A completely flat aluminum roof will pool water, leak, and sag over time. Most kit manufacturers specify a minimum slope of at least a quarter inch of drop per foot of projection. Some systems like AlumaVue specify exactly half an inch per foot. A practical rule of thumb: if your cover projects 12 feet from the house, you want at least 3 to 6 inches of drop from the ledger attachment point at the house to the front beam. You achieve this by setting the front posts shorter than the back attachment height. When you're doing your layout math, calculate that drop first, then work backward to figure out your post heights.
Common mistake here: people measure their desired ceiling height at the posts and forget to account for the slope drop at the house end. You want to set the ledger/header height at the house first, then subtract the required slope drop across the projection to find the front beam height, then subtract the beam depth to find the post height. Do that math on paper before you touch a tape measure on the wall.
For style selection: a lean-to is the fastest build and the easiest to permit because it's the simplest structural case. A gable cover looks great and can clear snow more effectively due to the steeper pitch, but it's a more complex build with more components. If this is your first build, start with a lean-to. If you have some framing experience and want the gable look, it's still very doable with a kit, just budget an extra half day and read the engineering packet carefully before you start.
Materials, hardware, and tools
What your kit includes and what it doesn't
A typical DIY aluminum patio cover kit includes the roof panels, aluminum perimeter beams and fascia, a ledger/header channel for the house attachment, post sleeves or post components, connectors and brackets, screws and fasteners, gutters and downspouts, and flashing material. What it usually does not include: concrete for footings, the structural steel posts that go into the ground (for free-standing builds), caulk and sealant, a ladder or scaffolding, or any wall anchors you need for masonry attachment.
For aluminum alloy quality, kits from reputable suppliers use alloys like 3004-H36, 3015-H25, or 6063-T6. These designations tell you the aluminum is tempered and work-hardened for structural use, not just decorative sheet. If a supplier can't tell you the alloy spec, keep shopping. For coatings, look for powder-coated finishes with corrosion-resistance ratings. A good powder coat will outlast paint by years in outdoor conditions.
Tools you'll need
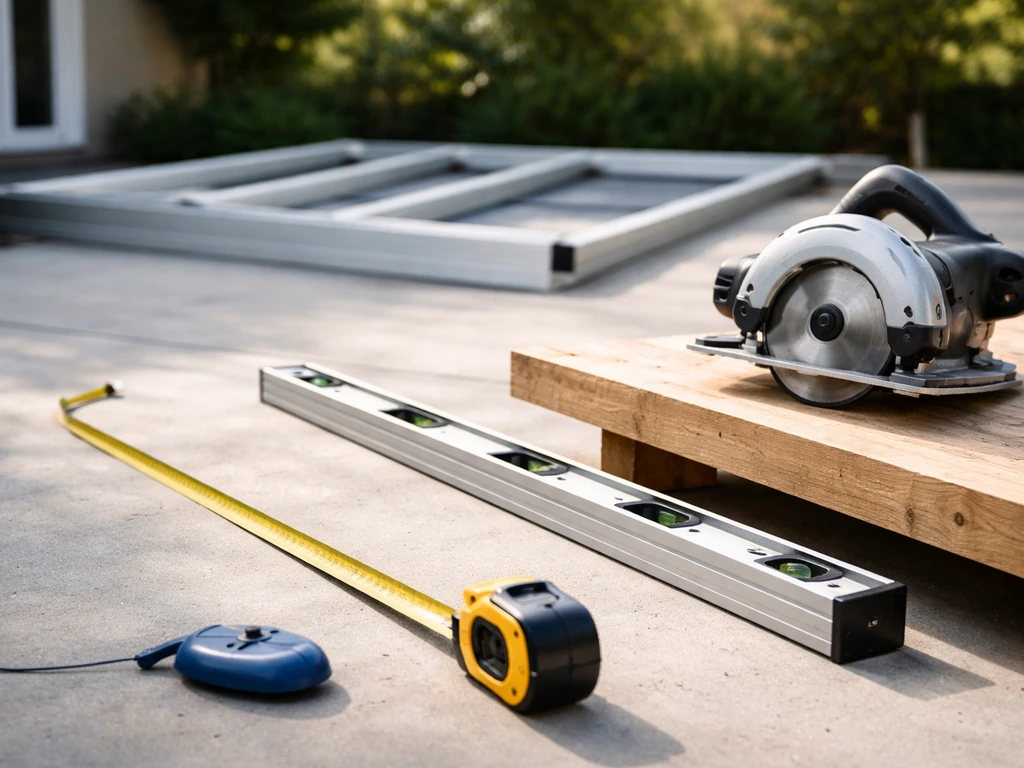
- Tape measure (at least 25 feet) and a long level (4 foot minimum)
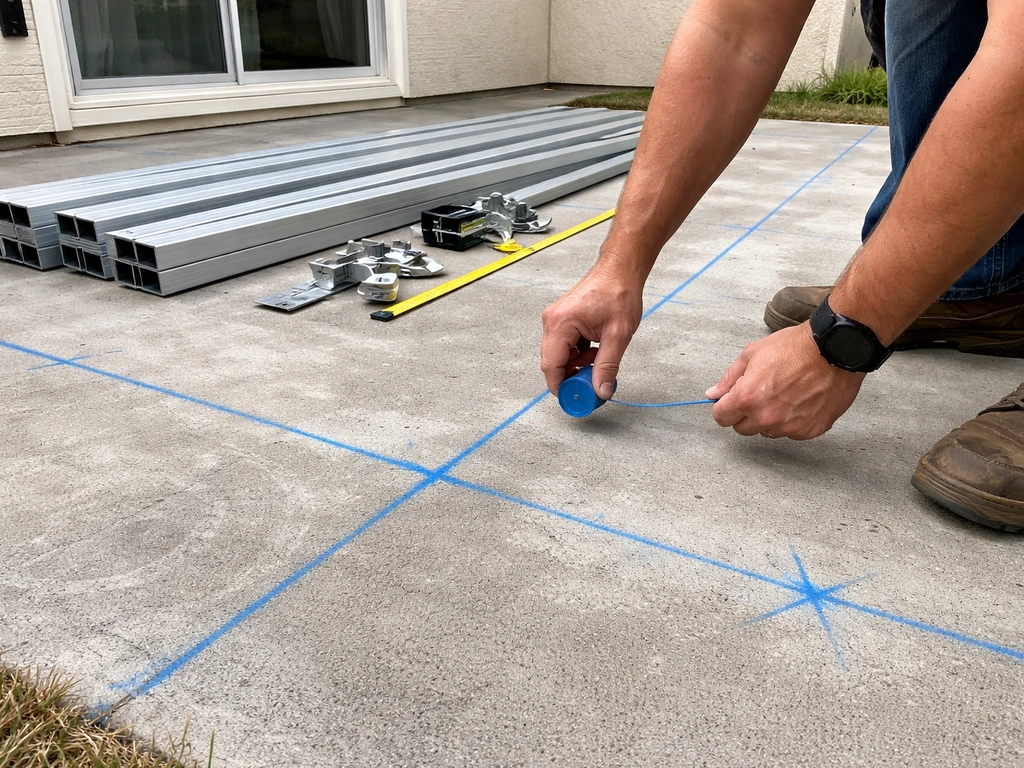
- Chalk line for marking layout on the ground
- Circular saw or miter saw with a fine-tooth blade rated for aluminum (a standard wood blade will work but leaves rough edges; a non-ferrous metal blade is cleaner and safer)
- Drill/driver with bits for aluminum and masonry if attaching to a concrete or stucco wall
- Hammer drill if anchoring into masonry or concrete
- Post hole digger or rented auger for footing holes
- Speed square and plumb bob or laser level
- Caulk gun
- Safety glasses, work gloves (aluminum edges are sharp), and hearing protection for cutting
- A solid 6-foot stepladder minimum; a second ladder or rented scaffold for larger builds
Canada-specific sourcing notes
If you're in Canada, your sourcing options are a bit different. Scandia Canada is one of the few Canadian-based manufacturers that produces engineered patio cover systems specifically designed for Canadian climate loads (their systems are engineered to meet area-specific snow, rain, and wind loads). In BC and Alberta especially, this matters because Canadian snow loads are often significantly higher than what a US-spec kit is engineered for. Do not order a US-market kit and assume it will meet Canadian structural requirements without verifying the engineering packet covers your local ground snow load and wind exposure class.
For hardware, Canadian Tire and Home Depot Canada carry concrete mix, structural screws, and anchor bolts. For aluminum extrusions and custom cuts, look for local metal supply yards (Metal Supermarkets has locations across Canada). For fasteners in corrosive coastal environments (Vancouver Island, Maritime provinces), specify stainless steel or hot-dip galvanized hardware rather than standard zinc-plated, which will corrode within a few years.
Permits, codes, and making sure your structure is safe
This is the section most DIYers want to skip. Don't. A permit isn't just bureaucratic overhead. It's the process by which someone with structural expertise checks that your cover won't blow off in a windstorm or collapse under snow. That matters for your safety, your family's safety, your neighbors' safety, and your home insurance.
In British Columbia, the rule is clear: any patio cover attached to your home requires a building permit under the BC Building Code 2024. Free-standing structures under 10 square meters may be exempt from a permit in some BC jurisdictions, but they still need to meet setback and height requirements. Check with your local municipality before assuming you're exempt. In Ontario, Alberta, and other provinces, the threshold varies by municipality but the general principle is the same: attached structures almost always require a permit; small free-standing structures may not, but verify locally.
In the US, rules vary by state and county, but most jurisdictions require a permit for any permanent attached patio cover. Budget one to three weeks for permit review before you can start building. Apply before you order materials because inspectors sometimes require plan changes.
For structural verification, your kit's engineering packet is your starting point. A proper engineering packet will specify the structure type (attached vs. free-standing, lattice vs. solid), the design wind speed and exposure class, the ground snow load the design is based on, beam and post sizing tables, footing diameter and depth schedules, and ledger/header bolt sizing and spacing. Your job is to confirm that the engineering packet you received matches your local design loads. You can find your jurisdiction's design wind speed and ground snow load in the local building code or on your municipality's building department website. If the kit's engineering was done for a lower snow load than your area requires, you need a different kit or a supplemental engineering stamp.
When to stop and call a pro: if your attachment point is to a structural element you can't identify (like a hip roof with no obvious rim joist), if your soil is expansive clay or very soft, if you're in a high-wind coastal or mountain zone with complex load combinations, or if the permit process requires a licensed engineer's stamp that your kit supplier doesn't provide, call a structural engineer or a licensed contractor for that piece. You can still do the rest of the build yourself.
Step-by-step build process
The workflow below covers a lean-to attached aluminum patio cover kit, which is the most common DIY project. Gable and free-standing builds follow the same general sequence but add steps for ridge framing (gable) or require more footing work (free-standing). Read your specific kit instructions alongside this guide because component names and sequence may vary slightly by manufacturer.
- Mark your layout. Snap chalk lines on the ground to define the exact footprint of the cover. Mark post locations based on the footing schedule in your engineering packet. Double-check all dimensions by measuring diagonals (they should be equal for a square/rectangular layout). Getting this step wrong causes every other step to be off.
- Dig and pour footings. Use a post hole digger or rented auger to dig footing holes to the depth specified in your kit's footing schedule. Depth varies by cover size and local frost depth. For freestanding covers, steel posts typically need to be set 2 feet into the concrete footing, so your posts will be longer than the finished height. Pour concrete and let it cure fully (minimum 24 to 48 hours, 72 hours is better) before loading the posts.
- Install the ledger/wall header at the house. This is the structural connection point at the house wall. Mark the correct height on the house wall first using your slope calculation. Snap a level line at that height. For wood-framed walls, attach the aluminum C-channel or ledger with structural bolts or lags going into the house's rim joist or framing, at the spacing specified in the engineering packet. For masonry or stucco walls, use a hammer drill and masonry anchors rated for the load. This connection is the most structurally critical part of an attached cover. Don't underspec the fasteners.
- Set the posts. If you poured footings with post anchor hardware embedded, attach post bases and set posts plumb. If you're setting posts in wet concrete, use temporary bracing to hold them plumb while the concrete cures. Check plumb on two faces.
- Install the front beam. This is the beam that runs across the tops of the front posts. It defines the front edge of the cover and must be level side to side while being lower than the ledger attachment at the house by your calculated slope drop. Verify level before fastening.
- Install the rafter/purlin members. These span from the ledger or wall header at the house to the front beam, carrying the roof panels. Space them as specified by the kit (usually every 24 to 48 inches depending on panel span capability and your local load requirements). Each rafter should be at the same slope as the overall roof.
- Install the roof panels. Starting from one end, slide or set panels into place following the kit's interlocking system. For insulated panel systems, seal each panel at the seam under the flashing as you go. Don't wait until all panels are in place to start sealing. Common mistake: people install all panels then try to reach back in to seal seams they can no longer access easily.
- Install gutters, downspouts, and end caps. The front beam typically integrates with or supports a gutter. Set the gutter with a slight slope toward the downspout location (about 1/8 inch per foot is enough). Cut and install downspouts to direct water away from the foundation.
- Flash and seal at the house wall. Install the flashing piece that covers the joint between the top of the cover panels and the house wall. This is where leaks happen if you skip or rush this step. The flashing should tuck under any existing siding or trim above and lap over the top of the panels or ledger channel. Apply a continuous bead of exterior-grade caulk (silicone or siliconized acrylic) along the top edge of the flashing where it contacts the house wall. On insulated panel systems, also seal the back of the hanging channel where it meets the wall.
- Final check and cleanup. Walk the structure and verify all fasteners are tight, all seams are sealed, and the slope drains correctly (run a hose at the high point and watch where the water goes). Remove any aluminum shavings from cutting (they'll rust-stain the aluminum if left behind). Check that no sharp cut edges are exposed where people might brush against them.
Anchoring and attachment: the details that matter most
Attaching to the house
The ledger connection is the single most important structural joint in a lean-to build. Your kit will specify bolt diameter, bolt length, and spacing. Follow those specs exactly. A common field mistake is substituting smaller bolts or spacing them farther apart because the specified hardware feels like overkill. It isn't. The engineering packet calculated those specs for your wind uplift and snow load. For wood-framed walls, you want your lags or through-bolts going into the rim joist or a doubled header, not just into sheathing. Use a stud finder and verify you're hitting actual framing before tightening.
For stucco or concrete block walls, use wedge anchors or sleeve anchors rated for the tension and shear loads in your engineering packet. Drill carefully, use the correct bit diameter, clean the hole of dust before setting the anchor, and torque to the manufacturer's specification. Don't eyeball it.
Post footings for lean-to and free-standing builds
For a lean-to, the front posts carry the load from the front beam to the ground. Your kit's footing schedule will give you a diameter and depth for each footing based on the cover size. A typical residential cover might call for 12 to 18 inch diameter footings at 18 to 30 inches deep, but check your specific schedule because Canadian builds often need deeper footings due to frost depth. In most Canadian provinces, footings must extend below the frost line, which can be 3 to 5 feet deep in colder regions.
For free-standing covers, you're doing four or more footings and the loads are higher because there's no house sharing the load. Free-standing kit documentation typically calls for steel posts embedded directly in concrete with a specific embed depth (often 2 feet of post into the footing). Don't trim posts to finish height before setting them. Set them long, let the concrete cure, then cut to height after confirming the footing is solid.
Weatherproofing, drainage, and finishing up
Good weatherproofing on an aluminum patio cover comes down to three things: slope, flashing, and sealant. You've already handled slope in your layout. Flashing and sealant happen at the end of the build but they deserve serious attention.
Flashing at the house interface should be continuous with no gaps. Tuck it under any existing flashing or siding above the cover attachment point. Use a compatible exterior caulk along the top edge. Polyurethane or silicone caulk both work well on aluminum; avoid latex paintable caulks for this application because they don't bond as reliably to metal and will fail faster in UV exposure.
For panel seams on insulated systems, apply sealant generously where panels meet the perimeter framing and where channels contact other components. The instructions for systems like Duralum explicitly call for sealing the back side of the hanging channel and sealing each panel at the seam under flashing. These aren't optional finishing touches. Water will find any unsealed joint.
Gutter and downspout placement is your drainage exit strategy. Make sure the downspout discharges away from your foundation, ideally with an extension or splash block that moves water at least 4 to 6 feet away from the house. In Canadian climates with significant snow and ice, also think about where snowmelt will go when it runs off the cover in spring. You don't want it pooling against the foundation.
After everything is assembled and sealed, do a water test. Run a garden hose at the top of the cover near the house wall and watch for any drips, pooling, or water tracking back toward the house. This is much easier to fix now than after you've painted or furnished the space underneath.
Final inspection and knowing you're done right
If you pulled a permit, schedule your final inspection before you consider the project complete. Have your engineering packet, your permit, and your kit installation instructions on hand for the inspector. They'll typically check the ledger connection, post footings (if still visible), slope, and flashing. Most inspectors who see a properly installed kit with the engineering documentation in hand will move through the inspection quickly.
Your personal final checklist before calling it done: all fasteners tight and at specified torque, all seams and flashing sealed with no gaps, water test passed with drainage going where it should, no exposed sharp cut edges, no aluminum shavings left on the structure, all end caps installed, and the structure feels solid with no movement when you push on a post. If any of those aren't checked off, fix them before moving on. A well-built aluminum patio cover, properly installed and sealed, should give you 20 to 30 years of low-maintenance performance.
Lean-to vs. gable vs. free-standing: which is right for your build
| Style | Difficulty | Best for | Key extra considerations |
|---|---|---|---|
| Lean-to (attached) | Beginner to intermediate | Most homeowners, first-time DIY builds, smaller footprints | Requires correct ledger connection to house framing; must nail slope calculation |
| Gable (attached) | Intermediate | Larger covers, areas with heavy snow, homeowners wanting a finished architectural look | More components, more complex framing, ridge beam sizing must match engineering packet |
| Free-standing | Intermediate | Detached patios, pools, or when house attachment isn't feasible | More and deeper footings required; higher structural loads on posts; may still need permit even if small |
If you're comparing aluminum against wood or other materials for your patio cover, aluminum wins on longevity and maintenance for most outdoor conditions, though wood has its own appeal for certain aesthetics. That trade-off is worth thinking through before you commit to a style. One other thing worth knowing before you finalize your design: aluminum patio cover panels, even solid ones, are not designed to be walked on for maintenance access. They're roof panels, not platforms. Because aluminum patio cover panels are not designed to support standing weight, you should not plan to stand on the patio cover surface stand on alumawood patio cover. If you ever need to work above the cover, use a ladder positioned to avoid loading the panels directly. Also, because aluminum patio covers are roof panels, not designed to be stepped on, it is safer to walk only on approved structural framing and use proper fall protection can you walk on aluminum patio covers.
FAQ
Can I attach aluminum patio covers do it yourself to any part of my house (siding, sheathing, or trim)?
Yes, but only if the kit’s engineering package includes that exact wall type and attachment method. If you’re tying into brick veneer, steel, or an uncommon framing setup, you may need an engineering modification (or a different hardware schedule) so wind uplift and shear loads are actually transferred into structure, not just surface material.
What happens if my site conditions make it hard to dig the footing depth in the kit instructions?
Avoid substituting footing depth or post embed depth to “save concrete,” because those values are tied to frost and load paths. If your kit calls for footings below frost depth (often 3 to 5 feet depending on area), you generally must follow that schedule or get an alternative design stamped for your local conditions.
Is it okay to install gutters after the patio cover is built?
You can add guttering later, but the slope and flashing strategy should be planned from the start. If panels and end caps are already sealed, retrofitting gutters can require lifting edges, re-sealing seams, and re-checking water paths to ensure runoff still goes away from the foundation.
Can I mix fasteners from different kits or brands if they look the same?
For most systems, plan on using the kit’s specified hardware and matching finish, especially for coastal or high-salt exposure. If you switch to standard zinc-plated fasteners, expect premature corrosion, which can loosen connections over time even if the aluminum roof panels look fine.
Do insulated aluminum patio covers do it yourself actually stay cool underfoot?
Insulated panels help a lot, but they don’t eliminate heat, especially in full sun. If your goal is comfort, pair insulated panels with a ceiling fan and shade strategies (like orienting the cover, choosing a vented soffit plan if allowed, and using the manufacturer’s recommended flashing and air-gap details).
How can I tell if my DIY build has enough slope before I seal everything?
A minor levelness issue can be corrected during framing, but you should not “fix” poor drainage by shimming after panels are installed. If the roof framing ends up with insufficient slope, you will likely get pooling, track marks, and faster seal failure, so rework the structure before sealing panel seams.
My water test shows drips near the ledger, what should I troubleshoot first?
If you see water around the house interface after the water test, fix the flashing and seal line first, then re-test. A common cause is flashing not tucked under existing siding or a discontinuous top edge seal, where capillary action pulls water behind trim.
Do I really need to remove every aluminum shavings after cutting panels?
Don’t treat leftover aluminum shavings like a minor cleanup item. Shavings can trap moisture against surfaces and can also interfere with proper end cap seating or create sharp edges. Clean them thoroughly and vacuum the area before final sealing.
Can I adjust the cover size or placement slightly as long as it “feels similar”?
Yes, but only if your kit’s design assumes that location. Snow and rain loads change with exposure, roof pitch, and obstructions, so if you’re placing the cover near trees or structures that block wind, you still must follow the engineering packet load assumptions or obtain supplemental design.
Is it safe to stand on aluminum patio cover panels during construction or maintenance?
You can walk on the framing if it’s designed and installed for it, but you should not step on the roof panels for any routine task. For working above the cover, use a ladder set so it contacts structural framing or use proper scaffolding and follow fall-safety practices.