
Installing an Alumawood patio cover is one of the more achievable weekend-to-week DIY projects for a homeowner with basic carpentry skills, a hammer drill, and a level. The system uses extruded aluminum components that snap, screw, or slide together, so you spend less time cutting and more time assembling. A typical attached lean-to over a 12x16 ft patio takes two people roughly two to three weekends from footing pour to final panel, assuming permits are in hand. This guide walks you through every stage: choosing the right style, pulling a permit, pouring footings, sizing your structure, and assembling Alumawood components step by step. See our detailed patio cover installation instructions for step-by-step photos and checklists. For step-by-step aluminum patio cover installation instructions, see our detailed guide. For step-by-step instructions and troubleshooting tips, see our patio cover how to guide.
Alumawood Patio Cover Installation Instructions and Checklist

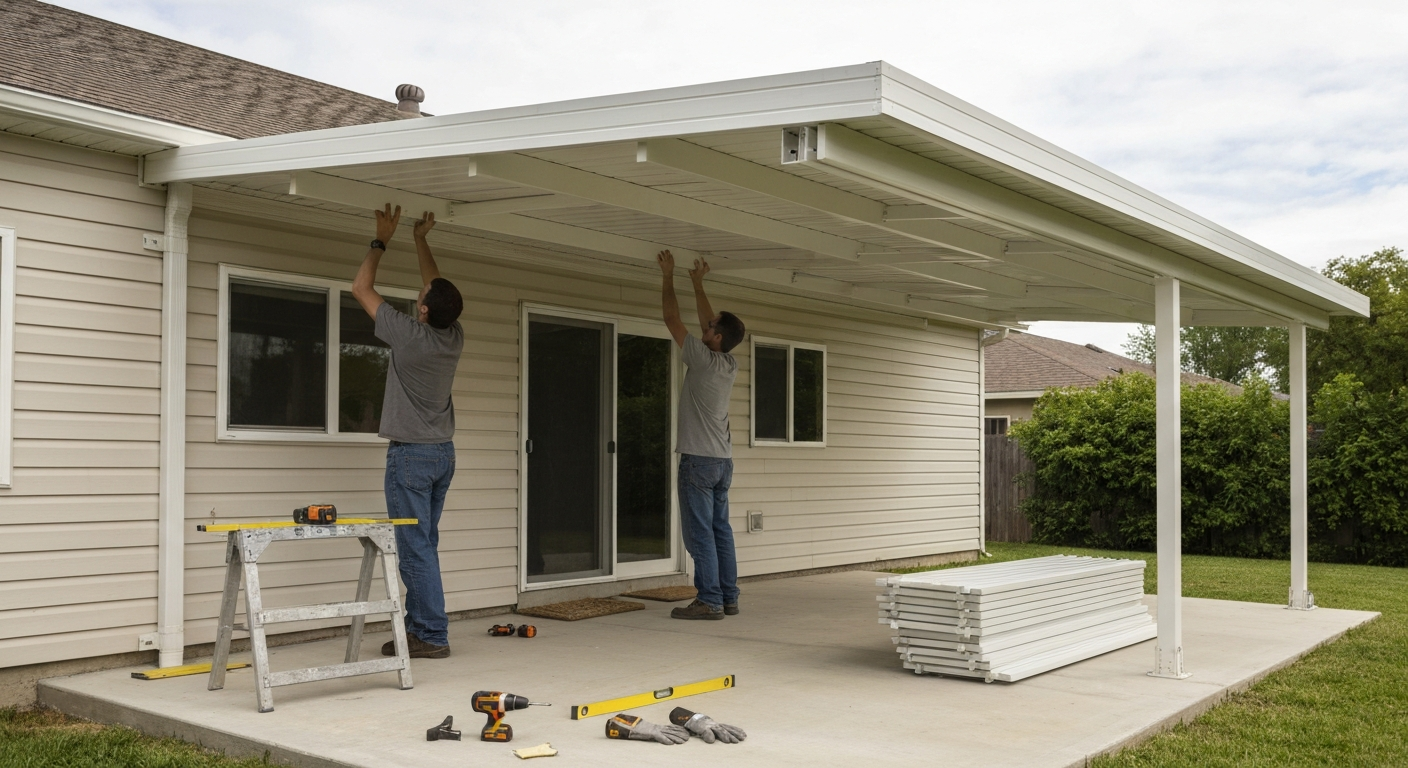
What this guide covers and who it's for
This is a complete DIY installation guide aimed at homeowners who are comfortable measuring, drilling into concrete, and following a plan. You don't need to be a contractor, but you should be confident using a hammer drill, a miter saw, and a level. If you've installed a fence, framed a shed, or built a deck, you have enough background to tackle an Alumawood patio cover. If you're newer to structural DIY work, this guide is still useful, but plan for a few extra days and budget for a structural inspection before you close the job out. The guide focuses on Alumawood/aluminum systems specifically, though it also touches on how those compare with wood and polycarbonate systems like Palram Olympia so you can confirm you've picked the right product before you start spending money.
Choosing the right style: lean-to, gable, or freestanding
The three main Alumawood configurations are the attached lean-to (single slope), the attached gable (peaked), and the freestanding structure (no house attachment). Each has a distinct use case, cost profile, and set of structural demands.
Attached lean-to
This is the most common starting point and the simplest to permit and build. One side of the roof connects to your house via a ledger board; the outer edge is supported by posts. Because the house provides one structural wall, you need fewer posts and less foundation work. The single slope creates a natural drainage direction away from the house. Most Alumawood distributor kits are designed around this configuration, so you'll find the most product support, pre-cut options, and installation PDFs for this style.
Attached gable
A gable cover has a peaked roof with two slopes meeting at a ridge, and it attaches to the house at the low eave end. It looks more like a permanent room addition and handles rain and snow better in most climates. The structural complexity goes up because you're adding a ridge beam, rafter framing at the peak, and potentially a larger header at the house wall. Permits are almost always required, and some jurisdictions will ask for engineered plans. Budget 30 to 50 percent more time than a lean-to of the same footprint.
Freestanding
A freestanding Alumawood cover has four post corners and no attachment to the house. It's the right choice when your local code restricts additions to the dwelling's envelope, when you want to cover a space away from the house (a fire pit area, pool deck, or side yard), or when your house wall doesn't offer a clean attachment point. The trade-off is that you need footings at all four corners and sometimes intermediate posts depending on span, which increases concrete work and cost.
Decision checklist: which style fits your situation
- Do you want to cover a space directly adjacent to a door or sliding glass door? Start with an attached lean-to.
- Is your climate high-snow or high-wind? A gable roof sheds loads better; check local design wind speeds per IRC Table R301.2(1) and ASCE 7 before committing to a flat or low-slope lean-to.
- Does your HOA or local code limit structural additions to the house footprint? A freestanding structure may avoid that trigger.
- Is the attachment wall wood-framed, brick, stucco over CMU, or concrete? This affects ledger feasibility and hardware cost (see the ledger attachment section below).
- Do you want a finished look that matches your roofline? A gable with matching pitch gives that result but adds complexity.
- Are you working alone or with one helper? A lean-to is the most manageable two-person install; a gable cover benefits from a third person during ridge and rafter work.
Project planning and design decisions
Before you order a single panel, lock in your dimensions, slope, and drainage plan on paper. Alumawood kits are manufactured to order by most distributors, so mistakes at this stage are expensive.
Dimensions and orientation
Measure your usable patio space and add at least 6 inches of overhang on the open sides. Common residential covers run from 10x12 ft up to 16x20 ft, but there's no standard size. The longer the span between posts, the larger (and heavier) the beams required. Alumawood manufacturer engineering data and span tables (published by distributors like Alumcenter and covered in their Knowledge Center guides) tie panel and beam sizing directly to post spacing, so your layout drives your structural decisions. Orient the cover so the low end of the slope faces away from the house and toward an existing drain, lawn edge, or gutter.
Slope and drainage
For a lean-to, a minimum 5% slope (roughly 5/8 inch drop per foot of horizontal run) is the commonly published manufacturer recommendation for drainage, consistent with guidance in Solara/Alumashade installation PDFs. This means a 10-foot deep cover should drop at least 6 inches from ledger to outer beam. More pitch sheds water faster and reduces ponding risk, but also raises the ledger attachment point on the house wall, which can complicate flashing. Don't go below 2% slope or water will pond. For gable configurations, each side typically pitches 3:12 or 4:12 to match standard residential aesthetics, but confirm with your local jurisdiction if minimum pitch triggers a different code category.
Scope and complexity assessment
Honestly assess what you're taking on. An attached lean-to under 200 square feet with no electrical is a manageable DIY project. Add a ceiling fan rough-in, a gable roof, a masonry attachment wall, or a freestanding design over 14 feet of span, and complexity climbs fast. For anything with electrical, you'll need a licensed electrician to run circuits regardless of your building skills. Write out every task: demo of existing structure if any, utility locating, footing excavation, concrete pour, ledger installation, post setting, beam and header placement, panel installation, flashing, and cleanup. Then assign realistic time to each. Underestimating this is the most common reason DIY patio cover projects drag on past a season.
Permits, building codes, and inspection requirements
Pull the permit. I know it adds time and a fee, but unpermitted patio covers regularly come up during home sales, and some insurance policies won't cover damage from unpermitted structures. More practically, the inspector is a free second set of eyes who catches footing and ledger mistakes before they're buried under concrete or behind panels.
When a permit is required
Most jurisdictions require a building permit for any permanent patio cover regardless of size, though some allow small attached shade structures under a certain square footage without a permit. The trigger is almost always structural attachment to the house, any electrical work, or any concrete footing deeper than a specified depth. Alumawood systems have an ICC-ES Evaluation Report (ESR-1398) that gives the product a code-compliant approval pathway under IBC/IRC criteria, including approved design scope, installation limitations, and references to ASCE 7 for wind and snow loads. When you submit your permit application, referencing ESR-1398 can speed up the review because the inspector already knows the product has been independently evaluated.
How to confirm your local requirements
Call or visit your local building department (the Authority Having Jurisdiction, or AHJ). Ask specifically: What is the minimum permit-exempt structure size? What design wind speed and ground snow load does my jurisdiction use per IRC Table R301.2(1)? What is the required frost depth for exterior footings? Check CHAPTER 3, IRC 2024 (R301.2 and frost‑depth guidance) for the IRC table R301.2(1) entries that jurisdictions use to set minimum frost depths and confirm the exact depth with your local AHJ CHAPTER 3 — IRC 2024 (R301.2 and frost‑depth guidance). Do I need engineered plans for an aluminum patio cover kit with an ICC-ES report? What inspections are required and when? Write the answers down. This conversation takes about 20 minutes and can save you from a stop-work order later.
Permit application checklist
- Completed permit application form (available from your building department or their website).
- Site plan: a simple overhead sketch showing your property, the house, the patio cover footprint, setback distances from property lines, and any easements.
- Construction drawings: a plan view and at least one elevation showing post heights, beam sizes, ledger location, footing dimensions, and overall dimensions.
- ICC-ES Evaluation Report ESR-1398 (download free from ICC-ES website) or manufacturer's engineered plans if your AHJ requires them.
- Manufacturer's installation manual for your specific Alumawood product line (Newport, Laguna, Maxx Panel, Open Lattice, etc.).
- Contractor license number if using a sub for concrete or electrical work.
- Permit fee (typically $75 to $300 for a residential patio cover; varies widely by jurisdiction).
Common inspection points your inspector will check: footing depth and diameter before you pour concrete, post base anchor installation, ledger attachment and flashing, and final structural completion. Schedule each required inspection before moving to the next phase.
Site evaluation and preparation
Locating utilities
Call 811 (the national dig-safe line in the US) at least three business days before any excavation. This is not optional. Underground utilities, including gas lines, irrigation, low-voltage landscape lighting, and electrical conduit, run through patio areas constantly. The 811 service marks utilities for free, and digging without calling is both dangerous and a legal liability. If your patio area is heavily landscaped or you know there's irrigation in the zone, mark those systems yourself before the locators arrive so they can confirm or correct.
Grading, slope, and drainage
Existing concrete slabs typically slope 1/8 to 1/4 inch per foot away from the house for surface drainage. Confirm that your post locations don't sit in low spots where water pools after rain; ponding at a post base accelerates corrosion even on aluminum systems. If you're placing posts on an existing slab, check that the slab is in good condition with no active cracks that would undermine anchor holding strength. Spalled or heaved concrete in the post anchor zone may need patching or core-out and repair before you install.
Obstructions and access
Walk the site and identify anything that complicates your layout: HVAC equipment, hose bibs, dryer vents, electrical outlets, soffit vents, downspouts, and trees. Low-hanging branches over the work area will slow you down and can interfere with panel installation. Move or protect HVAC equipment before cutting and drilling to keep aluminum shavings out of the condenser coil. Plan your material staging area, typically a garage or driveway, so panels and beams can be carried to the site without sharp turns around obstacles. Alumawood panels in 12-foot lengths are awkward to maneuver and easy to kink if you're navigating tight corners.
Footings and foundation options
Your footing choice depends on whether posts land on an existing slab, bare soil, or grade. Each situation calls for different hardware and prep work.
Concrete footings in soil (new construction or freestanding)
For posts in soil, dig a round hole (a 12-inch diameter hole saw auger bit works well with a rented one-man auger) to the required frost depth. IRC Section R403.1.4 requires exterior footings to extend below the frost line, and your local AHJ fills in the frost depth requirement in their version of IRC Table R301.2(1). In mild Southern California climates, 12 inches is often sufficient. In northern states and mountain regions, that can be 36 to 48 inches. For city‑specific frost depths and a nationwide table of typical footing requirements, see Deck Footing Frost Line Depth by City, PermitDeck (city‑specific frost data guide) Deck Footing Frost Line Depth by City — PermitDeck (city‑specific frost data guide). Don't guess; call your building department. After digging, place 4 to 6 inches of compacted gravel at the bottom for drainage, set a tube form, and pour concrete to a minimum specified compressive strength of 2,500 psi (3,000 psi is better for outdoor use in freeze-thaw climates). Set your post base anchor or J-bolt while the concrete is still wet, using a level and template to get bolt placement right. This is the most critical step in the entire project. Misaligned anchors mean misaligned posts, and that error propagates through every dimension above it.
Post bases on an existing concrete slab
If your patio is already a concrete slab in good condition, you can use post base hardware with concrete anchors rather than digging footings. The most common approach is a standoff post base (Simpson Strong-Tie ABA or ABU series, for example) anchored with wedge/expansion anchors or sleeve anchors into the slab. Use a hammer drill with the correct carbide bit for the anchor diameter (the anchor manufacturer's table specifies bit size and minimum embedment depth), drill to the required depth, vacuum the hole clean, set the anchor, and torque to the manufacturer's specified value. For outdoor and humid environments, use hot-dip galvanized or stainless-steel anchors; bright zinc will corrode at anchor heads within a couple of seasons. If the slab is less than 3.5 inches thick or shows structural cracking, you may need to core-drill and pour a thickened pad rather than relying on anchor embedment in a thin slab.
Pier pads and pre-cast options
Pre-cast concrete deck blocks are sometimes used for freestanding patio covers in mild, no-frost climates. They sit on grade without excavation and support a post base hardware piece. This approach is fast and inexpensive, but it's only appropriate where frost heave is not a concern (no freeze-thaw cycles) and where local code permits it. Many jurisdictions don't allow deck blocks for permanent structures, so confirm with your AHJ before committing to this method.
Structural considerations and sizing guidance
Alumawood is not a structural free-for-all just because it comes in a kit. The posts, beams, and header carry real loads: the weight of the roof panels and any accumulated snow or water (dead load plus live load), plus lateral wind forces. Getting these sizes right is how the cover stays standing in a storm.
How the loads flow
Panels span between beams. Beams carry the panel load and transfer it to posts. Posts transfer the load down to footings. The header (or ledger board at the house wall) carries the beam load on the house side and transfers it into the house's structural rim joist or wall framing. If any link in that chain is undersized, the cover can deflect, crack connections, or in extreme cases fail. For a lean-to, the critical members are the ledger/header connection to the house and the outer beam spanning between posts.
Alumawood beam and post sizing
Alumawood systems use proprietary extruded aluminum beams in several depths (typically 4, 6, and 8 inch nominal depths depending on product line). The manufacturer's engineering documentation and ESR-1398 tie beam selection to span length and tributary width. As a general planning rule, longer spans and wider tributary areas require deeper beams. Distributor span tables (available from sources like Alumcenter's Knowledge Center) typically specify beam depth as a function of post spacing and roof width. Always use the manufacturer's table for your specific product line rather than estimating, because wall thickness, alloy specification, and connection detailing vary between Alumawood product families like the Newport, Laguna, and Maxx Panel series.
When to get engineered plans
Your local AHJ may require stamped engineering plans regardless of your ESR report if your project exceeds certain thresholds: total roof area over a set square footage (often 200 to 400 sq ft), design wind speeds above a certain threshold, any snow load region, a gable roof configuration, or a freestanding structure with long spans. Even when not required, hiring a structural engineer for a plan review (typically $300 to $600) is money well spent for larger or more complex projects. The engineer will confirm footing size, post and beam selection, ledger attachment method, and hold-down requirements. Don't skip this step if you're in a high-wind coastal area, a high-snow mountain region, or if your total covered area exceeds 300 square feet.
Wind and snow load basics for planning
IRC Chapter 3 (R301.2) and IRC Appendix BF (Patio Covers) provide the code basis for load requirements. Your AHJ sets the local design wind speed and ground snow load in their version of IRC Table R301.2(1). ASCE 7 is the referenced standard for converting those site values into design pressures on roof panels and connections. In practice, for permit submittals using ESR-1398, you reference those site values in your permit application and the evaluation report confirms that the Alumawood system is rated for those conditions within its approved scope. If your site conditions exceed the ESR limits, you need engineered plans.
Dimension tables and quick-reference charts
The tables below are planning references based on common Alumawood distributor guidance and general span principles for aluminum patio cover systems. Always verify against the manufacturer's current engineering documentation for your specific product line and your AHJ's requirements before finalizing your design.
| Post Spacing (ft) | Typical Beam Depth | Max Roof Width (single span) | Notes |
|---|---|---|---|
| Up to 8 | 4-inch nominal beam | Up to 12 ft | Light loads, mild climate. Confirm with product-specific span table. |
| 8 to 10 | 6-inch nominal beam | Up to 14 ft | Standard residential lean-to range. |
| 10 to 12 | 6-inch nominal beam | Up to 16 ft | Upper range for 6-inch; verify with manufacturer table. |
| 12 to 14 | 8-inch nominal beam | Up to 18 ft | Larger structures; engineered plans often required. |
| Over 14 | Engineer-specified | Varies | Stamped engineering plans required in most jurisdictions. |
| Footing Type | Typical Diameter | Typical Depth Range | Concrete f'c Min | Best Used For |
|---|---|---|---|---|
| Drilled round pier | 10 to 12 inches | 12 to 48 in. (per frost line) | 2,500 to 3,000 psi | Freestanding posts in soil; most climates |
| Thickened slab pad | 18 x 18 inches square | 6 to 10 inches thick | 3,000 psi | Retrofit on existing slab with poor anchor capacity |
| Slab anchor (existing slab) | N/A (anchor into slab) | 3.5 in. min slab depth | Per existing slab | Posts on sound existing concrete patio |
| Pre-cast deck block | 12 x 12 inches or larger | Grade level only | N/A (pre-made) | Mild climates, no frost, freestanding only, confirm with AHJ |
| Fastener / Anchor Type | Common Size | Typical Use | Environment Rating |
|---|---|---|---|
| Wedge/expansion anchor | 1/2 in. x 3.5 in. | Post base to slab | HDG or SS for outdoor use |
| Sleeve anchor | 1/2 in. x 3.5 in. | Post base to slab or CMU | HDG or SS for outdoor use |
| Adhesive/epoxy anchor | 5/8 in. threaded rod | High-load post base, thinner slab | SS rod for outdoor; per manufacturer cure time |
| Titen HD / THDSS screw anchor | 1/2 in. | Ledger to concrete or CMU wall | THDSS for outdoor/coastal |
| Hex lag screw | 1/2 in. x 3.5 in. min | Ledger to wood rim joist | HDG; staggered per IRC Table R507.9.1.3(1) |
| Self-drilling aluminum screw | #10 or #12 | Panel-to-beam, beam-to-post cap | Per Alumawood kit hardware pack |
HDG = hot-dip galvanized. SS = stainless steel (316 grade for coastal environments). Do not mix aluminum structural members with incompatible metals (carbon steel in direct contact with aluminum causes galvanic corrosion); use aluminum-compatible hardware or isolate dissimilar metals with non-conductive tape or coatings where contact is unavoidable.
Materials and tools you'll actually need
Materials checklist
- Alumawood kit for your chosen product line (panels, beams, posts, fascia, end caps, hardware pack): order from manufacturer or licensed distributor, specify dimensions and color.
- Ledger board (for attached covers): typically the manufacturer-supplied aluminum header channel, or pressure-treated lumber if specified by your design.
- Post base hardware: Simpson ABA/ABU series standoff bases or equivalent, sized to post dimension.
- Concrete anchors: wedge anchors or Titen HD screws sized per post base hardware instructions.
- Flashing: continuous aluminum Z-flashing or purpose-made Alumawood ledger flashing for the house attachment; self-adhering waterproof membrane for backup.
- Concrete: 60 lb or 80 lb bags of 3,000 psi mix (or ready-mix for large pours), rebar or tube forms as needed.
- Sealant: exterior-grade polyurethane or manufacturer-specified sealant for panel ends and flashing terminations.
- Touch-up paint: color-matched to your Alumawood finish for cut ends.
- Fasteners: self-drilling aluminum screws from the hardware pack; additional box of #10 x 1-inch and #10 x 2-inch sheet metal screws as backup.
- Safety equipment: safety glasses, hearing protection, gloves, work boots.
Tools checklist
- Hammer drill (SDS or SDS-Plus) with carbide-tipped masonry bits in sizes matching your anchor diameter.
- Circular saw or miter saw with a fine-tooth aluminum-cutting blade (80T carbide non-ferrous blade; do not use a wood blade on aluminum).
- Cordless drill/driver with bits matching the Alumawood hardware pack fasteners.
- Tape measure, 4-foot level, and a string line with line level for establishing slope.
- Speed square and chalk line.
- Post hole digger or rented one-man auger (for soil footings).
- Tube form (Sonotube or similar) in 10 to 12 inch diameter.
- Mixing paddle and bucket or rented mixer for concrete.
- Reciprocating saw for any trim cuts.
- Caulk gun.
- Stepladder or scaffold (6 to 8 ft minimum height for most lean-to installs).
- Safety glasses and hearing protection (aluminum cutting produces sharp chips and is loud).
Ledger and wall attachment methods
The ledger is how the roof load transfers from your patio cover into the house. It's the most important connection in an attached installation, and it's also the most common place where leaks start. Getting both the structural connection and the waterproofing right here is non-negotiable.
Attaching to a wood-framed wall
The ledger (aluminum header channel or pressure-treated lumber per your plan) must attach to the structural rim joist or band joist of the house framing, not just to siding, stucco skin, or sheathing. For a wood-framed wall with wood or engineered rim joist, the standard method is 1/2-inch hex lag screws at minimum 3.5-inch embedment into the rim joist, staggered vertically and spaced per your local code or the ledger span being supported. Simpson Strong-Tie's Deck Connection and Fastening Guide provides tested spacing tables based on tributary area, and many AHJs accept those tables directly. Strip siding and install flashing before the ledger: self-adhering waterproof membrane behind the ledger, then a continuous aluminum Z-flashing or Alumawood-specific header flashing over the top of the ledger, tucked up under the siding course above. This is what keeps water out of your wall for the life of the structure.
Attaching to brick, stucco, or CMU
Masonry and CMU walls require through-wall anchors or screw anchors rated for masonry. The Simpson Titen HD (standard) or THDSS (stainless for outdoor/corrosive environments) is a widely used option with published load data for CMU and concrete. Drill with a hammer drill at the manufacturer's specified bit size, vacuum the hole clean, and drive the screw to the specified torque. Do not anchor into mortar joints; anchor into the masonry units themselves. For stucco over wood framing, the same approach as a wood-framed wall applies, but you'll need to cut through the stucco cleanly to expose the sheathing and rim joist. A reciprocating saw with a carbide blade works well for this. Waterproofing the ledger penetration through stucco is critical: use self-adhering flashing membrane around the entire ledger perimeter and over the cut stucco edge.
Step-by-step Alumawood installation
- Confirm permit is approved and first inspection (footing) is scheduled before you dig.
- Call 811 and wait for utility marking before excavating post hole locations.
- Lay out post locations with batter boards and string lines. Verify square using the 3-4-5 triangle method. Mark hole centers with spray paint.
- Dig or auger post holes to the required frost depth (confirmed with your AHJ). Place 4 to 6 inches of compacted gravel at the bottom.
- Set tube forms, mix and pour 3,000 psi concrete. While concrete is wet, set J-bolts or post base anchors using a template to ensure correct spacing and alignment. Check plumb and level. Let cure for minimum 24 to 48 hours (72 hours in cool weather) before loading.
- Schedule and pass the footing inspection before proceeding.
- Install the ledger or header at the house wall. Strip siding in the ledger zone, install waterproof flashing membrane, attach ledger per the fastener schedule, then install aluminum Z-flashing over the top edge. Caulk all penetrations with exterior-grade sealant.
- Set post base hardware on the cured footings using concrete anchors. Drill with hammer drill at specified bit size, vacuum holes, install and torque anchors to manufacturer specifications.
- Cut posts to the correct height, accounting for the slope. The house-side ledger is higher than the outer beam to create the drainage slope (minimum 5% / 5/8 inch per foot). Set posts in bases, plumb in both directions, and brace temporarily with 2x4 diagonal bracing before releasing your grip.
- Install beam pockets or end caps on posts, then set and fasten beams. Check level and slope. Beams should run perpendicular to the panels (panels span between beams in the direction of roof slope for a lean-to).
- Snap or slide panels into the beam channels per the specific Alumawood product instructions. Start from one end and work toward the other. For solid or insulated panel systems, each panel interlocks with the next via a tongue-and-groove profile. Don't force panels; if they're binding, recheck beam alignment.
- Install fascia boards over the panel ends on the open sides. Fascia covers the panel edges and gives a finished appearance.
- Install end caps on all exposed aluminum extrusion ends. Apply manufacturer-specified sealant to any gaps at the ledger-to-panel interface.
- Apply touch-up paint to all cut ends using color-matched aluminum paint to prevent oxidation at exposed cuts.
- Schedule and pass the final inspection.
- Run a water test with a garden hose before calling the job complete. Check for drips at the ledger flashing, panel end laps, and beam-to-post junctions.
Sealing, flashing, and water management
Water intrusion is the biggest long-term failure mode for attached patio covers, and it almost always starts at the ledger. Think of flashing as your primary defense and sealant as the backup. The aluminum Z-flashing over the ledger top must extend under the lowest course of siding or stucco above it by at least 2 inches, with no gaps at inside corners where the ledger meets house walls. At those inside corners, cut a small notch in the flashing leg and fold it up the adjacent wall, then seal the corner with polyurethane caulk. Don't use silicone on raw aluminum if you plan to paint it; silicone doesn't accept paint. Aluminum-compatible polyurethane sealants (such as products in the NP1 or Sikaflex family) bond better to aluminum and hold up longer outdoors.
Finishing and ongoing maintenance
Alumawood and aluminum patio covers are marketed as low-maintenance, and compared to wood they genuinely are. But they're not no-maintenance. Once or twice a year, rinse the panels and beams with a garden hose to remove dust, pollen, and debris that accumulates in panel channels. Check sealant at the ledger and around all fastener heads annually; reapply where it's cracked or peeling. Inspect the post base hardware for any signs of corrosion or anchor loosening, especially after major wind or seismic events. If you used galvanized anchors and live near a coast, upgrade to stainless steel at the first sign of rust staining. Aluminum extrusions may oxidize to a chalky white over years in UV-heavy climates; a coat of automotive or commercial aluminum polish restores the surface. Touch up any scratches or cut edges with color-matched paint to prevent oxidation pits.
Alumawood vs. wood vs. polycarbonate: which system is right for you
Alumawood/aluminum systems are not the only option, and before you order, it's worth understanding what you're trading off against pressure-treated wood covers and polycarbonate panel systems like the Palram Olympia. Each material has a genuine best use case.
| Attribute | Alumawood (Aluminum) | Pressure-Treated Wood | Polycarbonate (e.g., Palram Olympia) |
|---|---|---|---|
| Lifespan | 30+ years with minimal care | 15 to 25 years with regular sealing/painting | 10 to 20 years (UV degradation of panels) |
| Maintenance | Low: annual rinse, spot sealant check | High: paint/seal every 2 to 3 years | Low: clean panels; hardware check |
| DIY-friendliness | High: kit-based, aluminum cuts cleanly | High: familiar materials, widely available | High: lightweight, modular kits |
| Light transmission | None (solid) or partial (lattice) | None (solid) or partial (lattice/pergola) | High: translucent panels let light through |
| Structural load capacity | Engineered per ESR-1398 | Varies by framing design | Moderate; panels not structural |
| Typical installed cost (DIY, 12x16 ft) | $2,500 to $5,500 | $1,800 to $4,000 | $2,000 to $4,500 |
| Permit / code pathway | ICC-ES ESR-1398 available | Standard IRC prescriptive framing | Product-specific; varies by manufacturer |
| Best for | Long-term low-maintenance cover; kit simplicity | Custom looks; easy local sourcing | Sunrooms, bright patios where light is wanted |
If budget is the primary driver and you're comfortable painting every few years, a wood structure gives you maximum flexibility and the lowest material cost. If you want light under the cover, a polycarbonate panel system is the better call. For most homeowners who want a clean, long-lasting, low-maintenance patio cover with clear structural documentation and a permit-ready code pathway, Alumawood aluminum systems are the practical sweet spot.
Common problems and troubleshooting
- Panels rattle in wind: panel-to-beam channels are not fully seated or end caps are missing. Remove the affected panel, reseat fully, and install end caps and sealant.
- Water drips at the ledger: flashing is not tucked under the siding above, or sealant has cracked at a corner. Rerun flashing and reseal all corners and fastener heads.
- Posts are not plumb after concrete cures: the J-bolt or anchor was set before the concrete fully stiffened or was disturbed during cure. In mild cases, slotted post base hardware allows minor position adjustment. In severe cases, the footing may need to be cut out and re-poured.
- Beam sag in the middle of a long span: the beam depth is insufficient for the span and load, or the beam was incorrectly selected. Consult the manufacturer's span table for your product line and add an intermediate post if needed.
- Concrete anchor spins during torque (slab anchors): the hole diameter is too large or the anchor brand was not matched to the correct drill bit size. Re-drill at a diameter 1/64 inch tighter or use an adhesive anchor at that location.
- Aluminum panels show white chalking after a few seasons: normal UV oxidation on powder-coated or bare aluminum. Clean with aluminum cleaner and apply a UV-protectant wax or top coat.
- Ledger pulls away from house wall: lag screws missed the rim joist and are only in sheathing or stucco. The ledger must be removed, the rim joist located precisely, and the connection remade with proper fasteners.
Estimated costs and realistic timelines
Material costs for a DIY Alumawood lean-to over a 12x16 ft patio typically run $2,500 to $4,500 for the kit, $200 to $600 for hardware, concrete, and anchor materials, and $75 to $300 for the permit. If you need a concrete pour for new footings, rent an auger ($100 to $200/day) and add bag concrete at roughly $6 to $8 per 60 lb bag. A 12x16 freestanding structure with four footings might need 10 to 14 bags per footing at depth, depending on frost requirements. Total DIY material budget for most 12x16 projects lands between $3,500 and $6,000, not including any electrical work.
For timeline, plan on: permit application and approval at 1 to 4 weeks depending on your jurisdiction; site prep and utility locating at 1 day; footing excavation, pour, and cure at 3 to 5 days (including cure time); ledger installation at half a day; post and beam installation at 1 day; panel and fascia installation at 1 to 2 days; sealant and finishing at half a day. Total active work time for two people is typically 3 to 5 days spread over 2 to 3 weekends. Gable covers and freestanding structures add 1 to 3 days depending on complexity.
When to call a pro instead
This is a genuinely doable DIY project for most homeowners, but there are specific situations where hiring out makes more sense than pushing through. Call a licensed contractor or structural engineer if: your local design wind speed exceeds 130 mph (common in coastal Florida and Gulf Coast regions), you're in a high-snow load zone (ground snow load over 20 psf), your house wall is concrete or CMU and you're unsure how to locate and attach to structural framing, the total covered area exceeds 300 square feet, your AHJ requires stamped engineering plans and you can't source them from the manufacturer, or the project includes any electrical rough-in. Hiring a pro for one of these specific scopes while doing the rest yourself is completely reasonable and often the right call.
FAQ
What primary authoritative documents and manufacturer resources must I gather before writing an Alumawood patio cover DIY guide?
Collect product‑specific installation manuals and kit PDFs from Alumawood Products and authorized distributors (installation steps, recommended tools, panel types, flashing details, slope/drainage notes). Obtain the ICC‑ES evaluation report(s) for the specific Alumawood product (e.g., ESR‑1398) to capture approved scope, limitations, required engineering references and permitted spans. Retrieve span/engineering tables and panel capacity guidance published by the manufacturer/distributor (panel gauge/thickness, tributary area, deflection limits). Gather related manufacturer videos and part details (post bases, gutters, trim, fasteners). Keep copies of all downloadable files for permit submittal and to quote exact manufacturer instructions rather than paraphrasing without source.
What building codes and standards must the guide reference for safe, code‑compliant designs?
Reference the applicable International Residential Code (IRC) sections: R301 (loads), Chapter 3 building planning, Chapter 4 foundations (R403) and Appendix BF/Appendix H (patio cover prescriptive provisions where available). Cite ASCE 7 for determining site‑specific wind and snow loads (component/cladding and roof pressures). Note that local jurisdictions may adopt amendments and publish tabled values (wind speed, ground snow, frost depth) — the homeowner must verify values with the local Authority Having Jurisdiction (AHJ). For product approval and installation limits, cite the ICC‑ES report(s) (e.g., ESR‑1398). For ledger, anchor and connector requirements, reference Simpson Strong‑Tie or equivalent manufacturer technical guides.
What structural and load information is required to create accurate span tables and header/beam/post sizing guidance?
You need: 1) The manufacturer’s published span/spacing/tributary area tables for the exact panel/profile; 2) the applicable design loads: site wind pressures and ground snow loads per IRC/ASCE 7 (or AHJ values); 3) allowable material properties and design limits from the product ESR or engineering drawings (maximum cantilever, inter‑member connections, deflection criteria like L/120, L/180 as specified); 4) beam and header capacity charts for the chosen beam material (aluminum extrusions or wood laminated beams) including section modulus and moment capacity; and 5) post buckling and compressive capacity info; if the manufacturer doesn’t provide tables for a configuration, an engineered stamped plan is required.
What permit and footing information must be included for homeowners to secure a permit and build correctly?
List the permit submittal items: project description, plan views and elevations showing spans, post locations and footing sizes, manufacturer product approvals/ESR, engineering calculations or stamped plans if spans exceed prescriptive limits, and site wind/snow/frost data. For footings, cite IRC R403 requirements: footing dimensions, concrete minimum compressive strength (follow product ESR or local code, commonly 2,500–3,000 psi), and frost‑depth embedment (Table R301.2(1) or AHJ values). Explain footing types: poured concrete pier footings beneath post bases with required depth below frost line or frost‑protected shallow foundations; provide guidance on typical footing diameters/heights given post loads as starting points but emphasize AHJ confirmation or engineering stamp for atypical loads/soil conditions.
What ledger and attachment details must the guide cover for attaching an alumawood cover to different wall types?
Provide tested, code‑based ledger attachment methods: 1) Wood framed band/rim joist — through‑bolts or structural lag screws into the rim/band joist per Simpson Strong‑Tie ledger guidance; 2) Wood framed wall with siding/stucco — remove siding to positively fasten to structural sheathing/rim joist; 3) Masonry or brick veneer — use through‑bolt or manufactured ledger bracket anchored to backup wall or use engineered through‑wall anchors; 4) CMU/concrete — epoxy anchors or mechanical sleeve/wedge anchors with specified embedment and edge‑clearance; 5) Provide flashing/lath/weep details to prevent water intrusion behind ledger (self‑adhering flashing, counterflashing, sealant). Specify anchor types, minimum embedment, and corrosion‑resistant hardware for exterior use, and recommend manufacturer‑approved ledger flashing and fasteners per ESR or install manual.
Which fasteners, post bases and anchor details are essential to list and specify?
List corrosion‑resistant fasteners (hot‑dip galvanized or stainless steel) sized per manufacturer or connector tables. Include post bases and connectors with published load capacities (Simpson Strong‑Tie ABU/ABA/ABA‑10 style or manufacturer equivalents), wedge/sleeve/adhesive concrete anchors for base plates with required embedment depths and torque steps, and through‑bolts or structural lag screws for ledger attachment to wood. Provide anchor selection criteria: base material (concrete, CMU, brick, wood), required capacity, minimum embedment, edge distance, and corrosion protection. Reference connector manufacturer technical bulletins for drill sizes, installation torque, and minimum concrete strength.