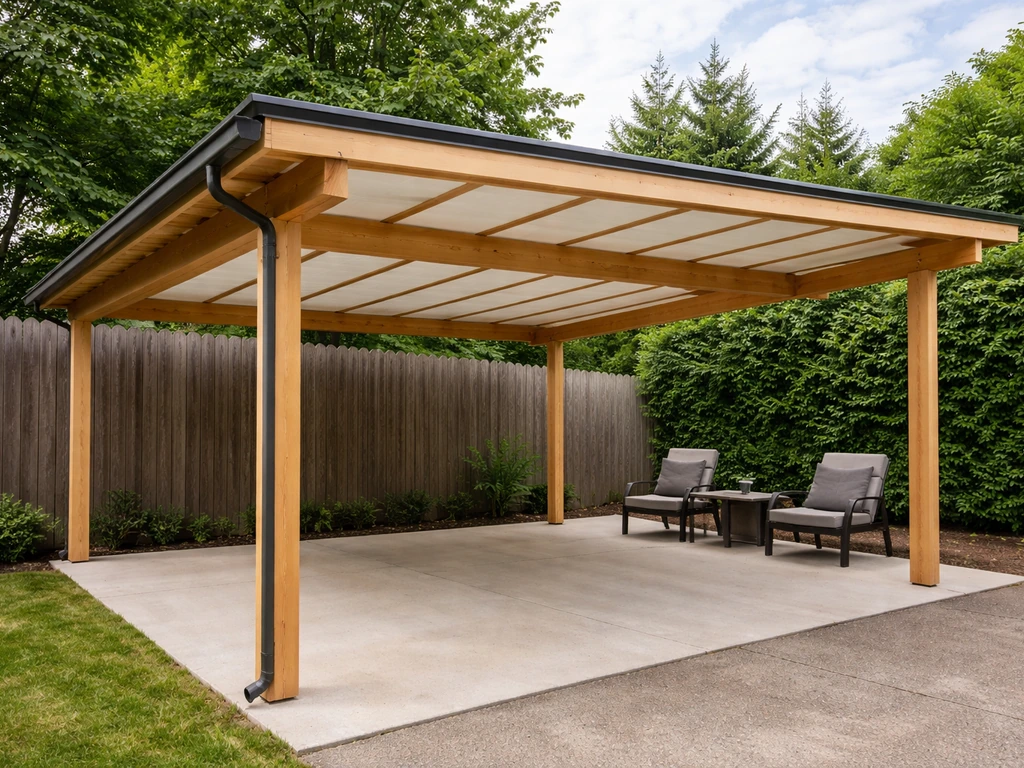
Building a patio cover is one of the most rewarding weekend projects a homeowner can tackle. The basic process goes like this: pick a style (lean-to, gable, or freestanding), pull a permit, set your posts or attach a ledger board to the house, run your beams and rafters, nail down roof sheathing or panels, then seal and flash everything so water stays out. Most DIYers with basic carpentry skills can complete a simple attached lean-to over a long weekend. More complex gable or freestanding builds usually take two to three weekends with a helper.
Patio Cover How To: DIY Step-by-Step Build Guide

Celia Vaughn
3 May 2026
Choose the right patio cover style first
The style you pick affects everything: your permit requirements, how you attach to the house, how you handle water runoff, and how much the whole project costs. There are three main options, and each one suits a different situation.
Lean-to (attached shed-style roof)
A lean-to patio cover is the most common DIY choice. One side attaches directly to your house wall via a ledger board, and the opposite side is supported by posts. The roof slopes away from the house, which makes drainage simple. If your patio sits against a solid exterior wall and you want maximum coverage with minimal complexity, this is the style to build. It is also the most code-friendly for attached structures under IRC Appendix H provisions.
Gable roof cover
A gable cover has a peaked roof with two slopes, like a miniature house roof. It looks more architectural and handles snow loads better than a flat or low-slope lean-to because the pitch sheds accumulation. The tradeoff is complexity: you are cutting and installing ridge boards and angled rafters, which takes more skill and time. If you are in a high-snow-load region or you want the cover to match the look of your home's existing roofline, the gable style is worth the extra effort.
Freestanding cover
A freestanding patio cover stands on four or more posts with no connection to the house. This is the right choice when your patio is not directly against the house, when your exterior wall does not have solid framing to attach a ledger to, or when you simply want to avoid any penetrations in your home's envelope. The engineering tradeoff is that all wind uplift and lateral loads must be handled entirely by the posts and their footings, which means larger concrete footings are typically required. You also give up the house's structure as part of your load-resisting system, so post sizing and footing depth matter more here.
| Style | Best for | Attachment to house | Drainage | Relative difficulty |
|---|---|---|---|---|
| Lean-to | Patios against the house wall | Yes, ledger required | Single slope away from house | Easiest |
| Gable | High-snow climates, matching home roofline | Usually yes, center ridge at house | Two slopes, good for snow | Moderate |
| Freestanding | Detached patios, weak or inaccessible walls | None | Designer's choice | Moderate to hard |
Plan the layout and measure for coverage
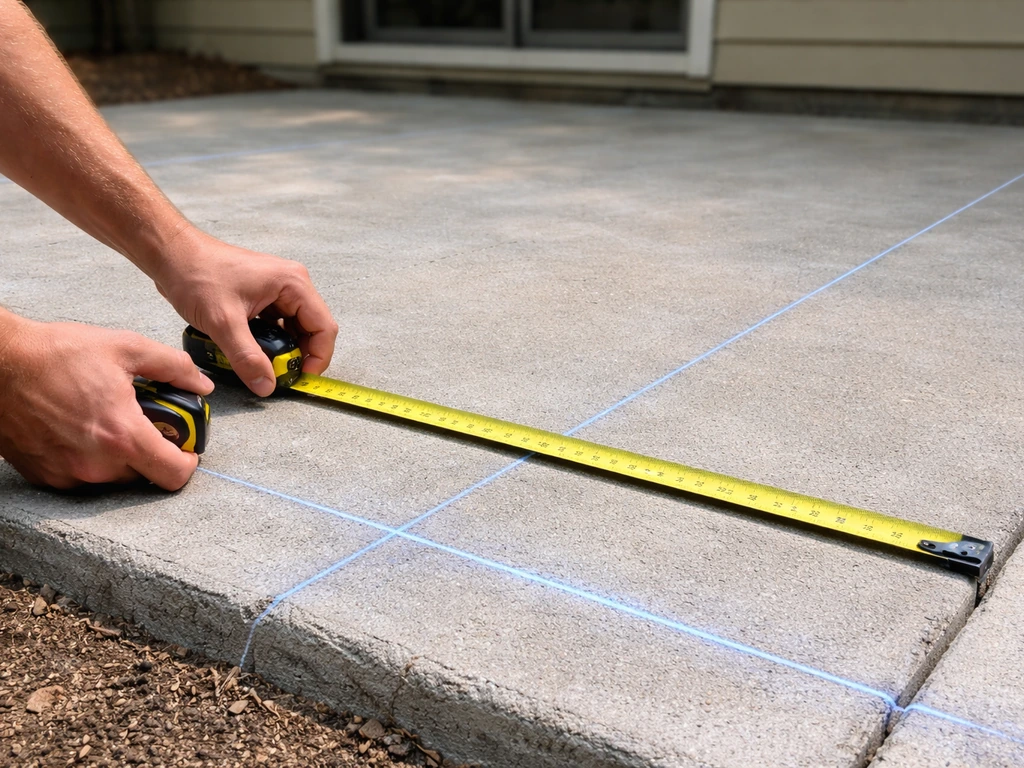
Start by measuring your patio slab or the area you want to cover. Write down the width (parallel to the house) and the depth (how far out from the house). Add at least 12 inches of overhang on the outer edge beyond your slab if possible, this keeps rain splash off furniture and off your foundation. A common mistake here is planning the cover exactly to the slab edge, then realizing rain pours right off the edge onto the ground six inches from the slab.
Next, mark your post locations on the patio. For an attached lean-to, posts typically land 8 to 12 feet out from the house, spaced 8 to 10 feet apart along the outer beam. Sketch a simple top-down plan on graph paper showing the house wall, ledger position, post locations, beam runs, and rafter direction. This sketch becomes your permit drawing, so take the time to make it legible. Include dimensions, roof pitch (even just '1:12 slope' or '3:12 slope'), and note the material you plan to use for each member.
Before you finalize anything, check your local setback requirements. Most municipalities require patio covers to sit a minimum distance (often 5 feet) from property lines. If your patio is close to a fence line, this can limit how far out you can build. Your permit application will flag this, but it is much easier to find out before you have drawn up plans.
Pick your materials and hardware
Material choice drives cost, maintenance, and longevity more than almost any other decision on this project. Here is an honest breakdown of the three main options.
Aluminum
Aluminum patio cover systems (sometimes sold under brand names like Alumawood) are the low-maintenance choice. Factory-finished extruded aluminum beams, posts, and pan-style roof sections snap and bolt together from a kit. They do not rot, they do not need painting every few years, and insects have no interest in them. The downside is that aluminum kits are not as forgiving when dimensions are non-standard, and the look is distinctly modern. Expect to pay roughly $20 to $50 per square foot installed, or significantly less if you buy a kit and do all the labor yourself. Aluminum-specific installation instructions can get detailed, so it is worth reading through system-specific guides before you order. Be sure to follow the aluminum patio cover installation instructions that come with your specific kit, since dimensions and hardware vary by system. Palram Olympia patio cover installation instructions will walk you through the kit-specific sequencing, fastener placement, and fit checks so the system seals and performs correctly. If you are using an Alumawood system, follow the alumawood patio cover installation instructions for your exact kit parts and spacing Aluminum-specific installation instructions. Then follow the patio cover installation instructions for your exact kit or materials to keep the structure weatherproof.
Wood
Pressure-treated lumber (PT) is the most flexible DIY material and the most familiar to anyone who has done basic carpentry. You can cut it on site, adjust dimensions freely, and it accepts any paint or stain. Use PT for any members in contact with concrete or close to grade. For rafters and beams above the weather line, you can use Douglas fir or hem-fir if you prefer a more traditional look. Wood requires periodic maintenance: plan on repainting or re-staining every 3 to 5 years. It is also heavier than aluminum, which matters for your ledger attachment loads.
Steel/metal
Steel framing is less common for residential DIY patio covers but worth knowing about. Steel tube posts and beams are extremely strong, span longer distances, and resist rot and insects. The challenge is fabrication: cutting and connecting steel requires a grinder, welder, or specialized connectors, and most homeowners do not have that equipment. Pre-engineered steel or aluminum carport-style kits are an exception and can be installed with standard tools. If you are covering a very large area (over 400 square feet) or need long clear spans, it may be worth pricing out a steel kit.
Roofing and hardware
For roof covering, the most common choices for a patio cover are corrugated polycarbonate panels (lets in diffused light, easy to cut and fasten), solid aluminum roofing panels (fully opaque, matches aluminum cover kits), and standard asphalt shingles over OSB sheathing (best match for your home's existing roof). Polycarbonate is the easiest for a first-time builder. For hardware, use hot-dipped galvanized or stainless steel fasteners throughout, standard zinc-plated screws will rust and stain within a year or two, especially in humid climates. Post bases, joist hangers, hurricane ties, and post caps should all be Simpson Strong-Tie or equivalent structural connectors rated for the loads you are dealing with.
Structural basics: framing, spans, and attaching to your house
This is where most DIY patio cover projects go sideways if the homeowner skips the planning. Structural sizing is not optional, and it is not as intimidating as it sounds once you understand the key variables.
Loads you have to account for
Your patio cover needs to resist three types of load: dead load (the weight of the roof materials themselves), live load (people, tools, or equipment on the roof), and environmental loads (snow and wind). In mild climates with no real snow, design loads around 30 pounds per square foot (psf) are sometimes referenced as a starting point. In areas with ground snow loads, you need to look up your specific local value from IRC tables and use it to size your members. Wind uplift is equally important: the 2024 IRC patio cover guidance explicitly calls out that uplift and lateral forces from wind must be addressed in the attachment and footing design. Do not skip this step.
Beam and rafter sizing
Local building departments typically publish a beam size chart for patio covers that you can use directly, Fort Collins and many other Colorado-area municipalities post these online. The chart tells you what size beam you need based on beam span, rafter tributary width, and your design snow load. As a rough example, a doubled 2x8 beam can typically span about 10 feet under moderate loads with posts at each end. Rafters are usually 2x6 at 24 inches on center for moderate spans up to about 10 to 12 feet in mild climates. When in doubt, go up one lumber size. Oversizing beams by one step costs relatively little and gives you a meaningful safety margin.
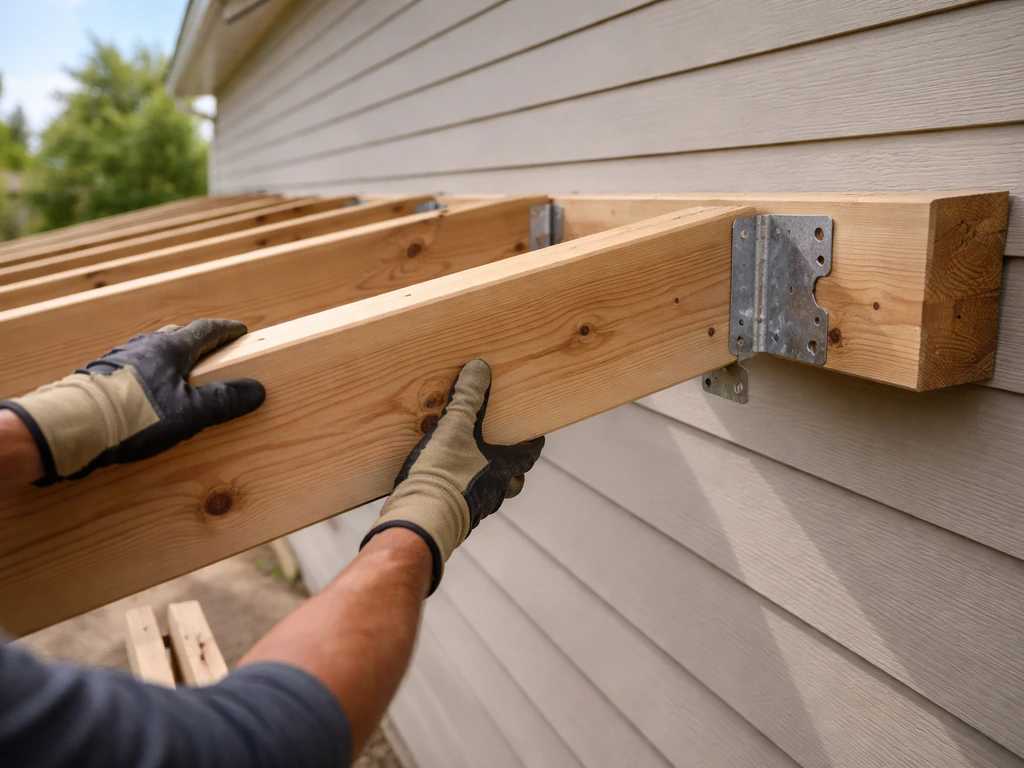
Attaching a ledger to the house
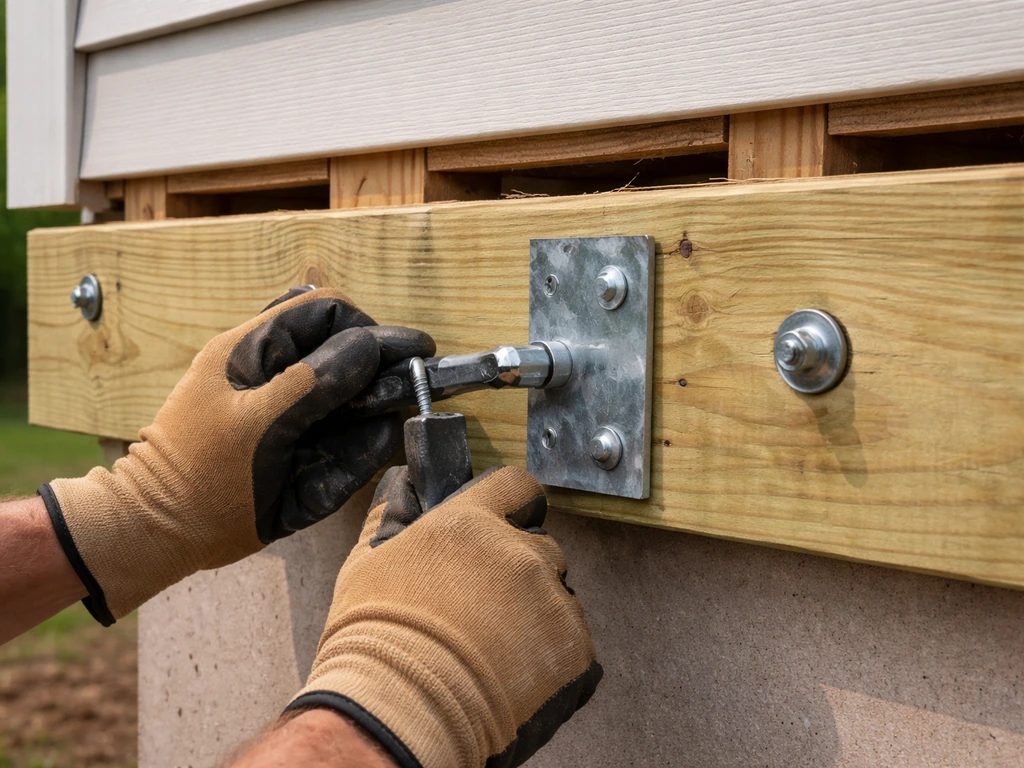
For an attached lean-to, the ledger board carries half your roof load and transfers it into your home's framing. This is the most structurally critical connection on the whole project, and it is also the most common place for moisture problems. The ledger must be bolted to the house's rim joist or wall framing, not just into siding or sheathing. Lag bolts (typically 1/2-inch diameter) should be staggered and spaced per your local code, the 2018 IRC patio cover guide references continuous ledger attachment using lag bolts through each rafter connection point as one accepted method. Before you bolt, strip the siding in the ledger zone, and install proper ledger flashing with layered, overlapping sections so water drains out and never gets trapped behind the ledger. Any flashing seams should overlap by at least 2 inches, and you should avoid driving fasteners through the weather barrier directly behind the ledger if at all possible.
Posts and footings
Posts need footings. In most climates, footings must extend below the local frost depth so freeze-thaw cycles cannot heave them out of the ground. In frost-free areas (zero frost depth), the IRC allows supporting posts on existing concrete slabs under certain constraints, including minimum slab thickness and column load limits. For most of the country, you will be digging and pouring concrete piers. A standard residential patio cover footing is often a 12-inch diameter cylinder poured 12 to 24 inches deep (deeper in colder climates), but check your local jurisdiction's requirement. The City of Seal Beach plan, for example, explicitly requires a footing inspection after excavation and before concrete pour. That step exists for a reason: get it inspected while it is still open.
Step-by-step build process
Once your permit is approved and your materials are on site, the build sequence is straightforward. Work through these steps in order. Skipping ahead, for example, setting posts before the footing inspection, can force you to tear work out.
- Pull your permit and get your plans approved. Even a simple attached lean-to typically requires a permit in most jurisdictions, and working without one creates liability and resale problems.
- Lay out post locations on the patio using batter boards and string lines. Double-check that your outer beam line is square to the house wall using the 3-4-5 triangle method.
- Dig footing holes to the required depth and diameter. Call 811 (in the US) to have utilities marked before you dig, every single time.
- Schedule your footing inspection if your jurisdiction requires it (most do). Wait for the inspector before pouring concrete.
- Pour footings and set post base hardware (J-bolts or post base anchors) while the concrete is wet. Use a level and string line to get all the bases perfectly aligned.
- Once concrete has cured (minimum 48 to 72 hours, ideally longer), set and plumb your posts. Brace them temporarily with 2x4 diagonal braces staked into the ground.
- Install the ledger board on the house wall. Strip siding, install flashing first, then bolt the ledger to the house framing using correctly sized and spaced lag bolts. This is the step that most needs careful attention.
- Install the outer beam across the top of your posts. Use post cap connectors rated for your loads. Verify the beam is level and at the correct height to give you your target roof pitch.
- Cut and hang rafters from the ledger to the outer beam, using rafter hangers or direct toenailing per your plan. Space at 24 inches on center unless your plan calls for closer spacing.
- Add hurricane ties or equivalent uplift connectors at every rafter-to-beam connection. This is non-negotiable in any area with meaningful wind.
- Install roof sheathing (typically 1/2-inch OSB or CDX plywood for shingle roofs) or attach panel roofing directly to the rafters if using polycarbonate or aluminum panels.
- Install drip edge flashing at the eaves and rakes before installing your final roof covering. Drip edge directs water away from the roof edge and prevents capillary action from pulling moisture back under the roofing material.
- Install your final roof covering (shingles, polycarbonate panels, aluminum panels).
- Complete all finish work: fascia boards, trim, gutters if applicable, and any paint or staining.
Weatherproofing, finishing, and safety checks
Structural work that passes inspection is not the finish line. Water is patient, and any gaps or improper transitions will eventually cause damage. Here is where to focus your attention before calling the project done.
Flashing and sealing
The ledger-to-house transition needs layered, overlapping metal flashing installed so each piece sheds water onto the one below it, never behind it. Cap flashing should sit under the house siding above and over the ledger flashing below. Seal the top edge of the cap flashing with a compatible flashing sealant, but do not rely on sealant alone as a waterproofing strategy, proper lapping geometry does the real work. At the roof edge, install drip edge at the eaves first (under the underlayment), then at the rakes on top of the underlayment. This specific order matters and is a common detail that gets reversed on first builds.
Gutters and drainage
A patio cover with no gutters will dump water right at the base of your posts or directly onto the patio. If your cover is larger than about 100 square feet, strongly consider adding a gutter on the outer beam. A simple aluminum K-style gutter with a downspout directed away from the foundation makes a big difference. Make sure any downspout terminates at least 3 to 4 feet from the house or feeds into an underground drain.
Final safety checks before closing the permit
- Verify all structural connectors (post caps, rafter hangers, hurricane ties) are fully nailed with the correct nails specified on the connector packaging. Missing nails in these connectors are one of the most common issues on final inspection.
- Check that the ledger flashing is correctly lapped and that no fasteners penetrate the weather barrier behind the ledger without proper sealing.
- Confirm all posts are plumb and post bases are fully tightened and bolted.
- Walk the roof edge and verify drip edge is continuous with no gaps at corners.
- If you have electrical fixtures planned (a fan, lights), make sure that rough-in wiring was inspected before closing up the framing.
- Schedule and pass your final inspection before you consider the project complete.
What to expect for cost, timeline, and when to call a pro
Realistic cost ranges
For a DIY wood-framed lean-to patio cover in the 200 to 300 square foot range, expect to spend roughly $1,500 to $4,000 in materials, hardware, and permit fees depending on your region and material quality. Aluminum kit systems for the same footprint run higher on material cost but save on tools and finishing work. If you hire out installation, solid aluminum patio covers commonly run $20 to $50 per square foot installed, which puts a 250 square foot project somewhere between $5,000 and $12,500 depending on your market and the system's complexity. Insulated aluminum panel systems and motorized louvered roofs push costs higher still.
Timeline
Plan for permit review to take one to four weeks depending on your jurisdiction. Once approved, a straightforward attached lean-to can go from post holes to weathertight roof in two to three weekends for an experienced DIYer with one helper. Factor in concrete cure time between footings and post-setting. A gable cover or larger freestanding structure adds at least another weekend. Budget for one extra weekend of unexpected fixes, because there always is one.
When to hire a pro instead
Most homeowners can handle the build itself if they are comfortable with basic carpentry and are willing to read the code requirements carefully. The situations where hiring a professional or at least an engineer makes sense are specific and worth being honest about.
- Your house wall does not have accessible framing where you need to attach the ledger (common in certain concrete block or ICF construction). A structural engineer can specify an alternate attachment method.
- You are in a high-wind or high-snow-load region and your span or load exceeds what the standard IRC span tables cover. An engineer's stamp may be required by your jurisdiction in this case.
- Your permit application triggers a full engineering review, which some jurisdictions require for any attached structure over a certain size.
- You are dealing with electrical work: running new circuits for fans or lighting typically requires a licensed electrician in most jurisdictions.
- The project involves significant changes to your home's existing roof or requires modifying structural members of the house. That scope almost always warrants a professional.
The permit and inspection process is genuinely your friend on this project. Inspectors catch real problems before they become expensive ones, and a passed final inspection means your project is documented as code-compliant, which matters when you eventually sell the home. Pull the permit, build it right, and get it signed off. That is the whole job.
FAQ
How do I choose the right roof pitch for a patio cover?
Match pitch to your climate and roof covering. For polycarbonate and metal panels, a steeper slope helps runoff, which reduces standing water and premature panel staining. In snow-prone areas, lean-to roofs often need more pitch or stronger framing than a flat look would suggest, so confirm the pitch and snow load together using your local code tables before ordering materials.
What if my patio slab is uneven or sloped?
Plan to level the posts using adjustable post bases or shim plates on the brackets, not by forcing beams to twist. If the slab slope is significant, you may need different footing depths or a redesigned layout so the ledger and beam elevations stay consistent along the run.
Can I attach the ledger to siding instead of framing?
No, ledger fasteners need to land in structural framing (rim joist or wall framing), not just sheathing or siding. If your ledger zone is over unfinished areas or blocked studs, you will need to expose and add blocking, then reinstall siding with proper weatherproofing and flashing lapping.
Do I need gutters even if my cover has a slope?
A slope improves runoff, but it does not control where the water falls. If your cover is wide enough that water hits seating, steps, or landscaping, add a gutter to the outer beam, especially above paths. Also route downspouts so they discharge 3 to 4 feet away from the house or into an approved drain line, to prevent foundation and post-base erosion.
How can I prevent fastener rust and staining on roof panels?
Use the right fastener type throughout, hot-dipped galvanized or stainless, not zinc-plated screws. Apply fasteners with consistent spacing and do not “overdrive” them so you do not deform panels. If you must replace a fastener, replace like with like, because mismatched metals can cause corrosion streaks.
What is the most common mistake that causes patio cover leaks?
Incorrect flashing lapping at the ledger and roof edges. Flashing must shed water in sequence from the top piece to the next lower piece, and the cap flashing placement matters. Many DIYers try to seal gaps with caulk, but sealant cannot replace correct overlap geometry.
How do I handle roof panel seams and overlaps correctly?
Follow the panel manufacturer’s overlap direction so water flows away from fastener lines. Start at the low end of the slope and work upward, keeping seams aligned over beams. If you cut panels, deburr edges and confirm the screw pattern, because rushed fit checks are a frequent cause of pinhole leaks.
What clearance do I need around property lines and fences?
Use your local setback rules, they vary widely by municipality and sometimes by lot size. Even if your permit process will flag it, measure early, because setbacks can force a different post layout, which changes spans and beam sizes. If a fence is within the setback area, plan for relocating the build footprint or adjusting the design.
Can I build a freestanding patio cover on the existing patio slab?
Sometimes, but only under specific conditions allowed by your local code, such as frost-free situations and slab capacity limits. If you are in a region with frost depth, you typically still need footings below frost line. Have your local inspector confirm what is acceptable for your exact slab thickness and column loads.
How do I estimate whether I should use a kit system or custom lumber?
Use a kit if your dimensions match typical spacing and you want standardized component engineering. Choose custom lumber if your layout is non-standard, your patio is irregular, or you need to adjust around offsets to property lines or utilities. If you go custom, still follow the structural sizing logic, do not assume “similar” sizes are adequate.
What size helper and timeline should I plan for?
For many attached lean-to projects, one helper is enough for setting posts, lifting beams, and holding ledger flash components in place while you fasten. Concrete cure time often controls the schedule, and inspections can add delays. If you are ordering panels or shingles, build in extra time for trial-fit and panel cut optimization so you do not rush weatherproofing at the end.
When should I hire an engineer or contractor for a patio cover?
Consider professional help if you need long clear spans, have high wind exposure, are in a heavy snow region, or if your ledger connection is complicated by unusual wall construction. Also hire help if your permit drawings require stamped engineering or if you cannot confidently confirm footing and uplift resistance without guessing.