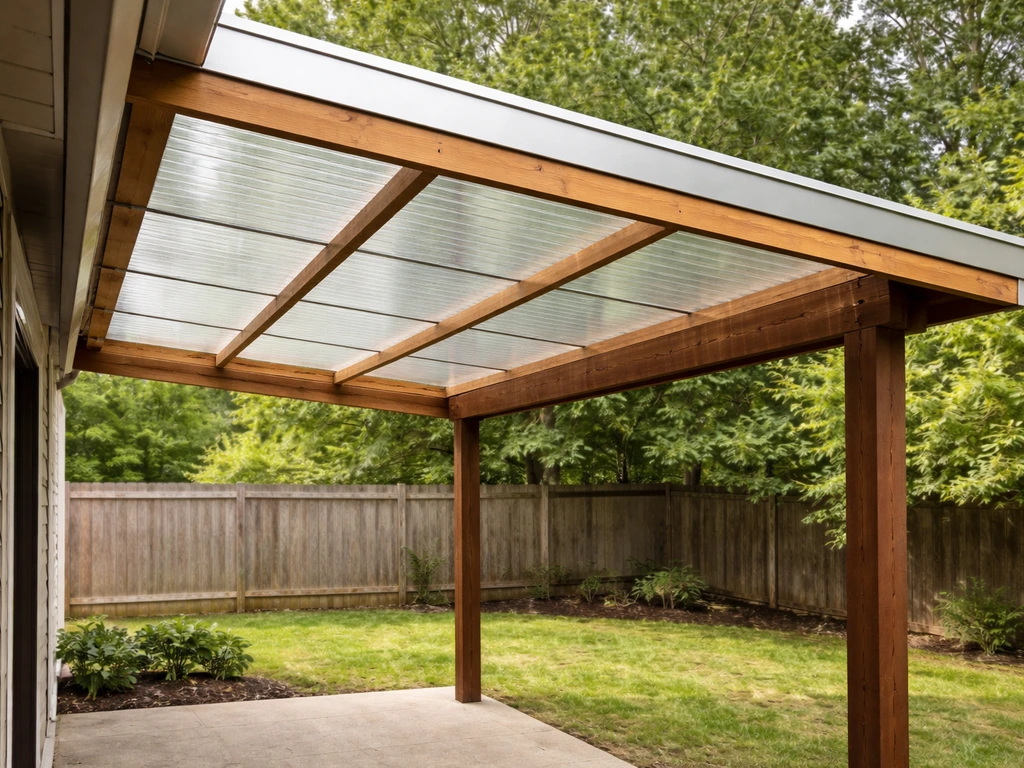
You can build a polycarbonate patio roof yourself in a weekend or two if you plan it right. The process involves setting a ledger on the house wall (or freestanding posts), running rafters at a slope, fastening polycarbonate sheets with the correct screws and caps, and sealing every edge so rain can't sneak in. Get those four things right and you'll have a roof that handles UV, rain, and wind for 10 to 20 years without cracking or leaking.
How to Build a Polycarbonate Patio Roof Step by Step

Celia Vaughn
2 Jul 2026
Planning and measurements before you touch a single tool
Start by deciding exactly where the roof will sit and how big it needs to be. Measure the width of your patio and how far out from the house you want coverage. Most polycarbonate sheets come in lengths up to 12 feet or in custom cut lengths, so try to design your roof span to avoid expensive cutting or waste. Sketch this on graph paper or use a free tool like SketchUp before ordering anything.
Roof pitch is one of the most important decisions you'll make. For polycarbonate, you need a minimum slope of about 1 in 10 (roughly 6 degrees or a 1.2-inch rise per foot of run). That's the absolute floor. In practice, go steeper if you can, 1 in 6 or better, because near-flat roofs are a standing-water trap. Even if a shallow slope technically drains, debris and slight framing sag can create ponds that eventually force water under your seals. A 5/12 or even 3/12 pitch is much more forgiving.
Mark your attachment points now. If you're building a lean-to against the house, locate the wall studs or rim joist behind the siding, that's where your ledger bolts go. For a freestanding structure, decide where your post footings will land. Check the ground for underground utilities (call 811 before you dig) and verify you're not sitting over drainage lines or irrigation pipes.
- Measure overall width and depth of the covered area
- Decide on slope direction and calculate rise over run
- Locate wall studs or rim joist for ledger attachment
- Mark post footing locations and check for underground utilities
- Note eaves, gutters, or existing overhangs that affect header height
- Factor in local snow and wind loads when sizing posts and beams
Picking the right polycarbonate: type, thickness, and coatings
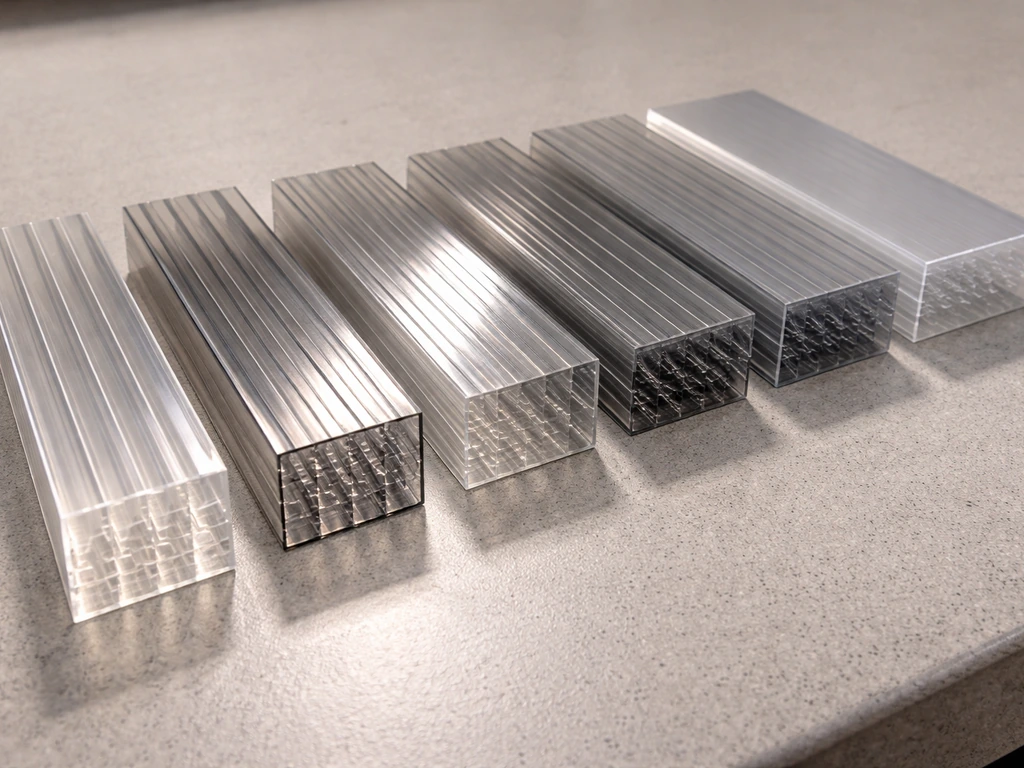
Twin-wall polycarbonate is the go-to choice for most patio roofs and is what most DIYers should be buying. It has two parallel faces separated by internal channels, which gives it structural stiffness and decent thermal insulation. Single-wall (solid) polycarbonate is clearer and more rigid but heavier and more expensive for the same coverage area. Multiwall (triple or honeycomb) panels offer even more insulation and are great for year-round enclosures, but they're overkill for a basic patio shade structure.
| Type | Thickness | Best For | Light Transmission | Relative Cost |
|---|---|---|---|---|
| Twin-wall | 6mm, 8mm, 10mm | Most patio roofs, shade + rain cover | High (clear) to moderate (opal) | Budget-friendly |
| Solid/single-wall | 3mm, 4mm, 6mm | Skylights, accent panels | Very high | Moderate |
| Multiwall (triple+) | 16mm, 25mm | Year-round enclosures, insulated structures | Moderate to low | High |
| Corrugated polycarbonate | 0.8mm–1.2mm | Simple lean-tos, pergola toppers | High | Lowest |
For a standard patio roof, 10mm twin-wall is a solid pick. It spans up to 650mm (about 25 inches) between rafters without flexing, comes in 4-foot-wide sheets, and is easy to handle solo. Go with 6mm only if your rafters are closely spaced (under 500mm apart). Always buy panels with a UV-protective coating on at least one face, this is not optional. Uncoated polycarbonate yellows and becomes brittle within 2 to 3 years in direct sun. The UV coating is usually factory-applied to one face and marked with a protective film; that side faces the sky.
Color matters for comfort. Clear lets in the most light but also the most heat. Opal or bronze tints reduce glare and heat gain noticeably. If your patio faces west or south and gets hammered by afternoon sun, an opal or tinted panel makes a real difference in usability. Standard sheet widths are 4 feet (1220mm) and lengths commonly run 6, 8, 10, or 12 feet. Order sheets long enough to run continuously from ridge to eave if at all possible, mid-sheet laps are a leak risk.
Lean-to, gable, or freestanding: choosing your roof style
A lean-to is the simplest and most popular option for a polycarbonate patio roof. To get the best results, follow the same lean-to patio roof approach: plan the span, choose twin-wall polycarbonate, and build the frame with the right pitch and fastening details. One side attaches to the house wall via a ledger, and the roof slopes away from the house. It's structurally straightforward, uses fewer materials, and fits almost any house wall. If you're new to this kind of project, start here. A lean-to patio roof is a well-documented build style that most confident DIYers can complete in a weekend.
A gable roof adds a ridge beam and two slopes, which looks more architectural and handles snow and rain more efficiently. It's a step up in complexity because you need to cut angled rafter ends, install a ridge board, and deal with two drainage directions. If your patio is wide (over 12 feet) and you want a finished look that matches the house roofline, a gable is worth the extra effort.
A freestanding structure works when you can't attach to the house (rental property, masonry wall with no good attachment point, or a detached patio area). You need four or more posts with proper footings in this case, which means more concrete and a bit more engineering. Freestanding structures are also more exposed to wind uplift, so post sizing and footing depth matter more. If you're considering a freestanding design, taking the time to properly design the structure first will save you a lot of headaches, working through your roof design on paper before picking up a shovel pays off here.
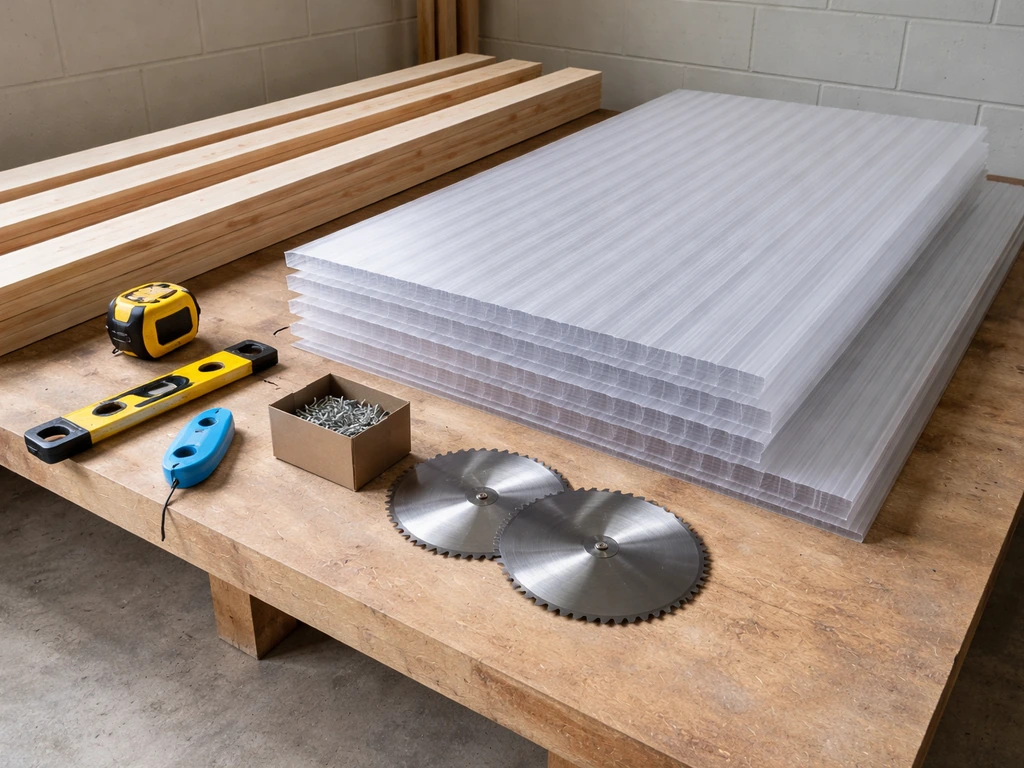
Materials and tools you'll actually need
Here's a realistic list for a lean-to polycarbonate patio roof roughly 12 feet wide by 10 feet deep. If you are also building a roof in The Sims 4, use the same measurements and pitch ideas so it looks right and sits correctly lean-to polycarbonate patio roof. Scale the lumber and sheet quantities up or down for your specific dimensions.
Materials
- Polycarbonate twin-wall sheets (10mm), sized to span from ledger to outer beam in one piece
- Pressure-treated 2x8 or 2x10 ledger board (length equals patio width)
- Pressure-treated 4x4 or 4x6 posts (count depends on span and design)
- Pressure-treated 2x6 or 2x8 rafters (spacing 24 inches on center typically)
- Double 2x8 or LVL beam for the outer header
- Post bases and post caps (galvanized or stainless)
- Ledger joist hangers (galvanized)
- Lag screws (1/2" diameter) for ledger-to-wall attachment
- Structural screws or joist hanger nails
- Concrete for post footings (Quikrete 80lb bags or poured)
- Polycarbonate roofing screws with neoprene/EPDM washers and caps
- Aluminum closure strips (top and bottom of sheets)
- F-section or U-section aluminum capping for sheet ends
- Aluminum H-section joiner bars for sheet-to-sheet connections
- Butyl tape or foam closure strips for sealing
- Flashing (pre-bent aluminum or stainless) for wall/roof junction
- Silicone sealant (neutral cure, compatible with polycarbonate)
- Gutter, brackets, and downspout for drainage
Tools
- Tape measure, pencil, chalk line
- Post hole digger or rented auger
- Level (4-foot and torpedo)
- Speed square and combination square
- Circular saw with fine-tooth blade (60-tooth or higher for clean polycarbonate cuts)
- Drill/driver and impact driver
- Drill bits including 1/2" bit for lag screws
- Step ladder and extension ladder
- Safety glasses, gloves, and hearing protection
- Stud finder
- Caulking gun
- Tin snips for flashing
One tool tip: when cutting polycarbonate, use a fine-tooth circular saw blade and cut with the protective film still on. It reduces chipping and keeps the panel clean. Cut slowly and support the sheet fully on both sides of the cut line so it doesn't vibrate or flex as you go.
Building the frame: posts, ledger, beams, and rafters
Setting the ledger
The ledger board is the backbone of a lean-to build. It carries the upper end of every rafter and transfers that load to the house structure, so it has to be bolted into something solid, studs, rim joist, or a concrete/masonry wall. Snap a level chalk line at the correct height on your wall. The ledger needs to sit high enough that your finished roof slope reaches the outer beam at the right height. A common mistake is setting the ledger too low and ending up with a barely-there slope, measure twice, get someone to double-check your math.
Remove siding where the ledger will sit (if applicable) and cut flashing to tuck behind the siding and over the ledger. This step is critical for keeping water from getting behind the ledger and rotting the wall sheathing. Use 1/2-inch lag screws at least 3 inches into solid framing, spaced no more than 16 inches apart. Two lags per stud bay is even better. Drill a pilot hole first to avoid splitting.
Digging footings and setting posts

Post footings need to reach below your local frost line, that's the depth at which the ground freezes in winter. This varies from 0 in frost-free climates to 48 inches or more in cold northern states. Check with your local building department if you're unsure of the depth. A standard minimum for a patio cover footing is 12 inches wide by the required depth. Mix and pour your concrete, then set your post base hardware in wet concrete with a plumb string line to keep spacing accurate. Let it cure 24 to 48 hours before loading it.
Posts for a 10-foot-deep lean-to typically need to be 4x6 or larger if your span between posts is over 8 feet. For most residential patio covers, 4x4 posts are fine for 6-to-8-foot spacing. Plumb each post carefully, any lean here gets amplified by the time your roof is on. Use temporary bracing screwed to stakes in the ground to hold posts plumb while the concrete or hardware is being secured.
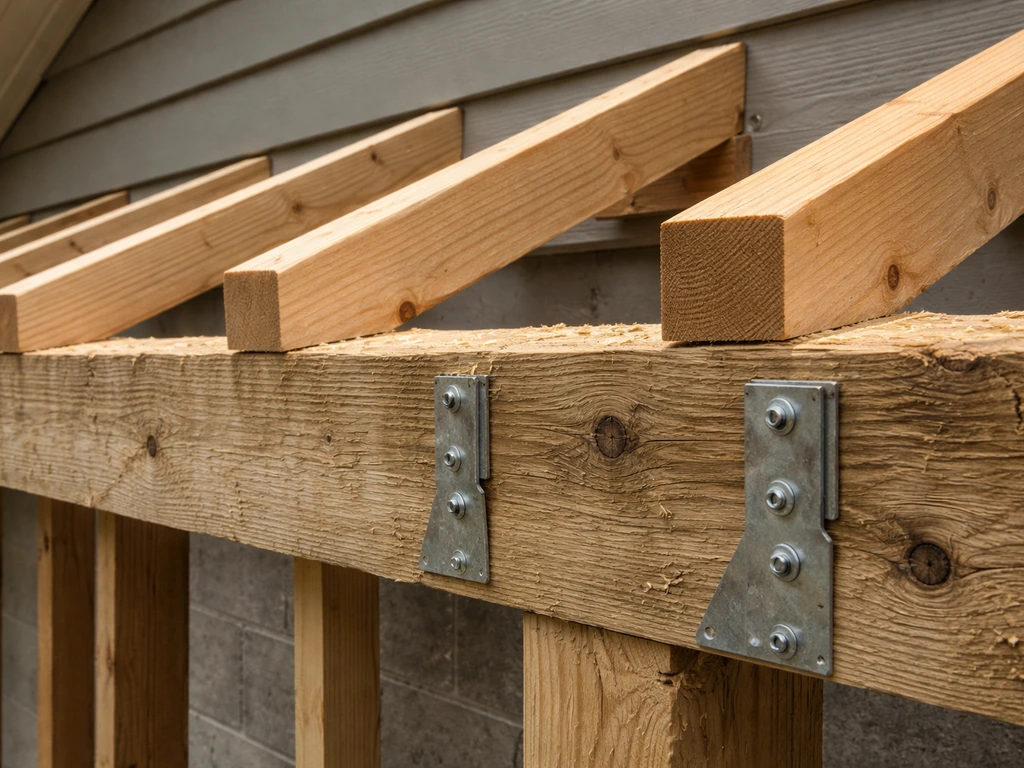
Installing the outer beam and rafters
The outer beam (also called the header or fascia beam) runs across the top of the posts at the eave end. For a 12-foot span, a doubled 2x8 or a single LVL beam typically does the job. Bolt it to your post caps with the hardware specified by the post cap manufacturer, don't just toe-nail it and hope for the best.
Rafters span from the ledger to the outer beam. Notch the rafter tail at the outer end (a bird's mouth cut) to sit flat on the beam, or use rafter ties. Space rafters at 24 inches on center for 10mm twin-wall polycarbonate, this keeps deflection low. For corrugated polycarbonate, you can sometimes go to 32 inches, but tighter spacing always results in a better-feeling roof. Install rafters with joist hanger hardware at the ledger end and structural screws or framing nails at the beam end.
Installing the polycarbonate sheets correctly
Sheet orientation, this matters more than most people think

Twin-wall polycarbonate has internal channels running in one direction. Those channels must run parallel to the roof slope, from ridge to eave, so that condensation and any water that gets inside the sheet can drain out the bottom. If you are aiming for a patio cover, this ridge-to-eave channel direction is one of the key “how to build” details for polycarbonate panels. If you install sheets with channels running horizontally, water gets trapped inside, algae grows, and the panel turns green and opaque within a year or two. Always check the sheet edges to confirm which direction the channels run before lifting it onto the roof.
UV coating face up, always
The protective film on your panels should have a label indicating which side has the UV coating. That side faces the sky. If you put it face down, the sun will degrade the unprotected face in a single season. Peel the protective film off after installation, not before, it protects against scratches during handling and cutting.
Pre-drilling and fastening without cracking
Polycarbonate expands and contracts significantly with temperature changes, up to 3mm per meter of sheet length over a 50-degree temperature swing. If you don't account for this, sheets will crack around the fastener holes. The fix is simple: pre-drill holes 50% larger than the screw shank diameter. A 5mm screw gets a 7.5 to 8mm hole. Drill holes at least 40mm from any sheet edge to prevent edge cracking. Never tighten screws fully against the panel, leave the washer just snug enough to seal, not compressed.
Use purpose-made polycarbonate roofing screws. These come with a neoprene or EPDM washer bonded to a metal cap that spreads the load and seals the hole in one step. Standard wood screws will eventually crack the sheet or allow leaks at the fastener point. Fasten through the ribs of the polycarbonate if the sheet profile allows, not in the flat valleys, especially for corrugated sheets.
Sheet laps and H-section joiner bars
For side-by-side sheets, use an aluminum H-section joiner bar that clips over adjacent sheet edges. Seal the top of the H-bar with neutral-cure silicone before pushing the sheets into place. For end laps (when a sheet doesn't reach full length and you need to join two sheets in the slope direction), overlap the upper sheet over the lower by at least 200mm (about 8 inches) and seal the lap with butyl tape. Avoid end laps entirely if you can by ordering sheets cut to your exact rafter length.
Sealing, flashing, drainage, and finishing the edges
Sealing the top (ridge) and bottom (eave) ends of sheets
The top edge of every polycarbonate sheet must be completely sealed to stop water, insects, and debris from entering the internal channels. Use an aluminum tape or purpose-made solid aluminum end cap that covers the entire top edge. Seal it with a bead of neutral-cure silicone. The bottom (eave) end needs a vented closure, this lets condensation drain out while blocking insects. You can buy purpose-made vented end caps or use a foam closure strip with slots cut in it. Never seal both ends solid, or you'll trap condensation inside the channels.
Flashing the wall junction
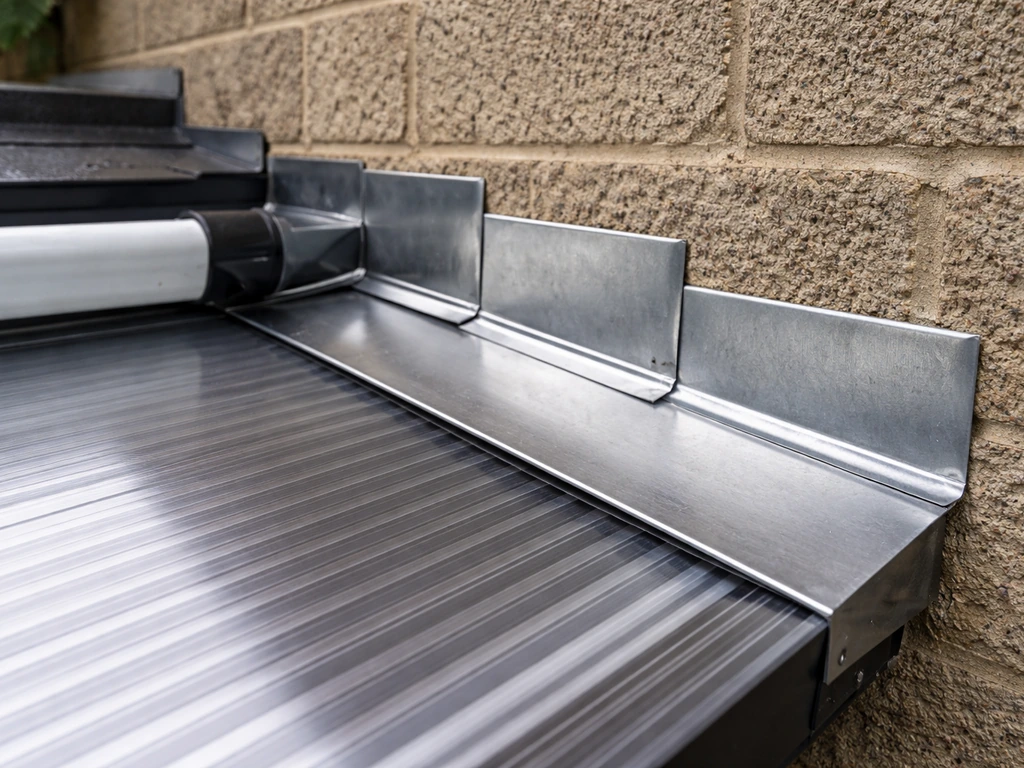
Where your polycarbonate roof meets the house wall, you need proper step flashing or a continuous apron flashing. This is the number one leak point on any lean-to roof. The flashing should slide up behind the siding by at least 4 inches and overlap the polycarbonate by at least 3 to 4 inches. Seal the top edge of the flashing to the wall with neutral-cure silicone (never use acidic silicone, it off-gasses acetic acid which can attack polycarbonate). Run a second bead along the underside of the flashing where it overlaps the sheeting.
Gutters and drainage
A 12x10 roof throws a significant amount of water in a rain event. Without a gutter at the eave, that water dumps off the edge and can erode the ground, splash back onto the house foundation, and create a mess right at your patio entrance. Install a K-style or half-round gutter along the outer eave beam, pitching it toward a downspout at a rate of about 1/4 inch per 10 feet. Connect a downspout to a splash block or extend it away from the foundation.
Edge finishing
Exposed sheet edges at the sides of the roof look unfinished and can let wind-driven rain get under the panels. Fit aluminum F-section trim over the side edges, clipping it to the rafter or a side fascia board. This gives a clean line, protects the sheet edge from UV, and keeps debris out. Miter the corners neatly with tin snips for a professional finish.
Safety, permits, and knowing when to hire a pro
Load requirements and wind
The 2018 International Residential Code (Appendix H) requires patio covers to handle a minimum live load of 10 psf on top of dead loads. The 2018 International Residential Code (IRC) Appendix H requires patio covers to be designed to sustain all dead loads plus a vertical live load of not less than 10 psf (0.48 kN/m²), except where snow loads exceed this minimum blank" rel="noopener noreferrer">2018 International Residential Code (Appendix H) requires patio covers to handle a minimum vertical live load of 10 psf. That's a code floor, not a ceiling, if your area gets snow, your design load must match or exceed your local ground snow load, which can be significantly higher. Wind loads are determined by your local exposure category and building height, with values pulled from IRC Table R301. Wind loads for determining design load performance for exterior roof coverings are based on IRC Table R301.2.1(1) adjusted by height and exposure using Table R301.2.1(2) blank" rel="noopener noreferrer">Wind loads are determined by your local exposure category and building height. 2.1. The practical takeaway: don't just size your posts and beams to look right. Look up your local design loads (your building department can give you these) and verify your lumber sizes against span tables. This is especially critical for wider spans over 10 to 12 feet.
Permits: what you likely need
Most jurisdictions require a permit for any patio cover attached to a house or over a certain size. Some places offer exemptions for smaller structures, for example, some California cities allow up to 300 square feet of projected roof area on a single-family home without a permit, but even those often require a permit if the structure attaches to the dwelling. Douglas County and similar jurisdictions typically want to see framing plans that include lumber species and dimensions, post/footing sizes, rafter spacing, ledger attachment details, and the roof covering type. Check with your local building department before you start. Getting caught without a permit can mean fines, a stop-work order, and having to tear out completed work.
On-site safety during the build
- Never work on a ladder alone — have a helper footing the ladder at minimum
- Polycarbonate sheets are large and catch wind like a sail; always have two people when placing sheets on the roof
- Wear safety glasses when cutting polycarbonate (small chips fly at speed)
- Check the weather before roof days — wet decking and ladders are a serious fall hazard
- Don't stand on polycarbonate sheets — they will not support your weight and you will fall through
- Call 811 at least two business days before digging any post footings
When to bring in a professional
Most competent DIYers can build a straightforward lean-to polycarbonate roof without professional help. But there are situations where calling a structural engineer or licensed contractor is the smart move. If your roof span is over 14 feet, you're in a high-wind or heavy-snow zone, you're attaching to an older home with questionable framing, or your permit application requires engineer-stamped drawings, get professional input. Similarly, if your local permit process involves inspections and you've never dealt with that before, a one-hour consultation with a local contractor can save you from costly mistakes. The structure itself might be DIY-friendly; the engineering and permitting piece sometimes isn't.
If you're unsure whether your project qualifies as a patio cover or crosses into more regulated territory (enclosed patio, sunroom, addition), talk to your building department early. The definitions matter for code compliance and for what inspections are required. A patio cover with polycarbonate roofing is generally straightforward to permit, but only if the paperwork matches the actual build.
FAQ
Do I need to build my polycarbonate roof at a specific width and length to avoid sheet cutting and weak joints?
Yes. Plan the rafter length and sheet layout so each panel runs continuously from ridge to eave, and aim for full sheets rather than end laps in the slope direction. If you must do an end lap, overlap by at least 200mm and align laps so they occur over framing, then seal with butyl tape to reduce the risk of leak paths.
What side should face up, and how can I tell the UV side if the protective film marks are missing?
In most panels, the UV-coated face is the one with protective labeling and a film you peel after install. If markings are missing, check the manufacturer data sheet or look for a slightly different surface finish, lightly scuffing the uncoated face is usually more prone to cosmetic dulling. Never guess if the film is gone before you confirm which face is protected.
How do I prevent water from trapping inside the twin-wall panels beyond setting the channel direction correctly?
Channel direction is critical, but also ensure your fastener pattern and seals do not interfere with drainage within the sheet. Use vented closures on the eave end (not solid caps), and make sure the top edge cap seals completely. If you leave both ends solid, condensation and meltwater have nowhere to go and can turn the panel green.
What fastener spacing should I use, and do I need to fasten every rib or every channel?
Use purpose-made polycarbonate roofing screws and keep your spacing consistent with the sheet thickness and rafter spacing. A common mistake is tightening one screw here and there and relying on friction, which can cause leaks at individual points. If you are unsure, follow the screw schedule from the panel or fastener manufacturer, and always pre-drill oversized holes to prevent cracking.
How tight should the screws be, and what happens if I over-tighten?
Leave a small clearance so the washer seals without crushing the panel. Over-tightening can deform the polycarbonate around the hole, which leads to cracking as the sheet expands and contracts, even if you drilled oversized holes. After the first row is installed, re-check tension before continuing.
Can I use silicone on all seams, including the edge seals, or are there materials to avoid?
Use neutral-cure silicone where the article recommends it, especially on flashing and where top sealing needs flexibility. Avoid acidic (often labeled acetoxy) silicone because its fumes can attack polycarbonate. For lap joints and specific overlap locations, use the specified products (for example, butyl tape on end overlaps) instead of substituting silicone everywhere.
Do I need gutters if my polycarbonate roof slopes away from the house?
Often yes, especially for larger roofs or patios close to the foundation. Without capture at the eave, concentrated runoff can erode soil, splash into doorways, and create persistent wet areas near the foundation. If you skip gutters, add a splash apron and route water away from footings, not just away from the patio surface.
How do I handle snow load if my area gets freezing rain or heavy, wet snow?
Beyond meeting minimum code live load, consider your ground snow load and whether snow will wet and add dead weight. If heavy snow is possible, increase structural capacity by reducing rafter spacing, upsizing beams, and ensuring the roof pitch will shed snow. If you are near your design limits, consult a local engineer or contractor rather than relying on DIY sizing alone.
What should I do if my patio cover is attached to a house with older framing or unknown stud locations?
Do not assume stud positions behind siding match current layouts. Locate solid structural members using careful measuring and probing, then confirm with a stud finder or small test holes before drilling ledger bolts. If you cannot reliably hit framing, redesign to use appropriate anchors or consider engineering guidance for ledger attachment.
Is it safe to walk on a polycarbonate roof during construction or maintenance?
Be cautious. Twin-wall panels are stronger than single-wall, but they still can crack or shift if your weight concentrates between rafters or if the sheet is not fully fastened and supported. During build and cleanup, use a plank to distribute load across multiple rafters and avoid stepping on the panel surface between supports.
How long after building can I expect to see problems like leaks or discoloration, and what are the first signs to check?
Early signs are usually around penetrations and edges, for example wet streaks at screws, bubbling tape at laps, or condensation stains near the eave. Discoloration from UV exposure usually shows up as yellowing and brittleness over time, so confirm UV side orientation immediately during install. If you notice leaks after the first heavy rain, re-check flashing overlap and top-edge sealing before winter weather starts.