Most patio drain covers come off with a flathead screwdriver, a wrench, or simple upward pressure once you know what's holding them down. If your patio cover is aluminum, the same basic process applies, but you need to be gentler to avoid bending or damaging the frame remove an aluminum patio cover. The tricky part is figuring out which of those applies to yours, and what to do when rust, debris, or old sealant turns a two-minute job into a stubborn 30-minute one. This guide walks you through exactly that, from identifying your cover type to freeing it safely without cracking the surrounding concrete or wrecking the drain body underneath.
How to Remove a Patio Drain Cover Safely and Quickly

Celia Vaughn
5 May 2026
First, figure out what kind of cover you're dealing with
Patio drain covers are not all the same, and the removal approach depends almost entirely on how the cover is attached. Spend 60 seconds looking at yours before you grab any tools. Get down close, brush off any surface debris, and look at the center and the edges.
Here are the most common types you'll find on a residential patio or outdoor slab:
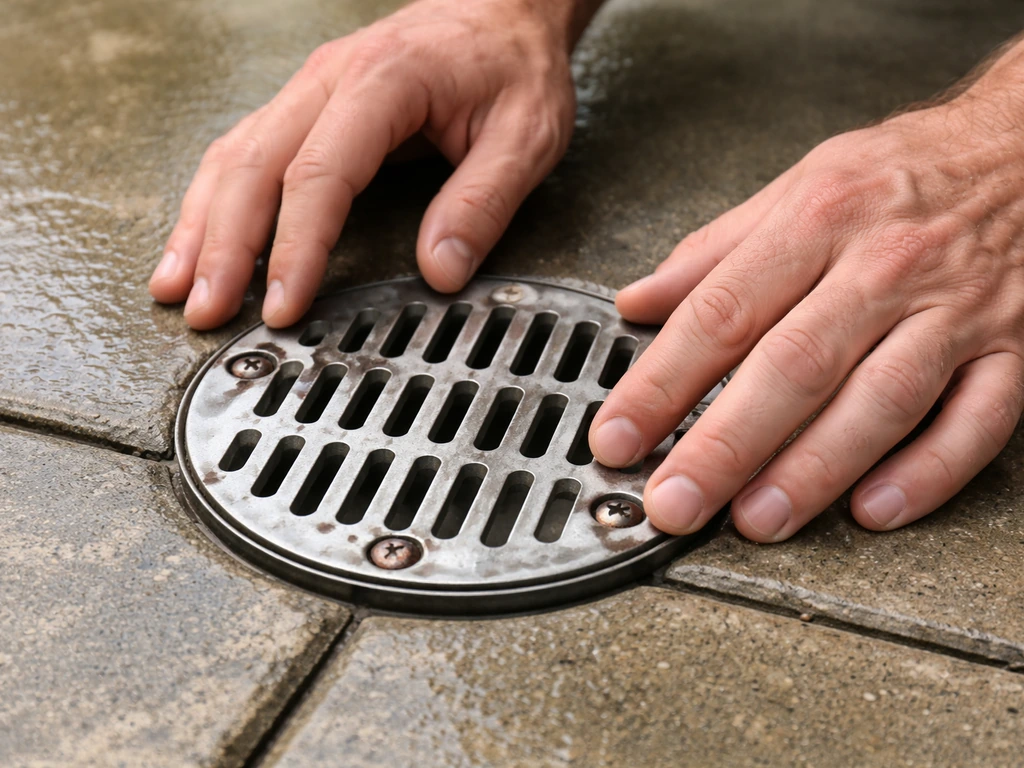
- Center-screw grates: A single screw (Phillips, flathead, or tamper-resistant spanner head) sits in the middle of the grate. Unscrew it and the whole cover lifts free.
- Multi-bolt or perimeter-screw grates: Two to four screws or bolts run around the edge or at set points across the face. Common on square or rectangular linear-drain covers.
- Snap-fit or latch-style covers: No visible screws. The cover clips into a channel or edge rail (similar to ACO's Drainlock system). You need to press or lift near the locking point to release it.
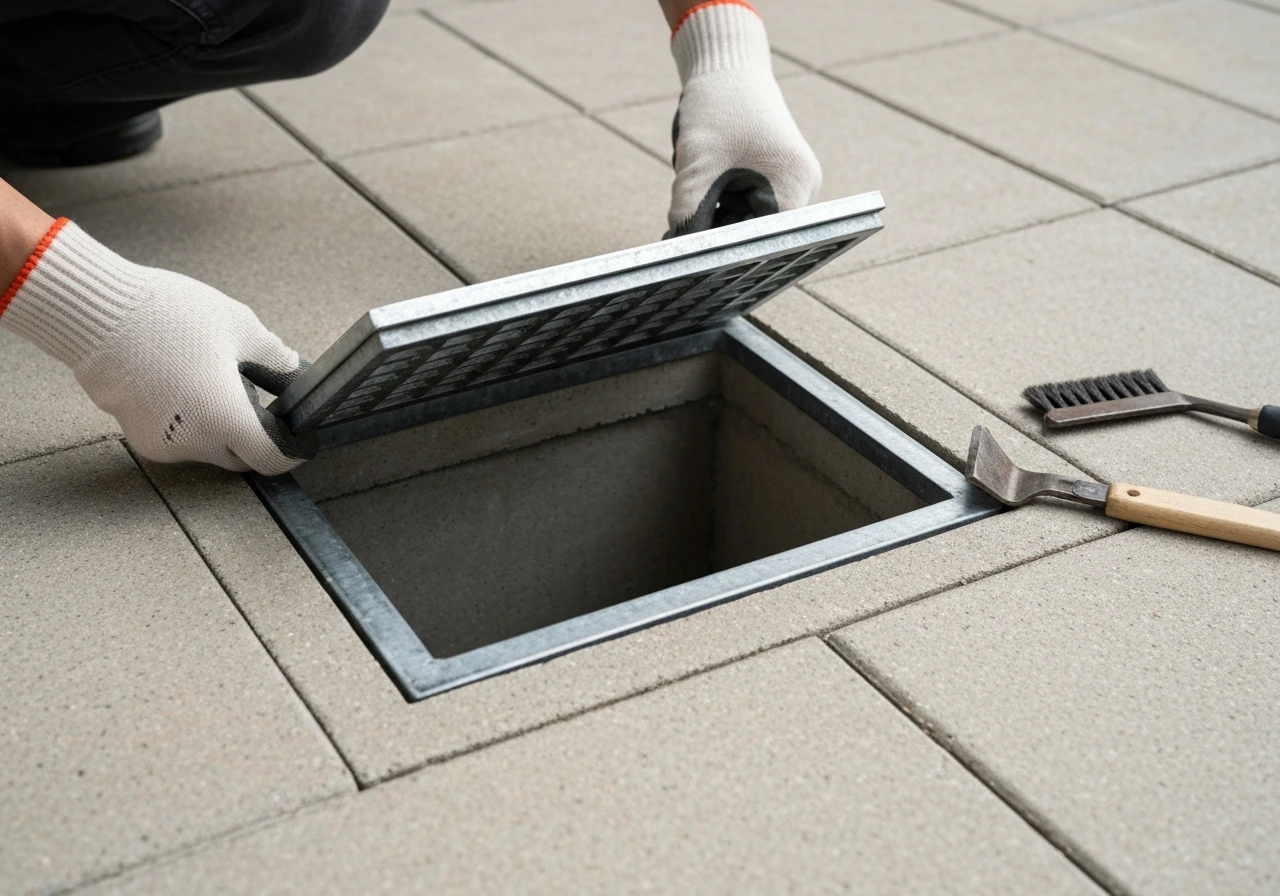
- Drop-in or lift-out grates: No fasteners at all. The cover just sits in a recessed seat in the drain frame. Lift it straight up.
- Tamper-resistant or drain-lock covers: Looks like a screw head but requires a special spanner key or Torx bit you won't have in a standard kit. Common in commercial settings but occasionally found in residential installs.
- Access-panel covers: Larger, heavier covers that sit flush with the concrete and allow full access to a drain cleanout or plumbing junction below, not just a strainer.
Why does this matter? Because prying a snap-fit cover when it actually has hidden screws will snap the tabs off. And hammering a bolt-secured cover when it's actually a simple lift-out grate just scratches your patio. Identify first, then act.
One more thing to check: is there any sealant or caulk around the edge? Run your fingernail around the perimeter. If the cover feels like it's glued down or there's a visible bead of gray or clear material around the rim, that's a bonded cover and it needs its own approach (covered below).
Tools and safety gear to have ready before you start
You probably already own most of what you need. Here's what to pull together before you crouch down on the patio:
- Flathead and Phillips screwdrivers (have both, you won't always know which until you're up close)
- Socket wrench or adjustable wrench for bolt-secured covers
- Spanner bit set or Torx bit set for tamper-resistant screws
- Penetrating oil (PB Blaster, WD-40 Specialist Rust Penetrant, or similar) for rusted fasteners
- Wire brush or stiff nylon brush to clear debris from screw heads and grate slots
- Flathead screwdriver or plastic pry tool for snap-fit releases
- Utility knife and/or oscillating multitool with a caulk/sealant blade for bonded covers
- Thin pry bar or flat crowbar for stuck lift-out grates
- Heavy wire or zip ties for the wire-loop lifting method on grates with no good grip point
- Work gloves (drain grate edges are sharp, and there can be biological gunk underneath)
- Safety glasses (flying rust, debris, or broken sealant fragments are real hazards)
- Old rags or a bucket for cleaning up after
A few safety points worth taking seriously: drain covers on a patio are a trip hazard the moment they're off, so don't leave them in a walkway. If the cover is cast iron or a large concrete-seated access panel, it can weigh 20 to 40 pounds or more. Don't try to yank it with one hand and bad leverage. Heavy covers need a solid two-handed lift or a helper. Also, once the cover is off, that open drain is a hazard for kids, pets, and tools. Set a bucket or a board over the opening if you walk away.
Step-by-step removal for each cover type
Screw-secured grates (center screw or perimeter screws)
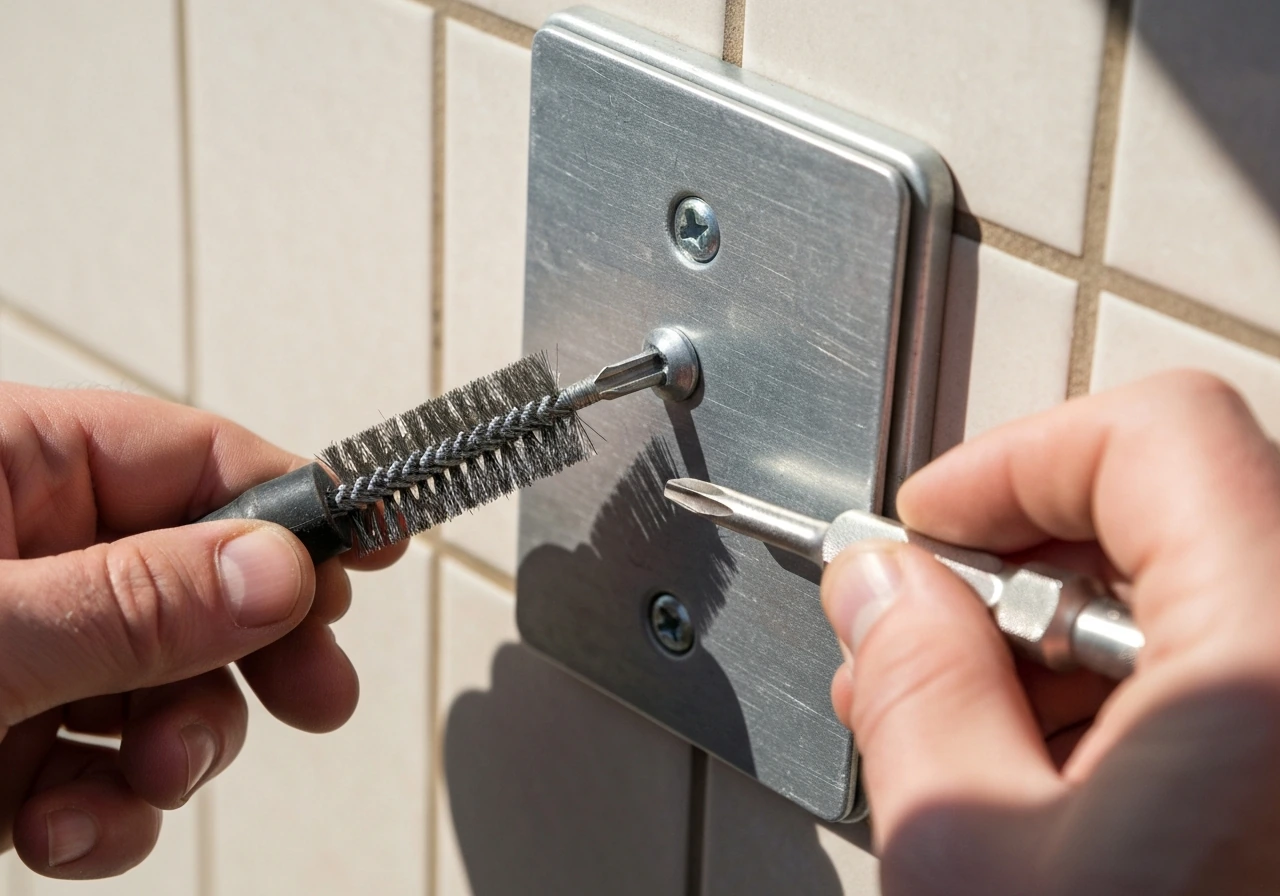
- Brush out the screw head with a wire brush so you can see the slot or drive type clearly.
- Choose the matching screwdriver or bit. For tamper-resistant spanner heads, you need a spanner bit, not a flathead. Forcing a flathead on a spanner head just rounds it out.
- If the screw is tight, apply penetrating oil directly to the screw head and the threads around it. Wait at least 10 minutes, longer if there's visible rust.
- Turn counterclockwise. Apply steady downward pressure while turning to keep the bit seated. If it slips, stop and reapply oil rather than stripping the head.
- Once the screw(s) are out, lift the grate straight up. If it's still stuck, see the section on rust and debris below.
Snap-fit and latch-style covers
- Look for the locking point. On channel-style linear drains (like ACO-style systems), there's typically one locking clip on one end of the grate. On round snap-fit covers, there may be two tabs on opposite sides.
- Use a flathead screwdriver or a thin pry tool. Insert it near the locking point, not at random along the edge.
- Apply gentle upward and outward pressure. The grate should click free. If you're forcing it hard, you're probably in the wrong spot.
- Once the latch releases, the grate lifts straight out of the channel or frame.
- If your cover uses a proprietary tool (like ACO's lifting key), don't substitute a screwdriver. These systems are designed to prevent damage to the channel edge rail, and prying in the wrong spot bends the rail and makes the grate rattle afterward.
Simple lift-out (no fasteners)
- Clear any dirt or debris from the gap around the cover with a stiff brush.
- Try lifting with your fingers from one edge. If there's no finger clearance, use a flathead screwdriver as a lever against the drain frame, not the concrete.
- If the grate has no good grip point, loop a piece of heavy wire or a doubled zip tie through one of the grate slots. Then use the claw of a hammer or a small crowbar through the wire loop to apply upward force. This trick works well when slots are small and there's nothing else to grab.
- Lift straight up. These covers are often cast iron or steel, so have both hands ready.
Bolt-secured covers
- Identify all bolt locations before starting. Some covers have two bolts visible and a third hidden under surface grime.
- Apply penetrating oil to each bolt and wait 10 to 15 minutes.
- Use the correct socket size. An adjustable wrench works in a pinch but rounds corners on stubborn bolts. A proper socket is worth the 30 seconds to find the right size.
- Break the bolts loose counterclockwise. If a bolt spins without loosening (it's freewheeling), the nut underneath the drain frame has spun loose. You may need to hold the nut with pliers while turning the bolt.
- Remove all bolts and set them somewhere you won't lose them, then lift the cover.
What to do when the cover is stuck: rust, debris, paint, and concrete bonding
This is where most people get frustrated and either give up or break something. The cover looks like it should come free, but it won't budge. If you still cannot get the cover off, you can also follow step-by-step guidance for how to repair patio cover bonding issues and restore the drain to proper function the cover looks like it should come free. Here's how to work through the most common reasons.
Rust and corrosion
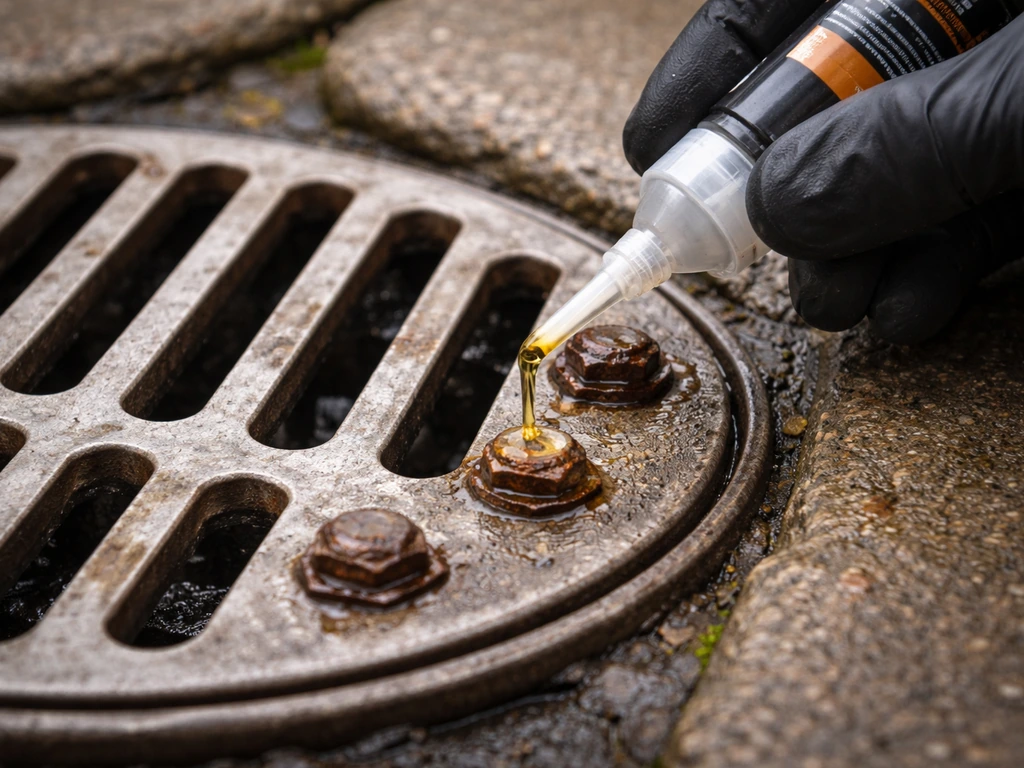
Rust is the number one reason a grate that technically has no fasteners still won't lift. Metal-on-metal corrosion essentially bonds the cover to the drain frame. Penetrating oil is your best friend here. Apply it generously around the entire perimeter of the cover and into any screw heads or bolt threads.
If you’re dealing with a patio bolt that won’t loosen, keep applying penetrating oil and work it gently so you don’t damage the surrounding concrete screw heads or bolt threads. Give it a full 15 to 20 minutes to soak in. Then tap around the edge of the cover lightly with a rubber mallet or the wooden handle of a hammer. The vibration breaks the rust seal.
Try to lift again. Repeat the oil and tap cycle if needed. Don't whale on it with a steel hammer, you'll crack the drain frame or chip surrounding concrete. Hunker also notes that when a rusted floor drain cover is stuck, you should use techniques that avoid damaging the surrounding area while loosening it [Don't whale on it with a steel hammer](https://www.
hunker. com/12617250/how-to-remove-a-rusted-floor-drain-cover/).
Debris and sediment buildup
Years of leaves, dirt, and organic material can pack into the gap between the cover and the drain frame so tightly that the cover is literally being held in place by compacted gunk. Use a stiff wire brush or a flathead screwdriver to dig out the debris from the perimeter gap all the way around. Flush it with water from a hose. You'll often find the cover lifts easily once that gap is cleared.
Paint or sealant over the cover
If the patio was ever painted or sealed and someone didn't mask the drain, there may be a thin layer of sealant or paint bridging the cover to the surrounding concrete. Score around the entire perimeter with a sharp utility knife first. If the sealant is thick or rubbery, an oscillating multitool with a caulk-removal or scraper blade gives you more control and cuts faster without the risk of gouging the concrete. Keep the blade angle shallow and work around the full perimeter before trying to lift. Once the bond is cut, the cover should come up.
Covers lightly bonded to concrete
Occasionally a drain cover ends up with a thin skim of concrete or grout over part of its edge, especially if the slab was poured or patched after installation. Score the bond line with a utility knife or oscillating tool. Then use a thin pry bar placed at the drain frame (not the concrete edge) to work the cover up gradually.
The Smith/ACO drainage systems site installation manual cautions against prying blindly and instead references using the correct tool or hook for manipulating the grating or clip mechanism [use a thin pry bar placed at the drain frame (not the concrete edge)](https://www. jrsmith. com/uploads/fileLibrary/Smith-ACO%20Drainage%20Systems-Site-Installation-Manual. pdf?
v=638905915047807957). Move the pry bar around the perimeter in small increments rather than forcing one spot. Uneven force is how you crack a concrete slab around a drain, and that repair is significantly more involved than removing a cover.
Lift-out grates vs. access-panel covers: what you'll find underneath
It's worth knowing what's likely waiting for you under the cover before you pull it, because the two main types reveal very different things.
| Cover Type | What's Underneath | Typical Purpose | What to Watch For |
|---|---|---|---|
| Lift-out grate or strainer | Drain body with a trap, basket, or open pipe | Catches debris, allows water to flow to drain | Debris buildup at strainer and first elbow, standing water, odors from dry trap |
| Access-panel cover | Cleanout port, plumbing junction, or larger drain chamber | Provides access to plumbing for maintenance or rodding | Pressurized or active plumbing, gas from sewer line, heavy cover weight, structural frame around opening |
For standard grates, lifting the cover reveals the drain body: a cylindrical or rectangular housing with a strainer basket or open channel that leads to the trap and then the drain line. Debris (leaves, grit, hair, built-up sediment) collects right at the strainer and at the first bend in the pipe. That's completely normal and is exactly why you're in here.
For access-panel covers, particularly large flush-mounted ones set into a concrete slab, what's underneath can be more complex: a full cleanout chamber, a junction between drain lines, or a trap with a removable plug. If you can smell sewer gas when you lift it, ventilate the area and don't work over the opening without a proper respirator. That gas can build up in low spots and enclosed patios.
After removal: clean, inspect, repair, and put it back right
Clean the cover and the drain body
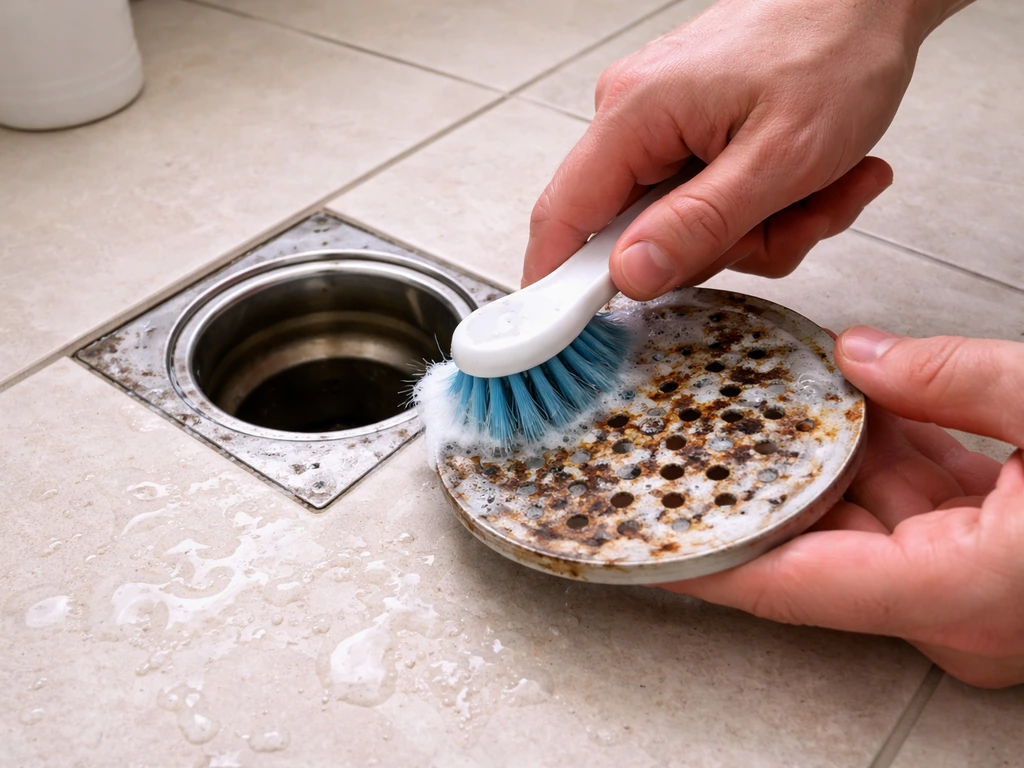
Take the cover and scrub it with a stiff brush, dish soap, and water. For heavy rust or mineral scale, a wire brush on a drill makes short work of it. Inside the drain body, remove any debris by hand (gloves on) or with a wet/dry vacuum. Don't push debris further down the pipe. If you can see standing water with no blockage and the drain just seems slow, use a drain brush or a plumber's snake to clear the first elbow. That's usually where the clog lives.
Inspect for damage
While you have access, look at the drain body for cracks, corrosion, or shifting. Check whether the drain frame is still sitting flush with the concrete surface. A drain that has settled or heaved slightly can cause pooling water on your patio and will keep presenting problems no matter how clean the grate is. Also check the condition of the cover itself: bent grates, broken tabs, or cracked plastic bodies mean it's time to replace rather than reinstall.
Reinstall or replace
If reinstalling, clean the screw threads with a wire brush and apply a small amount of anti-seize compound before threading the screws or bolts back in. This makes next time's removal dramatically easier. Don't overtighten, snug is enough. The cover should sit flush and not rock or rattle. If it wobbles, check whether the drain frame is damaged or whether debris is sitting in the seat preventing full contact.
If replacing, bring the old cover to the hardware store or take a photo of it with a tape measure for scale. Drain covers are not universal. NDS, Zurn, Sioux Chief, ACO, and other manufacturers all have slightly different frame sizes and fastener patterns. Match the brand or measure the outer frame opening diameter (or channel width for linear drains) and the bolt hole spacing before ordering.
Once back in place, run water from a hose and confirm it drains freely. If you had a slow drain before, test the speed now. If it's still slow after clearing visible debris, the blockage is further down the line.
When to stop and call a plumber or contractor
Most drain cover removals are genuinely a DIY job. But there are situations where continuing on your own creates more risk than it's worth. Here's an honest rundown:
- The cover has tamper-resistant fasteners and you don't have (and can't get) the correct tool. Forcing these damages the drain body and the cover, and the correct key is usually cheap and available from the manufacturer. Order it first.
- The concrete around the drain is cracking as you work or the drain frame is visibly shifting. Stop immediately. A shifting drain frame usually means the drain body below has moved, which is a plumbing and structural issue, not just a cover swap.
- You smell strong sewer gas when the cover comes up. Ventilate, step back, and call a plumber. Sewer gas in an enclosed patio area is a health and fire hazard.
- The access cover is extremely heavy (think large cast-iron utility covers) and you don't have a helper or the right lifting tool. Back injury risk is real, and dropping a heavy cover onto a concrete patio or onto your foot is a bad outcome.
- The drain body below is cracked, badly corroded, or has active leaking visible. This is a plumbing repair, not a cover replacement.
- After clearing visible debris the drain still backs up and you can't reach the blockage with a standard snake. A plumber with a camera and a hydro-jetter will sort it in one visit.
Knowing when to hand it off is part of good DIY judgment, not a failure. If you've been working on other patio projects like removing an aluminum patio cover or taking down a wooden patio cover, you already know that having someone else handle the genuinely risky parts makes the overall project go better. The same logic applies here. A $150 plumber call to clear a deep drain blockage is a lot cheaper than a cracked concrete slab or a damaged drain line that needs excavation.
FAQ
What should I do if I cannot tell whether my patio drain cover is snap-fit, screwed, or bolted?
Do a close visual check with a flashlight, focus on the center and all four corners, then try gentle lift pressure only after brushing away debris. If you see any bolt heads, screw slots, or recessed hardware, do not pry, switch to the correct tool (wrench or screwdriver) and work slowly to avoid stripping.
Is it safe to use a pry bar on the concrete edge to get the cover off faster?
No. Place prying force against the drain frame, not the surrounding concrete. Using the concrete edge as a lever can chip the slab and create new cracks that are harder to repair than removing the cover.
How long should I let penetrating oil soak before tapping and trying again?
Give it a full 15 to 20 minutes, then try a light tap around the perimeter to break the rust seal. If it still won’t move, reapply oil and repeat the tap cycle rather than increasing impact strength.
Can I speed up rust removal with heat or a torch?
Avoid open flame. Heat can damage surrounding materials and can be unsafe if there are plastic parts or nearby sealants. Stick to penetrating oil and mechanical vibration (rubber mallet or light tapping).
What if the cover is bonded with caulk or sealant and scoring does not free it?
After scoring, use a caulk scraper or oscillating scraper with a shallow angle around the entire perimeter until you feel resistance release. Then lift gradually from multiple points around the frame, do not force from one side.
Do I need to remove debris before I try to free the cover?
Yes. Clear packed leaves and grit around the rim first so you can see any fasteners and reduce the amount holding the cover. A stiff wire brush and flushing the gap with water often makes lifting possible without extra force.
How can I prevent the drain opening from becoming a hazard while I work?
Set the cover on a stable surface away from walkways, and cover the open drain with a board or bucket if you need to step away. Keep pets and kids away until the cover is back in place.
What should I do if I notice a sewer gas smell when lifting an access-panel cover?
Stop and ventilate the area, then do not lean over the opening. If the smell is strong, avoid continuing work without proper respiratory protection and consider calling a professional to handle the situation safely.
If the drain is still slow after clearing the visible area, where is the clog most likely?
It is often in the first bend after the strainer. Use a plumber's snake or drain brush to clear that initial elbow, and then test with a hose to confirm flow improves before assuming the problem is deeper.
Can I reinstall the cover without cleaning the drain frame threads or seat?
You should not. Clean screw threads with a wire brush and apply a small amount of anti-seize before reinstalling. Also remove debris from the seat so the cover sits flush and does not rock or rattle.
How do I know when a replacement is better than trying to reinstall a damaged cover?
Replace if you see bent grates, broken tabs, or cracked plastic bodies, because damaged parts can prevent a flush fit and can trap debris that leads to recurring clogs. Reinstalling damaged covers often makes future removal harder and less safe.
When should I stop and call a pro instead of continuing DIY?
Call a plumber if the blockage seems deep (still slow after clearing the first elbow), if the drain body appears cracked or badly corroded, or if removing the cover risks cracking the surrounding concrete. A professional can clear downstream lines without needing slab excavation.