Painting a patio cover comes down to three things done right: knowing what material you're working with, prepping the surface so the paint actually sticks, and using the correct primer and topcoat system for outdoor conditions. Skip any of those steps and you'll be repainting in two years. Do them properly and a painted patio cover can look sharp and hold up for a decade or more.
How to Paint a Patio Cover: Step-by-Step DIY Guide

Celia Vaughn
7 May 2026
Step 1: Identify Your Patio Cover Material and Assess Its Condition

Before you open a single can of paint, figure out what you're painting. The prep work, primer, and topcoat you'll need are completely different depending on whether your cover is wood, steel, or aluminum. Getting this wrong is the fastest path to peeling paint.
Wood Patio Covers
Wood covers are usually easy to identify by sight and feel. Run your hand across a beam or rafter. Real wood has natural grain, knots, and slight surface texture variation. The bigger concern with wood is its condition. Press a fingernail or a screwdriver tip into any suspicious-looking area. Healthy wood resists compression. Rotted wood compresses with moderate hand pressure and may feel soft or spongy. Wet rot produces noticeably spongy spots; dry rot shows as abnormal texture, often crumbly or blocky. If you find soft spots covering large sections of a structural member, stop and deal with the rot before painting. Paint over rotted wood and you're just sealing in moisture and accelerating the damage.
Steel and Metal Patio Covers
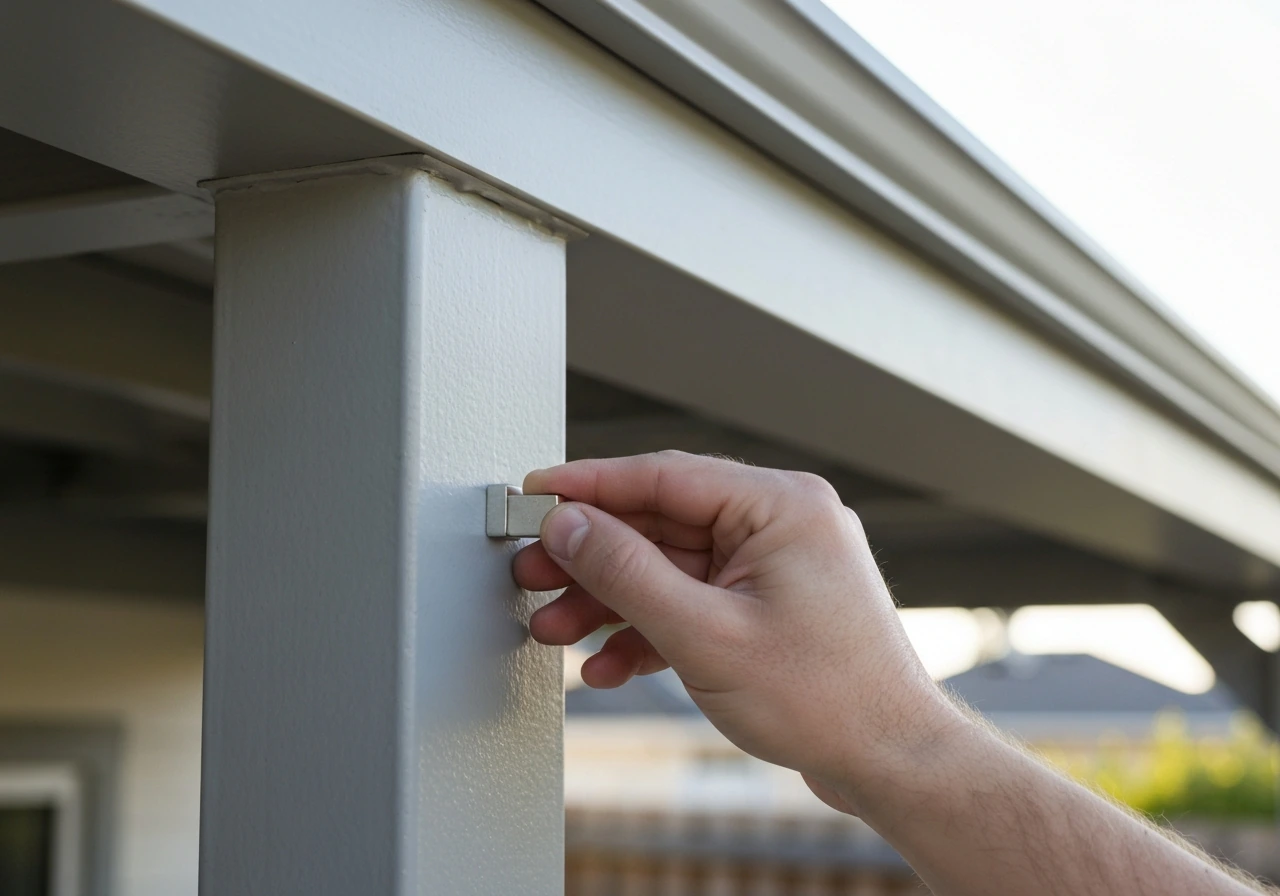
Steel and iron are easy to distinguish from aluminum using a magnet. Stick a refrigerator magnet to the surface. If it holds, you've got ferrous metal (steel or iron). Steel rusts red-brown; that orange-brown corrosion is your signal that rust-inhibiting primer is non-negotiable. Aluminum doesn't rust the same way but can develop white, chalky oxidation or pitting over time. Note that Alumawood-style covers (structural-grade aluminum alloy with an embossed cedar-grain texture) are a common product category on this site and have their own painting considerations worth knowing about.
Assess the Existing Coating
Look for peeling, flaking, blistering, chalking, cracking, or delamination. These are classic signs of coating failure, typically caused by poor adhesion, trapped moisture, UV breakdown, or incompatible products applied over each other in the past. Run your fingers along a beam. If you get white chalky residue on your hand, the old paint has broken down badly and will need to come off. Any paint that's lifting, bubbling, or flaking must be removed before you apply anything new. Painting over loose coating is the single most common mistake homeowners make, and it guarantees early failure.
Step 2: Choose the Right Paint and Coating System
There's no single paint that works perfectly for every patio cover material. Here's how to match the product to the substrate.
| Material | Recommended Primer | Recommended Topcoat | Key Feature to Look For |
|---|---|---|---|
| Bare or weathered wood | Oil-based exterior primer or latex wood primer | 100% acrylic exterior paint | Mildew-resistant, UV-stable formula |
| Steel / iron (rusted) | Rust-inhibitive alkyd primer (e.g., BM 568 Rust Primer) or rust converter + primer | Direct-to-metal (DTM) exterior enamel or acrylic | Anti-corrosive, moisture-resistant |
| Steel / iron (clean) | Rust-inhibitive primer or acrylic metal primer (e.g., BM V110) | DTM exterior enamel or acrylic | Adhesion to bare metal |
| Aluminum (bare or oxidized) | Etch primer or acrylic metal primer formulated for non-ferrous metals | 100% acrylic exterior paint or DTM acrylic | Bonding to non-porous aluminum surface |
| Previously painted (sound coating) | Spot-prime bare areas only | 100% acrylic exterior paint matched to existing type | Compatibility with existing coating |
For wood, oil-based primers are ideal on bare or weathered surfaces because they penetrate deeply and seal porous grain better than latex. If the wood has mildew staining, a shellac-based stain-blocking primer (like Zinsser B-I-N) is worth using before your topcoat. For metal, never skip a rust-inhibitive primer on steel, even if the surface looks clean. For aluminum, use a product specifically listed for non-ferrous metals. A general-purpose etch primer such as PPG Velocity VP900 works well on bare steel, galvanized, and aluminum alike. Always buy exterior-rated products. Interior paint on a patio cover will chalk, crack, and peel within one season.
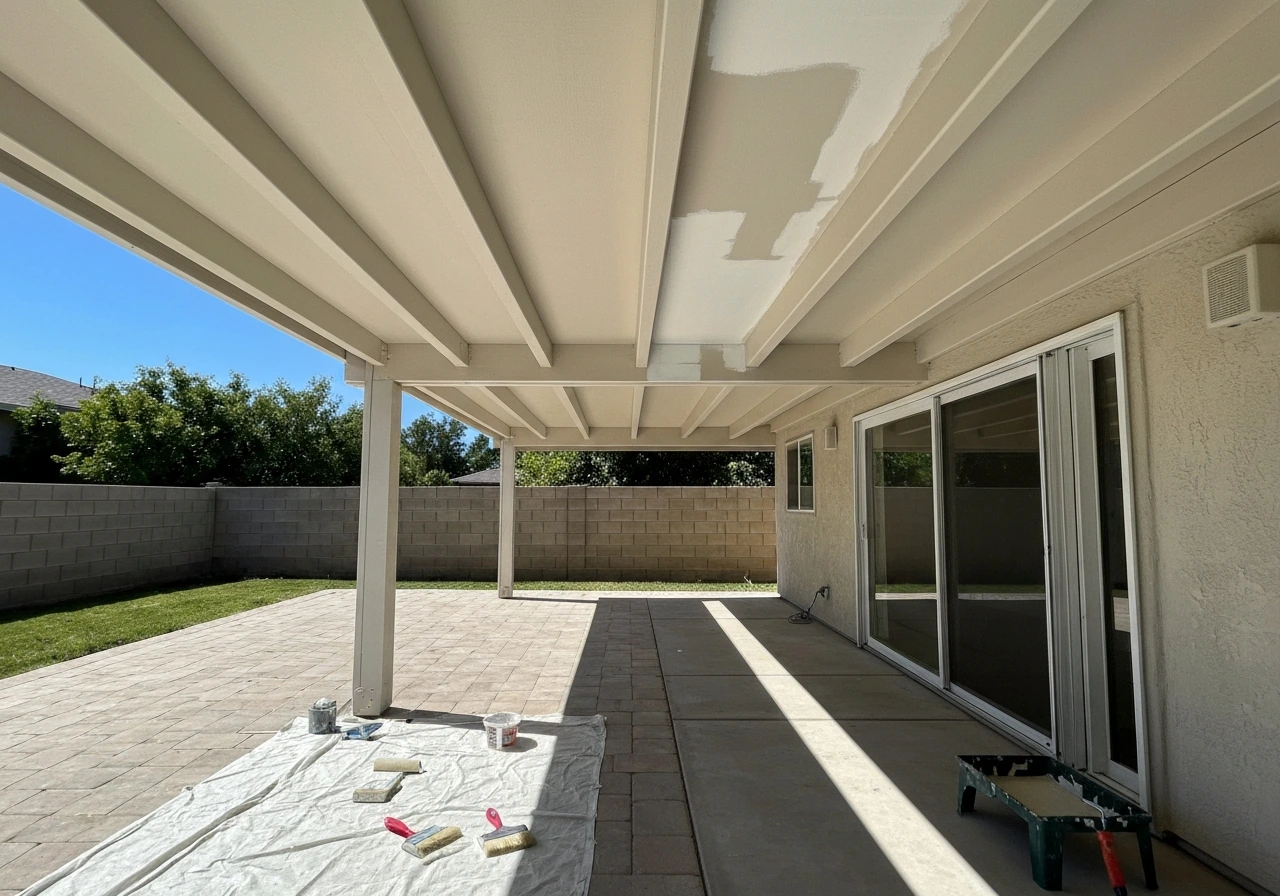
Step 3: Prep Work (The Part That Actually Determines How Long Your Paint Lasts)
I'll be honest: prep is where most DIYers cut corners, and it's why most DIY paint jobs fail early. Budget at least half your total project time here.
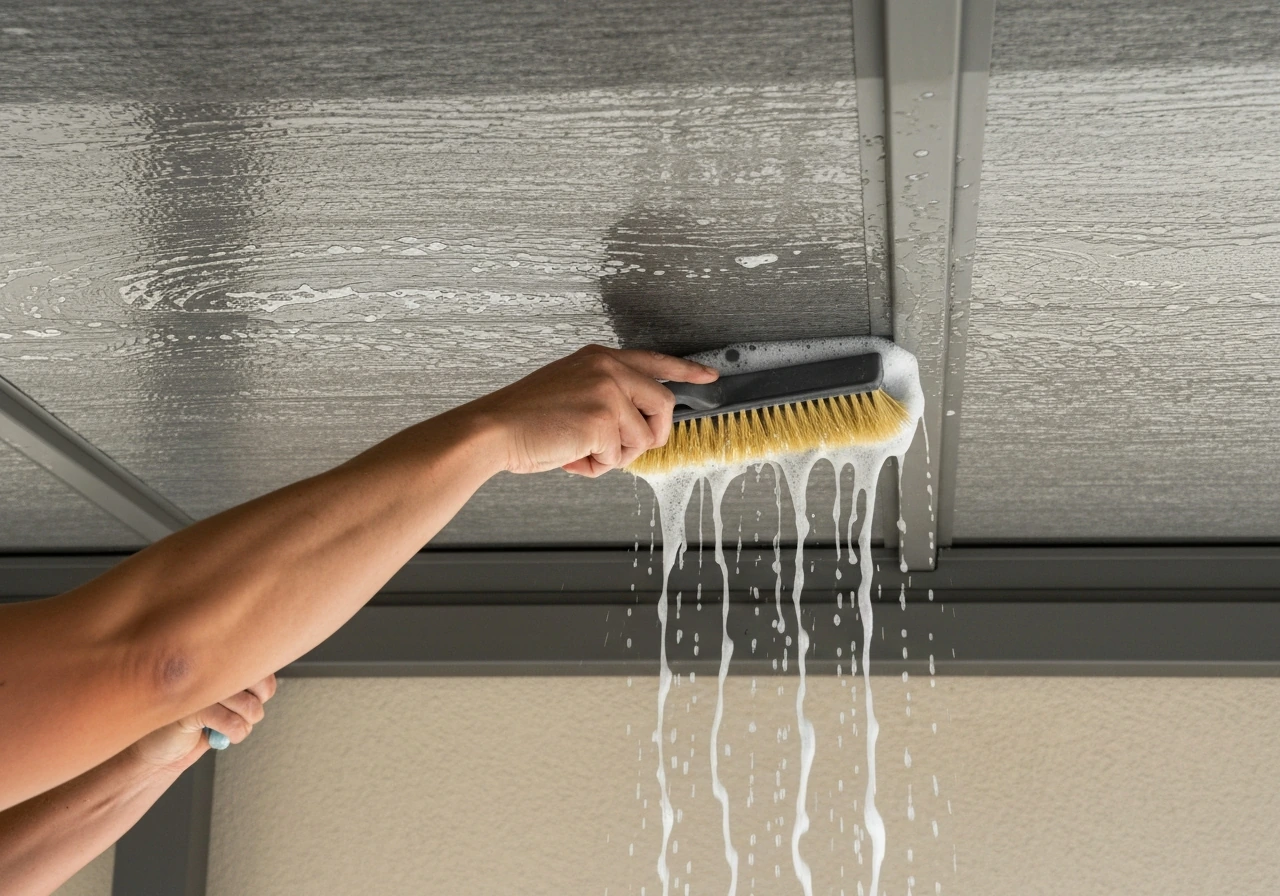
Cleaning
Start with a thorough wash. Mix a detergent and water solution and scrub the entire surface with a stiff brush or sponge. This removes water-soluble contaminants like dirt, dust, and chalk that will kill adhesion if left in place. OSHA’s respiratory protection guidance explains selection and use concepts for respirators, including [chemical cartridge use](https://www.
osha. gov/publications/respiratoryprotectionbulletin_2011), to protect workers from chemical vapors, fumes, and mists. For mildew (look for black or gray splotchy staining), you need a bleach-based solution. A reliable mix is one quart of household bleach, one-third cup of powdered TSP (or TSP substitute), and one quart of warm water.
Scrub it on, let it sit for 10 to 15 minutes, then rinse thoroughly. Never paint over active mildew. The paint will look fine for a month, then the biological attack will push right through. Dirt, oil, grease, wax, or silicone residue on the surface will all interfere with adhesion, so if you're dealing with a cover above a grill or cooking area, a degreasing wash is essential.
Stripping Loose Paint and Sanding

Once the surface is clean and dry, remove everything that isn't tight. Use a paint scraper for large peeling sections, then follow with 80- to 120-grit sandpaper to feather the edges of any remaining paint. On wood, sand with the grain. On metal, scuff the entire surface, including areas that look sound, to give the primer something to bite into. A pole sander or sanding block helps on flat overhead surfaces. For intricate or detailed sections (brackets, fascia trim), a small detail sander or folded sandpaper by hand works fine.
Rust Removal on Metal
Wire-brush any visible rust until you've removed all the flaky, loose material. For light surface rust, a phosphoric acid-based metal treatment like OSPHO converts rust and leaves a surface ready for primer. For heavier rust, a rust converter product like KBS Rust Converter chemically neutralizes active rust and turns it into a stable, inert matte-black surface. Both approaches minimize the aggressive grinding otherwise needed, but you still need to remove all loose scale and flaking material first. Once treated, let it dry fully before priming, typically overnight.
Step 4: Prime Correctly
Skipping primer is probably the single biggest mistake I see on patio cover painting projects. Even if you're repainting a surface with a sound existing coat, any bare spots you've sanded back to raw material need spot-priming before your topcoat goes on.
For bare wood, an oil-based exterior primer (or a quality latex primer designed for exterior bare wood) does the best job of sealing porous grain and giving your topcoat a stable base. Apply one full coat and let it dry according to the label, typically one to two hours touch-dry, but give it the full recoat time listed before topcoating. For metal, apply your rust-inhibitive or metal primer in a uniform coat, covering all bare areas.
Behr's interior/exterior metal primer is a practical option that works on both ferrous and non-ferrous metals with minimal surface prep requirements. Benjamin Moore's V110 Acrylic Metal Primer is another solid choice for steel, iron, and aluminum. For mildew-prone areas or stained wood, a shellac primer like Zinsser B-I-N dries to the touch in about 20 minutes and can be recoated in roughly 45 minutes, which is useful when you're working in sections overhead.
The key rule: let every coat reach its full recoat window before applying the next one. Rushing this step traps solvents and causes blistering.
Step 5: Tools and Technique for Overhead Surfaces
Painting overhead is physically demanding and requires the right setup. Working off a ladder for more than a few minutes gets tiring fast and creates real fall risk. If you're painting a full patio cover, consider renting a pump-up scaffolding platform or a rolling scaffold. It's safer, faster, and produces much better results than trying to balance on a stepladder while cutting in with a brush.
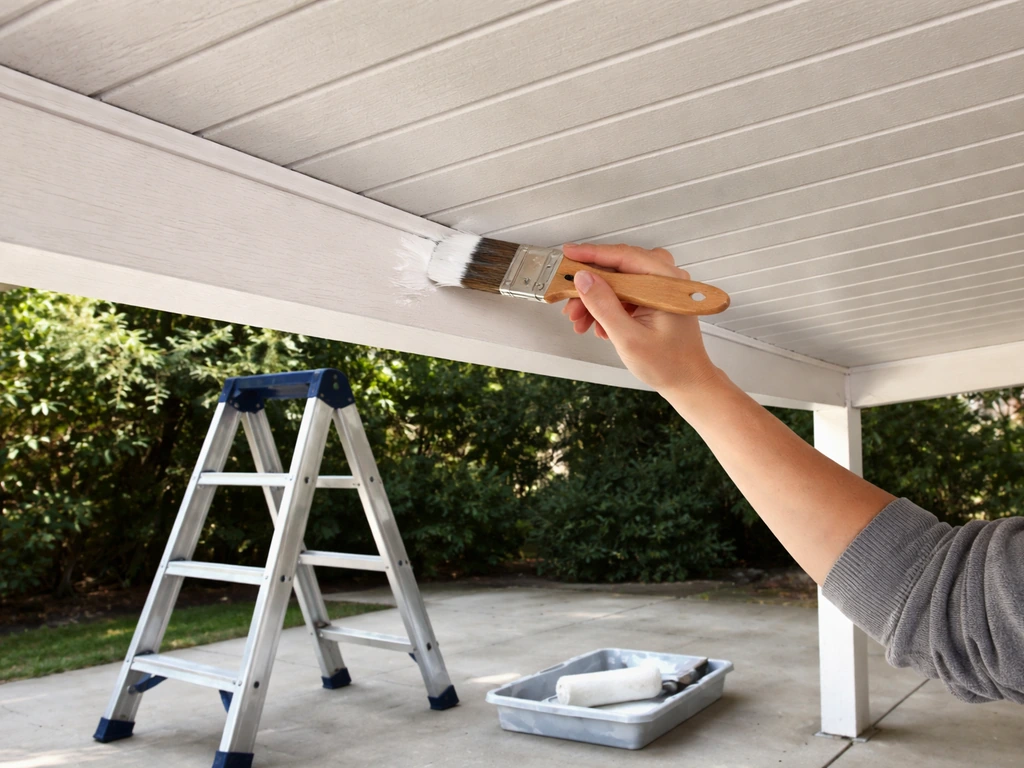
Brush and Roller
A 2.5-inch angled brush works well for edges, trim, and tight corners. For flat overhead sections, a 9-inch roller with a 3/8-inch to 1/2-inch nap cover applies paint efficiently. Use an extension pole on the roller so you can work from a standing position rather than reaching directly overhead, which reduces fatigue and drips. Roll in a consistent W or M pattern and keep a wet edge to avoid lap marks.
Airless Sprayer
For larger patio covers, an airless sprayer dramatically cuts application time. When spray painting creates mists, fumes, and vapors, OSHA notes that respirators help protect workers from these paint and solvent hazards, and confined-space spray work may require additional respiratory protection respirators help protect workers from mists, fumes, and vapors.
Use a . 015 to . 019 tip for most latex paints. Keep the gun 10 to 12 inches from the surface and move in smooth, overlapping passes.
Spray and back-roll: immediately after spraying a section, follow with a dry roller to push the paint into any texture or grain and eliminate spray lines while the paint is still wet. This technique is especially effective on embossed or textured aluminum surfaces. Always mask and protect everything below and around you before spraying. Overspray on concrete, furniture, or your house siding is a pain to clean up.
Safety When Working Overhead
- Wear safety glasses or goggles. Paint drips from overhead land directly in your eyes if you're not protected.
- Use a respirator rated for organic vapors when spraying or working with oil-based or shellac primers in enclosed or semi-enclosed spaces.
- Set up ladders and scaffolding on level, stable ground. Never lean a ladder against gutters or fascia that aren't structurally rated for the load.
- Work in calm weather. Wind scatters spray and can destabilize ladders.
- Don't paint in direct midday sun on hot days. Heat accelerates drying unevenly and causes lap marks and blistering.
Step 6: The Painting Process, Start to Finish
- Check the weather forecast. You need at least 48 hours with no rain, temperatures between 50°F and 90°F, and humidity below 85%. Don't paint if rain is expected within 24 hours of application.
- Final wipe-down: just before painting, wipe down all surfaces with a damp cloth to remove any dust from sanding. Let it dry completely.
- Mask off anything you don't want painted: house siding, windows, light fixtures, ceiling fans, columns, and the ground below.
- Apply primer to all bare material first. Let the primer reach its full recoat time per the label, typically 1 to 2 hours for water-based, 4 to 8 hours for oil-based, and as little as 45 minutes for shellac-based.
- Apply your first topcoat. Work in sections from one end of the cover to the other. Cut in edges and tight spots with a brush first, then fill large flat sections with a roller or sprayer.
- Let the first coat dry to its recoat window. At 77°F and 50% relative humidity, most quality exterior acrylics are touch-dry in about an hour and ready to recoat in around 4 hours. Cooler or more humid conditions extend those times significantly.
- Apply a second topcoat using the same technique. Two full coats over primer is the standard for patio covers exposed to weather. One coat over primer is only acceptable for light refresh jobs over sound existing paint.
- Allow the coating to cure fully. Paint may be dry to the touch and even recoatable in hours, but full cure to hardness can take up to 30 days. Avoid pressure washing, heavy abrasion, or dragging furniture across painted surfaces during that window.
Common Mistakes, Troubleshooting, and When to Call a Pro
What Often Goes Wrong
- Painting over loose or peeling paint: the new coat will pull up along with the old one. Remove all loose material first, no exceptions.
- Skipping primer on bare metal or bare wood: without primer, topcoat adhesion is unreliable and the coating will fail early, usually within one to two seasons.
- Painting in humid or wet conditions: moisture trapped under a fresh coat causes blistering and peeling. Check humidity, not just rain.
- Using interior paint outdoors: interior formulas aren't built for UV exposure or temperature cycling. They'll chalk and crack fast.
- Not waiting for full recoat time between coats: rushing coats traps solvents and causes wrinkling, bubbling, or soft spots.
- Painting over mildew without treating it: mildew pushes right through paint. Bleach-clean and fully dry the surface first.
- Applying too-thin coats with a sprayer on overhead surfaces: without back-rolling, sprayed paint on textured or porous surfaces often misses recessed areas. Always back-roll on textured materials.
Troubleshooting Paint Failures
If you're seeing peeling within the first season, the cause is almost always one of three things: inadequate prep (surface was dirty, oily, or had loose paint), moisture moving through the substrate, or the wrong primer for the material. Peel back a small section of the failing paint and look at what's underneath. If the back of the paint is clean and the substrate is bare, the paint didn't bond. If the back of the paint has rust stains or moisture residue, you have a moisture or rust problem in the substrate. Both require stripping back to bare material and starting the prep process over with the correct system.
When to Pause and Call a Pro
Painting a patio cover is a solid DIY project for most homeowners, but there are situations where stopping and getting professional help is the smarter call. If you are looking at adding solar, the structure and roof covering details matter just as much as the wiring and mounting hardware.
If you press on a wood rafter and your hand goes through it, or you find rot covering more than a small localized area, the structure needs repair or replacement before paint is even a topic. Paint on compromised wood is cosmetic at best and dangerous at worst.
Similarly, if a metal cover has heavy structural rust, not just surface rust but rust that has eaten through the section, that's a structural issue requiring a metal fabricator or contractor, not a paint brush. And if you're working on a large elevated structure and you don't have the right scaffolding or aren't comfortable working at height, hire someone. Falls from ladders during painting projects send more than 90,000 people to emergency rooms every year in the US.
No paint job is worth that risk.
One more practical note: if you're painting an aluminum patio cover and you're not sure whether it's a standard aluminum product or an Alumawood-type system (look for that distinctive embossed cedar-grain texture), the prep and primer steps above still apply, but there are some specific considerations around painting factory-finished aluminum covers that are worth understanding before you start. Many homeowners also wonder whether you can put solar panels on an Alumawood patio cover, since the mounting and weight requirements can be different from standard patio covers Alumawood-type system.
FAQ
How can I tell whether my patio cover is sealed or has old coatings that will block adhesion?
Do a water test the day of prep: sprinkle water on the surface and watch how it behaves (beads, soaks in, or runs off). If wood beads or the coating looks sealed, you may need to fully remove old paint or weathered exterior finish before priming, especially on sun-baked beams.
Can I just spot prime and touch up chipped areas instead of repainting the whole patio cover?
Yes, but only after cleaning and feathering, not just touching up. Spot-priming is only truly effective if you expose clean, sanded substrate at the edges of the patch, then apply primer to bare material and blend topcoat onto stable, sanded paint.
How long should I wait before the patio cover is considered fully cured and ready for normal use?
Cover your topcoat with a full curing window, not just “dry to the touch.” Exterior coatings can remain vulnerable to scuffs and trapping solvents if you expose them to heavy dew, washing, or rain too soon, so follow the recoat and cure timing on the label for both durability and adhesion.
What’s the best way to avoid roller marks, drips, and lap lines when painting overhead?
If you’re getting runs or drips overhead, thin is usually not the issue, coverage and application technique are. Use the roller extension to stay on top of the surface, keep consistent paint thickness, and do lighter passes, then back-roll while the coat is still wet to level the finish.
What should I do if my sanded metal is sitting outside overnight and it starts to flash rust?
For metal, the safer route is to remove loose coating and treat remaining rust, then prime before any visible flash-rust returns. If you sand and stop for a day in humid conditions, re-check for orange speckling or chalky oxidation before priming.
My patio cover shows mildew again after cleaning. Can I just prime and paint over it?
If mildew returns quickly, don’t repaint over it. You likely have recurring moisture or inadequate cleaning. Re-scrub with the bleach/TSP type approach, ensure thorough rinse, let it dry completely, then consider a stain-blocking primer for wood or a mildew-resistant system for the topcoat.
What paint sheen should I choose for a patio cover, flat, eggshell, satin, or gloss?
Match sheen to the reality of overhead surfaces: flat or matte hides minor roller texture and imperfections, while higher sheen highlights them. For patio covers that get frequent sun and dirt exposure, a satin or eggshell often balances cleanability and appearance.
If paint starts peeling after I repaint, what is the fastest way to diagnose the real cause?
If the paint peels, you’re not dealing with a “paint problem” but an adhesion or substrate problem. Remove peeling sections down to stable material, clean fully, and confirm primer compatibility (wood vs ferrous metal vs non-ferrous aluminum) before applying a new primer and full topcoat system.
Can I switch paint brands or switch from oil to latex mid-project?
Many products will fail if they are not compatible. When in doubt, stick with the same coating type as the existing system (oil vs latex) and confirm the primer is approved for that topcoat brand or category. Over-priming is usually fine, mixing systems without compatibility guidance is not.
Is it okay to paint right after a rain if the surface looks dry to the touch?
Do it after confirming the wood is structurally sound and the surface is fully dry. If you paint over wet weathered wood, trapped moisture can blister coatings. A practical check is to wait until the wood looks and feels dry in multiple spots, including underside areas that dry slower.
Are factory-finished aluminum patio covers harder to paint, and what changes in prep?
If the cover has factory finishes on aluminum (including embossed cedar-grain systems), lightly scuffing is not enough if the finish is intact and glossy. You still need the correct non-ferrous primer and you should scuff thoroughly to create uniform bite, then apply topcoat soon after priming within the recoat window.
If I use an airless sprayer, how do I minimize overspray and still get a smooth finish overhead?
Use sprayers carefully: mask large areas below, and plan nozzle angles to avoid bouncing overspray. After spraying, back-roll immediately to even out texture and reduce visible spray patterning, and wear eye and lung protection since overhead overspray is heavier than on vertical walls.