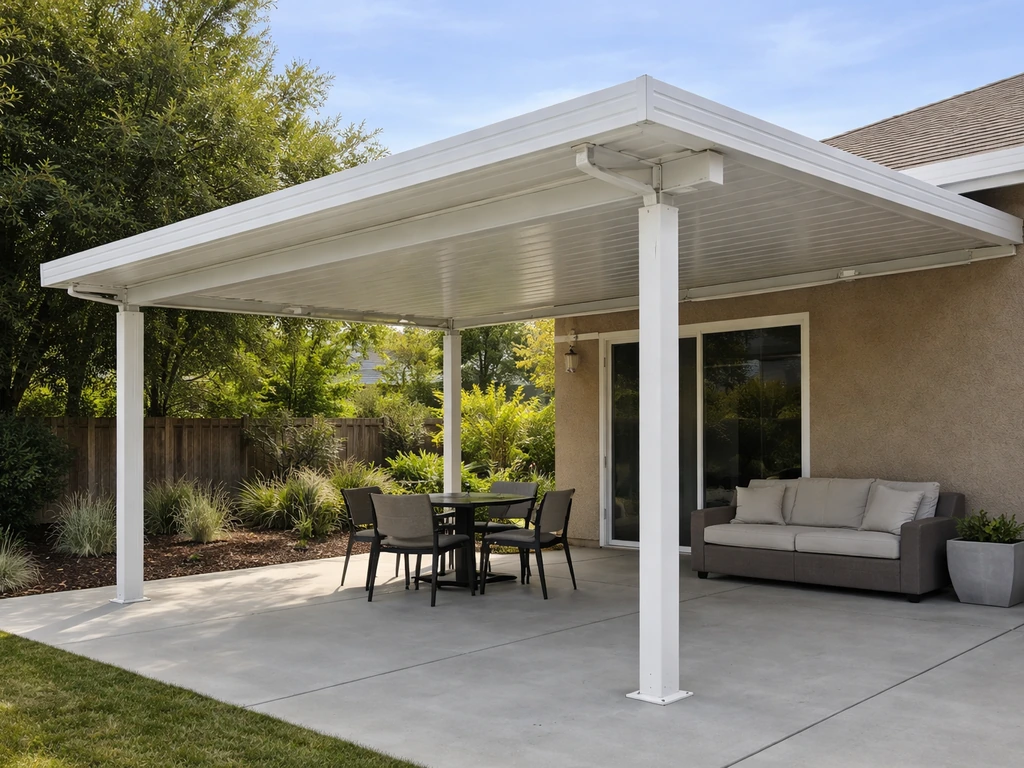
Installing an aluminum patio cover is a very doable weekend project for most homeowners, but it goes smoothly only when you follow the right sequence: pick the correct kit configuration, pull a permit, prep your posts and ledger attachment properly, then install the frame and roof panels in order. When you are ready to plan your specific build, review this guide on how to build aluminum patio cover step by step so you can choose the right size, layout, and components. Alumawood (made by Amerimax) is the most popular DIY aluminum patio cover system, and it ships as a pre-cut kit with PDF instructions matched to your specific roof type. If you follow those instructions alongside the engineered span tables included in your kit, you'll end up with a structure that's both safe and code-compliant.
How to Install an Aluminum Patio Cover Like Alumawood

Pick the Right Aluminum Patio Cover System First
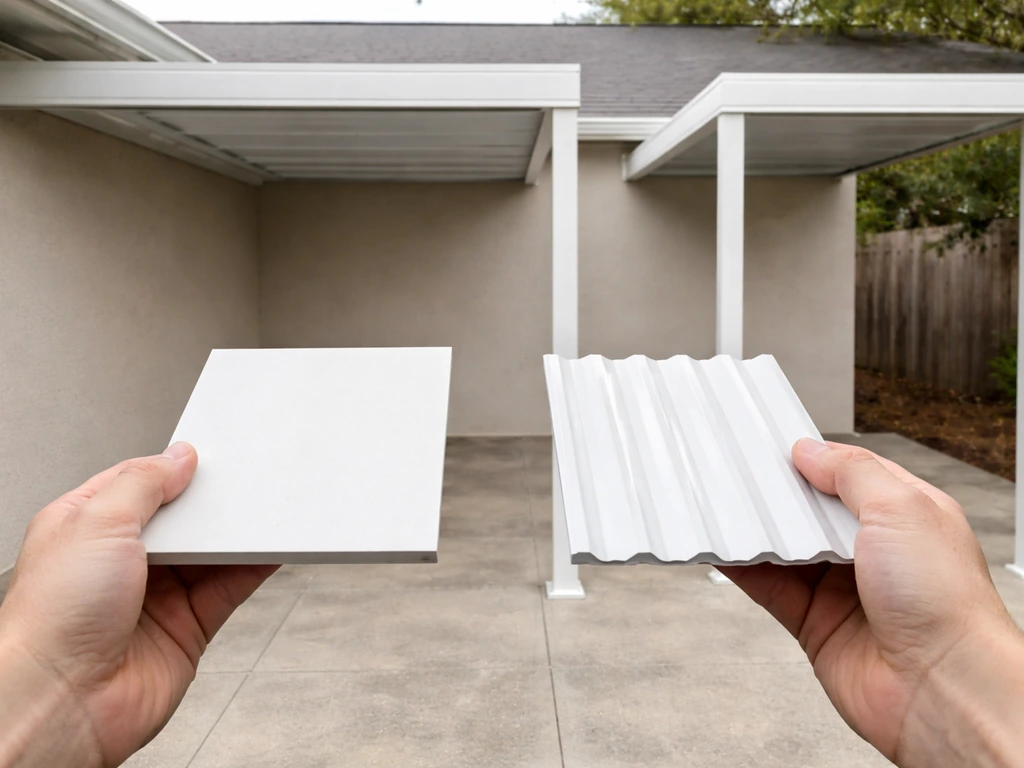
Before you order anything, you need to decide on three things: roof style, attachment method, and kit size. Alumawood offers three main roof panel types: the Newport Solid (flat panel, closed roof), the Laguna Lattice (open slat style), and the IRP Insulated Roof Panel (best for heat and sound). Each one has its own PDF installation guide from Amerimax, and the instructions differ enough that you really can't mix them up. Alumashade is a similar brand that uses the same Alumawood-style system and is worth comparing if pricing or availability is a factor in your area.
The second decision is attached versus freestanding. An attached cover connects to your house with a ledger board along the wall, which is simpler and more common. A freestanding cover needs four or more posts and engineered concrete footings, and the footing design has to match the engineered span table in your kit. Amerimax's engineering report includes span tables (Table 7.5 and related tables) that specify exactly how far apart posts can be, which fastener type you need at each connection, and what loads the system is designed for. That engineering packet isn't optional reading. It's the document your building department will ask about.
Use Amerimax's kit designer to configure your cover by roof width, projection (depth from house), height, and roof style. The kit arrives pre-cut to those dimensions. Some hardware like a wood ledger board, lag bolts, and rooftop brackets may not be included and will need to be sourced locally, so read your specific kit's parts list carefully before your first hardware store run.
Tools, Materials, and Site Prep Checklist
Get everything staged before you start. A half-finished aluminum frame sitting in your yard overnight is a recipe for bent components and lost hardware. Here's what you'll typically need for a standard attached Alumawood-style install:
- Tape measure, speed square, and chalk line
- Cordless drill with #8 and #14 bit sets
- Circular saw with a fine-tooth blade rated for aluminum (or a miter saw)
- Level (4-foot minimum) and a laser level if you have one
- Hammer drill with masonry bit set (for concrete or stucco wall attachment)
- Socket set and adjustable wrench
- Caulk gun and Solar Seal 900 sealant (recommended by Amerimax for panel seams)
- Safety glasses, gloves, and hearing protection
- Step ladder and/or scaffolding depending on your eave height
- Wood ledger board (if not included), lag screws, and masonry anchors per your kit's wall attachment table
- Concrete mix for post footings (freestanding covers only)
- Post base hardware rated for your post size
Site prep starts with a clean, level area and a confirmed attachment point on your house. Locate the wall studs or verify that your masonry wall is solid where the ledger will land. Check the ground for slope and decide whether you need to pour a small concrete pad or if an existing slab will work. For freestanding covers, dig your footings to your local frost line depth before anything else. The footing diameter and depth have to match the engineered spec in your kit packet.
Step-by-Step Installation: Frame, Panels, and Finishing
Step 1: Install the Ledger or Set the Posts
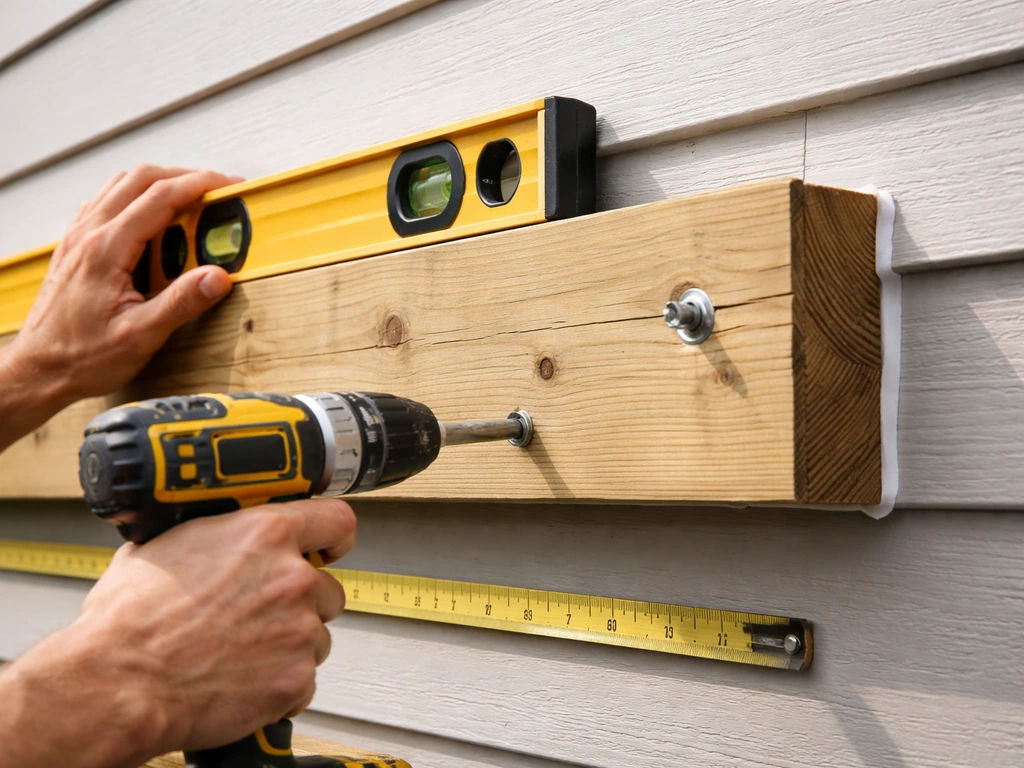
For an attached cover, start by mounting the ledger (also called the wall header or beam) to the house. Mark your height on the wall, keeping in mind that you want a slight slope away from the house for drainage (typically 1/8 inch per foot). Snap a chalk line, then attach the ledger using the fastener type your engineering packet specifies for your wall type. On a wood-framed wall, that's usually 1/4-inch lag screws into studs with a minimum 1.5-inch embedment. On masonry or concrete, you'll use expansion anchors or masonry bolts. Don't eyeball the spacing. The wall attachment table in your engineering report tells you exactly how many fasteners you need and how far apart to place them based on your roof's load conditions.
For freestanding covers, set your posts in the cured footings first. Use post base brackets anchored into the concrete and plumb each post carefully before the concrete fully sets. Post spacing must match the span table in your engineering packet exactly. Incorrect post spacing is one of the most common structural mistakes on freestanding builds, and it can cause load distribution problems that aren't obvious until something fails.
Step 2: Set the Beams and Frame
With the ledger secured and posts set, install your main beams across the posts. The beams typically rest in post cap brackets and are secured with the specified screws. Then install the cross members (purlins or rafters) at the spacing your kit calls for. Square the entire frame before you lock anything down permanently. A frame that's even slightly out of square will cause problems when you try to snap the roof panels in.
Step 3: Install the Roof Panels
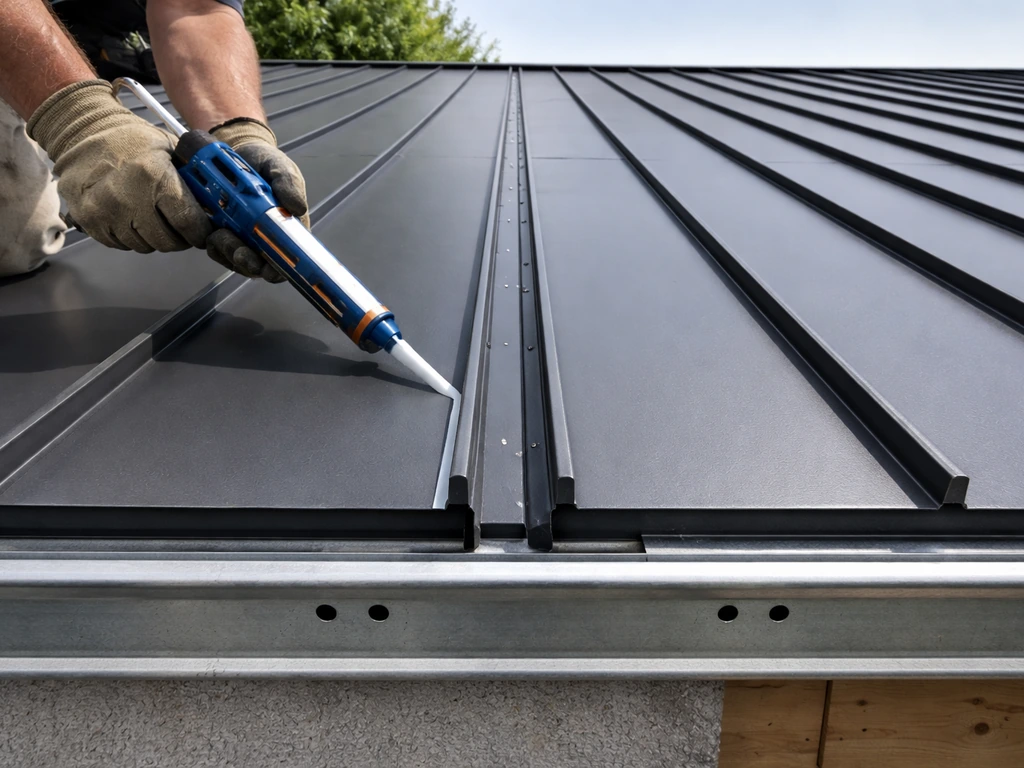
Panel installation sequence matters. Start at one end and work toward the opposite side wall. Before placing each panel, apply sealant into the sealant reservoir channel on the panel's receiving edge. Amerimax specifically recommends Solar Seal 900 for this application. Snap each panel's male edge into the female receiver of the previous panel. Do not place screws within 4 inches of any panel seam, and make sure the male edge is fully seated before adding fasteners. The final panel requires more care: square it before snapping, then install the side wall valance and outside corner trim to lock it in.
For the Newport solid panel system, drill weepholes at the ends of the drip edge/receiver gutter assembly and at panel seams on the underside. These small holes let any water that gets in between panels drain out rather than pool. It's a detail that's easy to skip and almost always causes leaks later.
Step 4: Install Fascia, Trim, and Counterflashing
Cut your front fascia extrusion to the total roof width plus 1/8 inch, then slip it over the panel ends starting from one end. Secure it and install your drip edge or receiver gutter along the front. At the wall, install counterflashing over the ledger/wall connection. Run caulk under the edge of the counterflashing, then secure it with #8 x 1/2-inch screws at 6-inch intervals. Also run caulk along the roof panel connections at the header and along the outside wall module connections and base channel edges. Seal all exposed screw heads. If a washer is recessed from over-driving, fill that depression with sealant so it doesn't become a water trap.
For long-term leak protection at panel seams and header connections, the Newport installation guide suggests an optional flexible tape or Flex-Seal application over seams. This helps accommodate the natural expansion and contraction of aluminum in temperature swings, which is real enough to eventually work caulk loose on its own.
Anchoring and Attachment: What Works on Each Surface
The fastener schedule in your Amerimax engineering packet is specific by surface type and load condition. Here's a summary of what the engineering documentation specifies for common surfaces:
| Surface Type | Fastener Type | Key Requirements |
|---|---|---|
| Wood framing / stud wall | 1/4" lag screws or #14 wood screws | Minimum 1.5" embedment; follow AWC NDS sections 12.1.4 and 12.1.5 for spacing |
| Masonry / concrete block | Masonry anchors or expansion bolts | Spacing and count per Table 7.5 in engineering packet; drill depth per anchor spec |
| Poured concrete wall | Concrete anchors or bolts | Follow engineering packet for bolt diameter and embedment depth |
| Steel / metal framing | #14 SMS (sheet metal screws) | Verify wall thickness supports required penetration per engineering spec |
Do not substitute fastener types. Swapping #14 lag screws for smaller screws because they're what you have in the garage is the kind of decision that fails a building inspection and, more seriously, can cause a ledger to pull away from the house under wind or snow load. If you're attaching to stucco over wood framing, you'll typically need to penetrate through the stucco layer entirely and get your embedment measurement into the structural framing behind it. If you're wondering can you screw into aluminum patio cover, stick to the specific fastener schedule in your kit and don't improvise with the wrong screw size or type.
Permits, Safety, and Knowing When to Call a Pro
Pull a permit. I know it feels like extra hassle, but almost every municipality requires one for a permanent patio cover, and skipping it creates real problems when you sell your house or file an insurance claim. Your building department will ask about live load, ground snow load, wind speed, exposure category, seismic load, patio height, and possibly frost line depth. Your Amerimax engineering packet addresses most of these, which is exactly why you need to build to spec and not freestyle it.
For the DIY vs. pro question: most homeowners with basic carpentry experience can handle an attached, single-slope aluminum patio cover with a pre-cut kit on a wood-framed house. The difficulty jumps significantly if you're dealing with a masonry wall, a multi-section kit, a freestanding cover that needs engineered footings, or a roof pitch and attachment configuration that requires custom cuts. If any of those apply, getting at least a consultation from a licensed contractor before you start is money well spent.
Safety during the install: aluminum extrusions have sharp edges right out of the box. Always wear gloves when handling cut sections. Work with a helper when lifting beams. Don't work on a ladder while holding long sections of aluminum in wind. And if your install requires working anywhere near your roofline, make sure you've got a solid, properly footed ladder or scaffolding, not just a step stool propped against a wall.
Common Mistakes, Troubleshooting, and Keeping It in Good Shape
Mistakes That Bite People Most Often
- Skipping the permit: beyond the legal issue, you also lose access to an inspector who can catch structural errors before they become expensive problems
- Poor waterproofing at the ledger: this is the number one source of leaks, and it usually shows up the first rainy season after the install
- Off-center posts or incorrect post spacing: measure twice, confirm against the span table, then set posts; moving them after the fact is a major rework
- Using non-weather-rated fasteners: standard hardware store screws will rust and stain your aluminum within a season; use stainless or the hardware specified in your kit
- Skipping weepholes in the drip edge: trapped water between panels is a slow, hidden rot and leak problem
- Over-driving screws into panels: this crushes the seating surface and can crack the panel extrusion
Troubleshooting After Installation
If you're getting a leak at the wall, the counterflashing seal is almost always the culprit. Remove the flashing, clean the surfaces, re-caulk with a paintable polyurethane sealant, and re-secure. If panels are not snapping together cleanly, check whether the frame is square and whether the panel ends are cut truly perpendicular. A slightly angled cut from a dull blade can make panels bind. If a post feels loose, check the post base anchor bolts first before assuming the footing is the problem.
Keeping Your Cover in Good Shape Long-Term
Aluminum is low maintenance but not zero maintenance. Do a quick visual inspection every few weeks during seasons with heavy weather. Look for any screws that have backed out, caulk that has cracked or pulled away at seams, and any debris accumulation in the drip edge channel. Once or twice a year, rinse the panels with a hose and mild soap, and check all post base hardware for any signs of movement. After any heavy snow event, don't let significant accumulation sit on the roof longer than necessary. While the engineered system has a rated snow load, prolonged weight combined with any ice buildup can stress connections over time. Catching a loose fastener or a failed caulk joint early keeps a 30-minute fix from becoming a full panel replacement.
Once your cover is up and solid, you may find yourself thinking about additions. If you plan to update the aluminum patio cover after it’s installed, follow the same measurement and fastening-by-load principles to keep everything safe and weather-tight up and solid. Attaching shade screens, adding a ceiling fan, or even updating the look of an older aluminum cover are all natural next steps that build on the same foundation you just installed. If you plan to add a ceiling fan, the mounting method and wiring safety should be planned before you finish the panels and trim. To attach shade to an aluminum patio cover, make sure you choose compatible brackets, align them with the frame members, and use the correct sealants and fastener sizes to avoid leaks and pull-away attach shade screens.
FAQ
Can I install an aluminum patio cover directly into stucco or do I need to hit the framing behind it?
If your house wall is covered in stucco, you usually cannot treat it like wood. You must penetrate through the stucco layer and hit the structural framing behind it (or use an engineered masonry approach, depending on your wall build). Always follow the fastener schedule and embedment depth in your kit engineering packet, since using the wrong anchor type or embedment can fail inspection and cause a dangerous ledger pull-off.
What if my patio opening is an odd size, can I adjust the kit dimensions myself?
Yes, but only if your kit’s span tables and engineering cover that specific roof width and projection. When homeowners “stretch” a kit by changing post spacing or beam spacing to fit an awkward area, the roof can become under-supported. If you have a nonstandard opening, plan on a new kit configuration or engineered modification rather than adjusting spacing on your own.
What measurements should I double-check before I buy the aluminum patio cover kit?
Before you order, confirm you know your exact roof line and obstruction clearances, not just the patio area. Measure the projection from the house surface where the ledger will mount, confirm the height you want relative to doors and light fixtures, and verify any gutters, downspouts, or vents won’t conflict with the fascia, receiver gutter, or counterflashing. Many install headaches come from realizing too late that trim or flashing won’t land where you expected.
Can I use a different sealant than Solar Seal 900 in the panel sealant channel?
Solar Seal 900 (or the exact sealant specified for your system) is recommended because the sealant needs the right compatibility with the aluminum edges and the sealant channel design. If you use a different product, you risk poor adhesion or a seam that fails sooner during thermal cycling. If you must substitute, match the substitute’s purpose (sealant in the reservoir channel) and verify it’s rated for that application.
If water leaks from a seam, what are the most common causes besides missing caulk?
Panel seams often leak when panels are not fully seated or when the frame is even slightly out of square, because the male edge will not engage cleanly. Re-check that the frame is square, verify each panel end is truly perpendicular before snapping, and confirm the panel is locked before adding screws. If you already fastened incorrectly, it is usually better to correct the seam alignment than to simply add extra sealant.
Are weepholes really necessary, and where exactly should they be drilled on a solid panel system?
Weepholes are part of the drainage design, especially for Newport solid panel systems. Skipping them can trap moisture in the receiver or drip edge area and lead to staining or recurring leaks at the ends or underside. Drill locations should follow the kit instructions, typically at the end of the drip edge or receiver gutter assembly and at designated panel seam underside points.
When is flexible tape or similar seam sealing actually helpful, and where should it go?
For the flex or flexible tape option, you should only apply it to the seams and connections called out in the installation guidance, and prep the surface as directed (clean, dry, and free of dust). Don’t rely on tape to compensate for a bad panel fit, loose fasteners, or an incorrect ledger attachment. Think of it as reinforcement over an already-correct interface, not a fix for structural or alignment errors.
What are the biggest structural mistakes to avoid on freestanding aluminum patio covers?
Freestanding installs usually require concrete footings below the frost line depth, post base brackets anchored into cured concrete, and exact post spacing from the span table. Never set posts “close enough” because the loads transfer through the engineered framing in a predictable way. If your yard grade or soil conditions are unusual, it’s worth having a contractor or engineer confirm the footing approach before pouring.
What should I do if I realize my slope away from the house is wrong after mounting the ledger?
If you installed the ledger on the wrong wall height or the wrong slope, drainage will suffer and leaks become more likely at the wall connection. Revisit your planned slope (commonly 1/8 inch per foot away from the house) and confirm the wall header alignment before panels and trim go on. If the slope is off after the fact, fixing it later often means partially disassembling sections, so measure twice during ledger mounting.
Any practical safety and workflow tips that prevent common install problems?
Most DIYers should plan a helper and staged handling because long aluminum sections can twist, especially in wind. If you are working near the roofline, use proper scaffolding or a stable ladder setup, and avoid carrying panels while repositioning. A common mistake is rushing squaring and fastening early, then forcing panel snap-in, which can stress seams.
What maintenance schedule should I follow, and what issues should I look for first?
For maintenance, make sure you clear debris from the drip edge or receiver channel so water can drain out properly, and check screw heads and sealant visually for gaps after heavy rain. Rinsing with mild soap once or twice a year helps, but avoid harsh cleaners that can damage sealant or trim coatings. Also inspect after winter events, since ice buildup can magnify stress on connections.
Can I add a ceiling fan or shade screen after the cover is installed, and what should I plan for?
If you are planning upgrades like shade screens or a ceiling fan, decide the mounting points before finishing panels and trim. The key is to attach to the structural members and seal penetrations so water cannot enter at the attachment site. Don’t mount hardware to the panel skins, and treat any wiring or electrical work as code subject, including safe routing and weather protection.