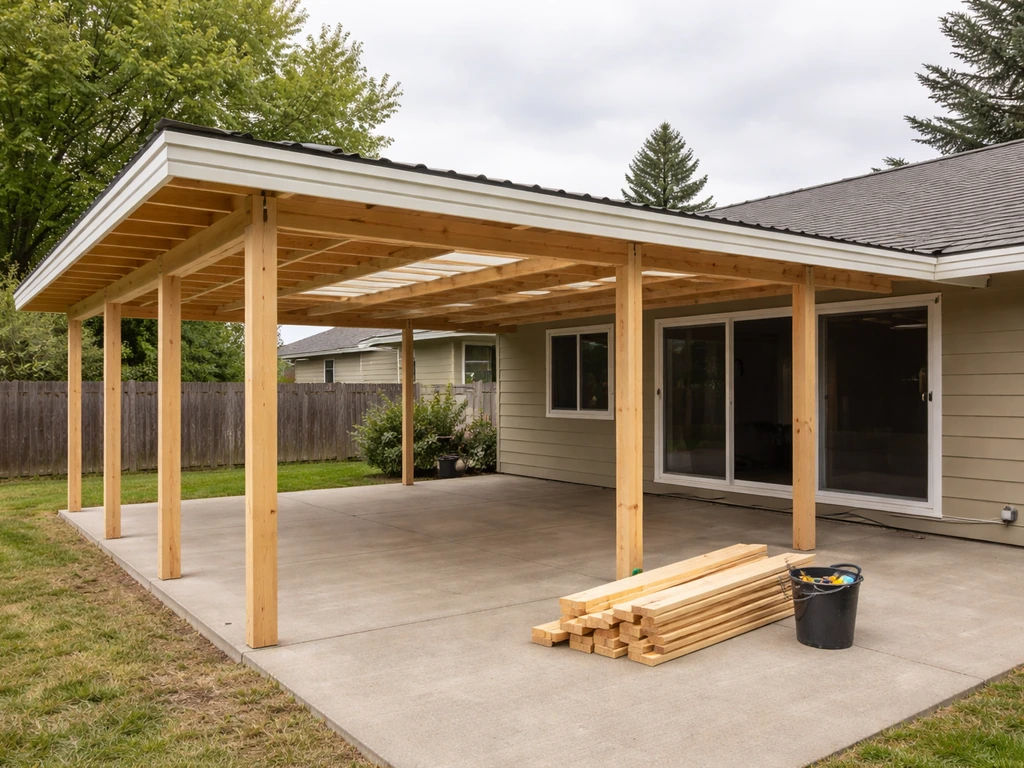
You can extend an existing covered patio by adding new posts and beams that continue the same roofline outward, attaching everything back to either the house ledger or the existing cover's framing, and finishing with matching roofing panels, flashing, and drainage details. The project is solidly DIY-able for most homeowners, but it does require careful planning, a permit in most jurisdictions, and attention to a few structural details that are easy to get wrong the first time.
How to Extend a Covered Patio Step by Step Guide

Celia Vaughn
7 May 2026
Confirm feasibility and plan the extension footprint
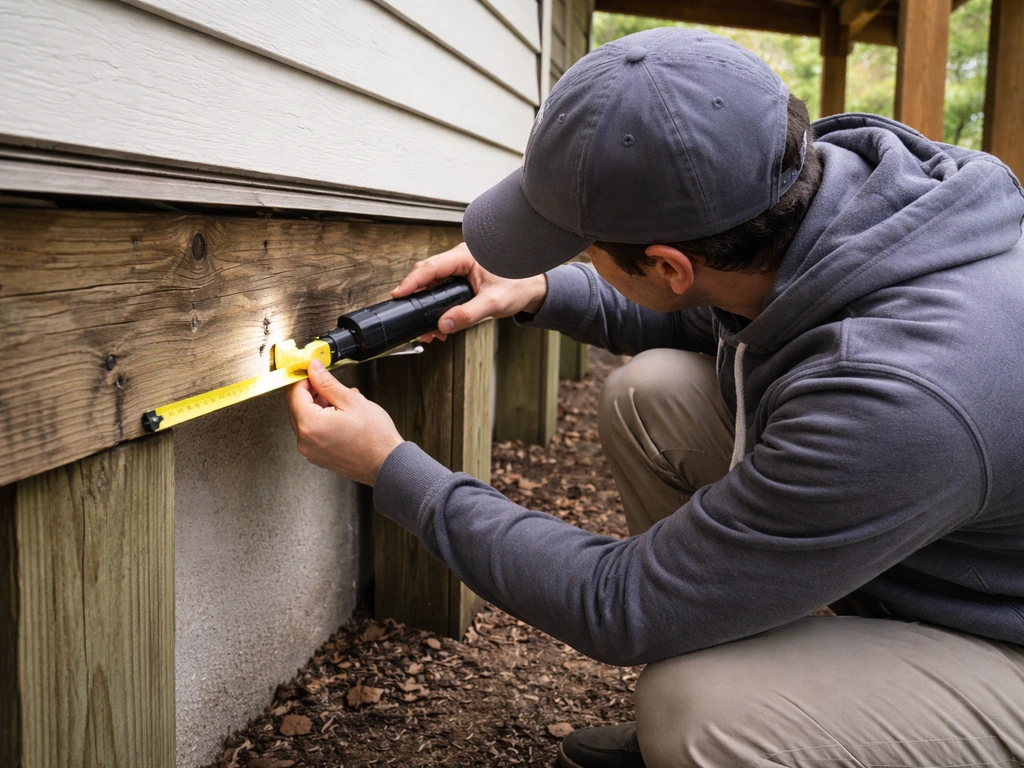
Before you buy anything, walk out to your existing cover and do a honest inspection. Check the current ledger board (where the cover meets the house), look at the existing posts and beams for rot, rust, or any signs of movement, and confirm the cover is actually attached to the house framing, not just resting against siding. If the existing structure has problems, fix those first. Extending a compromised cover just spreads the problem.
Next, define your new footprint. Decide whether you're extending the cover outward (adding depth away from the house), sideways (adding width along the house wall), or both. Measure the existing cover's width, depth, and height at the posts and at the ledger. Sketch it on paper with dimensions. Mark where new posts would land on the ground and check for underground utilities before you commit to anything. In most areas, you can call 811 for a free utility locate before digging.
Check your local zoning setbacks. Most municipalities require covered structures to stay a minimum distance from property lines, often 5 feet on the sides and rear. Pull up your county's parcel map or call the planning department to confirm. This step can save you from building something you'd have to tear down.
- Inspect existing posts, beams, ledger, and roofing for damage or movement before planning the extension
- Measure existing cover: total width, depth from house, height at ledger and at posts
- Sketch the new footprint to scale, noting post locations and any obstacles
- Confirm property line setbacks with your local planning or building department
- Call 811 to locate underground utilities before digging any footings
Match roofline and choose a patio cover style and materials
The single biggest visual mistake people make when extending a covered patio is changing the roof style or pitch mid-way. If your existing cover is a lean-to (sloping flat away from the house), extend it with the same slope. If you want a lean-to roof like this, see the guide on how to build a cover over my patio for the full step-by-step. If it's a gable, you'll need to continue the gable geometry or add a complementary shed roof off one side. Matching the roofline makes the extension look intentional rather than tacked-on, and it simplifies the framing dramatically.
For most DIY extensions, a lean-to or flat-style cover is the easiest to frame and the most forgiving to get right. Gable extensions are doable but require more precise rafter cuts and a ridge beam, so they're better for someone who has done basic roof framing before.
Material choice matters for both looks and long-term maintenance. Here's how the three main options stack up for extensions:
| Material | Best For | Durability | DIY Difficulty | Rough Cost |
|---|---|---|---|---|
| Aluminum (kit system) | Matching existing aluminum covers; low maintenance | Excellent, won't rot or rust | Low to moderate (pre-engineered, cuts with circular saw) | $15–$30/sq ft installed DIY |
| Wood (dimensional lumber) | Matching wood-framed covers; custom looks | Good if sealed/painted; can rot if neglected | Moderate (standard carpentry skills) | $10–$20/sq ft materials |
| Metal (steel or galvanized) | Heavy-duty or commercial-style covers | Excellent | High (welding or specialized fasteners often needed) | $20–$40/sq ft materials |
If your existing cover is an aluminum kit system, buy from the same manufacturer or a compatible system. Most aluminum patio cover brands use standardized panel widths (usually 4-inch or 6-inch thick insulated panels) and matching beam profiles, so adding on is straightforward. If it's wood, extending with dimensional lumber is the natural choice. Mixing materials is possible but makes weatherproofing at the seam much harder.
Measure, layout, and engineer the structure
This is where you do the math before you swing a hammer. The key structural elements in any patio cover extension are posts, beams, and rafters (or roof panels), and each one has to handle the blank" rel="noopener noreferrer">load above it. The blank" rel="noopener noreferrer">IRC minimum roof live load for patio covers is 10 pounds per square foot (psf). In snow country, your local code will add a ground snow load on top of that. If you're using a manufacturer's engineered aluminum system, the load tables are built into the product specs. If you're framing in wood, use your local span tables or talk to your building department.
Post spacing is one of the most important decisions. For most aluminum kit systems, post spacing maxes out at 8 to 12 feet depending on the beam size and load. For wood framing, a doubled 2x8 or 2x10 beam can typically span 10 to 14 feet between posts in a residential patio cover application, but always verify against your local span tables. Wider spans look cleaner but require heavier beams and larger post footings.
For footings, the standard approach is a concrete pier that extends below the frost line (if you're in a freeze zone) or at least 12 inches deep in warm climates. Footing diameter is typically 10 to 12 inches for a standard residential patio cover post. Post bases (metal post anchors set in the wet concrete) keep the wood off the ground and are code-required in most jurisdictions. If you're anchoring to an existing concrete slab, you can use wedge anchors or epoxy anchors to attach post bases directly to the slab, but confirm the slab thickness and condition first.
- Calculate the total roof area of the extension and apply the 10 psf minimum live load plus your local dead load and any snow load
- Determine post locations based on your beam span capacity and the extension dimensions
- Size footings to match soil conditions and post loads (your building department can give you a standard footing size for your area)
- Select beam size based on the span between posts, using manufacturer load tables or local wood span tables
- Confirm rafter or panel spacing meets the roof material manufacturer's requirements
Attachment to the existing house or cover: ledgering, ties, and flashing
This is the most critical part of the whole project. More patio covers fail here than anywhere else. Covers pull away from houses when the ledger isn't attached to the actual structural framing behind the siding, or when there aren't enough fasteners, or when water gets behind the ledger and rots the wall framing over time. The Town of Windsor's building guide specifically calls out covers pulling away from homes as a common failure, and it's almost always a ledger problem.
If you're extending outward from the existing cover, you have two attachment scenarios: attaching a new ledger to the house (if the extension goes beyond the current structure), or tying into the existing cover's beam or ledger. For a clean structural connection, the new ledger board should be a 2x8 or 2x10 that lags directly into the house's rim joist or wall studs, not into sheathing or siding alone. Use 1/2-inch lag screws or structural bolts spaced every 16 inches, alternating high and low by about 1.5 inches to avoid splitting the framing member.
Flashing is non-negotiable. Install Z-flashing or an integrated flashing system behind the siding above the ledger, lapping down over the top edge of the ledger board. The goal is to train any water that gets behind the siding to drip in front of the ledger, not behind it. Use self-adhesive flashing tape (products like DeckWise LedgerTape work well) over all fastener penetrations to seal around the lag screws. Trex and other manufacturers recommend including a drip edge at the bottom of the flashing layer so water exits cleanly rather than running along the ledger face.
If you're tying the extension into an existing beam rather than a house wall, use structural metal connectors (beam hangers, post caps, or angle brackets rated for the load) rather than toe-nailing alone. Toe-nailed connections in a lateral load situation can work loose over time, especially in wind events.
Framing, roofing panels, and drainage
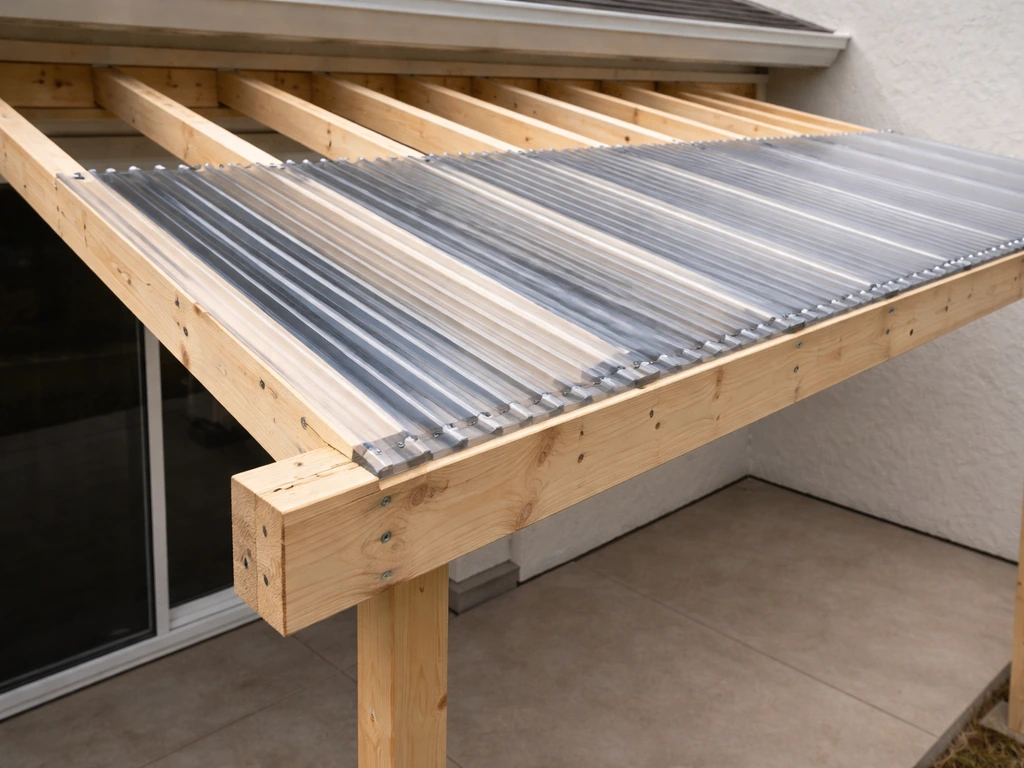
Once your posts, beams, and ledger are set and level, you frame the roof. For a lean-to extension, this means running rafters from the ledger down to the outer beam at your target pitch. For aluminum panel systems, the panels themselves span from the ledger to the outer beam without separate rafters, using the beam profile as a receiver.
Slope is where a lot of DIYers underestimate the importance. A flat-looking patio cover still needs to drain. For aluminum panel systems, a minimum slope of 1/4 inch per foot is typically required by the manufacturer, though 1/2 inch per foot gives you more margin. For polycarbonate panels, most manufacturers call for at least 1 inch per foot, and 2 to 3 inches per foot is ideal to keep water moving and prevent pooling that leads to leaks at panel joints. For a solid wood-framed roof with asphalt shingles or corrugated metal, aim for at least 1 to 2 inches per foot.
Plan where the water goes. If your extension adds significant roof area, add a gutter at the outer beam. A standard 5-inch K-style gutter handles most residential patio cover drainage volumes. Slope the gutter at least 1/4 inch per 10 feet toward the downspout. Make sure the downspout discharges away from the foundation, ideally into a splash block or underground drain. What often goes wrong here: people skip the gutter and end up with a trench of eroded soil along the outer edge of their new patio after the first hard rain.
Weatherproofing, sealing, and finishing at seams
The seam where the new extension meets the existing cover is the most vulnerable spot for water intrusion. Whether you're connecting aluminum panels to aluminum panels or tying a new wood-framed section to an old one, you need a continuous weatherproof transition.
For aluminum systems, manufacturers typically supply a closure piece or H-channel that caps the joint between panel runs. Make sure the joint is also sealed with a compatible silicone or butyl sealant on the underside. Run a bead of sealant in the channel before sliding the closure into place, and tool it smooth so there are no gaps. For wood-to-wood transitions, use metal step flashing woven between each rafter/sheathing layer, the same way a roofer would flash a dormer. Finish with a counter-flashing cap that overlaps the step flashing by at least 2 inches.
At the house wall, caulk the gap between the ledger flashing and the siding with a paintable exterior polyurethane or silicone caulk. Don't use standard painter's caulk here. It isn't rated for direct water exposure and will crack and pull away within a season or two. Check this joint every spring as part of routine maintenance.
If you're extending a wood-framed cover, apply a penetrating wood sealer or exterior primer and paint to all cut ends before installation. End grain soaks up water faster than any other surface and is where rot starts. For aluminum, touch up any cut edges with a compatible touch-up paint to prevent oxidation streaks.
DIY workflow, tools and materials checklist, and when to hire a pro
Here's a realistic build sequence for a typical patio cover extension. The timeline assumes a weekend warrior working one or two weekends, with a helper for the framing day.
- Week 1: Pull permit (required in most jurisdictions when attaching to the house or adding footings), finalize dimensions, and order materials
- Day 1: Dig and pour footings, set post anchor hardware in wet concrete, let cure 48–72 hours
- Day 2: Set posts, install ledger board and flashing on house wall
- Day 3: Install beams, connect rafters or begin panel installation, recheck level and plumb throughout
- Day 4: Complete roofing panels, install gutters, seal all joints and penetrations
- Final: Schedule inspection (if required), touch up paint or finish, clean up
Tools and materials to have on hand
- Tape measure, framing square, 4-foot level, and string line for layout
- Post hole digger or rented power auger for footings
- Circular saw with a metal-cutting blade (for aluminum panels) or carbide blade (for wood framing)
- Drill/driver with long bit set and 1/2-inch socket for lag screws
- Caulk gun, exterior silicone or polyurethane sealant, and self-adhesive flashing tape
- Post bases and structural post caps (sized to your post and beam dimensions)
- Lag screws (1/2-inch x 3.5-inch minimum for ledger attachment into rim joist)
- Roofing panels or lumber, beams, and posts per your extension dimensions
- Gutter sections, end caps, downspout, and gutter hangers
- Z-flashing or integrated ledger flashing system
- Safety glasses, gloves, and a reliable ladder rated for your working height
When it makes sense to hire a pro
Most homeowners with basic carpentry skills can handle a straightforward lean-to extension off an existing covered patio. That said, there are a few situations where bringing in a pro or at least a structural engineer is the smarter move. If your extension involves a gable roof that ties into the house's existing roof structure, get an engineer to look at the ridge and rafter connections. If your soil is clay, expansive, or poorly draining, a geo engineer or experienced contractor should size your footings. If your existing cover has structural issues (rotted posts, a sagging beam, a ledger that's pulling away), fix those with professional help before extending. And if your city requires stamped engineering drawings for the permit, you'll need a licensed engineer to provide them anyway.
On permits: yes, you need one in nearly every jurisdiction when you're attaching a covered structure to a house or installing new footings. The permit process typically involves submitting a simple site plan and structural details, then getting a framing inspection and a final inspection. It sounds like a hassle but it's actually useful because the inspector will catch issues before they're buried under roofing panels. Projects similar to this, like building a cover over an existing deck or covering a patio under an upper deck, go through the same permit process, and the ledger and footing requirements are essentially identical. Projects similar to this, like building a cover over an existing deck or covering a patio under an upper deck, go through the same permit process, and the ledger and footing requirements are essentially identical.
If you're comfortable with basic carpentry, comfortable reading a tape measure and a level, and willing to do the permit legwork upfront, extending your covered patio is one of the more satisfying home improvement projects you can take on. The structural principles aren't complicated, the materials are available at any home center or from online kit suppliers, and the payoff in usable outdoor space is immediate. Start by walking out to your existing cover today, snapping some photos, and measuring what you have. If you already have a deck, you can apply the same extension logic and attachment checks when you’re learning how to extend a patio deck. Covering a patio under a deck follows the same core approach: plan the roofline, confirm the existing structure, and handle ledgering, flashing, and drainage correctly. That's step one.
FAQ
Can I extend from a patio cover that is only attached to siding or trim?
Yes, but only if the existing cover is truly structurally sound and your extension can share load safely. Before you add anything, confirm the ledger board is bolted or lagged into framing (rim joist or studs), check the posts for straightness and no rot, and verify the beam is not sagging. If the extension would change the roof overhang length enough to increase loads on an undersized existing beam, you may need to reinforce or reframe the original section, not just build outward.
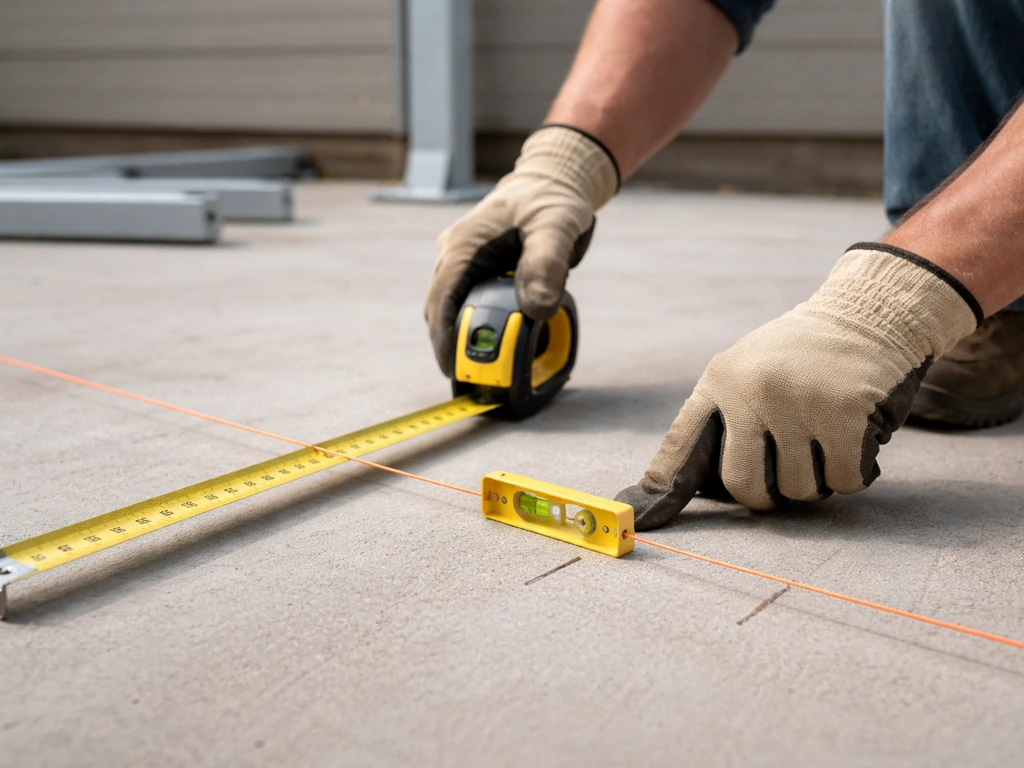
What’s the right way to set level and slope during an extension?
Don’t rely on “looks level” when you extend. Use a laser level or string line and re-check level at every new post after the concrete pier has cured, then confirm the outer beam is level or set to your planned slope. If you lock in rafters or panels before the structure is square and level, you can end up with uneven panel seams, poor flashing alignment, and chronic leaks at the transition joint.
How do I know my ledger flashing is installed correctly?
A good rule is to keep water from ever landing on top of the ledger-flashing connection. That usually means siding is flashed with a Z-flashing or integrated system behind it, with the top edge lapped correctly and the flashing material lapping over the ledger face while training water outward. Also seal fasteners through the flashing layer with an appropriate sealant tape or flashing tape, then check that the caulked joint is not taking full water pressure. If water can pool where the ledger meets siding, you are setting yourself up for rot.
When should I add a new ledger versus tying into the existing beam or ledger?
If you’re extending outward beyond the original cover’s footprint, you generally need a new ledger attachment at the house for structural support. If you’re attaching only to the existing structure, you may still need an additional connection if the load path changes (for example, adding a second row of posts increases beam reactions). A quick decision aid is to identify where the new roof load ultimately goes, then ensure each “stop” in the load path is positively connected (ledger to rim joist/studs, beams to posts, roof to beams or panels).
Can I mix roof cover materials (aluminum panels with wood framing, for example) for the extension?
Yes, but it can be done poorly, so decide based on how you want to manage the flashing and joint. For example, aluminum-to-aluminum is usually simpler because you can use compatible closure pieces or channels, while wood-to-aluminum often requires a more careful transition with step flashing and a compatible sealant strategy. If the materials expand differently with heat, plan for a joint that can tolerate movement and avoid rigidly stuffing the seam with material that will crack.
What sealant should I use at the house-to-ledger gap, and where should it be avoided?
Typically you should not use regular exterior caulk alone for the ledger area. The ledger zone gets repeated wetting and fastener penetrations, so the better approach is proper flashing plus sealing at penetrations with tape or a sealant intended for flashing applications, then caulk only at the final trim line where water is not expected to pond. If you see cracking after the first season, the problem is usually either missing flashing laps or using the wrong caulk at the wrong interface.
Do I really need a gutter on a patio cover extension?
In most cases, you should plan for gutters or at least a controlled runoff path when the extension increases roof area or creates a new outer edge where water will discharge. If you don’t add a gutter, the water often concentrates at the patio edge and erodes soil, undercuts footings, or saturates post bases. If you do add a gutter, size it for the new roof area and make sure the downspout discharges away from the foundation with splash blocks or buried drainage.
When is it worth paying for an engineer or contractor even if the project looks DIY-friendly?
Not always. A pro or engineer becomes the right move when you have any of these: gable geometry that ties into the house roof structure, clay or poorly draining soils that complicate footing sizing, any signs the existing cover is pulling away, rot, or sag, or local requirements for stamped engineering drawings. If you’re unsure, pull your permit checklist early, because sometimes the city will require engineered details even if the build seems straightforward.
Can I skip concrete piers and anchor posts directly to an existing concrete slab?
Avoid anchoring posts to the slab without checking slab thickness and condition, and use anchors rated for the post base load. If the slab is thin, cracked, or has unknown reinforcement, it may not safely carry uplift and lateral loads. The safer decision aid is to plan pier footings below the frost line in freeze climates, and in warm climates to follow local minimum depth requirements, then use metal post bases set in concrete with proper fastening.
What happens if I build the extension with less slope than recommended?
If you use manufacturer aluminum panel systems, use the system’s specified minimum slope and follow their connection details, including any underside closure or sealant requirements. For polycarbonate panels, slope requirements are usually more aggressive to prevent pooling, and installing with insufficient pitch can cause panel joint leaks over time. For shingle or metal over wood framing, keep the slope consistent and confirm the roof system’s installation rules, because “flat-looking” doesn’t mean “drainage-free.”